Girl's bow tie made with crocheted Roman cord. [ESP-ENG]

Hola amigos 🙋 yo soy Lelys, me da gusto pasar a visitarlos. Espero que estén muy bien. El día de hoy traigo una muestra o modelo de moñera/cola para el cabello tejida a crochet.
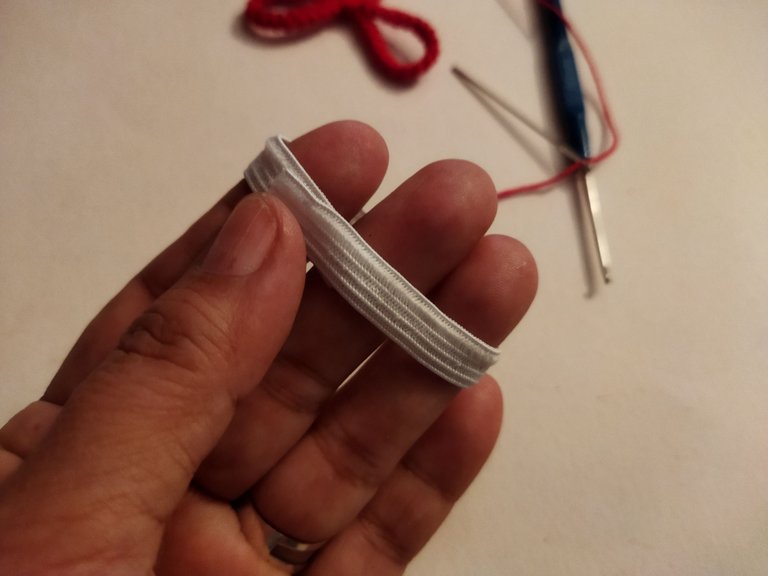
En este proyecto utilicé un resto de hilo de crochet marca Araña de Oro, hilos producidos en la República Bolivariana de Venezuela, mi país natal. Como podrán ver tan solo fue necesario unos cuantos metros de hilo y una aguja de crochet de 1,60 mm. Adicional usé pegamento, aguja lanera, elástica blanca de 1 cm de ancho y una figura para decorar.
Estos hilos no son cien por ciento algodón, pero sí muy duraderos. Me gustan para estos proyectos porque tienen un poco de brillo y no son sedosos. Hay muchos colores para escoger.
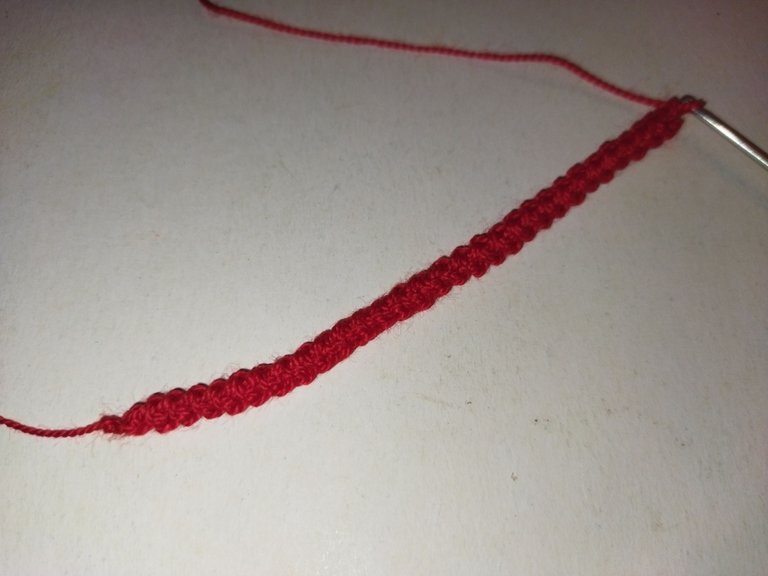
Para hacer este lazo tejí un cordón romano de 22 cm de largo. Este cordón se teje muy rápido. Consiste en hacer un punto bajo enganchando la aguja en las cadenas de atrás del punto anterior. Yo recomiendo tejer un poco suelto para que las cadenas no se pierdan y sea más fácil ubicarlas.
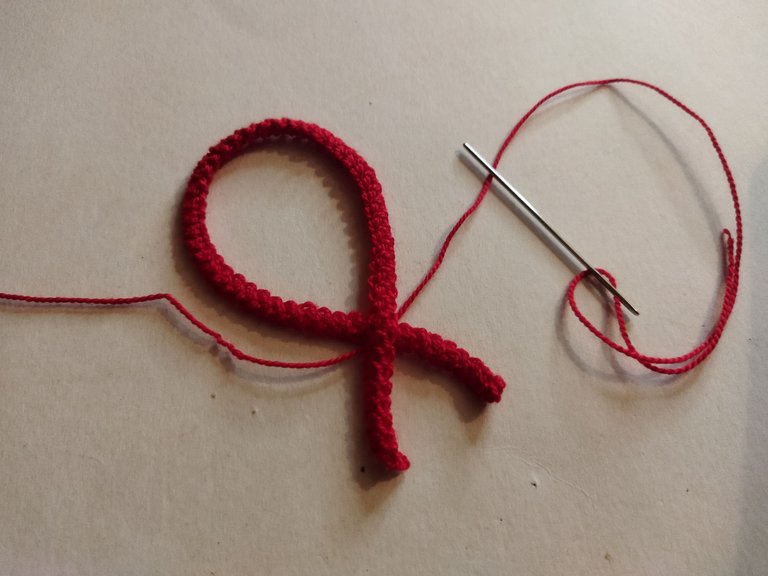
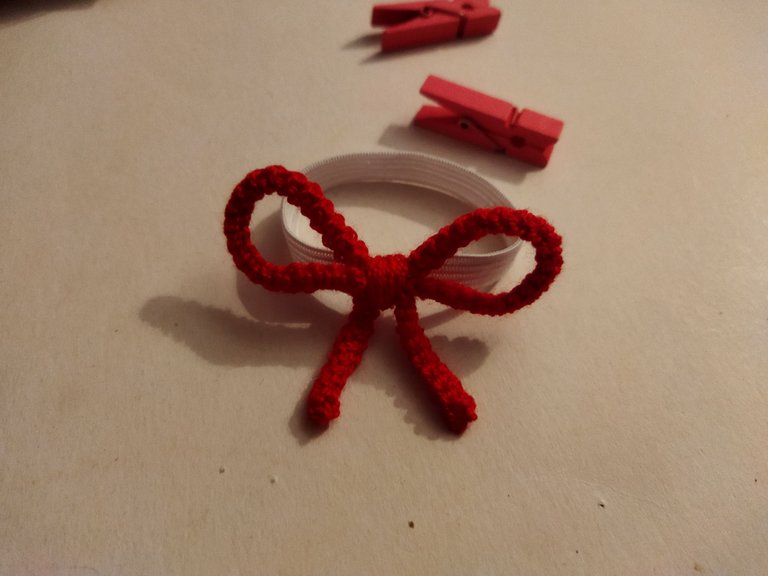
Luego pasé los extremos de hilo que previamente dejé largo por seis puntos del tejido, contando desde donde salen los hilos. Ubicándolos en la orilla del tejido. Después formé una X con esas puntas y cosí.
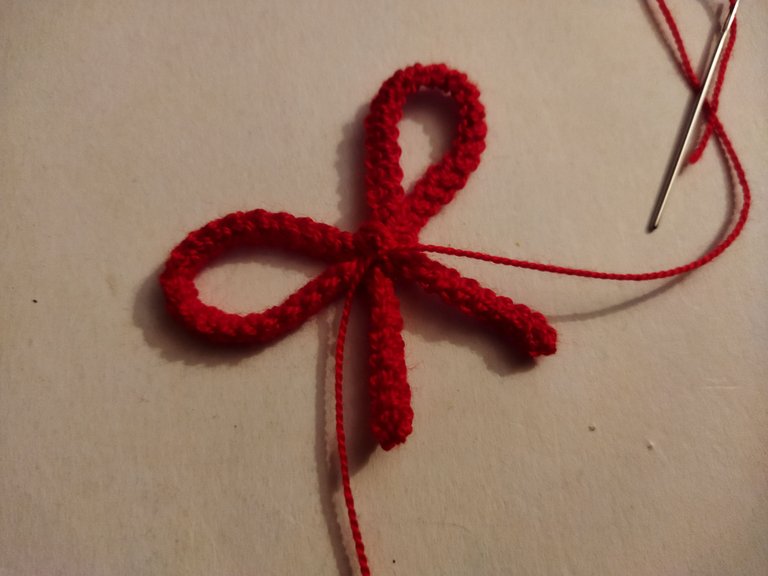
Una vez cosidas las puntas en X formé el lazo con el cordón de arriba. Y volví a coser. Finalmente tomé esas dos hebras y enrollé en el medio del lazo, hice un nudo dejando hilo para coser el lazo a la liga o elástica.
Es muy fácil hacer este lazo. Cuesta un poco maniobrar los hilos al principio, pero después le agarré la vuelta. Como no tengo cola o liga blanca yo usé un trocito de elástica de 1cm. Tomé la medida de mis tres dedos y cosí para unir.
Ahora lo que hice es coser con el sobrante de hilo el lazo a la elástica. Enrollando primero y cosiendo después para fijar y asegurar las hebras. Es importante hacer bien este paso para que no se mueva el lazo o se salga de la liga.
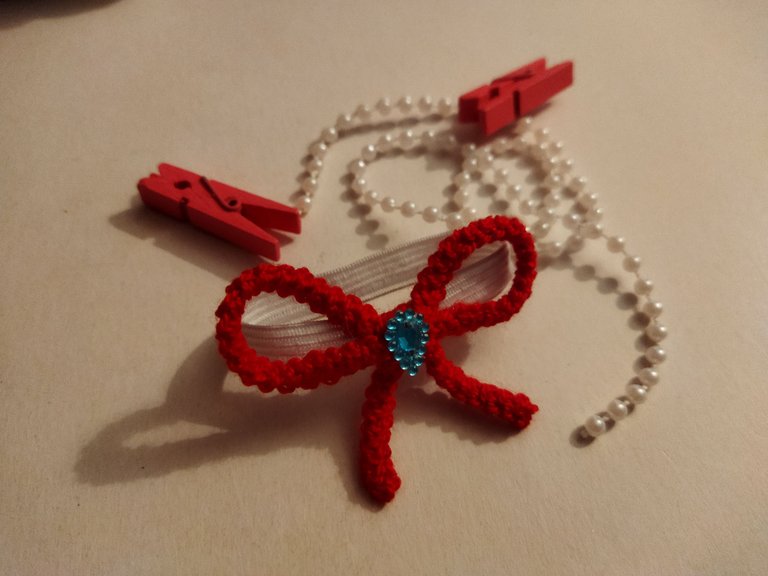
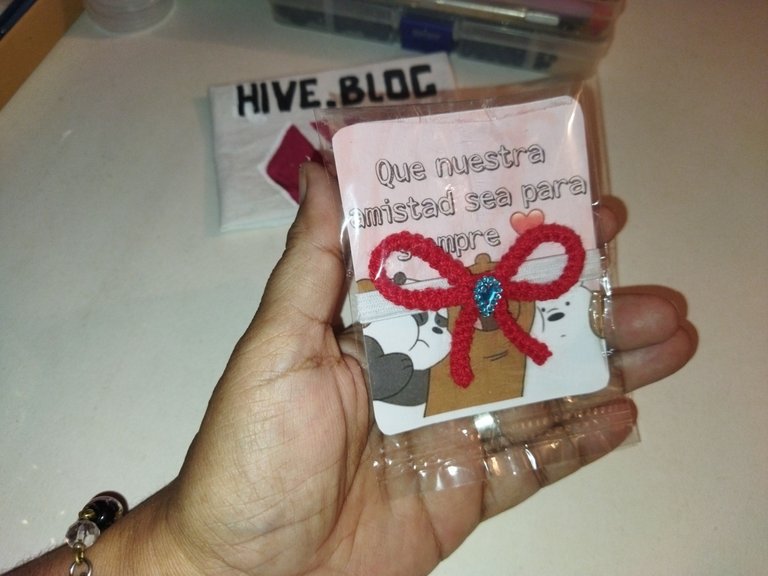
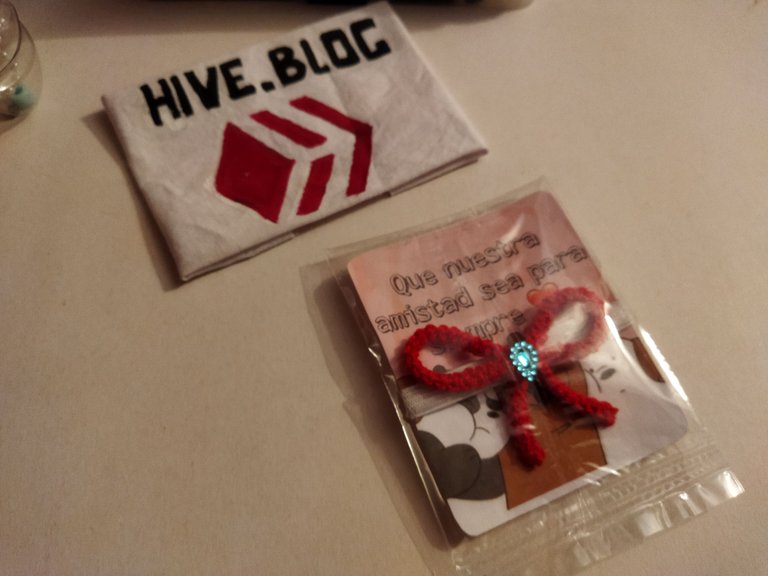
En el centro del lazo pegué una figura plana para decorar. Quería pegar una blanca, pero solo tenía azules. Esta figura tiene orificios por lo que también la cosí con hilo nylon para dejarla más segura.
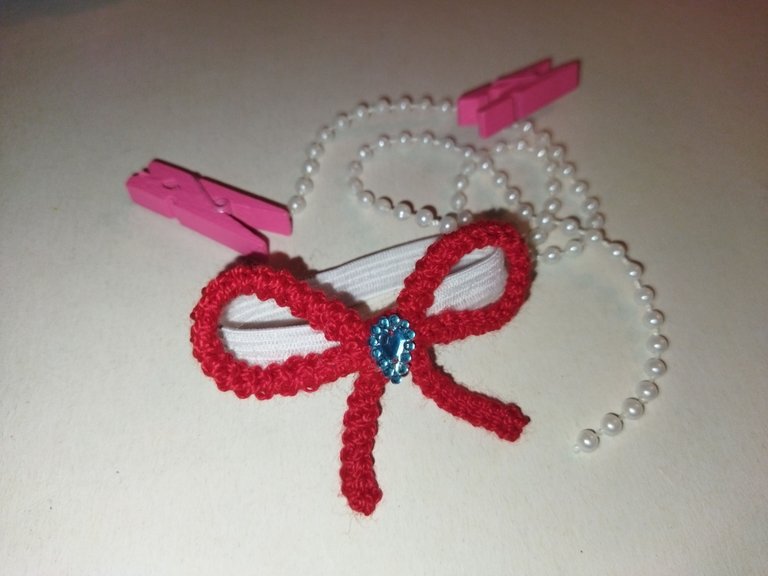
Si lo crees necesario puedes poner un punto de pegamento en la parte de atrás del lazo para que quede fijo a los lados. Así ya se ve terminado mi proyecto de hoy.
Ya les conté a todos mis suscriptores y amigos de #hive que ando emprendiendo. Deseo iniciar con la venta de accesorios para el cabello. Para señoras, señoritas, niñas y también para caballeros. Si lo han notado muchos jóvenes en la actualidad usan su cabello largo y en ocasiones lo llevan recogido. Para ellos también tengo en mente hacer las colas o moñeras.
Este sería el segundo modelo de cola que realizo. Estoy haciendo diversos modelos para sacar presupuesto y cantidad de materiales. El primero quedó muy bonito, se teje de una sola vez y el resultado es fantástico.
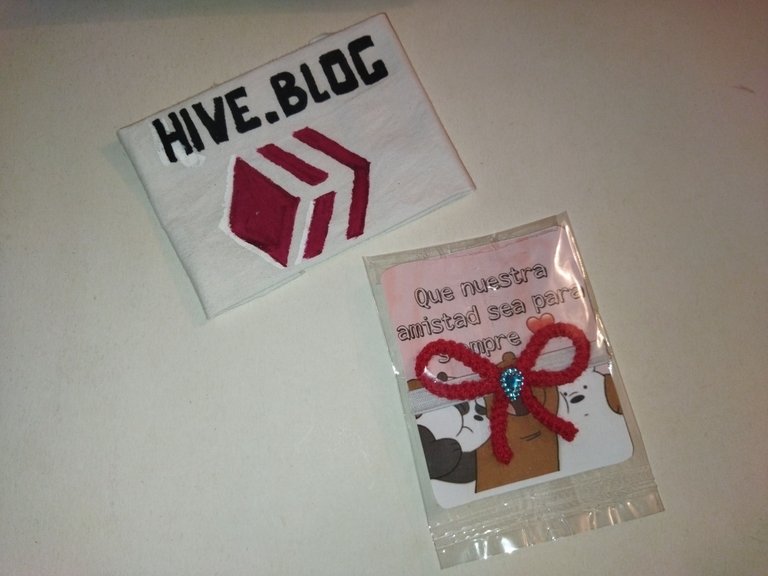
Para tener la muestra también la empaqué en la bolsita de celofán. Esta la enganché en el cartón antes de guardarla. La bolsita me quedó justa. ¿Qué tal luce?
Espero seguir compartiendo mis creaciones. Tal vez alguien más como yo desee iniciar con la elaboración de accesorios para el cabello. Son muy útiles y usadas por las mujeres de cualquier edad, en especial las niñas.
Muchas gracias por leer. Todas las fotos son de mi propiedad. Edité con Polish. Usé el traductor de Deelp. Hasta pronto.
English
Hello friends 🙋 I'm Lelys, I'm glad to visit you. I hope you are very well. Today I bring you a sample or model of a crochet hair bun/tail.
In this project I used a remainder of Araña de Oro crochet thread, yarn produced in the Bolivarian Republic of Venezuela, my native country. As you can see, only a few meters of yarn and a 1.60 mm crochet needle were needed. In addition I used glue, a wool needle, a 1 cm wide white elastic and a figure to decorate.
These yarns are not 100% cotton, but they are very durable. I like them for these projects because they have a bit of sheen and are not silky. There are many colors to choose from.
To make this bow I wove a 22 cm long Roman cord. This cord is very quick to knit. It consists of knitting a low stitch by hooking the needle into the back chains of the previous stitch. I recommend knitting a little loosely so that the chains don't get lost and it is easier to locate them.
Then I passed the ends of yarn that I previously left long through six stitches of the weave, counting from where the threads come out. Placing them at the edge of the fabric. Then I formed an X with those ends and sewed.
Once the ends were sewn in X I formed the loop with the top cord. And I sewed again. Finally I took those two strands and wound in the middle of the loop, tied a knot leaving thread to sew the loop to the garter or elastic.
It is very easy to make this loop. It's a little hard to maneuver the threads at first, but then I got the hang of it. Since I don't have any white glue or rubber band I used a 1cm piece of elastic. I took the measurement of my three fingers and sewed to join.
Now what I did is sew with the excess thread the loop to the elastic. Winding first and then sewing to fix and secure the strands. It is important to do this step well so that the loop does not move or come out of the garter.
In the center of the ribbon I glued a flat figure for decoration. I wanted to glue a white one, but I only had blue ones. This figure has holes so I also sewed it with nylon thread to make it more secure.
If you think it's necessary you can put a dot of glue on the back of the loop to fix it to the sides. This is how my project for today looks finished.
I already told all my #hive subscribers and friends that I am starting a new project. I want to start selling hair accessories. For ladies, young ladies, girls and also for men. If you have noticed many young people nowadays wear their hair long and sometimes they wear it up. For them I also have in mind to make the tails or buns.
This would be the second model of tail that I make. I am making several models to get a budget and quantity of materials. The first was very nice, it is knitted in one go and the result is fantastic.
To have the sample I also packed it in the cellophane bag. This one I hooked on the cardboard before storing it. The bag fit me just right, how does it look?
I hope to continue sharing my creations. Maybe someone else like me would like to get started with making hair accessories. They are very useful and used by women of any age, especially girls.
Thank you very much for reading. All photos are my property. I edited with Polish. I used Deelp translator. See you soon.
https://twitter.com/obo2004/status/1540294969067540480
The rewards earned on this comment will go directly to the people sharing the post on Twitter as long as they are registered with @poshtoken. Sign up at https://hiveposh.com.
Thank you for sharing this amazing post on HIVE!
Your content got selected by our fellow curator @stevenson7 & you just received a little thank you via an upvote from our non-profit curation initiative!
You will be featured in one of our recurring curation compilations and on our pinterest boards! Both are aiming to offer you a stage to widen your audience within and outside of the DIY scene of hive.
Join the official DIYHub community on HIVE and show us more of your amazing work and feel free to connect with us and other DIYers via our discord server: https://discord.gg/mY5uCfQ !
If you want to support our goal to motivate other DIY/art/music/homesteading/... creators just delegate to us and earn 100% of your curation rewards!
Stay creative & hive on!
Thanks you ☺️🎉😉🎉🙏