Mickey Mouse Cotillion. [ESP-ENG]
Cotillón de Mickey Mouse.
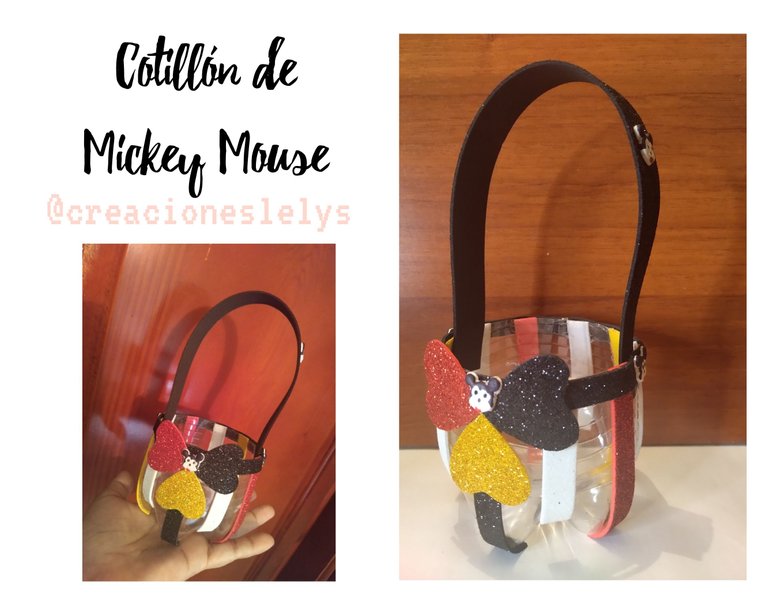
Hola amigos de #HIVE 💙 Deseo que estén muy bien. ¿Qué les parece si hacemos un cotillón divertido para que los niños se sientan muy felices al recibirlo? ¡Si! Claro, a ellos les encantará tener un lindo y alegre cotillón repleto de caramelos y por qué no 👏 también, quizá un obsequio. Todo dependerá del tamaño que elijas hacerlo. Lo mejor y más importante de este proyecto que te traigo hoy es que vamos a RECICLAR ♻️ ya que usaremos los retazos de materiales como foami sobrantes, además de una botella plástica de agua, jugo o de refresco.
COTILLON DE MICKEY PARA NIÑOS.
Hace uno días, en el 2022 para ser exacta 😁 realicé con masa flexible varias figuras pequeñas, entre ellas elaboré algunas caritas de este lindo personaje llamado Mickey Mouse 🐭 a los niños les gusta y se divierten mirando sus dibujos animados. Ahora quiero usarlas en este bello cotillón que les mostraré a continuación.
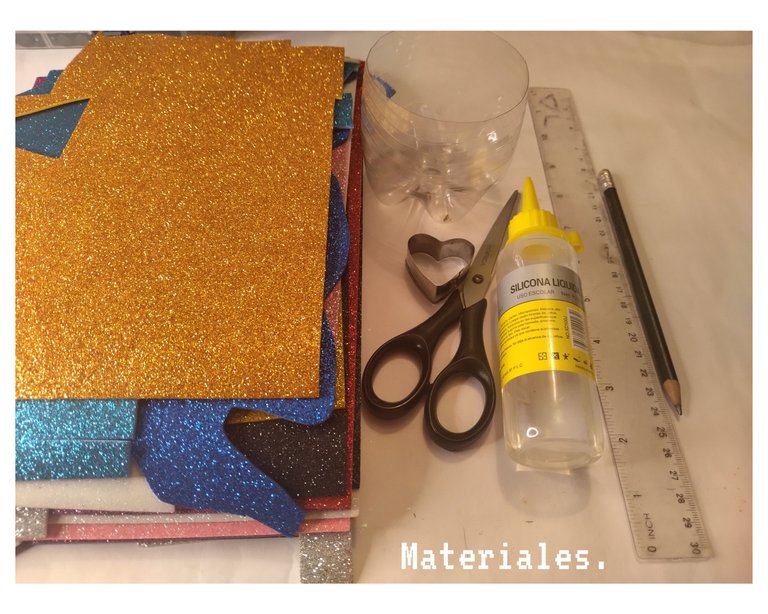
MATERIALES:
🐭 Botella plástica reciclada. Limpia y seca.
🐭 Foami liso y escarchado.
🐭 Figuras de Mickey Mouse realizadas con masa flexible.
🐭 Marcadores.
🐭 Tijeras.
🐭 Pegamento.
🐭 Lápiz de grafito.
🐭 Regla.
🐭 Molde de corazón.
PROCEDIMIENTO PARA ELABORARLO:
🐭 Lo primero que hice fue cortar la botella de modo tal de aprovechar la parte baja donde está la base. Con ella formé la cesta igualando el boquete con la tijera para que se viera redondo.
🐭 Luego elegí los colores amarillo, rojo, blanco y negro propios del personaje alusivo en mi proyecto. Con este foami escarchado de los colores mencionados hice varios listones considerando las medidas de mi cesta plástica. Para la medida más larga corté listones de 7cm×1cm y para las más cortas listones de 5cm×1cm.
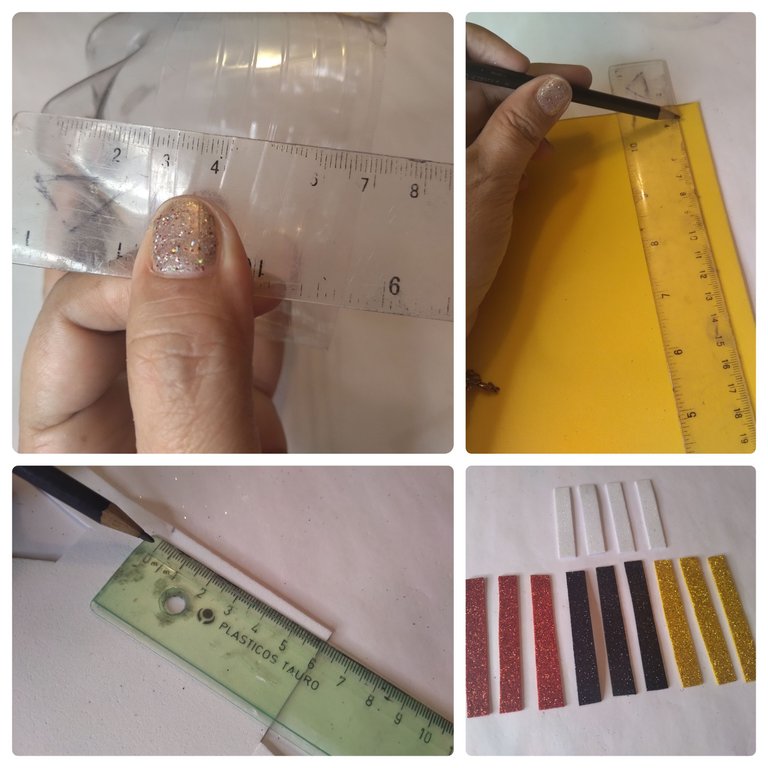
🐭 Empecé a pegar cada listón en la cesta plástica, alternando los colores y las medidas, así como pueden ver en las imágenes 👇 dejando de separación entre ellas las que pueden notar de 1cm aproximadamente.
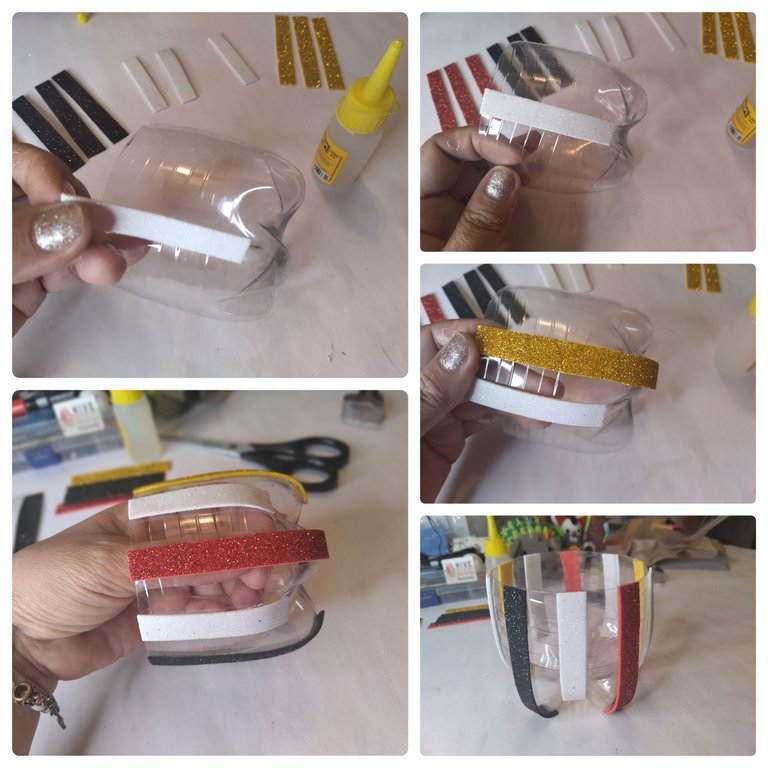
🐭 Tomé el foami de color negro, medí y corté un listón de 1cm de ancho y del largo necesario para envolver el boquete de la cesta por la parte externa. De esta manera le hice un vivo u orillo para resaltar las franjas verticales ya hechas. Se ve mucho más bonito con este listón negro.
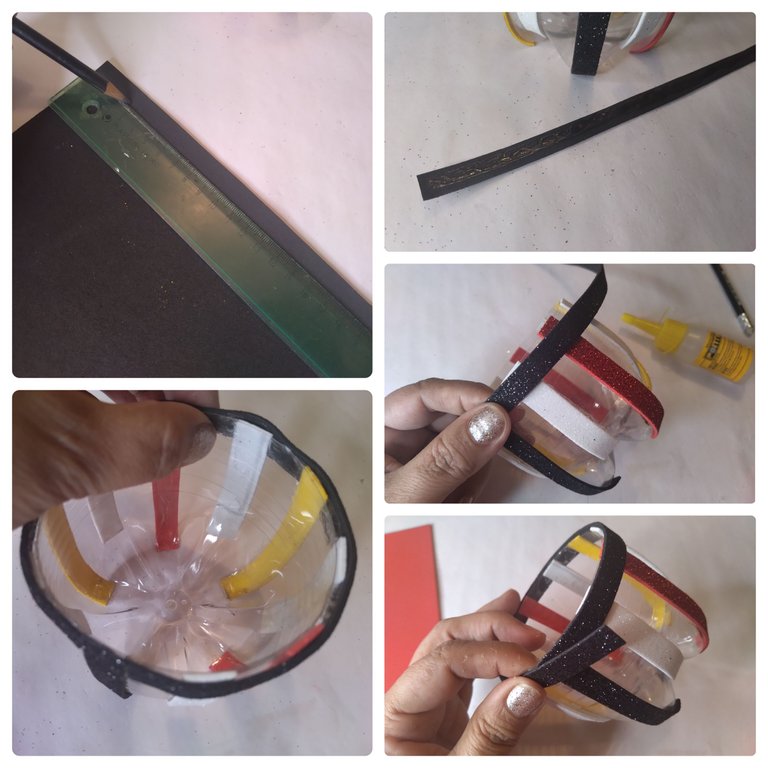
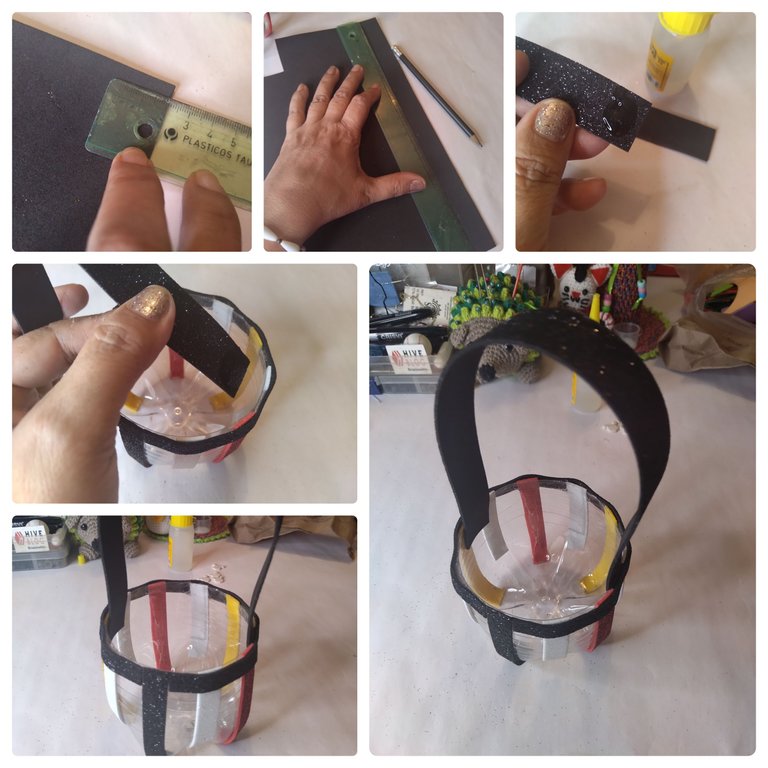
🐭 Con foami negro escarchado también le hice el asa o agarradera a la cesta. Medí 2cm de ancho a todo lo largo de la hoja de foami. La dejé larga para tener espacio suficiente y poder guardar algunas galletas y obsequios dentro. Para fijar esta asa a la cesta coloqué pegamento en cada uno de los extremos y lo pegué por dentro de la cesta.
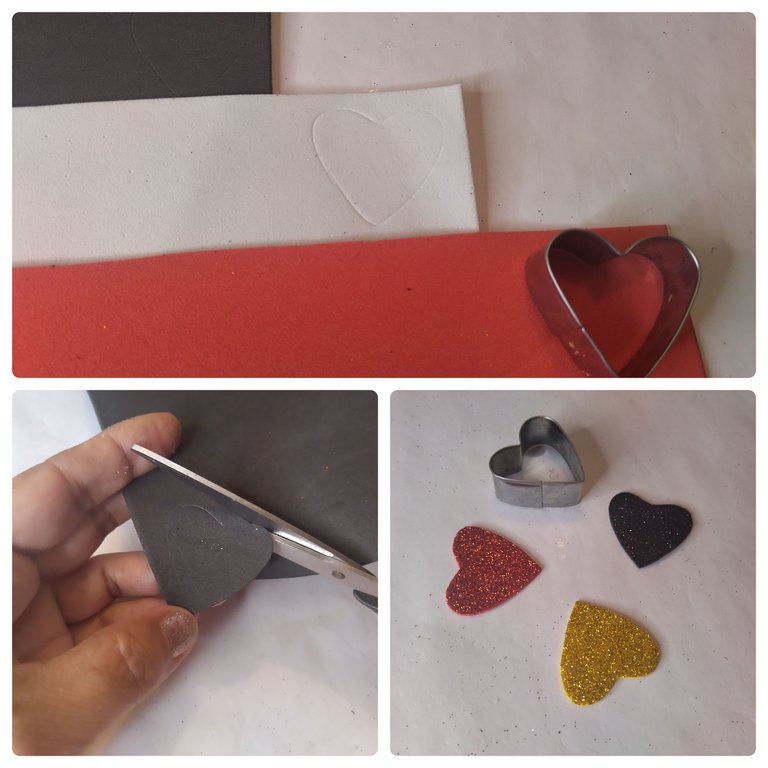
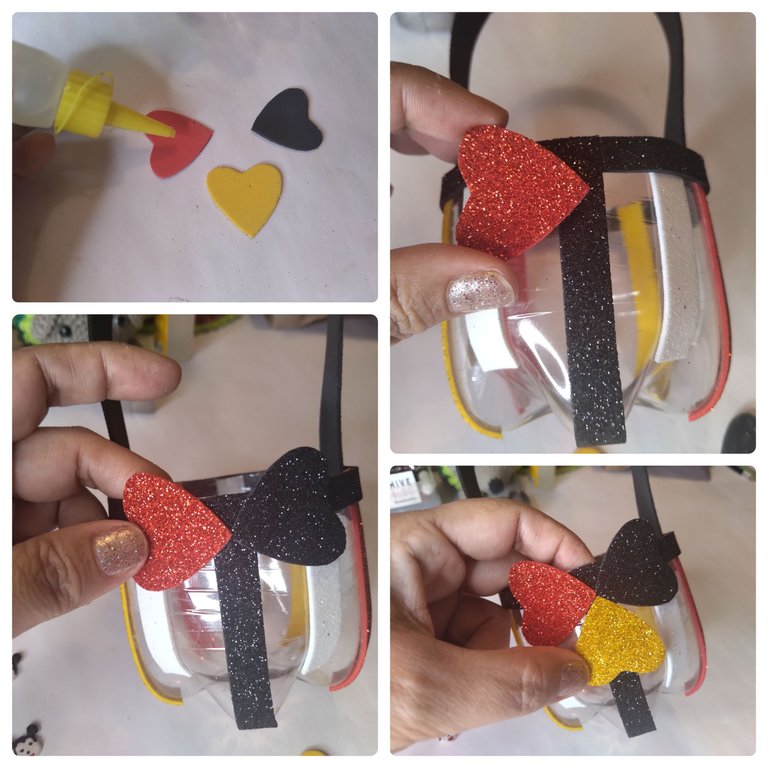
🐭 Para la parte decorativa usé corazones en foami. Me ayudé con moldes de aluminio en forma de corazón. Presioné con este molde sobre el reverso del foami a utilizar; colores amarillo, negro y rojo.
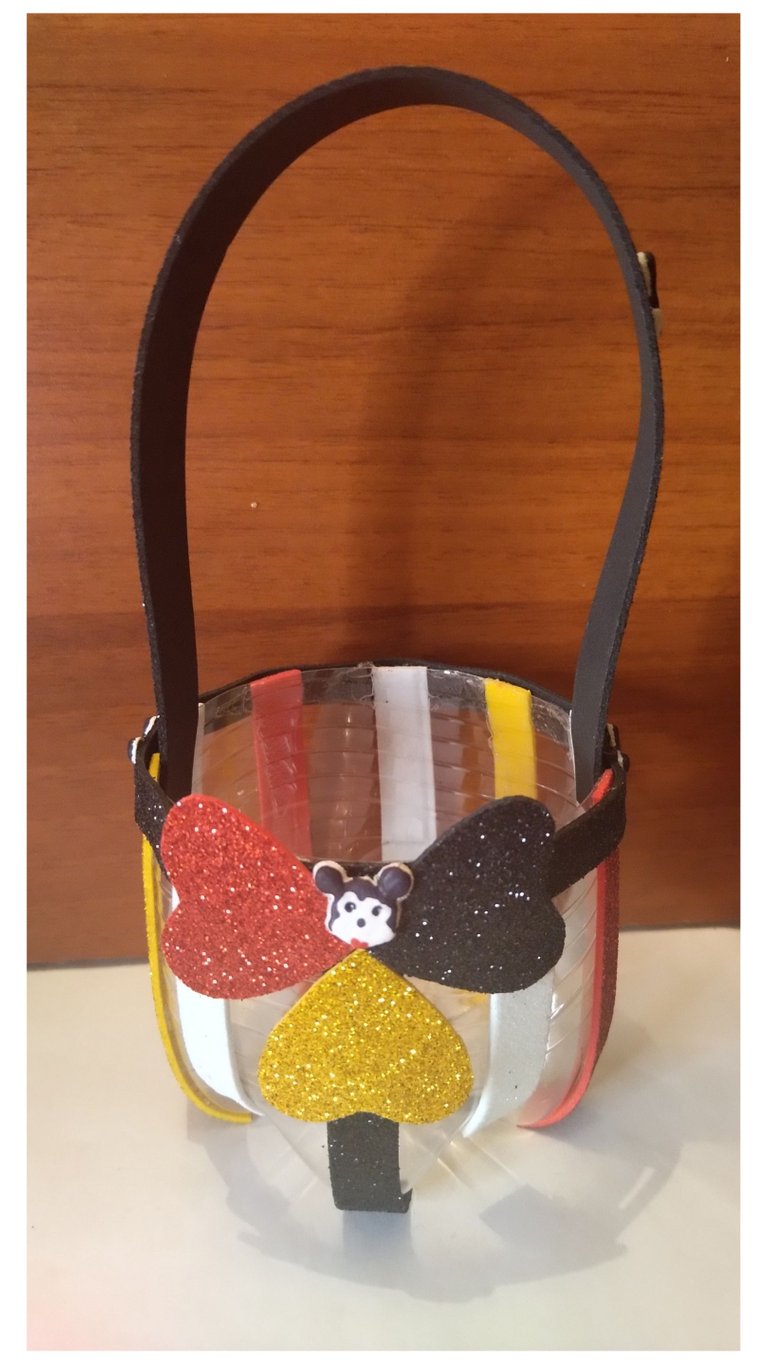
🐭 Luego de probar varias posiciones decidí colocar los corazones tal como puedes ver en la imagen 👇 me gustó así. Los fijé con pegamento y esperé que secara muy bien.
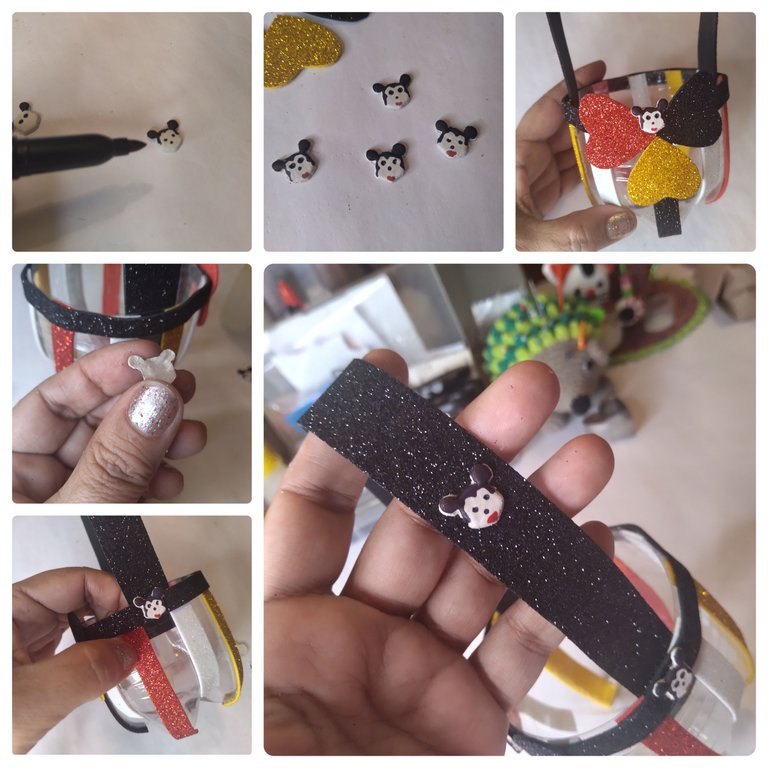
🐭 Mientras secaba el pegamento de los corazones empecé a dibujar las figuras de Mickey Mouse realizadas con masa flexible. Usé marcadores de foami, me gustó hacer esto porque es la primera vez que pinto este material con marcador, para mi buena suerte el marcador secó rápido y sin correrse. Tenía cuatro Mickey Mouse y los usé todos. Pegué uno en la parte de enfrente sobre los corazones, uno en cada lateral del asa y el último sobre el asa hacia un lado.
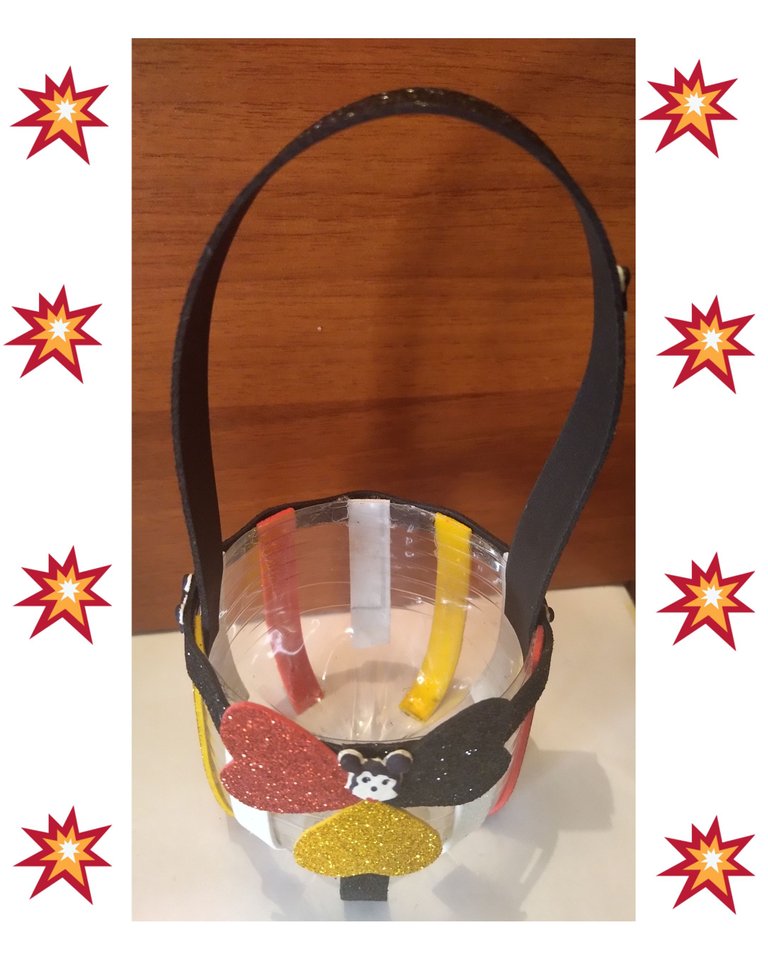
🐭 Me gusta mucho como se ve. Pronto lo llenaré de caramelos de chocolates y algún obsequio para regalárselo a mi bella Sofía el día del amor y la amistad. ¿Qué les pareció? Muy fácil y rápido de hacer. Podemos sustituir el foami por otro material como papel o tela y quedará igual de bello.
🙋 Muchas gracias por tu apoyo. Todas las fotos son de mi propiedad. Edité con Polish y PicsArt. Usé el traductor de Deepl. Hasta pronto 😗 Bendiciones 🙏

English.
Mickey Mouse Cotillion.
Hi #HIVE friends 💙 I wish you are doing great, how about making a fun cotillion for the kids to be very happy to receive? Yes! Sure, they will love to have a cute and cheerful cotillion full of candies and why not 👏 also, maybe a treat. It will all depend on the size you choose to make it. The best and most important thing about this project I bring you today is that we are going to RECYCLE ♻️ as we will use scraps of materials like leftover foami, plus a plastic water, juice or soda bottle.
MICKEY COTILLION FOR KIDS.
A few days ago, in 2022 to be exact 😁 I made with flexible dough several small figures, among them I made some faces of this cute character called Mickey Mouse 🐭 children like and have fun watching his cartoons. Now I want to use them in this beautiful cotillion that I will show you below.
MATERIALS:
🐭 Recycled plastic bottle. Clean and dry.
🐭 Smooth and frosted foami.
🐭 Mickey Mouse figures made with flexible dough.
🐭 Markers.
🐭 Scissors.
Glue.
Graphite pencil.
🐭 Ruler.
🐭 Heart mold.
.
PROCEDURE TO MAKE IT:
🐭 The first thing I did was to cut the bottle in such a way to take advantage of the lower part where the base is. With it I formed the basket by equalizing the gap with the scissors so that it looked round.
🐭 Then I chose the yellow, red, white and black colors of the allusive character in my project. With this frosted foami of the mentioned colors I made several ribbons considering the measures of my plastic basket. For the longest size I cut strips of 7cm×1cm and for the shortest I cut strips of 5cm×1cm.
🐭 I started to glue each ribbon in the plastic basket, alternating the colors and measures, as you can see in the images 👇 leaving separation between them that you can notice of about 1cm.
🐭 I took the black foami, measured and cut a ribbon 1cm wide and the length needed to wrap around the hole on the outside of the basket. This way I made a border to highlight the vertical stripes already made. It looks much prettier with this black ribbon.
🐭 With black frosted foami I also made the handle for the basket. I measured 2cm wide along the entire length of the foami sheet. I left it long to have enough space to keep some cookies and gifts inside. To attach this handle to the basket I put glue on each end and glued it to the inside of the basket.
🐭 For the decorative part I used foami hearts. I helped myself with heart-shaped aluminum molds. I pressed with this mold on the back of the foami to be used; yellow, black and red colors.
🐭 After trying several positions I decided to place the hearts as you can see in the image 👇 I liked it that way. I attached them with glue and waited for it to dry very well.
🐭 While the glue on the hearts was drying I started to draw the Mickey Mouse figures made with flexible dough. I used foami markers, I liked doing this because it is the first time I paint this material with marker, to my good luck the marker dried fast and without running. I had four Mickey Mouse and used them all. I glued one on the front over the hearts, one on each side of the handle and the last one on the handle to one side.
🐭 I really like the way it looks. I will soon fill it with chocolates candies and some gift to give it to my beautiful Sofia on love and friendship day. what did you think? Very easy and quick to make. We can substitute the foami for another material such as paper or fabric and it will be just as beautiful.
🙋 Thank you very much for your support. All photos are my property. I edited with Polish and PicsArt. I used Deepl translator. see you soon 😗 Blessings 🙏
https://twitter.com/131481196/status/1624219388181196802
The rewards earned on this comment will go directly to the people( @creacioneslelys ) sharing the post on Twitter as long as they are registered with @poshtoken. Sign up at https://hiveposh.com.
This is so beautiful,I love it
Hello!
How have you been? I love that you liked this cotillion. Thanks so much for your support ☺️
I've been good and you? You are welcome friend
Me fine. Enjoying the final of the Caribbean Series ☺️
Alright then, enjoy..
Wow This is so cute and easy to follow! Love it!
Thanks you 💕🙏😊
Congratulations @creacioneslelys! You have completed the following achievement on the Hive blockchain And have been rewarded with New badge(s)
Your next target is to reach 14000 upvotes.
You can view your badges on your board and compare yourself to others in the Ranking
If you no longer want to receive notifications, reply to this comment with the word
STOPTo support your work, I also upvoted your post!
Check out our last posts:
Support the HiveBuzz project. Vote for our proposal!
Pura dulzura y lleno de color, me encanta @creacioneslelys, para los niños es perfecto, les va a encantar!✨
Si. Este será para la nena ☺️ mi nieta. Muchísimas gracias por tu visita 😊 me da gusto saludarte.
🤗❤️