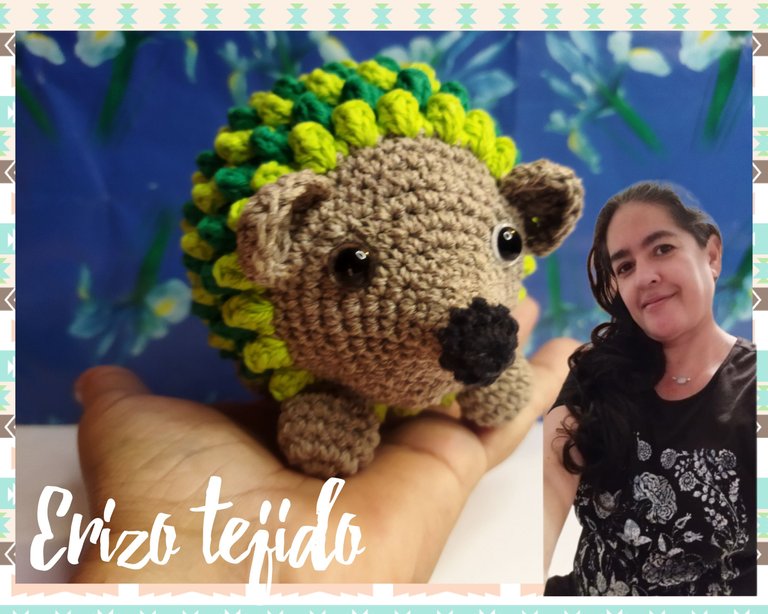
My new knitted hedgehog. Special for HIVEDIY ❤️🦔💙 Mi nuevo erizo tejido. Especial para HIVEDIY ❤️🦔💙
Hola amigos. Feliz día. Ya pronto se nos terminan las vacaciones escolares. En Venezuela comienzan de nuevo las actividades en el mes de septiembre. Se incorporan estudiantes y docentes a las clases. Me da gusto saber que muchos de ustedes los que hacen vida en #hive también estudian y algunos trabajan como docentes.
Hello friends. Happy holidays. Soon our school vacations will be over. In Venezuela activities start again in September. Students and teachers are starting classes again. I am glad to know that many of you who make life in #hive also study and some of you work as teachers.

Desde muy pequeña me incliné por la profesión docente, me gusta mucho compartir mis conocimientos, instruir, guiar y orientar a las personas. Sé que a muchos les disgusta la repetición de frases, palabras y conceptos, sin embargo pienso que mientras más detalles podamos dar cuando enseñamos el aprendizaje será más rápido. También creo que debemos aprender de diferentes formas, intuir y descubrir es interesante. Todos debemos poner en práctica el rol de investigadores y siempre ir más allá de lo que nos enseñan. Digo todo esto porque para enseñar todos los procesos en las manualidades los involucrados debemos manejar los mismos códigos para poder comprendernos, no siempre se repetirán todos y cada uno de los pasos para realizar un proyecto porque se espera que ya los hayamos aprendido. Dicho esto, comencemos con el proyecto de hoy.
Since I was very young I have been inclined towards the teaching profession, I really enjoy sharing my knowledge, instructing, guiding and orienting people. I know that many people dislike the repetition of phrases, words and concepts, however I think that the more details we can give when we teach, the faster the learning will be. I also believe that we should learn in different ways, intuiting and discovering is interesting. We should all put into practice the role of researchers and always go beyond what we are taught. I say all this because to teach all the processes in the crafts those involved must handle the same codes to be able to understand each other, we will not always repeat each and every one of the steps to make a project because we are expected to have already learned them. That said, let's start with today's project.

HEDGEHOG OR PORCUPINE WOVEN.
Desde hace algún tiempo he querido compartirles el paso a paso para elaborar un precioso ERIZO TEJIDO, hoy me animé a realizar uno documentando el proceso para mostrárselos, espero que les guste.
For some time now I have wanted to share with you the step by step instructions to make a beautiful WOVEN ERIZO, today I decided to make one documenting the process to show you, I hope you like it.
Los materiales que usé para tejerlo son los siguientes:
The materials I used to weave it are as follows:

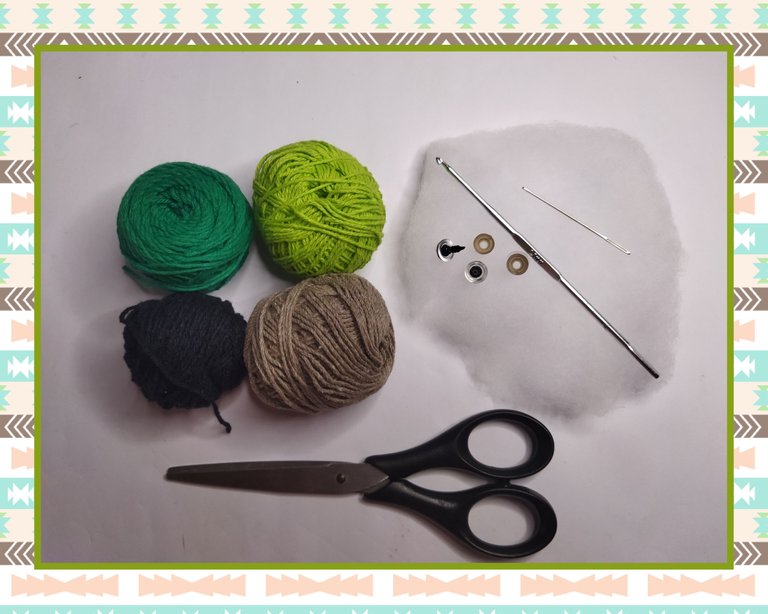
- Hilo pabilo colores variados.
- Aguja de crochet de 2,5 mm.
- Aguja lanera.
- Tijeras.
- Ojos de seguridad.
- Guata para rellenar.
- Wick yarn in assorted colors.
- Crochet needle of 2.5 mm.
- Wool needle.
- Scissors.
- Safety eyes.
- Wadding for stuffing.

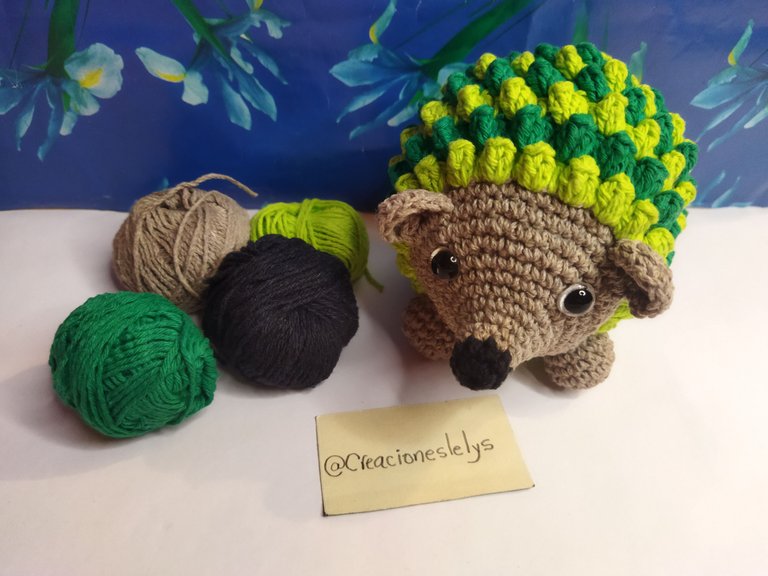
Los erizos tejidos generalmente se usan para decorar y organizar las agujas y alfileres. Dependiendo del tamaño también pueden usarse como juguete para los niños. Ahora te muestro cómo lo hice.
Knitted hedgehogs are generally used to decorate and organize needles and pins. Depending on the size they can also be used as a toy for children. Now I show you how I did it.
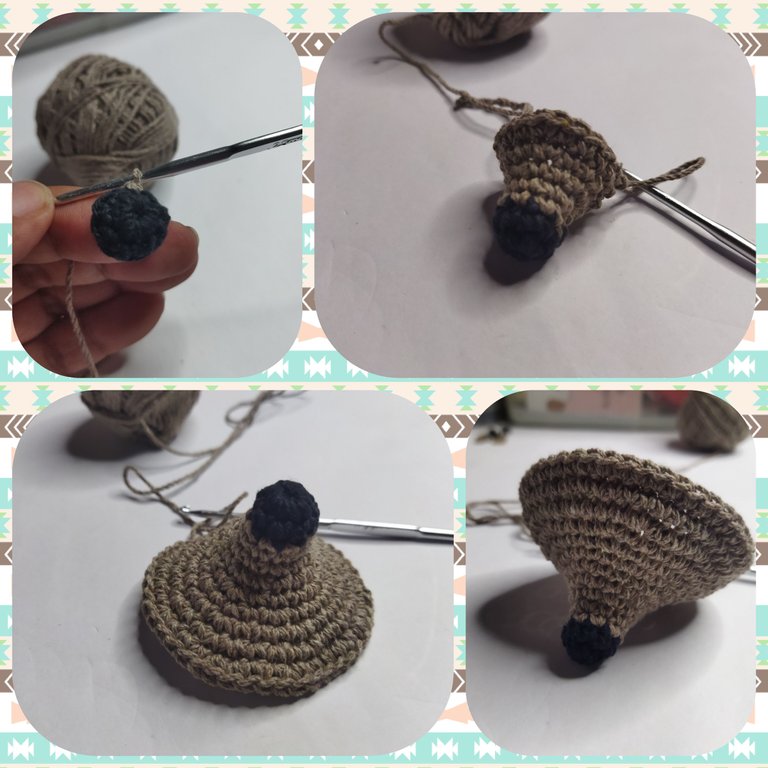
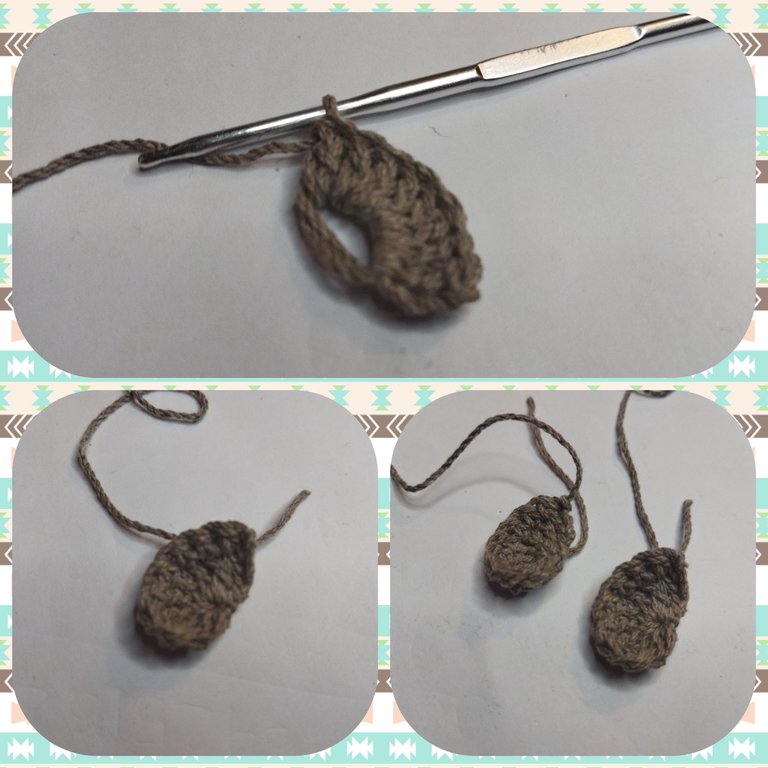
PASO 1.
Iniciamos por el hocico tejiendo con hilo color negro 8 pb dentro del am. Luego tejemos una vuelta de 8 pb y después cambiamos de hilo a color gris. Vamos a tejer 8 vueltas siguiendo la siguiente secuencia: 3 pb-1aum. Inmediatamente en las vueltas 11 y 12 tejemos solo pb.
STEP 1.
We start at the snout by knitting 8 stitches inside the am with black yarn. Then we knit one row of 8 sts and then we change to grey yarn. We are going to knit 8 rows following the following sequence: 3 bp-1aum. Immediately in the 11th and 12th rows we knit only bp.
En la vuelta 13 cambiaremos de color e iniciamos a tejer el cuerpo con 3cadenas-3puntos altos en el mismo punto de base para formar un punto puff. Para los siguientes puff se tejen 4 puntos altos. En el siguiente punto tejemos 1punto alto. Ver Gifs.
In the 13th row we will change color and start knitting the body with 3 chains-3chains-3high stitches in the same base stitch to form a puff stitch. For the next puff we knit 4 double crochet. In the next stitch, we knit 1 single crochet. See Gifs.
En la vuelta 14 cambiamos de nuevo de color. Tejemos para empezar la vuelta 3 cadenas. Luego en el punto alto de la vuelta anterior tejemos un punto puff y así seguimos la secuencia durante el resto del tejido hasta completar 6 vueltas cambiando de color por vuelta.
In the 14th row we change color again. We knit 3 chains to start the row. Then we knit a puff stitch in the previous row and so we continue the sequence for the rest of the knitting until we complete 6 rows, changing color per row.
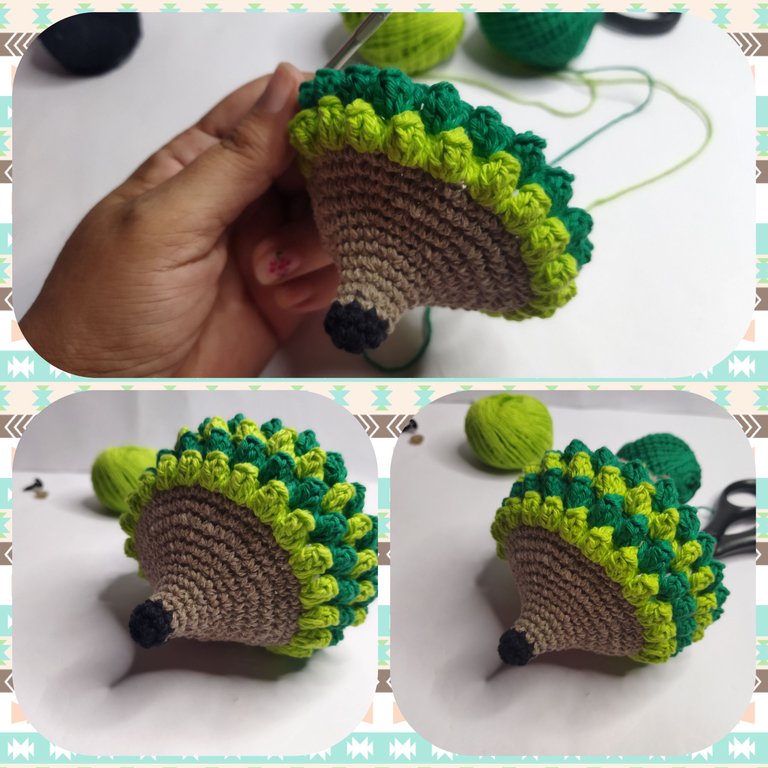
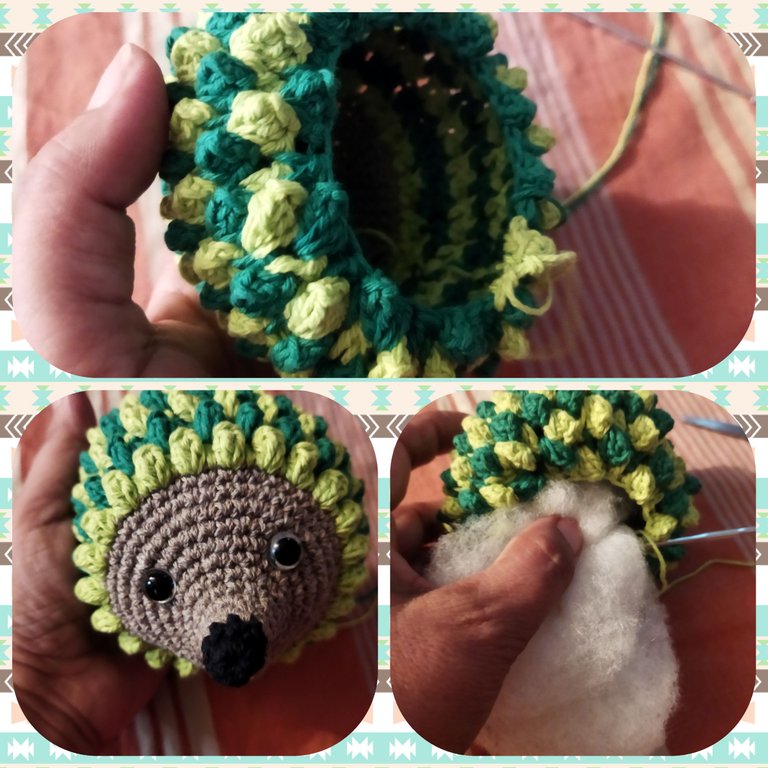
Después de tejer estas 6 vueltas comenzamos con las disminuciones. Consiste en realizar dos puntos juntos en un mismo punto. En el erizo las disminuciones las haremos cuando corresponda estar en el punto puff, a ambos lados levantaremos 1 punto alto y hacemos las disminuciones. Estas vueltas se comienzan todas con un punto puff.
Antes de cerrar el tejido debemos colocar los ojos en la vuelta 7 tejida en color gris separados por al menos 7 puntos y rellenamos con la guata o algodón siliconado.
After knitting these 6 rows we start with the decreases. It consists of knitting two stitches together in the same stitch. In the hedgehog we will make the decreases when it corresponds to be in the puff stitch, on both sides we will raise 1 high stitch and make the decreases. These rows all start with a puff stitch.
Before closing the knitting we must place the eyes in the 7th row knitted in gray color separated by at least 7 stitches and fill with the wadding or silicone cotton.
PASO 2.
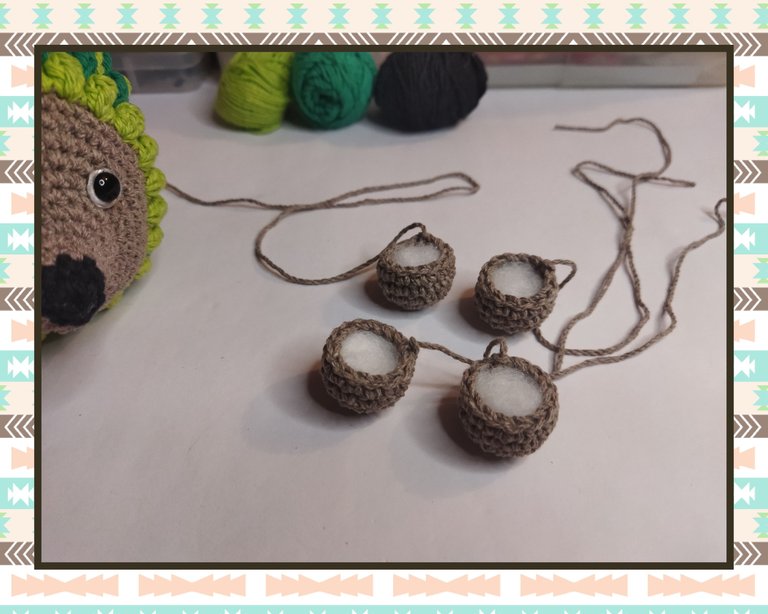
Haremos ahora las patas de nuestro erizo. Para ello usaremos el color gris. Tejeremos cuatro patas iguales siguiendo los siguientes pasos:
Iniciamos con un am de 7 pb. Luego hacemos una vuelta de aumentos para tener 14 puntos bajos. Después tejemos tres vueltas de 14 pb. Cerramos la vuelta y dejamos la hebra para coser. Rellenamos un poco.
STEP 2.
We will now make the legs of our hedgehog. For this we will use gray color. We will knit four equal paws following the next steps:
We start with an am of 7 sts. Then we knit one row of increases to have 14 single crochet stitches. Then we knit three rows of 14 stitches. Close the row and leave the yarn to sew. We fill in a little bit.
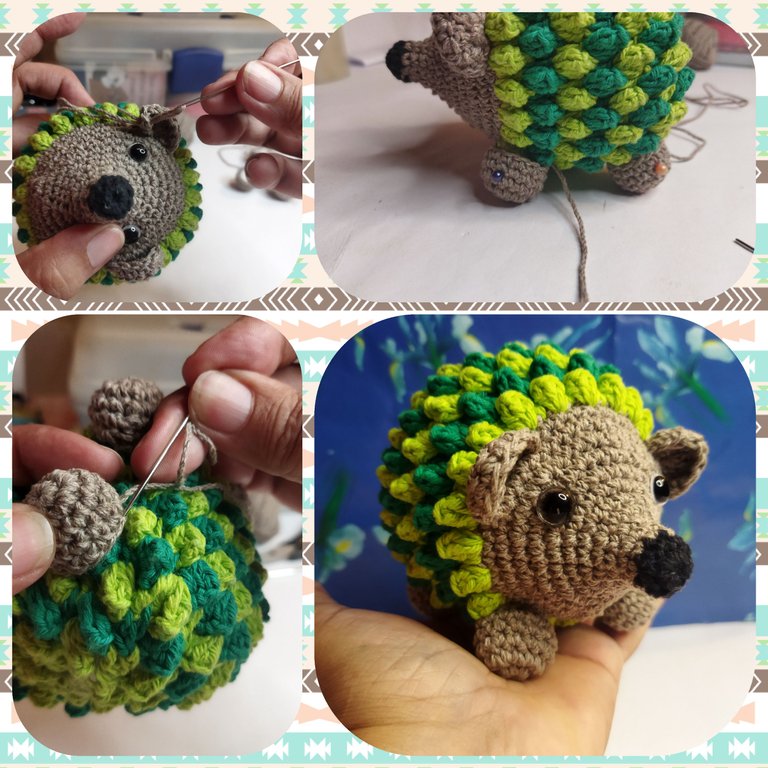
PASO 3.
Tejemos las orejas del erizo. Empezamos haciendo un am sin cerrarlo de 8 puntos altos. Giramos el tejido, levantamos 1 cadena y tejemos 8 pb. Finalizamos dejando la hebra larga para coser. Haremos dos piezas iguales en color gris.
STEP 3.
We knit the ears of the hedgehog. We start by knitting a single crochet of 8 tall stitches. Turn the fabric, pick up 1 chain and knit 8 sts. We finish leaving the long strand to sew. We will make two equal pieces in gray color.
PASO 4.
Coseremos las orejas y las patas al cuerpo del erizo.
STEP 4.
We will sew the ears and paws to the hedgehog's body.
Final result.
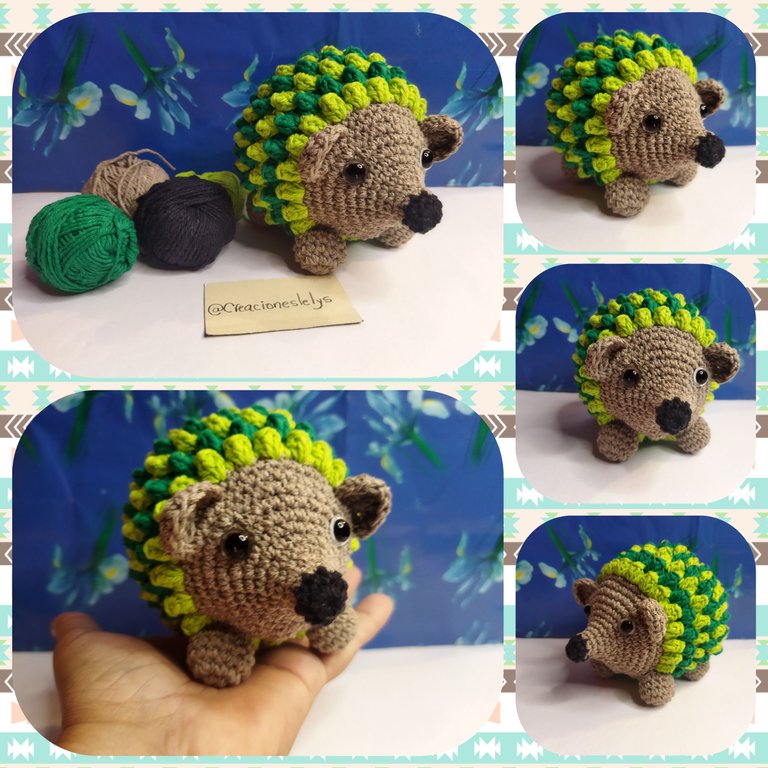
Me dió mucho gusto compartir este hermoso proyecto. La verdad fue bastante laborioso. Les recomiendo asegurarse de tener suficiente cantidad de hilo antes de comenzarlo. Si no tienes los ojos de seguridad puedes bordarlos o colocarle ojos plásticos. Se ven muy lindos también.
Muchas gracias por acompañarme en este nuevo reto. Todas las fotos son de mi propiedad. Edité con Polish e Inshot. Gracias a @kattycrochet por el separador con el nombre de mi blog. Usé el traductor de Deelp. Hasta luego.
I was very happy to share this beautiful project. It was really quite laborious. I recommend making sure you have enough yarn before you start it. If you don't have the safety eyes you can embroider them or attach plastic eyes. They look very cute too.
Thank you so much for joining me in this new challenge. All photos are my property. I edited with Polish and Inshot. Thanks to @kattycrochet for the divider with my blog name. I used Deelp translator. See you later.
https://twitter.com/obo2004/status/1561510412448849921
The rewards earned on this comment will go directly to the people sharing the post on Twitter as long as they are registered with @poshtoken. Sign up at https://hiveposh.com.
Tejer es todo un arte, se necesita habilidad para lograr tan hermosas creaciones, tienes mucho talento amiga me encantó.
Hola. Gracias. El tejido es fascinante, se puede hacer casi todo lo que queramos. Espero que te animes pronto a tejer algo.
Hola amiga, esto te quedo muy bonito, de verdad que muchas felicidades por este incinerable trabajo que nos compartes, ya que para esto se necesita talento, esfuerzo, una creatividad muy grande y lo más importante técnica para hacerlo. A medida que iba viendo las fotos, notaba que las osas se complicaban un poco más, por el hecho de que los detalles eran más pequeños, pero al final lo conseguiste y lograste lo que te propusiste. Así que amiga, nuevamente muchas felicidades y gracias por compartirlo con nosotros.
Hola. Bienvenido a mi blog. Me alegra mucho verte por aquí.
La verdad es que cuando me decidí a tejerlo no recordaba el trabajo que me esperaba jajaja. Ayer pasamos todo el día sin luz y no pude adelantarlo. Me tocó hacerlo todo completo hoy. Valió el esfuerzo.
Gracias por apreciar mi creación. Lo valoro mucho. Feliz noche. 🤗
Hola linda, estoy encantada con lo que lograste, es impresionante todo lo que podemos hacer con nuestra creatividad, los hilos y las agujas. Felicidades
Hola. Muchas gracias por pasar por aquí. Tejer es un arte maravilloso. Con muy pocos puntos podemos elaborar muchísimos proyectos.
Saludos.
Me enamore de los tonos verdes que usaste para el cuerpo, te felicito por ese hermoso trabajo.
Hola @giocondina me costó decidir el color. Estaba entre tonos verdes y violetas. Que bueno que te gustó. Muchas gracias por tu apoyo. Feliz noche. 🤗🙋👆
Hola ☺️✨
Que hermoso trabajo, de verdad que para tejer hay que tener mucha paciencia. Utilizaste unos colores de verde muy hermoso.
Gracias por compartir amiga, saludos. 😊
Hola. Gracias.
Estaba decidiendo entre los tonos violetas y estos. Creo que haré uno en violeta también.
Que bueno que te gustó. 👆🙋🤗👏☺️
Debe quedar muy lindo en esos tonos, me encanta así, con diferentes colores.🤭❤️✨
Un saludos!
Your content has been voted as a part of Encouragement program. Keep up the good work!
Use Ecency daily to boost your growth on platform!
Support Ecency
Vote for new Proposal
Delegate HP and earn more
Amiga que erizo más cuchi me encanta, se ve hermoso, eres una artista del amigurumi. 🥳🥳
Hola. Buen día. Me alegro que te guste. Hacer amigurumis es adictivo amiga. Una vez que uno comienza a verle forma a los primeros ya no quiere parar de crear. Anímate 😁
Guapo amiga @creacioneslelys esto es realmente hermoso. Eres una artista explendida con los hilos. Te quedó excelentemente elaborado, tierno y super Cuchi. Felicidades y gracias por compartir esta belleza. Que tengas bello día @creacioneslelys 🌞🌈🌟🌸
Gracias a ti por pasar. Me encanta hacer esto. Espero seguir aprendiendo para traer más contenido para #hive ❤️
Saludos.
Es una cuchitura que bello
Muchas gracias 🤗
te quedo bastante bonito el erizo esta bastante genial como decoración incluso también serviría como juguete para algún niño pequeño, gracias por compartir el paso a paso te quedo bastante bien la explicación, seguramente te llevo bastante trabajo realizar el erizo pero el resultado final valió cada hora de trabajo
Hola! Me da gusto tenerte de visita.
Me dió algo de trabajo tejer el cuerpo, por los cambios de colores, pero valió el esfuerzo.
Muchísimas gracias a ti por apreciarlo. Saludos.
Thank you for sharing this amazing post on HIVE!
Your content got selected by our fellow curator @stevenson7 & you just received a little thank you via an upvote from our non-profit curation initiative!
You will be featured in one of our recurring curation compilations and on our pinterest boards! Both are aiming to offer you a stage to widen your audience within and outside of the DIY scene of hive.
Join the official DIYHub community on HIVE and show us more of your amazing work and feel free to connect with us and other DIYers via our discord server: https://discord.gg/mY5uCfQ !
If you want to support our goal to motivate other DIY/art/music/homesteading/... creators just delegate to us and earn 100% of your curation rewards!
Stay creative & hive on!
Thanks you 🤗