Black Currant: New Garden Addition [Gardening]
Spring is almost here, and the days are getting warmer. I can't wait to be outside for more hours working in the garden.
Recently I purchased a Black Currant.
In this article, I will be sharing information about this plant, and the process I followed to plant it into a large pot.
Inspiration
Years ago when I visited England, currant was a part of nearly every breakfast, as it was always offered as a delicious dark grape flavored preserve to put on bread. Yet in America, I find it is almost non-existent in any of our local stores. Instead, we have blueberries, blackberries, and raspberries everywhere.
For a plant that grows so well in my climate, and one so delicious, I see no reason why I shouldn't plant this in my yard. I always enjoy planting interesting things few people (or nobody) around me has. So that is the story behind why I decided to grow my own this year.
Ribes odoratum 'Crandall'
The variety I picked is called Crandall.
Crandall is is a clove currant, native to North America. It is thornless, and produces yellow blooms.
"Fruit has a tart-sweet flavor that is superior to the flavor of the fruit found on species plants. Fruit looks like black currant (Ribes nigrum), but is larger and somewhat milder in flavor."
-Missouri Botanical Garden
Some reviews of this flavor of currant have said it has a less musky flavor than Consort, yet retains all the sweetness and full flavor. I thought this might be a good choice since it can be eaten fresh, or mashed up and turned into preserves or syrups.
Best of all, this plant is often grown as a hedge, requiring frequent pruning of old thick branches that no longer fruit. So that means I can practice pruning with it, and perhaps make it into a beautiful topiary for the front yard.
Let's Plan-it
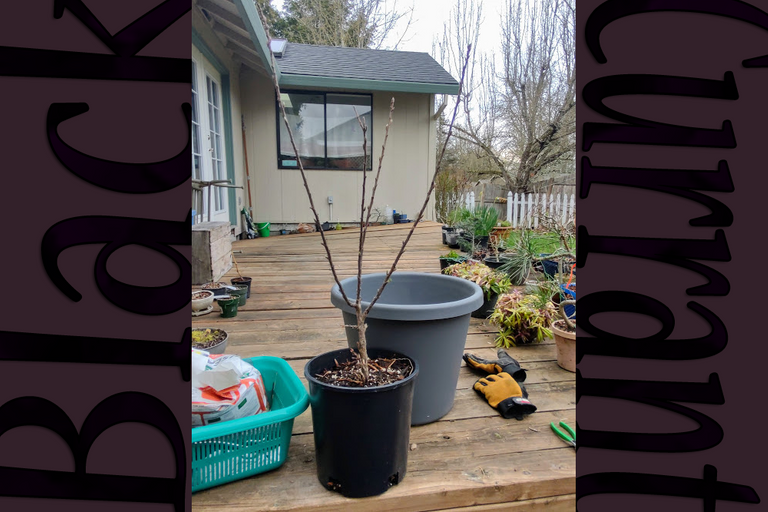
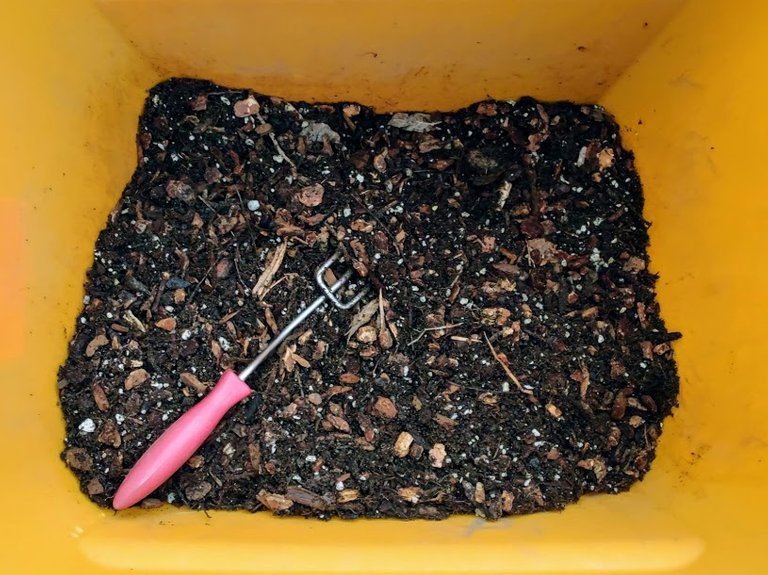
The first thing I do is prepare my pot.
I picked an oversized pot, with the prediction that this plant will quickly grow lots of spreading deep roots. I want it to have as much space as possible for future years of growth, and lots of drainage so it does not rot the roots.

This pot has already has 10 coin sized drainage holes, which is excellent. Still, I decided to cover the holes with screen, secured with wire, to prevent soil from falling out. Then I made a layer of rocks to really help prevent water from puddling.
This should also prevent feeding roots from forming thickly at the base. Dry air can move freely through the rocks and most roots don't like to grow through the open air. Eventually I may get some structural taproots coiling around the base. When it is time to repot the plant, and these rocks are removed, problematic roots will be much easier to prune off.
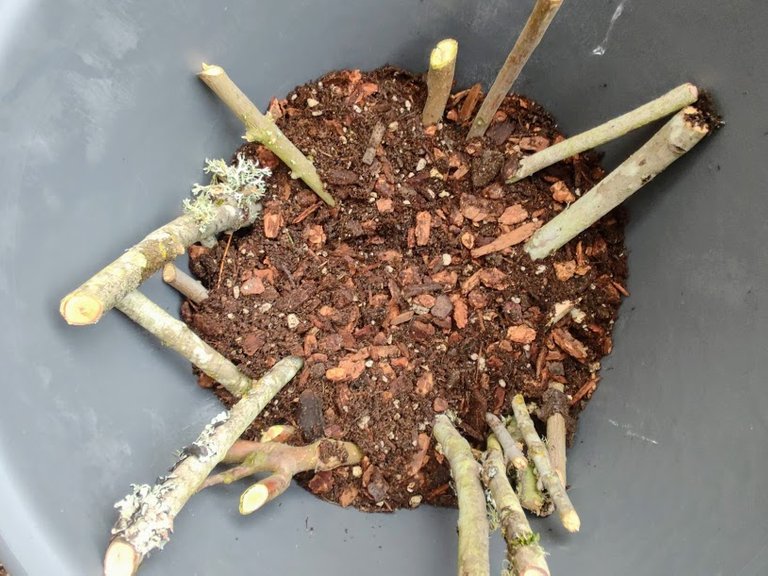
hugelkultur?
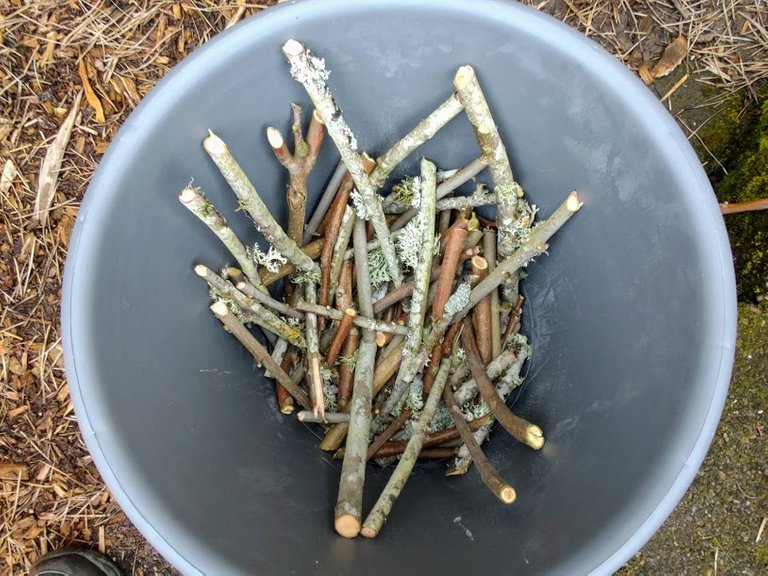
Sometimes I try some crazy experiments, and this is up there with some of my crazier ideas.
Today I pruned a bunch of limbs off of some of our trees, and I saved some of the thick short pieces that I thought might aid in drainage for this pot.
The idea is that the sticks in here will initially provide strong pieces for plant roots to coil around and grip, and eventually these sticks will decompose and feed worms, which will feed the plant.
Only problem is that I was a bit impatient and did not wait for these sticks to dry out, so they are still a bit fresh green on the cambion edges. Let's cross our fingers and hope the sticks do not form roots of their own. And I have no idea what kind of funk these green sticks will do to the soil temperature and ph.
Preparing the Soil
I am not a big fan of adding a ton of chemicals to soils, because I don't always know what they do exactly, and how much every variety of plant will need specifically. Especially ph of soil, I try not to mess with that too much, as nature has a way of drastically attempting to rebalance anything it finds out of wack. The wrong mixture of chemicals can easily cause disease, pests, mold, or worse.
Instead my strategy is always to create a soil medium that is conducive for healthy water, air, nutrients, bacteria, fungi, and microbial organisms, so the roots can become healthy too.
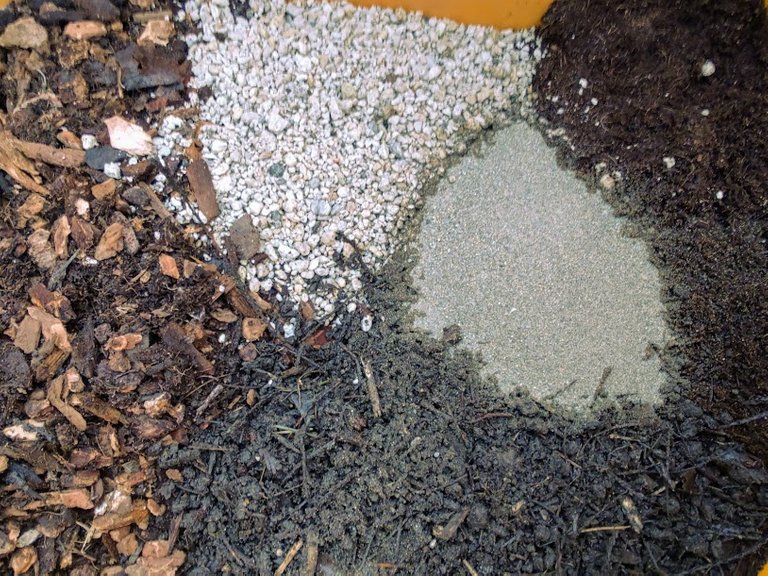
This is a similar mixture to what I used when I planted my grafted apple trees bare root into containers, and they are still doing very well years later. It is a mix of pine bark, pumice, coconut coir, sand, and my own homemade compost.
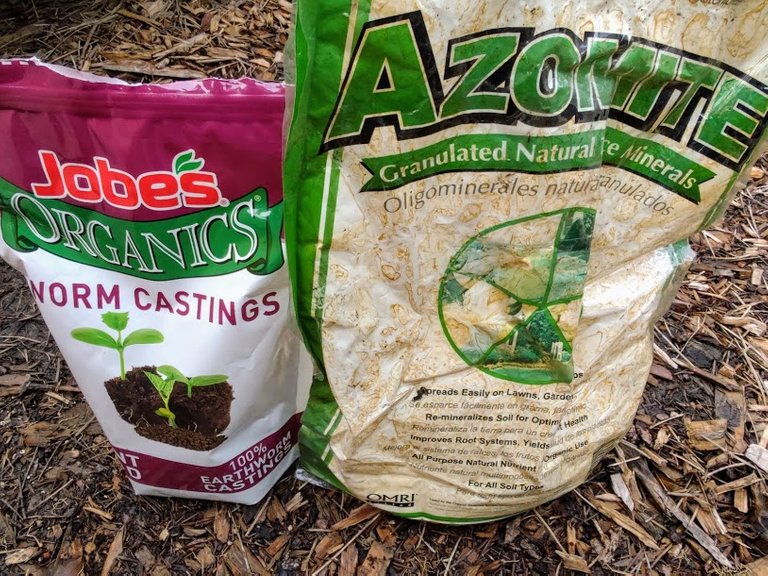
To help the plant get a good zippy start, I add a few handfuls of worm casting and azomite. Nothing that an excess amount will cause any harm, yet an available nutrient source.
The mixed soil ended up very chunky with soft bits and also some sandy, rocky bits. The chunky wood is going to retain the perfect amount of moisture and allow excess water to drain away. Knowing that most of the organic matter will eventually decompose and pack down, the pumice and sand will retain the permanent structural shape of the soil, and still provide additional surface area for fresh air and water to absorb onto.
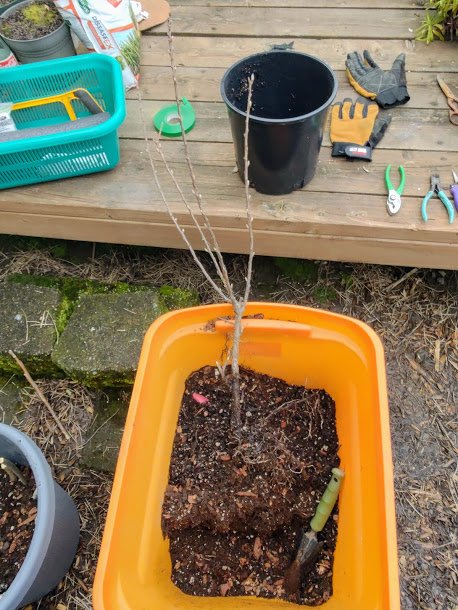
A mound of soil is piled into the base of the pot over the rocks and sticks. I use my hand spade to poke through and eliminate any big air pockets. Soil will always settle down a few inches after it is watered, so it is better to pack soil in tightly here at the base. I want the currant to have a strong foundation so it stays standing upright after many waterings.
Looking At the Roots
I decided to dump the entire thing out with the included soil into my own soil mix. Likely there are some nutrients and ph additives inside that soil that the plant will need for healthy development.
As I suspected, the loosely potted soil barely stuck to the plant at all. It was practically a bare root tree. Most likely the nursery planted it fresh only a few weeks ago before selling it to me. Not much of a root ball.
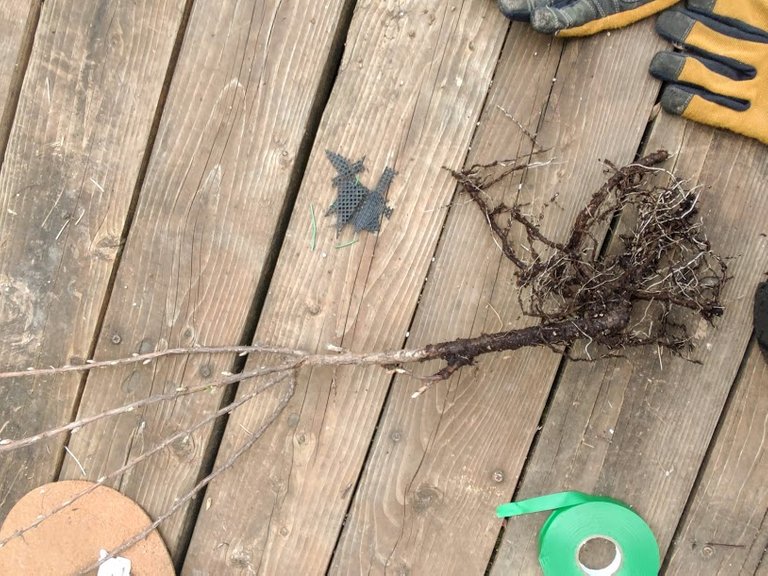
What I like about this plant is the tree shape. I picked this plant because it had a strong looking trunk, and I saw that low limb with buds on it as a benefit to further thicken up the trunk at the base. The upper limbs have a decent open center I can train out into any shape I want.
The roots however, I am a not fully satisfied with yet. All the roots are growing to one side. It must have been growing along the edge of a small container in the past. However, the roots that are thinner than a finger are all rubbery and flexible, so I will be able to position them into a better radial shape, somewhat, over the soil mound.
A few of the roots I did prune off. One old thick piece I removed, because it was had four inches of wet rotten root, with nothing growing on it. A stringy root was a few inches too long to fit in the pot, so I cut it down to the length of the radius of the pot.
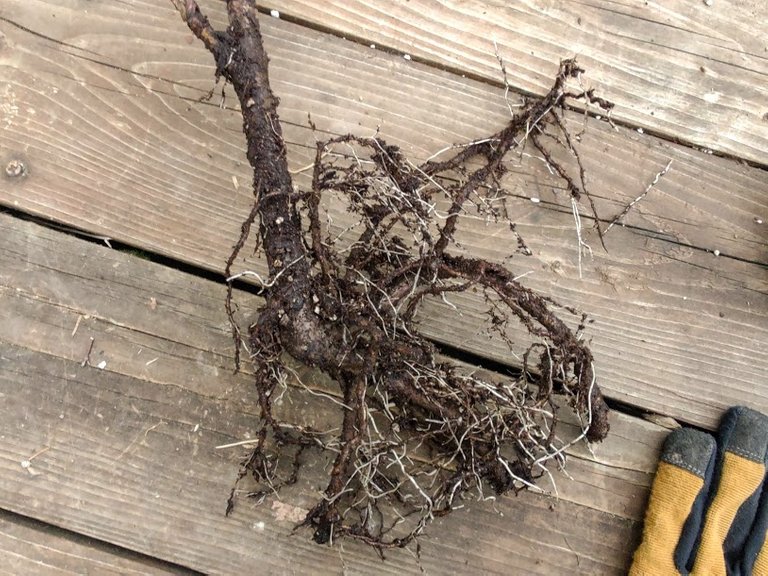
A third root in the middle looked like it was crawling over another one, to cross back in toward the center. I eliminated the competing crossing root, favoring the one that looked healthier and heading in the correct outward direction.
Planting It Up
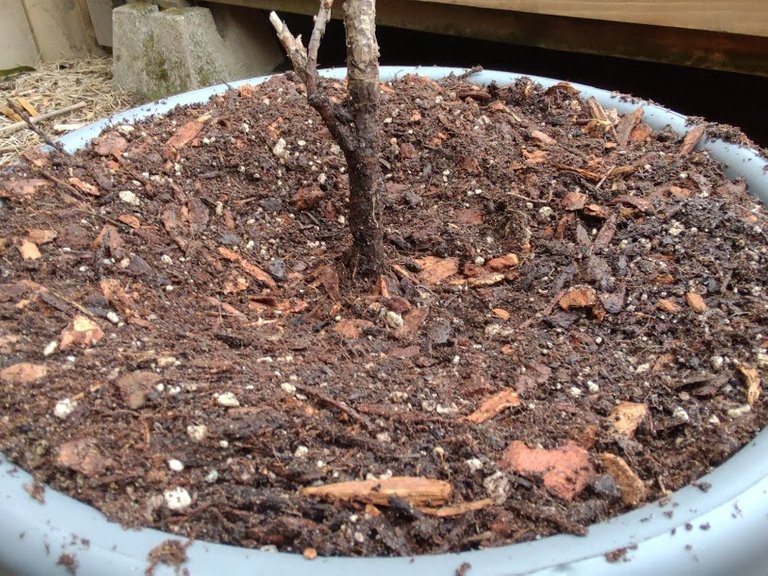
Holding the currant plant with the trunk base at the ideal level with the rim of the pot, I began backfilling the pot with soil, patting and poking out the air pockets as I went to help hold the roots in tightly.
As you can see I left the faintest traces of the topmost roots visible where they connect to the trunk, and buried everything else out in a radial pattern around the plant. I angled the soil surface so it had a slight trench, sloping down like a bowl around the the trunk.
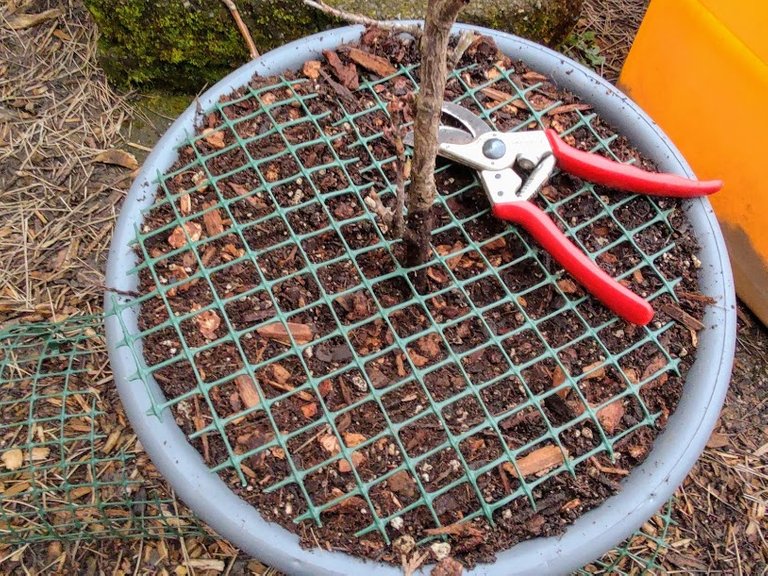
To further protect the roots, I add this screen material over the surface. Lately the squirrels and birds are going crazy looking for their buried nuts, worms, and slugs. Some animals love digging through soft, disturbed soil. The screen should prevent animals from making any progress here.

Lastly I added a layer of pine bark nuggets on top of everything. It masks the green screen, and further insulates the top roots as a mulch.
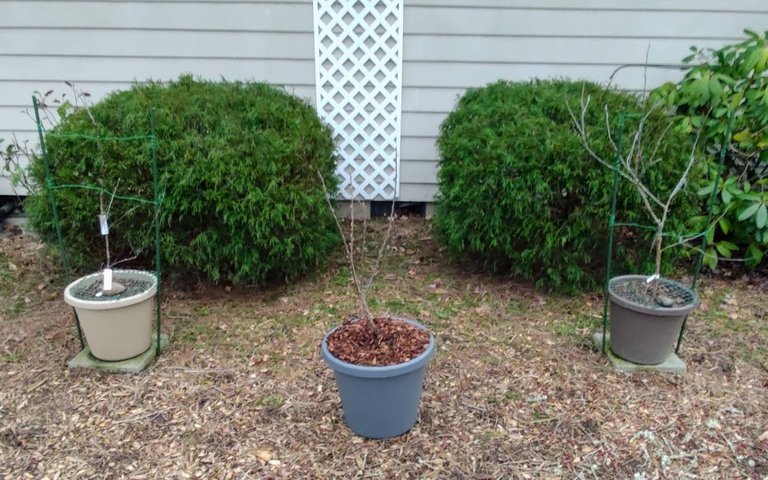
Final Results
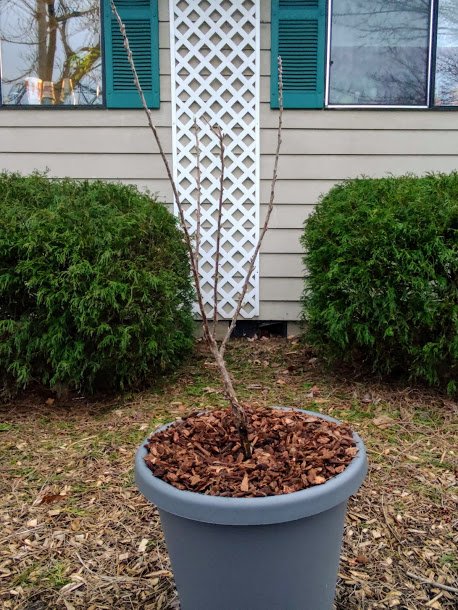
Here she is. My Black Currant, in all its glory.
Its new home will be here between my two apple trees.
Next I plan to get a paver underneath the pot, so it doesn't root into the earth. And I think the tree needs some stakes to help straighten its upright shape a little bit. Maybe I can even train the top branches to open into balanced outward directions a little bit more.
Post Beneficiaries:
- 1% @mendezand
- 1% @cryptopie
This is my way of thanking each of you for your friendship and support. By sharing my talents on Hive, I can also share to help with your needs.
Let my success also grant you some happiness too.
#black-currant #how-to #container-gardening #pruning #soil #garden #berry #shrub #hedge #healthy-food #organic #organic-gardening

I guess putting the sticks in there will act as a kind of hugelculture?
I have a few blackcurrants, they form a nice hedge. With the extra rain this year we had an absolute bounty of them.
I've never tried currants before but I think I would like them. Actually, when I was interning as a horticulturist I was given a jar of currant preserves and they were delicious! Looking forward to your plants progression. Speaking of little known fruits, do you have any goji berry bushes on your property? I think they would do well in your area.
Actually, yes! I have a goji berry.
Everybody says they are easy to grow because the roots are so invasive and spreading, but in a container I find them challenging. Overwintering them is not easy without a greenhouse. I barely managed to keep mine alive after the first winter. The year before I had to start over from seed when it dried up indoors.
I've had mine for several years (2 of them) but they haven't bore fruit. I think it's because they're on the shady side of my garden. They survive the winters fine though (I'm in zone 5). I've started some new seeds from some berries in the trail mix that I like. I will plant these on the sunny side.
Zone 5 gets well below freezing in Winter.
May I ask, have you always left yours outdoors all year in winters? If they lose all their leaves after frost, do they always kick back in Spring?
Thank you for sharing this amazing post on HIVE!
Your content got selected by our fellow curator @hafizullah & you just received a little thank you via an upvote from our non-profit curation initiative!
You will be featured in one of our recurring curation compilations and on our pinterest boards! Both are aiming to offer you a stage to widen your audience within and outside of the DIY scene of hive.
Join the official DIYHub community on HIVE and show us more of your amazing work and feel free to connect with us and other DIYers via our discord server: https://discord.gg/mY5uCfQ !
If you want to support our goal to motivate other DIY/art/music/homesteading/... creators just delegate to us and earn 100% of your curation rewards!
Stay creative & hive on!