Ceramics Class: Third Week Progress. Granite Inlays, Tray, Coil Planter, Lion Relief Face
Check out my latest ceramic projects in this short article. Four of my works in progress are featured here, along with plans for my future designs.
Bisqueware
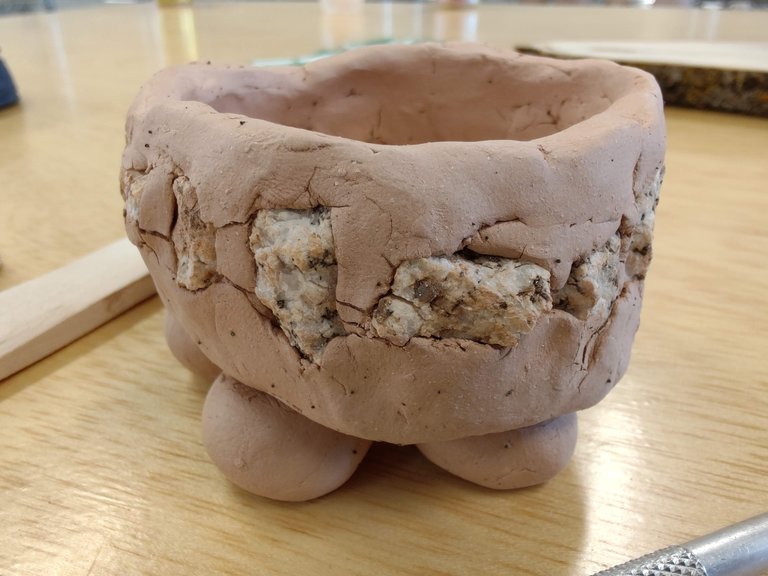
Featured first is my mini planter with composite granite inlaid chips. Notice the silvery mica has turned copper tinted. I used a needle tool to scrach off some of the pink fired clay staining the granite, but found it was also digging chips and fissures through the granite.
It has been through the kiln, so it is considered solid #bisqueware at this phase. It it so hard the clay can no longer be reshaped. Some people sand their items down at this stage, but you have to wear a mask and work outside to not harm others in the studio with the dust.
I must decide what sort of glaze or underglaze treatment to add, or leave it unglazed. Ideally, the granite would be highlighted by a neutral unglazed finish, but I still feel the cracks should be reinforced somehow. Think I can find a tool to apply glaze into the cracks, and leave the granite clean?
This clay, called Pioneer Dark w/ Speckles does change shade slightly when fired a second time, where it becomes a stronger, glass-like stoneware. From what I have seen, its final pigment resembles mocho ice cream with ash black specks.
Greenware
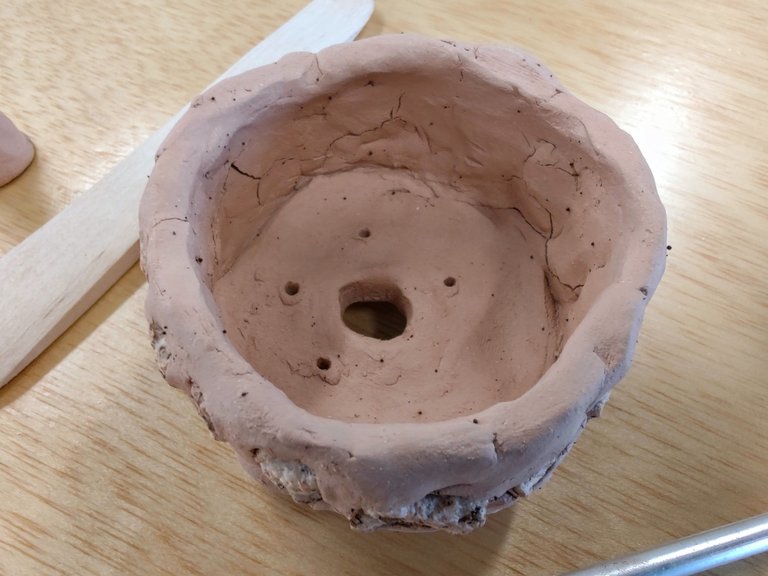
This is my coil built planter. I attached some thick coin sized feet when it was leather hard.
Any time you attach soft clay to hard clay, you have to put it under plastic and wait a few days for the moisture levels to balance, or else the additions will crack off when the clay shrinks.
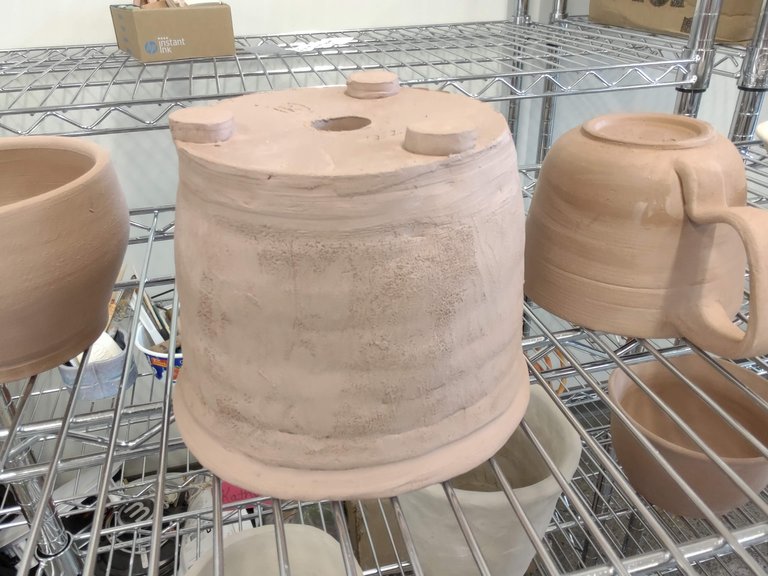
So here it is a week later bone dry, and ready to go into the kiln. Since the kilns take most of a day to slowly heat up, and a long time to fire and cool down, I think this new studio developing a pattern schedule to fire only the dryest greenware once a week. Patience.
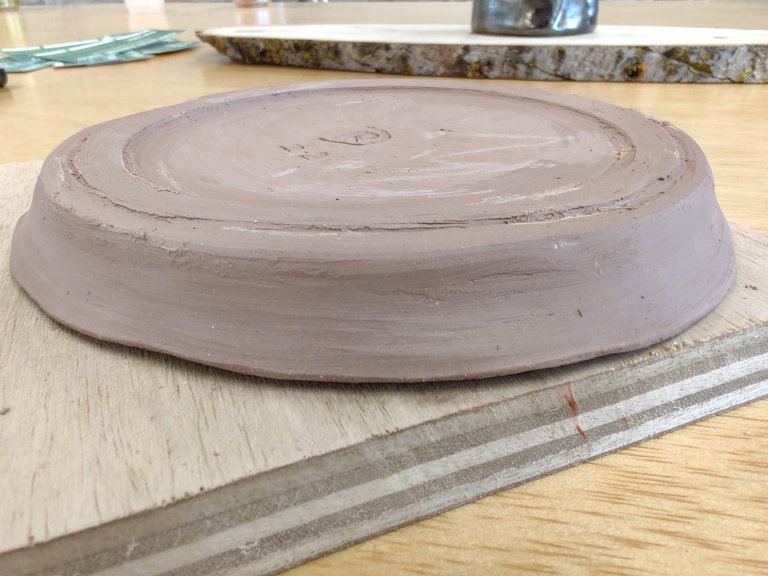
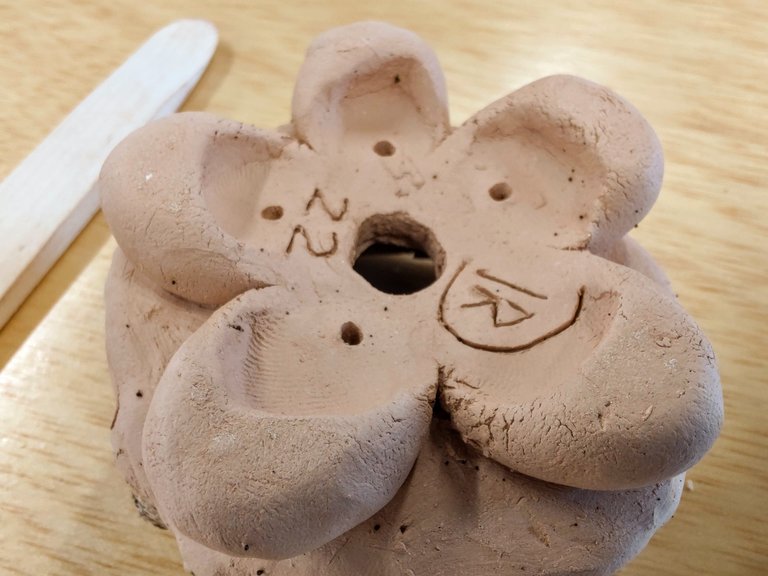
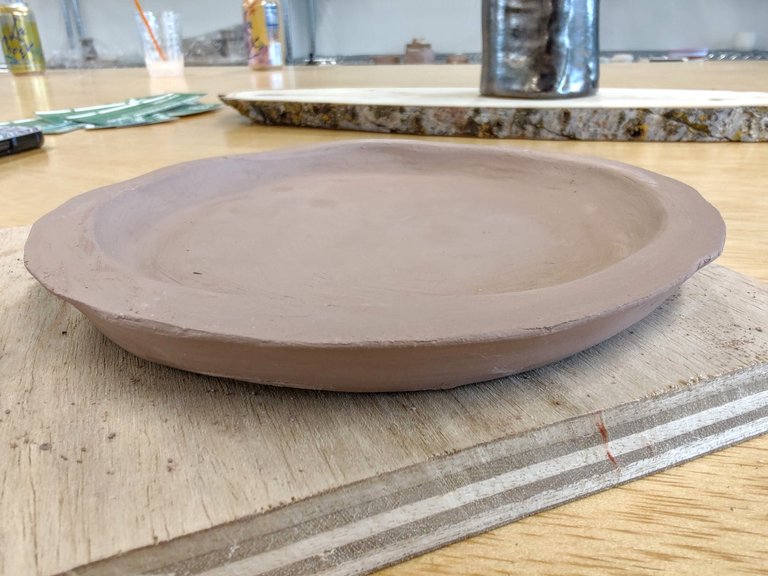
This is a dish I hand built on the banding wheel to match the coil made planter above.
The lip of this dish was also made using a single coil addition.
The rim and underside were trimmed with a carving tool when the clay was leather hard, as pictured here.
I tried carving out the center and around the outside, but found the clay was very dry and difficult to remove evenly. So I only was abled to carve out a thin layer to develop a slight footer. That is okay though, since this is a simple water dish, designed to mostly highlight (not outdo) the planter as an understated water spill catch basin.
Another student in my class had forgotten to add a footer to her planter before it dried out, so I shared an idea for her dish design she liked. To build raised lifts on the interior of the dish, it would serve the same function as a footer under the planter, to lift the planter above the water, and the footer/lift could be hidden by the raised edge of the dish when the planter is placed centered.
Lion Head Relief
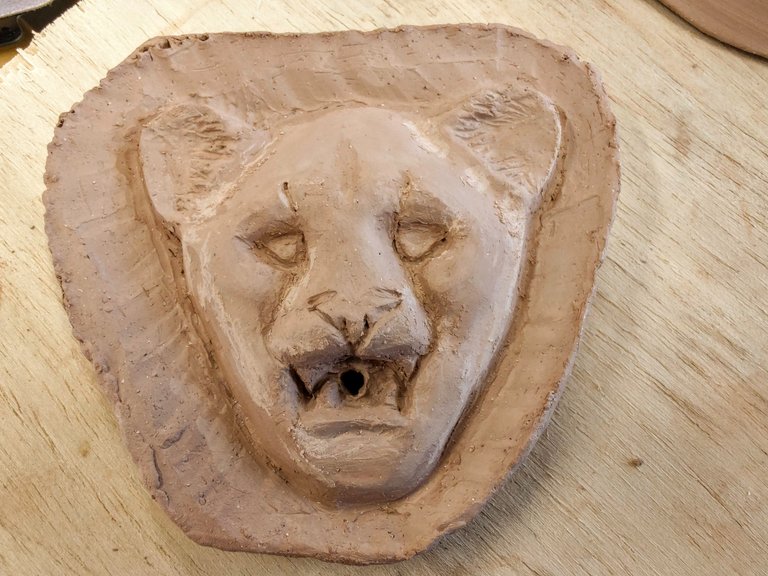
This is practically finished. Now it is nearly bone dry.
Last time it was leather hard I built up more raised flesh in face around the mouth, cheeks, forehead and eyes.
The nose and teeth aren't quite right, but overall good enough for my first artistic lion carving, and a heck of a lot better than most amateurs can do.
I think it also looks better than expensive lion face moulds you can purchase online, which was my primary goal. Nothing online looked realistic or personal to my style.
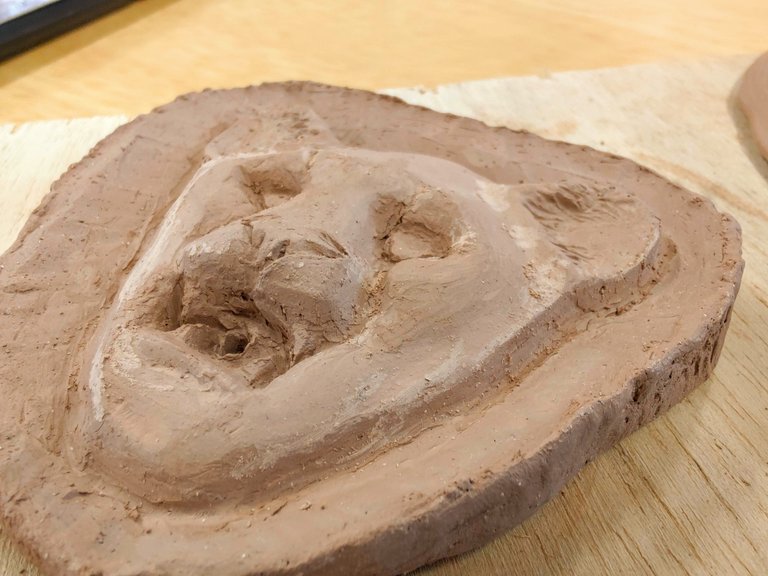
The scratch marks are where I used a wood tool to smooth out some sharp edges. Since bone dry clay does not move, you basically scratch and powderize any disturbed surfaces. Too much pressure, and it can cause less predictable splits and cracks.
Since I want to make a reverse mold out of this, to reproduce the relief face, I am still undecided.
Option 1: Press soft clay onto the bisque face, and remove to make a mould.
Option 2: Pour wet slip onto bisque face, and cross fingers that the slip will shrink and peel alway as it dries, and use the slip made reverse relief as a mould.
Option 3: Invest into plaster of paris used for making clay moulds, and pour this over a form around the bisque face. A coating of oil might help the bisque to release when the plaster is hardening. Plaster works well for helping slip poured in to dry quickly and evenly, ideal for moulding a clay released form. I have heard warnings though that plaster does not last long for reuse.
Design Showcase
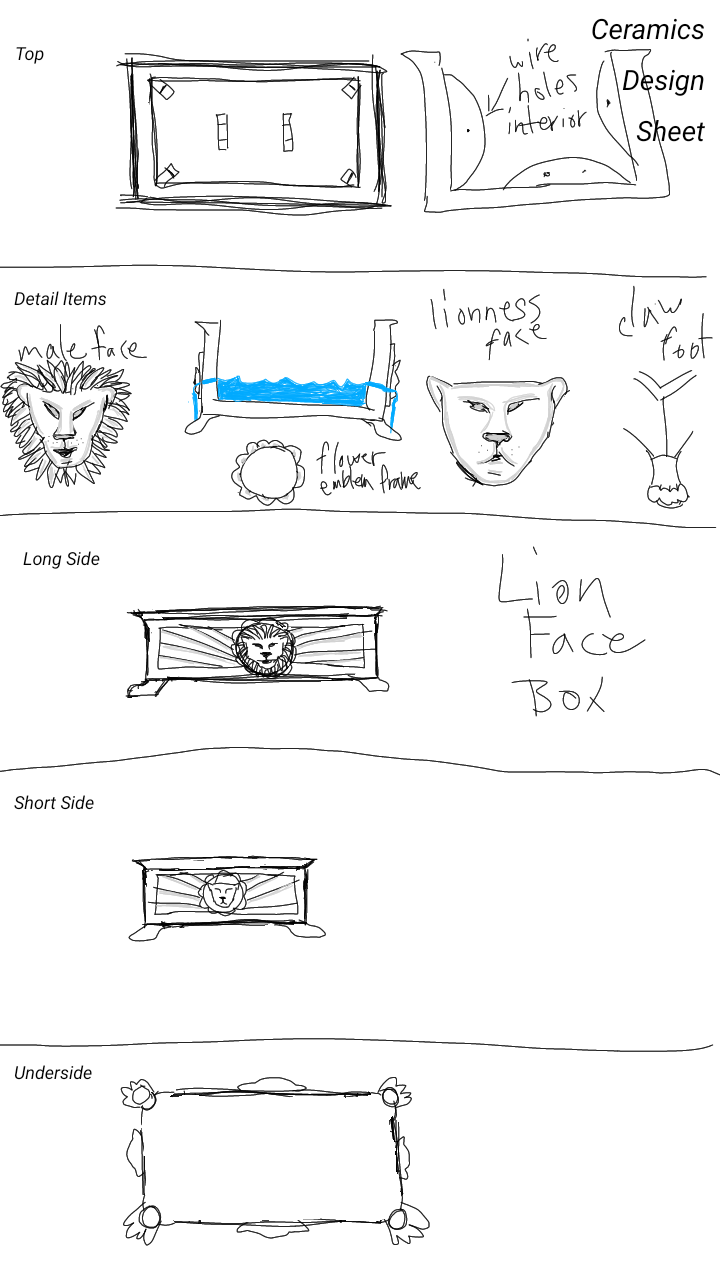
Above is my future design plan.
This is a box planter, with a special water drain design, in which the water would drain out the sides through the lion face reliefs whenever the water reaches a certain threshold. A box that holds onto a shallow layer of water is ideal for some bonsai trees, like willow.
Next I'll need to figure out how to reproduce the lion face before I construct the box form and claw feet.
Conclusion
Please share any constructive comments or feedback. I would certainly welcome advice from any experienced artists with comments on glazing the cracked pottery, or making an easy and effective relief mould.
#lion #face #relief #mould #bisque #greenware #granite #glaze #stoneware #bonsai
Post Beneficiaries:
- 1% @cryptopie
This is my way of thanking each of you for your friendship and support. By sharing my talents on Hive, I can also share to help with your needs.
Let my success also grant you some happiness too.

Very beautiful! Original!
I'm not the experienced artist you are looking for 🙂 My experience is only watching a couple of friends throwing pots and watching The Great Pottery Throw Down haha I love the planter box design with the different lion heads and claw feet. The details are impressive. I hope the glaze comes out well on the mini planter with the granite inlays. I really like the inlays. I'm also curious to see the final look of the different clays you are using.
Hey buddy. Part 3 of the Gang Wars Survivor Series was finally posted today. Huckleberry is fighting Jeremiah Vatrix at our version of Wrestle Mania "Ultra Slam" at the next show. It be great if you could role play for Huckleberry for it :) Also kind wanted to feel out if you still wanted to be part of the E-Fed going into Season 3. Let me know. I do have some exciting news as some new blood is entering the writing staff for the show so things will be picking up pace a little bit from here on out.