First Glazed Ceramic Results: Coiled Planter and Matching Dish
Here is a progress update on my latest ceramic project I've been working on.
Scroll all the way to the end and I'll exhibit the final glazed results, along with a special new plant chosen specifically to match its design and color scheme.
Greenware
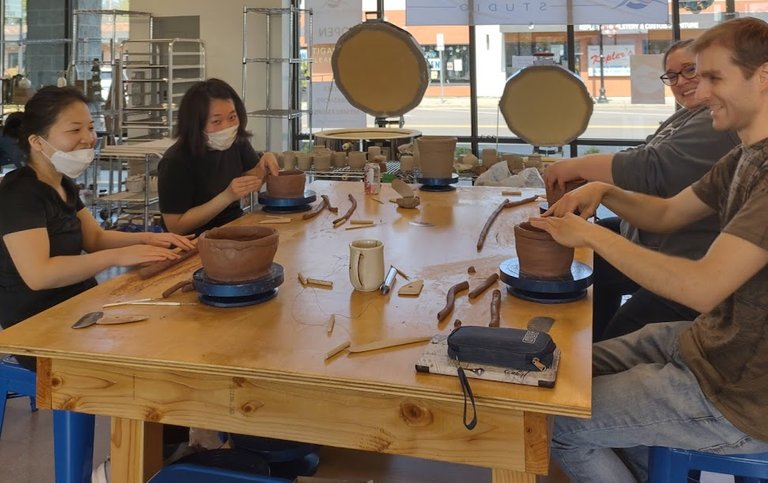
Up above, that is me on the right working my magic fingers on my first coiled pot in many years.
The process of making a coiled piece of ceramics involves many steps that can take hours under my unpracticed hands.
It generally involves adding coils until the desired height is achieved, scoring the edges of all clay that will be attached, pinching coils together until joined to the base and body, smoothing the inside and outside, shaping the rim, trimming the underside.
Adding feet is optional.
A hole has to be added into the center to allow water to drain. Alternatively, without a hole, it can be used to hold liquid, such as a vase or jar.
A maker's mark denotes the artist who made the piece. I like to scratch in the year it was made as well.
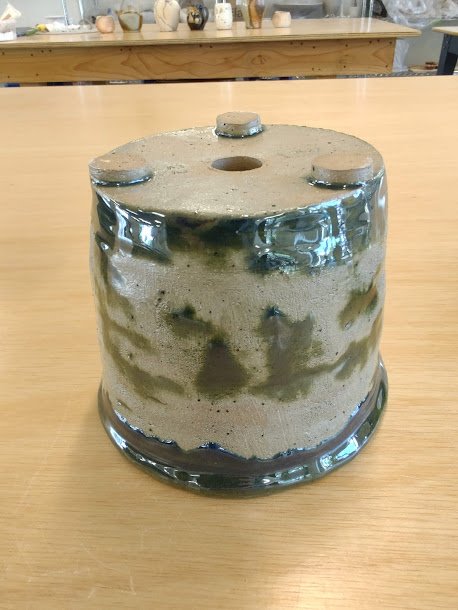
To create the rough brick texture, I used a plastic bristle brush, and hammered the bristles in to punch in some porous holes. A metal rib was used to smooth areas in between. The goal was to make it look like an unfinished plastered brick surface.
Perhaps the rough texture and coil lines will affect the final glaze result.
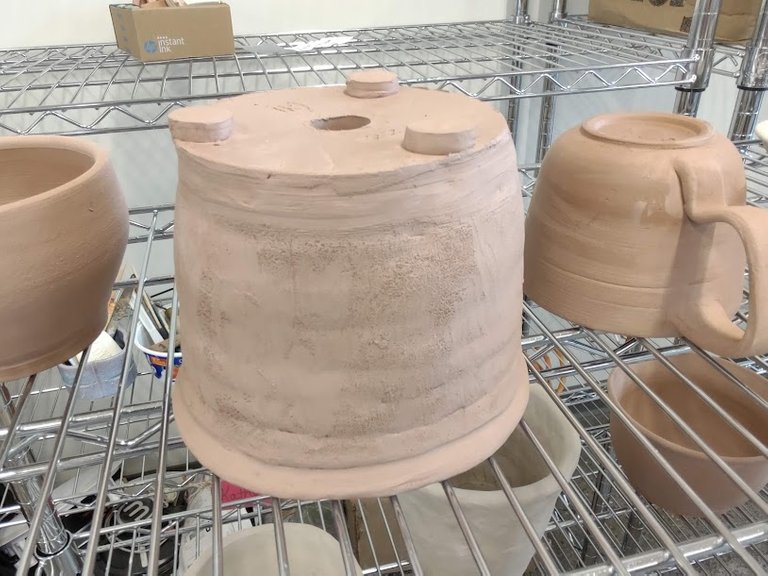
Here it is after becoming bone dry hard. Texture details are more evident.
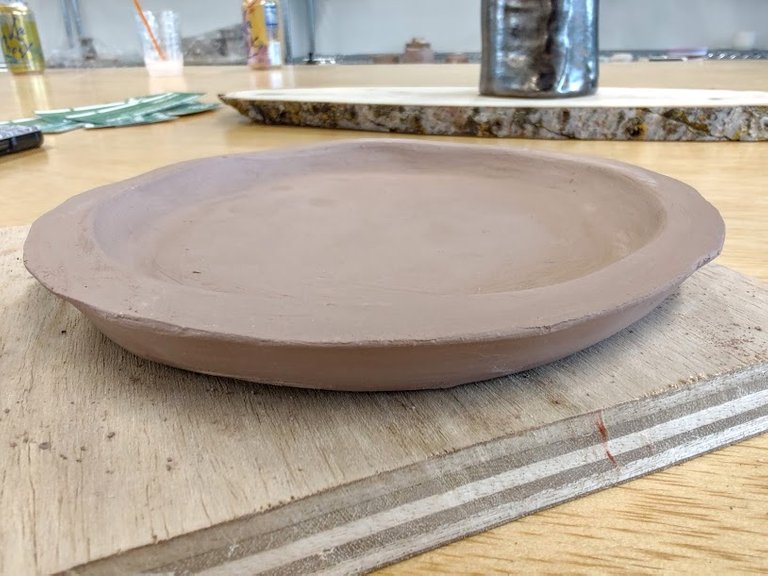
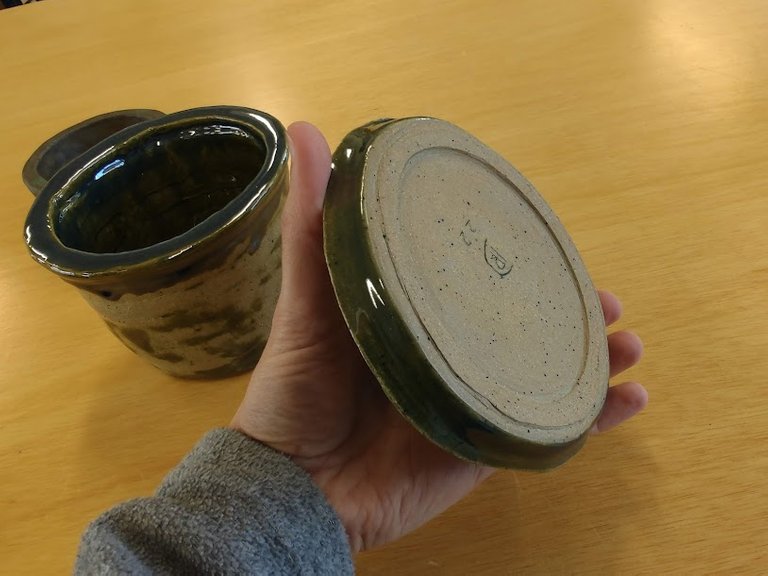
A dish was made to match the planter. A single coil was joined over a circular slab and pinched together.
The tapered edges were formed by spinning the plate on a banding wheel by hand, and using a trimming tool to shave off clay to form a smooth contoured edge. This was done with the top face upside down, with the clay fairly hard, so the center wouldn't cave in when pressed on with an edged tool.
Bisque

Here is what the two pieces looked like after going into the kiln. You can now see the sandy black bits that are a characteristic of this clay.
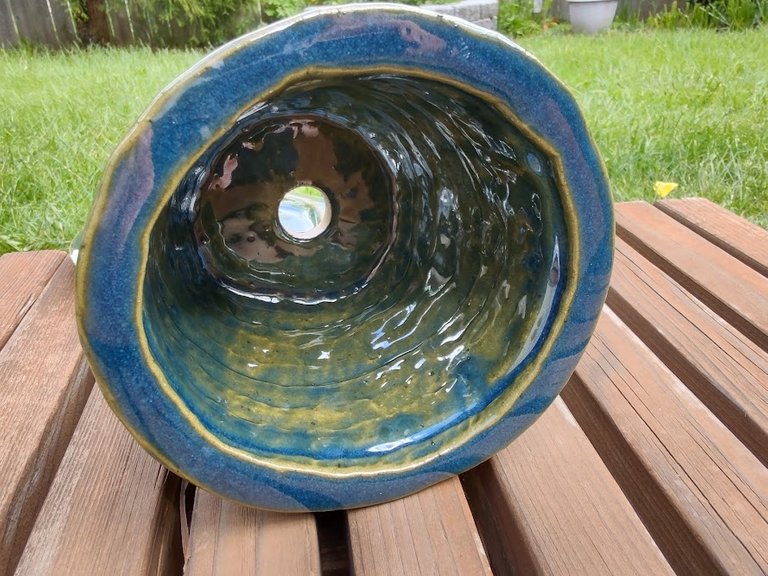
Using a glaze called Scotch Pine, I thoroughly coated the inside and rim. On the outside, I chose to leave the glaze more patchy to show off the texture of the clay more.
This is my first time using this glaze which is expected to be pine green.
All I knew at this stage is the color may vary based on how thick or thin it coats, and how it drools down the sides. To see how it looks when the glaze reacts in different thickness situations, I allowed for as much variances as possible.

On the plate, I allowed for a more full coat throughout.
Since the weight of the entire planter will be pressing down onto the feet directly on the dish surface, I believe a smooth, thick glaze coating should protect the pottery from chipping, scratching, and tipping.
A brush was used to touch up some bare spots where the glaze bubbled. Bisqueware can sometimes absorb water so quickly, it wicks the glaze away, preventing it from sticking onto dry pockets.
Stoneware
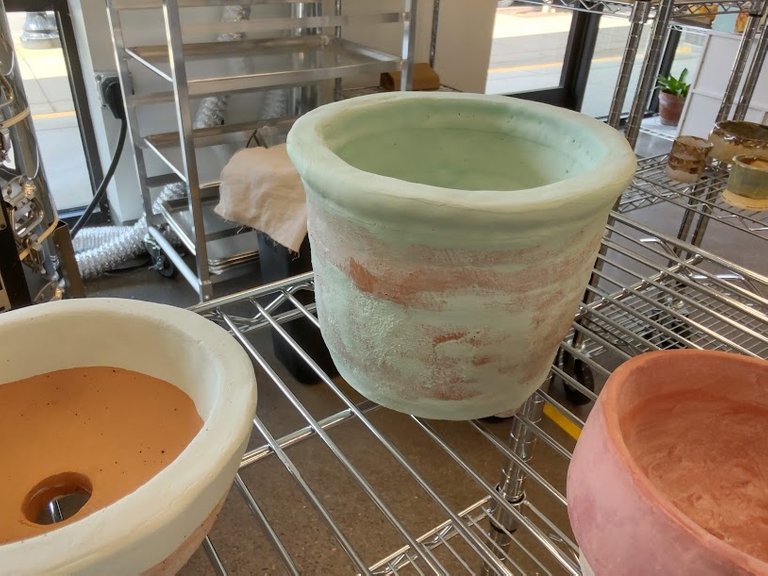
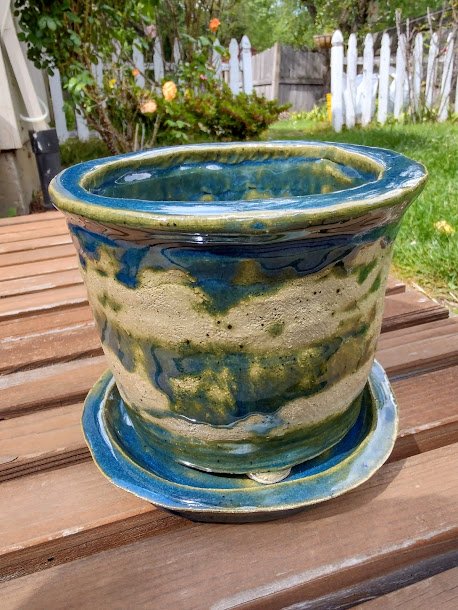
Below is the glazed results.
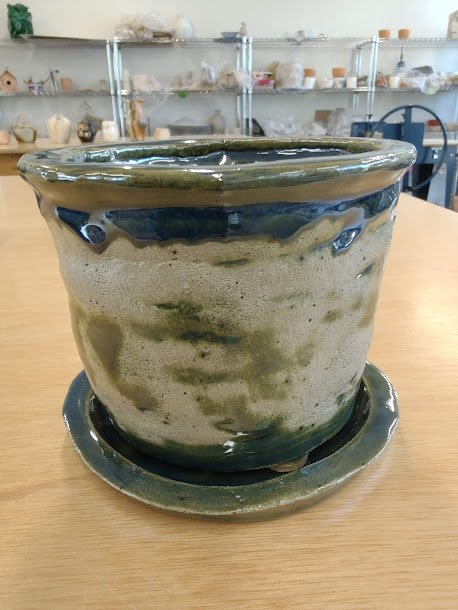
Personally I was not super impressed with the glaze on the coiled planter. It is far bluer than the example shown on the product label.
With the dish, I was quite satisfied with the results. The dish has a nice hefty weight to it that feels good in the hand, and a smooth even finish on all sides. The bare clay on the underside looks natural, and shows off the peppery grog bits.
What I've learned is the glaze appears more mossy green when coated thin enough to mostly coat the clay, and more blue when thickly coated.
When the glaze is coated so thin that the clay is still visible, it becomes fully transparent, yet retains a glossy finish.
The stoneware clay loses its appeal to me when coated in a clear glossy glaze, as it takes on the appearance cellophane melted on cement.

Final Results
Pictured here next to a real Japanese Black Pine tree, and a another type of conifer in the background, I can see how the glaze contrasts with other colors in the natural sunlight.
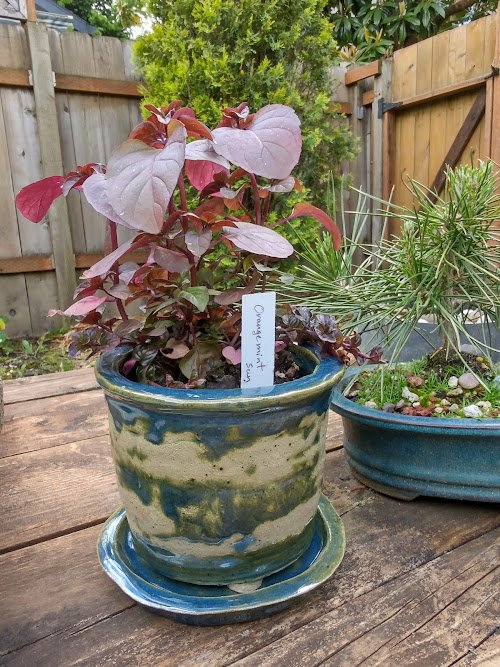
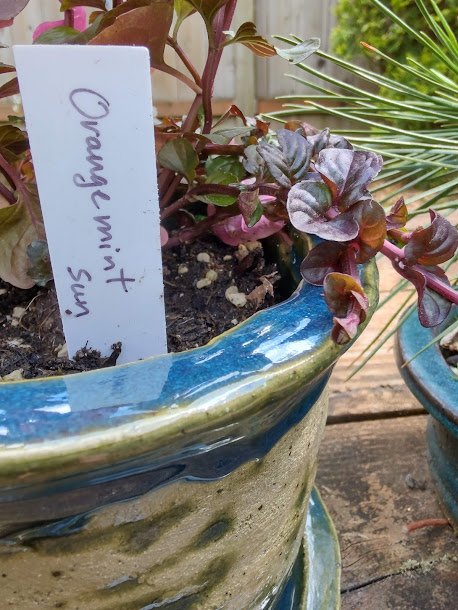
Orange Mint is the plant I picked out at the recent plant sale. The dark red leaves are dramatic enough to overpower the splotchy glazework of the bright, shiny blue pottery.
Mint comes in a variety of scented plant varieties. The orange mint is a mildly orange scent. It adds to my other scented mint varieties I grow, including Strawberry, Peppermint, Corsican (my favorite and most aromatic), and classic mint that is a bit like Wintergreen.
Mint always has a tendency to spread roots out the bottom of pots, and send long runners over the rim. I seriously doubt any mint plant will have any luck escaping the confines of this ceramic prison I've designed to keep it happily housed.
#stoneware #bique #greenware #creative #design #plant #orange #scent #scented #aromatic
Post Beneficiaries:
- 1% @cryptopie
This is my way of thanking each of you for your friendship and support. By sharing my talents on Hive, I can also share to help with your needs.
Let my success also grant you some happiness too.

That came out great the fact the blue and green go well with the plants must have been thought off before the end result was their. Creative and nice hive on
!LADY
View or trade
LOHtokens.@brittandjosie, you successfully shared 0.1000 LOH with @creativetruth and you earned 0.1000 LOH as tips. (1/10 calls)
Use !LADY command to share LOH! More details available in this post.
Oh wow!! One, it's nice to see what you look like after all this time. And I really love the pot! I can understand your disappointment but the mix of blue and green looks good. I'm impressed. I've always wanted to do pottery.
I like the thought and planning that went into the design and then the glazing of this pot. I think the patchy effect on the outside of the pot works well even though the rim base became more blue than you hoped for. Still looks like a good match for your orange mint. We tried some mint in the garden but it didn't come up. We had some seeds that were of "uncertain" provenance lol Expired or free or found in the bottom of a drawer. We planted them all just to see if they would grow. Experiments are the spice of life...like trying a new glaze 😉 btw the glaze on the inside of the pot is interesting. The glaze looks much better on an uneven surface than on the flat surface of the plate. (or with uneven application like you did on the outside of the pot)
Yeah I agree about the uneven glaze looking better. As with gemstone, the ones with imperfections under the surface end up far more interesting and rare.
Mint is ridiculously easy to transplant and propagate from cutting, yet notoriously challenging to grow from seed. Seeds do not stay viable for long, and the young roots need perfect balance of airflow, moisture, and temperature. I would probably try to start them outdoors in summer shade, or in a greenhouse.
If you can ever find some wild mint growing near the sidewalk, rip a few stems off and the neighbor will probably thank you if they even notice. Farmer's markets and plant stores often sell inexpensive starter plants too.
It really isn't even worth the cost of seeds and soil, unless you have a diehard life goal to prove you can do it for yourself. 😪
This is an excellent work of art from you. Well-done.
Amazing!