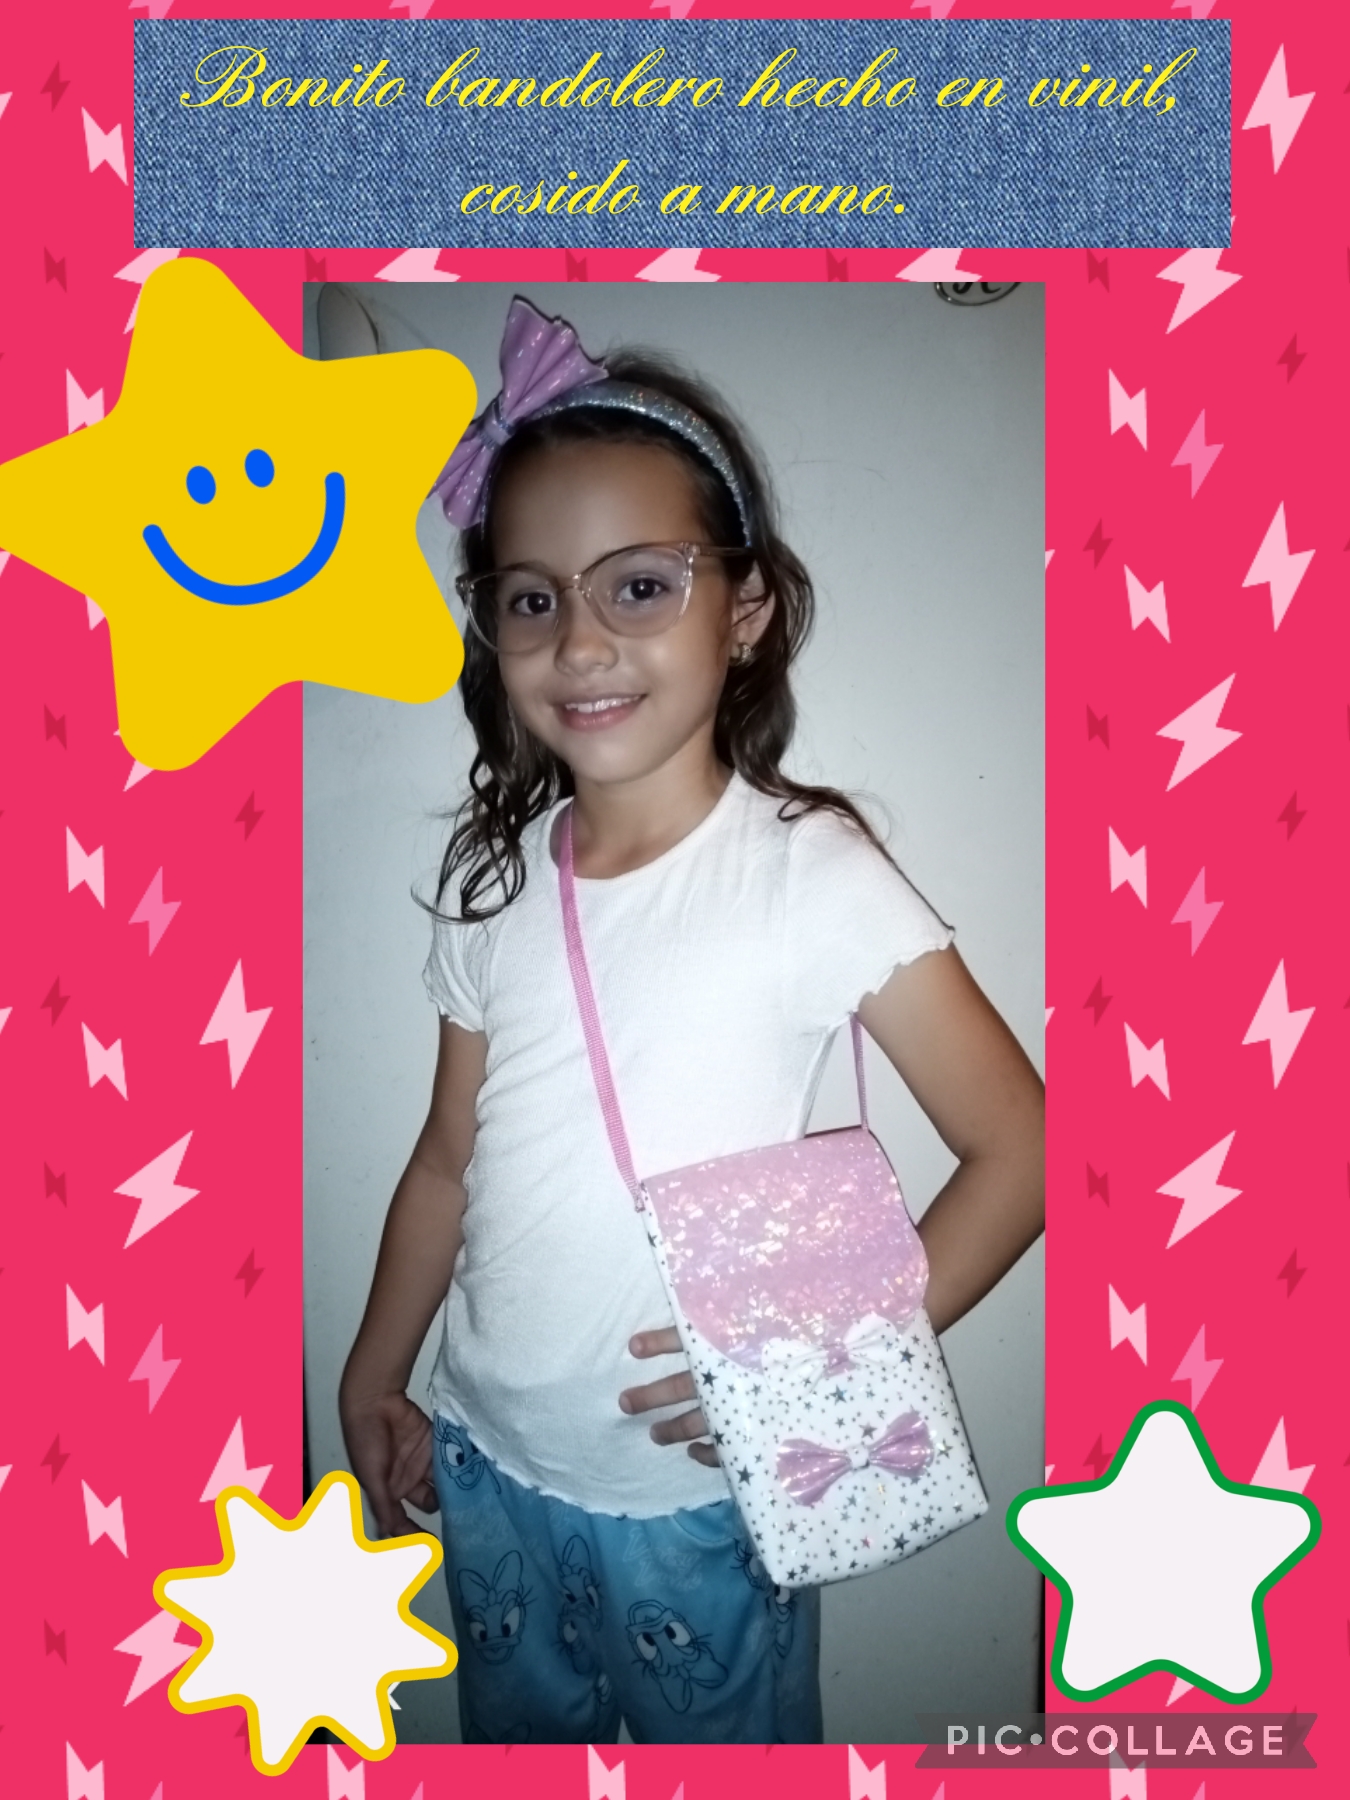
Tutorial: les mostrare como hacer un bandolero para niñas, con tela de vinil, costura a mano.//Tutorial: I will show you how to make a bandolero for a girl, with vinyl fabric, sewn by hand.
Muy buenas tardes, amigas y artistas amantes de la costura, hoy quiero comenzar a compartir con ustedes todos mis proyectos de costura, primera vez que voy a publicar en esta comunidad, Espero que me apoyen en mis publicaciones, hoy les traigp un bonito y divertido proyecto, se trata de hacer con tela de vinil, un bonito bandolero para niña cosido a mano, lo hice especiamente para mi hija, les voy a mostrar el paso a paso seguro les va a gustar.
Good afternoon friends and artists who love sewing, today I want to start sharing with you all my sewing projects, the first time I am going to publish in this community, I hope you support me in my publications, today I bring you a nice and fun project, It's about making a beautiful hand-sewn shoulder bag for a girl with vinyl fabric, I made it especially for my daughter, I'm going to show it to her step by step, I'm sure she'll like it.
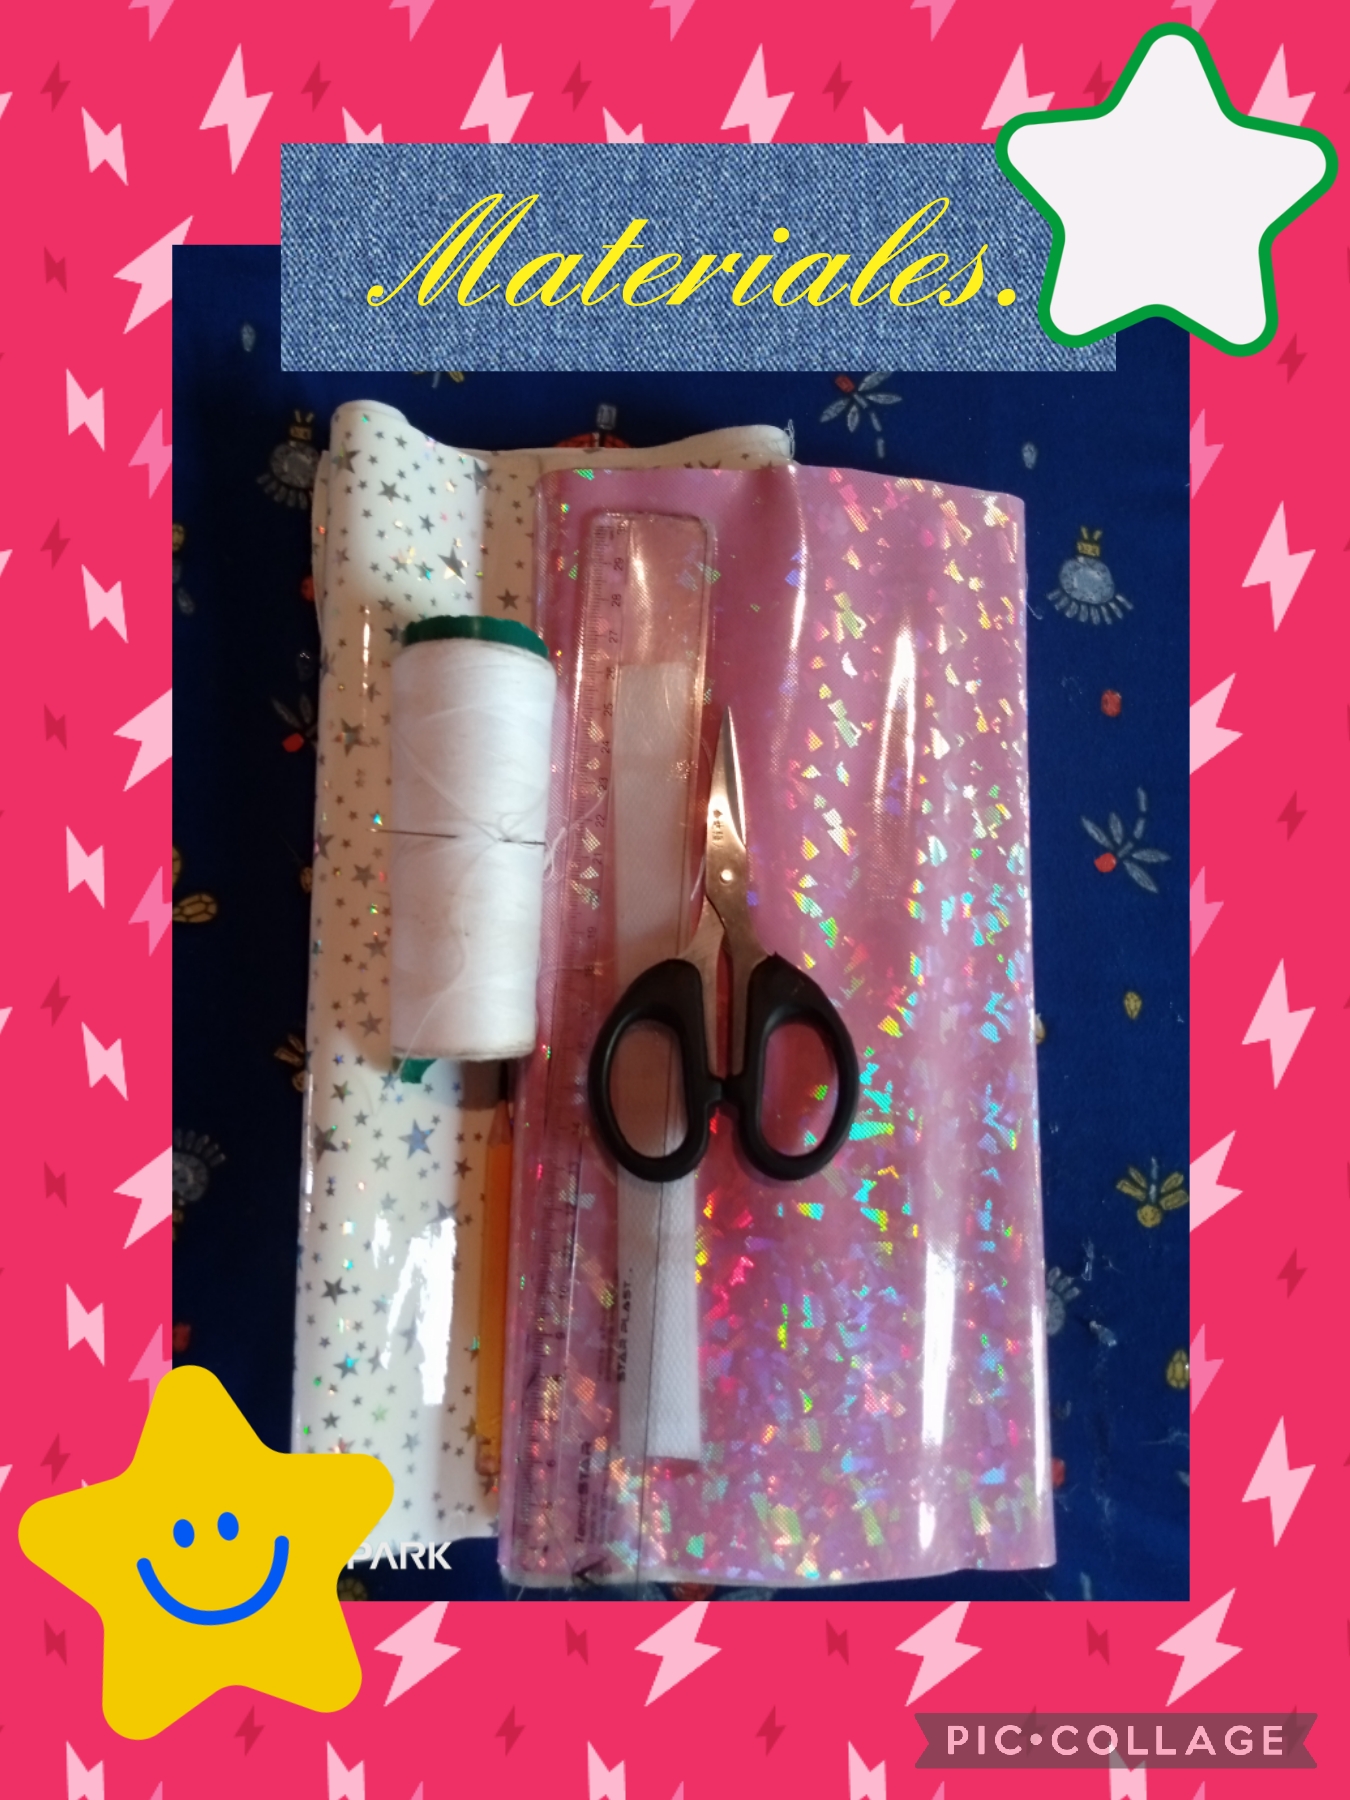
Para hacer este bonito bandolero para niña, vamos a necesitar los siguientes materiales:
*1 pedazo de tela de vinil.
*Hilo.
*Aguja.
*1 regla métrica.
*1 lápiz.
*1 tijera.
*1 pedazo de cierre mágico.
*1 cinta de tela.
*1 pistola de silicona caliente.
To make this beautiful shoulder bag for girls we will need the following materials:
*1 piece of vinyl cloth.
*Thread.
*Needle.
*1 metric ruler.
*1 pencil.
*1 scissors.
*1 piece of magic lock.
*1 cloth ribbon.
*1 hot glue gun
Let's start with the step by step.
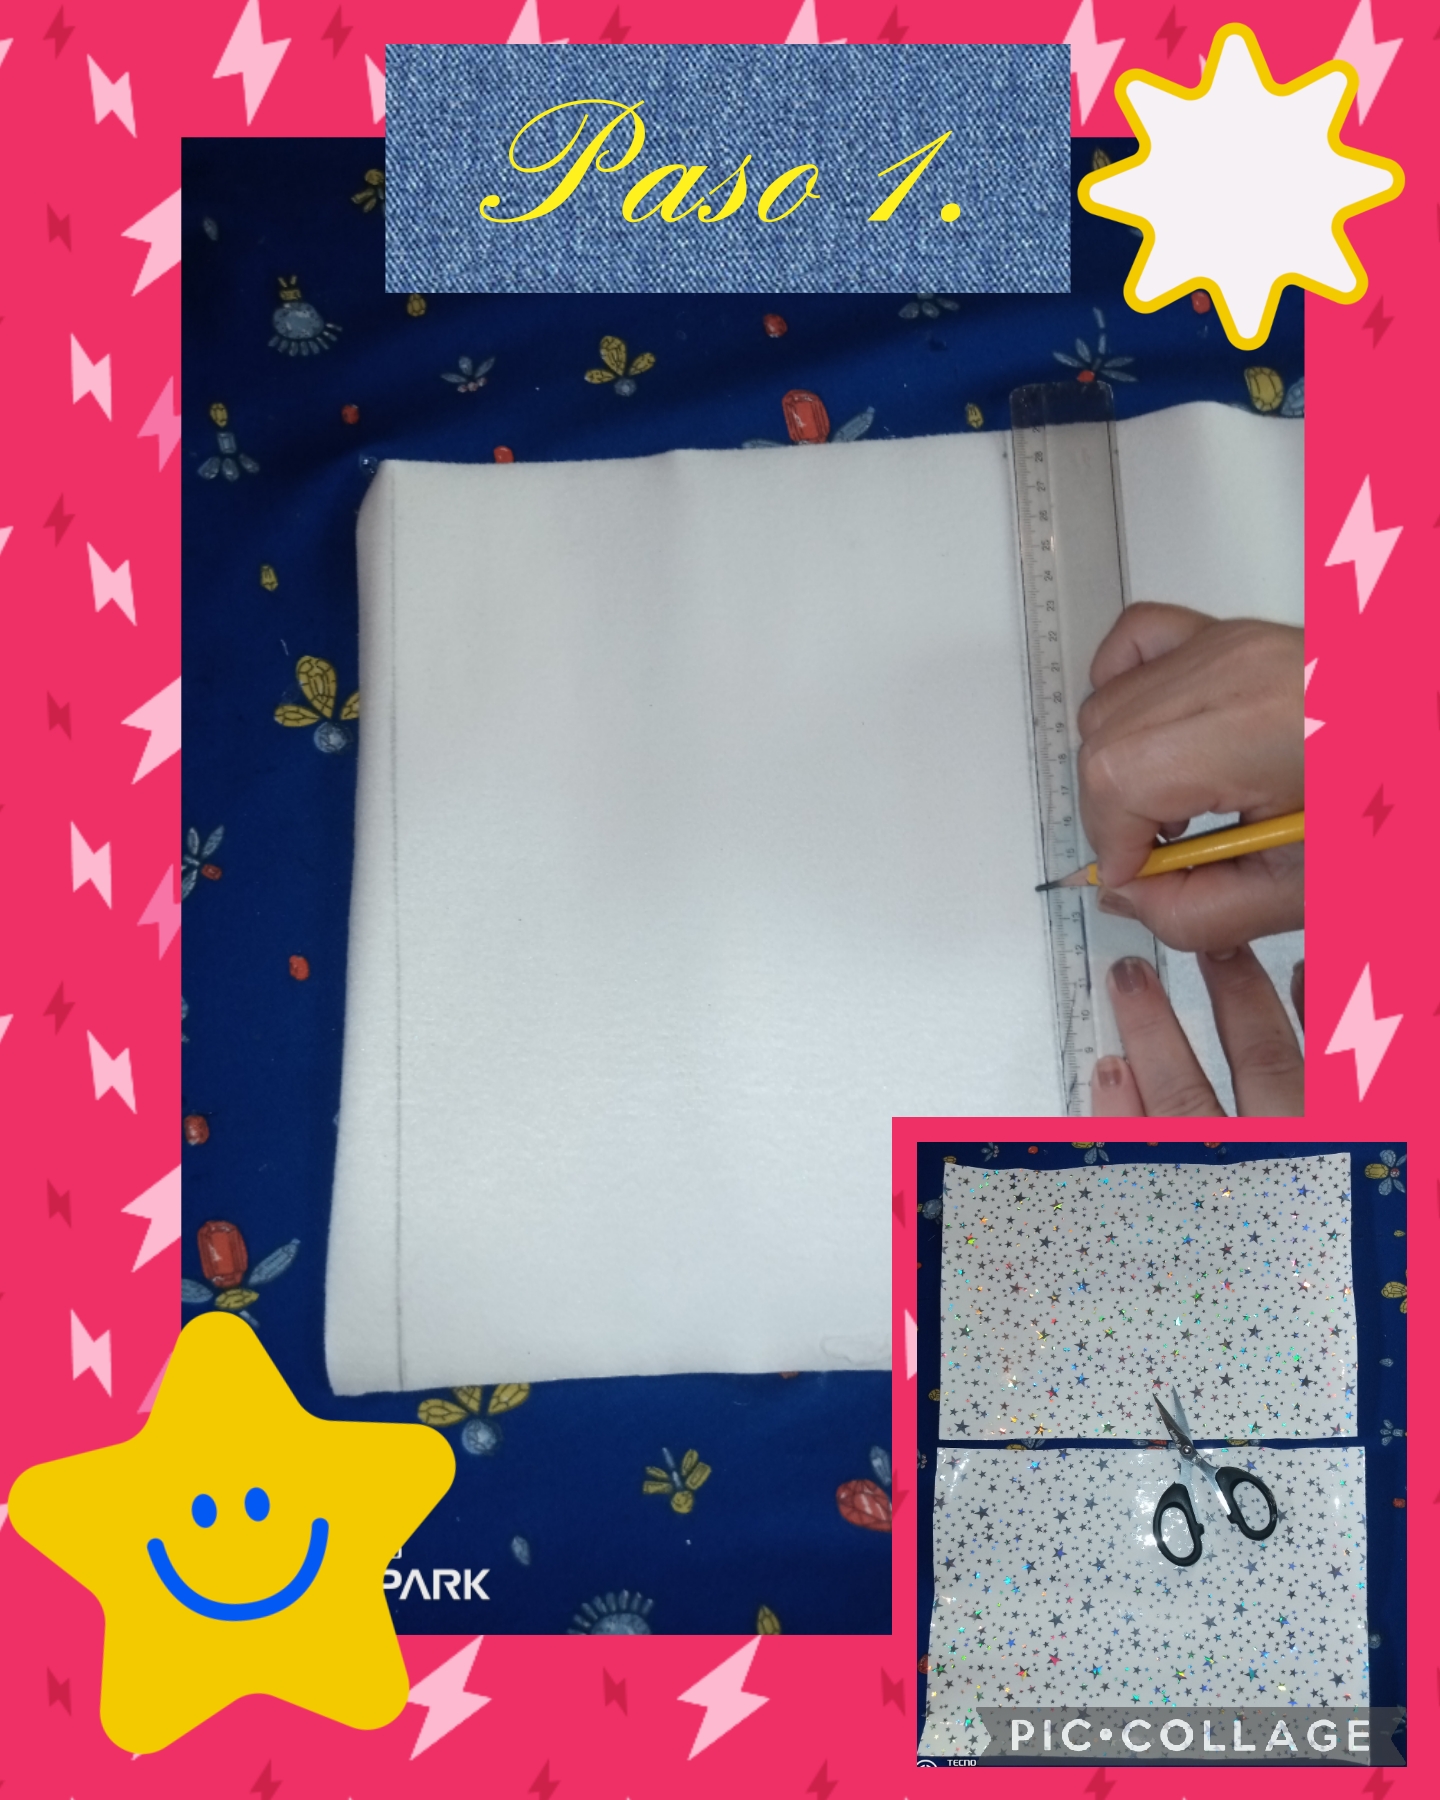
Step 1. To start making this cute shoulder bag for girls, the first thing we are going to do is take the vinyl fabric, and with the metric ruler and a pencil we mark the measurements on the back of the vinyl fabric. vinyl for the shoulder bag that we are going to make, then with the help of scissors we cut out the pieces, I show you the images.
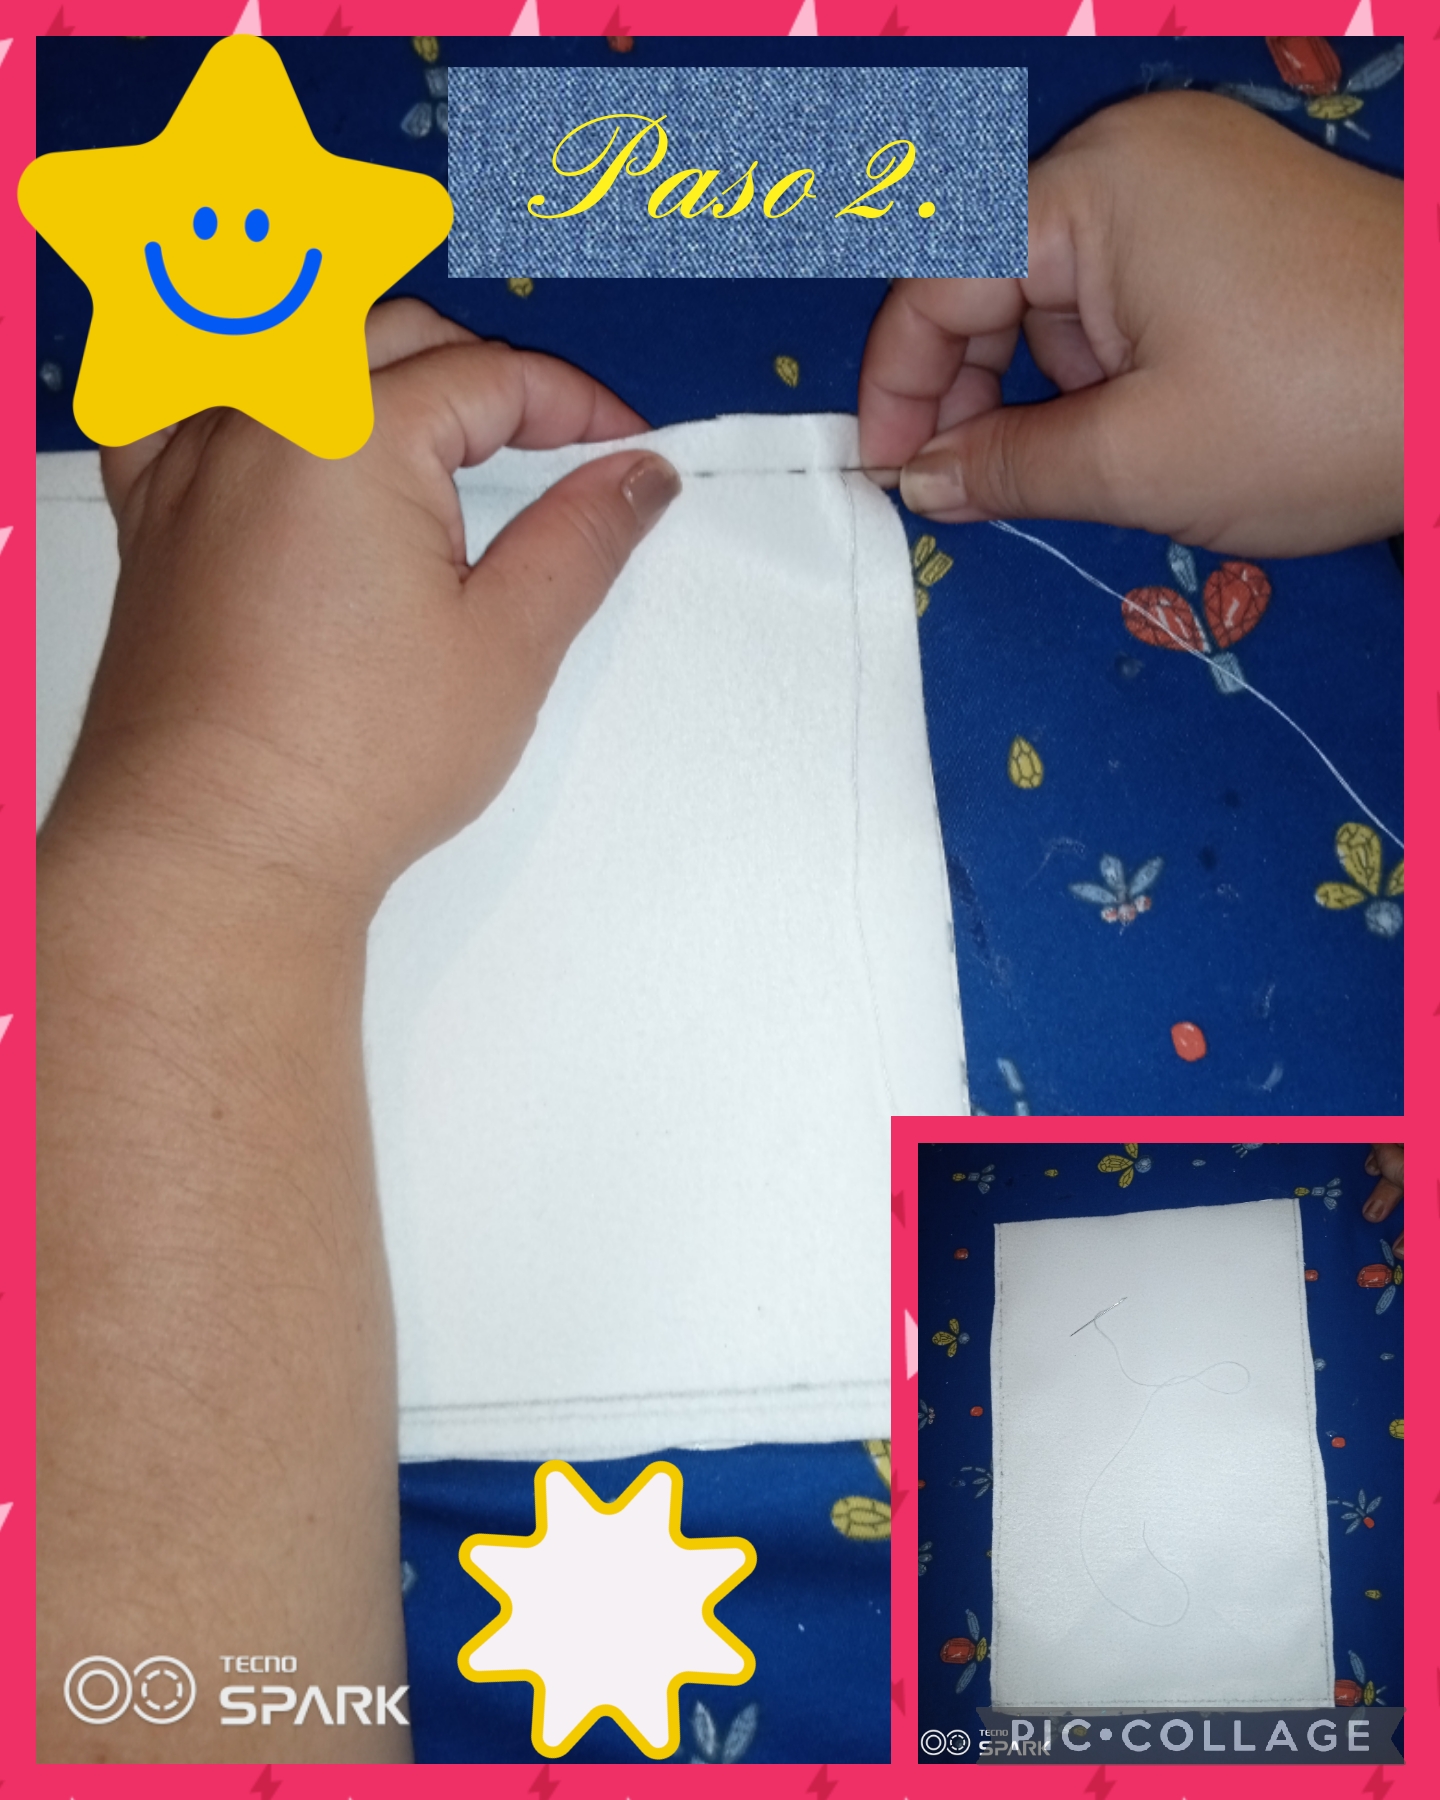
Step 2. With a needle and thread we begin to sew by hand the edges of the sides of the pieces that we cut, leaving the upper part without seams, see the images.
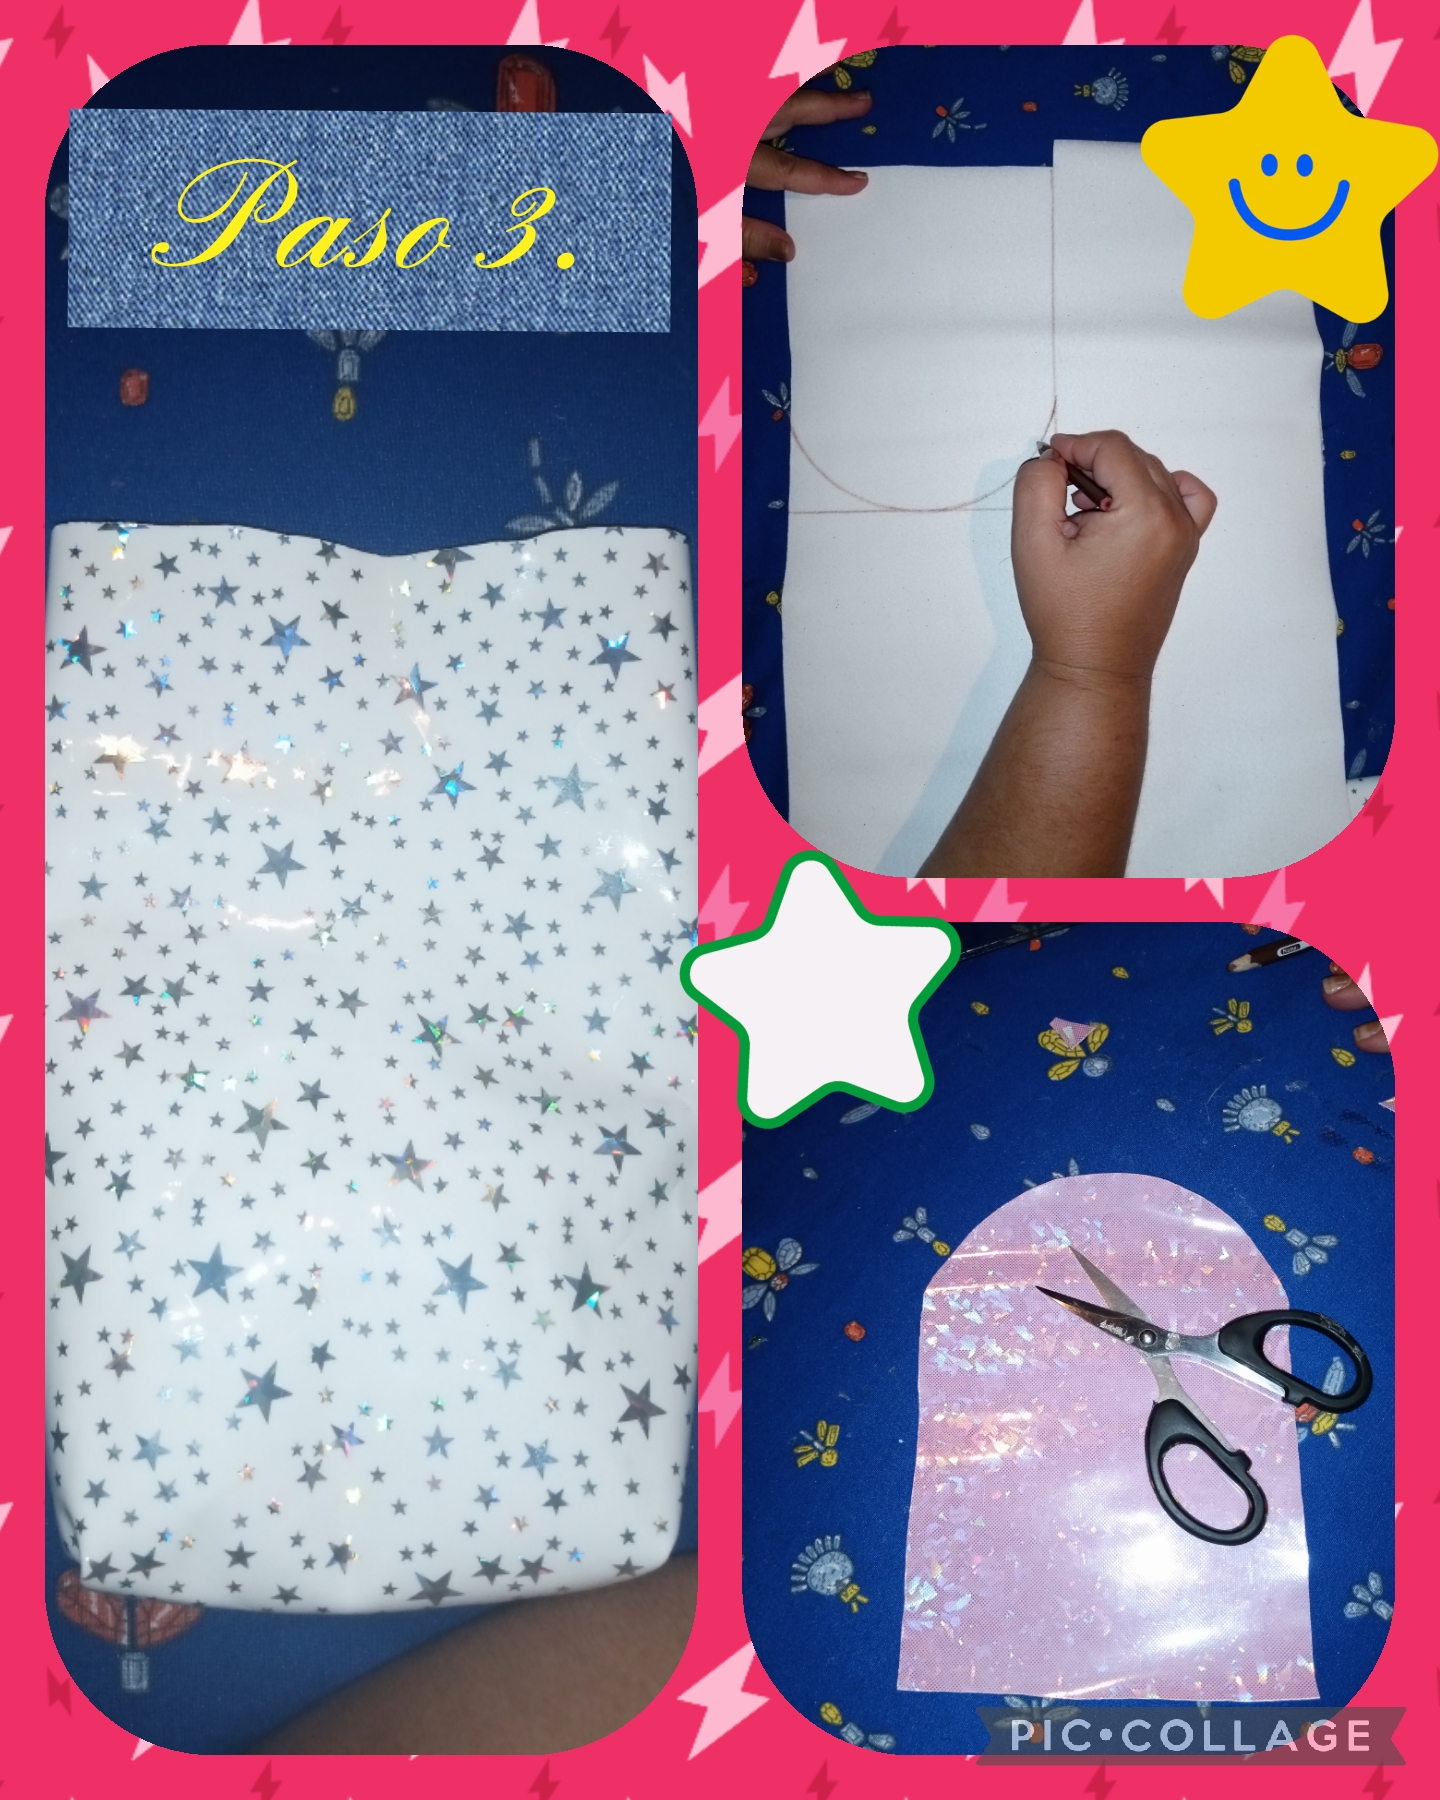
Step 3. Now that we have sewn the edges, we turn the piece to the right side, and see how it turns out, now we take the pink vinyl fabric again, and we mark the piece of the lid to form the shoulder strap, and then we cut it out ,see the images.

Step 4. In this step we are going to join the two pieces, the lid with the part of the bag to form the bandolero and we are going to join it by cooking it with a needle and thread, and we are also going to sew the cloth ribbon , on the sides that would serve as a pendant.
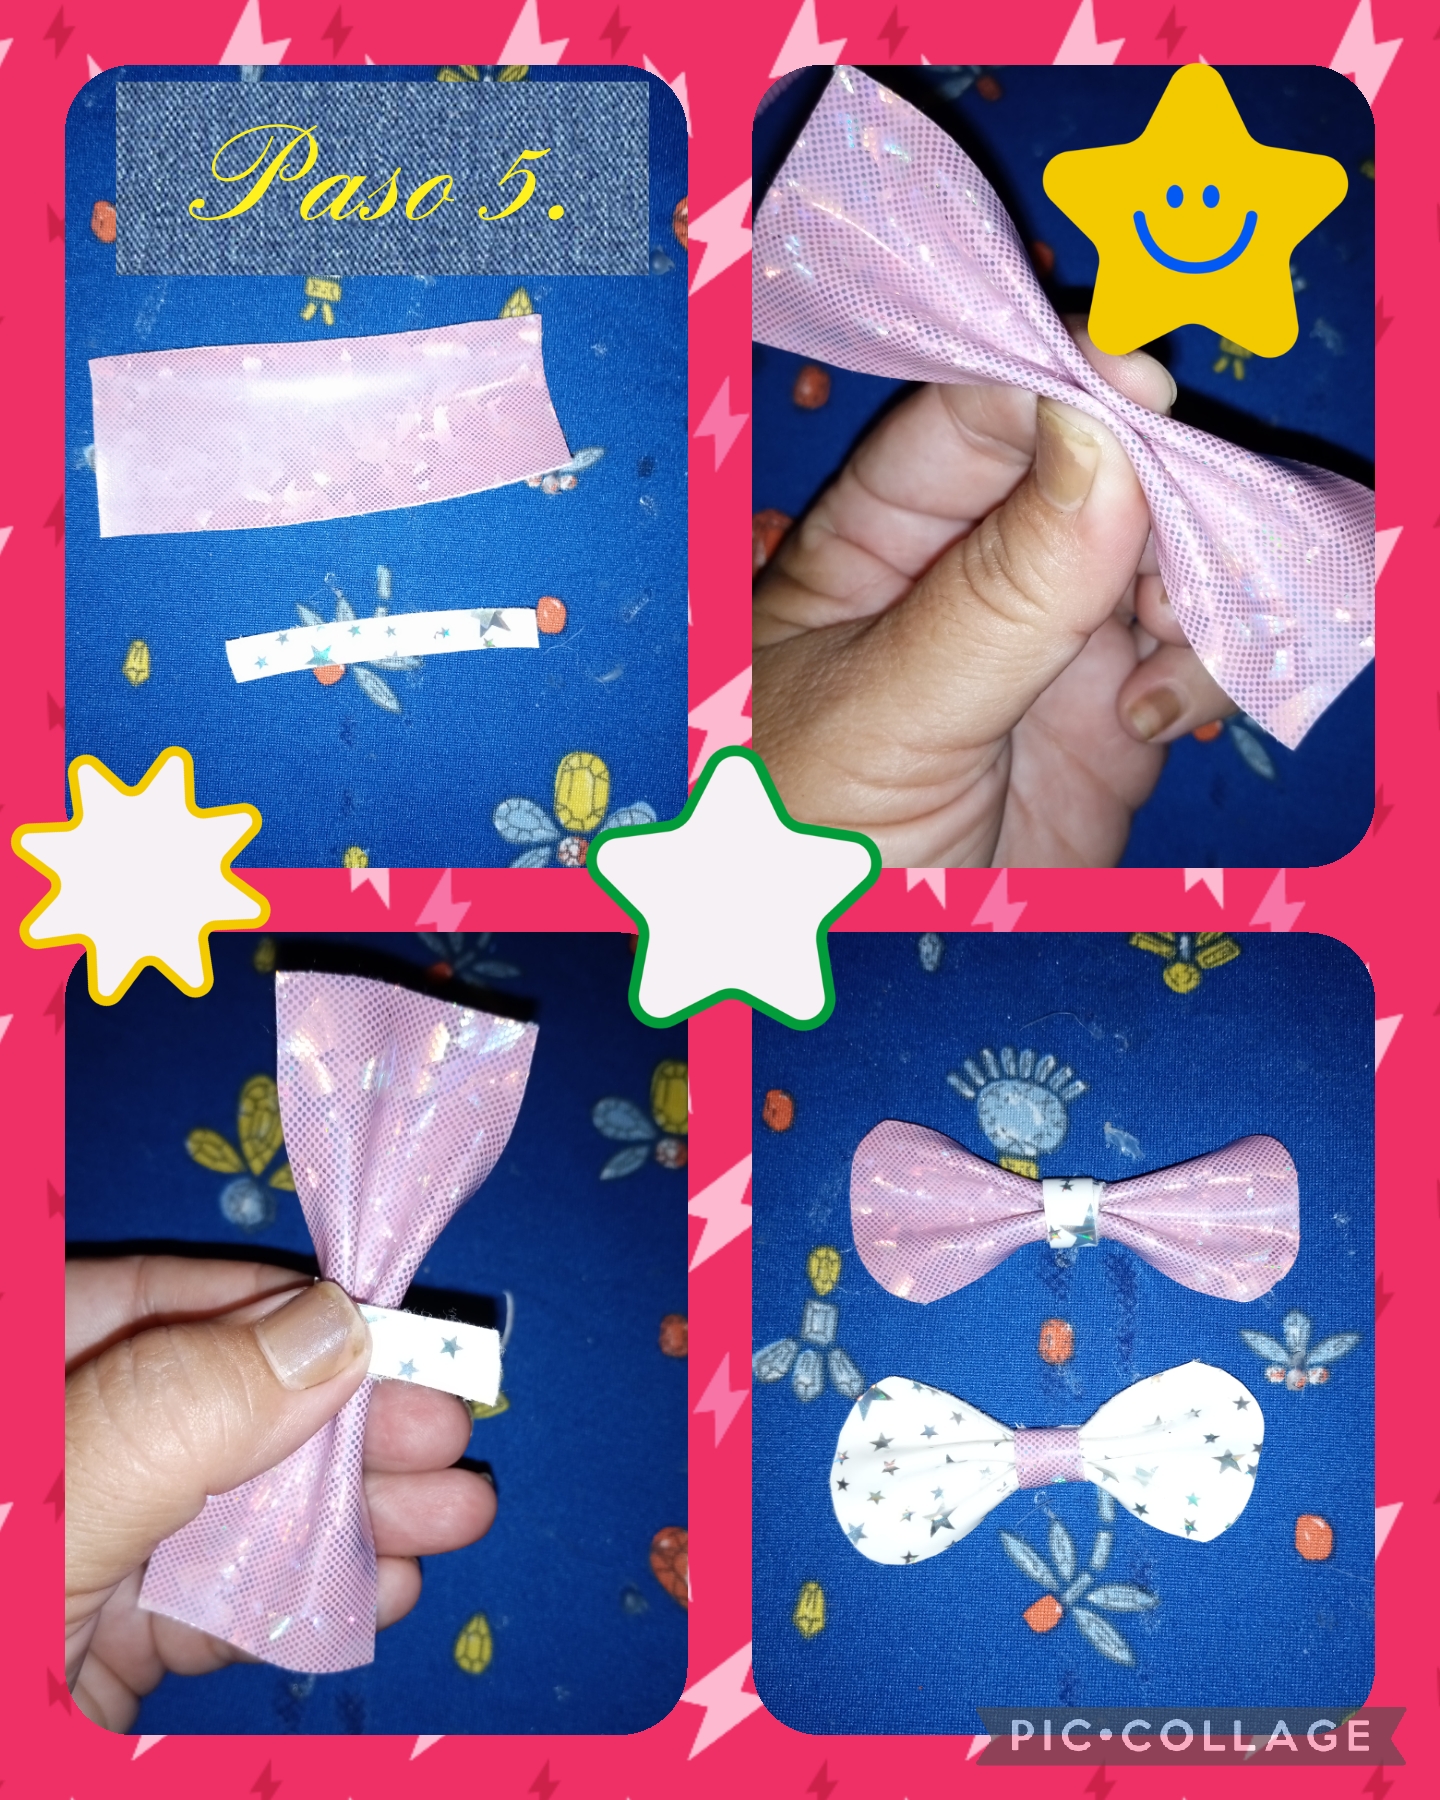
Step 5. In this step we are going to mark and cut out some rectangles and two thin strips of vinyl fabric, then we squeeze the rectangles in the central part and then we sew them with a needle and thread, until we form some loops to decorate the shoulder strap that we are doing.
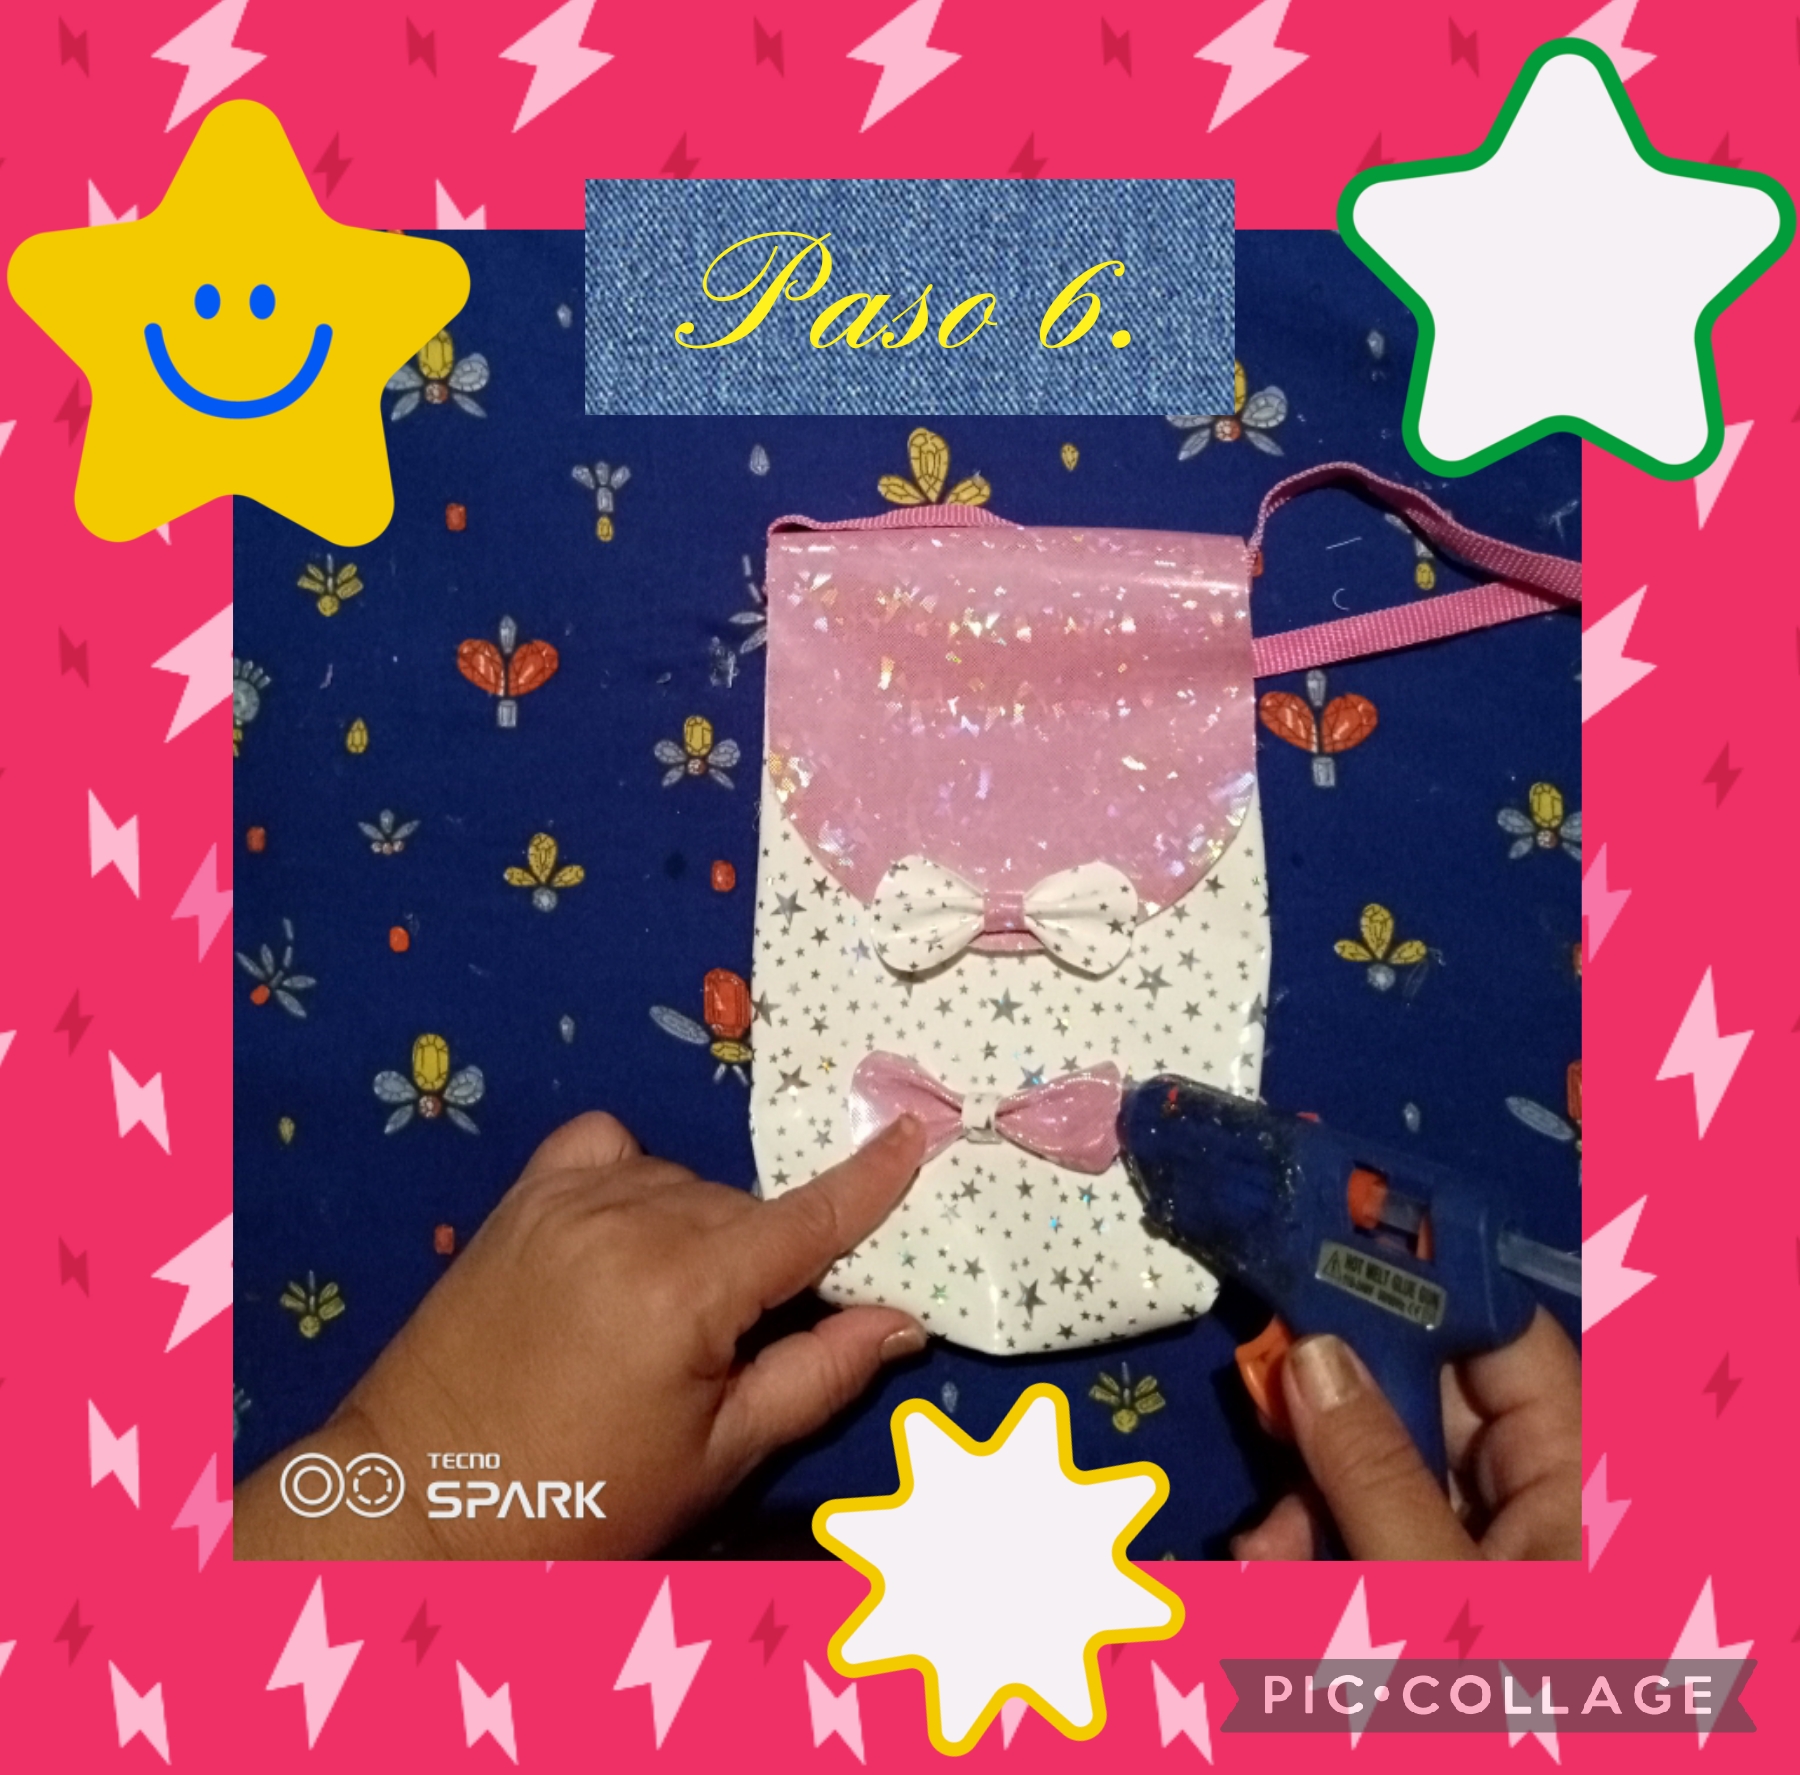
Step 6. In this step we are going to decorate the bandolero, with the bows and we will also glue the magic closure at the bottom, in the center of the lid, inside, here if we glue it with hot silicone, see the image.
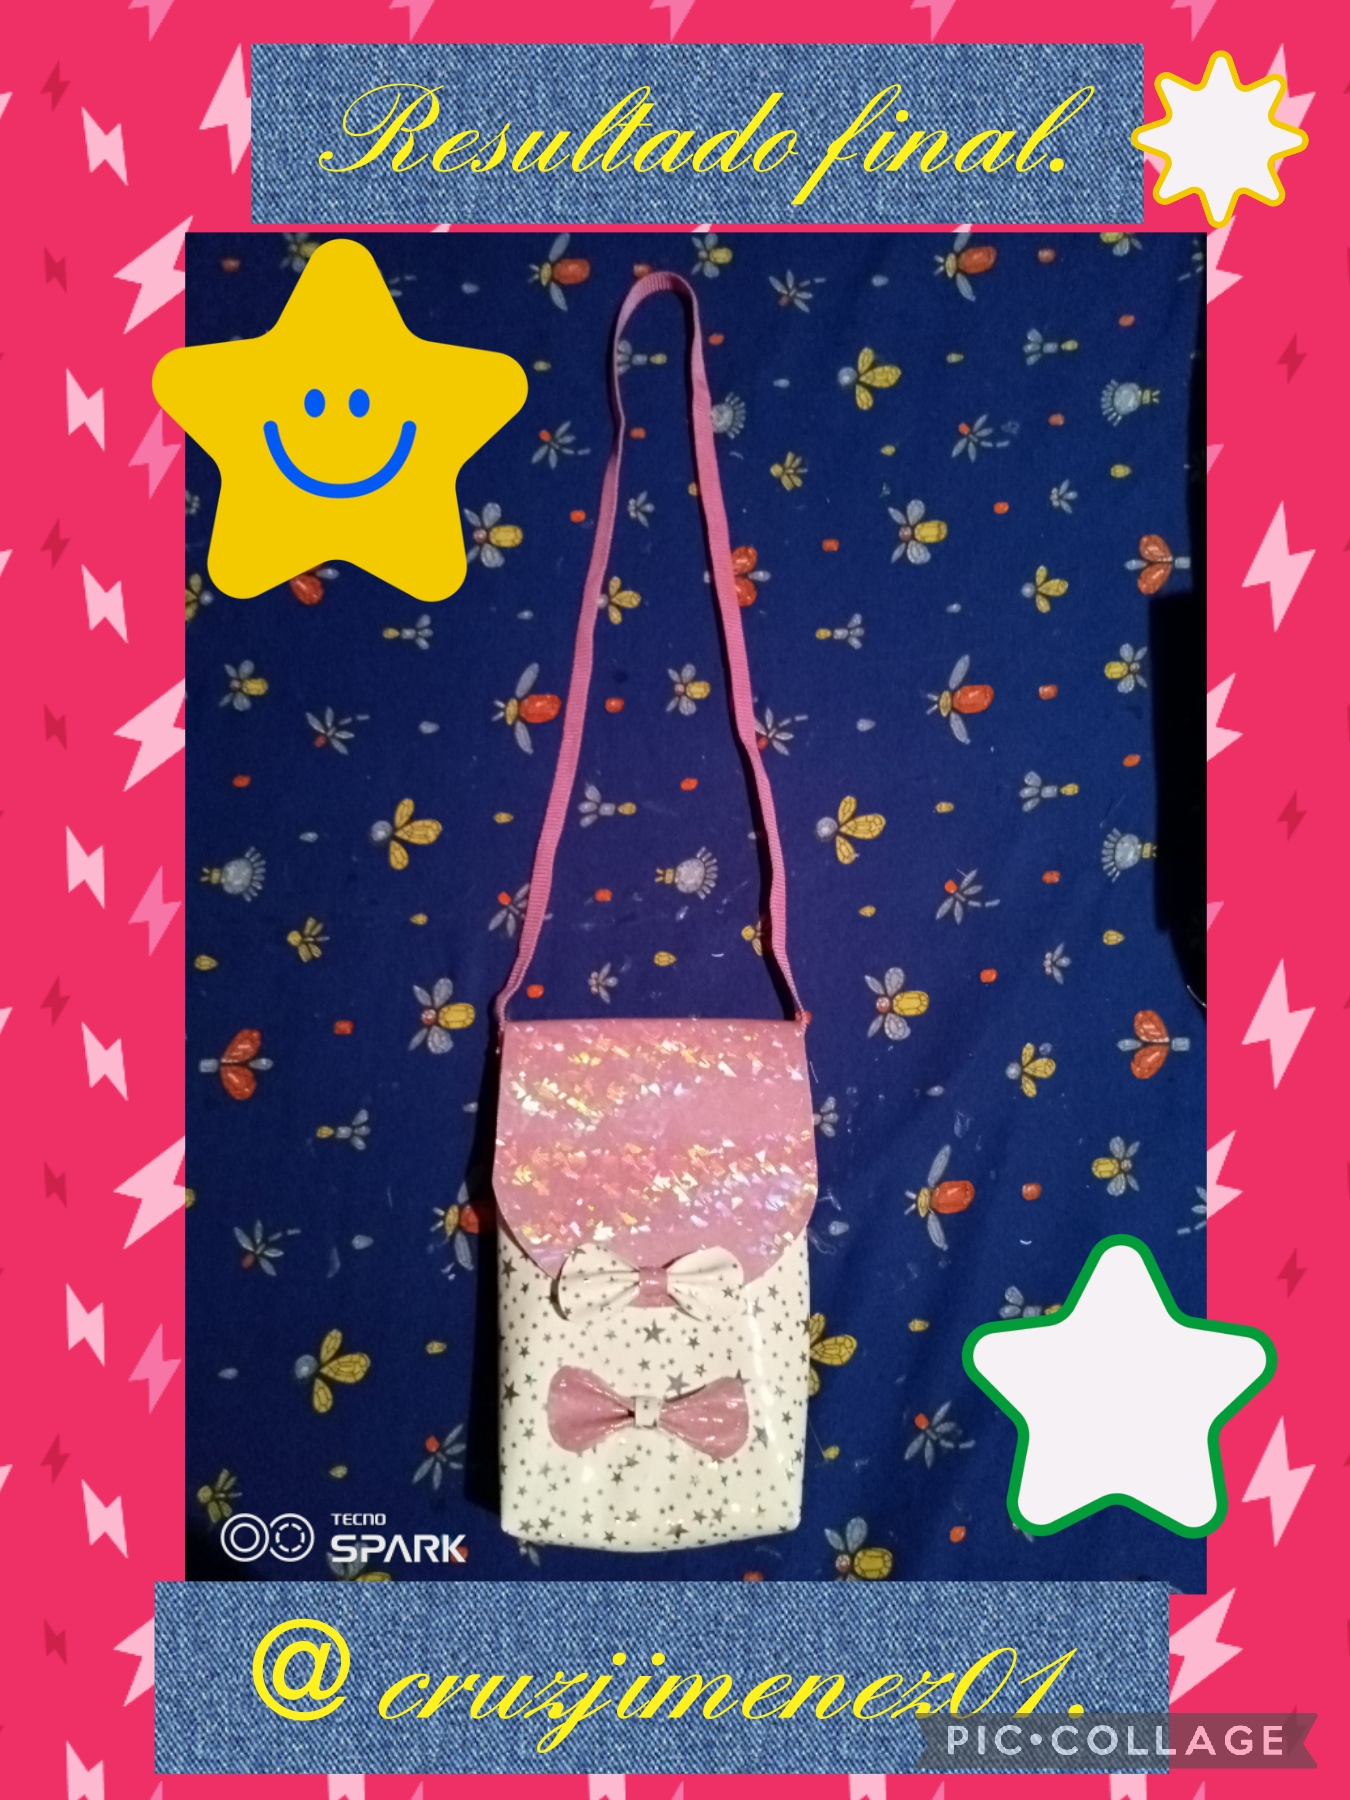
We have reached the end of all the steps, this is the result, a nice shoulder bag for a girl, made with vinyl fabric and sewn by hand, I invite you to see my blog, see you very soon with another project. God bless you all.
Las fotos son tomadas con mi teléfono androide TECNO SPARK 6GO y editadas con la aplicación PIC-COLLAGE. Texto original traducido por español-inglés Google.
The photos are taken with my android phone TECNO SPARK 6GO and edited with the PIC-COLLAGE application. Original text translated by Google Spanish-English.
Thank you for sharing this amazing post on HIVE!
Your content got selected by our fellow curator @rezoanulvibes & you just received a little thank you via an upvote from our non-profit curation initiative!
You will be featured in one of our recurring curation compilations and on our pinterest boards! Both are aiming to offer you a stage to widen your audience within and outside of the DIY scene of hive.
Join the official DIYHub community on HIVE and show us more of your amazing work and feel free to connect with us and other DIYers via our discord server: https://discord.gg/mY5uCfQ !
If you want to support our goal to motivate other DIY/art/music/homesteading/... creators just delegate to us and earn 100% of your curation rewards!
Stay creative & hive on!