Tutorial: Linda gargantilla, para niñas hecha con perlas y dije con la figura de una de libélula.//Tutorial: Nice choker, for girls made with pearls and I said with the figure of a dragonfly.
Holaaa, buenas noches mis amigas creativas, que hacemos vida en esta hermosa comunidad Jewelry, ante de todos espero que hayan pasado un feliz día, lleno de muchas alegrías, les envio un saludo y fuerte abrazo virtual, esta noche les doy la bienvenida a mi blog, porque les traigo un interesante y divertido tutorial, se trata de elaborar una linda gargantilla, para niñas, para elaborarla utilice los materiales perlas medianas, color blancas, cuentas medianas, color plateada y un dije con la figura de una libélula, como siempre les he dicho en mis publicaciones es para mi niña, que le encanta las bisuterías, y le ha quedado muy lindo, ahora manos a la obra vamos a comenzar con el paso a paso, de este divertido tutorial, seguro les va a gustar.
Hello, good evening my creative friends who make life in this beautiful jewelry community. I hope you all had a happy day, full of joy, I send you greetings and a big virtual hug, tonight I welcome you to my blog, Well, I bring you an interesting and fun tutorial, it is about making a beautiful choker, for girls, to make it I used the materials medium pearls, white, medium beads, silver and a pendant with the figure of a dragonfly, as I have always told you. I said in my publications that it is for my girl, that she loves jewelry, and it has been very beautiful, now let's get to work, we are going to start with the step by step, of this fun tutorial, you will surely like it.

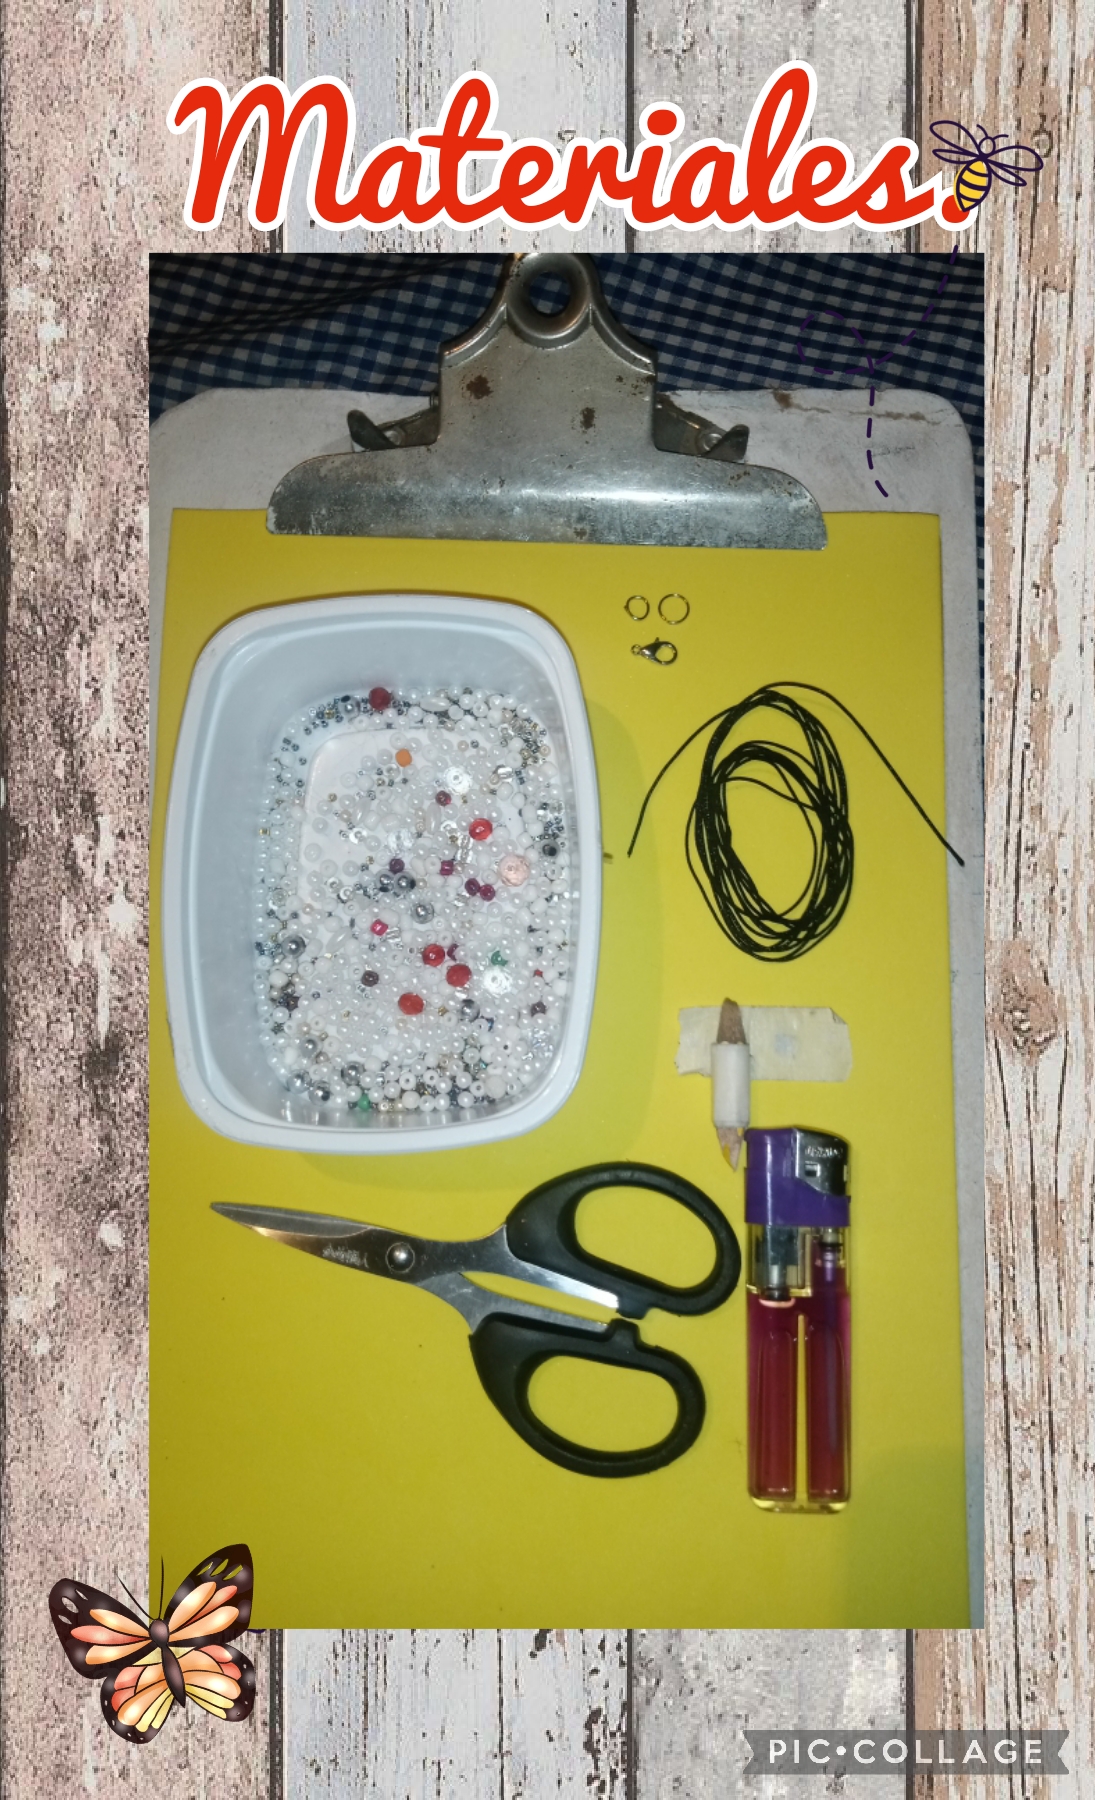
Los materiales y herramientas que vamos a necesitar para elaborar esta linda gargantilla, para niñas, son los siguientes:
*Hilo chino, color negro.
*Perlas medianas, color blancas.
*Cuentas medianas, color plateadas.
*1 dije colgante, con la figura de una libélula.
*1 tabla de madera, con un gancho de presión.
*2 aros de metal, tamaño grande y pequeño y un trancadero de abrir y cerrar.
*1 tijeras.
*Cinta adhesiva.
*1 yesquero.
The materials and tools that we are going to need to make this beautiful choker, for girls, are the following:
*Chinese thread, black color.
*Medium pearls, white color.
*Medium beads, silver color.
*1 pendant pendant, with the figure of a dragonfly.
*1 wooden board, with a snap hook.
*2 metal rings, large and small, and a lock to open and close.
*1 scissors.
*Scotch tape.
*1 tinderbox.
Let's start this fun tutorial step by step.
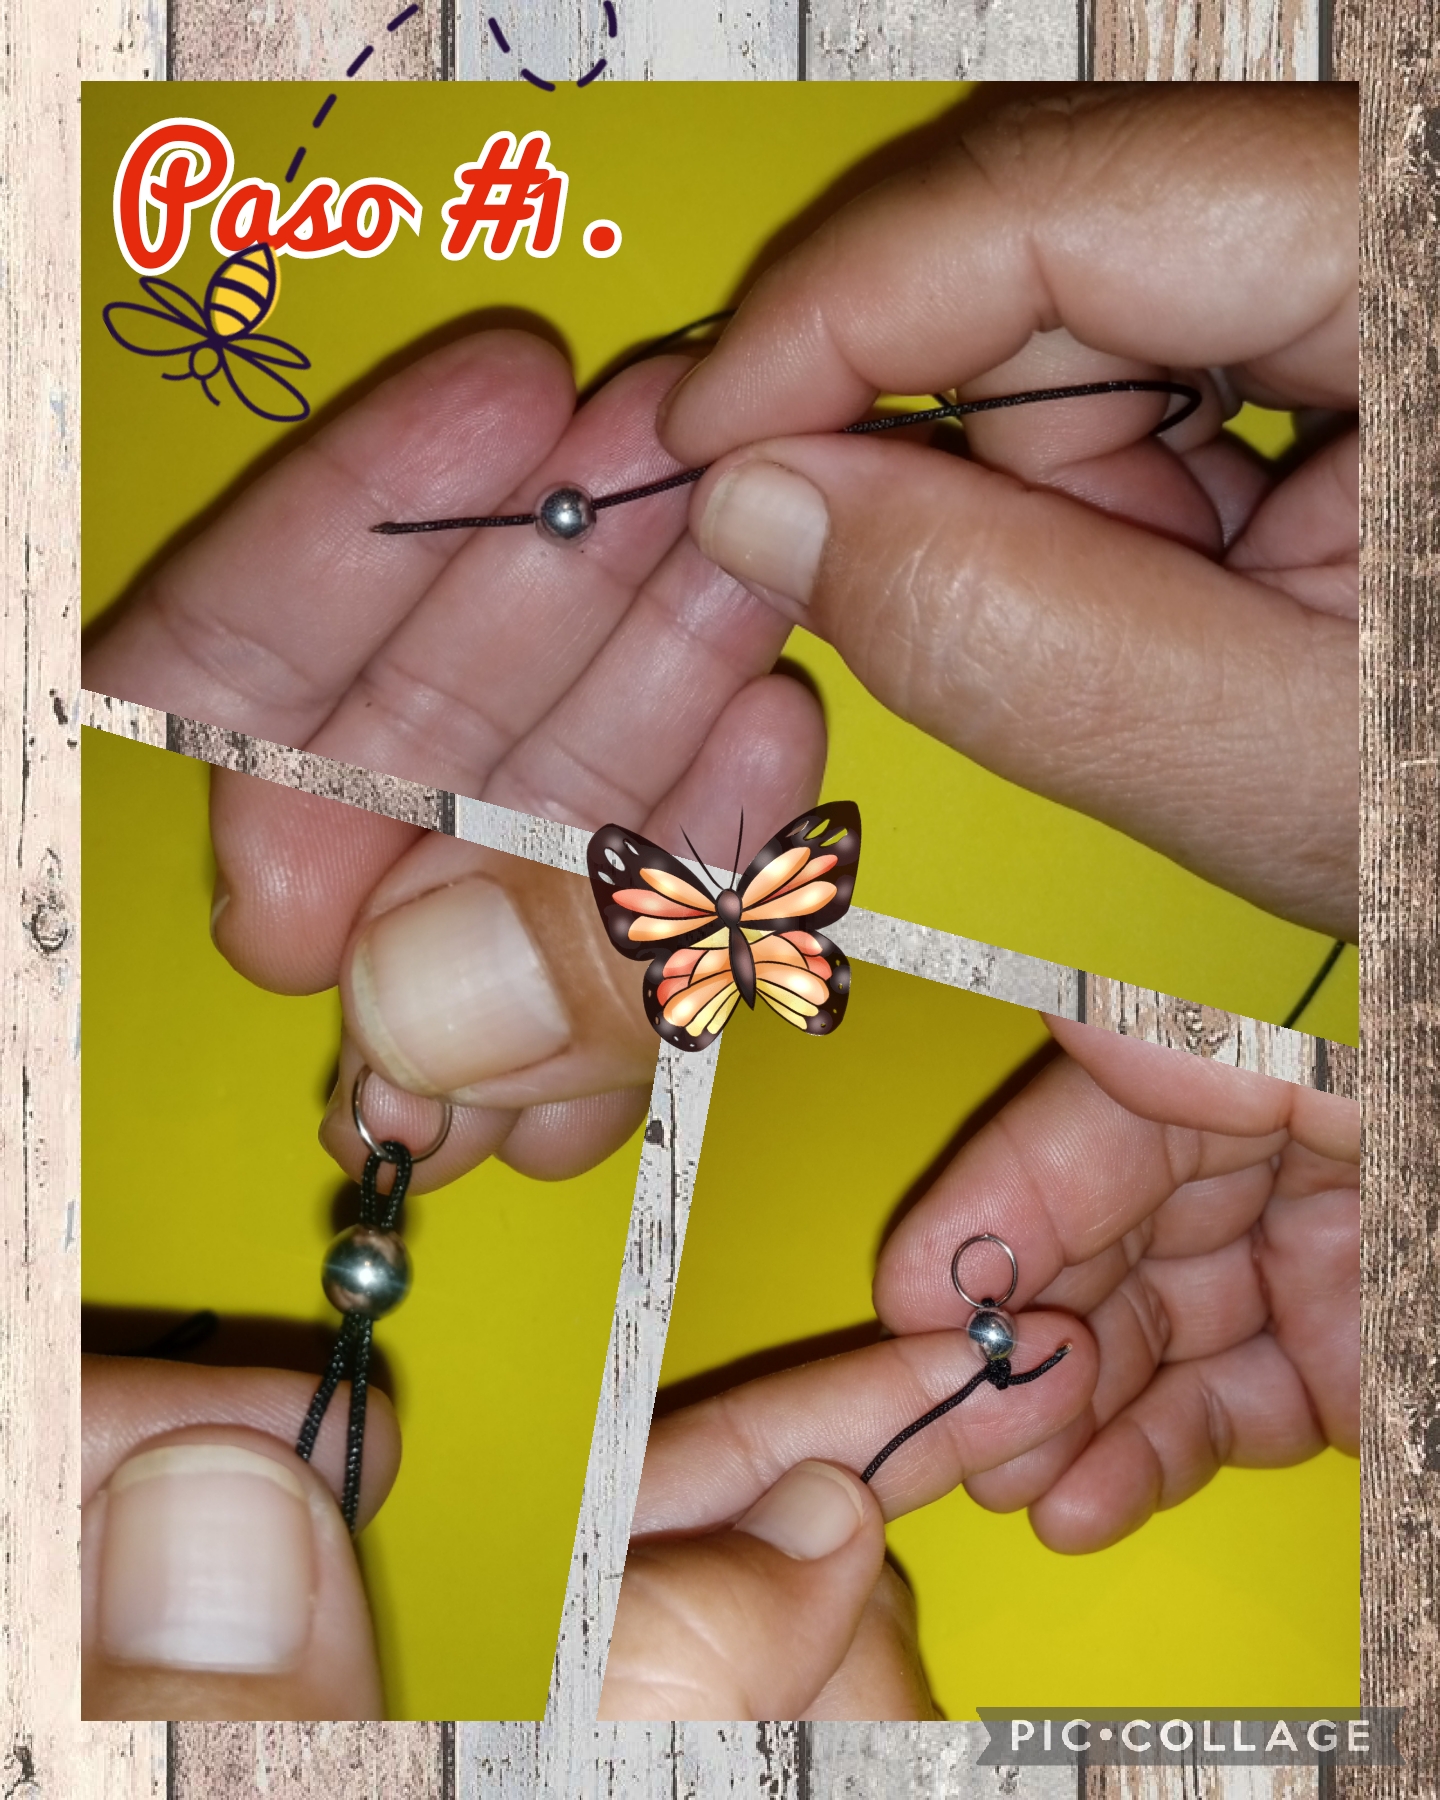
Step #1. To start making this beautiful necklace for girls, the first thing we are going to do is take the black Chinese thread and we are going to measure 30 centimeters long, and we cut 2 Chinese threads with the same measurement, then we insert a medium silver bead. , then we insert the large metal ring, and then we reinsert the Chinese thread in the hole of the same medium bead, silver color, we make a knot and we tighten it very hard, so that it does not come loose, I show you the images.
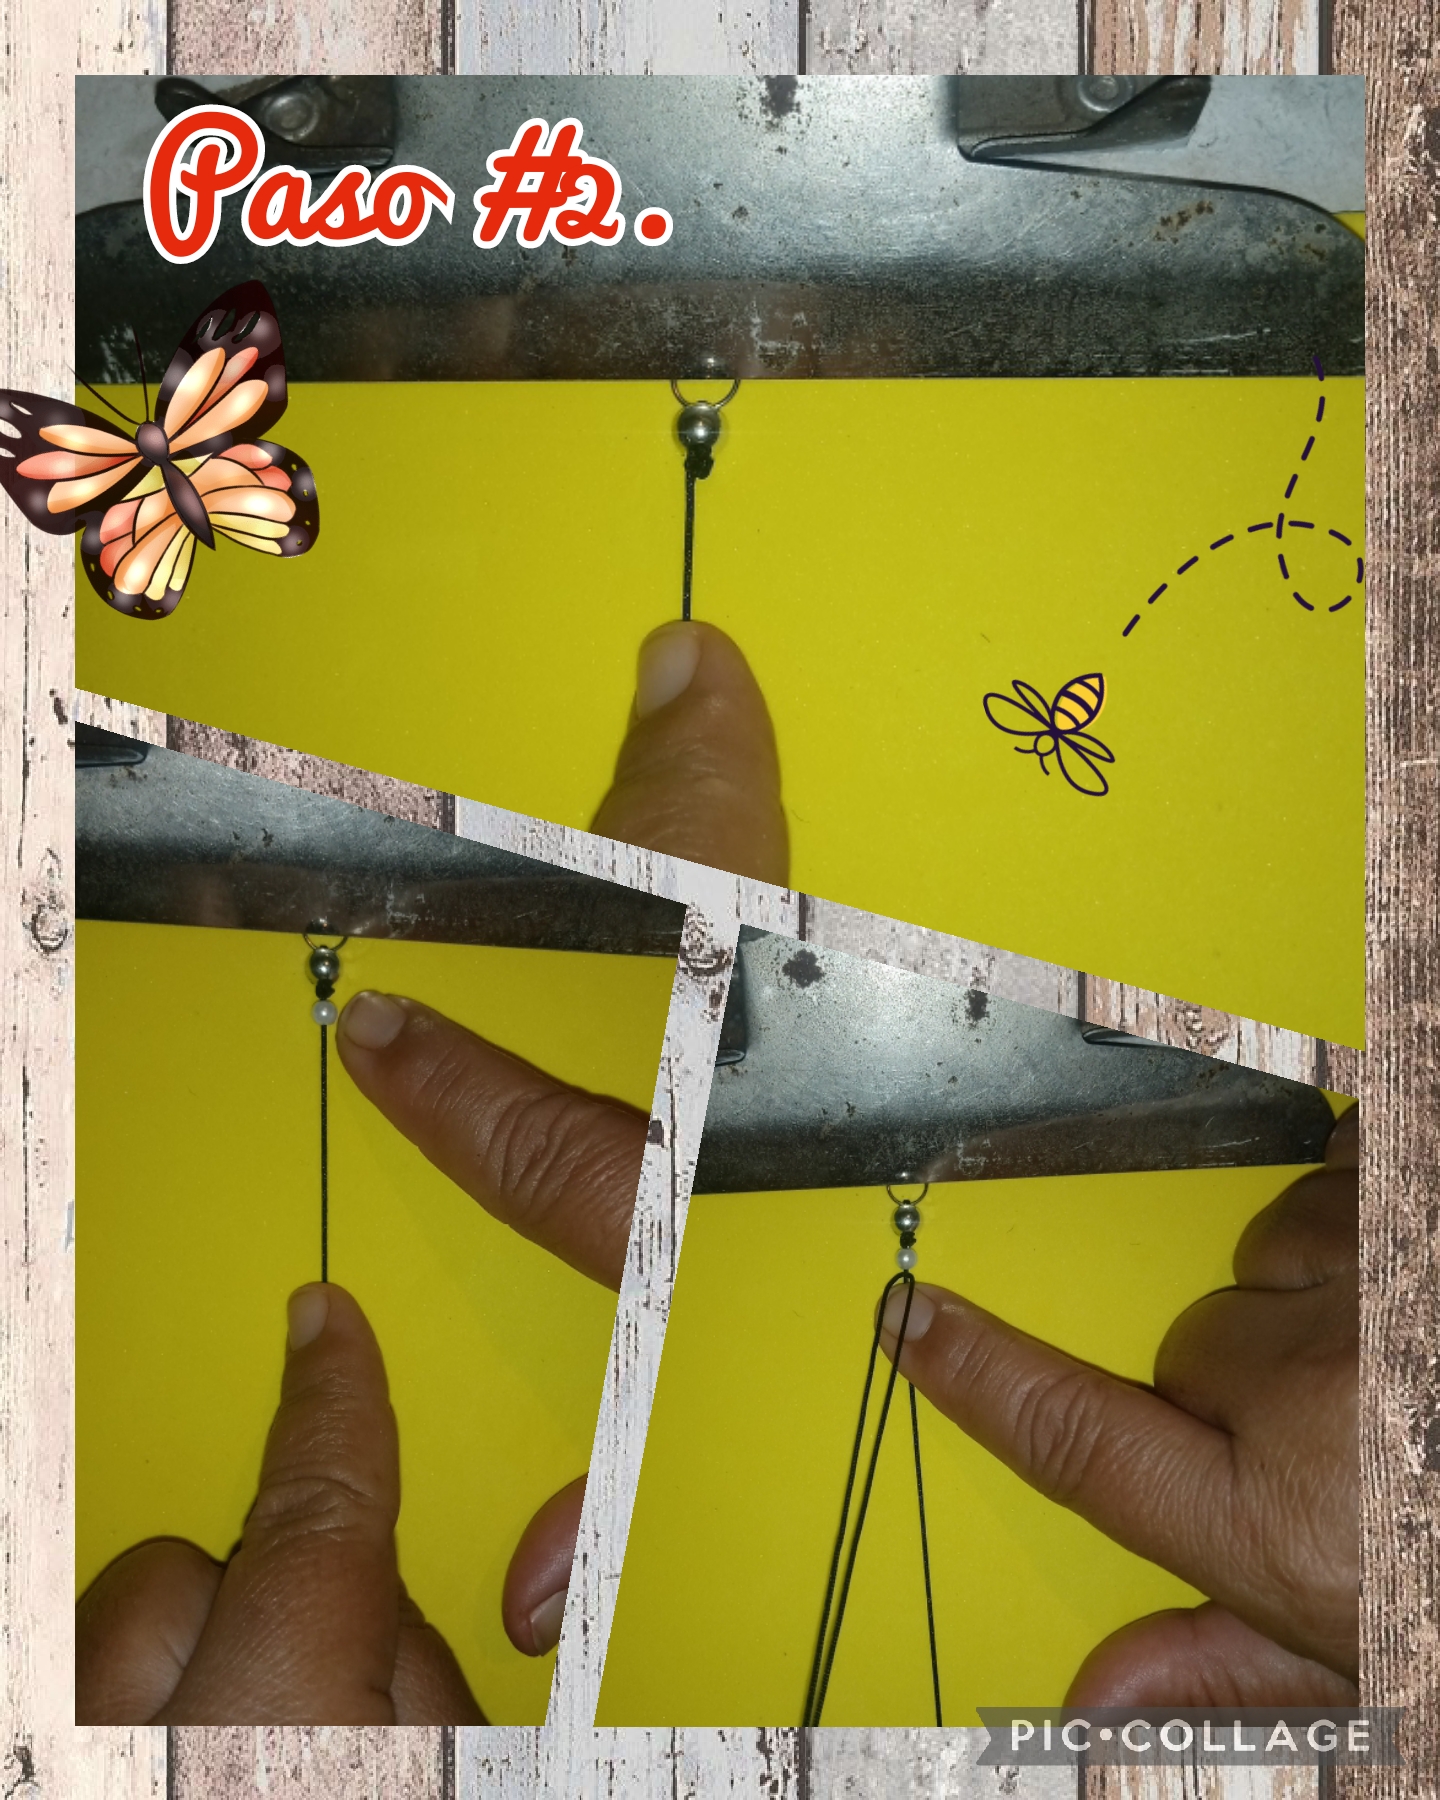
Step #2. In this step we are going to press the metal ring, on the wooden board, with the pressure hook, to begin to form the choker, we are going to insert a medium pearl, and then we are going to take, the other Chinese son, which we cut of 30 centimeters and we are going to place it in the part where the medium pearl is, look at the images.
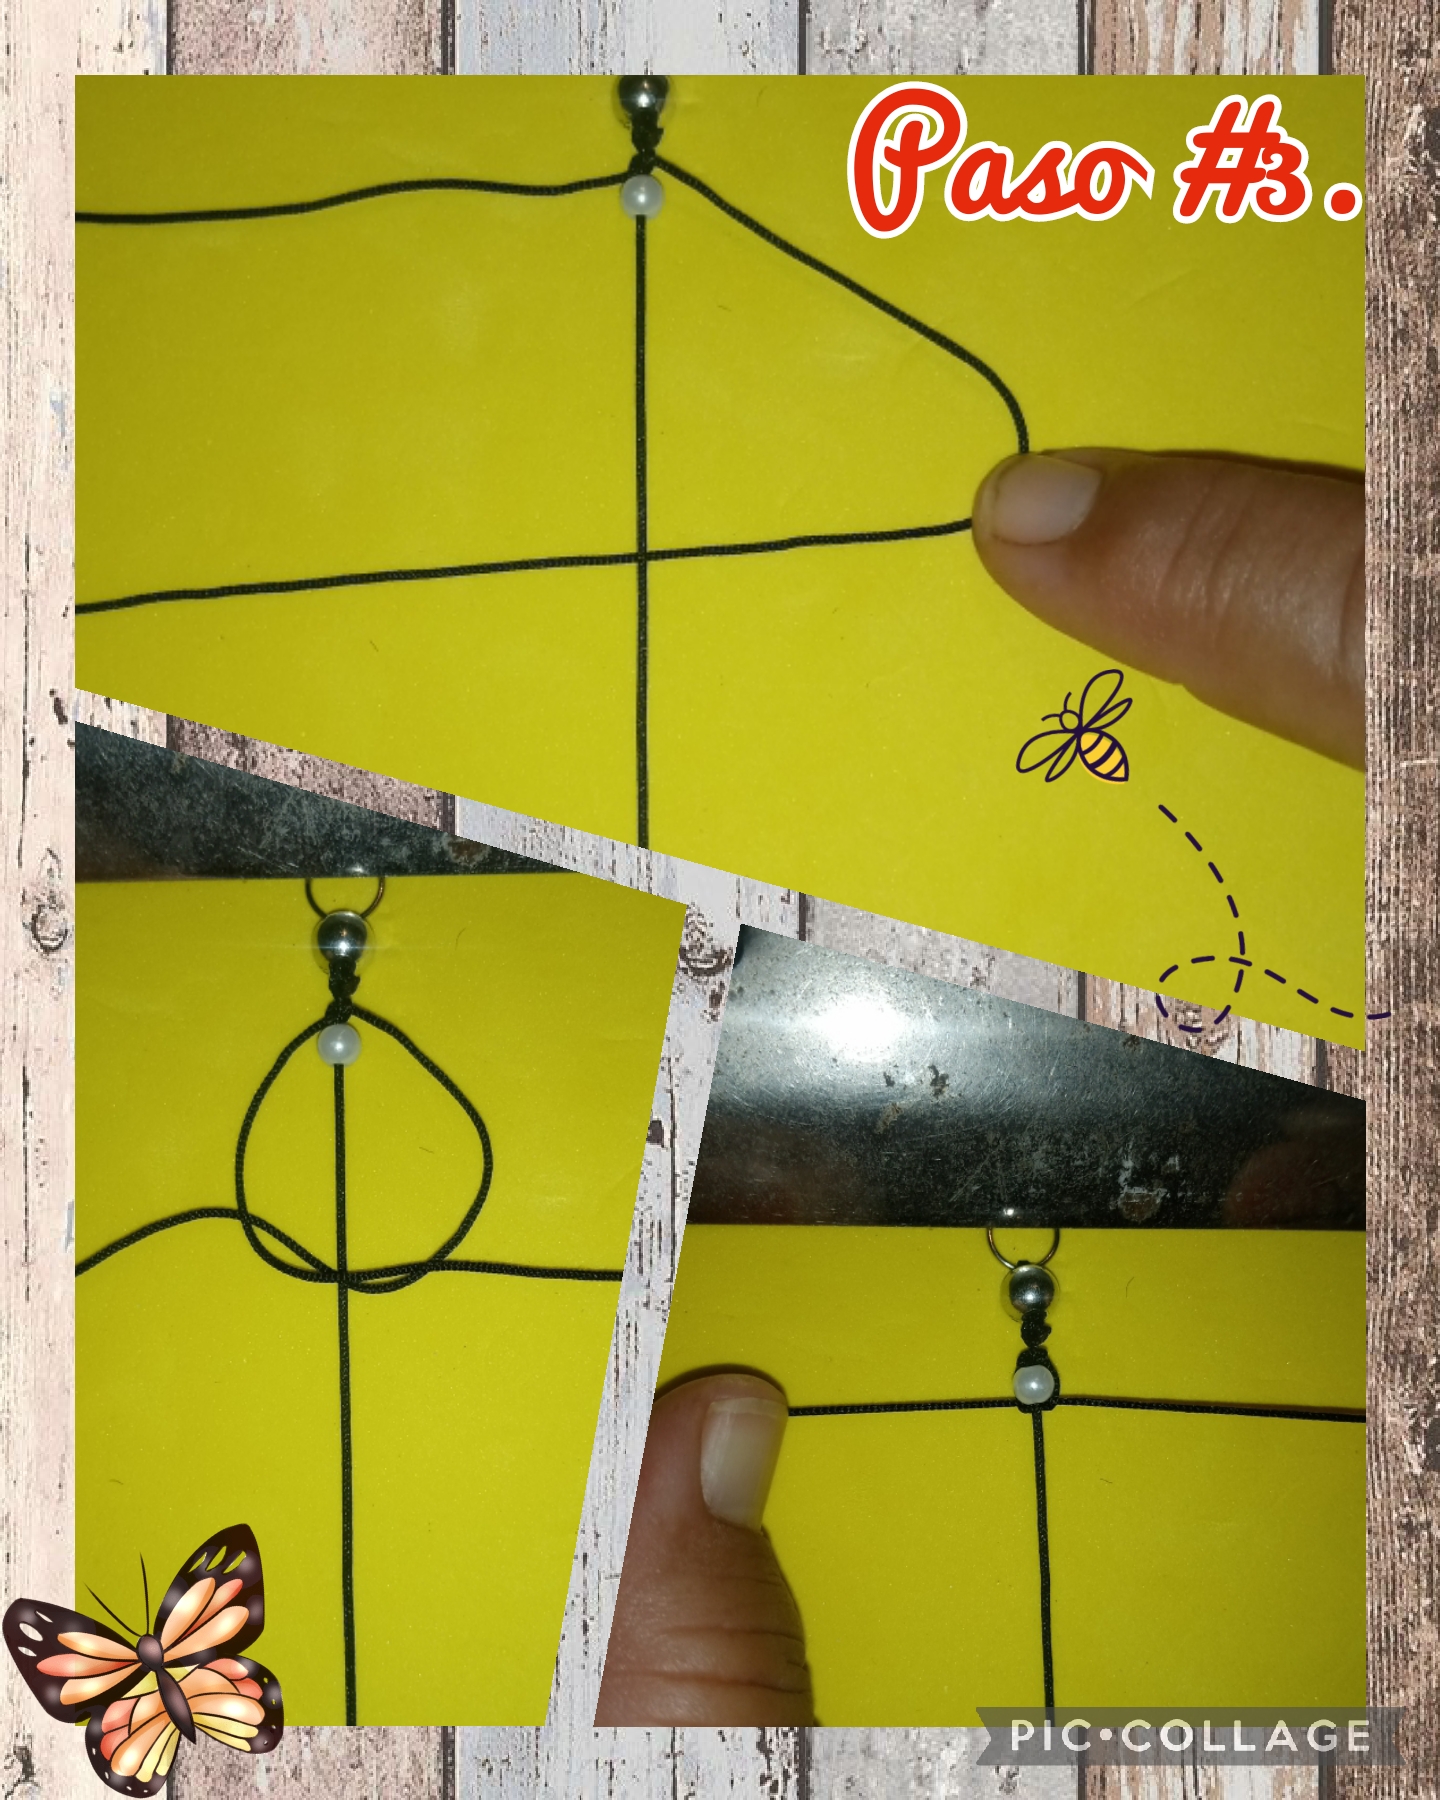
Step #3. Now in this step we are going to start to make the flat macrame knot, we are going to do it as follows, we make it in the shape of a "p", and the other thread, we put it on top, and then we pass it under and then we pull it up, press it hard and continue doing it from right to left and vice versa, see the images.
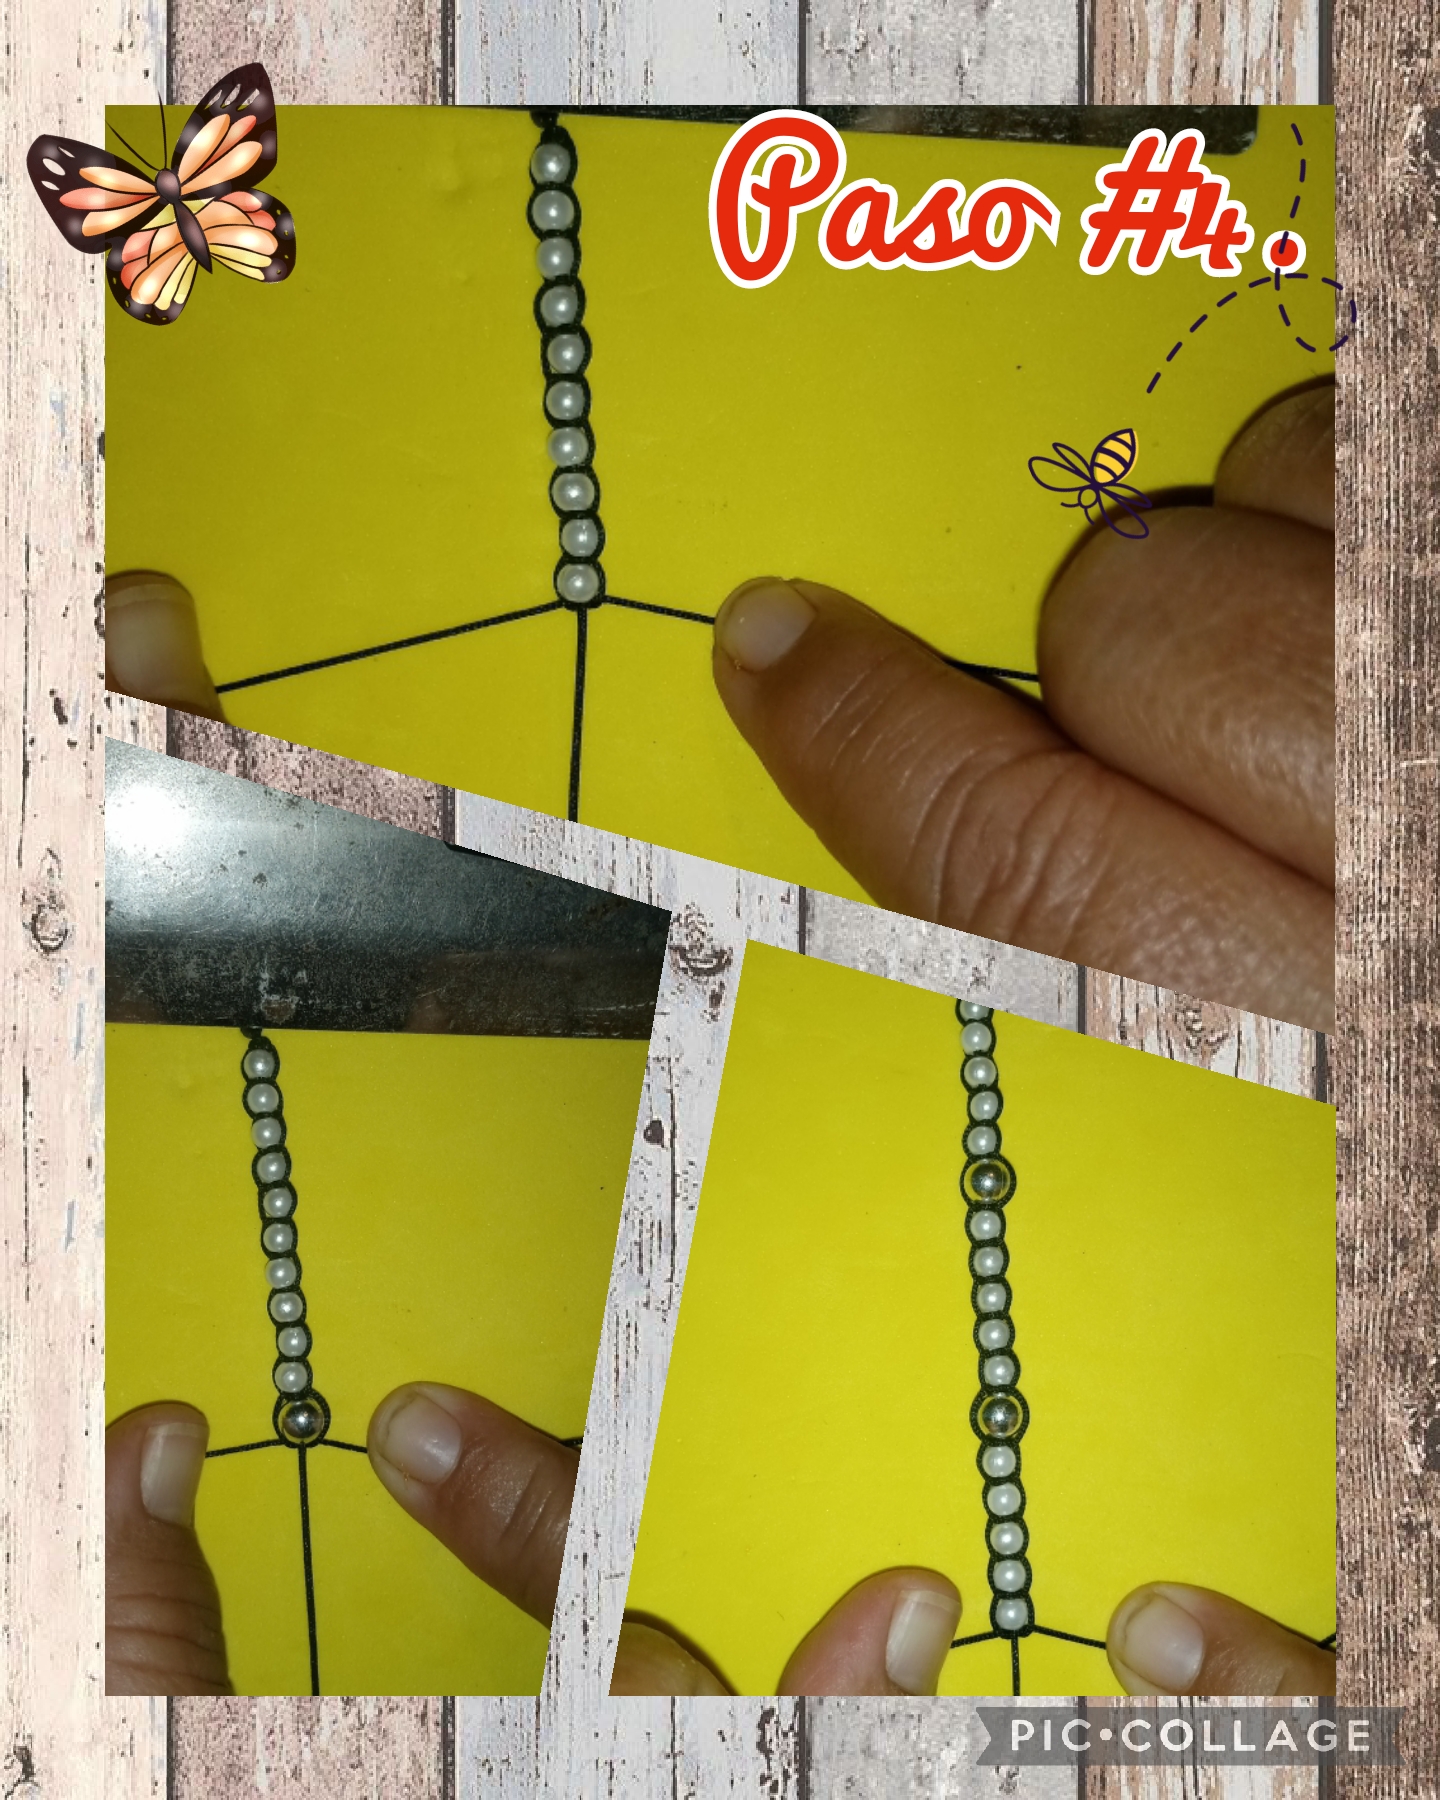
Step #4. In this step, as you will see, first we began to insert 10 medium pearls, white color and 1 medium bead, silver color, and then we reduced the medium pearls, white color from 10 to 5 pearls, and when finishing making the necklace, we returned to place 10 medium white pearls so that it remains, all the same as in the initial part and in the final part, see the images.

Step #5. The entire choker has been formed, we take a pair of scissors, cut the excess threads on the sides, leaving only the thread in the center, where we are going to insert a metal ring and a lock to open and close, we tie a knot and tighten so that it does not come loose, and with a tinderbox we burn all the ends of the threads, to seal, and to finish we place the pendant, with the figure of a dragonfly.
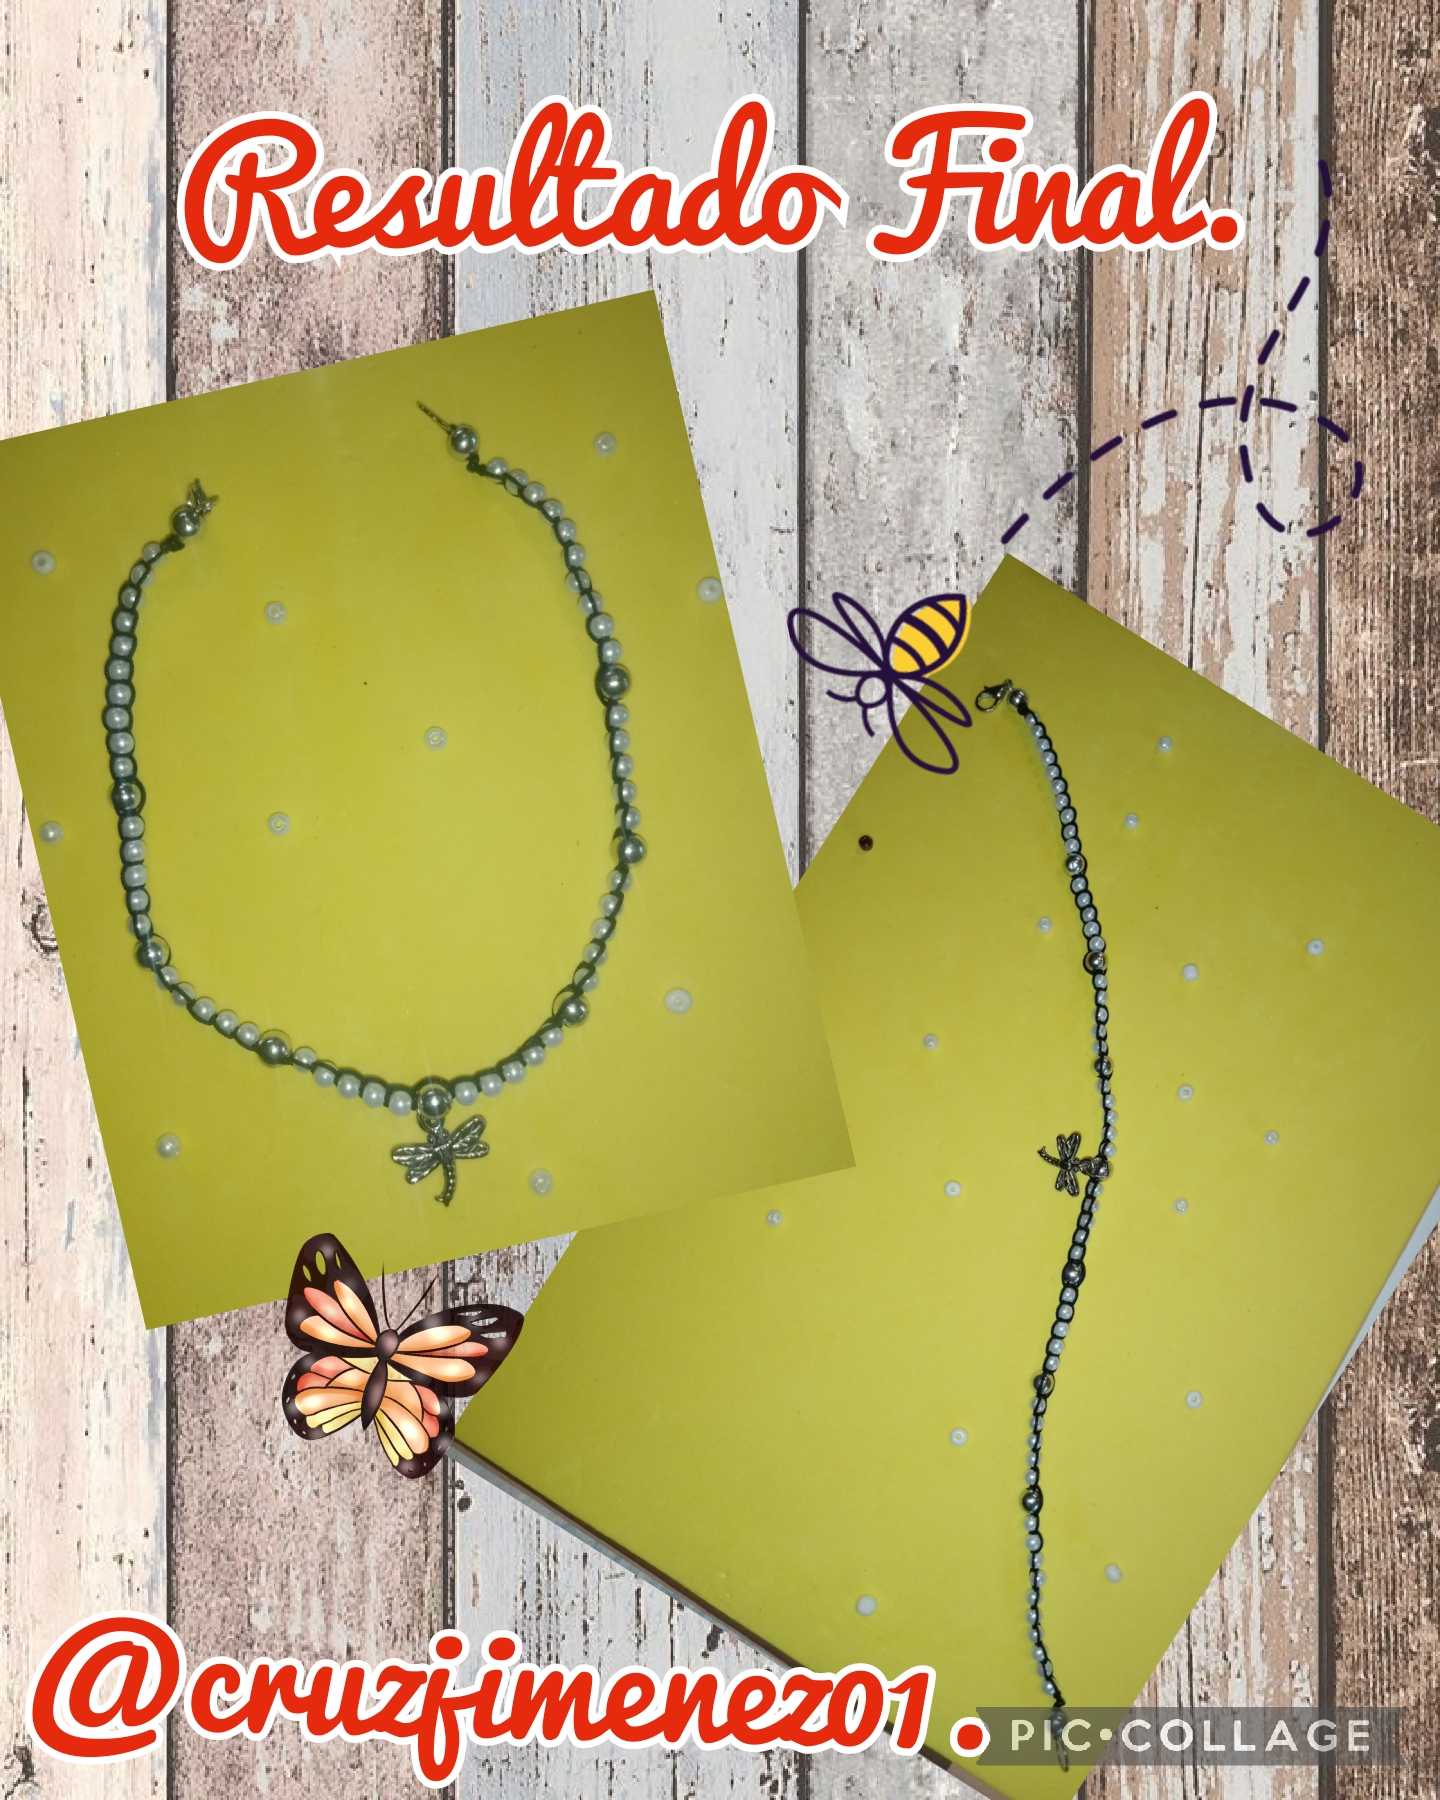
The final result was a beautiful necklace, for girls, ideal for the princesses of the house, I thank you for visiting my blog and reading until the end, see you very soon with another idea, have a good night, God bless you all of you.
Las fotos son de mi auditoria, capturada con mi teléfono Tecno Spark 6go y editadas con la aplicación Pic-Collage y traducido el contenido con Google Esp-Ing.
The photos are from my audit, captured with my Tecno Spark 6go cell phone and edited with the Pic-Collage application and translated the content with Google Esp-Ing.
https://twitter.com/2774723569/status/1643141605442953221
The rewards earned on this comment will go directly to the people( @kristal24 ) sharing the post on Twitter as long as they are registered with @poshtoken. Sign up at https://hiveposh.com.
The chocker will also be good for my little girl. The beads turned the butterfly pendant into a colorful one.