Hermoso y Sencillo Anillo de Cristales Dorados 💛💎// Beautiful and Simple Gold Crystals Ring 💛💎
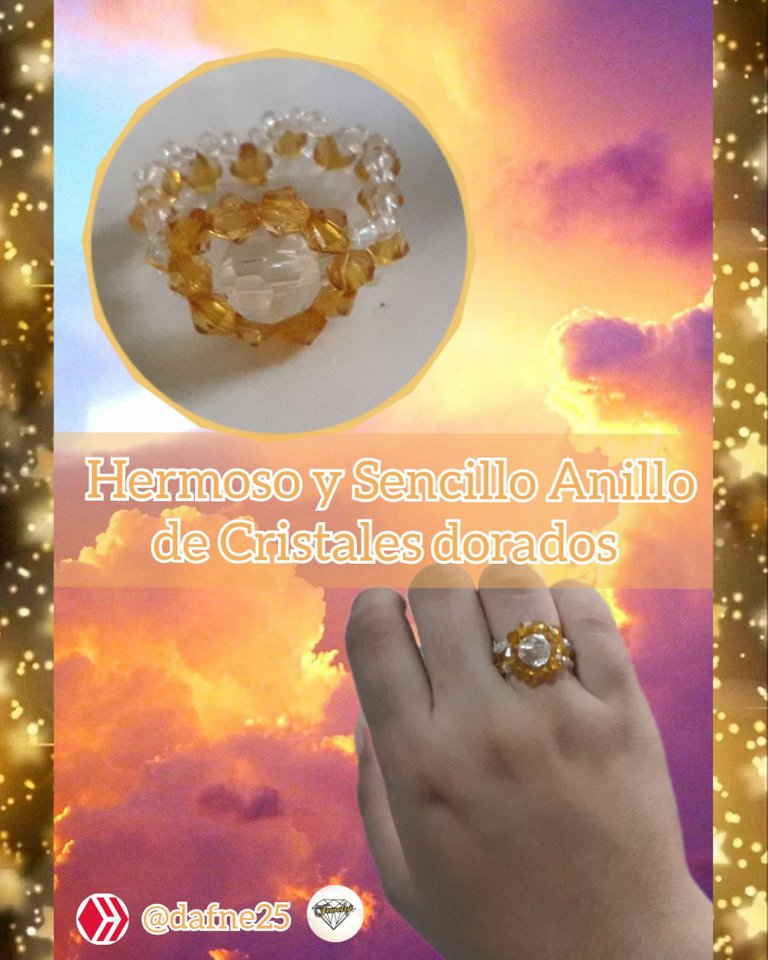

Buenas noches queridos amigos de Hive y de esta maravillosa comunidad de Jewelry, hace unos días estaba pensando en hacer un anillo con un cristal redondo que tenía guardado de una pulsera rota, pero no me había puesto a hacerlo hasta ayer, cuando me senté en la mesa con los materiales en frente no sabía cómo empezar o cómo quería que fuera la forma del anillo, lo único que sabía es que quería ese cristal redondo trasparente en el centro del anillo, no sabía que color lo haría ni nada por el estilo, así que me puse a ver el contraste de los colores que tenía en mis cajitas de bisutería, probé el color azul, pero ya tengo 3 anillos de este color, probé amarillo pero tengo un anillo de este color, rosado claro no le iba muy bien, fucsia no tenía suficientes cristales, marrón, aunque quedaba bien el contraste no me pareció la mejor opción, así que lo hice con estos cristales que compré hace unos meses y me ha gustado mucho el resultado, me recuerda a los rayos del sol. El procedimiento para hacer este anillo fue muy sencillo, después de hacer varias opciones para luego desarmarlos, se me ocurrieron estos sencillos pasos para hacer un hermoso anillo en muy pocos pasos y con muy poco tiempo que perder, a mi me encantó el resultado y me encantó el cristal redondo trasparente en el centro del anillo, se ve elegante pero se puede usar en cualquier ocasión, yo no soy de estar usando muchos anillos porque me los quito, he perdido la costumbre, pero este se ve muy bien. Espero les guste.
Los materiales que elegí usar fueron:
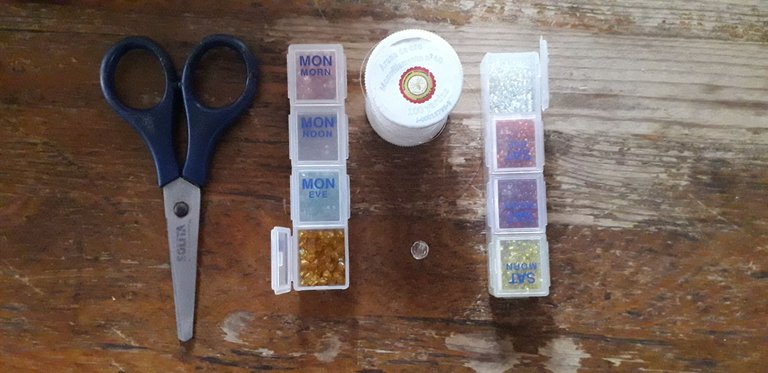
💍1 cristal redondo trasparente de tamaño mediano
💍 Cristales de 3mm y de color dorado
💍Mostacilla trasparente
💍1 mt de nylon N° 0, 4
💍Tijera
Procedimiento:
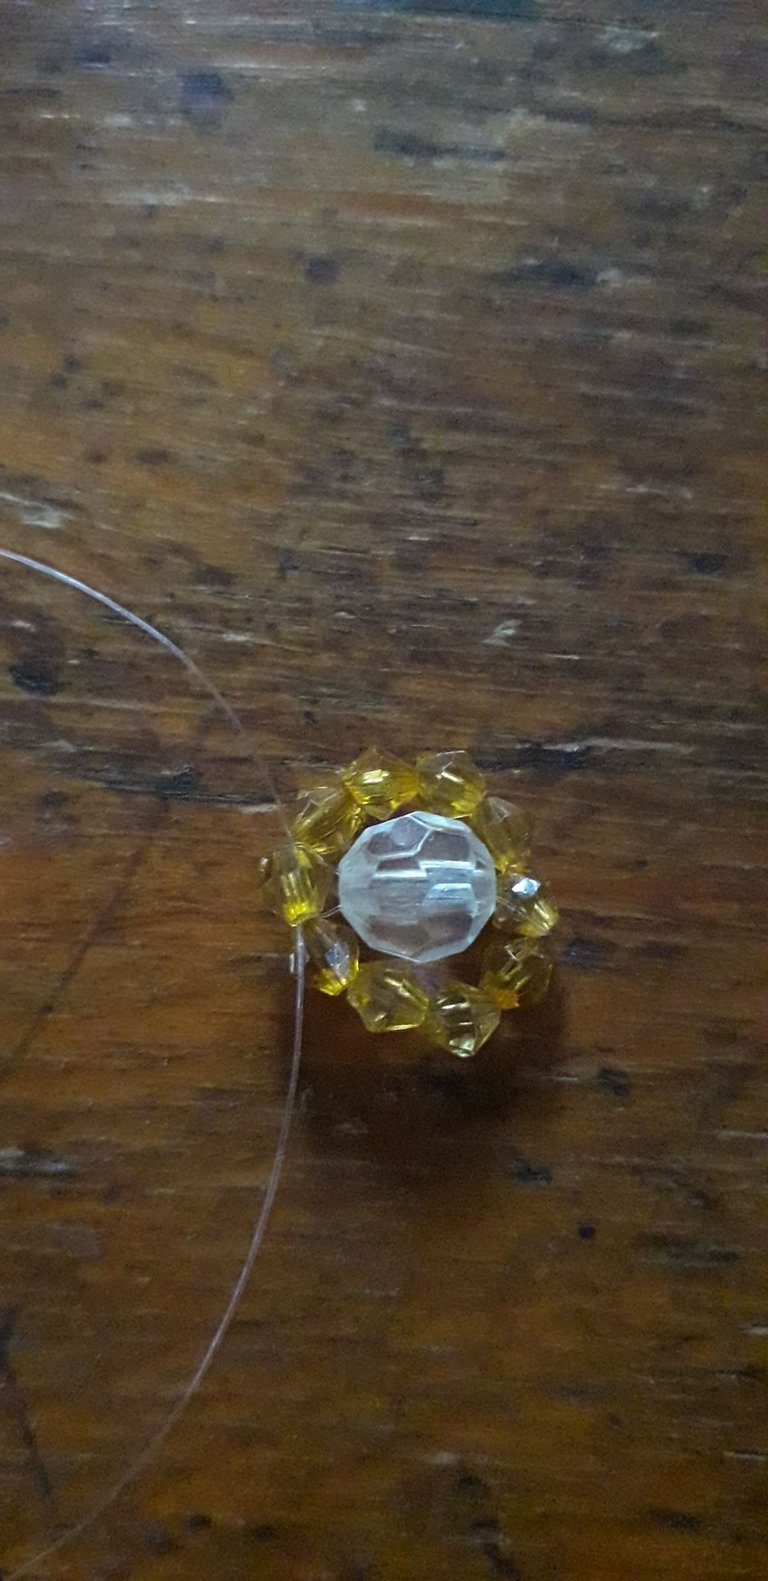
Para empezar vamos a insertar en el nylon 8 cristales de 3mm color dorado y cruzamos por el último. Juntamos los nylon y añadimos el cristal redondo trasparente de tamaño mediano y cruzamos los nylon en el cristal de 3mm opuesto a donde estamos.

Luego vamos a pasar los nylon por los cristales de 3mm una vez más hasta cruzar en el cristal opuesto a donde estamos, esto es para que los cristales dorados queden con una forma circular firme alrededor del cristal transparente de tamaño mediano y
empezamos a hacer la cadena del anillo, para esto insertamos 2 mostacillas trasparentes en cada nylon y cruzamos los nylon con un cristal de 3mm color dorado.
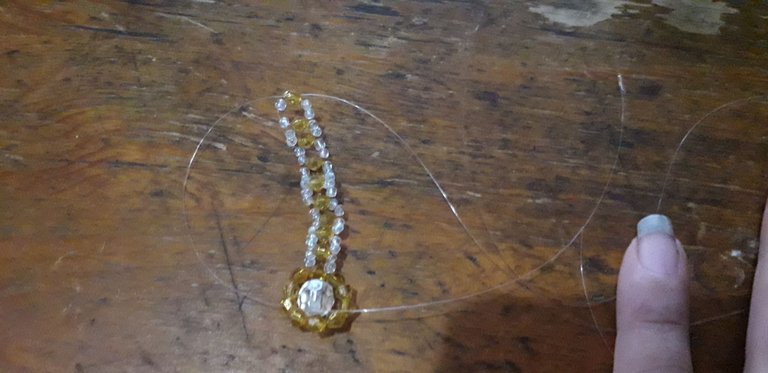
Volvemos a insertar 2 mostacillas de cada lado y cruzamos por un nuevo cristal de 3mm color dorado, hacemos esto varias veces más hasta que el largo de la cadena rodee nuestro dedo anular.

Insertamos 2 mostacillas más y pasamos uno de los nylon en el cristal opuesto del anillo. Y listo, terminamos…
Fotos de mi autoría, tomadas con celular Samsung Galaxy A12
Traductor: app DeepL Traductor
Editores de fotos usados: Edición de fotos Polish y Editor de fotos Canva.

Good evening dear friends of Hive and this wonderful Jewelry community, a few days ago I was thinking about making a ring with a round crystal I had saved from a broken bracelet, but I hadn’t gotten around to it until yesterday, when I sat down at the table with the materials in front of me I didn’t know how to start or how I wanted the shape of the ring to be, the only thing I knew is that I wanted that round transparent crystal in the center of the ring, I didn’t know what color I would make it or anything like that, so I started to see the contrast of the colors that I had in my jewelry boxes, I tried the blue color, but I already have 3 rings of this color, I tried yellow but I have a ring of this color, light pink did not go very well, fuchsia did not have enough crystals, brown, although the contrast was good I did not think the best option, so I did it with these crystals I bought a few months ago and I really liked the result, it reminds me of the sun’s rays. The procedure to make this ring was very simple, after making several options to then take them apart, I came up with these simple steps to make a beautiful ring in very few steps and with very little time to waste, I loved the result and I loved the transparent round crystal in the center of the ring, it looks elegant but can be used in any occasion, I am not wearing many rings because I take them off, I have lost the habit, but this looks great. I hope you like it.
The materials I chose to use were:
💍1 medium size round clear crystal.
💍 3mm crystals and gold colored crystals
💍Transparent clay
💍1 mt of nylon N° 0, 4
💍Scissors
Procedure:
To start, we are going to insert in the nylon 8 crystals of 3mm golden color and we cross over the last one. Put the nylons together and add the medium size transparent round crystal and cross the nylons on the 3mm crystal opposite to where we are.
Then we are going to pass the nylons through the 3mm crystals one more time until crossing the opposite crystal to where we are, this is so that the golden crystals remain with a firm circular shape around the transparent crystal of medium size and we begin to make the chain of the ring, for this we insert 2 transparent beads in each nylon and cross the nylons with a 3mm crystal of golden color.
We insert again 2 beads on each side and cross them with a new 3mm crystal of golden color, we do this several more times until the length of the chain surrounds our ring finger.
We insert 2 more beads and pass one of the nylon on the opposite crystal of the ring. And that’s it, we’re done…
Photos by me, taken with Samsung Galaxy A12 cell phone.
Translator: app DeepL Translator
Photo editors used: Polish photo editor and Canva photo editor.
te quedo hermoso amiga❤️❤️❤️
Lindo anillo de cristales sencillo pero coqueto
Congratulations @dafne25! You have completed the following achievement on the Hive blockchain And have been rewarded with New badge(s)
Your next target is to reach 100 replies.
You can view your badges on your board and compare yourself to others in the Ranking
If you no longer want to receive notifications, reply to this comment with the word
STOPCheck out our last posts:
Support the HiveBuzz project. Vote for our proposal!
Oh how cool this is! Very creative way to do your own ring! It's a beautiful piece!