🌷🐥🍃🐥🌸🌿🌷🐥🍃🐥🌸🌿<\Center>
This is a very easy, fast and simple project that we can elaborate in an afternoon that we have free and to which we want to give an additional value, for it I used the following materials: cotton threads in yellow, turquoise green, mustard, pink, hypoallergenic stuffing, a crochet number 9, two bowls that will serve us for the eyes and a wool needle.
Éste es un proyecto muy fácil, rápido y sencillo que bien podemos elaborar en una tarde que tengamos desocupada y a la cual querramos darle un valor adicional, para ello utilicé los siguientes materiales: hilos de algodón tono amarillo,verde turquesa,mostaza,rosa,relleno hipoalergénico,un crochet número 9,dos cuencas que nos van a servir para los ojitos y una aguja lanera.
🌷🐥🍃🐥🌸🌿🌷🐥🍃🐥🌸🌿<\Center>
🌷🐥🍃🐥🌸🌿🌷🐥🍃🐥🌸🌿<\Center>
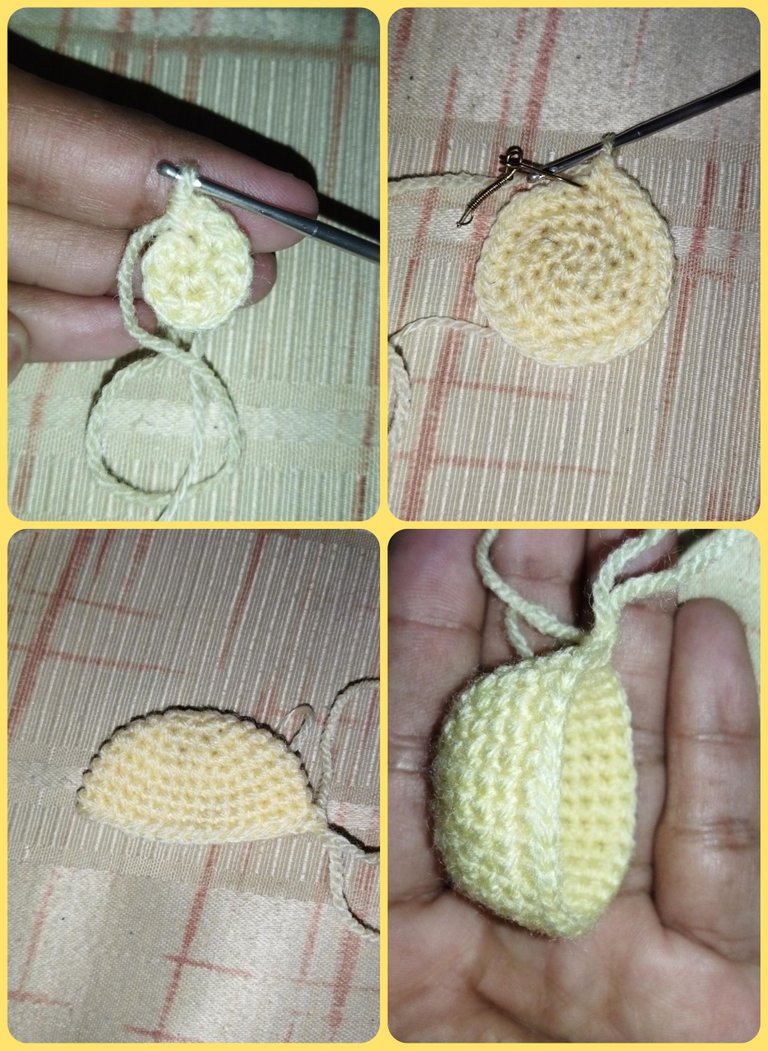
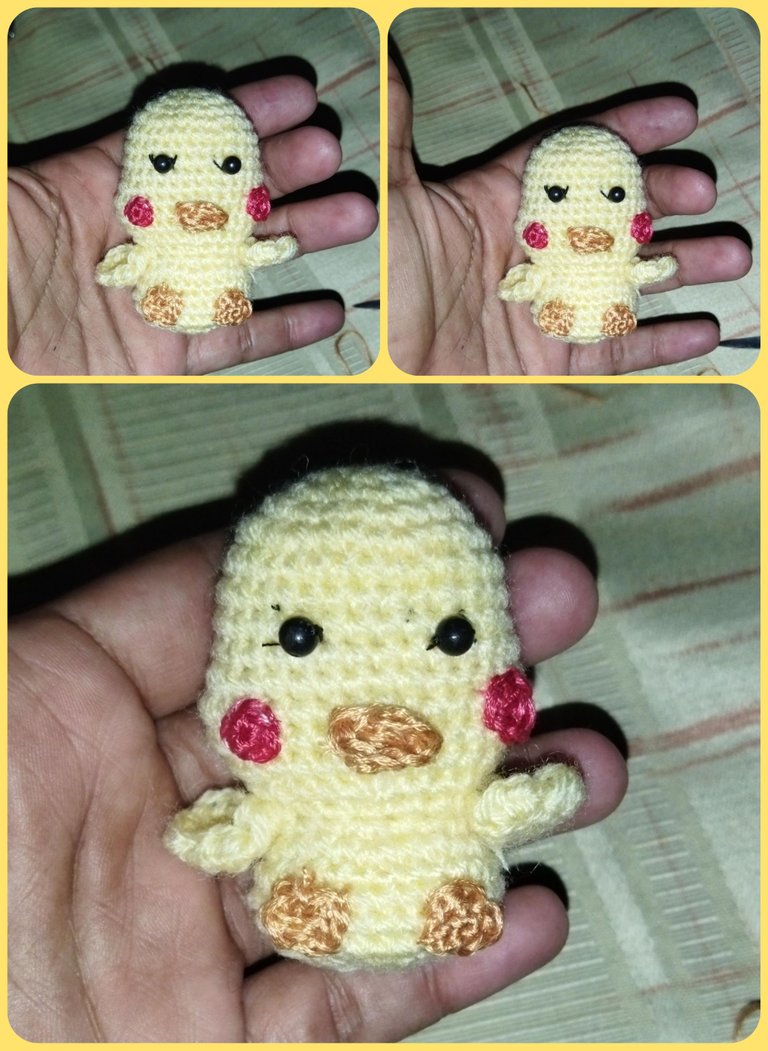
to begin we are going to start with the yellow yarn making a magic ring of 6 stitches, for the next row we are going to make the sequence of one increase for each stitch, the next row we are going to make the sequence of one stitch one increase, the next row we are going to make two single crochets one increase and the last row we are going to make 3 single crochets one increase, then we will make 5 additional rows of one stitch in each stitch that would be 30 stitches in total; in the next row we are going to start making 3 increases in a row, then 2 single crochets and three increases in a row and 12 single crochets repeating this same sequence for two additional rows, then we are going to make the decrease making 3 single crochets a decrease, then we make a single crochet a decrease and then we make six decreases, with this stitch we will finish the part of the head with some nice and funny little cheeks.
para comenzar vamos a iniciar con el hilo amarillo realizando un anillo mágico de 6 puntos, para la próxima vuelta vamos hacer la secuencia de un aumento por cada punto, la próxima vuelta vamos a realizar la secuencia de un punto un aumento, la próxima vuelta realizamos dos puntos bajos un aumento y la última vuelta vamos a realizar 3 puntos bajos un aumento, luego realizamos 5 vueltas adicionales de un punto en cada punto que serían 30 puntos en total; en la próxima vuelta vamos a comenzar realizando 3 aumentos seguidos, luego 2 puntos bajo y tres aumentos seguidos y 12 puntos bajos repitiendo está misma secuencia por dos vueltas adicionales, luego vamos a realizar las disminución realizando 3 puntos bajos una disminución, luego realizamos un punto bajo una disminución y luego realizamos seis disminuciónes, con este punto tendríamos culmina da la parte de la cabecita con unos simpáticos y graciosos cachetitos.
🌷🐥🍃🐥🌸🌿🌷🐥🍃🐥🌸🌿<\Center>
 🌷🐥🍃🐥🌸🌿🌷🐥🍃🐥🌸🌿<\Center>
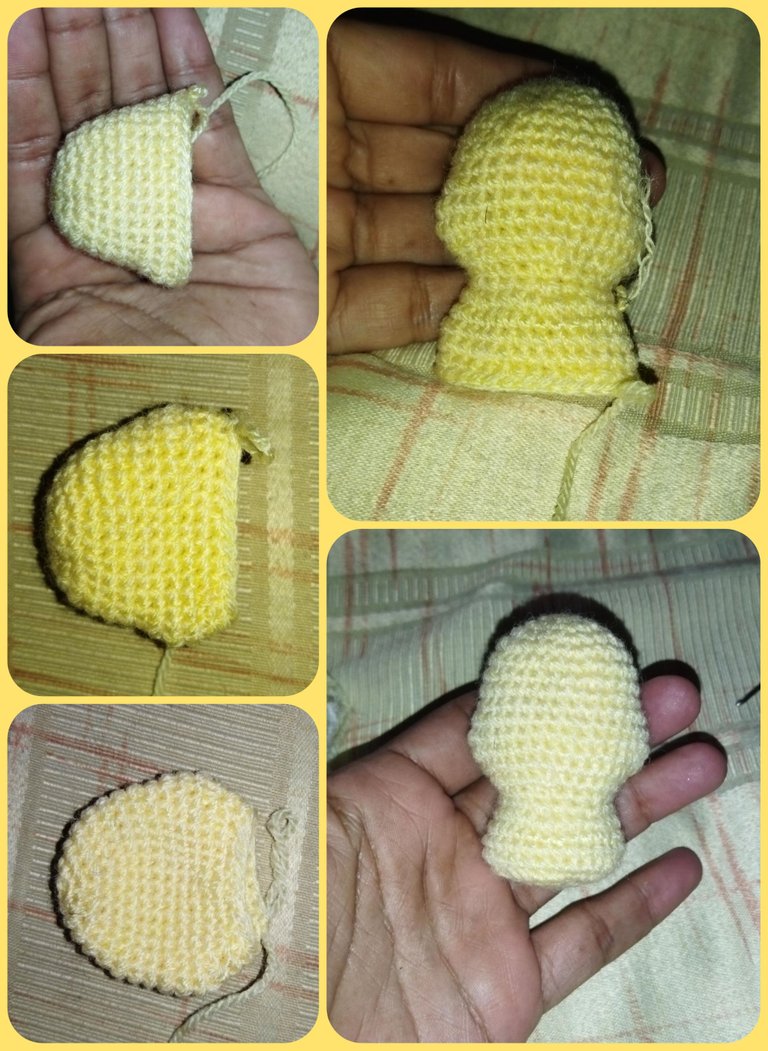
For the body part we are going to start by making an increase in each stitch and then we make a stitch an increase and we finish with a total of 4 rows, of one stitch on each stitch, we are going to fill in and with the help of the knitting needle we are going to close the structure of the head and the body of our little duck.
para la parte del cuerpo vamos a iniciar realizando un aumento en cada punto y luego realizamos un punto un aumento y culminamos con un total de 4 vueltas, de un punto sobre cada punto, vamos a ir rellenando y con la ayuda de la aguja lanera vamos a cerrar la estructura de la cabeza y el cuerpo de nuestro pequeño patito.
🌷🐥🍃🐥🌸🌿🌷🐥🍃🐥🌸🌿<\Center>
 🌷🐥🍃🐥🌸🌿🌷🐥🍃🐥🌸🌿<\Center>
For the elaboration of the wings we are going to take yellow yarn and make a magic ring of 6 stitches, then we are going to make its increase for each stitch, the last round we are going to make two slipped stitches, 1 triple increase of medium high stitches, 3 slipped stitches and close, we are going to make two pieces exactly the same.
Para la elaboración de las alitas vamos a tomar hilo amarillo y realizamos una anillo mágico de 6 puntos,luego realizamos su aumento por cada punto, la última vuelta la vamos a realizar de dos puntos deslizados 1 aumento triple de puntos medio altos, 3 puntos deslizados y cerramos, vamos hacer dos pieza exactamente iguales.
🌷🐥🍃🐥🌸🌿🌷🐥🍃🐥🌸🌿<\Center>
 🌷🐥🍃🐥🌸🌿🌷🐥🍃🐥🌸🌿<\Center>
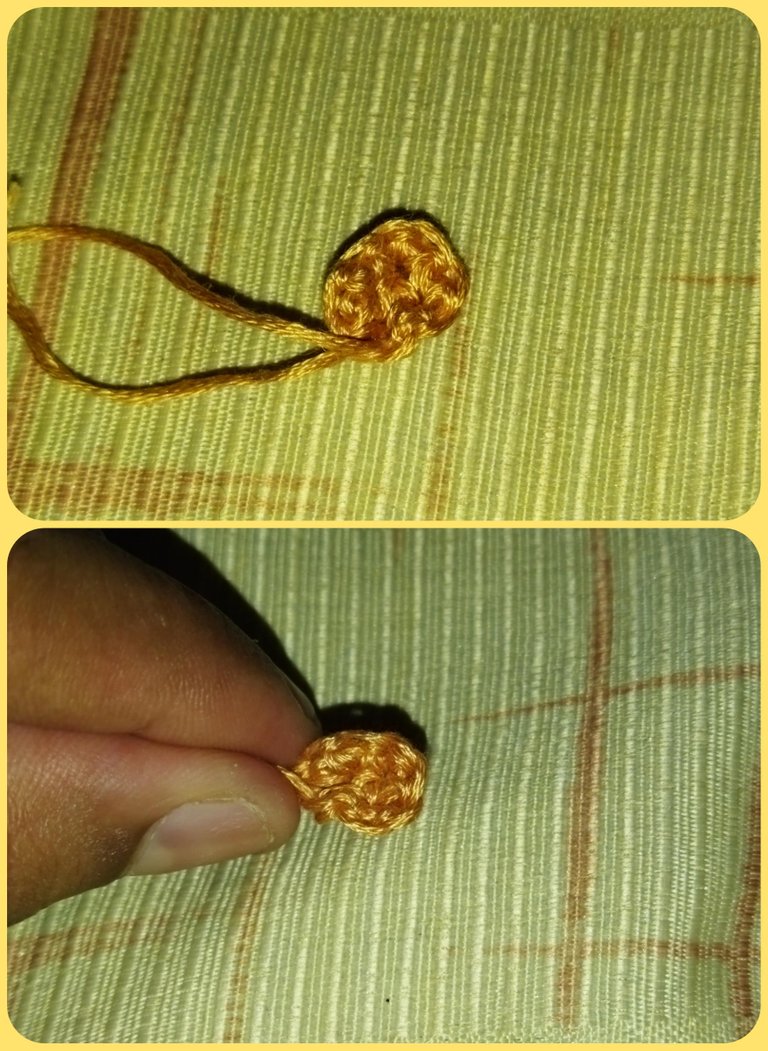
For the little duck we are going to take mustard colored yarn and make a magic ring of 6 stitches, making another round the same we pass the yarn through the back and we are going to fold it so that it does not have the shape of the little duck's little duck.
Para el piquito vamos a tomar hilo color mostaza y realizamos un anillo mágico de 6 puntos, realizando otra vuelta igual pasamos el hilo por la parte atrás y vamos a doblar para que no se la forma del pequeño piquito del patito.
🌷🐥🍃🐥🌸🌿🌷🐥🍃🐥🌸🌿<\Center>
 🌷🐥🍃🐥🌸🌿🌷🐥🍃🐥🌸🌿<\Center>
For the legs we also take the mustard colored yarn and make a magic ring of 6 stitches, next round we will make two increases followed by a single crochet, two increases followed by two double crochets and we close making two pieces exactly the same.
Para las patitas tomamos igualmente el hilo color mostaza y realizamos un anillo mágico de 6 puntos, próxima vuelta vamos a realizar dos aumento seguido un punto bajo dos aumento seguido dos punto bajos y cerramos realizando dos piezas exactamente iguales.
🌷🐥🍃🐥🌸🌿🌷🐥🍃🐥🌸🌿<\Center>
 🌷🐥🍃🐥🌸🌿🌷🐥🍃🐥🌸🌿<\Center>
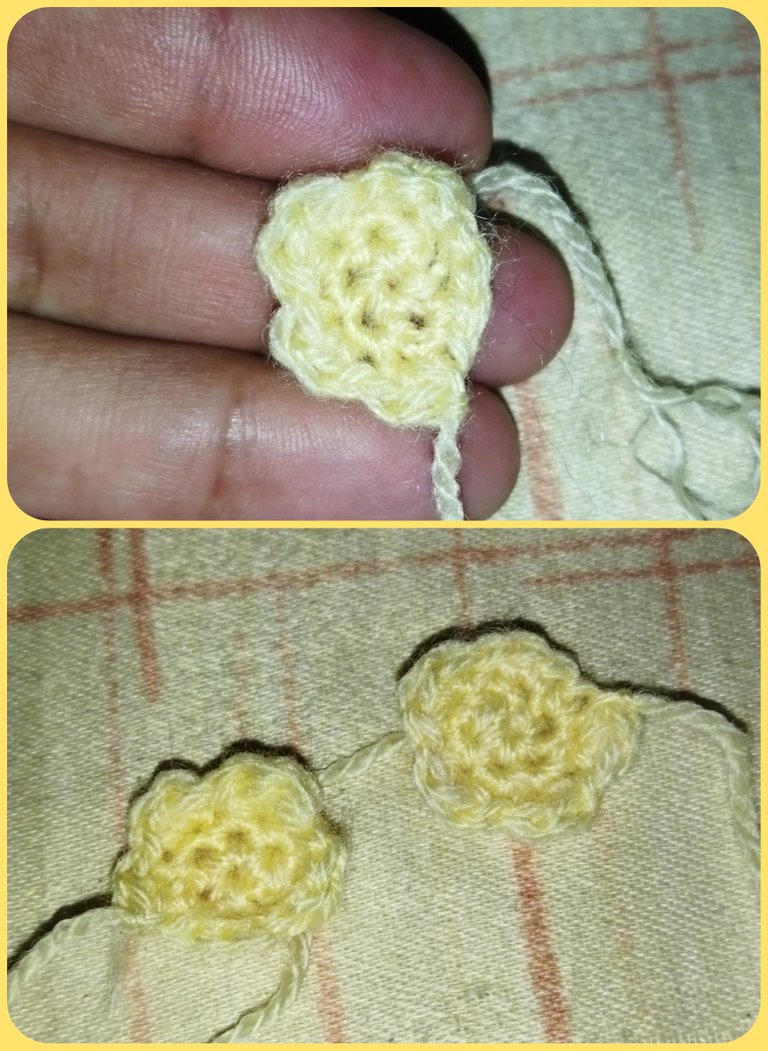
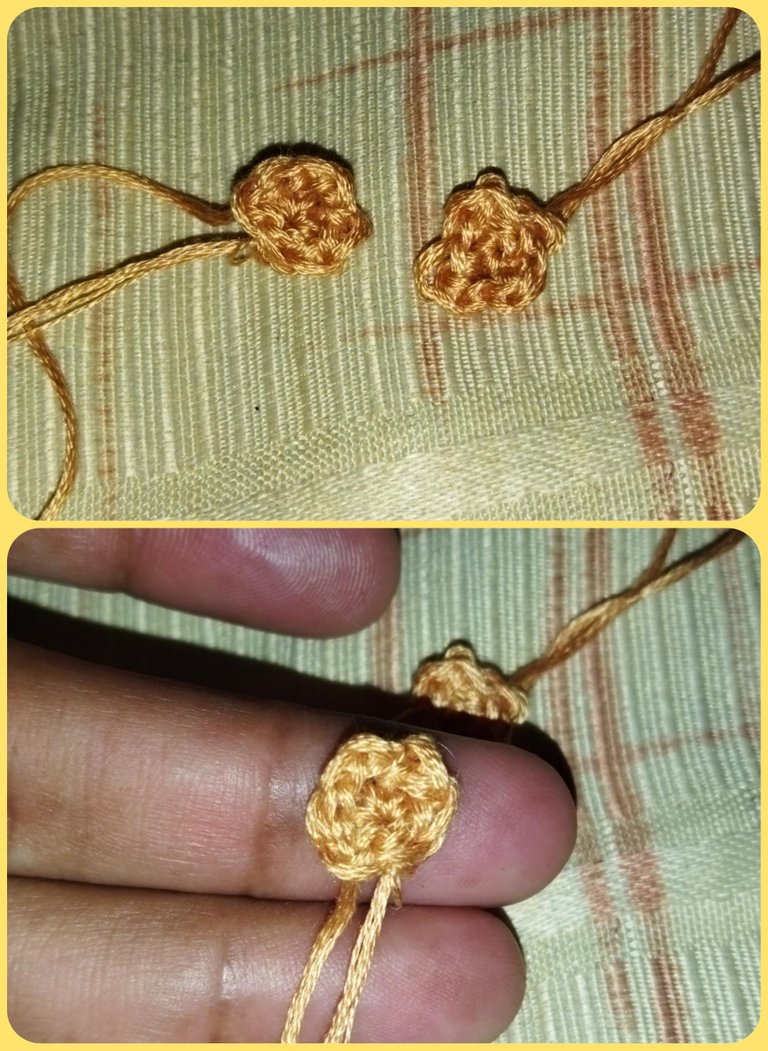
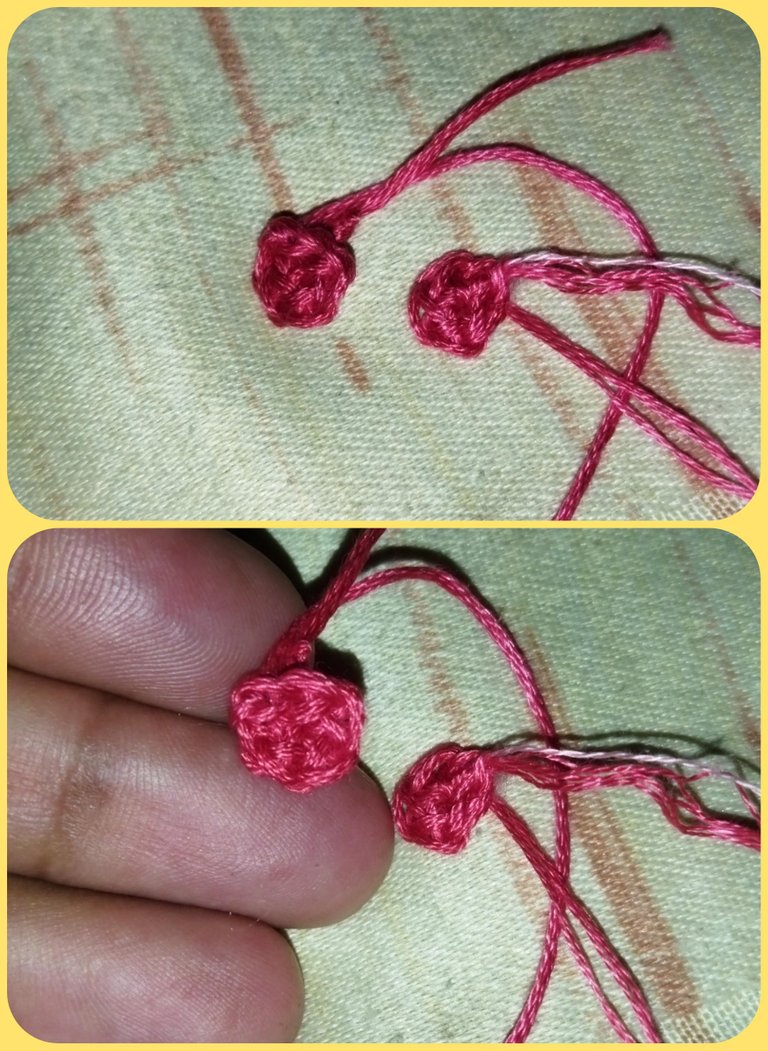
For the pink of the cheeks we will simply make a magic ring of 6 stitches and make two equal pieces.
Para el rosado de los cachetes simplemente vamos a realizar una anillo mágico de 6 puntos y hacemos dos piezas iguales.
🌷🐥🍃🐥🌸🌿🌷🐥🍃🐥🌸🌿<\Center>
 🌷🐥🍃🐥🌸🌿🌷🐥🍃🐥🌸🌿<\Center>
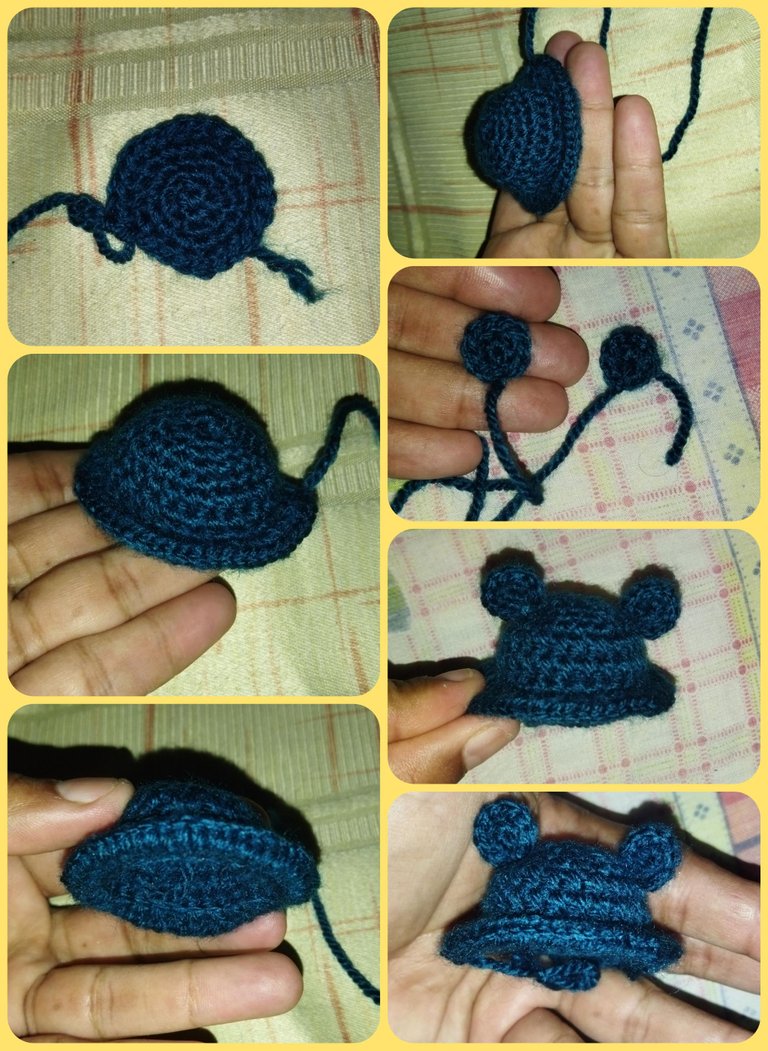
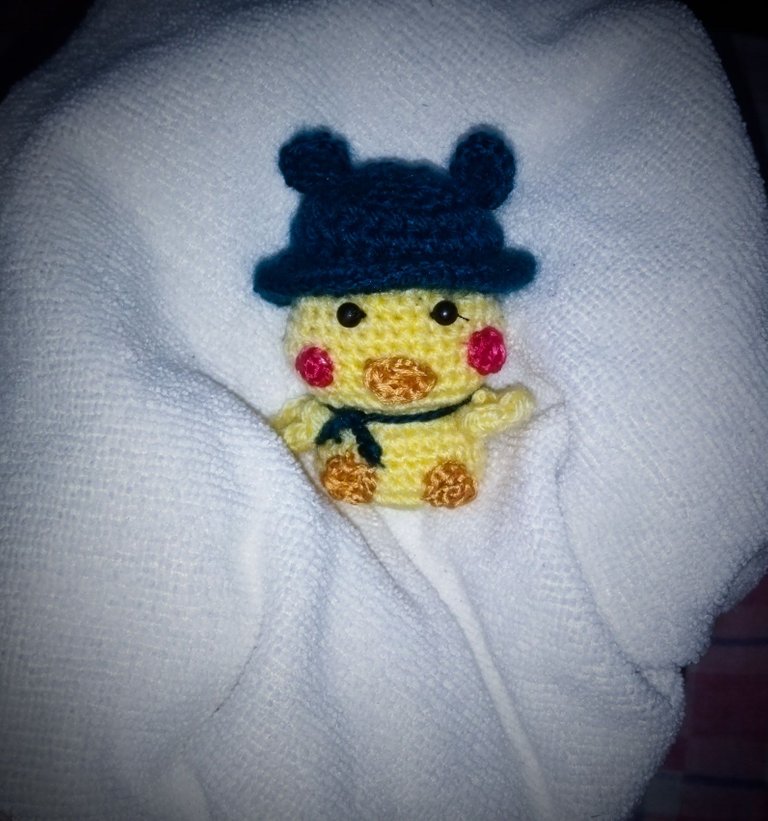
For the little hat I wanted to make a special design of little ears, since it is funnier and for this I used a turquoise green color, starting with a magic ring of 6 stitches, then we make 1 increase for each stitch, the other round we make a stitch under an increase and we make 3 rounds of a stitch over each stitch the next round we will make the same stitch over each stitch but of medium high stitches and only taking the thread from the front, the next round we make medium high stitches and the last round we make an increase of medium high stitches. For the part of the ears I only made a magic ring of 6 stitches and in the next round I made a moment in each stitch cut and left long yarn to sew making 2 equal pieces.
para el sombrerito quise hacerle un diseño especial de orejitas, ya que es más gracioso y para ello utilicé un color verde turquesa, iniciando con un anillo mágico de 6 puntos, luego realizamos 1 aumento por cada punto, la otra vuelta la realizamos de un punto bajo un aumento y realizamos 3 vueltas de un punto sobre cada punto la próxima vuelta vamos hacer de igual manera punto sobre cada punto pero de puntos medios altos y solamente tomando el hilo de adelante, la próxima vuelta realizamos puntos medios altos y la última vuelta realizamos aumento de puntos medios altos. Para la parte de las orejitas solamente realicé un anillo mágico de 6 puntos y en la próximo vuelta realicé un momento en cada punto corte y de dejé hilo largo para coser haciendo 2 piezas igual.
🌷🐥🍃🐥🌸🌿🌷🐥🍃🐥🌸🌿<\Center>
 🌷🐥🍃🐥🌸🌿🌷🐥🍃🐥🌸🌿<\Center>
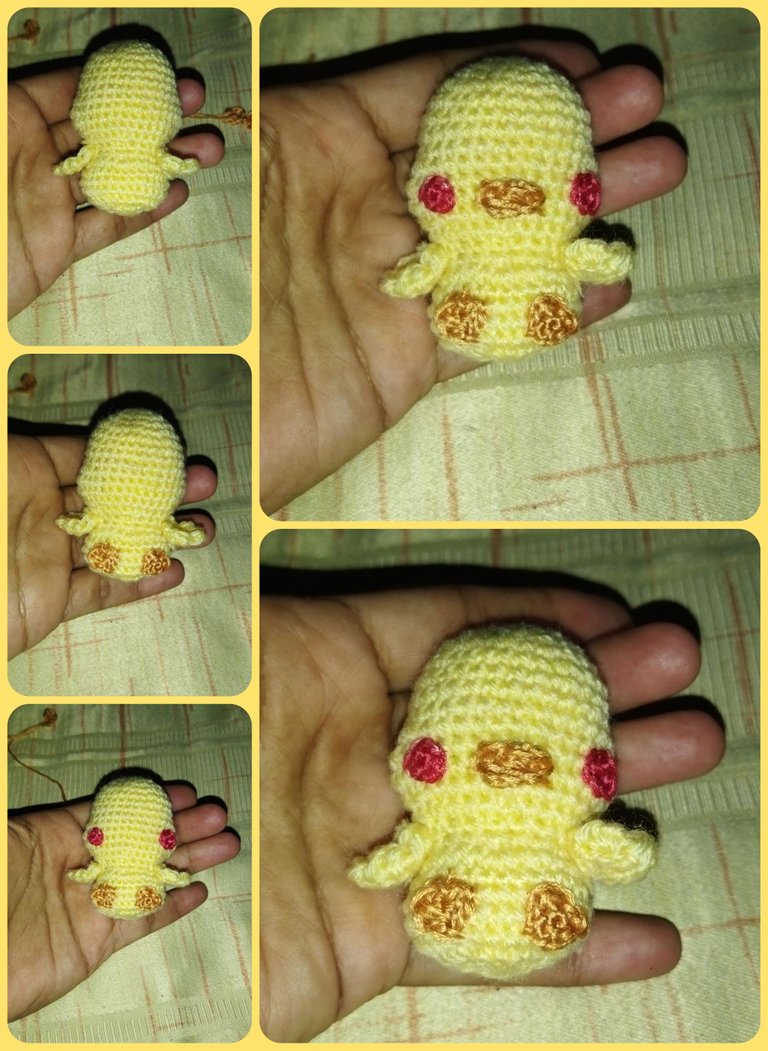
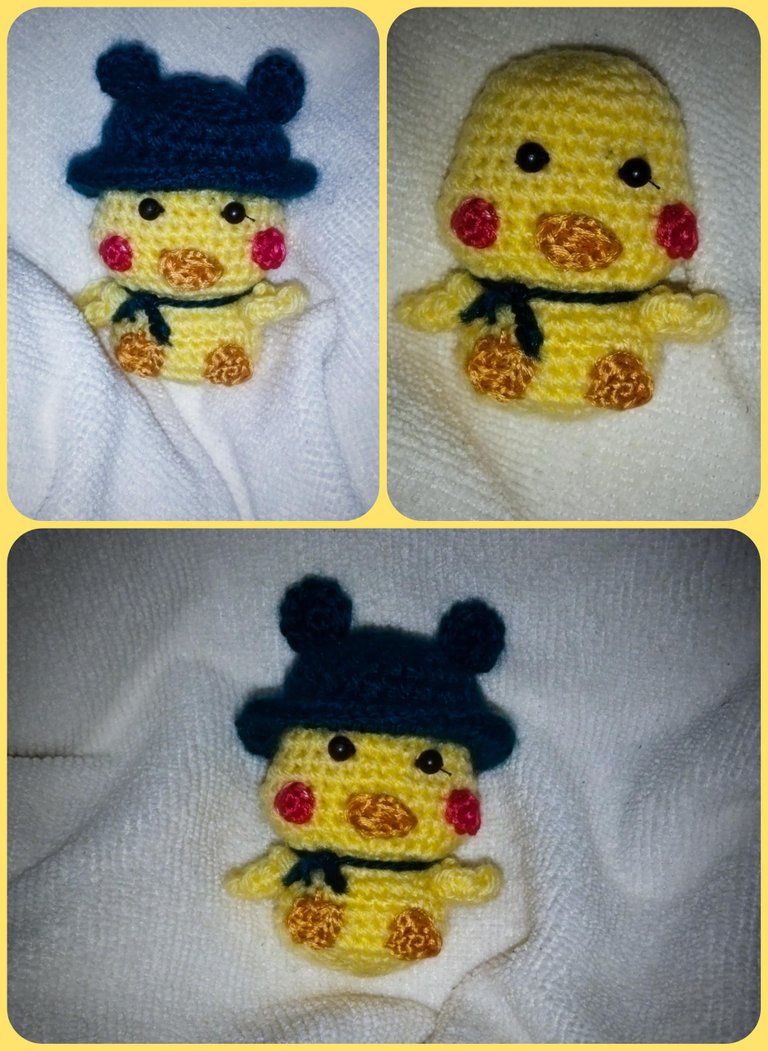
Once we have all the pieces ready, we will proceed to assemble our duckling, starting with the part of the wings positioning them at both ends, then we place the little legs in front, the little beak and the pink of the cheeks.
Una vez que tenemos toda las piezas listas, vamos a proceder a ensamblar a nuestro patito, comenzando con la parte de las alitas posicionandolas en ambos extremos, luego colocamos las patitas al frente, el pequeño piquito y los rosados de los cachetes.
🌷🐥🍃🐥🌸🌿🌷🐥🍃🐥🌸🌿<\Center>
 🌷🐥🍃🐥🌸🌿🌷🐥🍃🐥🌸🌿<\Center>
At this point, the only thing left to do was to place the little eyes and I used two black beads and placed his funny little hat with ears on top.
En este punto sólo no faltaría colocarle los ojitos y utilicé dos cuentas en color negro y le coloqué encima su pequeño y graciosos sombrerito de orejitas.
🌷🐥🍃🐥🌸🌿🌷🐥🍃🐥🌸🌿<\Center>
 🌷🐥🍃🐥🌸🌿🌷🐥🍃🐥🌸🌿<\Center>
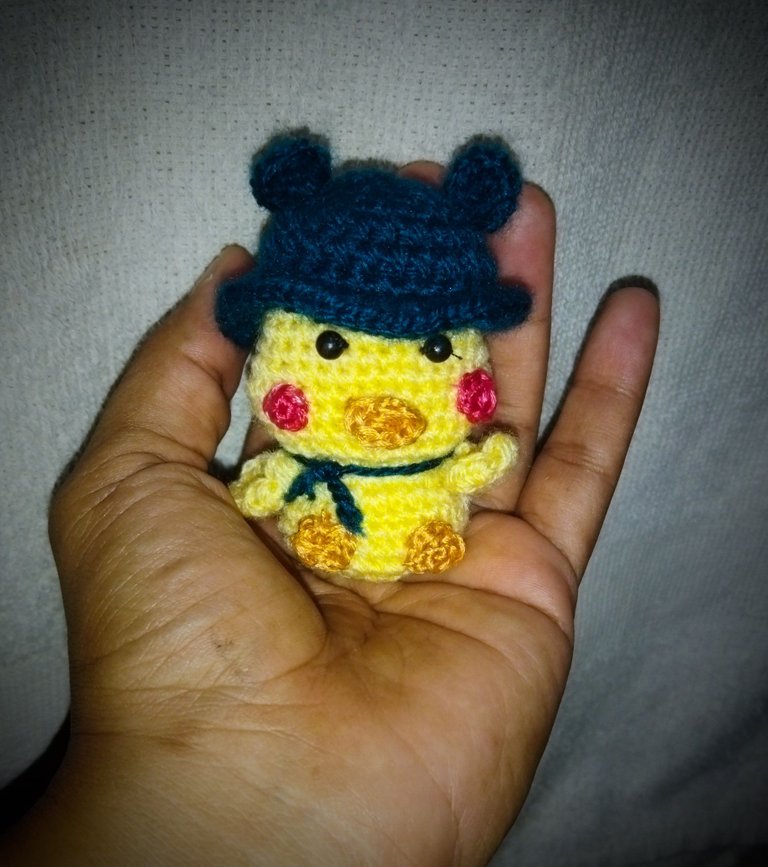
And in this way I had completed this nice, cute and funny crochet duck with a funny little hat with ears, I hope you liked it and for my part I say goodbye until a new opportunity where I can share with you a nice and creative craft.
Y de esta manera tuve culminado a este bonito, simpático y gracioso patito a crochet con un divertido sombrero de orejitas, espero que haya sido de todo su agrado y por mi parte me despido hasta una nueva oportunidad donde les pueda compartir una bonita y creativa manualidad.
🌷🐥🍃🐥🌸🌿🌷🐥🍃🐥🌸🌿<\Center>
 🌷🐥🍃🐥🌸🌿🌷🐥🍃🐥🌸🌿<\Center>
All the images are from my own tomás with redmi 9t and edited with the Photoshop Express application for Android.
Todas las imágenes son de mi propia tomás con redmi 9t y editadas con la aplicación Photoshop Express para Android.
🌷🐥🍃🐥🌸🌿🌷🐥🍃🐥🌸🌿<\Center>
 <\Center>
🌷🐥🍃🐥🌸🌿🌷🐥🍃🐥🌸🌿<\Center>
<\Center>
🌷🐥🍃🐥🌸🌿🌷🐥🍃🐥🌸🌿<\Center>
Ay! qué trabajo tan tierno 😍 El tamaño me parece ideal para ponerlo en algún llaverito o como colgante en el bolso!! Saludos🌷
Saludos @imena gracias por su apoyo saludos 😃
Wow, this is really nice and creative. I like the way you explained everything in steps.
Thanks @starstrings01 👍☺️
woo que bonito me gusta esto, te quedo muy kiud, espero ver mas asi, muchos exitos
Hola saludos muchas gracias por su apoyo ☺️☺️