¡¡¡¡How to Crochet a Mini Jocker!! Tutorial 🤡🌺🌷 ¡¡¡¡Cómo Tejer a Ganchillo un Mini Jocker!!!!🤡🌺🌷 By Danhyelita24
The Joker or Joker is the antithesis of the main character of Batman, as it is his archenemy, but whose duality, one of the other could not exist, is a character with very serious mental conflicts and a dissociation of space-time reality.
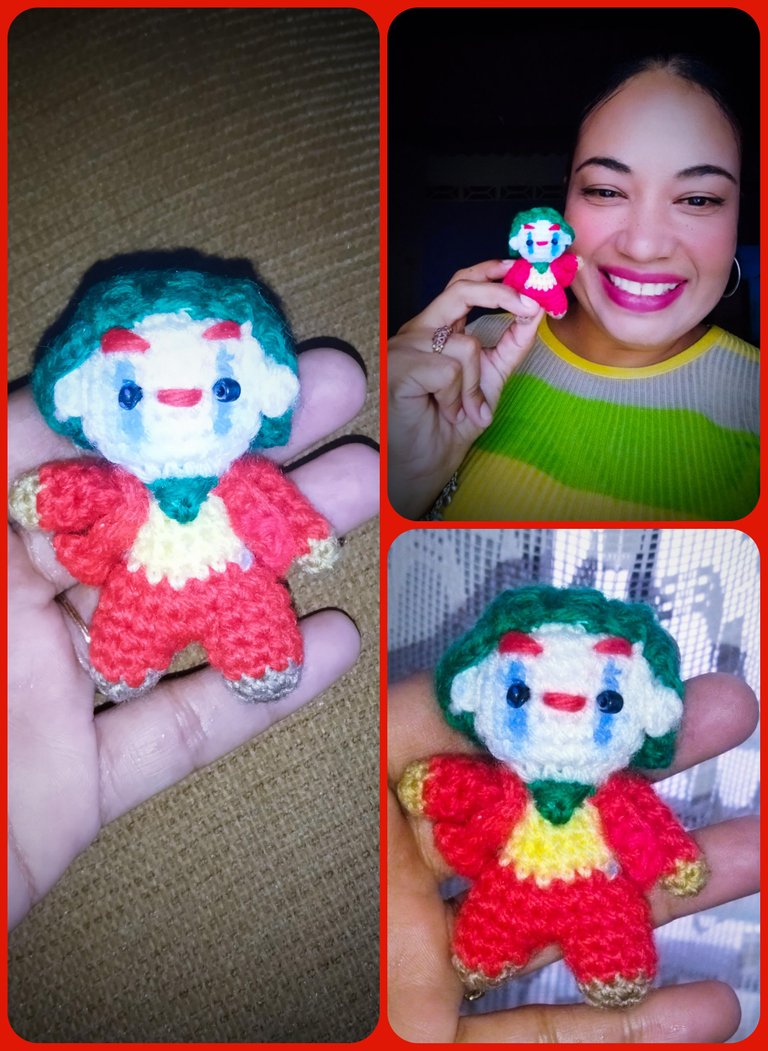
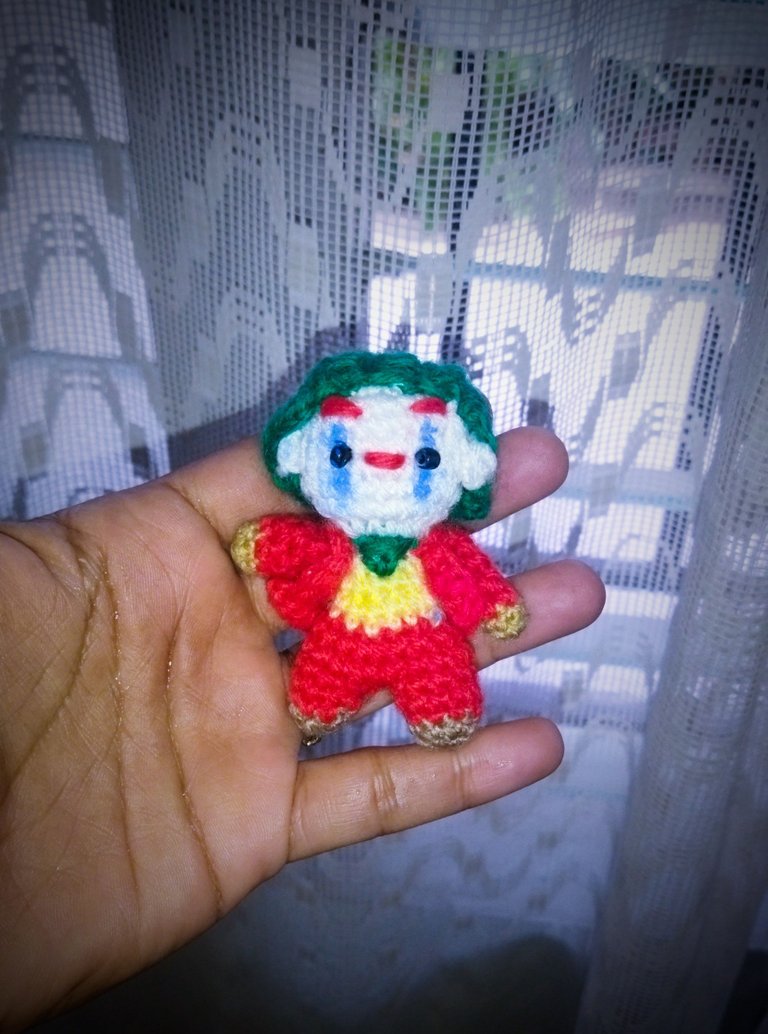
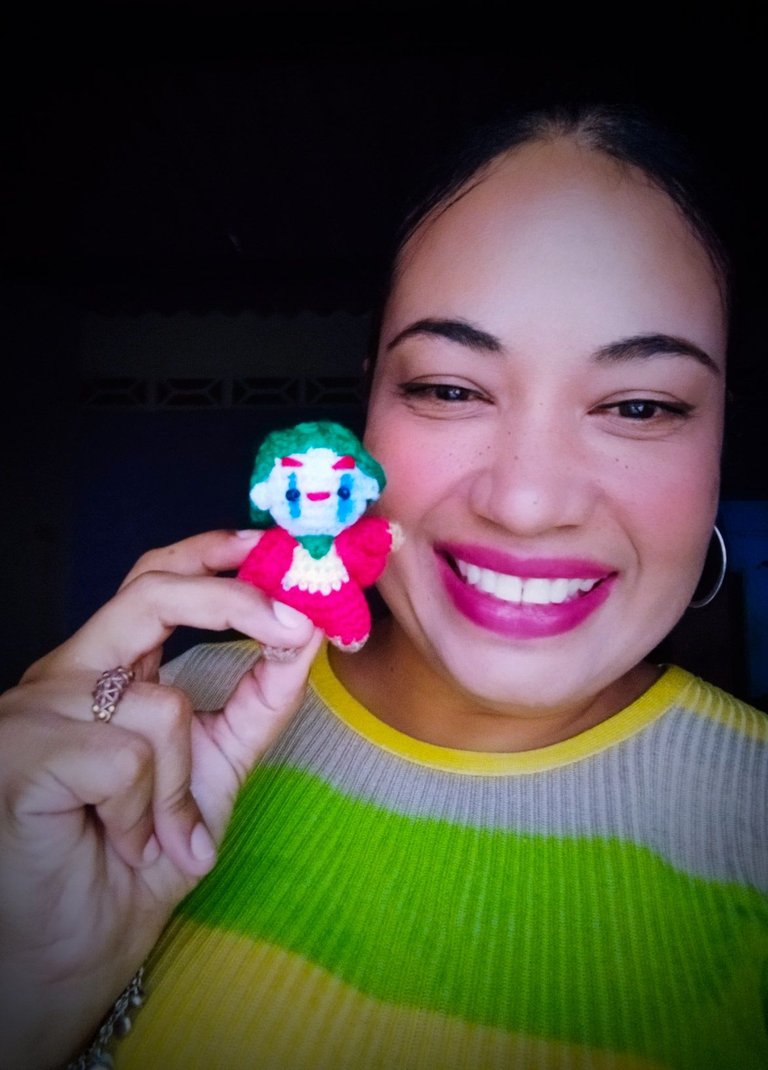
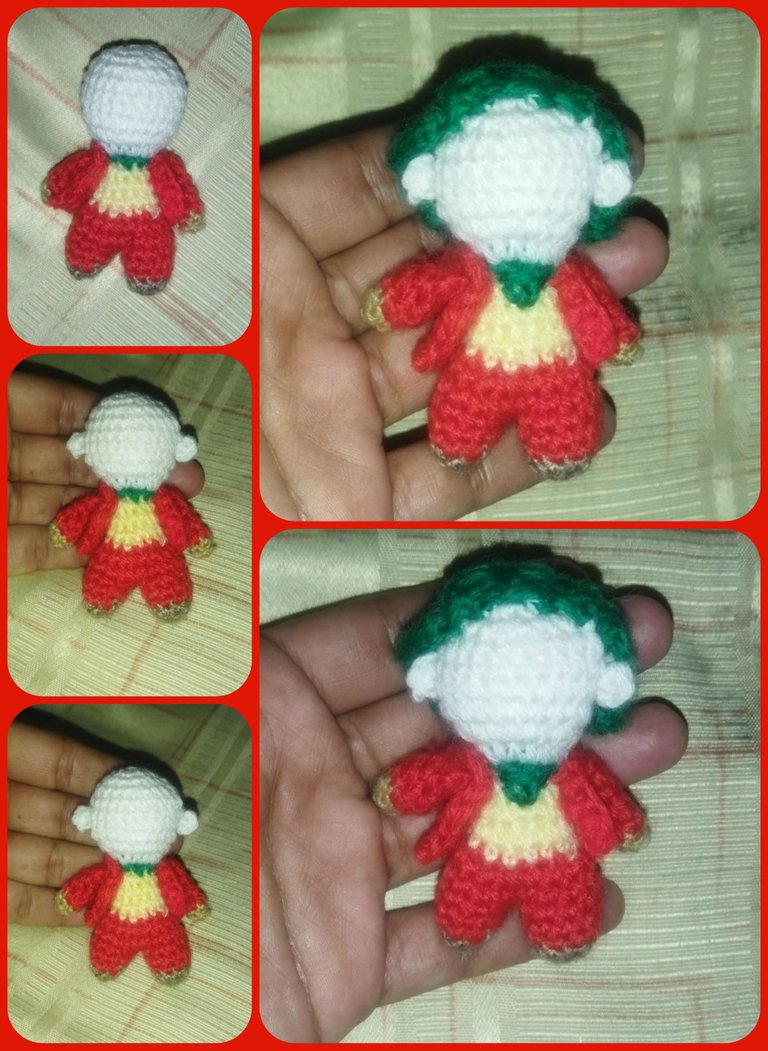
Hola hola qué tal queridos y apreciados amigos!! Una vez más les comparto un bonito tutorial realizado en crochet con la técnica amigurumi. Hoy les presento un personaje muy bonito y especial para mí deL Comic Batman, se trata de un mini Joker. Este Personaje me encantó, a pesar de lo gracioso y curioso que quedó Y de lo malvado que es en sí el personaje que representa. El Joker o Guasón es la antítesis del personaje principal de Batman, ya que es su archienemigo, pero cuya dualidad, el uno del otro no podría existir, es un personaje con conflictos mentales muy graves y una disociación del espacio tiempo realidad.
Para su elaboración utilicé hilos de algodón en tono marrón, rojo, verde, amarillo, blanco, negro, piel, relleno y hipoalergénico, dos cuencas de color negro, un crochet número 6, aguja lanera y tijera y un poco de color azul en sombra.
Once we have the two pieces of the legs we will proceed to make two chains in the air loosely and we hook the other leg making the stitches on each stitch for two continuous rows, the next row we will start with the decreases making two single crochets, one decrease, the next row we will make the same one single crochet one decrease and the other row we will make one stitch on each stitch. We change to green color by making six single crochets, then we will change to white color by making an increase for each stitch, until we get a total of 12 single crochets, which would be the part of the head, then we make the sequence of one single crochet, one increase, then we make two single crochets, one increase, then we make two single crochet stitches one increase and we make five additional rows of one stitch on each stitch to give the height to the head, then we are going to make the decreases, starting with two single crochets one decrease, then one single crochet one decrease and the last row of all decreases and we fill and complete the closing with the help of the wool needle.
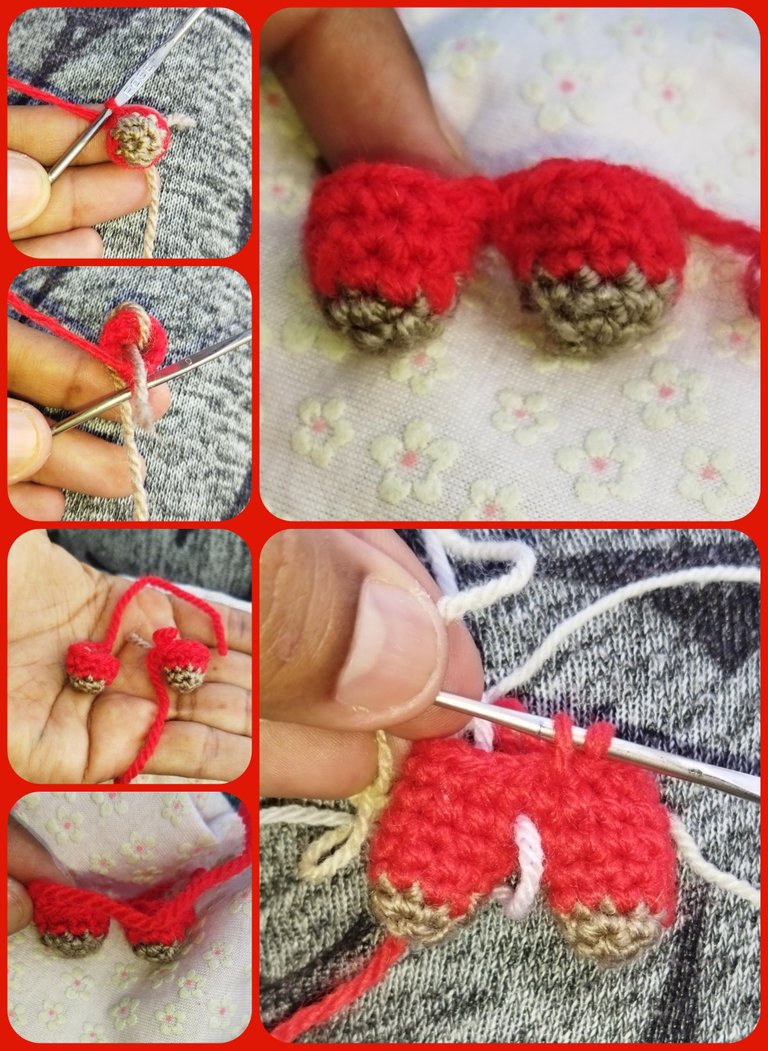
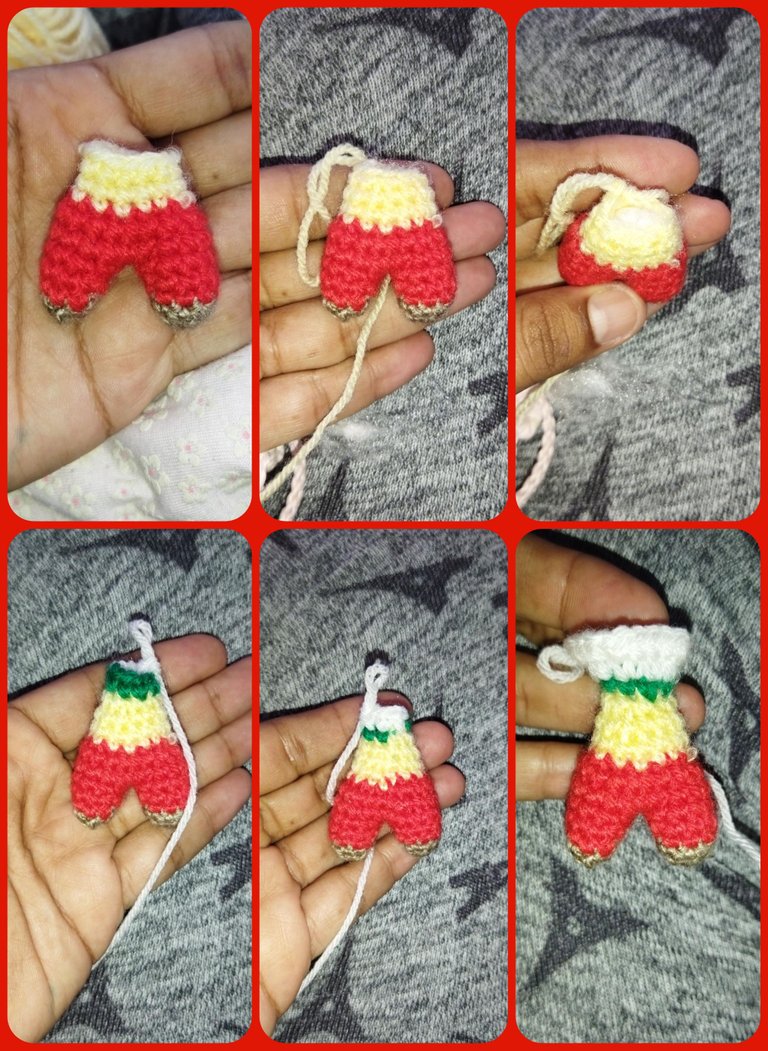
Para iniciar este simpático personaje, vamos a comenzar por la parte de las piernitas, haciendo dos exactamente iguales, comenzamos con un anillo mágico en el tono marrón ya que serían los zapatos del Guasón, realizando un anillo mágico de 6 puntos bajos y repitiendo la misma cantidad para la segunda vuelta, la tercera vuelta vamos a cambiar a hilo rojo y realizamos cuatro vueltas iguales de los mismos seis puntos bajos. Una vez que tenemos las dos piezas de las piernas vamos a proceder a realizar dos cadenas al aire de manera suelta y enganchamos a la otra piernita realizando los puntos sobre cada punto por dos vueltas continuas, la próxima vuelta vamos a comenzar con las disminuciones realizando dos puntos bajos, una disminución, la próxima vuelta realizamos igual un punto bajo una disminución y la otra vuelta realizamos un punto sobre cada punto. Cambiamos al color verde realizando seis puntos bajos, luego vamos a cambiar al tono blanco realizando un aumento por cada punto, Hasta obtener un total de 12 puntos bajos, que sería ya la parte de la cabeza,luego realizamos la secuencia de un punto bajo, Un aumento, luego realizamos dos puntos bajos Un aumento y realizamos cinco vueltas adicionales de un punto sobre cada punto para darle la altura a la cabeza, luego vamos a realizar las disminuciones, comenzando con dos puntos bajos una disminución, luego un punto bajo una disminución y la última vuelta de todas disminuciones y rellenamos y completamos el cierre con la ayuda de la aguja lanera.

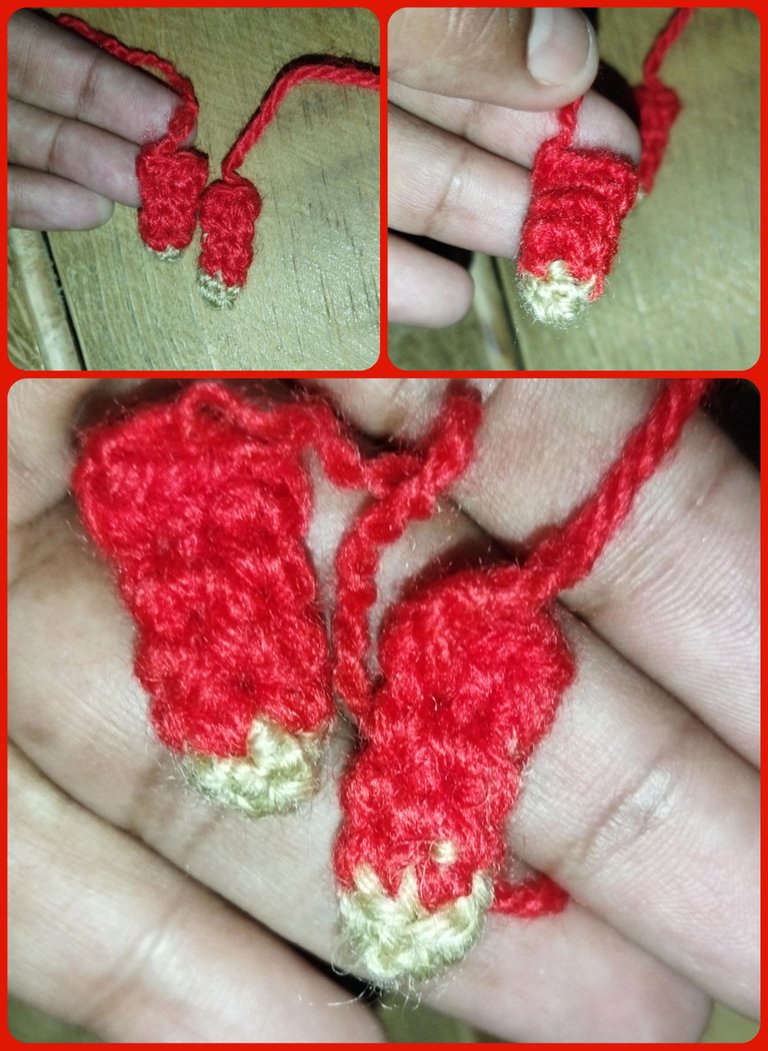
Para la parte de los bracitos vamos a utilizar el color hilo piel realizando un anillo mágico de 6 puntos bajos por dos vueltas iguales, Luego cambiamos al tono rojo que sería la parte de la chaqueta y realizamos cuatro vueltas adicionales de los mismos seis puntos bajos no hay necesidad de rellenar ya que el hilo es un poco grueso y vamos a coser con tres puntos deslizados en el borde de cada brazo y tenemos que realizar dos piezas exactamente iguales.
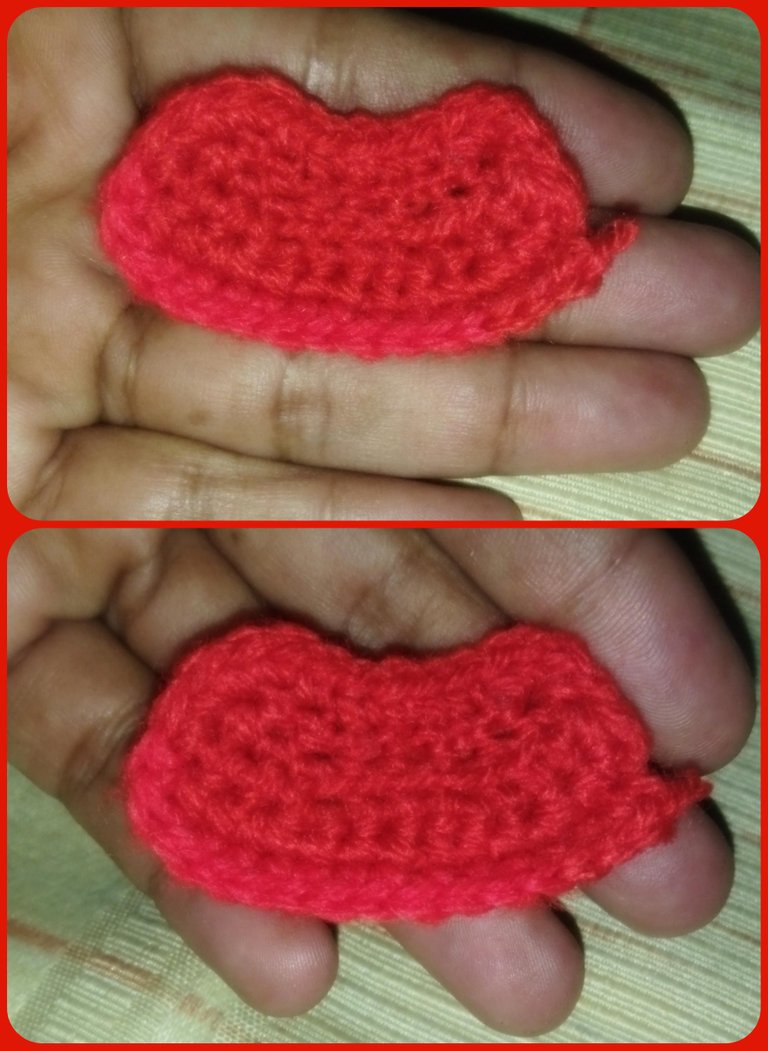
Para la parte de atrás de la chaqueta vamos a realizar una cadena de 18 puntos y dejamos dos puntos bajos y en el próximo punto bajo, realizamos un punto en cada. La próxima vuelta realizamos un punto al aire hacemos una disminución un punto en cada punto y una disminución en el otro extremo realizamos otra cadena al aire y volvemos a repetir la misma operación por dos vueltas adicionales al culminarla vamos a hacer un punto deslizado por todo el borde de la chaquetita.
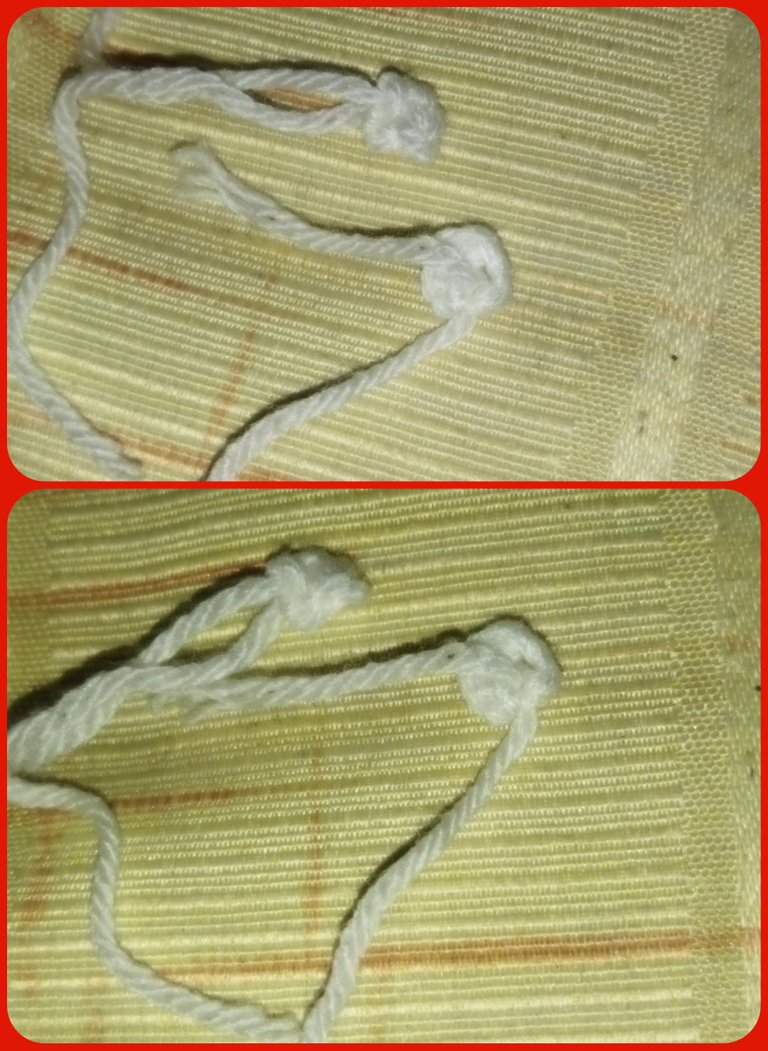
Para las orejas vamos a hacer simplemente un anillo mágico en color blanco y realizamos tres puntos bajos cerramos y dejamos hebra larga para poder coser.
Para la parte del cabello vamos a utilizar hilo verde y realizamos 12 cadenas, dejando tres cadenas sueltas y nos enganchamos en la próxima realizando medios puntos altos por cada punto, Luego realizamos 12 cadenas nuevamente y repetimos la misma operación por tres mechones realizando dos piezas exactamente iguales y para la pieza central del cabello realizamos un mechón bien largo de 18 puntos bajos, dejamos dos puntos bajos y hacemos puntos medios altos por todo el borde realizando tres mechones iguales.

Ya teniendo todas las piezas listas solo nos quedaría ensamblar a nuestro pequeño Joker, vamos a comenzar por la parte de la chaquetita Y los brazos en ambos extremos, una vez que pegamos bien con el hilo vamos a colocarle al frente con hilo verde abordarle la parte frontal de la camisa en tono verde.
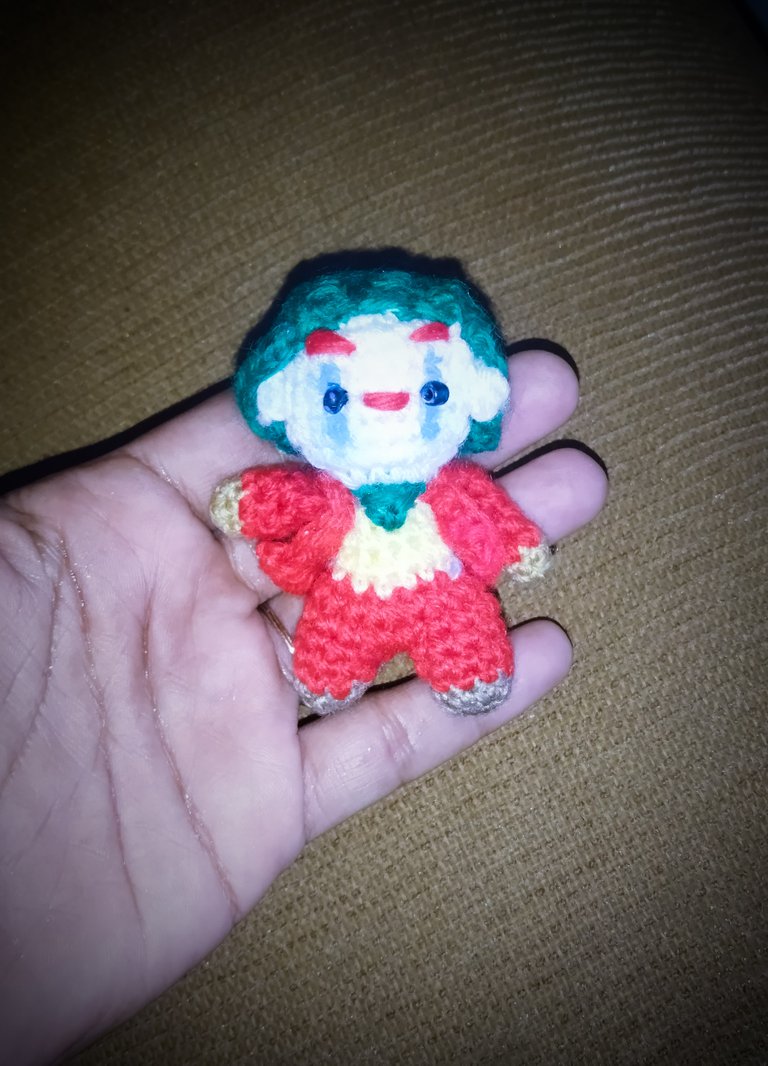
Luego procedemos a colocarle su cabello y las orejitas en ambos lados, luego le colocamos los ojitos y le delineamos las cejas y la nariz en color rojo característico del personaje payaso y como elemento decorativo final con sombra azul vamos a realizar el borde o las líneas que tiene en ambos ojos, que le dan ese toque macabro a este malvado personaje.
Y de esta manera tuve culmina do a este simpático y terrorífico personaje del guasón elaborado en crochet el cual sirve para realizar un sexo muy bonito y personal a una persona muy especial que sea fan de esta temática simplemente para colocarlo en un colgante como un llavero qué según estoy será del agrado de muchas personas.
Por mi parte me despido hasta una nueva oportunidad, agradezco toda tu atención y el apoyo brindado en mi post y próximamente nos volveremos a encontrar Dios mediante a través de esta maravillosa comunidad hasta la próxima.

Todas las imágenes son de mi propiedad editadas con Photoshop Express para Android y tomadas con telefono Redmi 9T.

Contáctenos para saber más del proyecto a nuestro servidor de Discord.
Si deseas delegar HP al proyecto: Delegue 5 HP - Delegue 10 HP - Delegue 20 HP - Delegue 30 HP - Delegue 50 HP - Delegue 100 HP.
Gracias @hive-134572 gracias por su apoyo saludos ☺️😌
Gracias @rutablockchain 😁😁
Si quieres formar parte de nuestro trail de curación ingresa a HIVEVOTE, haciendo clic en la imagen del capybara aristocratico. Capybaraexchange tu casa de cambio, rapida, confiable y segura
Gracias por su apoyo @capybaraexchange son muy amables saludos!!😚😚
Admiro tu trabajo, una miniatura pero muy linda!
Nunca he tenido la oportunidad de realizar figuras tejidas, pero creo que un dia de estos lo haré a ver que tal queda!
Saludos y gracias por compartir.