Efecto Cyberpunk a Nohelia (Paso a paso) 📷 Cyberpunk effect to Nohelia (Step by step)
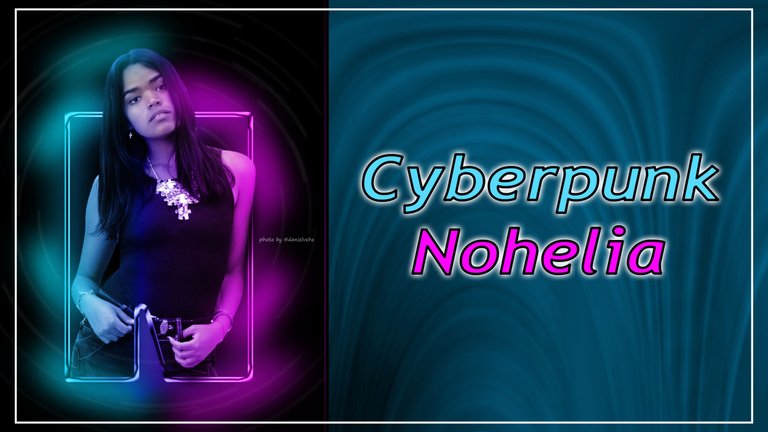
Le estoy agarrando el truco a este efecto que tanto gusta. Se pueden hacer variaciones como la que hice esta vez con Nohelia. Aparte de eso hoy les traigo una forma para realizar la letra, sin tener que crear un trazado que nos puede quitar tiempo.
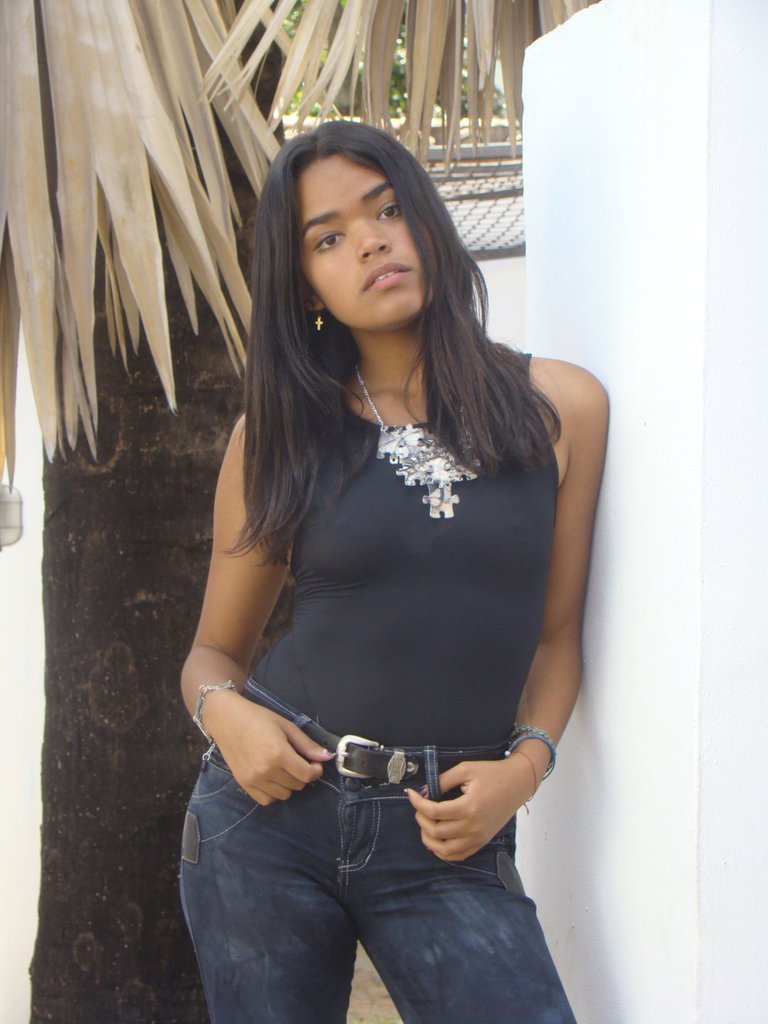
La foto original pertenece a una sesión fotográfica que le hice hace unos años; siendo una de mis primeras sesión de retratos a modelos.
I'm getting the hang of this effect that I like so much. You can do variations like the one I did this time with Nohelia. Apart from that, today I bring you a way to make the lettering, without having to create a layout that can take time.
The original photo belongs to a photo session I did a few years ago; being one of my first portrait sessions with models.
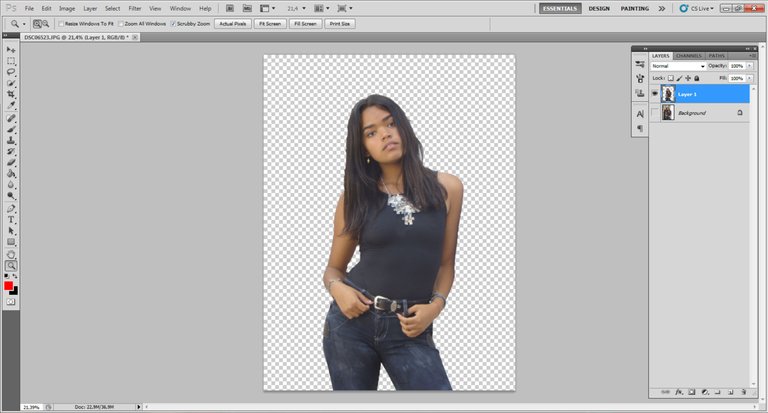
Para comenzar, primero retiramos el fondo de manera que quede sola la modelo en una capa con fondo transparente. Luego en una capa nueva, la rellenamos de negro para tener la base del fondo.
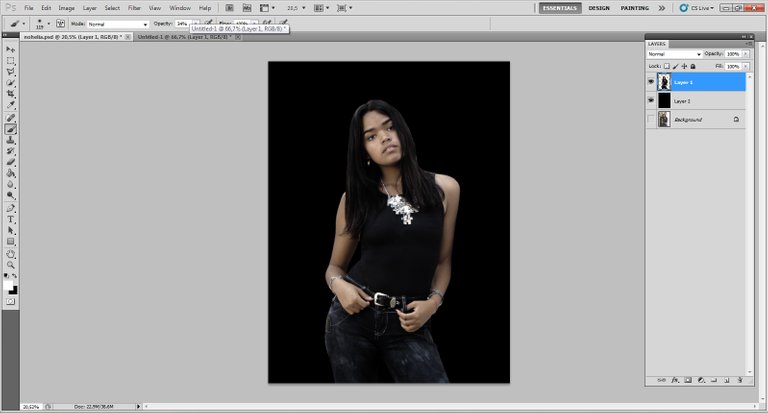
También le realizamos los ajustes de color. Creamos un mayor contraste, sobre todo elevamos los negros. Desaturamos un poco para que pierda algo de color la piel.
To begin, first we remove the background so that the model is left alone in a layer with transparent background. Then in a new layer, we fill it with black to have the base of the background.
We also make the color adjustments. We create a higher contrast, especially we raise the blacks. We desaturate a little to lose some color in the skin.
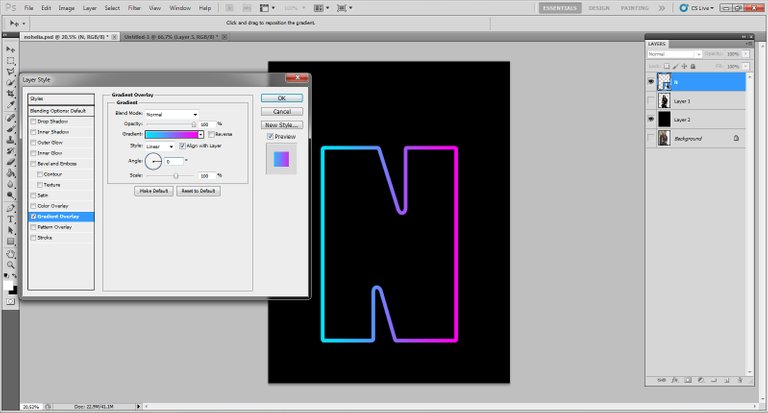
Aquí comienza el cambio y ya se darán cuenta. Creamos la letra de la inicial y el relleno lo ponemos al 0% y en fusión le ponemos un borde en posición interna y lo suficientemente grueso para que nos sirva para el efecto neón.
Here begins the change and you will notice. We create the letter of the initial and the fill we put it at 0% and in fusion we put a border in internal position and thick enough to serve us for the neon effect.

Esta capa que contiene la letra N, la vamos a convertir en objeto inteligente, de esa manera no tendremos que realizar el contorno.
Aplicamos un estilo de capa: Degradado y lo ponemos en degradado sólido. Los colores serán los mismos que venimos utilizando en post anteriores; cian y magenta. Recuerden colocar el ángulo en 0.
This layer containing the letter N, we are going to convert it into a smart object, that way we won't have to make the outline.
We apply a layer style: Gradient and set it to solid gradient. The colors will be the same that we have been using in previous posts; cyan and magenta. Remember to set the angle to 0.
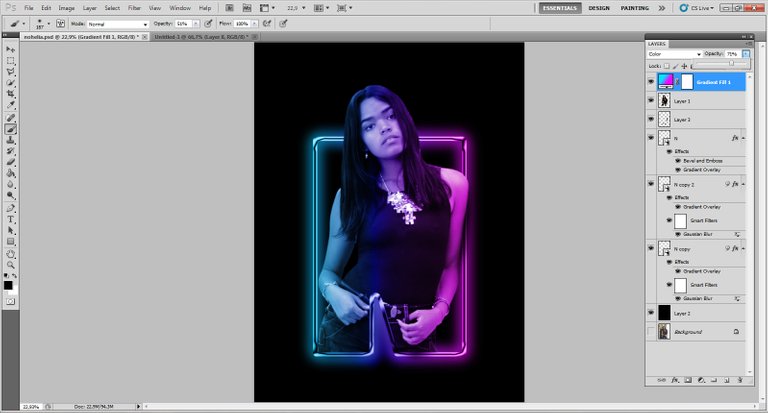
Esta capa la vamos a duplicar y aplicarle un efecto de desenfoque gausiano. El valor se coloca a gusto. Despues se duplica la capa con el desenfoque para ampliar el rango de la luz de neón.
We will duplicate this layer and apply a Gaussian blur effect to it. The value is set as desired. Then duplicate the layer with the blur to extend the range of the neon light.

Como pueden observar le hice una variación con respecto a las versiones anteriores. Apliqué una fusión de relieve. Particularmente me encanta esta versión, pienso que parece más real el efecto neón.
As you can see I made a variation with respect to the previous versions. I applied a relief fusion. I particularly love this version, I think it looks more real the neon effect.

El siguiente paso es eliminar las partes de la modelo que sobresalen de la N por la parte inferior; para dar la impresión que ella se encuentra dentro de la letra.
The next step is to remove the parts of the model that protrude from the N at the bottom; to give the impression that she is inside the letter.

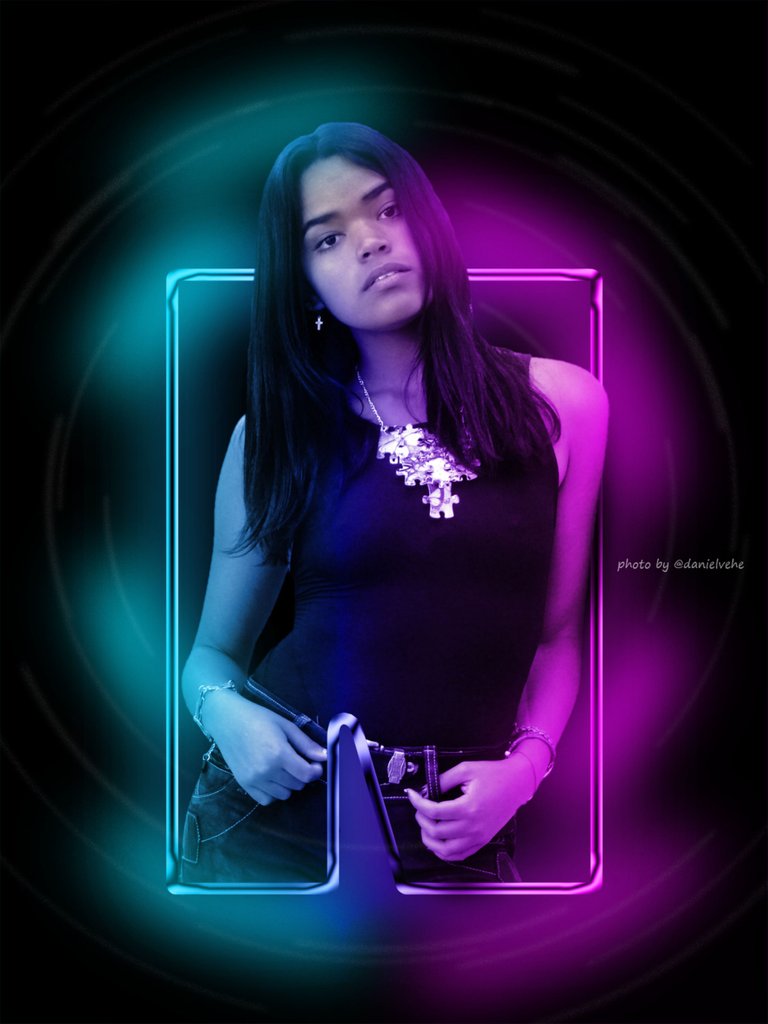
Ya en este nivel me gusta el resultado, incluso lo dejaría así, solo añadiendo algunos destellos leves. Parece que estuviera saliendo de la N. También la pose original de la foto ayuda mucho.
Already at this level I like the result, I would even leave it like this, just adding some slight highlights. It looks like it's coming out of the N. Also the original pose of the photo helps a lot.

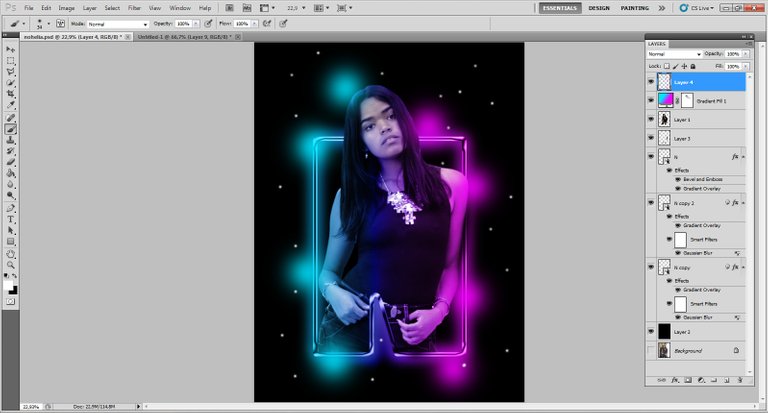
Ahora aplicamos las luces a la modelos. Igual que en la versión anterior, creamos un ajuste de capa de degradado de cian a magenta y esa capa la colocamos de modo "color"
En la máscara de capa eliminamos parte del degradado que quedó sobre la cara y le bajamos un poco la opacidad.
Now we apply the lights to the models. As in the previous version, we create a gradient layer adjustment from cyan to magenta and place this layer in "color" mode.
In the layer mask we remove part of the gradient that remained on the face and we lower the opacity a little.
Para finalizar, creamos una nueva capa donde pintaremos círulos de los colores usados y varios puntos blancos. Esto es para crear un fondo que le de energía. Para eso solo le aplicamos un efecto de desenfoque radial y listo...
Finally, we create a new layer where we will paint circles of the colors used and several white dots. This is to create a background to give it energy. For that we just apply a radial blur effect and that's it...
Listo. Este es el resultado final. Grabé los pasos para crear un video en Tik Tok. Mañana lo edito y se los muestro en la próxima edición.
Done. This is the final result. I recorded the steps to create a video in Tik Tok. Tomorrow I will edit it and show it to you in the next edition.
It's a beautiful model, and the photos are inspiring.
Thank you very much. I wish I had taken more pictures