Fun paper chickens - Step by step [ENG-ESP]
Greetings friends of the crafts, we continue to put hands to work and any figure that comes to mind I try to recreate it through the technique of origami and for several weeks I have managed to share very good work and are things that I like to do and I always try to increase the difficulty and see how good I am in this art. This time we had to make a bird that everyone knows, it is used for many things especially for human food, therefore we will recreate what would be a paper chicken, which will be a challenge and we will find easy folding as others that requires a lot of patience, but I'm sure you will be able to achieve many paper hens.
Saludos amigos de las manualidades, seguimos poniendo manos a la obra y cualquiera figura que se me ocurra trato de poder recrearla mediante la técnica del origami y durante varias semanas he logrado compartir muy buenos trabajos y son cosas que me gusta hacer y siempre trato de aumentar esa dificultad y ver qué tan bueno soy en este arte. Esta vez nos tocó hacer un ave que todo el mundo conoce, sirve para muchas cosas en especial para la alimentación del ser humano, por ende vamos a recrear lo que sería una gallina de papel, la cual será todo un desafío y nos vamos a encontrar con doblez fácil como otros que requiere de mucha paciencia, pero estoy seguro de que ustedes podrán lograr armar muchas gallinas de papel.
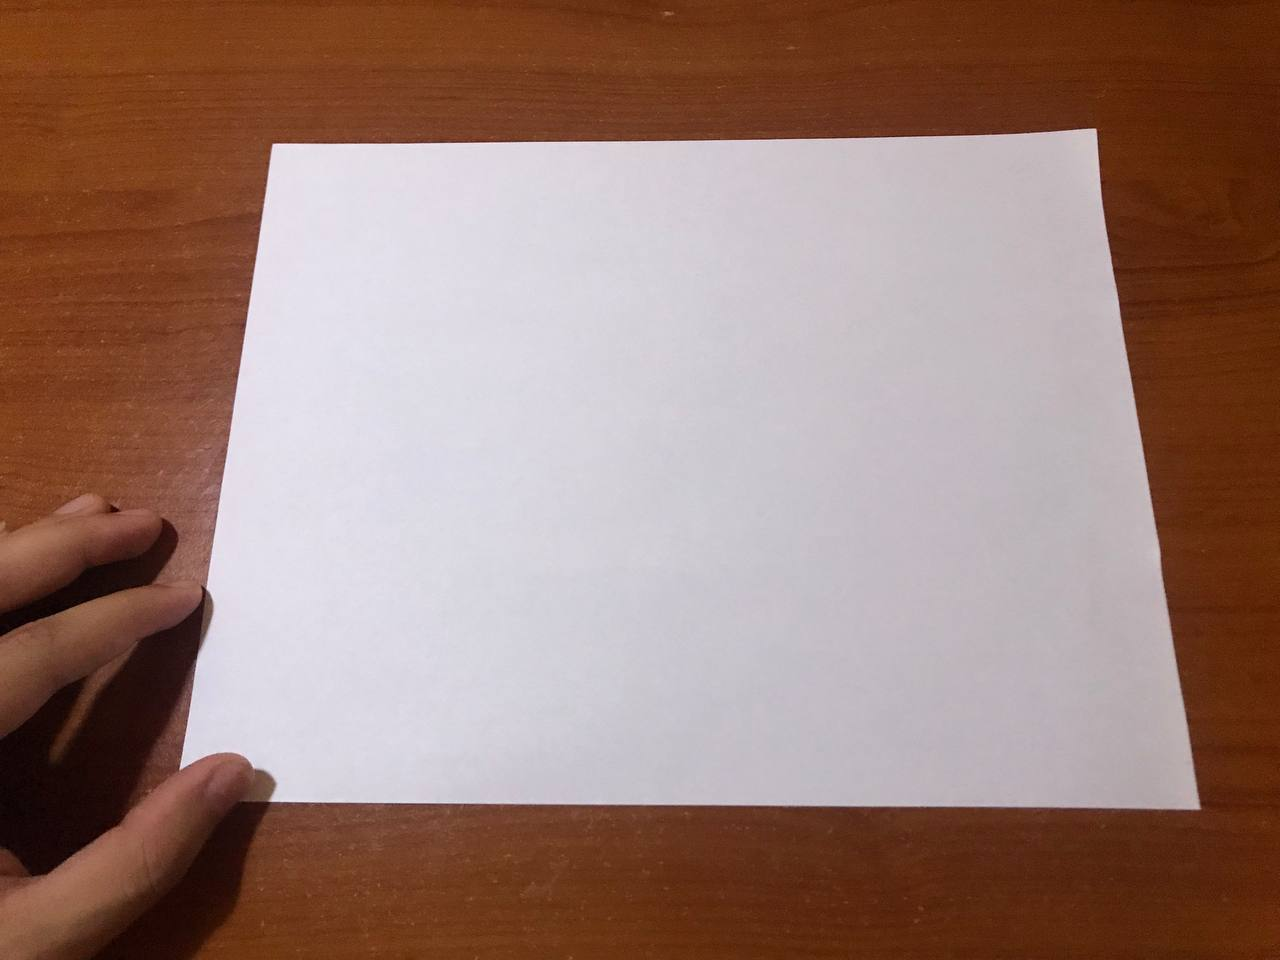
To begin to make this new origami the first thing we have to do is to take a sheet of 15*15 cm or this at home a sheet with a square shape to make it much easier to handle and this origami of hen is very well, no doubt you have to make the doubles very well, respect each step and when you realize you will have ready this figure of paper.
Para comenzar a realizar este nuevo origami lo primero que tenemos que hacer es tomar una hoja de 15*15 cm o este en casa una hoja con la forma cuadrada para que sea mucho más fácil de manejarla y este origami de gallina nos quede muy bien, sin duda se tienen que hacer los dobles muy bien, respetar cada paso y cuando te das cuenta tendrás listo esta figura de papel.
|
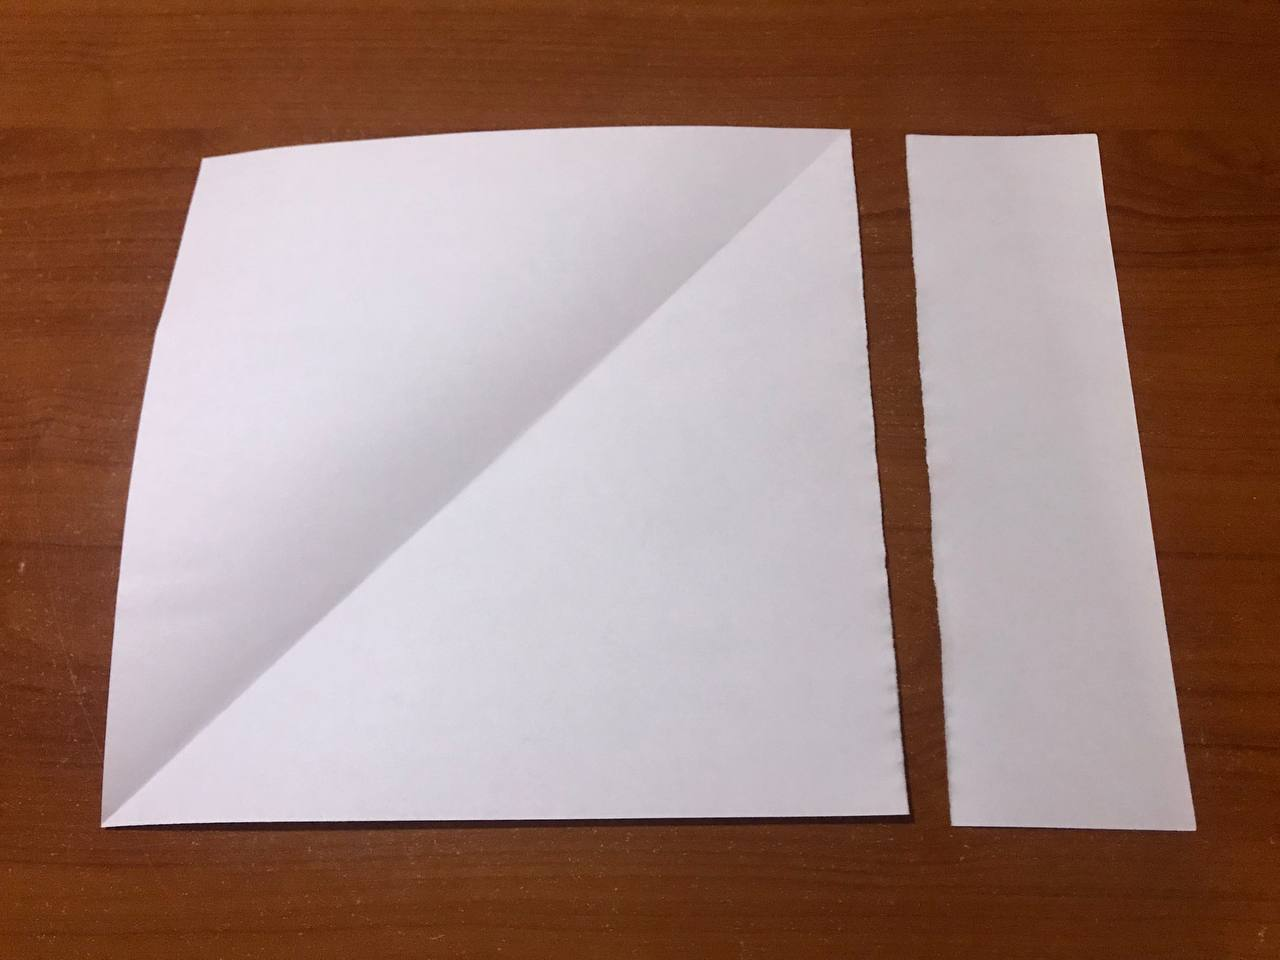 |
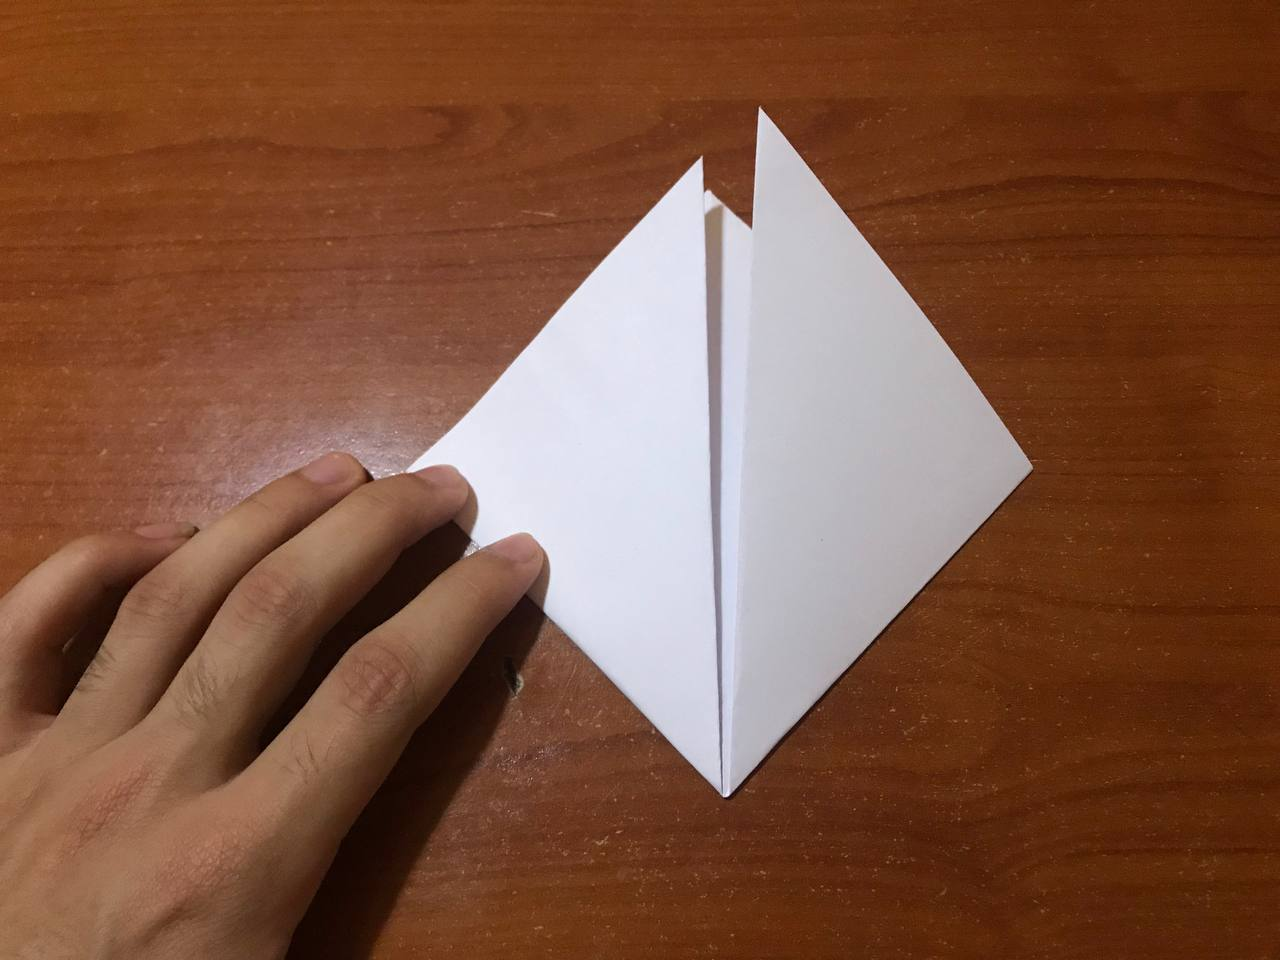
Next, we are going to fold along the two diagonals of the sheet, very carefully with the idea of being able to mark and flatten very well. Right there we are going to take the corners towards the top of the sheet, as shown in the photos, where they have to match perfectly and it is done on both sides of the sheet and we will have a kind of rhombus.
Seguidamente, vamos a doblar por las dos diagonales de la hoja, con mucho cuidado con la idea de poder marcar y aplastamos muy bien. Allí mismo vamos a llevar las esquina hacia la parte superior de la hoja, como se nota en las fotos, donde tienen que coincidir perfectamente y se hace en las dos caras de la hoja y nos quedara especie de un rombo.

|
|
|
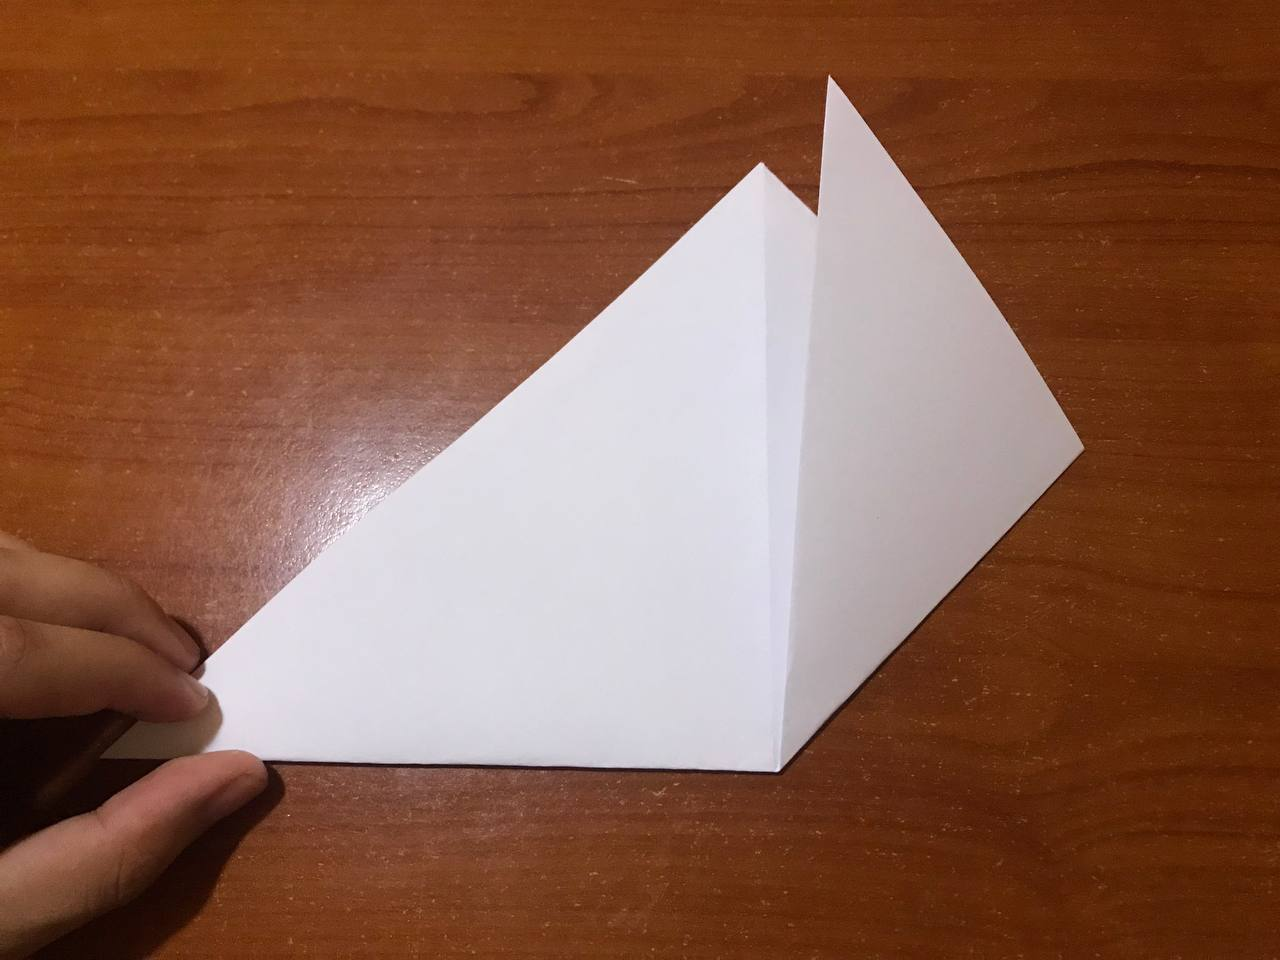
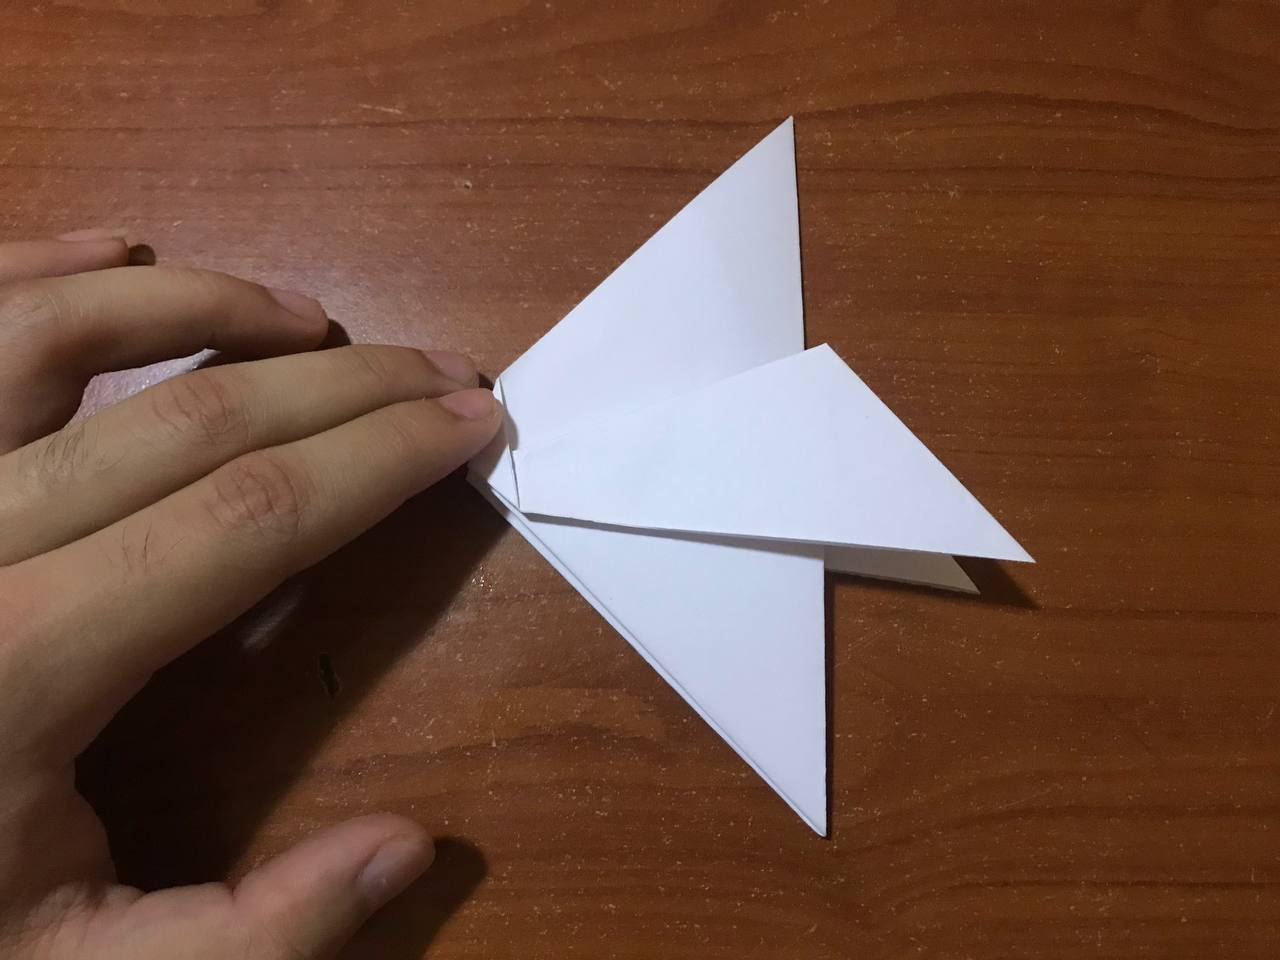
Now we are going to fold the paper in half and we realize that the paper will be divided into three parts, which will serve us to assemble and begin to fold each of the parts of the paper hen. We are going to take one of the corners of our paper and we are going to make a small double about one centimeter approximately with the idea of marking a line, then take one side of the paper and fold a little outward as shown in the photos and that double that we did in the previous step will serve to make the fold and it is very well all the origami, do it on both sides of the sheet.
Ahora vamos a doblar el papel por la mitad y nos damos cuenta de que el papel estará dividido en tres partes, la cual nos servirá para armar y comenzar a doblar cada una de las partes de la gallina de papel. Vamos a tomar una de las esquinas de nuestro papel y vamos a hacer un pequeño dobles como de un centímetro aproximadamente con la idea de marcar una línea, para luego tomar una cara del papel y doblar un poco hacia afuera como se nota en las fotos y ese dobles que hicimos en el paso anterior nos servirá para hacer el pliegue y quede muy bien todo el origami, hacerlo en las dos caras de la hoja.

|
 |
|
 |
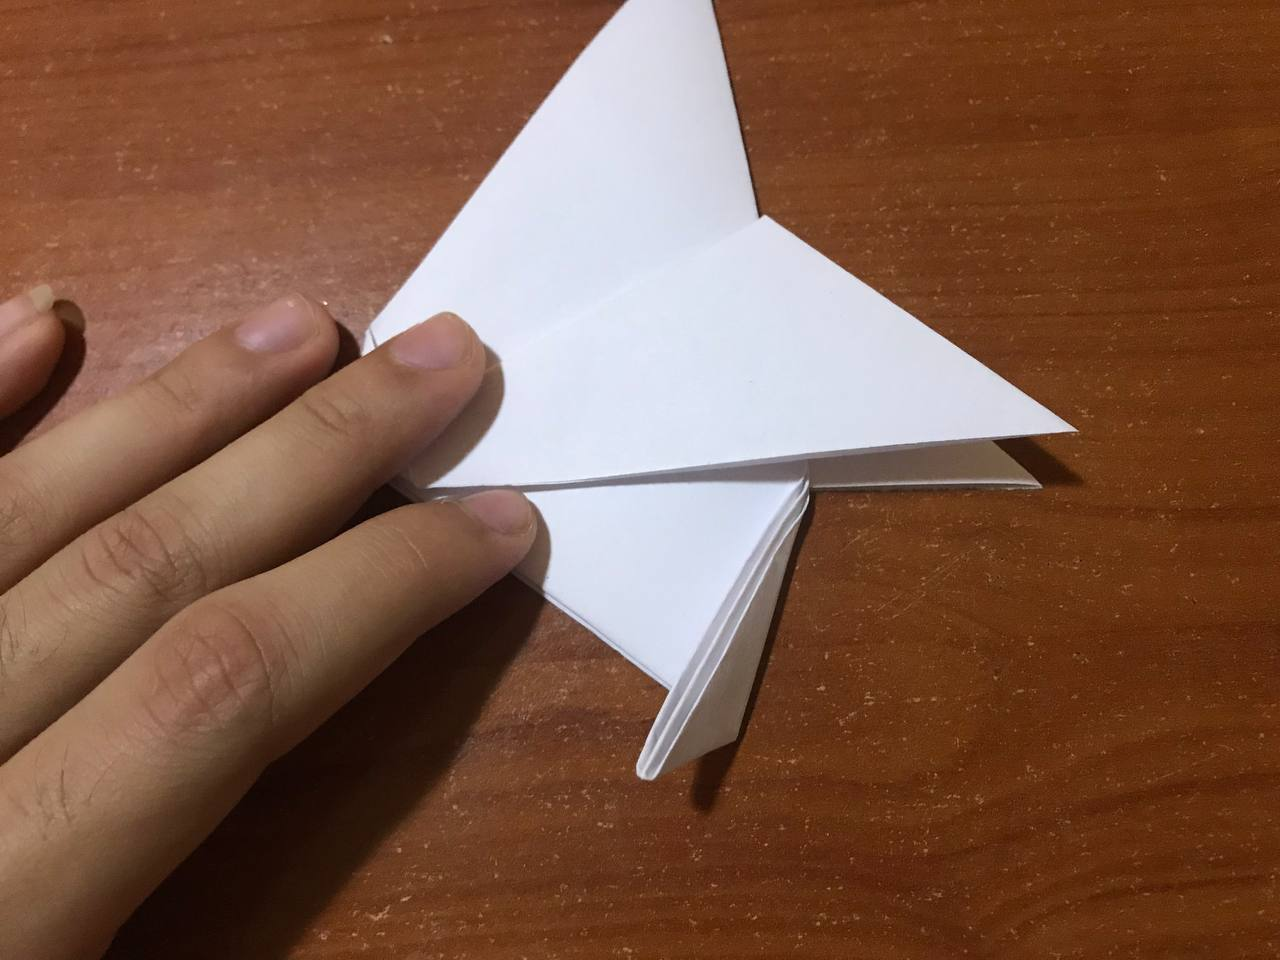
To make the legs of this hen we will take the bottom of our sheet and we will make a small fold diagonally with the idea of being able to mark a line, then we open and we will make a fold inward very carefully so as not to disassemble and thus we will have ready the legs and here you have to be careful with the size and where we are going to fold, so as to give the perfect stability.
Para hacer las patas de esta gallina vamos a tomar la parte inferior de nuestra hoja y vamos a realizar un pequeño doblez en forma diagonal con la idea de poder marcar una línea, luego abrimos y vamos a realizar un pliegue hacia adentro con mucho cuidado para que no se desarme y de esa manera vamos a tener lista las patas y aquí se tiene que tener cuidado con el tamaño y por donde vamos a doblar, para así darle la estabilidad perfecta.
|
 |
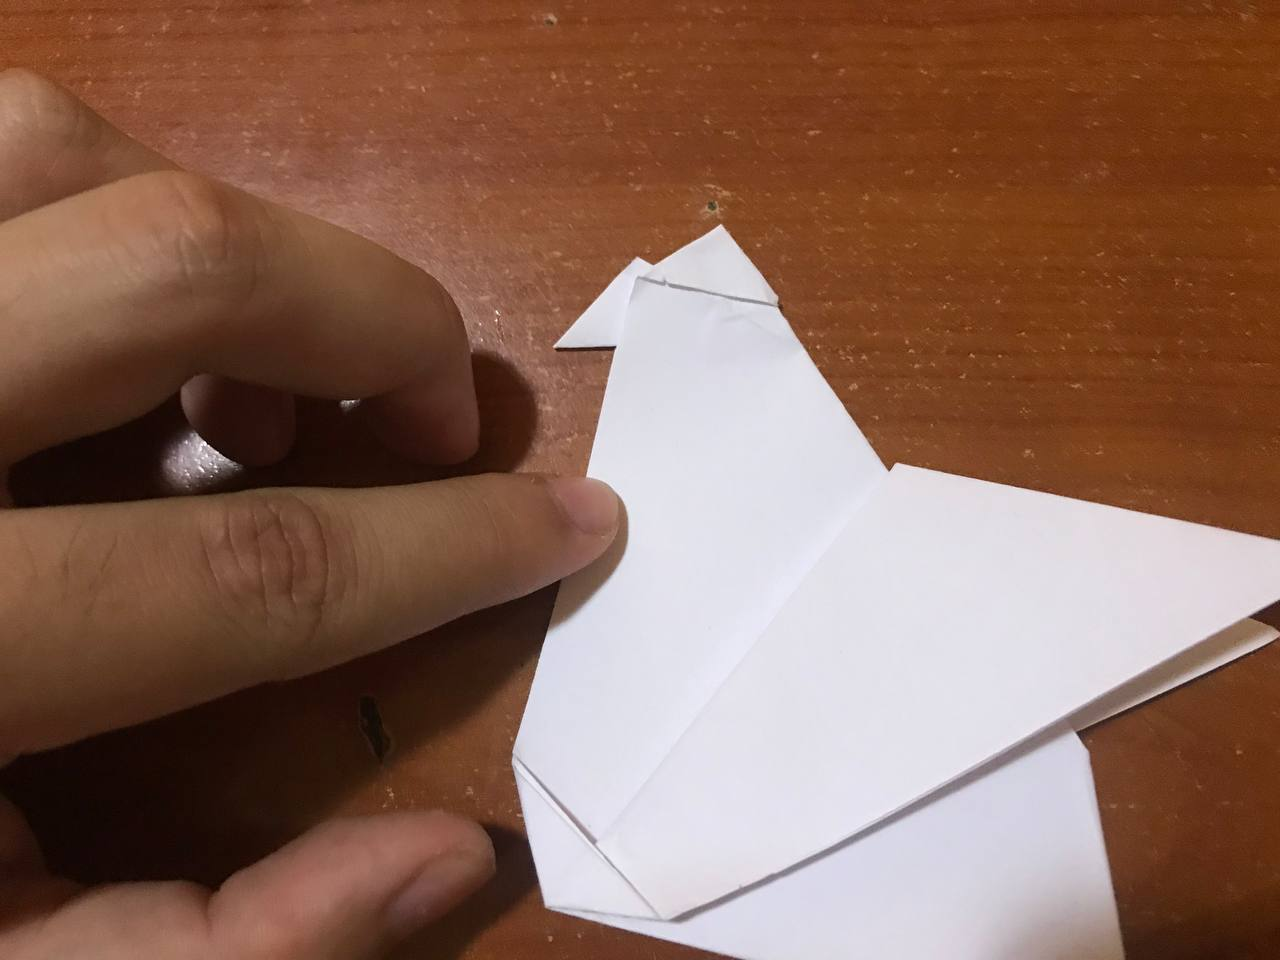
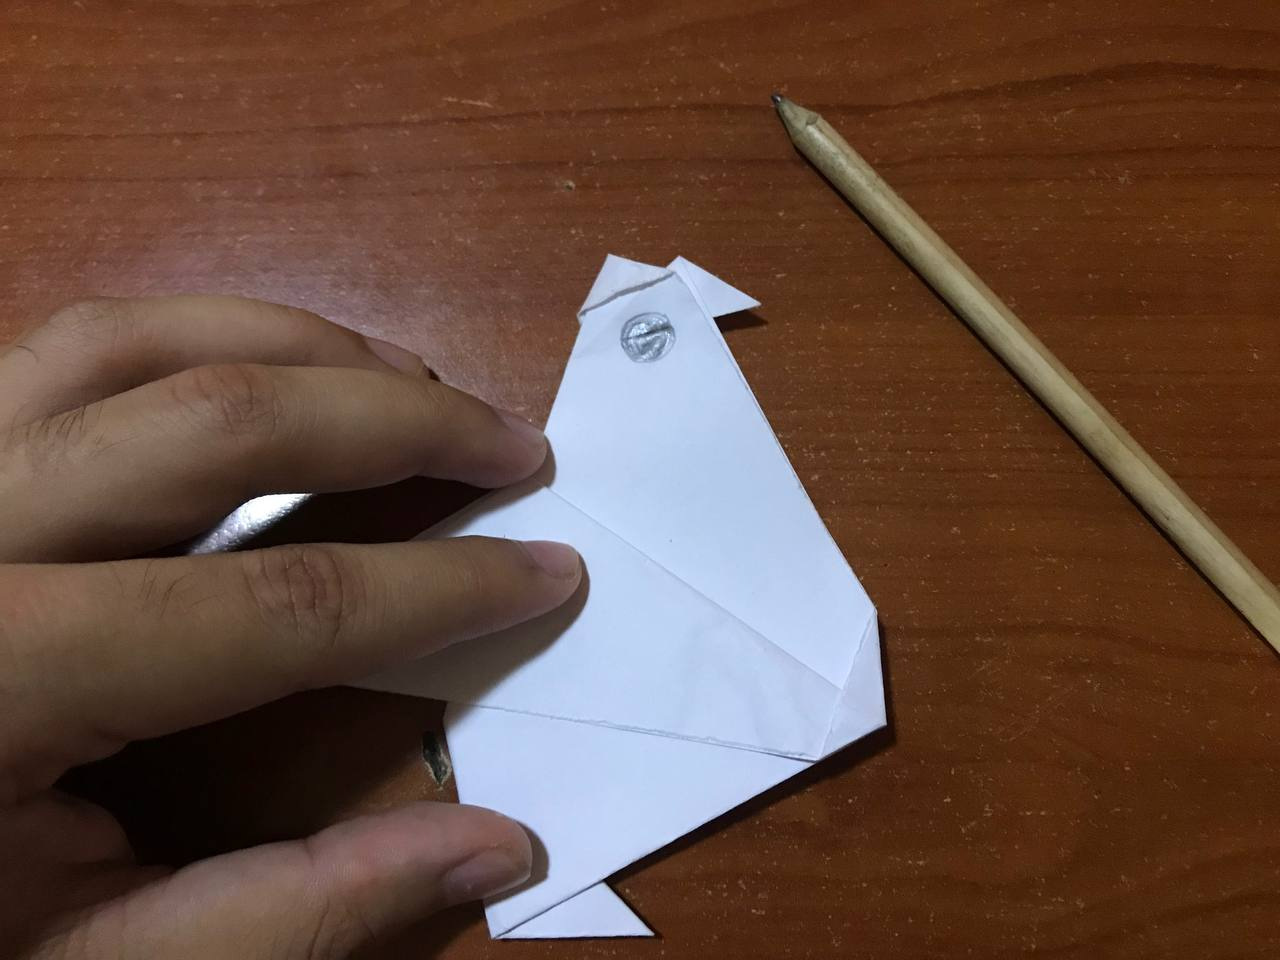
To make the head and the beak of the hen now we are going to take the other part of the sheet, in this case it would be the upper part of the sheet, making a small fold of the diagonal shape, to mark, we open and we are only going to take one of the sides of the sheet so that the beak of the hen protrudes. With the other side we are going to dollar it backwards very carefully so that it does not break and does not disassemble the origami.
Para hacer la cabeza y el pico de la gallina ahora vamos a tomar la otra parte de la hoja, en este caso sería la parte superior de la hoja, haciendo un pequeño dobles de la forma diagonal, para marcar, abrimos y solo vamos a tomar una de las caras de la hoja para que así sobresalga el pico de la gallina. Con la otra cara la vamos a dólar hacia atrás con mucho cuidado para que no se rompa y no se desarme el origami.

|

|
|
With the help of a pencil or a black marker we are going to make some details to make the hen look more striking, in this case it would be the eye. With that we finish what would be this paper origiami.
Con la ayuda de un lápiz o un marcador negro vamos a realizar algunos detalles para que se vea más llamativa la gallina en este caso sería el ojo. Con eso damos por terminado lo que sería este origiami de papel.

Resultado // Result
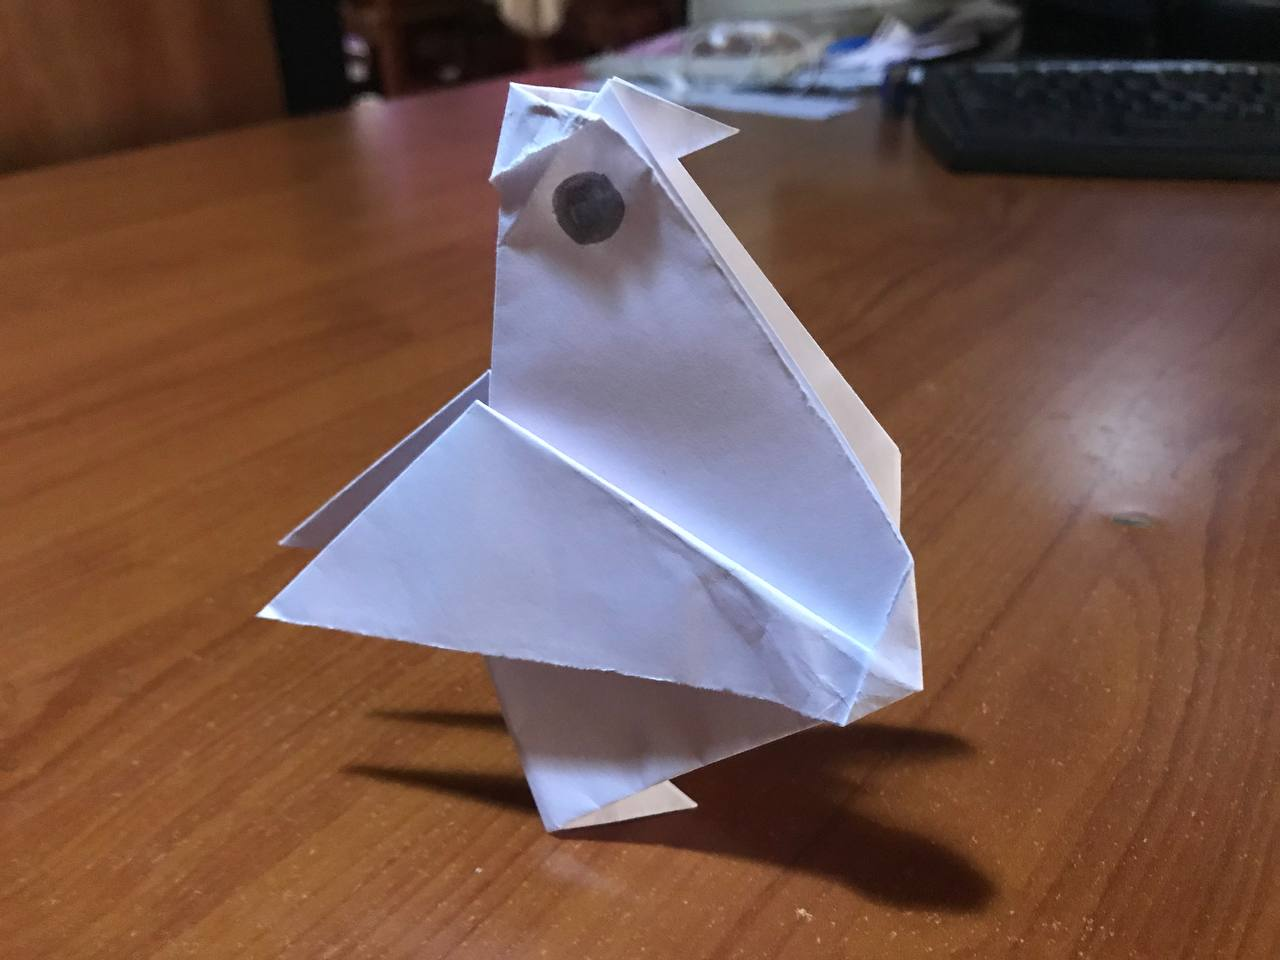
A very simple origami, with very few steps and for being the first time that I make it, it was practical to be able to control the paper and achieve a very nice and attractive result. So this paper chicken will be useful for many things. You can vary the size and color of the sheet, and thus achieve a great collection, where it is perfect to play, give it as a gift and many other things. So see you next time with another origami.
Un origami muy sencillo, con muy pocos pasos y para ser la primera vez que lo realizo se me hizo práctico poder controlar el papel y lograr un resultado muy bonito y atractivo. Así que esta gallina de papel te servirá para muchas cosas. Puedes variar el tamaño y color de la hoja, y de esa manera lograr una gran colección, donde es perfecto para jugar, regalarlo y muchas otras cosas. Así que nos vemos en la próxima con otro origami.
Fotos tomadas con un Iphone 7 // Photos prises avec un iPhone 7.

Hola amigo como excelente trabajo , como lo dices parece sencillo, aunque la verdad que en ese poco de vuelta termino haciendo otra cosa. Gracias por compartir
Muchas gracias amigo. Tienes que animarte a practicar este arte y poder recrear muchas cosas.
Super adorable te quedó, que bonita la gallinita! Sos artista David!😃
Gracias amiga, un resultado muy bueno. Tienes que intentarlo.
Poco a poco hay mucho tiempo para hacer de todo, tengo otras cosas en mente para este año jajaja gracias David!
Okey, esperemos que se dé todo
Paso a paso, por el momento tengo cosas que resolver, familiares, pero ya se dará todo, tranquilo!
Okey, por aquí estaré.
Yo también jaja
quien invento el origami era un artista sin duda ^^ con unos dobles pueden crear figuras de todo tipo :3
Era todo un profesional y con bastante tiempo para así poder recrear todo eso jajaj.
Es asombroso lo bien que te ha quedado, a mi me gustaria que hicieras un video, un timelapse de como haces estas figuras, para poder apreciar mejor el proceso. La verdad esta manualidad es muy interesante.
Me gusta como la gallina se queda de pie, me parece muy genial como te ha quedado.
Sigue trayéndonos estos origamis, me parecen geniales.
Muchas gracias amigo, tengo que practicar para poder grabar la explicación y que pueda ser muy fácil para que las personas puedan entender.
Estoy seguro que lo vas a lograr hacer bien, eres un joven muy inteligente y preparado para eso.
Que bonita gallina, está genial
Gracias amiga, un resultado muy bueno.
Te quedó genial!! 😊
Interesante ver cuántos doblez necesita el papel. Buen trabajo
!discovery 40
!VSC
@chacald.dcymt has sent VSC to @davidpena21
This post was rewarded with 0.1 VSC to support your work.
Join our photography communityVisual Shots
Check here to view or trade VSC Tokens
Be part of our Curation Trail
@chacald.dcymt ha enviado VSC a @davidpena21
Éste post fue recompensado con 0.1 VSC para apoyar tu trabajo.
Únete a nuestra comunidad de fotografía Visual Shots
Consulte aquí para ver o intercambiar VSC Tokens
Se parte de nuestro Trail de Curación
Muchas gracias amiga, seguimos mejorando y aprendiendo de este gran arte.
😊👍🏽
This post was shared and voted inside the discord by the curators team of discovery-it
Join our Community and follow our Curation Trail
Discovery-it is also a Witness, vote for us here
Delegate to us for passive income. Check our 80% fee-back Program
Muchas gracias por el apoyo, saludos.
hola,señorito saludos cordiales
siempre es un placer disfrutar de tu entretenimiento y habilidad de la hojas.
a mi me gusta siento eso terapéutico.
Muchas gracias amiga, un gran resultado, tienes que animarte a practicarlo.