Anasth Soothsayer // Accessories Quilling in 3D Technique [Eng-Esp]
Hello everyone... ✨
Hello to my dear Hivers and the beloved community of artists #Jewelry, as always very pleased and excited to be here again, showing you my work made with love and especially for you.
Greetings to the Splinterlands community, and everyone who lives there, I'm here to join the Splinterlands Social Media Challenge!
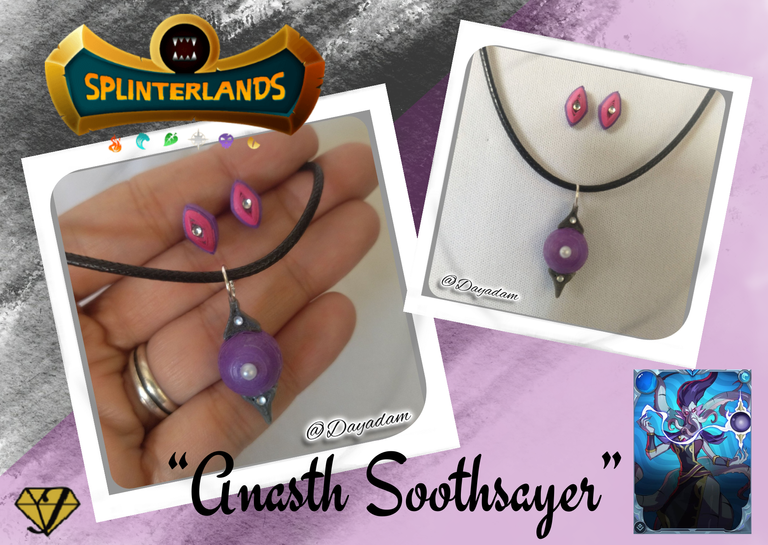
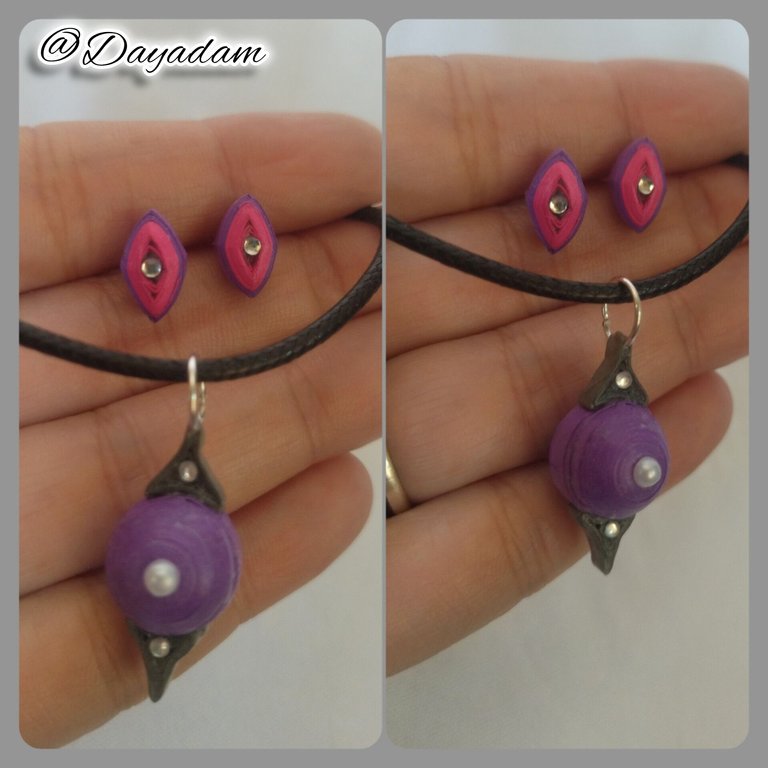
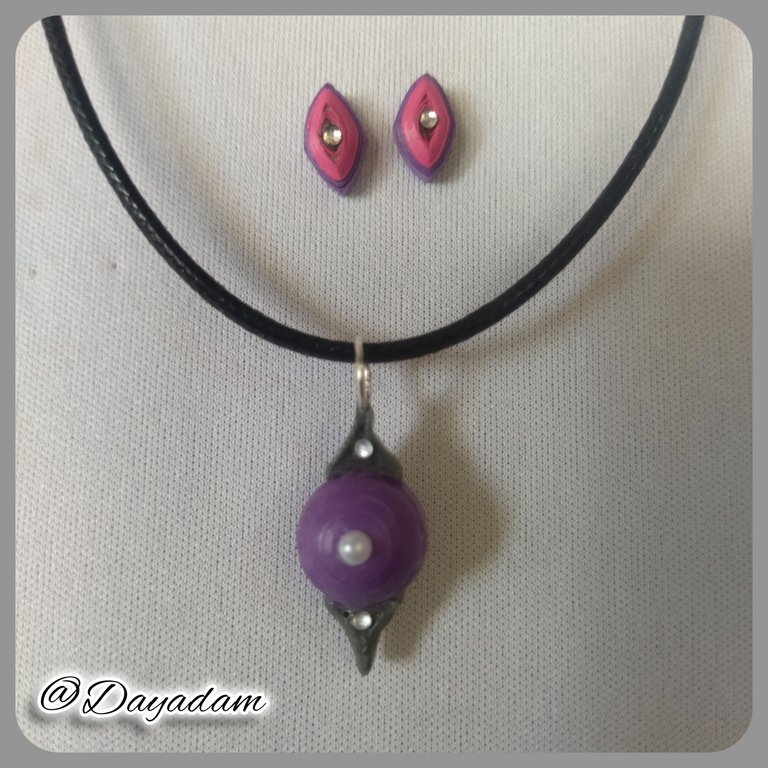
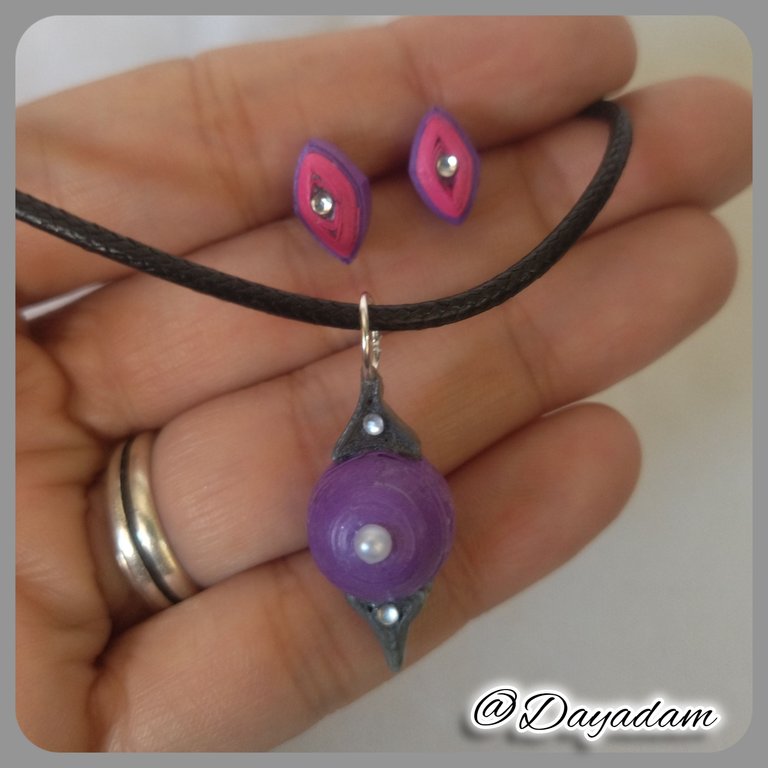
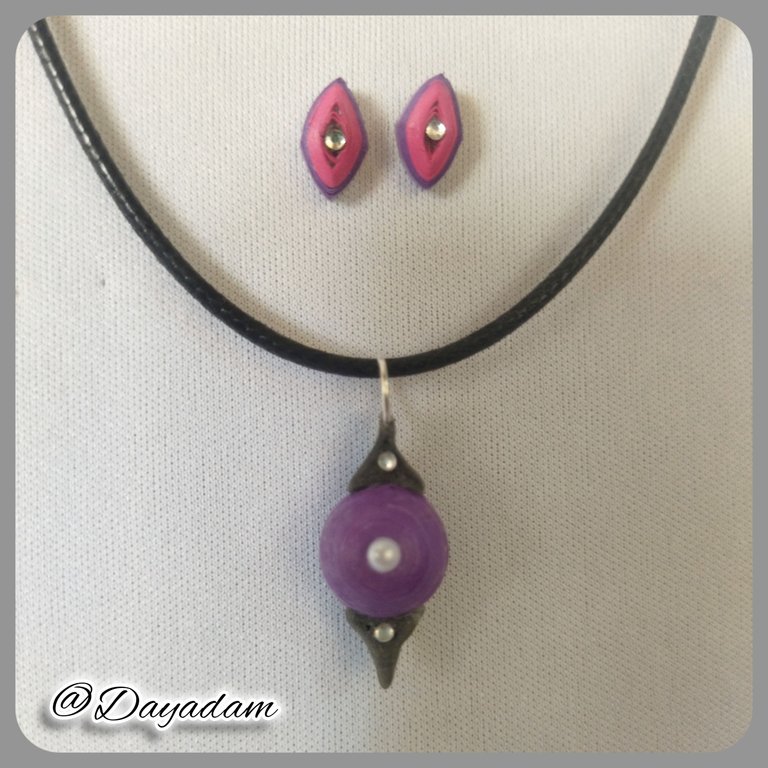
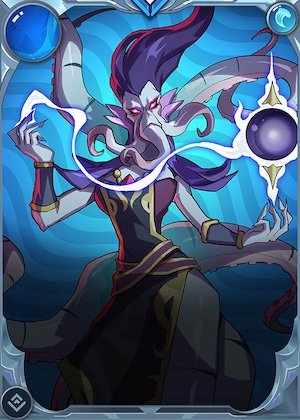
For today I bring you a simple set of 3D accessories, in the quilling technique, of an element of the character of the Rebellion card, "Anasth Soothsayer", it caught my attention and I did not hesitate to materialize it for you.
If you want to know more about the game, I leave you my reference link to enter it and navigate through this wonderful world: https://splinterlands.com?ref=dayadam
Hoping you like my work, without further ado, I leave you with my creative process.
Let's start:😃

Hola a Todos...✨
Hola a mis queridos Hivers y a la querida comunidad de artistas #Jewelry, como siempre muy complacida y emocionada de encontrarme por acá nuevamente, mostrándole mi trabajo hecho con mucho amor y especialmente para ustedes.
Un saludo para la comunidad de Splinterlands, y todos los que hacen vida por allí, estoy por acá para unirme al reto Splinterlands Social Media Challenge!.
Para hoy les traigo un sencillo conjunto de accesorios en 3D, en la técnica de quilling, de un elemento del personaje de la carta de Rebellion, "Anasth Soothsayer", me llamo mucho la atención y no dude en materializarlo para ustedes.
Si quieren saber más con respecto al juego les dejo mi enlace de referencia para que ingresen en él, y naveguen por este maravilloso mundo: https://splinterlands.com?ref=dayadam
Esperando les guste mi trabajo, sin más preámbulos, les dejo mi proceso creativo.
Comencemos:😃

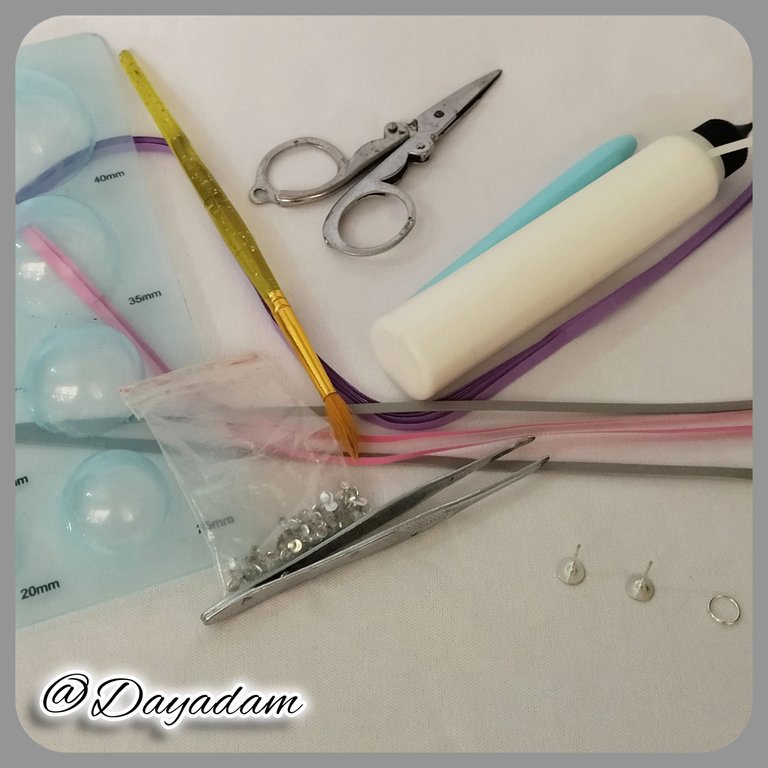
• Cintas de quilling.
• Aguja para quilling.
• Molde para círculos.
• Pega blanca extra fuerte (de carpintería).
• Tijera.
• Pincel.
• Argolla mediana de bisutería.
• Cristales de bisutería.
• Perla media de bisutería.
- Quilling ribbons.
- Quilling needle.
- Mold for circles.
- Extra strong white glue (carpentry glue).
- Scissors.
- Paintbrush.
- Medium size costume jewelry ring.
- Costume jewelry crystals.
- Medium costume jewelry bead.

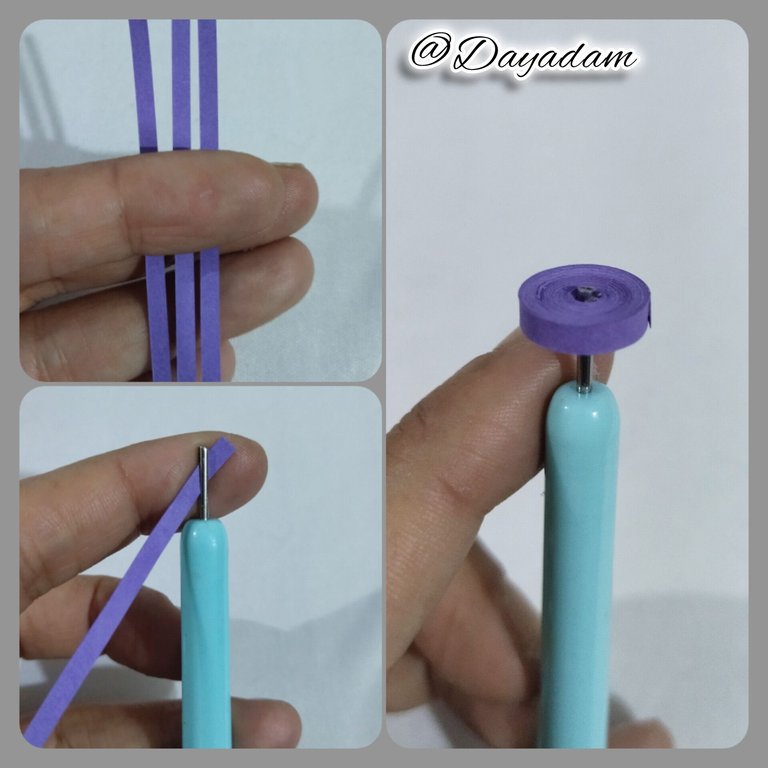
Base of the pendant:
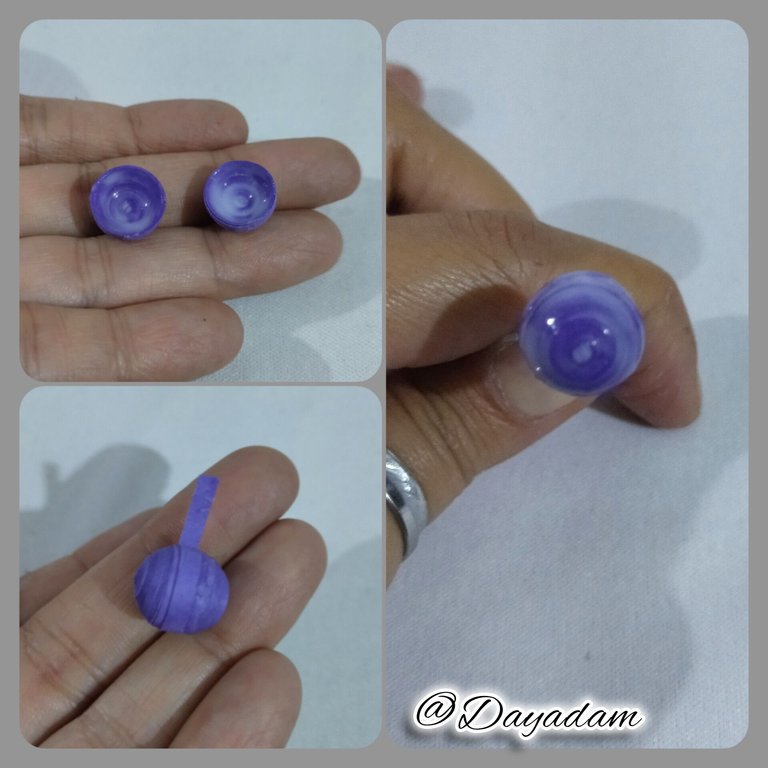
- We start taking purple quilling tape and we will join a strip of 3mm wide x 100cms long, we roll with the quilling needle until we reach the end of the tape, we seal with extra strong white glue, we take it out of the needle, we will obtain a closed circle, we will need 2 equal ones.
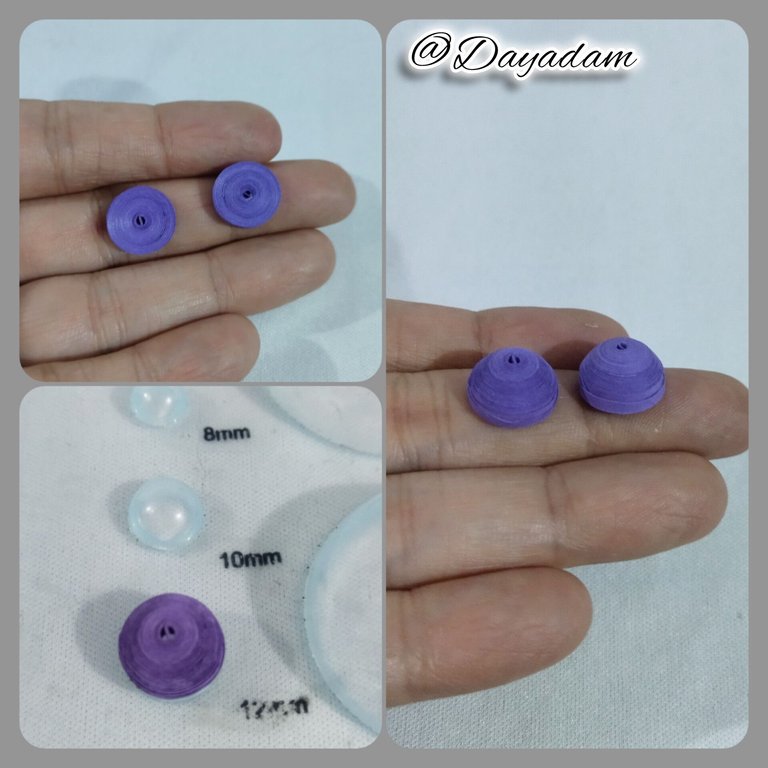
- We are going to mold the circles, placing the piece in the circle template in the measure number mm, in the internal part we will add with a brush a little extra strong white glue and let it dry to avoid deformation or movement of the pieces.
- We are going to take a small piece of purple quilling tape, 3mm wide with this we will join the 2 pieces that we made, we couple both passing the tape through the middle with extra strong white glue. At this point I decided to apply some layers of extra strong white glue to make the piece more resistant, I helped myself with a pin.
- We are going to take 3mm wide gray quilling tape, with the quilling needle we will roll and make 2 small semi-open circles

Base del dije:
• Comenzamos tomando cinta para quilling color morado y vamos a unir una tira de 3mm de ancho x 100cms de largo, enrollamos con la aguja para quilling hasta llegar al final de la cinta, sellamos con pega blanca extra fuerte, sacamos de la aguja, obtendremos un círculo cerrado, vamos a necesitar 2 iguales.
• Vamos a moldear los círculos, colocando la pieza en la plantilla de círculos en la medida numero mm, en la parte de interna agregaremos con un pincel un poco de pega blanca extra fuerte y dejaremos secar para evitar que se deformen o muevan las piezas.
• Vamos a tomar un pequeño trozo de cinta de quilling morado, de 3mm de ancho con esta uniremos las 2 piezas que elaboramos, acoplamos ambas pasando la cinta por el medio con pega blanca extra fuerte. En este punto decidí de una vez aplicar algunas capas de pega blanca extra fuerte para hacer la pieza mas resistente, me ayude con un alfiler.
• Vamos a tomar cinta para quilling color gris de 3mm de ancho, con la aguja para quilling enrollaremos y realizaremos 2 pequeños círculos semi abiertos.
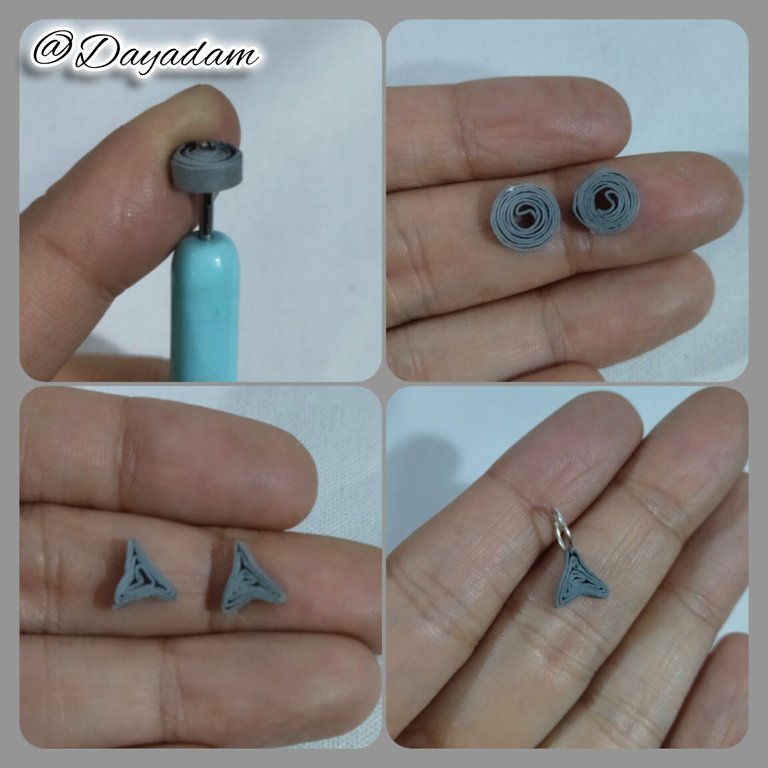
- Once the 2 circles are ready, we will mold them in the shape of a triangle, to one of them we will place a medium size costume jewelry ring at the top, we will apply extra strong glue to both of them and let them dry very well.
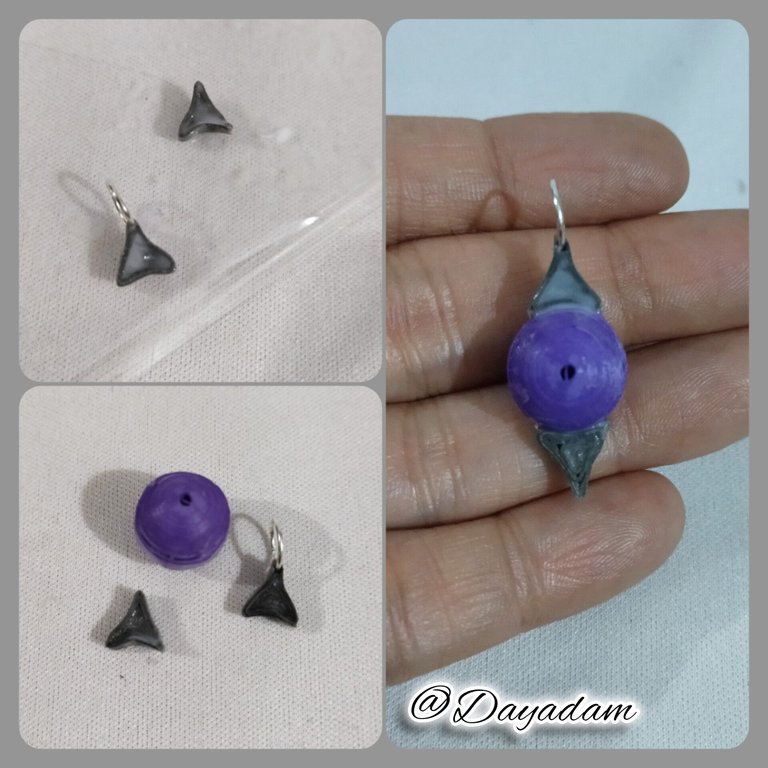
- Once the triangles are dry, we will glue one on the top and the other on the bottom of the sphere we previously made.
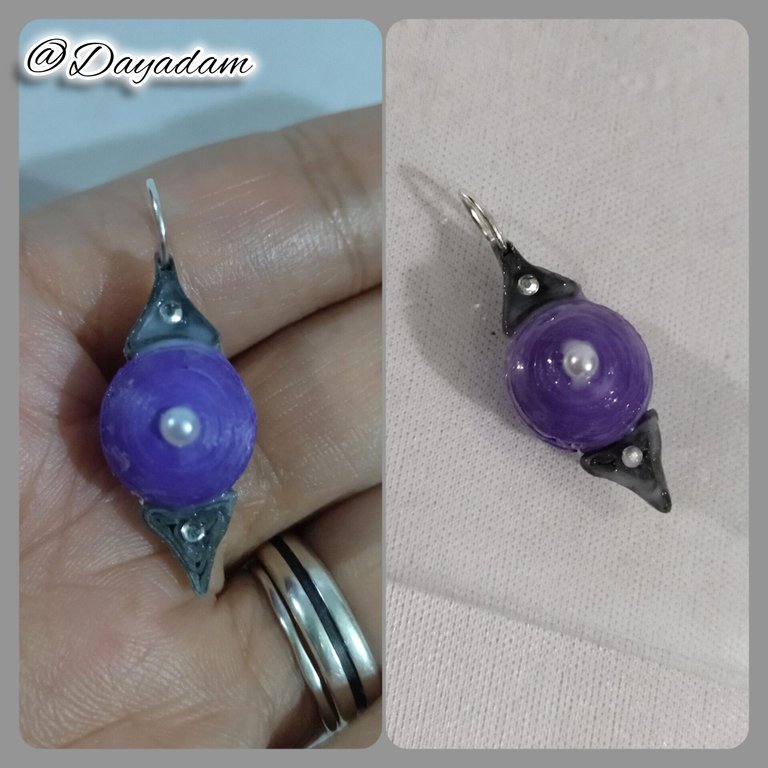
- To decorate the sphere I put a half pearl of white color, and to the triangles a small crystal of costume jewelry.
- Finally, I applied another layer of extra strong white glue to protect the pendant.
- To complement the pendant I made some very simple tendrils which also represent an element embodied in the letter, make 2 semi-open circles with ribbons combined futcia and purple color, which molded into a diamond shape, take them out a little out to give a small 3D effect, apply glue on the inside to prevent deformation, place their fixed bases with extra strong glue, 2 small crystals to decorate the center of the diamond, and finally apply several layers of glue to laminate.
This way we have ready this simple set of accessories, which I materialized inspired by a couple of elements of the Rebellion card "Anasth Soothsayer ".
• Listos los 2 círculos moldearemos en forma de triangulo, a uno de ellos le colocaremos una argolla de bisutería mediana en a parte de arriba, aplicaremos pega extra fuerte a ambos y dejaremos secar muy bien.
• Secos los triángulos pegaremos de la esfera que realizamos previamente, uno arriba y otro abajo de la misma.
• Para decorar le coloque a la esfera una media perla de color blanco, y a los triángulos un pequeño cristal de bisutería.
• Para finalizar le aplique otra capa de pega blanca extra fuerte para proteger el dije.
• Para complementar el dije elabore unos muy sencillos zarcillos los cuales también representan un elemento plasmado en la carta, realice 2 círculos semi abiertos con cintas combinadas color futcia y morado, los cuales moldee en forma de diamante, los saque un poco hacia afuera para dale un pequeño efecto 3D, aplique pega en su parte interna para evitar que se deformen, coloque sus bases fijas con pega extra fuerte, 2 cristales pequeños para decorar en el centro del diamante, y por ultimo aplique varias capas de pega para plastificar.
De esta manera tenemos listo este sencillo conjunto de accesorios, que materialice inspirado en un par de elementos de la carta de Rebellion "Anasth Soothsayer".


What did you think, did you like it?
I hope you did, I hope you liked my explanation, procedure and photos, I made them with love for you.
"Let out that muse that inspires you, and let your imagination fly".
Thank you all, see you next time.
¿Que les pareció, les gustó?
Espero que sí, que les haya gustado mi explicación, procedimiento y fotos, los hice con mucho cariño por y para ustedes.
"Deja salir esa musa que te inspira, y deja volar tu imaginación".
Gracias a todos, nos vemos en la próxima.

Thanks for the supported @splinterboost
Muy buena la presentación de este fanart, te digo que no lo había visto en la carta y te quedo igual, mucho éxito en el concurso 😉
Gracias bella por tus palabras y deseos, fue uno de sus pequeños elementos algo sencillo pero me llamo la atención. Me alegro que te gustara. Abrazos amiga bella @yolimarag
Es interesante porque buscas pequeños detalles de las cartas y haces prendas con estos, es muy bonito esto que hiciste.
!discovery 45
Me gusta materializar esos elementos resaltantes para mi en las cartas, la verdad han sabido hacer crecer mi creatividad, esto fue algo sencillo, pero desde lo mas complejo que he realizado hasta estos detalles me han complacido.
Gracias por tus palabras, y por tu apoyo a mi trabajo mi admirado artista.
Abrazos...
This post was shared and voted inside the discord by the curators team of discovery-it
Join our Community and follow our Curation Trail
Discovery-it is also a Witness, vote for us here
Delegate to us for passive income. Check our 80% fee-back Program
Muy lindo tu diseño amiga. Siempre mostrándonos bellezas. 🤌✨️
Gracias hermosa. Un placer que disfrutes mi trabajo,,,
Muy coqueto y curioso siempre con tu técnica quilling me encanta siempre te queda genial...gracias
Gracias mi corazón. Complacida con tus palabras.
Muy bonito tu trabajo amiga. gracias por compartirlo.
Gracias cariño. Un placer leer esto viniendo de ti, que admiro cada belleza que haces. Abrazos...
Excelente trabajo amiga siempre resaltando con tu arte esos hermosos detalles, suerte en esta iniciativa
Gracias hermosa por tus palabras y buenos deseos. Un gusto verte por acá. Bello día para ti...
Do beauty as usually.
Thanks honey...
Gracias por el apoyo @rutablockchain
Nunca entendí de dónde sacas esas ideas💡 tan geniales. Ves una carta y haces los accesorios con los más pequeños detalles que no todos podemos ver. Eres la mejor 😊👍🏽
!VSC
!PIZZA 🍕
@chacald.dcymt has sent VSC to @dayadam
This post was rewarded with 0.1 VSC to support your work.
Join our photography communityVisual Shots
Check here to view or trade VSC Tokens
Be part of our Curation Trail
@chacald.dcymt ha enviado VSC a @dayadam
Éste post fue recompensado con 0.1 VSC para apoyar tu trabajo.
Únete a nuestra comunidad de fotografía Visual Shots
Consulte aquí para ver o intercambiar VSC Tokens
Se parte de nuestro Trail de Curación
Gracias mi preciosa por tus hermosas palabras, trato en lo posible de captar el mínimo detalle que me llama la atención. Un abrazo fuertote para ti...
$PIZZA slices delivered:
@chacald.dcymt(1/5) tipped @dayadam
Bellísimo. Me llamó mucho la atención la forma convexa que le diste a la pieza para formar la esfera. Es una técnica maravillosa y la manejas de manera fascinante.
Saludos y bendiciones
Gracias mi corazón por tu presencia y palabras hacia mi trabajo. Abrazos y muchas bendiciones de vuelta para ti...
Congratulations @dayadam! You have completed the following achievement on the Hive blockchain And have been rewarded with New badge(s)
Your next target is to reach 15000 comments.
You can view your badges on your board and compare yourself to others in the Ranking
If you no longer want to receive notifications, reply to this comment with the word
STOPTo support your work, I also upvoted your post!
Gracias @hivebuzz
¡Eso es perfecto @dayadam! ¡Eres un verdadero profesional de Hive! ¡Adelante hacia esa nueva meta!
Hermoso trabajo, me encantó.. exitos
Gracias bella...
Congratulations, your post has been upvoted by @dsc-r2cornell, which is the curating account for @R2cornell's Discord Community.
Enhorabuena, su "post" ha sido "up-voted" por @dsc-r2cornell, que es la "cuenta curating" de la Comunidad de la Discordia de @R2cornell.
Thanks for the support @dsc-r2cornell ✨
Thanks for sharing! - @yonilkar

Hermosa inspiración y hermoso resultado.
Thanks for the supportd @steemmonsters and @yonilkar