Avocado Decorative Figure using Quilling Technique [Eng/Esp
Sourse Image cover generated by Gemini//Fuente Imagen de portada generada por Gemini
Hello to all my Hive friends... 🐱
Today I’m going to continue with a collection I’ve been working on of simple, decorative fruits that can be used in a variety of ways—you can use them to decorate boxes and bags, or turn them into charms for necklaces, earrings, pendants, and more.
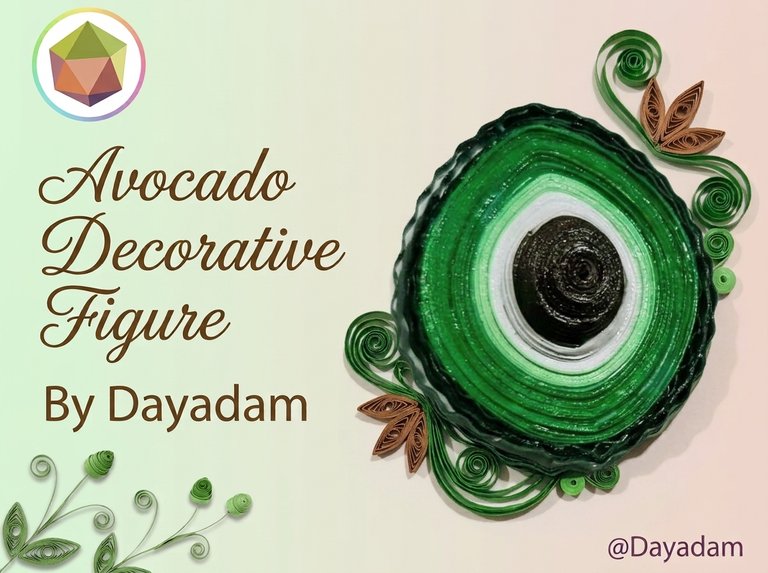
Today I’m sharing a decorative avocado made using the quilling technique.
Hoping you like it, I leave you my creative process:
Let's get started:😃

Hola a toda mi gente de Hive... 🐱
Hoy voy a continuar con una colección que he venido haciendo de simples y sencillas frutas decorativas, a las cuales les pueden dar usos variados, pueden decorar cajas, bolsas, convertirlos en dijes para collar, zarcillos, colgantes entre otras cosas.
Para hoy le traigo un Aguacate decorativo, realizada en la técnica de quilling.
Esperando que sea de su agrado, les dejo mi proceso creativo:
Comencemos:😃
 |
 |
 |

• Cintas para quilling.
• Aguja para quilling.
• Corrugadora de papel.
• Plantilla para moldear círculos.
• Pega blanca extra fuerte (de carpintería).
• Pincel.
• Tijera.
• Quilling paper strips.
• Quilling needle.
• Paper corrugator.
• Template for cutting out circles.
• Extra-strong white glue (woodworking glue).
• Paintbrush.
• Scissors.

• I started by cutting out all the strips I needed, each 3 mm wide, in the required colors: in this case, brown, white, light green, grass green, and dark green.
• Take the dark green strip and run it through a paper crimper; set this strip aside—we’ll use it later.
• I took the needle and started with the brown ribbon; I wound it around until I reached the end, secured it with extra-strong white glue, then attached the white ribbon, wound it around until the end, and secured it with extra-strong white glue.
• We’ll continue with the light green ribbon; wrap it around, secure it with glue, and finally add the grass-green ribbon—wrap it around, secure it with glue—and this way we’ll end up with a closed, multicolored circle.

• Comencé recortando todas las tiras que necesito de 3mm de ancho de los colores necesarios, en este caso marrón, blanca, verde claro, verde grama y verde oscuro.
• Vamos a tomar la tira de color verde oscuro y la pasamos por un Corrugadora de papel, reservamos está tira, luego la usaremos.
• Tomé la aguja y comencé por la cinta de color marrón enrollé hasta llegar al final de la misma, selle con pega blanca extra fuerte, luego pegué la cinta de color blanca, enrollé hasta finalizar selle con pega blanca extra fuerte.
• Proseguimos con la cinta de color verde claro, enrollamos la misma, sellamos con pegamento y por último incorporamos la cinta de color verde grama enrollamos, sellamos con la pega y de esta manera terminamos obteniendo un círculo cerrado multicolor.
 |  |  |
• Once our piece is ready, we’ll use a template to cut out circles and shape only the brown part to fit the template, creating the 3D effect of the avocado seed.
• We’ll remove it from the mold and apply extra-strong white glue all over the inside and outside to prevent it from shifting or warping.
• Use your fingers to gently shape it into an oval.
• To finish the piece, very carefully wrap the corrugated strip we set aside around the entire avocado; when finished, seal it with extra-strong white glue.
• To finish, protect, and laminate my decorative avocado-shaped figure, apply several layers of extra-strong white glue, allowing each layer to dry before applying the next.
This is how I finished this decorative avocado using the quilling technique.
• Lista nuestra pieza tomaremos una plantilla para moldear círculos y moldearemos solo la parte marrón en una medida que ajuste a la misma, esto para formar el efecto 3D de la semilla del aguacate.
• Sacamos del molde, aplicaremos pega blanca extra fuerte por toda la parte interna y externa para evitar que la misma se mueva o se deforme.
• Vamos a moldear con los dedos limpieza de forma ovalada.
• Para terminar con la pieza con sumo cuidado pasaremos la tira corrugada que teníamos reservada por todo el alrededor de nuestro aguacate, al terminar sellamos con pega blanca extra fuerte.
• Para finalizar, proteger y plastificar mi figura decorativa en forma de aguacate, aplique varias capas de pega blanca extra fuerte dejando secar entre una y otra.
De esta manera finalice este Aguacate decorativo, en la técnica de quilling.
 |  |  |

|
|
 |  |
 |
What did you think, did you like it?
I hope you did, I hope you liked my explanation, procedure and photos, I made them with love for you.
"Let out that muse that inspires you, and let your imagination fly".
Thank you all, see you next time ✨.
¿Qué les pareció, les gustó?
Espero que sí, que les haya gustado mi explicación, procedimiento y fotos, los hice con mucho cariño por y para ustedes.
"Deja salir esa musa que te inspira, y deja volar tu imaginación".
Gracias a todos, nos vemos en la próxima✨

que belleza, está espectacular
What a beauty—it’s spectacular.
This post has been manually curated by @bhattg from Indiaunited community. Join us on our Discord Server.
Do you know that you can earn a passive income by delegating to @indiaunited. We share more than 100 % of the curation rewards with the delegators in the form of IUC tokens.
Here are some handy links for delegations: 100HP, 250HP, 500HP, 1000HP.
100% of the rewards from this comment goes to the curator for their manual curation efforts. Please encourage the curator @bhattg by upvoting this comment and support the community by voting the posts made by @indiaunited.