Card With Decorated Bee in 2D Quilling Technique''PUD May'' [Eng-Esp]

Hello everyone... ⚡️🐝⚡️💕
Hello to my dear Hivers and the dear community of artists #HiveDIY, as always very pleased and excited to be here again, showing you my work made with love and especially for you.
.I decided to make something quick to celebrate the day, a small card decorated with flowers, a bee and some 2D appliqués in the quilling technique,
I invite you to participate in the PUD every time you can and if possible do it month by month, this way you make your HP grow and thus go hand in hand so that our wonderful blockchain becomes stronger every day.
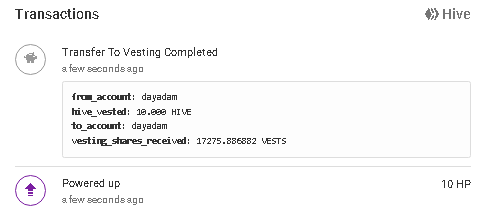
Below is an image of my respective PowerUp with a small contribution of 10 Hive,.
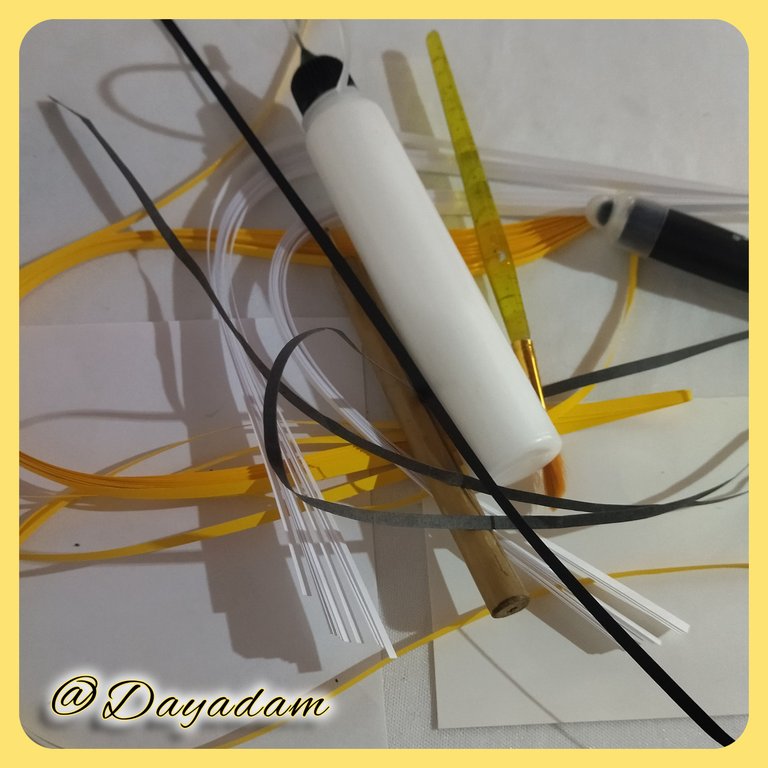
Hoping you like it, I leave you my creative process:
Let's get started:😃

Hola a Todos... ⚡️🐝⚡️💕
Hola a mis queridos Hivers y a la querida comunidad de artistas #HiveDIY, como siempre muy complacida y emocionada de encontrarme por acá nuevamente, mostrándole mi trabajo hecho con mucho amor y especialmente para ustedes.
Como todos los meses no podía dejar de conmemorar este día que para mi siempre es especial ya que se celebra nuestro PUD de cada mes, en este caso el del mes de mayo del 2024.
Decidí realizar algo rápido para celebrar el día, una pequeña tarjeta decorada con flores, una abeja y algunos apliques en 2D en la técnica de quilling,
Les hago una cordial invitación, a que participen en el PUD cada vez que puedan y si es posible lo hagan mes a mes, de esta manera haces que tu HP crezca y así vas de la mano para que nuestra maravillosa blockchain se fortalezca cada día más.
Más abajo les dejo una imagen de mi respectivo PowerUp con un pequeño aporte de 10 Hive,
Esperando que sea de su agrado, les dejo mi pequeño proceso creativo:
Comencemos:😃

•Cartulina blanca y negra.
• Cintas de quilling de amarillo, negro, blanco y rojas.
• Aguja para quilling.
• Hoja blanca.
• Diversos cristales y apliques.
• Pega blanca extra fuerte (de carpintería).
• Tijera.
• Pincel.
-Black and white card stock.
- Yellow, black, white and red quilling ribbons.
- Quilling needle.
- White sheet.
- Various crystals and appliqués.
- Extra strong white glue (carpentry glue).
- Scissors.
- Paintbrush.

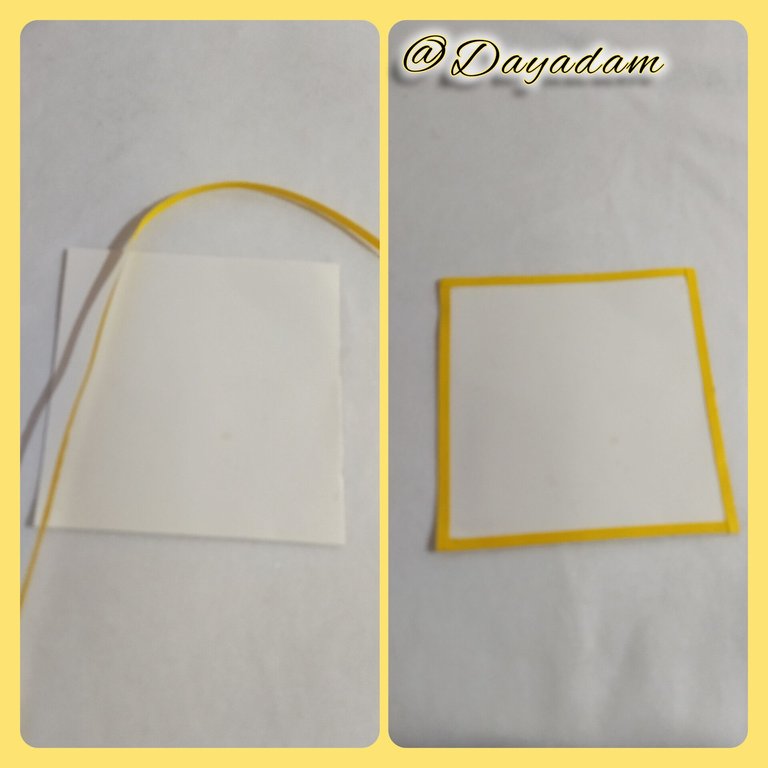
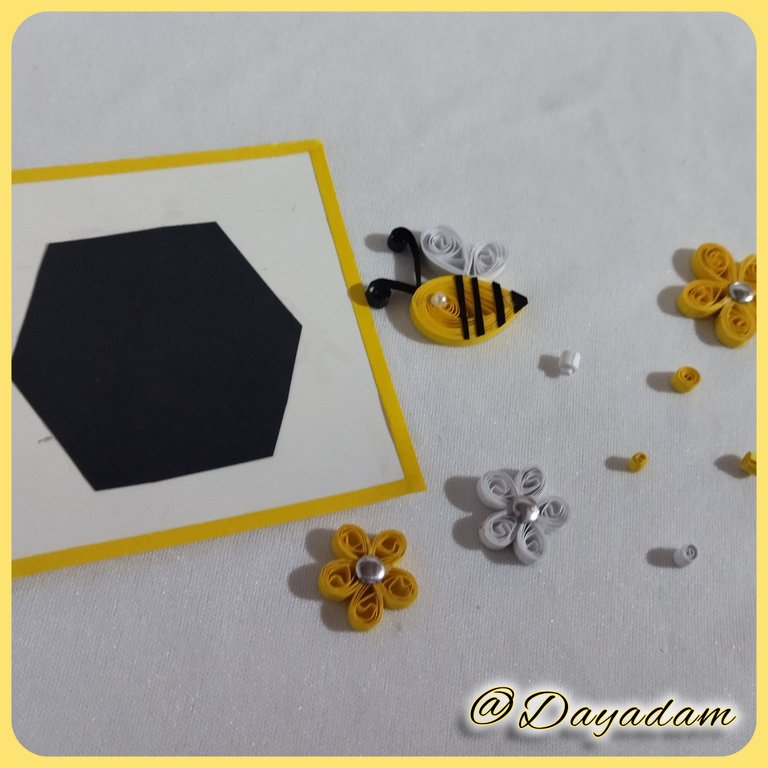
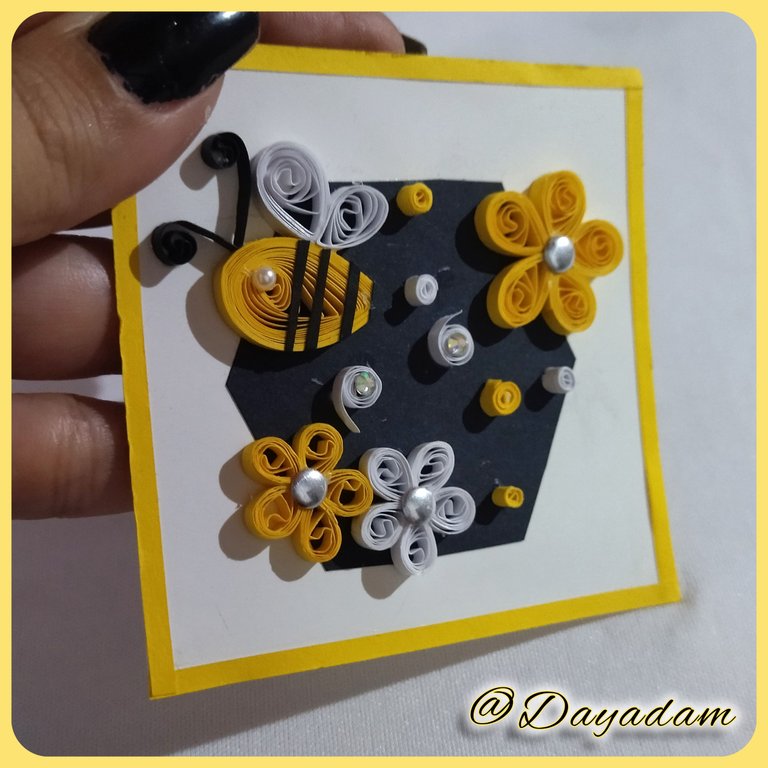
I started by taking a piece of white cardboard from which I cut out a square and decorated it with 3mm wide tape on all sides.
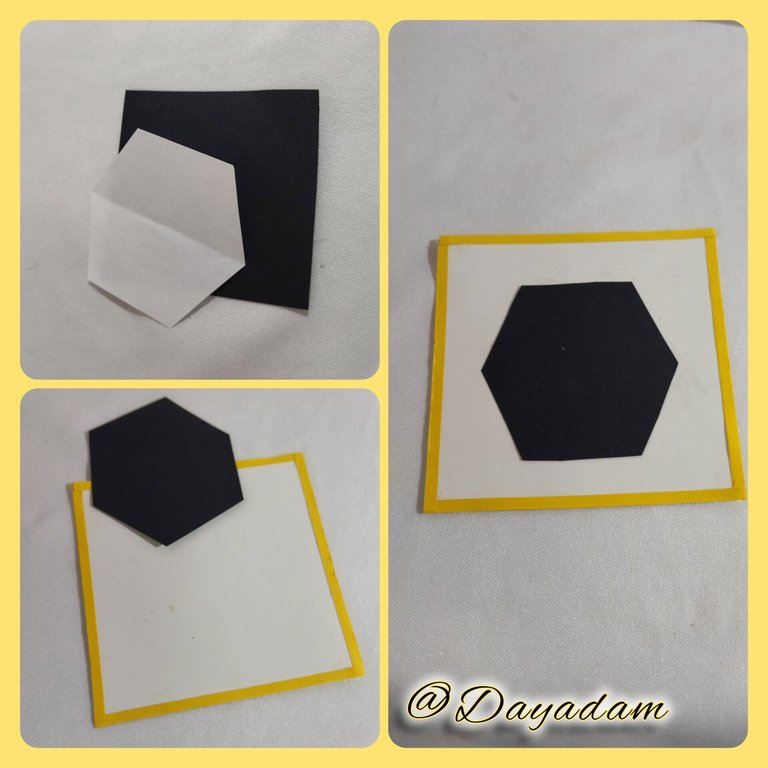
On a piece of white paper I painted a hexagon which I cut out and used as a mold to cut on a piece of black cardboard, once the hexagon was cut out I glued it in the center of the white card that I had previously made.
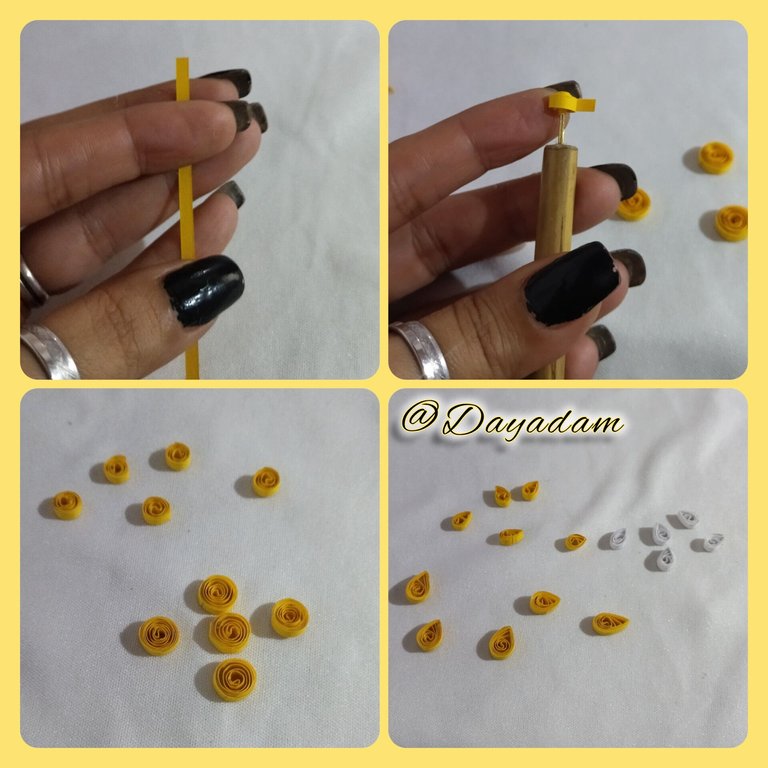
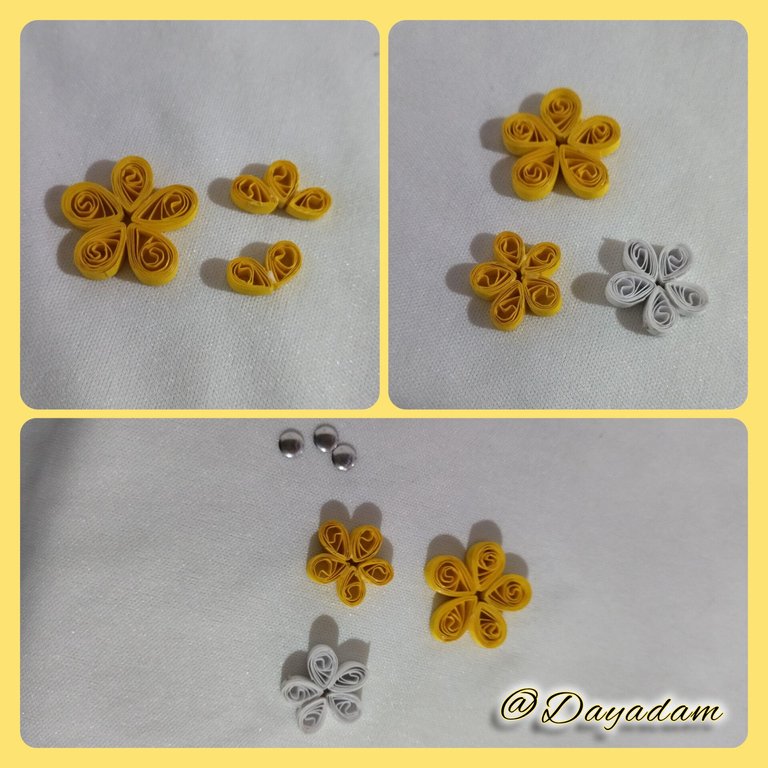
I proceeded to make some flowers with yellow and white ribbons of 3mm wide, make some open circles of different sizes, for each flower you need 5 of the same size.
To form the flower I molded the circles in the shape of a drop, then I joined a group of 2 and another of 3, then I glued them to form the flower of 5 petals, I decorated them with silver appliqués in the middle.

• Comencé tomando un trozo de cartulina blanca de la cual recorte un cuadrado y decore con cinta de 3mm de ancho por todos sus lados.
• En un trozo de hoja blanca pinte un hexágono el cual recorte y utilice como molde para recortar en un trozo de cartulina negra, una vez recortado dicho hexágono lo pegue en el centro de la tarjeta blanca que realice previamente.
• Procedí a realizar alguna flores con cintas amarillas y blancas de 3mm de ancho, realice algunos círculos abiertos de diversos tamaños, para cada flor se necesitan 5 iguales.
• Para formar la flor moldee los círculos en forma de gota, luego uní un grupo de 2 y otro de 3, luego los pegue para formar la flor de 5 pétalos, estos los decore con unos apliques plateados en el medio.
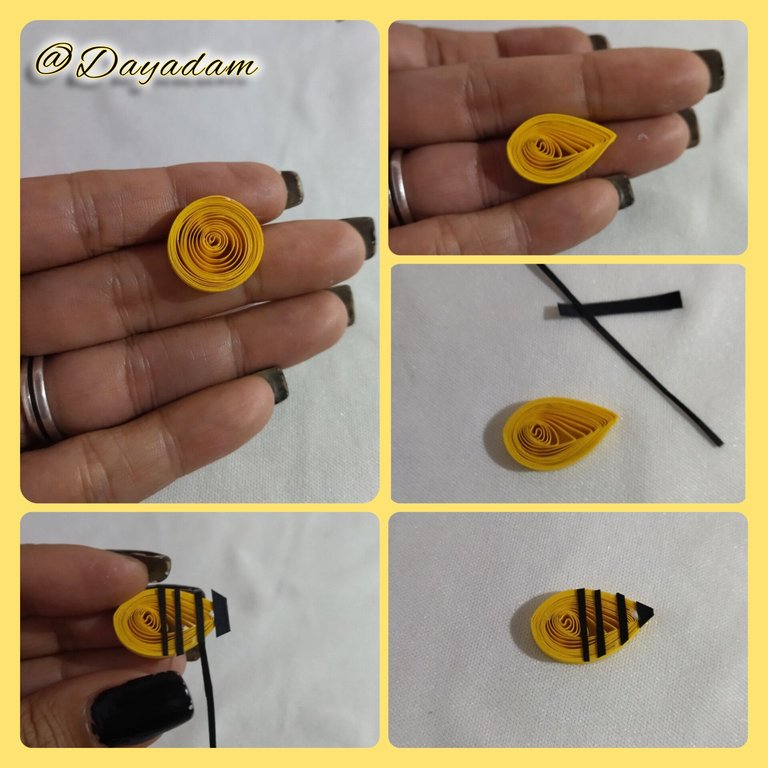
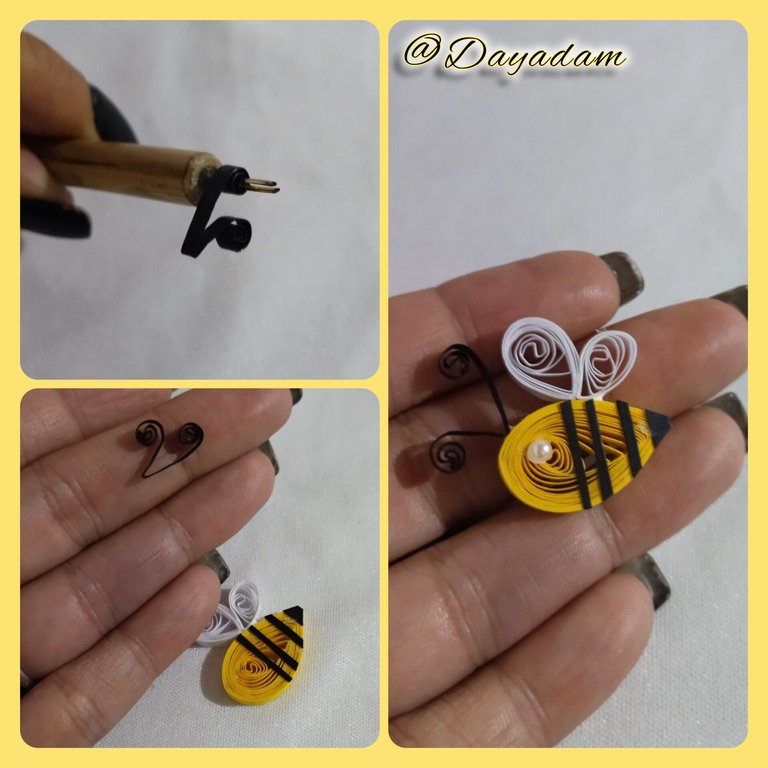
- To make the bee, make an open yellow circle with 3mm tape, mold it in the shape of a leaf, then take black tape and glue some stripes on the back of the drop to resemble the spots of the bee and its sting.
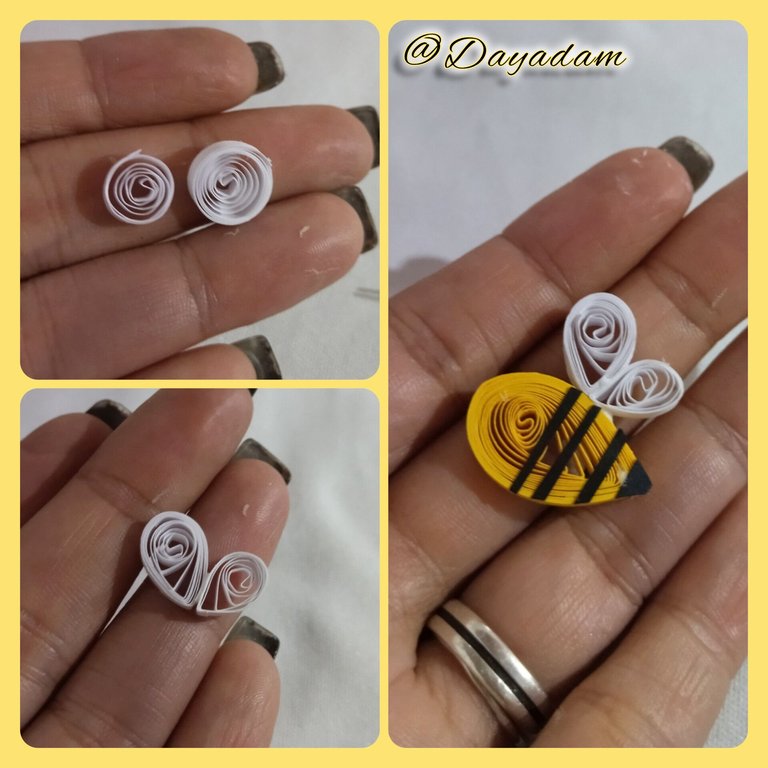
- To make the wings, make 2 open circles, one smaller than the other, mold them in the shape of a leaf, join them together and glue them to the top of the bee.
- The antennae are made by making a small double spiral with the help of a quilling needle with black ribbon 3mm wide, once ready glue it on the head of the bee.
-For the eye use a small white half pearl.
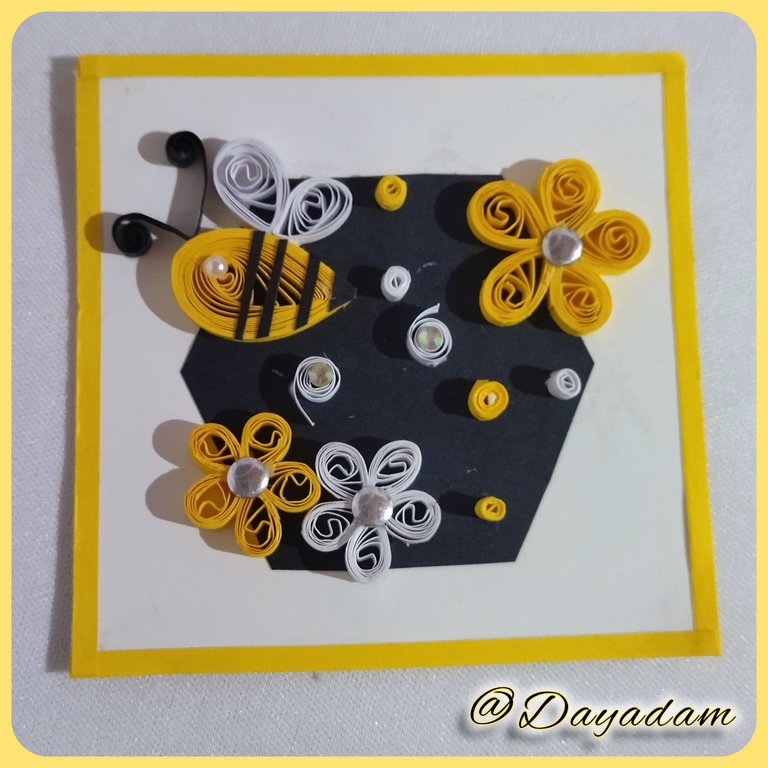
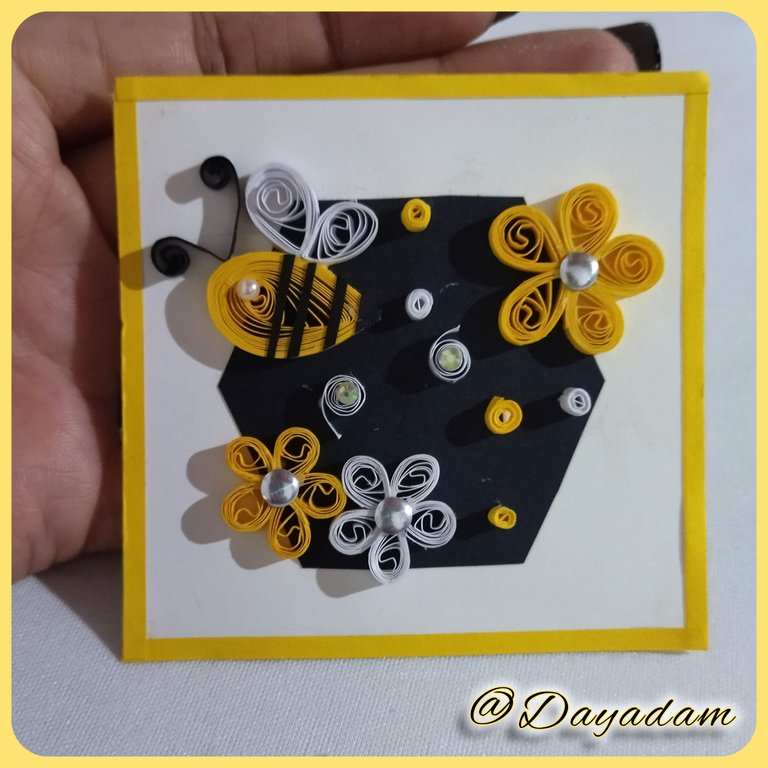
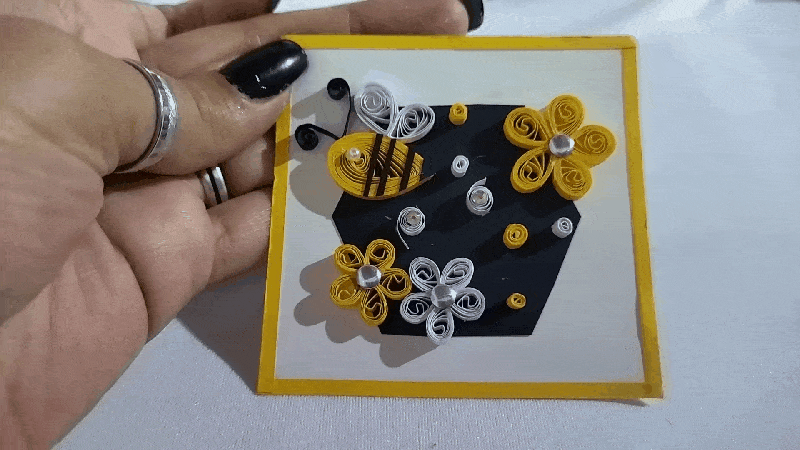
- Ready the flowers and the bee I glued them from the card that I made previously to my liking.
- Decorate making some small circles and spirals with yellow and white 3mm ribbon, also place some additional crystals.
This way we have ready this simple decorated card, which I made to commemorate our PUD for the month of May...⚡️🐝⚡️💕
• Para hacer la abeja realice un circulo abierto de color amarillo con cinta de 3mm, el cual moldee en forma de hoja, luego tome cinta de color negro y pegue el la parte posterior de la gota algunas franjas para asemejar las manchas de la abejita y su aguijón.
• Para hacer las alas realice 2 circulos abiertos uno mas pequeño que el otro, moldee en forma de hoja, los uni y pegue en la parte de arriba de la abejita.
• Las antenas las realice haciendo un pequeño espiral doble con la ayuda e la aguja para quilling con cinta negra de 3mm de ancho, una vez lista la pegue en la parte de la cabeza de la abeja.
•Para el ojo utilice una pequeña media perla blanca.
• Listas las flores y la abeja las pegue de la tarjeta que hice previamente a mi gusto.
• Decore realizando algunos pequeños círculos y espirales con cinta amarilla y blanca de 3mm, así mismo coloque algunos cristales adicionales.
De esta manera tenemos listo esta sencilla tarjeta decorada, que realice para conmemorar nuestro PUD del mes de mayo...⚡️🐝⚡️💕

What did you think, did you like it?
I hope you did, I hope you liked my explanation, procedure and photos, I made them with love for you.
"Let out that muse that inspires you, and let your imagination fly".
Thank you all, see you next time. Happy PowerUpDay ⚡️🐝⚡️
¿Qué les pareció, les gustó?
Espero que sí, que les haya gustado mi explicación, procedimiento y fotos, los hice con mucho cariño por y para ustedes.
"Deja salir esa musa que te inspira, y deja volar tu imaginación".
Gracias a todos, nos vemos en la próxima. Feliz PowerUpDay ⚡️🐝⚡️
Todas las fotos usadas en este post son de mi autoría y han sido sacadas en mi celular personal un Redmi 9T, editadas en InShot y Canva Banner y separador hecho por mí en Canva Traducido con la ayuda de DeepL

Posted Using InLeo Alpha
Congratulations @dayadam! You received a personal badge!
Participate in the next Power Up Day and try to power-up more HIVE to get a bigger Power-Bee.
May the Hive Power be with you!
You can view your badges on your board and compare yourself to others in the Ranking
Check out our last posts:
Thanks @hivebuzz ✨
Kudos @dayadam! Your commitment to Hive growth is admirable.
Quedó muy bello. Saludos ☺️
Gracia cariño. Saluditos para ti también 💖
This is very creative and beautiful, dear. Congrats on your power up.
Thank you very much for your words. I'm glad you liked it. Happy PUD ✨
Hola amiga , excelente trabajo, como ya es de costumbre nos muestras una vez más un bello trabajo, solo posible cundo se hace con amor y dedicación,algo que se demuestra con esos detalles que logras con tu técnica así como con un maravilloso resultado al final. Sin duda fue una idea muy creativa la de conmemorar el día del PUD con esa bella postal, me encantó como quedó la abejita. Saludos
Que lindo, con tantos detallitos y adornos 😍 ya van dos meses que me olvido del power up, y de otras cosas jajaja a Buhito le esta fallando la memoria 😂
Te quedo bello, bello ❤️
Amiga te quedo demasiado lindo como todas tus creaciones, se ve genial. Gracias por compartir.❤️🤗
¡¡¡Buen trabajo!!! Gracias por publicar tu excelente contenido en Hive Diy, qué hermosa manualidad nos has compartido querida amiga, adoro esta técnica que usas para tus manualidades, son hermosas.
Tu comunidad artesana ahora es testigo

Amiga, Quedó muy linda!
Gracias por compartirlo...
https://twitter.com/hivediy47901/status/1786243398757671164
it's very beautiful!