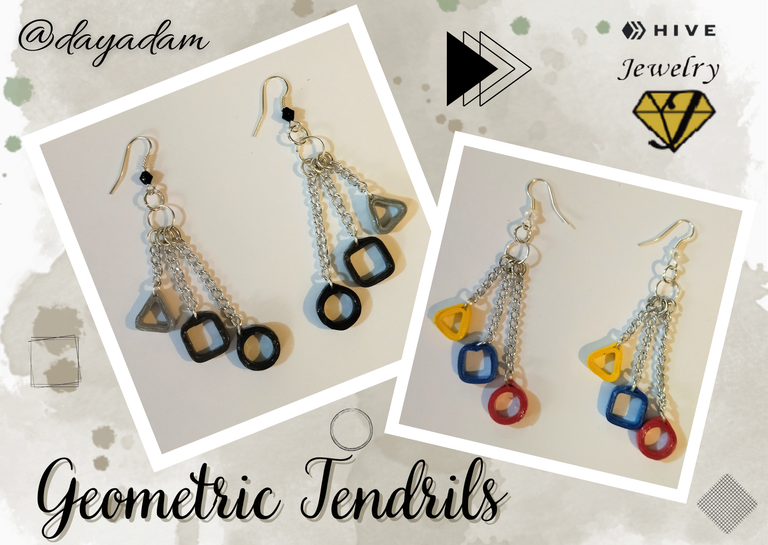
Geometric Tendrils // Quilling Technique [Eng/Esp]
Hello everyone... 🔷🔺🔵
Hello to my dear Hivers and the beloved community of artists #Jewelry, as always very pleased and excited to be here again, showing you my work made with love and especially for you.
I return to the theme of geometric shapes taking advantage of the beautiful molds that I received as a gift and that I have longed to have, as you can see, with them we can make an innumerable variety of earrings, pendants, charms, and much more, of various models, with styles, sizes and colors that best suit our needs.
Today I bring you some hanging tendrils, combined with chains and small geometric figures (triangle, circle, and square) made in the quilling technique.
Hoping you like it, I leave you my creative process:
Let's get started:😃

Hola a todos... 🔷🔺🔵
Hola a mis queridos Hivers y a la querida comunidad de artistas #Jewelry, como siempre muy complacida y emocionada de encontrarme por acá nuevamente, mostrándole mi trabajo hecho con mucho amor y especialmente para ustedes.
Vuelvo con la temática de las figuras geométricas aprovechando los hermosos moldes que me obsequiaron y que desde hace tanto tiempo añoraba tener, como podrán observar, con ellos podemos hacer una variedad innumerable de zarcillos, pendientes, dijes, y mucho mas, de diversos modelos, con estilos, tamaños y los colores que mas se adapten a nuestras necesidades.
Hoy les traigo unos zarcillos colgantes, combinados con cadenas y unas pequeñas figuras geométricas (triangulo, circulo, y cuadrado) realizadas en la técnica de quilling.
Esperando que sea de su agrado, les dejo mi proceso creativo:
Comencemos:😃

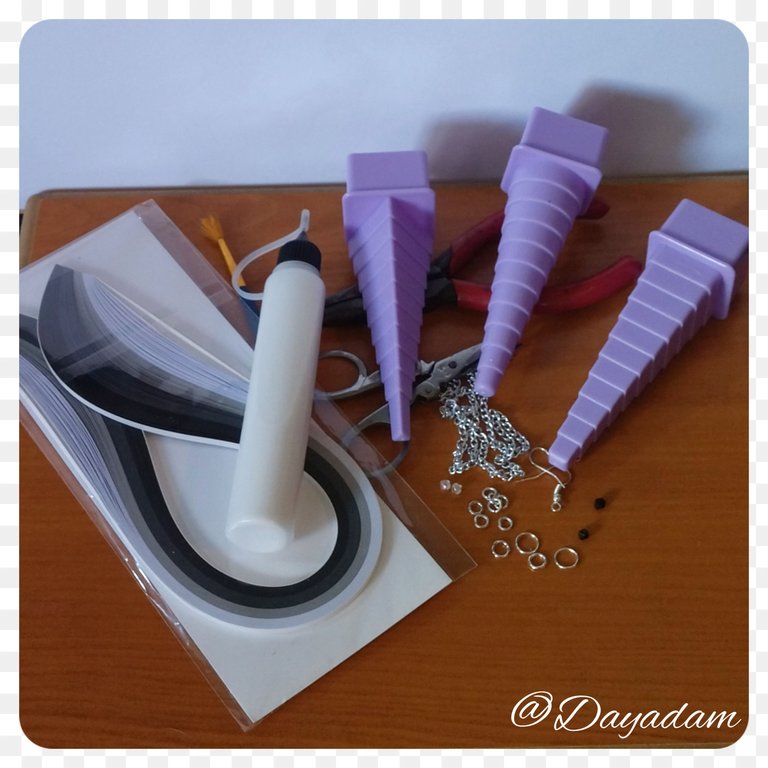
• Cintas de quilling de 3mm de ancho Negras, gris oscuro, gris claro.
• Plantillas o moldes para hacer cuadrados, triángulos, y círculos.
• Pega blanca extra fuerte (de carpintería).
• Regla.
• Bases para zarcillos colgante (anzuelos).
• Argolla pequeñas y medianas de bisutería.
• Cadena fina de bisutería.
• Cristales checos de bisutería pequeño (el color de tu preferencia).
• Tijera.
• Pinza punta fina
• Pincel.
- 3mm wide quilling ribbons Black, dark gray, light gray.
- Templates or molds to make squares, triangles, and circles.
- Extra strong white glue (carpentry glue).
- Ruler.
- Bases for hanging tendrils (hooks).
- Small and medium size jewelry earrings.
- Fine costume jewelry chain.
- Small costume jewelry Czech crystals (the color of your choice).
- Scissors.
- Fine tip tweezers.
- Paintbrush.

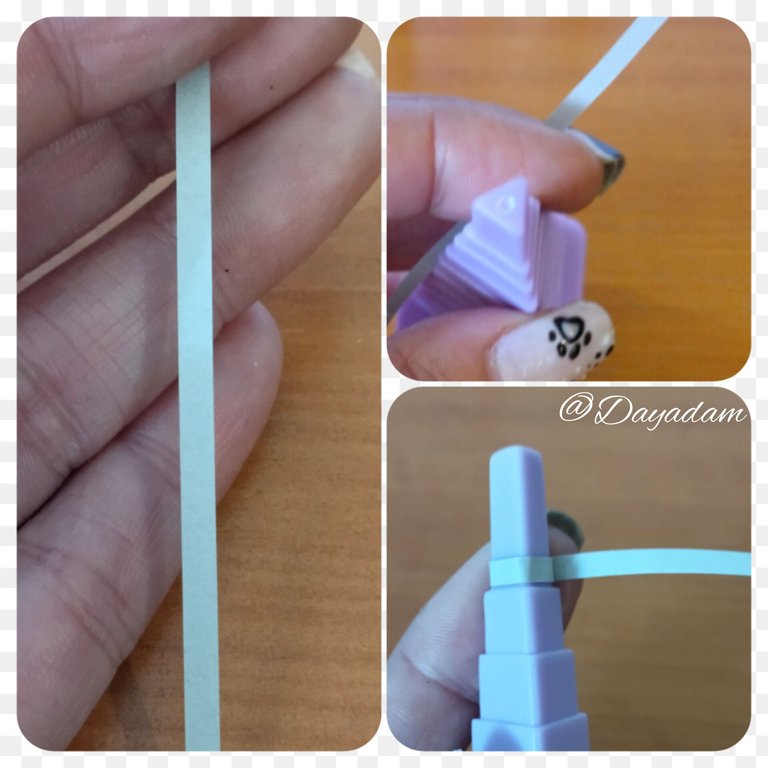
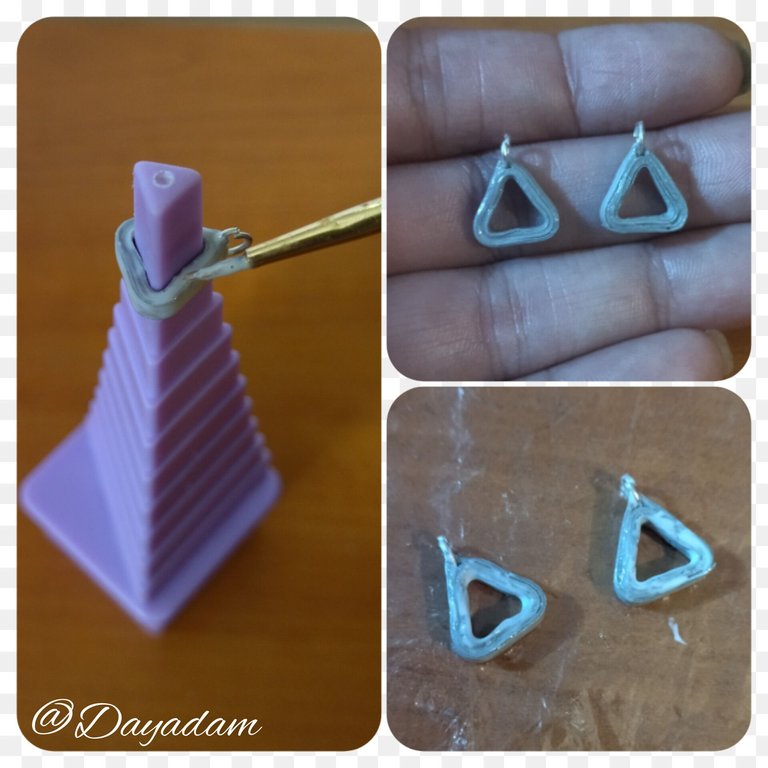
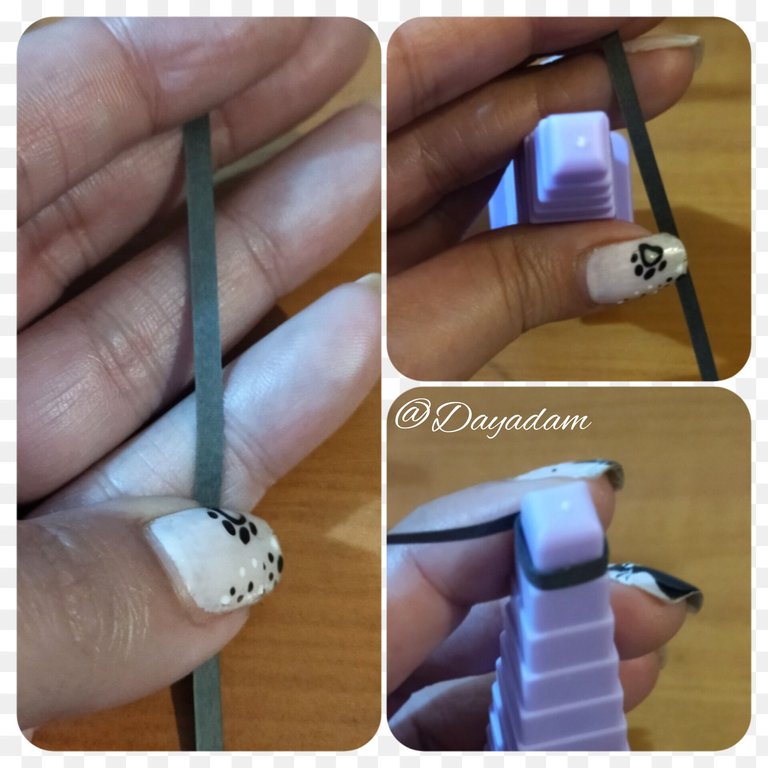
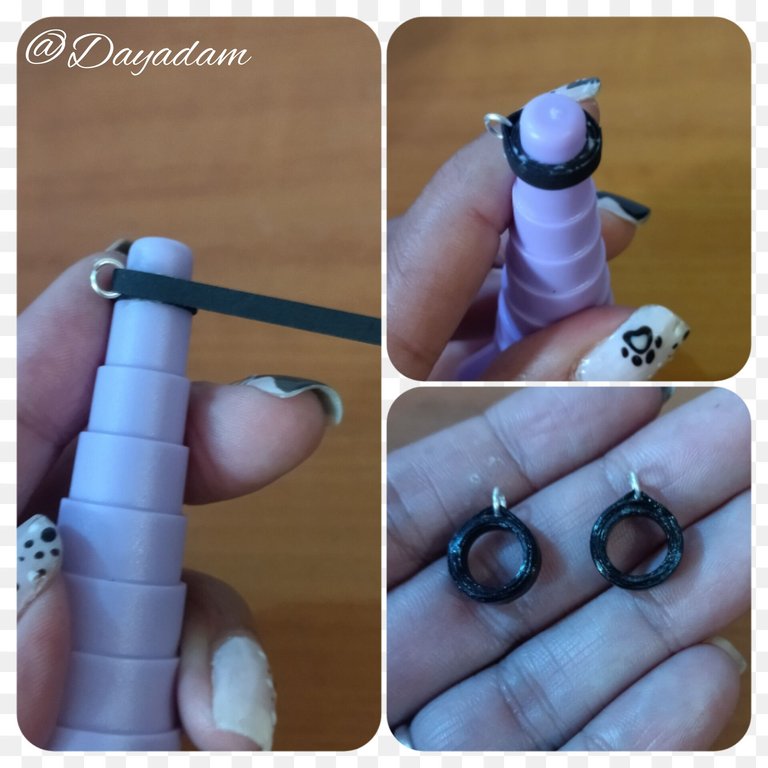
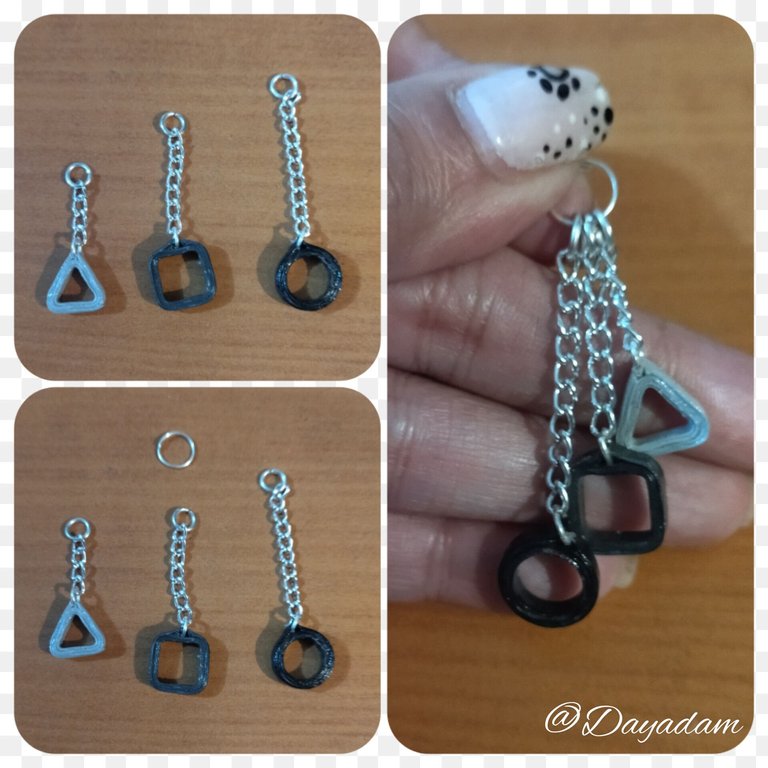
- We will begin by taking a light gray quilling tape 3mm wide x 40cms long, in a template to mold triangles in the first section the smallest, we will roll up little by little adding small amounts of extra strong white glue before finishing with the tape we will incorporate a small ring of costume jewelry we continue rolling until finishing with all the tape, once ready we will add glue around to give protection, plasticized and that the piece we made becomes hard and resistant. Let it dry very well, take it out of the mold and apply glue on the internal parts. We will make 2 equal ones.

• Vamos a comenzar tomando una cinta para quilling color gris claro de 3mm de ancho x 40cms de largo, en una plantilla para moldear triángulos en el primer tramo el mas pequeño, enrollaremos poco a poco añadiendo pequeñas cantidades de pega blanca extra fuerte antes de terminar con la cinta vamos a incorporar una argolla pequeña de bisutería seguimos enrollando hasta finalizar con toda la cinta, una vez listo añadiremos pega alrededor para darle protección, plastificado y que la pieza que hicimos se ponga dura y resistente. Dejamos secar muy bien, sacamos del molde y aplicamos pega en las partes internas. Haremos 2 iguales.

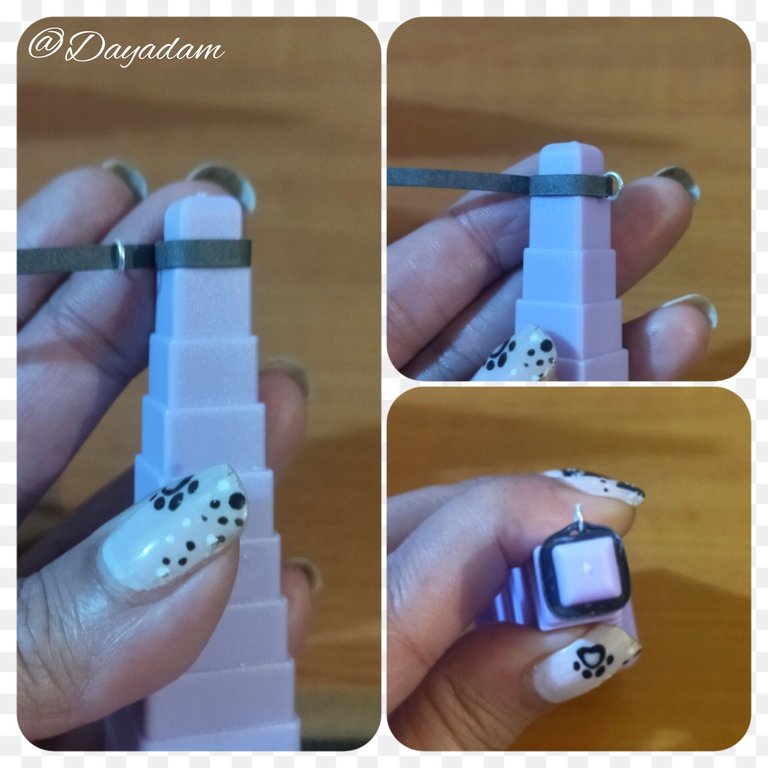
- Now we will take a dark gray quilling tape 3mm wide x 40cms long, in a template to mold squares in the smallest section that in this case would be the first one like the previous one, we will roll the tape little by little adding small amounts of extra strong white glue, before finishing with it we will incorporate a small ring of costume jewelry and continue rolling until finishing with all the tape, once ready we will add glue around to give protection, plasticized and that the piece we made becomes hard and resistant. Let it dry very well, take it out of the mold and apply glue to the internal parts. We will also need 2 of the same.
• Ahora tomaremos una cinta para quilling color gris oscuro de 3mm de ancho x 40cms de largo, en una plantilla para moldear cuadrados en el tramo más pequeño que mi este caso sería el primero igual que el anterior, enrollaremos poco a poco la cinta añadiendo pequeñas cantidades de pega blanca extra fuerte, antes de terminar con la misma incorporaremos una argolla pequeña de bisutería y seguiremos enrollando hasta terminar con toda la cinta, una vez listo añadiremos pega alrededor para darle protección, plastificado y que la pieza que hicimos se ponga dura y resistente. Dejamos secar muy bien, sacamos del molde y aplicamos pega en las partes internas. De esta también necesitaremos 2 iguales.
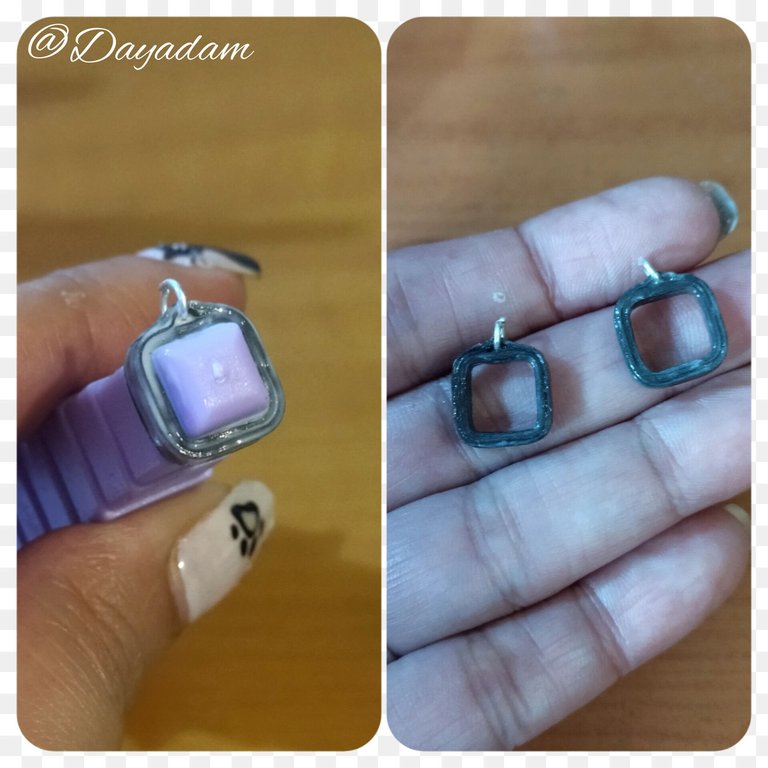
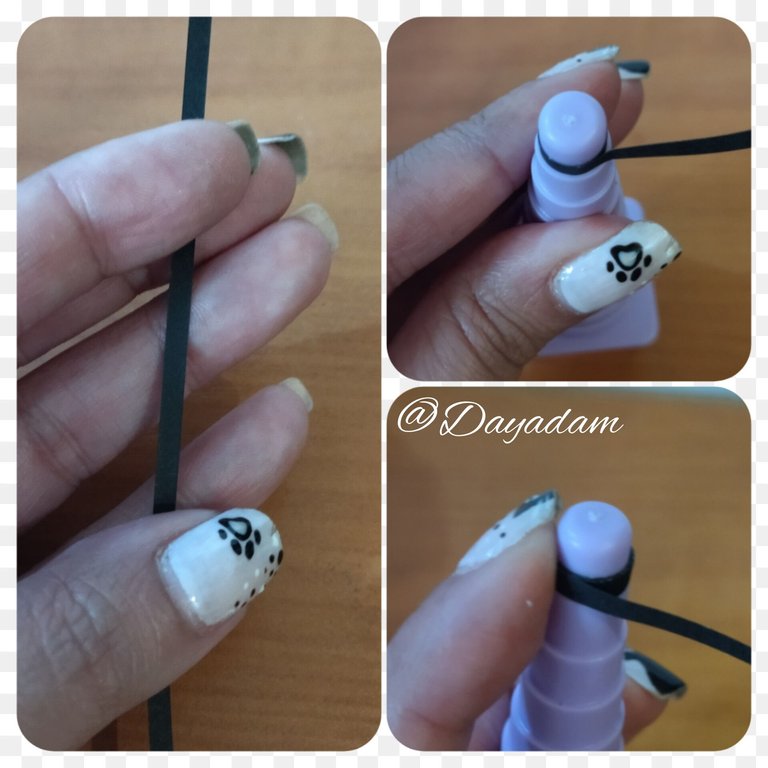
- To make the third and last piece, under the same parameters as before, we will take a black ribbon 3mm wide x 40cms long, but this time we will take a template or circular mold, we will make 2 equal ones.
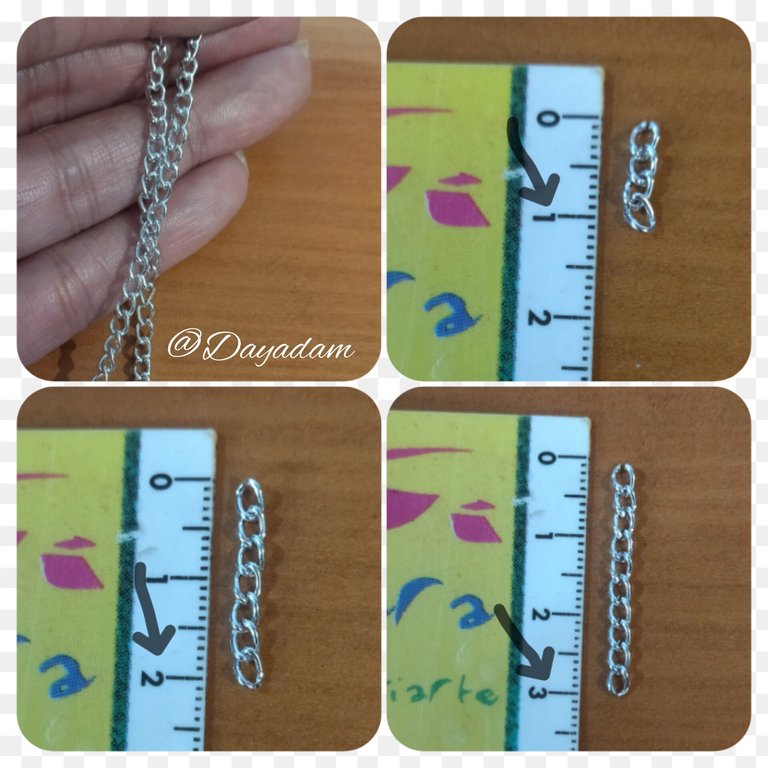
- Ready all the figures, we will take a fine costume jewelry chain, we will cut 3 pieces, one of 1cms long, another of 2cms long and finally another of 3cms long.
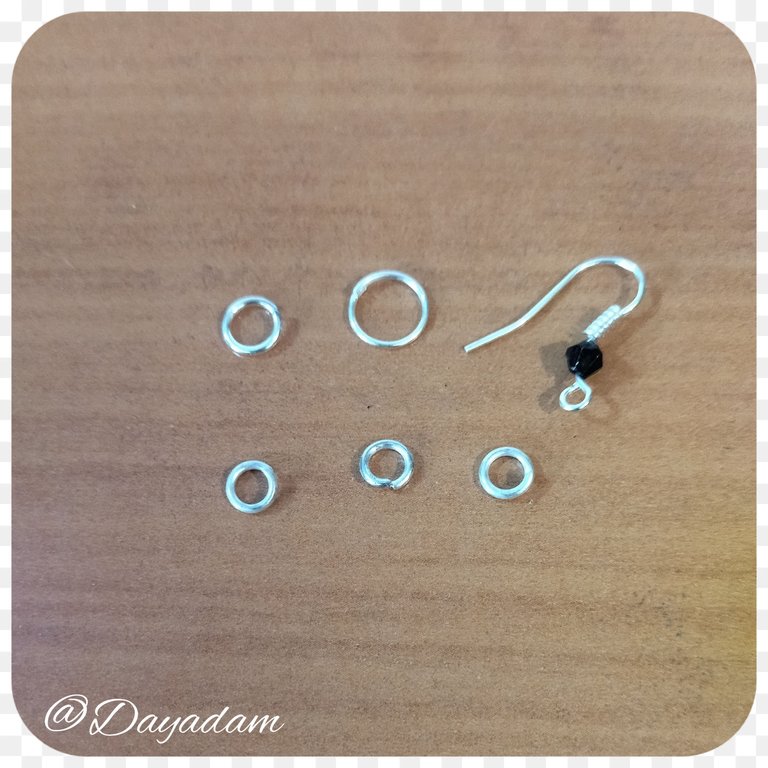
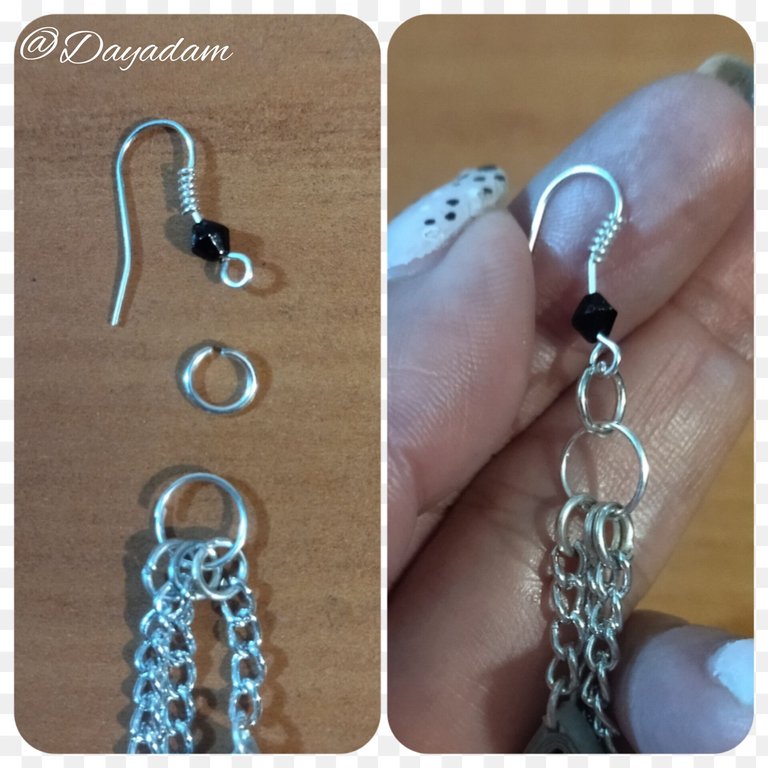
- We will also need 3 small costume jewelry rings, a large one, a medium one and a hanging base for tendrils (hook), which I will use previously I will put a black Czech crystal to give it more elegance or to make it look more striking.
• Para realizar la tercera y última pieza, bajo los mismos parámetros anteriores tomaremos una cinta de color negro de 3mm de ancho x 40cms de largo, pero esta vez tomaremos una plantilla o molde circular, realizaremos 2 iguales.
• Listas todas las figuras, tomaremos cadena fina de bisutería, cortaremos 3 pedazos, uno de 1cms de largo, otro de 2cms de largo y finalmente otro de 3cms de largo.
• También necesitaremos 3 argollas pequeñas de bisutería, una grande, una mediana y una base colgante para zarcillos (anzuelo), la que utilizare previamente le coloque un cristal checo negro para darle más elegancia o se vea más llamativo.
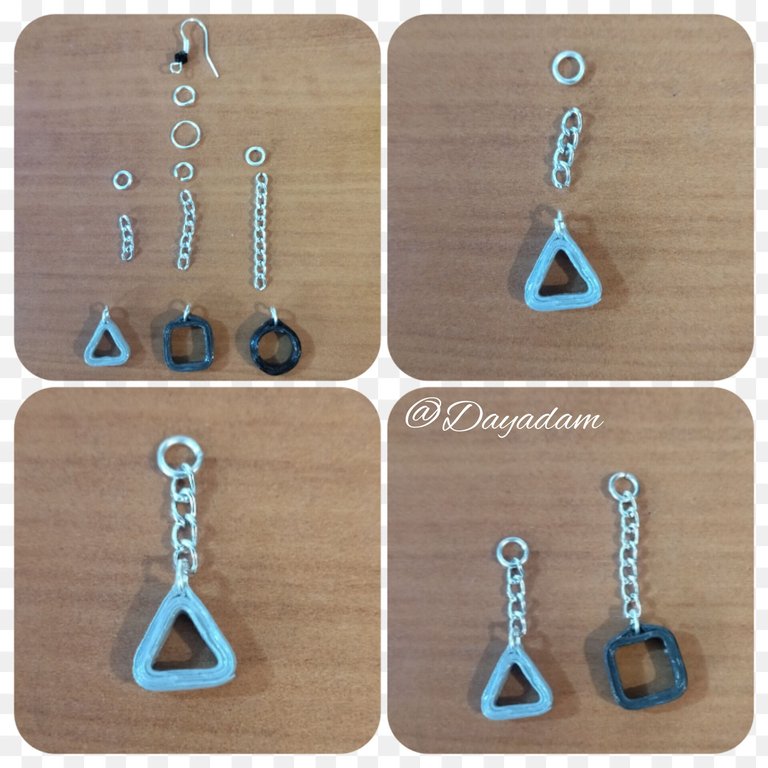
- In the image I will place all the pieces of costume jewelry next to the geometric figures that I made in quilling, and I will show how we will assemble them.
- The triangular quilling figure will be attached to the 1 cm long chain and we will place a small ring at the tip, the square figure will go with the 2 cm chain plus a small ring at the tip, and finally the circular figure will be attached with the 3 cm chain and a small ring.
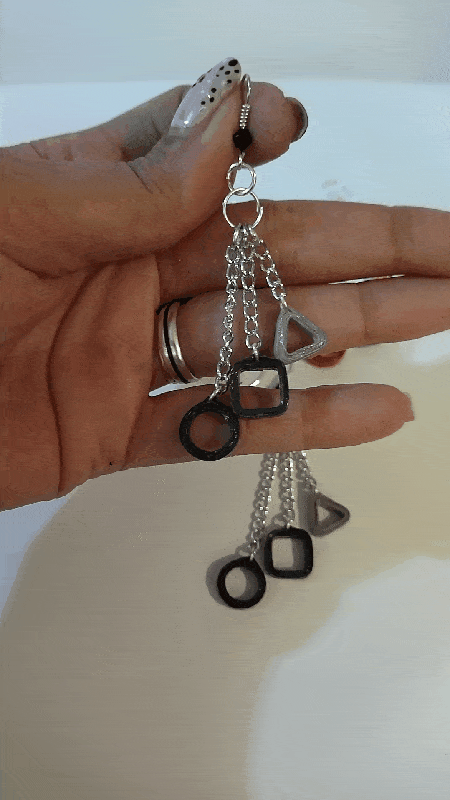
- Once the pendants are ready, we will incorporate them in a larger ring, then in a medium one and finally in the base for hanging tendrils. In this way our tendrils will be ready.
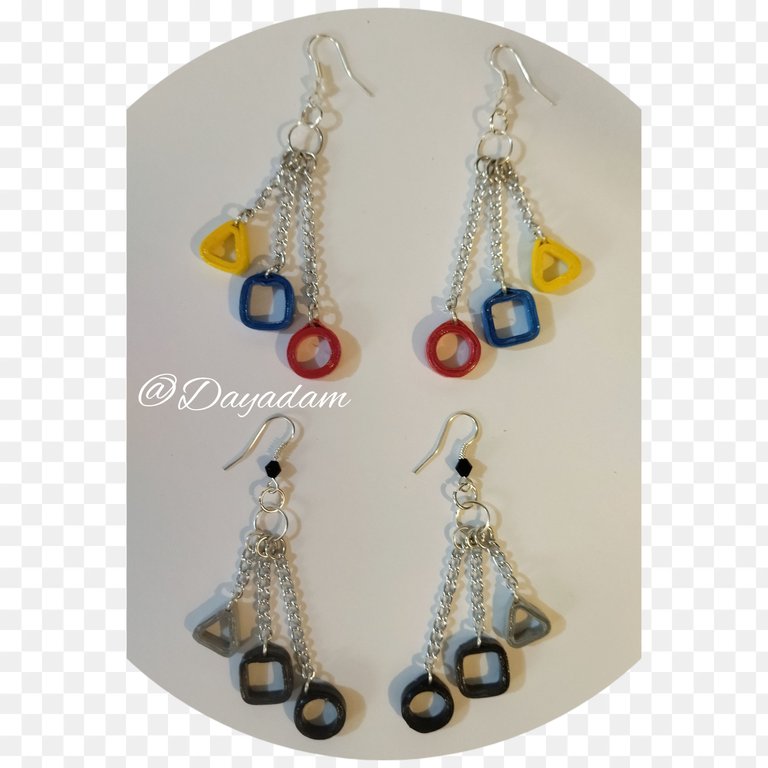
As you will see I made another pair of tendrils, with the colors of my national tricolor, you can make the combinations of your preference and also combine the measures of the chains or make the figures to your liking.
• En la imagen colocare todas las piezas de bisutería junto a las figuras geométricas que realice en quilling, y mostrare como las iremos ensamblando.
• La figura de quilling triangular la uniremos a la cadena de 1cms de largo y colocaremos una argolla pequeña en la punta, la figura cuadrada ira con la cadena de 2cms mas una argolla pequeña en la punta, y por último la figura circular la uniremos con la cadena de 3cms y una argolla pequeña.
• Listos los colgantes estos los incorporaremos en una argolla más grande, luego en una mediana y por último en la base para zarcillos colgante. De esta manera estarán listos nuestros zarcillos.
Como verán realice otro par de zarcillos, con los colores de mi tricolor nacional, pueden hacer las combinaciones de su preferencia y así mismo combinar las medidas de las cadenas o hacer las figuras a su gusto.


What did you think, did you like it?
I hope you did, I hope you liked my explanation, procedure and photos, I made them with love for you.
"Let out that muse that inspires you, and let your imagination fly".
Thank you all, see you next time 🔷🔺🔵
¿Que les pareció, les gustó?
Espero que sí, que les haya gustado mi explicación, procedimiento y fotos, los hice con mucho cariño por y para ustedes.
"Deja salir esa musa que te inspira, y deja volar tu imaginación".
Gracias a todos, nos vemos en la próxima 🔷🔺🔵
Todas las fotos usadas en este post son de mi autoría y han sido sacadas en mi celular personal un Redmi 9T y editadas en Canva y en Inshot Banner y separador hecho por mí en Canva Traducido con la ayuda de DeepL

Que bonitos pendientes , pueden salir muchos más combinando diferentes colores , gracias por mostrarnos tu trabajo con esa técnica impecable.
!diy
Muchísimas gracias bella, me alegro mucho que te hayan gustado... Saluditos @lileisabel 🔵🔺🔷
You can query your personal balance by
!DIYSTATSBellos estas pro. Super lindo trabajo. Todo bien detalladito. Yo simpre te tomo como referencia en los tutoriales. Felicidades.
Muchísimas gracias, honor que me hacen sus palabras. Por aca siempre a la orden amigo @viltredeltoro 🔵🔺🔷
Lo propio amiga.
Nos encantan estos zarcillos, sin duda hiciste un gran trabajo, las figuras geométricas y las cadenas ⛓️ lucen increíbles, esos moldes que te dieron son geniales, nos encanta que te diviertas haciendo lo que amas. 😍👏
Gracias a mi querida comunidad @hive-189504, muy agradecida por sus palabras hacia mi trabajo. Me alegra que les haya gustado... 🔵🔺🔷
Bellos amiga. Felicidades!
Muchísimas gracias amiga @glorysabel777 🔵🔺🔷
These are very beautiful thanks for showing every steps! I would love to try to make it. You are just amazing at every crafty things 🫰🏻 I really love your work.
!PIZZA
Thank you very much for your words, you are really very nice. I'll be glad to hear from you whenever you like. Welcome to my blog. I hope you try it and show me the result @ayamihaya 🔵🔺🔷
Of course, I will let you know 😊
Thank you!
$PIZZA slices delivered:
@ayamihaya(3/5) tipped @dayadam
Thanks @pizzabot 🔵🔺🔷
Your quilled jewelry pieces are absolutely stunning. Keep up the fantastic work.
Thank you very much for your words and support @diyhub 🔵🔺🔷
Como siempre muy bonito tu proceso creativo @dayadam; m
Muchísimas gracias amiga @nhaydu 🔵🔺🔷
Excelente trabajo 👍
Muchísimas gracias @hannymarchan 🔵🔺🔷