[ESP/ENG] Ratoncito amigurumi | Amigurumi mouse
Hello everyone, today I want to introduce you to this little amigurumi I made, I am still in my learning process, if you have seen my blog before, you will know that I am making my own amigurumis and I have the goal of creating my collection, I am still in a basic level and I had this project in mind, because as you can see in the image this amigurumi has a base made with a sphere, so it seemed to me an excellent opportunity to perfect the technique a little more. It is worth mentioning something that caught my attention, is that with a single figure you can change the details and create a completely new figure or character, which is a great advantage to speed up the learning process.
Empecé a trabajar en el proyecto y escogí unos colores de hilos que se encuentran entre mis colores favoritos para que quedara la figura más adorable en mi opinión, pasé un buen momento mientras trabajaba, porque, durante el tiempo que fabricaba la pieza tenia algunos videos de YouTube al fondo y sentí que el tiempo se me pasó bastante rápido, además, fue un momento terapéutico, creo que todas las personas que tejen pueden coincidir en que tejer es una actividad muy relajante y que da muchísima satisfacción al ver que un hilo se transforma en tus manos en algo completamente nuevo y maravilloso, también les invito que si tienen alguna idea que quieren que desarrolle en particular o alguna recomendación para seguir aprendiendo no olviden dejarlo en comentarios, sin más dilación comencemos a tejer.
I started working on the project and chose some yarn colors that are among my favorite colors to make the most adorable figure in my opinion, I had a good time while working, because, during the time I was making the piece I had some YouTube videos in the background and I felt the time went by quite fast, besides, it was a therapeutic moment, I think that all people who crochet can agree that crocheting is a very relaxing activity and that it gives a lot of satisfaction to see that a thread is transformed in your hands into something completely new and wonderful, I also invite you that if you have any idea that you want me to develop in particular or any recommendation to continue learning do not forget to leave it in comments, without further delay let's start to crochet.
Materiales:
-Hilo de algodón fucsia.
-Hilo de algodón turquesa.
-Dos cuentas de color negro.
-Hilo de coser color negro.
Materials:
-Fuchsia cotton yarn.
-Turquoise cotton yarn.
-Two black beads.
-Black sewing thread.
Herramientas a necesitar:
-Aguja de tejer triple cero (000).
-Tijeras.
-Aguja de coser.
-Marcadores.
Tools needed:
-Triple zero (000) knitting needle.
-Scissors.
-Sewing needle.
-markers
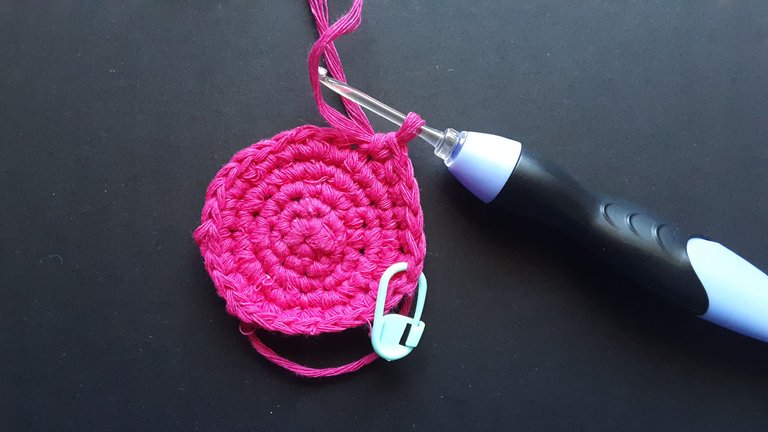
Pasos para realizar la base de ratoncito amigurumi:
Steps to make the amigurumi mouse base:
1era vuelta: Se realiza un anillo mágico y seis puntos bajos.
1st round: A magic ring and six single crochet stitches are made.
2da vuelta: Ahora se tienen que hacer seis aumentos para ello realizar dos puntos bajos por cada punto bajo de la vuelta anterior.
2nd round: Now you have to make six increases to do this, make two single crochet stitches for each single crochet of the previous round.
3era vuelta: Hacer un punto bajo, y dos puntos bajos de la vuelta anterior obteniendo dieciocho puntos.
3rd round: Make a single crochet, and two double crochet stitches from the previous round to obtain eighteen stitches.
4ta vuelta: Se hacen dos puntos por cada punto de la vuelta anterior y dos puntos bajos en el mismo punto de la vuelta anterior haciendo veinticuatro puntos en total.
4th round: Make two stitches for each stitch of the previous round and two single crochets in the same stitch of the previous round, making twenty-four stitches in total.
Para la 5ta, 6ta, 7ma y 8va vuelta se va a realizar el mismo procedimiento que se hizo en la vuelta anterior; asegurándonos de que siempre queden en cada vuelta veinticuatro puntos.
For the 5th, 6th, 7th and 8th rounds, the same procedure will be done as in the previous round; making sure that there are always twenty-four stitches left in each round.
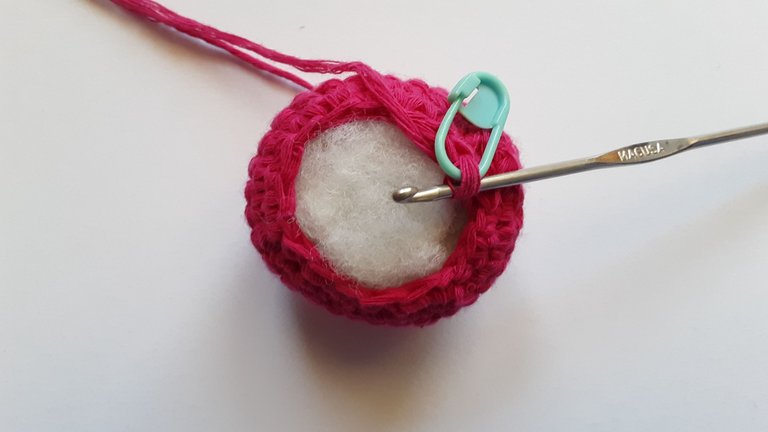
9na vuelta: Ahora comienza la parte de las disminuciones para ello debemos realizar dos puntos bajos en cada punto de la vuelta anterior y una disminución invisible. En esta vuelta se puede comenzar a rellenar el amigurumi con el algodón antialérgico.
9th round: Now begins the part of the decreases for this we must make two low stitches in each stitch of the previous round and an invisible decrease. In this row you can start filling the amigurumi with the anti-allergic cotton.
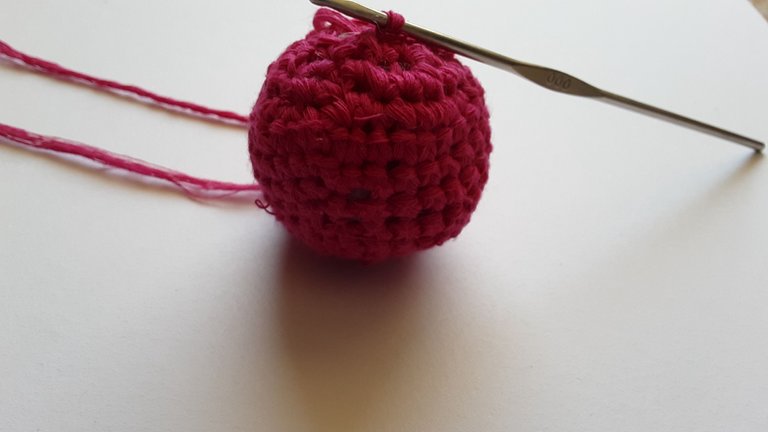
10ma vuelta: Se va alternando un punto bajo y una disminución invisible por toda la vuelta quedando doce puntos.
10th round: Alternate a single crochet and an invisible decrease throughout the row, leaving twelve stitches.
11era vuelta: Hacemos seis disminuciones y cerramos la esfera.
11th round: We make six decreases and close the sphere.
Pasos para realizar las orejas del ratoncito amigurumi:
Steps to make the ears of the amigurumi mouse:
1era vuelta: Hacer un anillo mágico y seis puntos bajos.
1st round: Make a magic ring and six single crochet stitches.
2da vuelta: Realizar dos puntos bajos en cada punto bajo de la vuelta anterior.
2nd round: Make two single crochets in each single crochet of the previous round.
3era vuelta: Se hace un punto bajo en un punto de la vuelta anterior y dos puntos bajos en un mismo punto de la vuelta anterior.
3rd round: Make a single crochet in a stitch of the previous round and two single crochets in the same stitch of the previous round.
4ta vuelta: Ahora realizamos dos puntos bajos en cada punto bajo en cada punto de la vuelta anterior y dos puntos bajos en el mismo punto de la vuelta anterior.
4th round: Now we make two single crochets in each single crochet in each stitch of the previous round and two double crochets in the same stitch of the previous round.
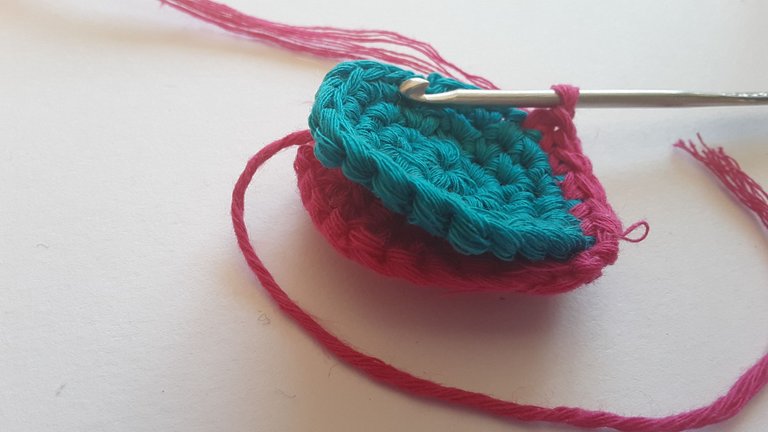
Vamos a repetir este proceso cuatro veces obteniendo dos círculos de color turquesa y dos de color fucsia, luego vamos a sobreponer un circulo turquesa sobre el circulo fucsia, y con el hilo de algodón fucsia hacemos puntos bajos por todo el alrededor uniendo las dos piezas.
We will repeat this process four times obtaining two turquoise and two fuchsia circles, then we will superimpose a turquoise circle over the fuchsia circle, and with the fuchsia cotton thread we will make low stitches all around joining the two pieces.
Detalles para finalizar el ratoncito amigurumi:
Details to finish the amigurumi mouse:
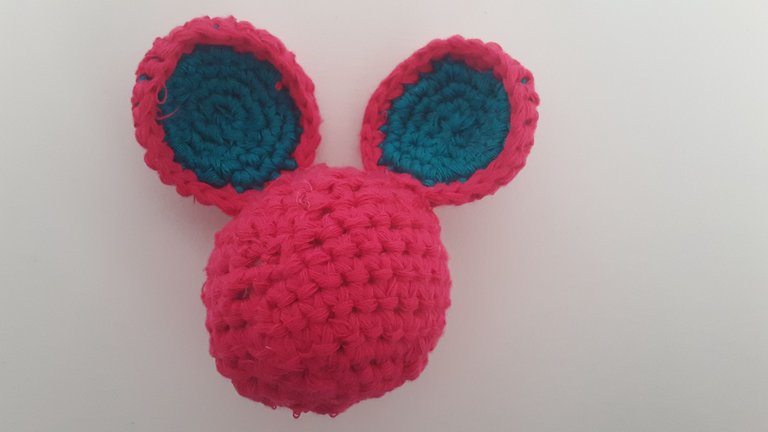
-Utilizando los marcadores de tejido vamos a marcar donde se van a ubicar las orejas para proceder a coserlas con el hilo de algodón color fucsia.
-Using the markers we are going to mark where the ears are going to be placed to proceed to sew them with the fuchsia colored cotton thread.
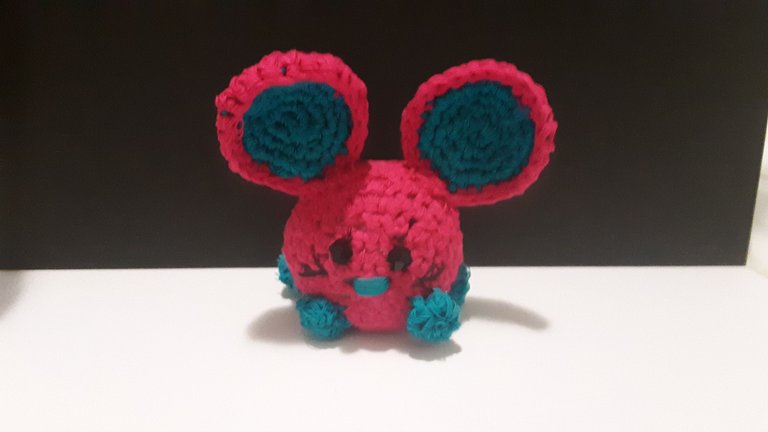
-Con hilo de coser negro colocar las dos cuentas de color negro para formar los ojos del ratoncito.
-With black sewing thread, place the two black beads to form the eyes of the mouse.
-Vamos a coser con hilo de color negro tres rayitas de cada lado de la esfera para hacer el efecto de bigotes.
-We are going to sew with black thread three little stripes on each side of the sphere to make the whiskers effect.
-Coser con hilo turquesa una rayita un poco más abajo entre los ojos para formar la nariz.
-Sew with turquoise thread a small line a little lower between the eyes to form the nose.
-Con hilo turquesa hacer un anillo mágico y seis puntos bajos, hacemos dos puntos bajos en cada punto de la vuelta anterior, luego, un punto bajo y una disminución para posteriormente cerrar, repetir este proceso hasta tener cuatro de éstos y coserlos a la esfera para formar las patitas.
-With turquoise yarn make a magic ring and six single crochet stitches, make two single crochets in each stitch of the previous row, then, a single crochet and a decrease to close, repeat this process until you have four of these and sew them to the sphere to form the little legs.
¡Listo! Ojalá les haya gustado mi pequeña creación tanto como a mí, y que hayan aprendido algo nuevo hoy, cambiando de tema, ya comenzó el mundial espero que estén disfrutando de los partidos definitivamente yo sí que lo estoy haciendo, aunque mi país no haya sido seleccionado, y deseo que las personas que estén leyendo esto tengan un lindo día, tarde o noche.
That's it! I hope you liked my little creation as much as I did, and that you have learned something new today, changing the subject, the world cup has started, I hope you are enjoying the games, I definitely am, even though my country has not been selected, and I hope that the people who are reading this have a nice day, afternoon or evening.
Muchísimas gracias por leer! | Thank you very much for reading!
-- Todas las imágenes son de mi autoría, editadas con FIREWORKS / CANVA --
-- All images belong to my authorship, edited with FIREWORKS / CANVA --
✌️
Que preciosura 😍
✨Muchas gracias✨ 😊
Hola @delcielo, es un gusto saludarte.
Que bueno que estás aprendiendo y mejorando tu técnica con los amigurumis, el crochet es un arte maravilloso que requiere de mucha práctica y dedicación. Vas muy bien, te felicito.
Saludos!
¡Saludos! ✨Muchas gracias por tu comentario y buenas vibras✨
@delcielo está muy tierno 🥰, gracias por compartir tu creación 🤗
Gracias a ti por leer 😊, me alegra que te haya gustado 😽
Thank you for sharing this post on HIVE!
Your content got selected by our fellow curator elizacheng & you just received a little thank you upvote from us for your great work! Your post will be featured in one of our recurring compilations which are aiming to offer you a stage to widen your audience within the DIY scene of Hive. Next time make sure to post / cross-post your creation within the DIYHub community on HIVE and you will receive a higher upvote ;) Stay creative & HIVE ON!
Please vote for our hive witness <3
Hola. Me alegra leerte tan animada. Te felicito por el empeño que le estás poniendo. Es chévere que estés haciendo tus propios diseños. Me encantará ver toda tu colección de amigurumis. No olvides escribir y cuidar tus patrones.
¡Hola! MUCHAS GRACIAS, y también gracias por el consejo😊
Áwww quedó super lindo.☺️ Cuando tenga materiales espero poder hacer uno. Gracias por compartir 😊
Gracias,🤗 me alegra mucho que te haya gustado😊
Congratulations @delcielo! You have completed the following achievement on the Hive blockchain And have been rewarded with New badge(s)
Your next target is to reach 20 posts.
Your next target is to reach 900 upvotes.
Your next target is to reach 100 replies.
You can view your badges on your board and compare yourself to others in the Ranking
If you no longer want to receive notifications, reply to this comment with the word
STOPCheck out the last post from @hivebuzz:
Support the HiveBuzz project. Vote for our proposal!