The architecture of the house window design that was so popular in the 2000s and is now starting to be ignored by the public.
![]()
How are you friends of architectural design hiveans, I am deltasteem from aceh, the province of Indonesia, in the last few weeks I have been a little busy completing the project of making frames for the construction of mosque buildings in large numbers and for the architectural design process of the frames for these buildings I did not have time to take pictures of each process and I have a publication for the project.
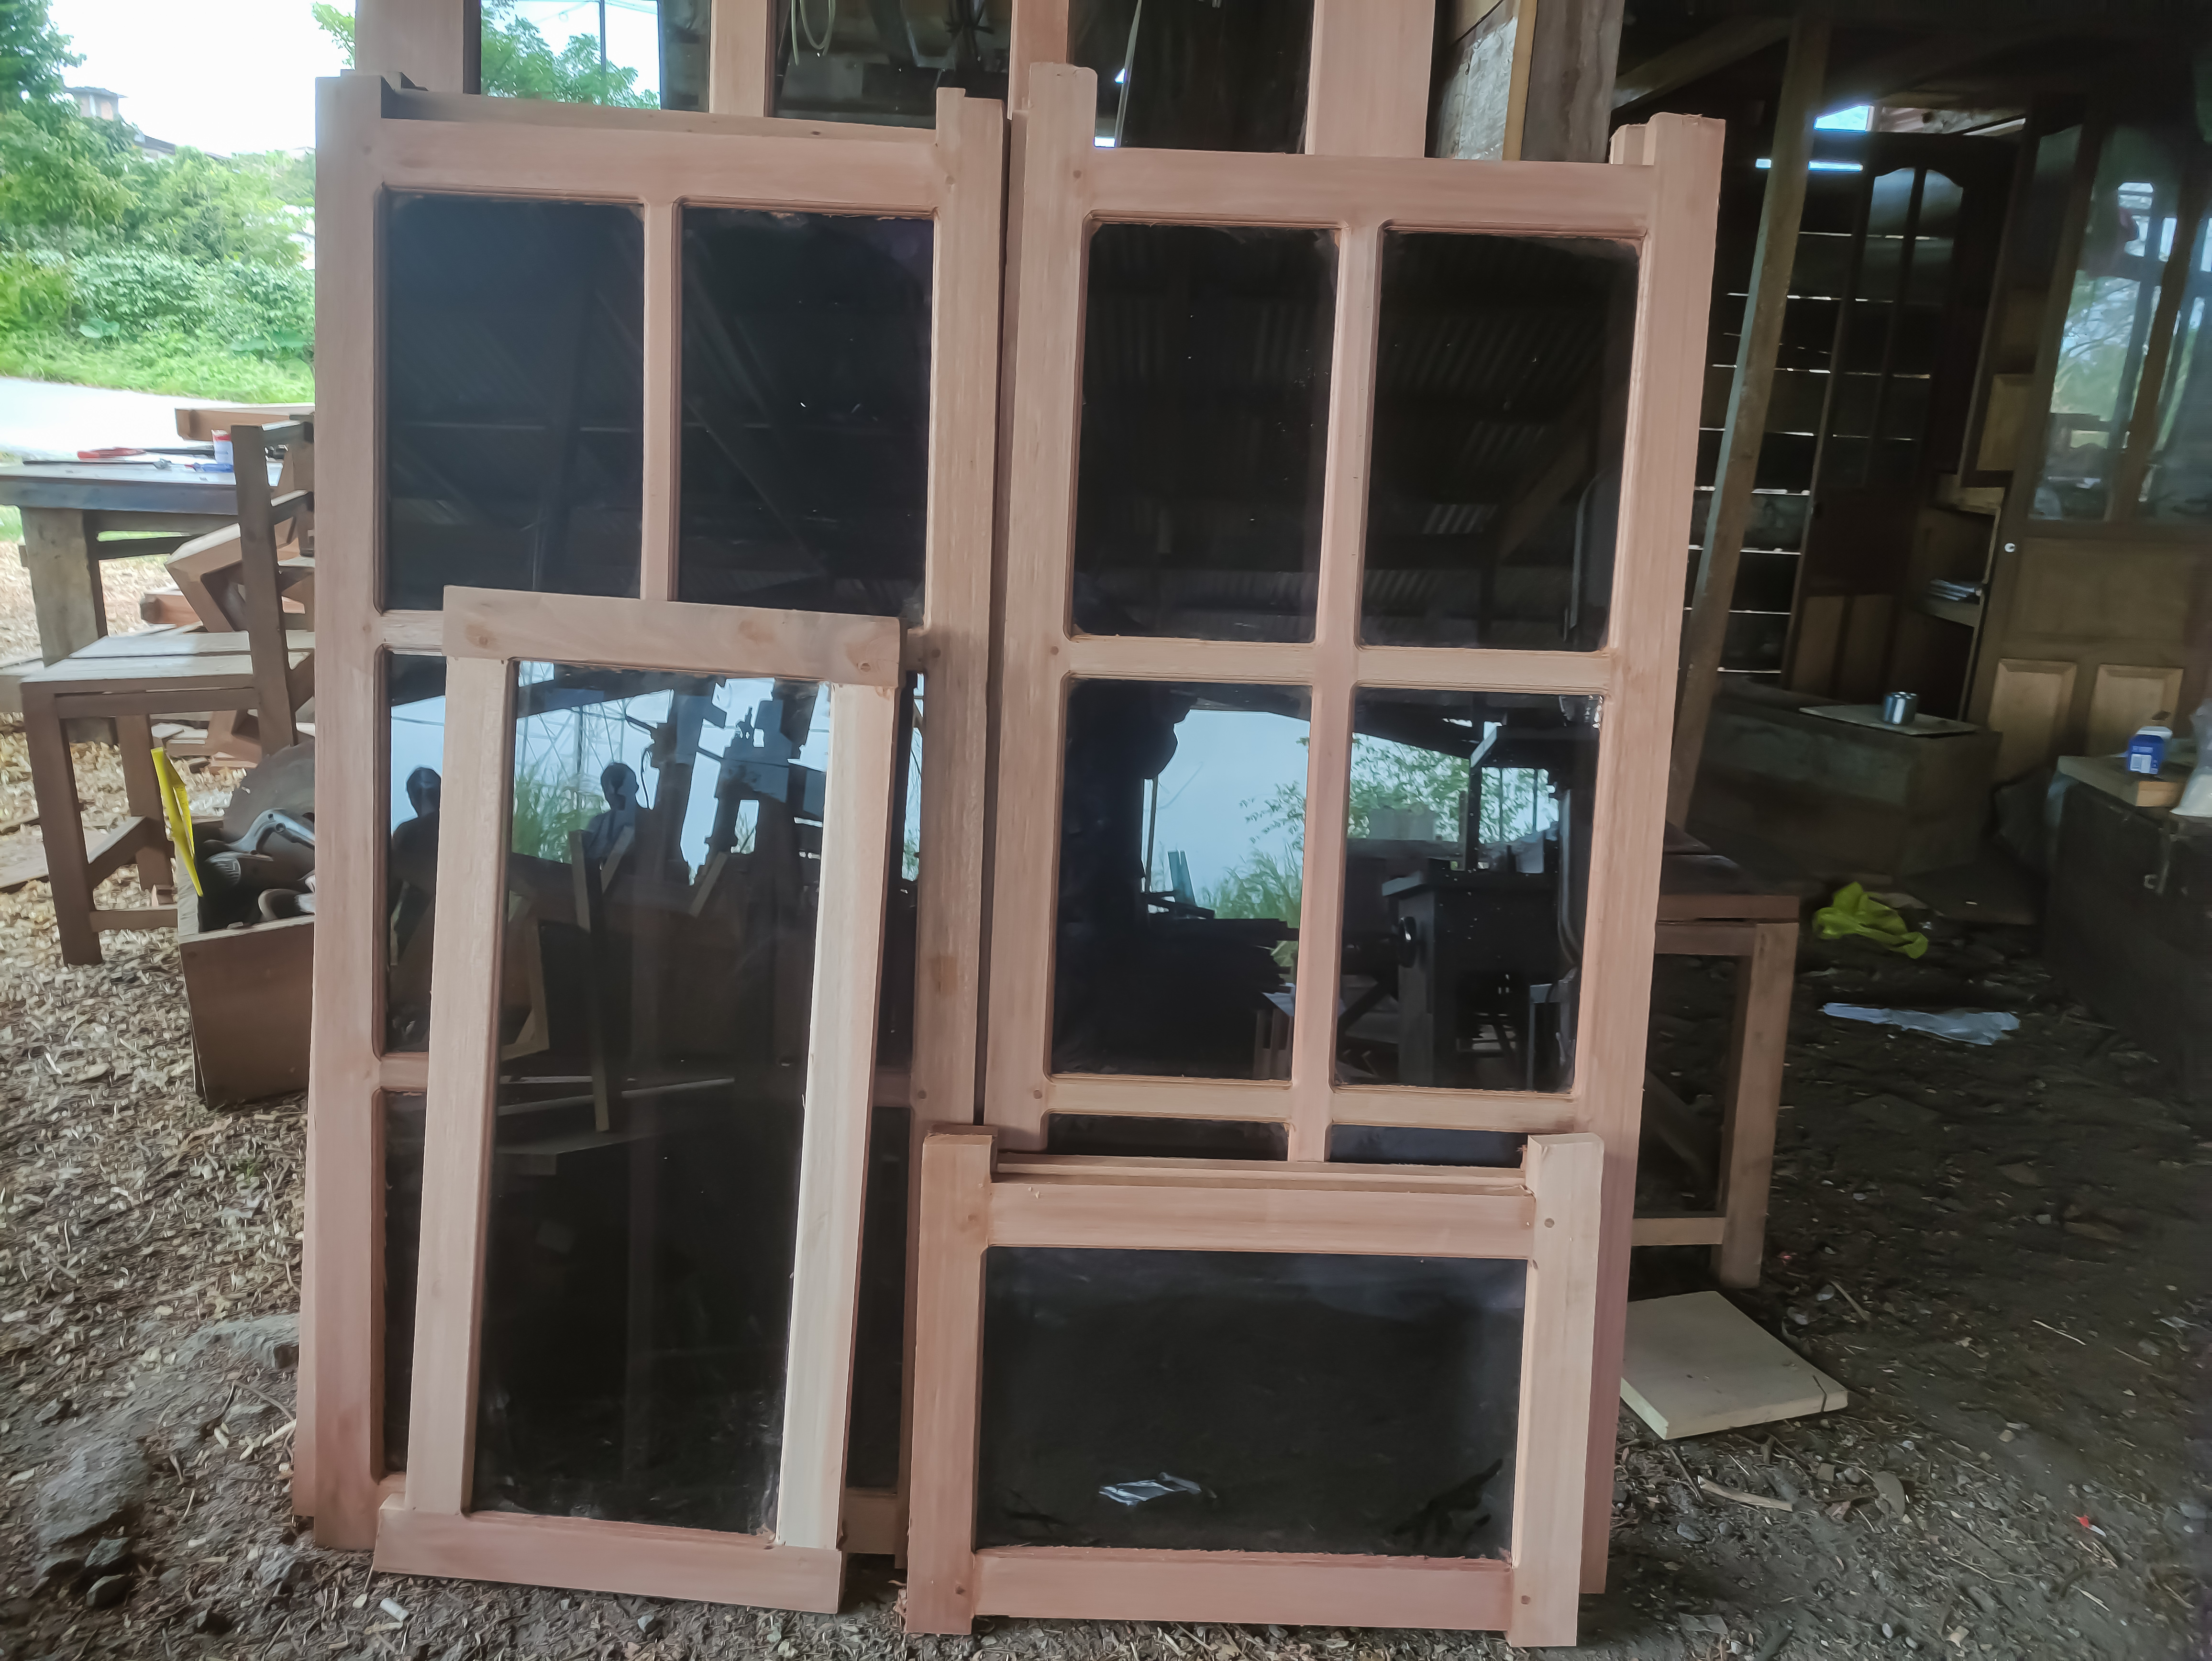
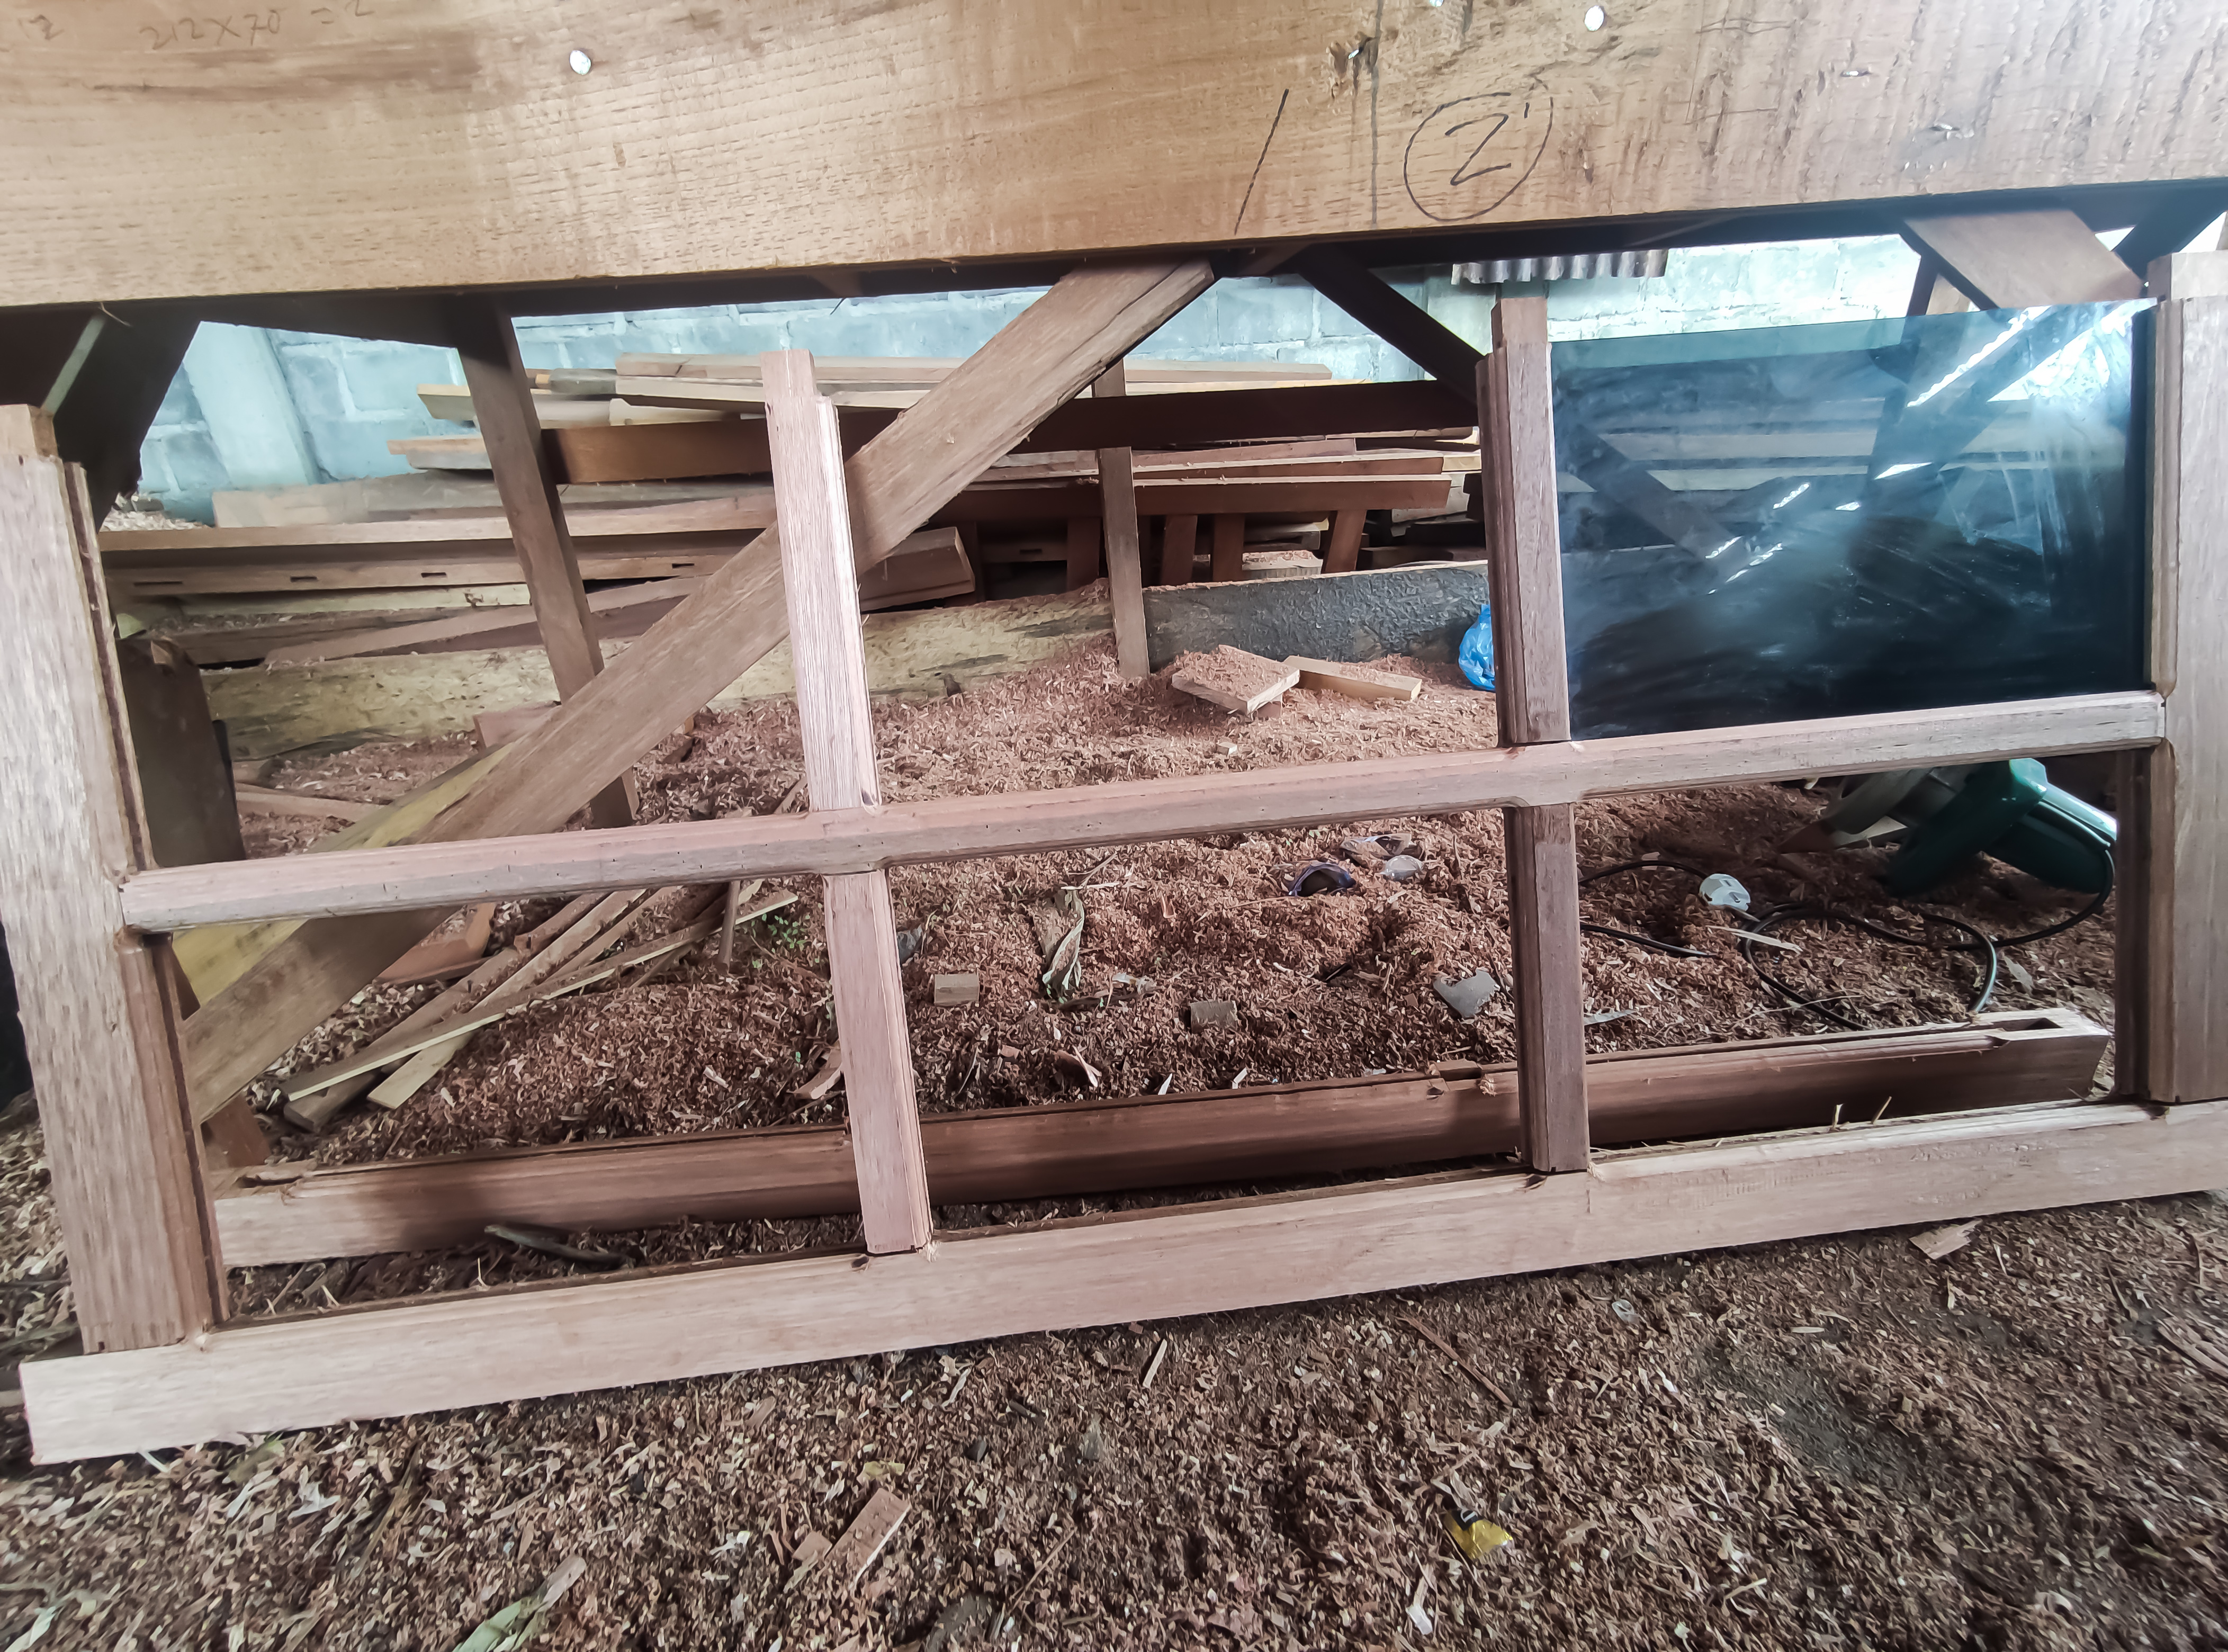
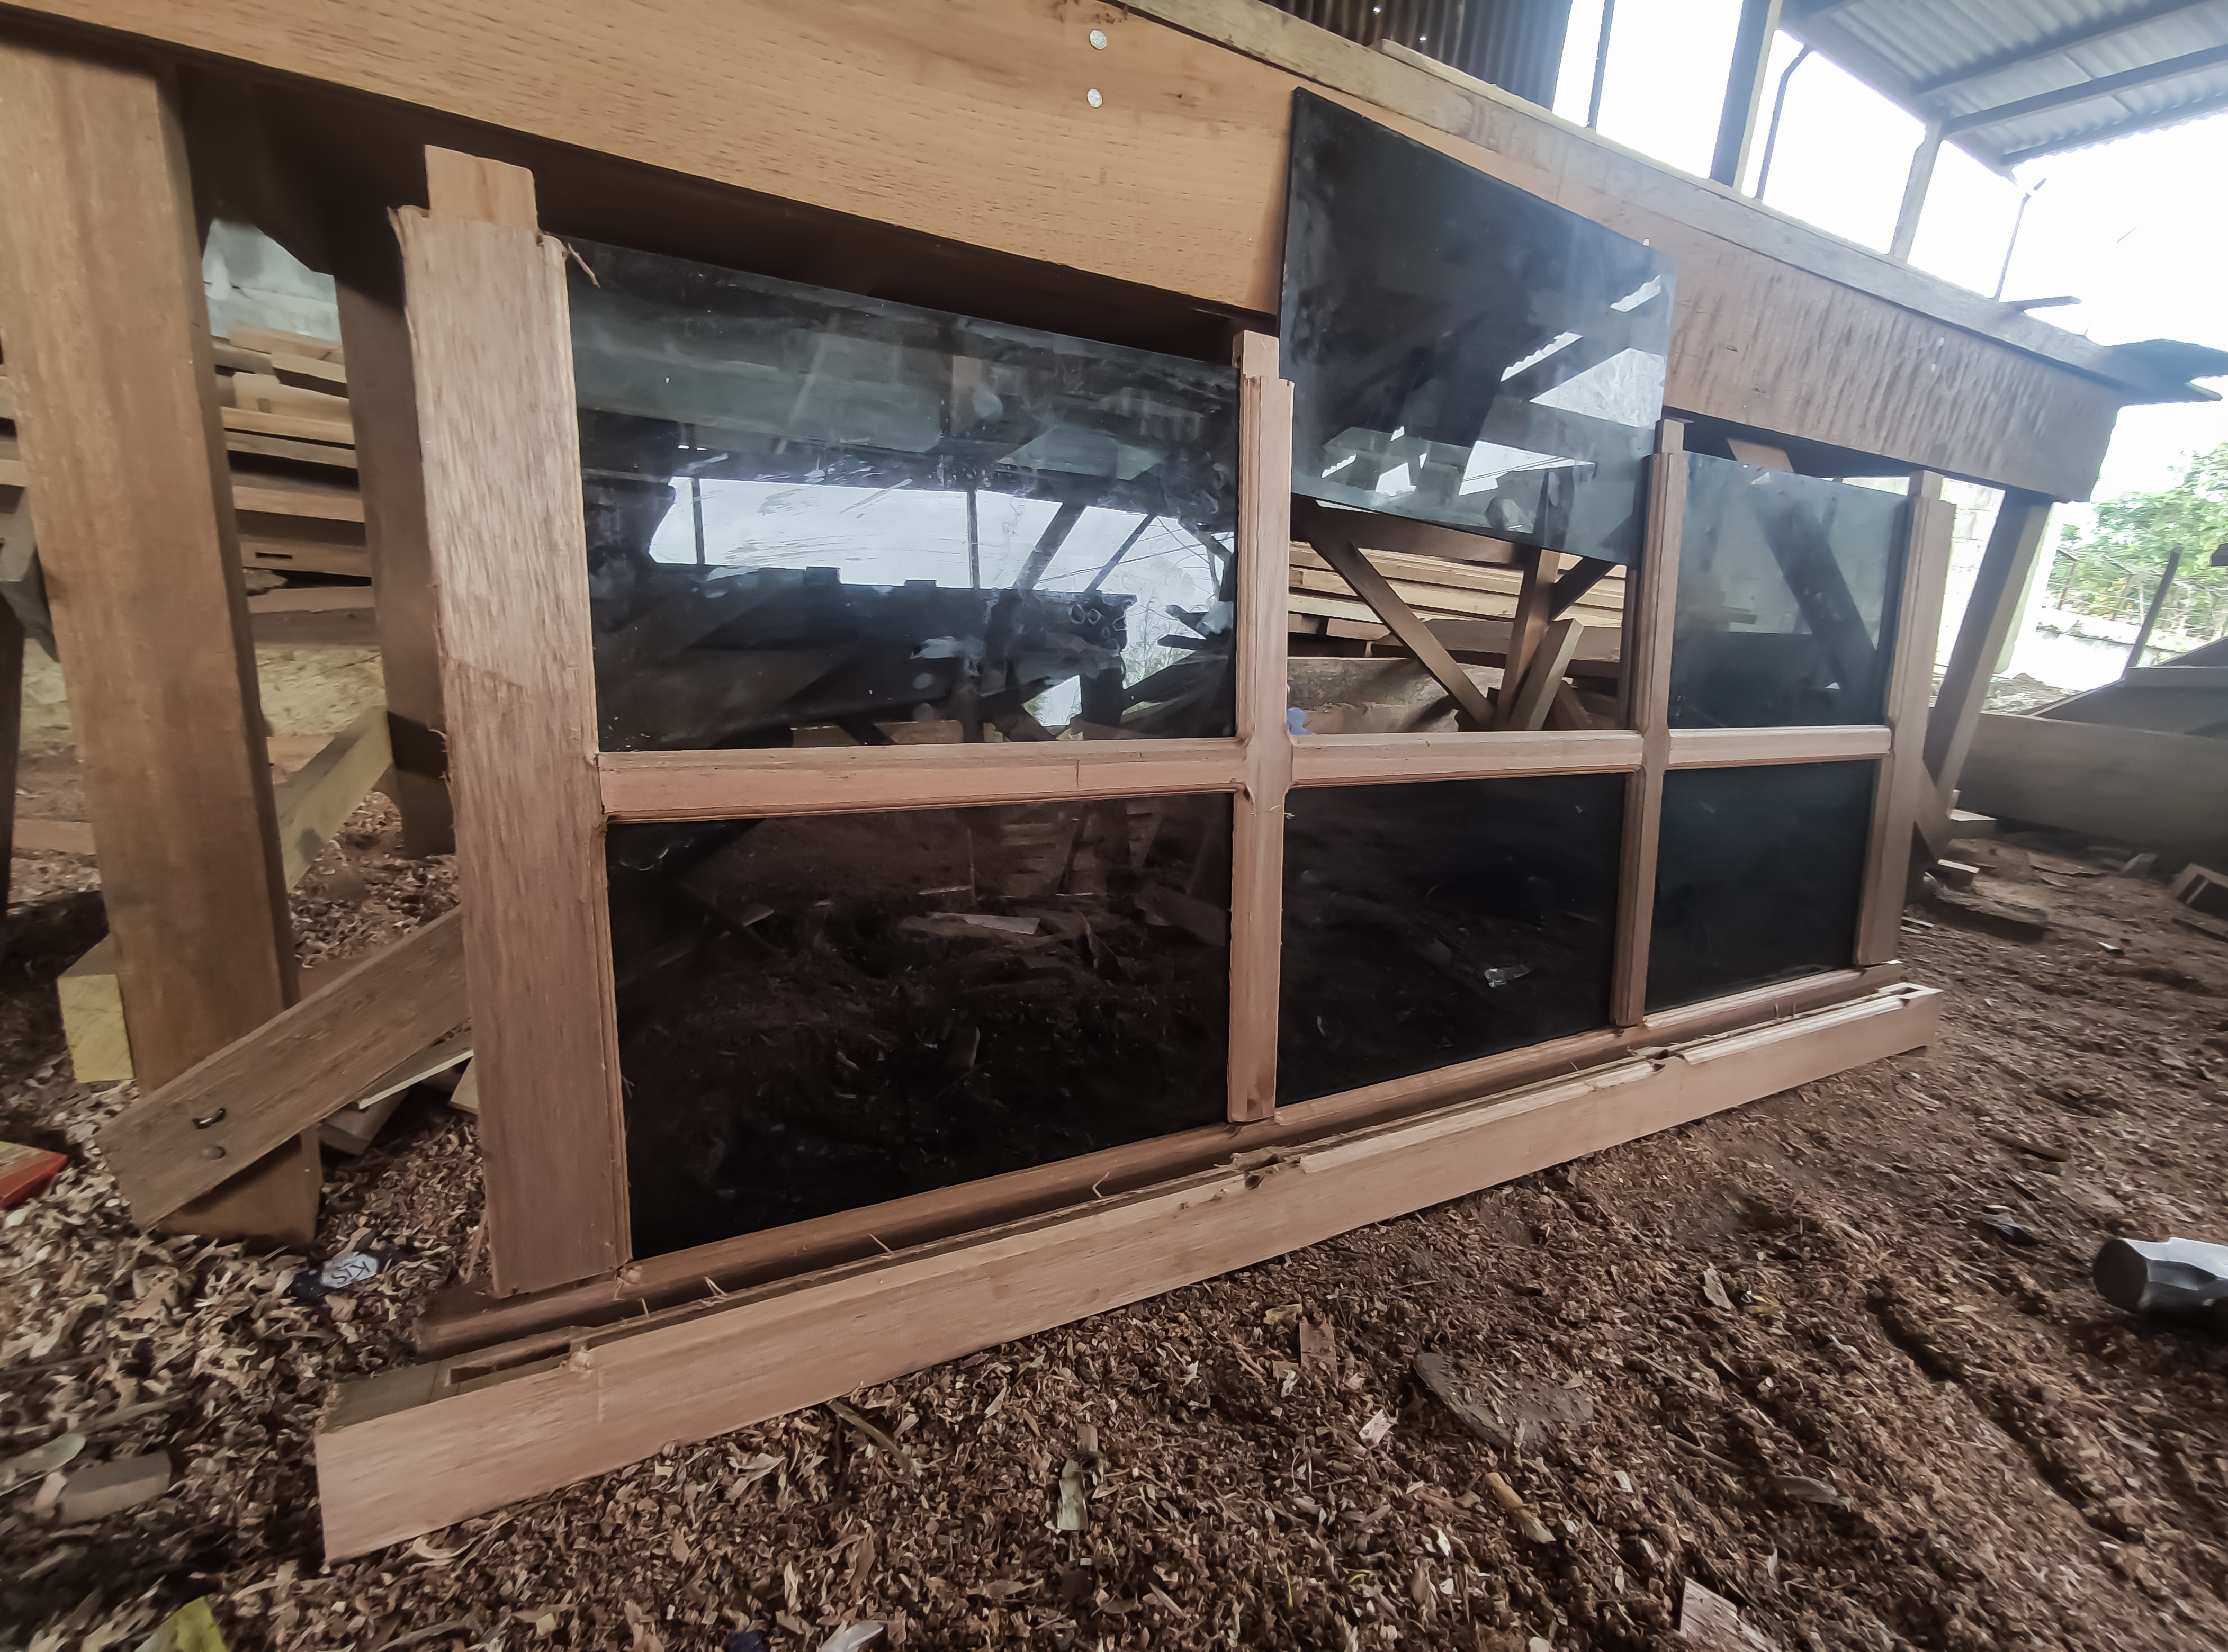
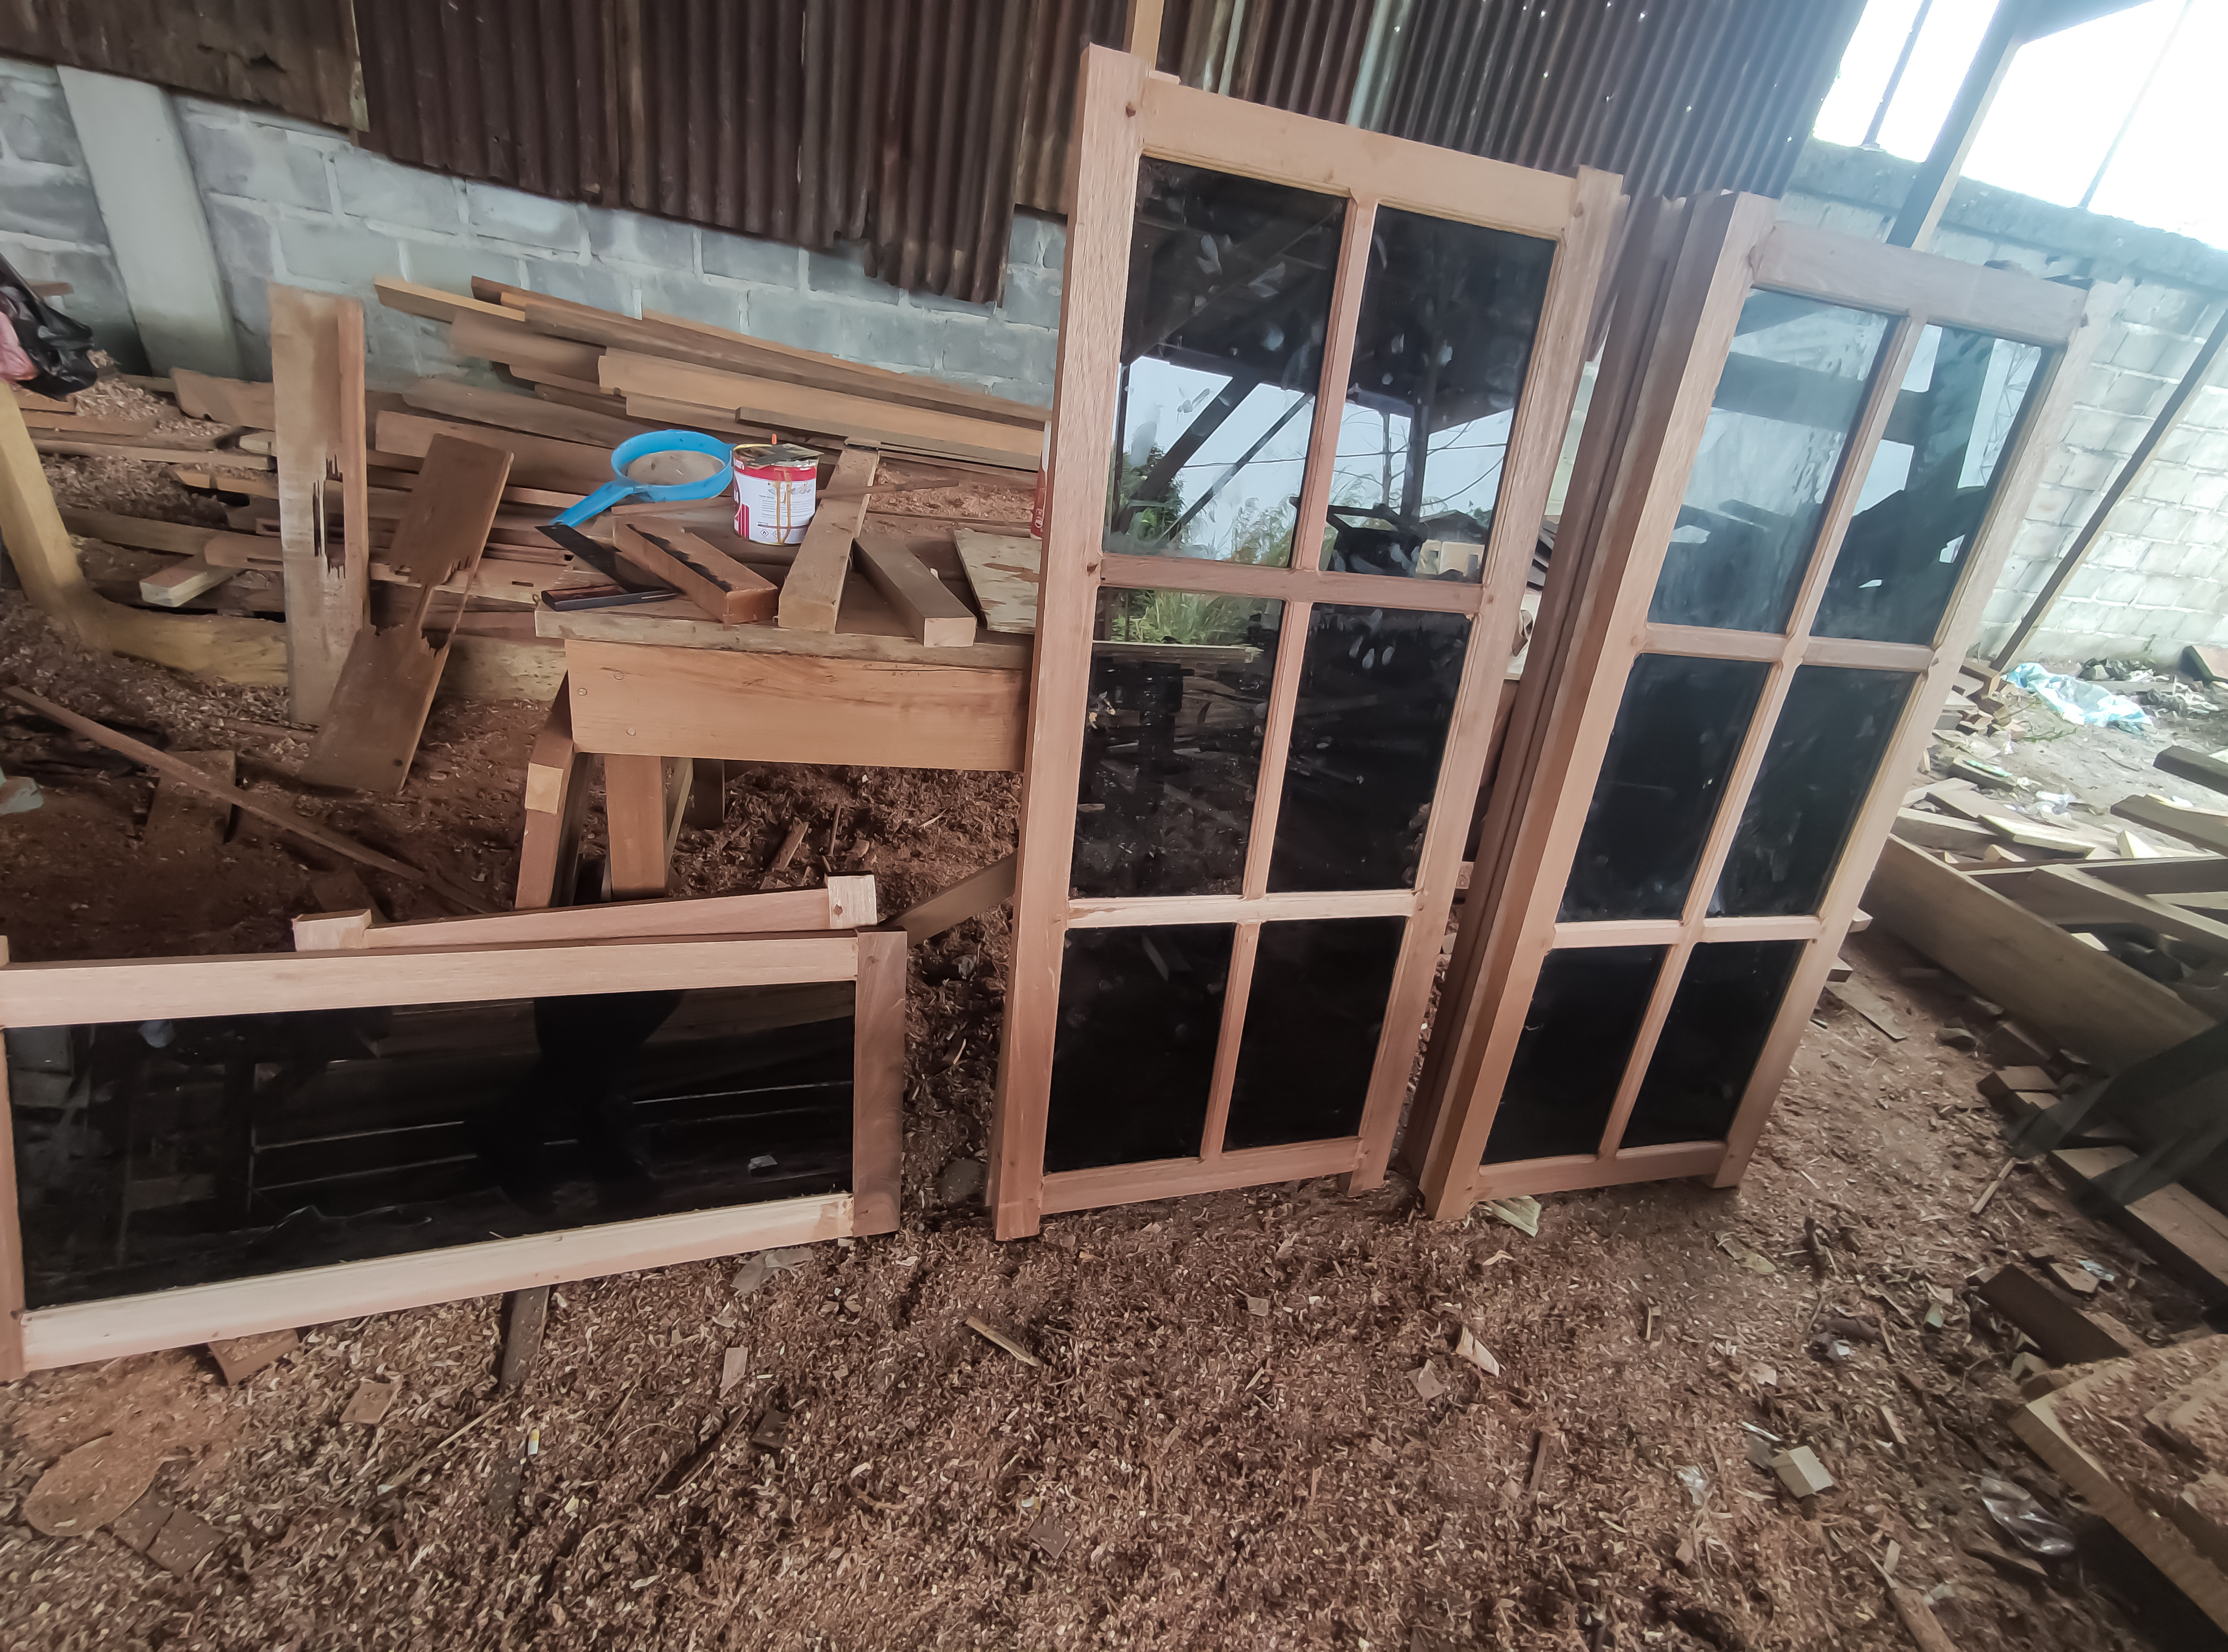
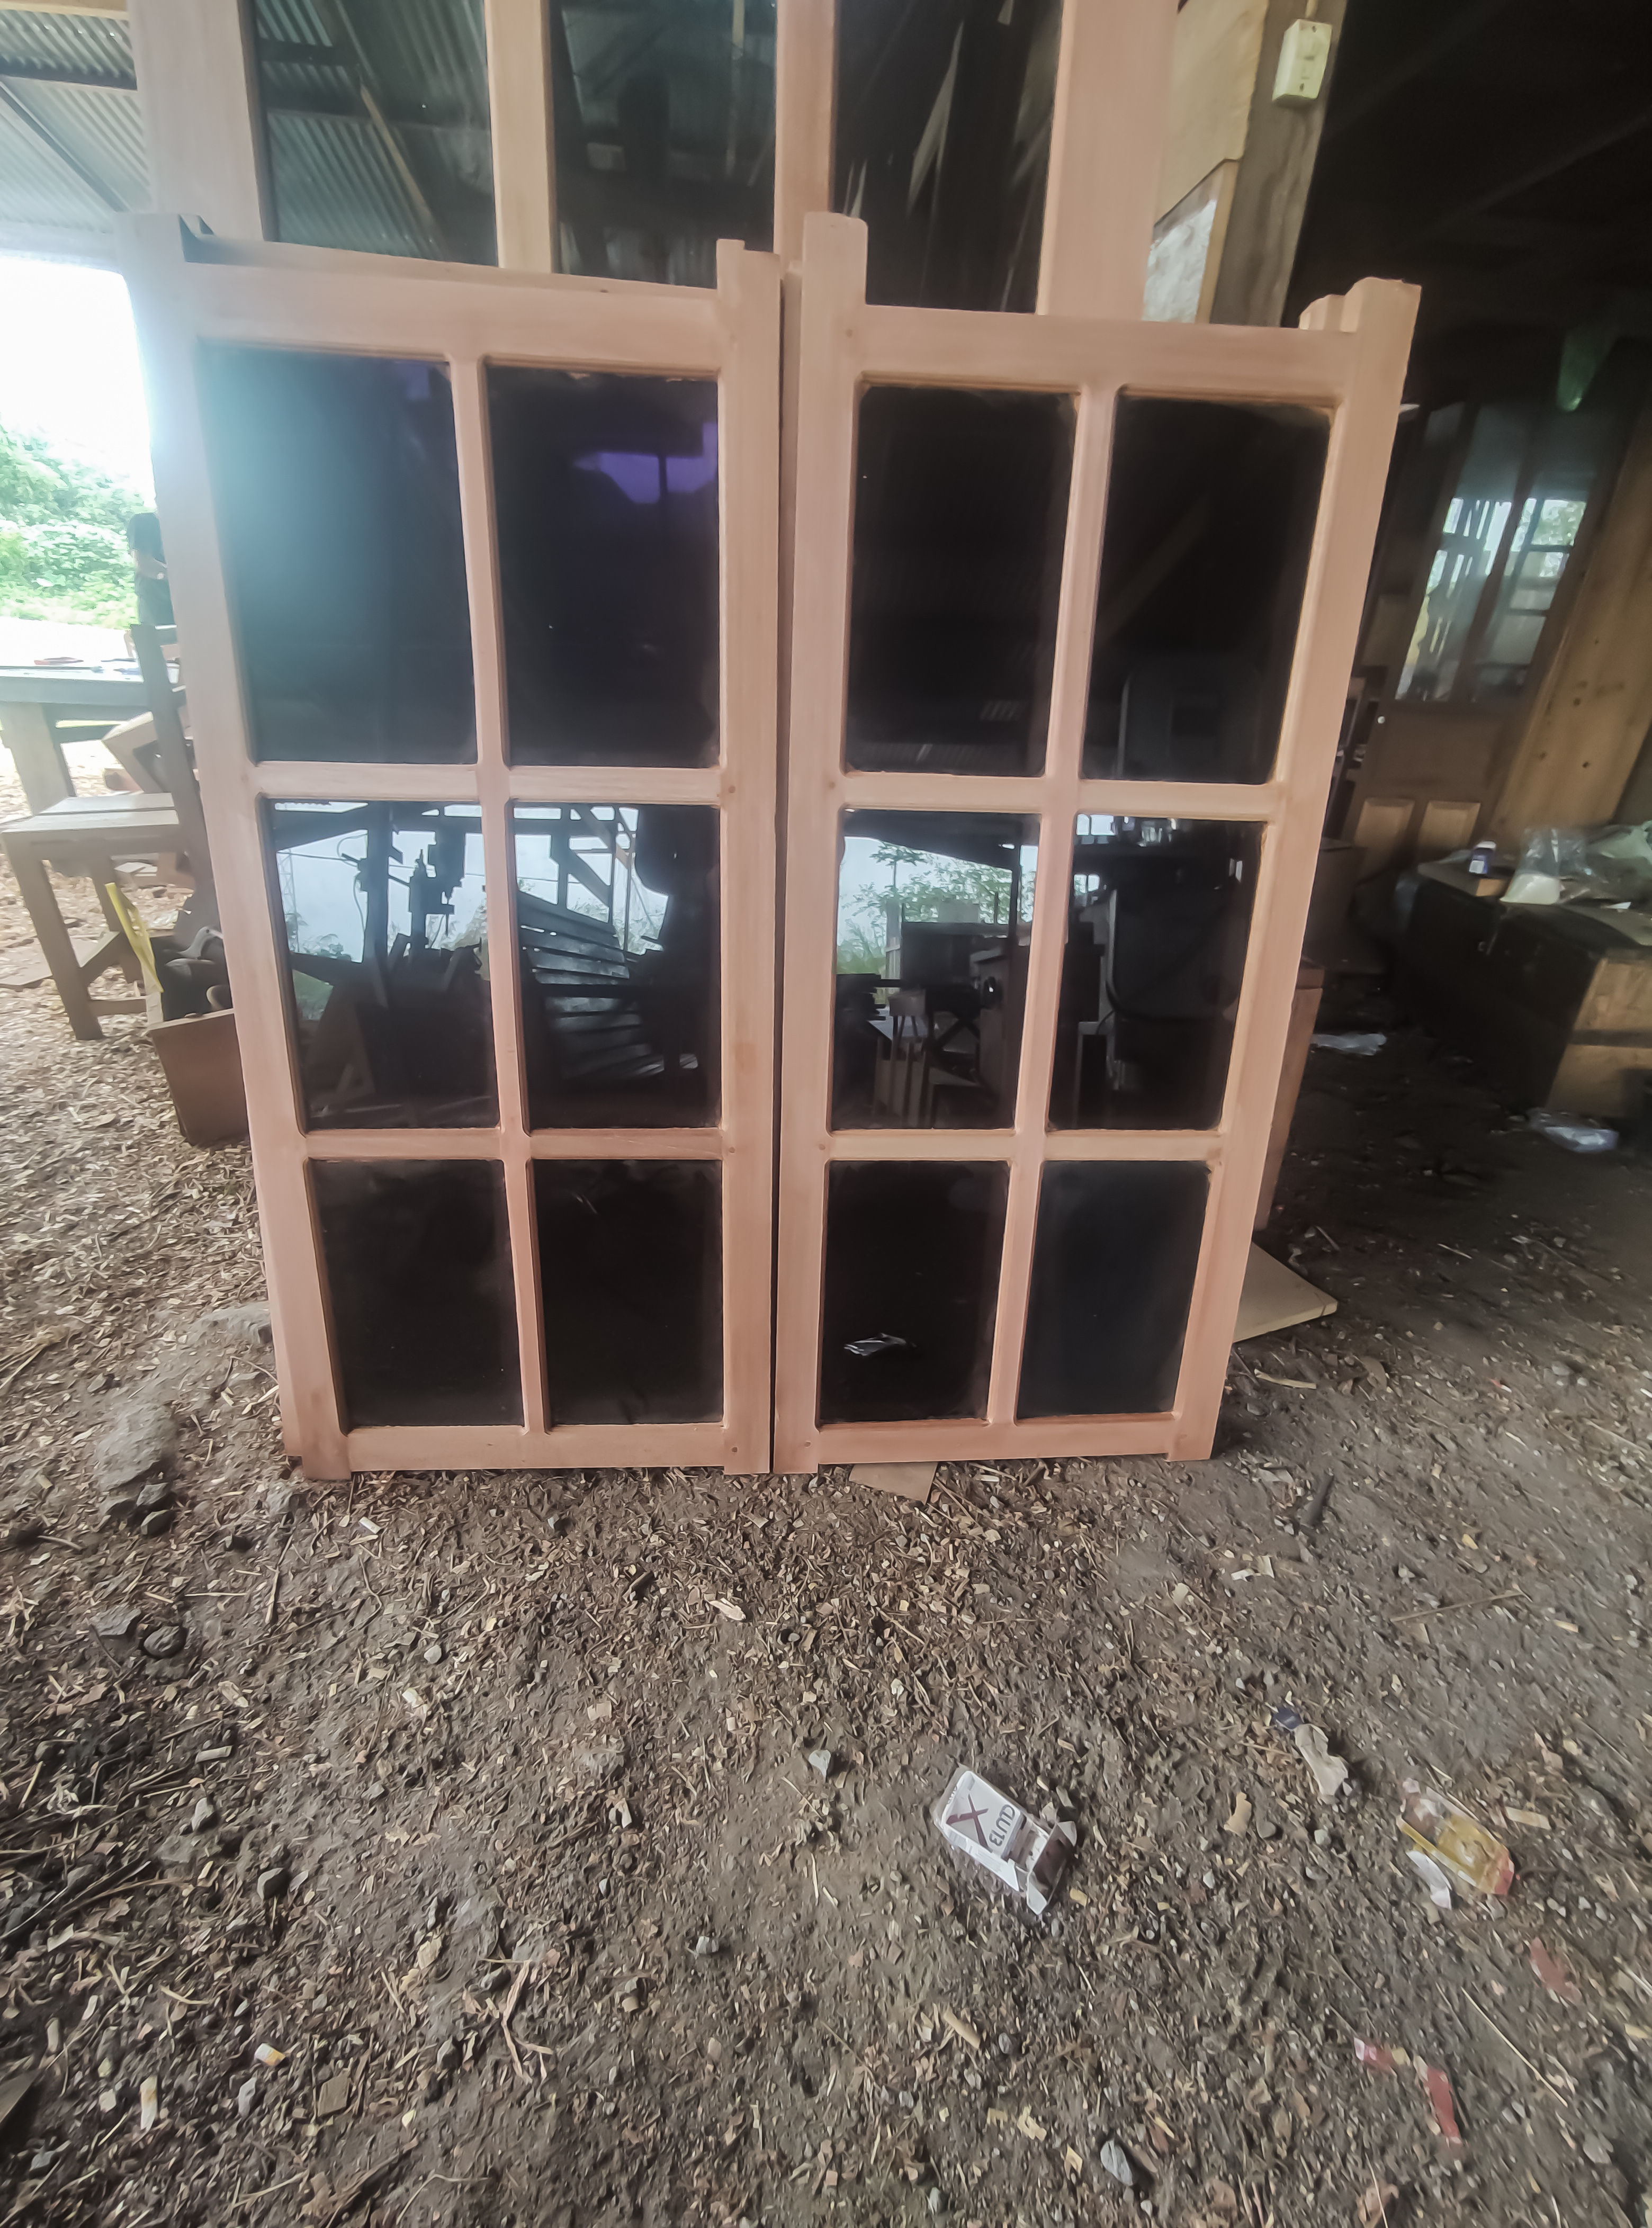
And in the last few days this week I just got a house design architectural window equipped with 3 units of door and window jalousie with an order from meranti wood with 5mm transparent black glass and is an order from the local community.
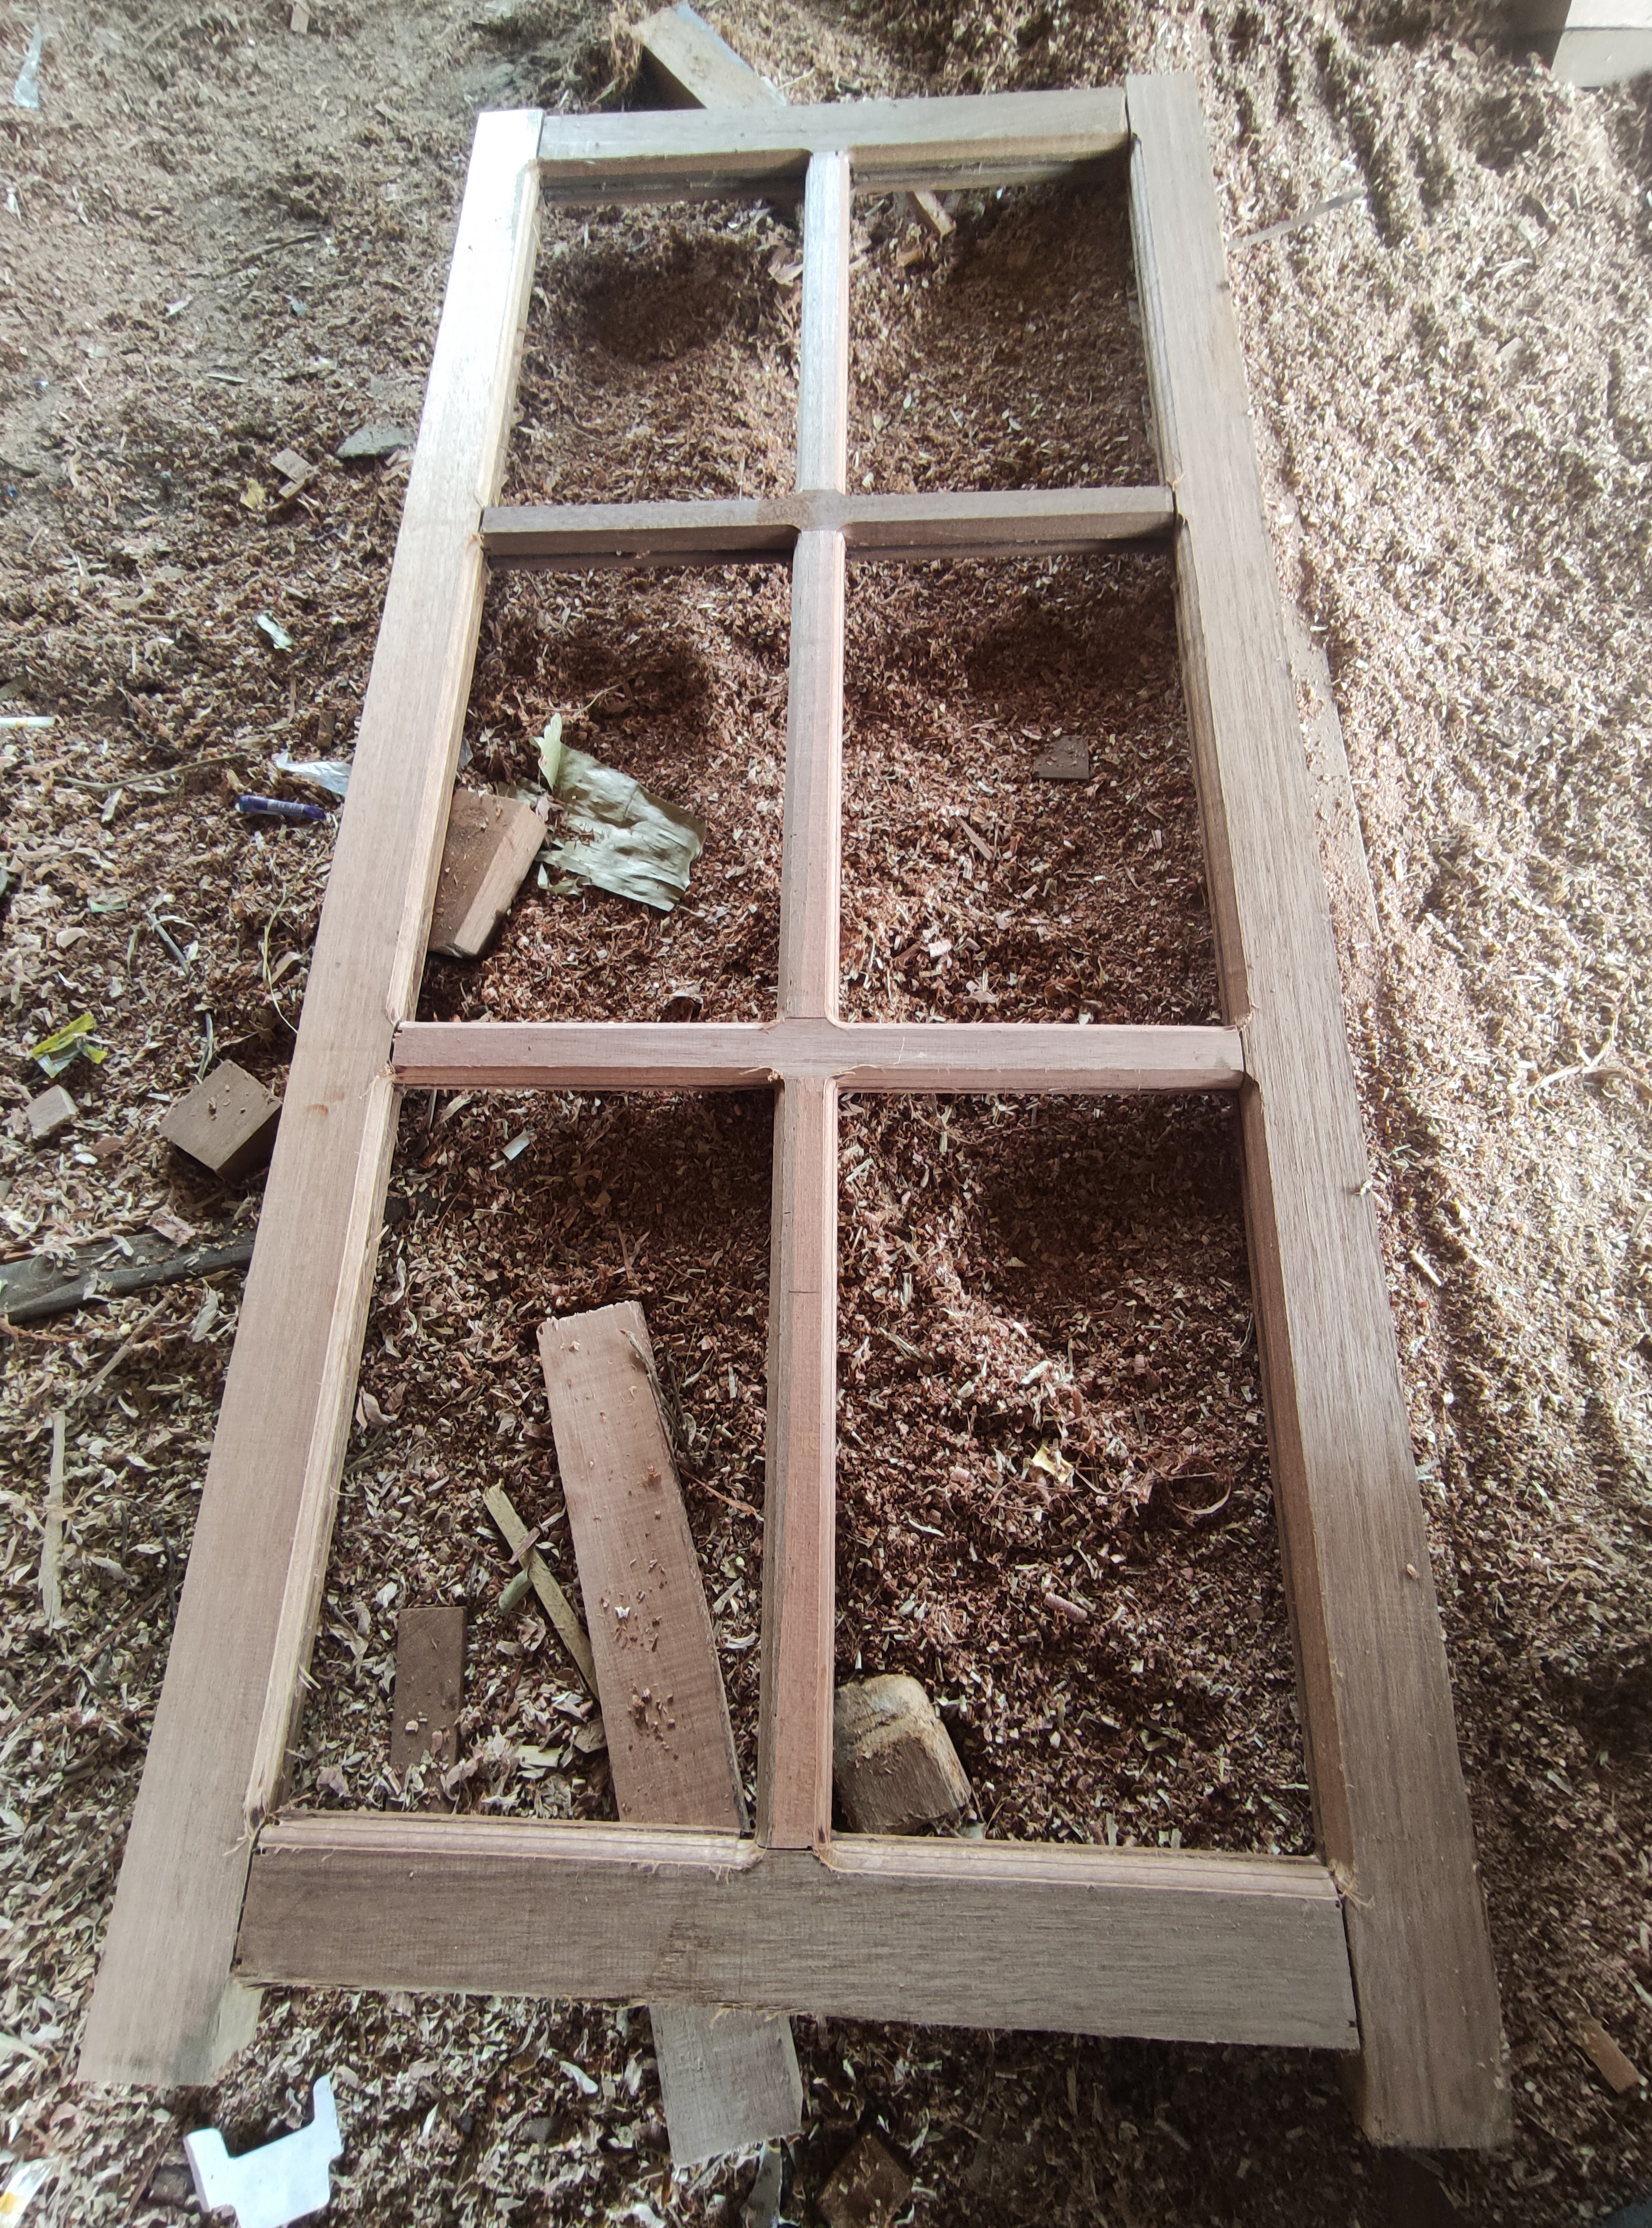
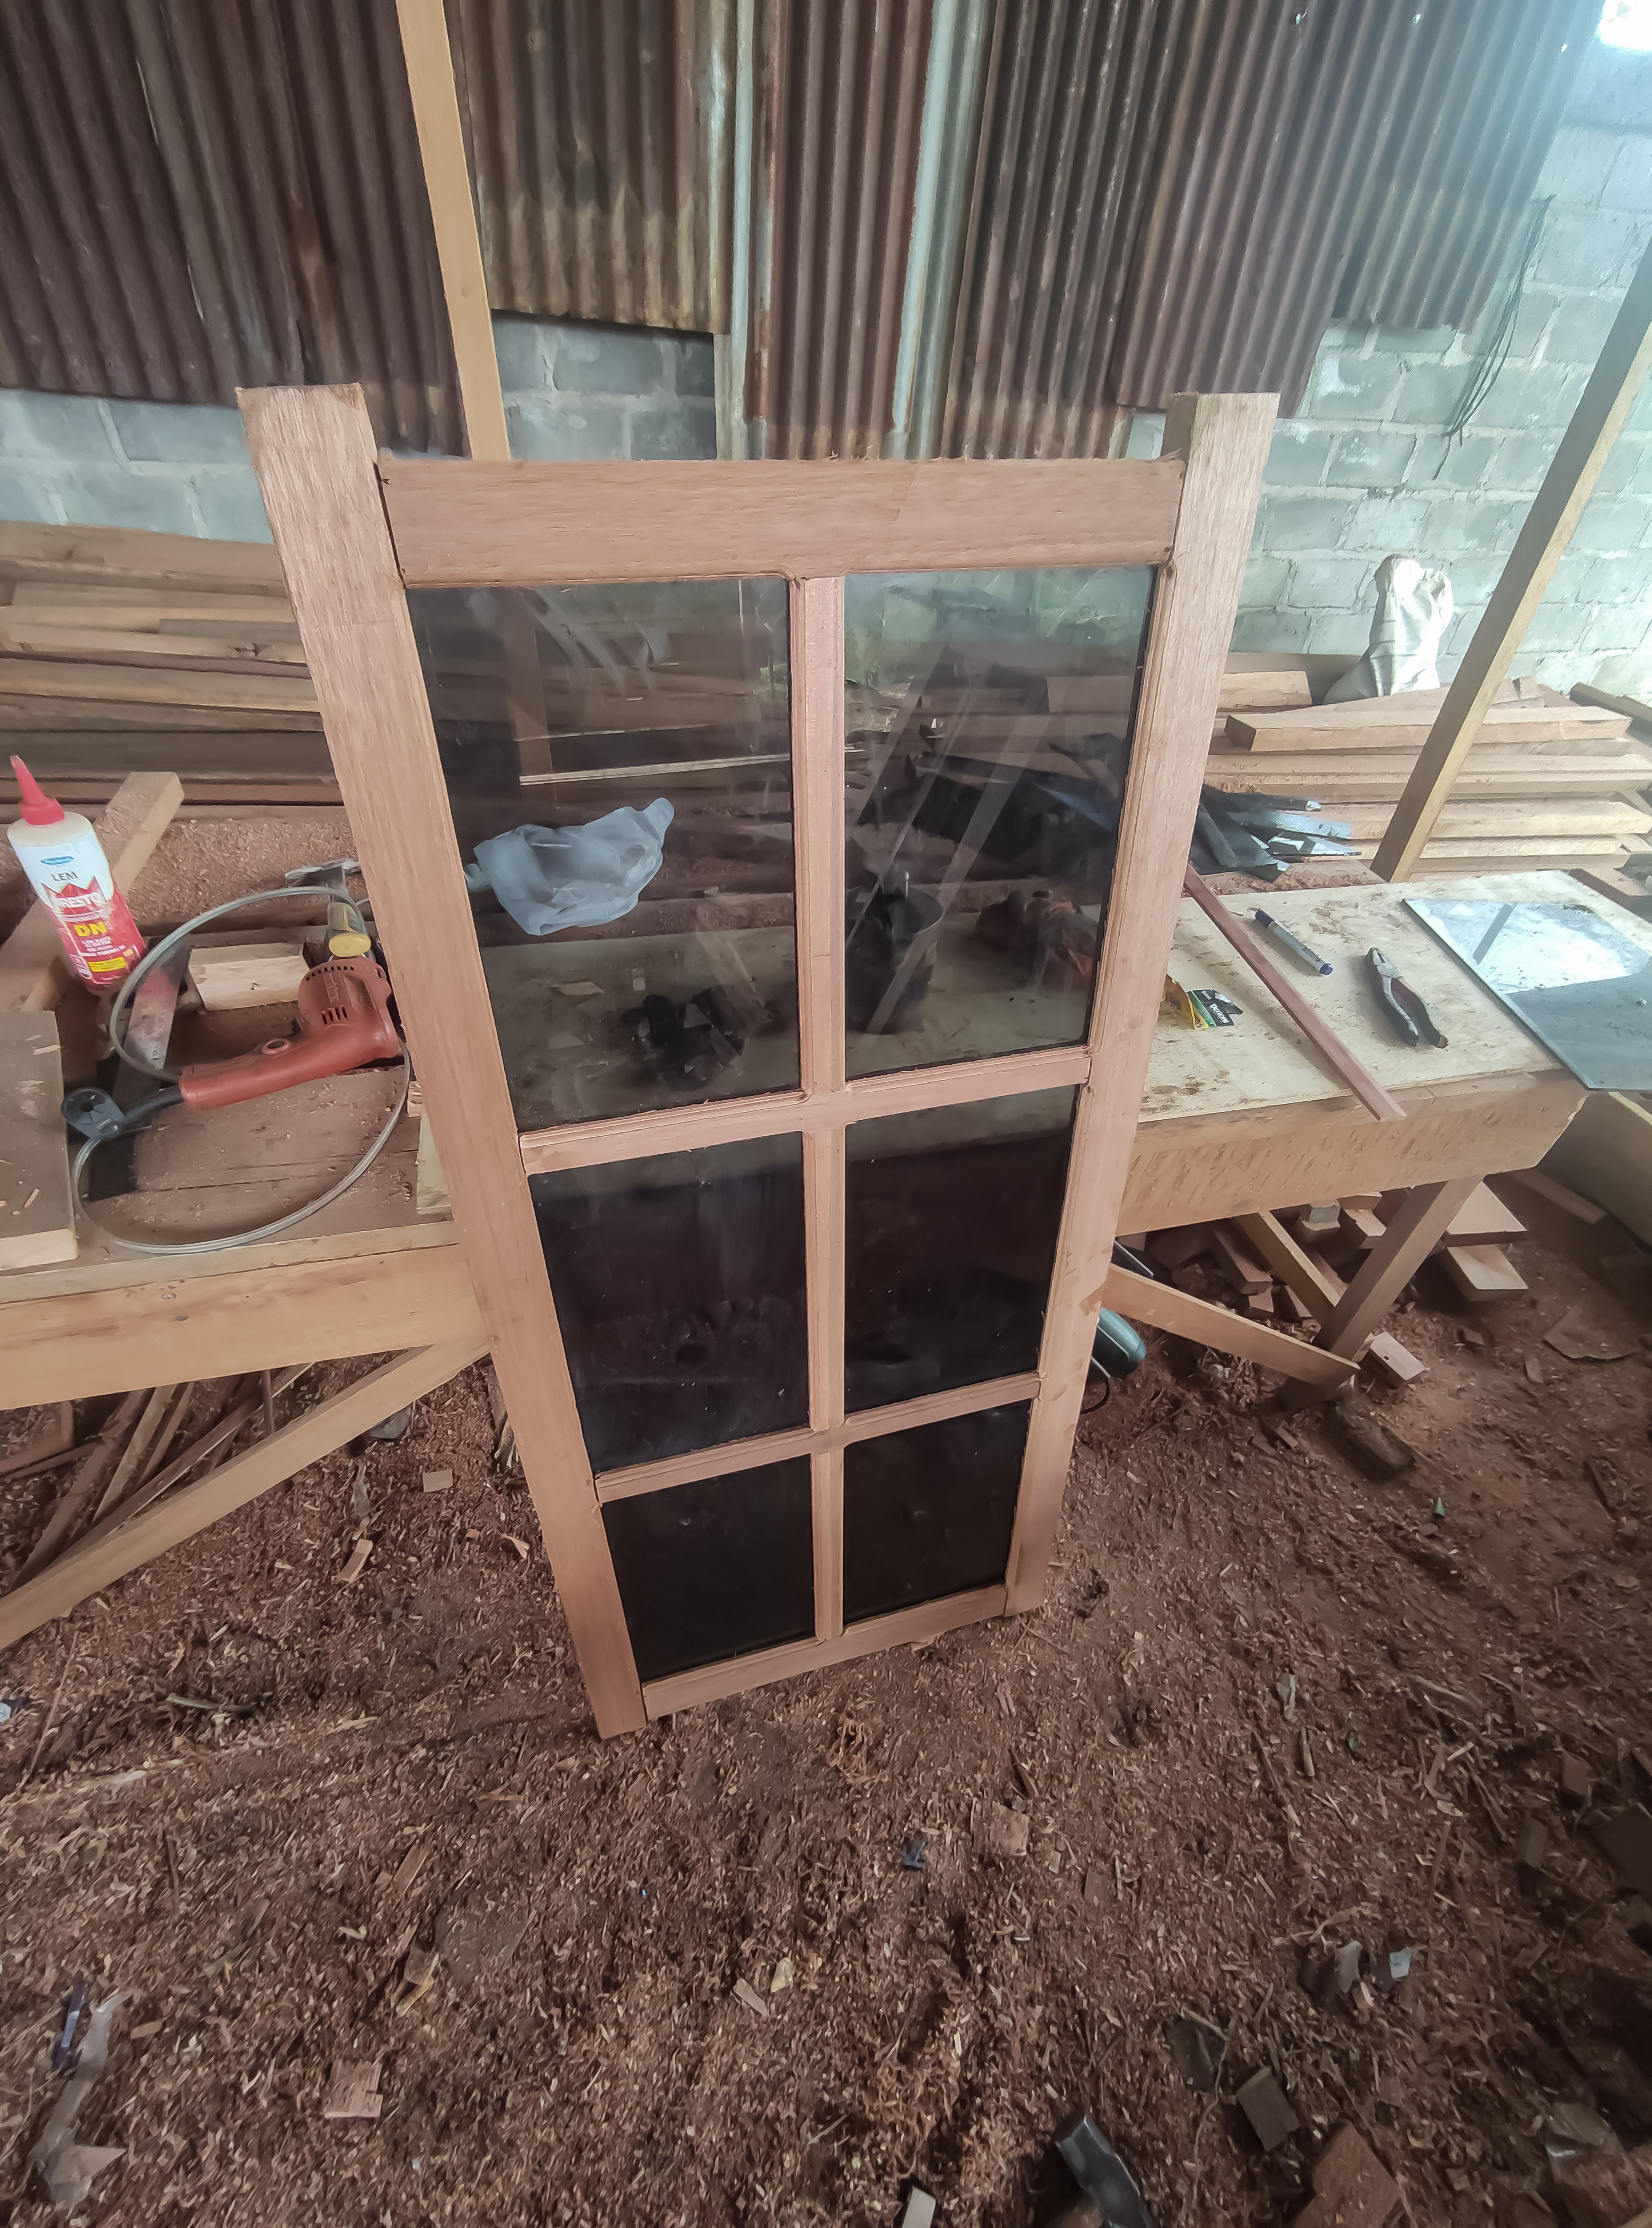
This time I got an order for a house window with a 2000s window design and that design is a bit rarely used by people in today's modern era and this is what the order window design looks like I just finished working on in the last few days this week.

![]()
When I saw the window design provided by my customer, I remembered the window of my grandmother's house around the village which was a window design that was so much in demand by the people at that time and in modern times, I rarely receive orders for windows with this design.
But you need to know that for a window design like this it has a long enough durability compared to a plain rectangular window without reinforcement in the middle of the window bulkhead.
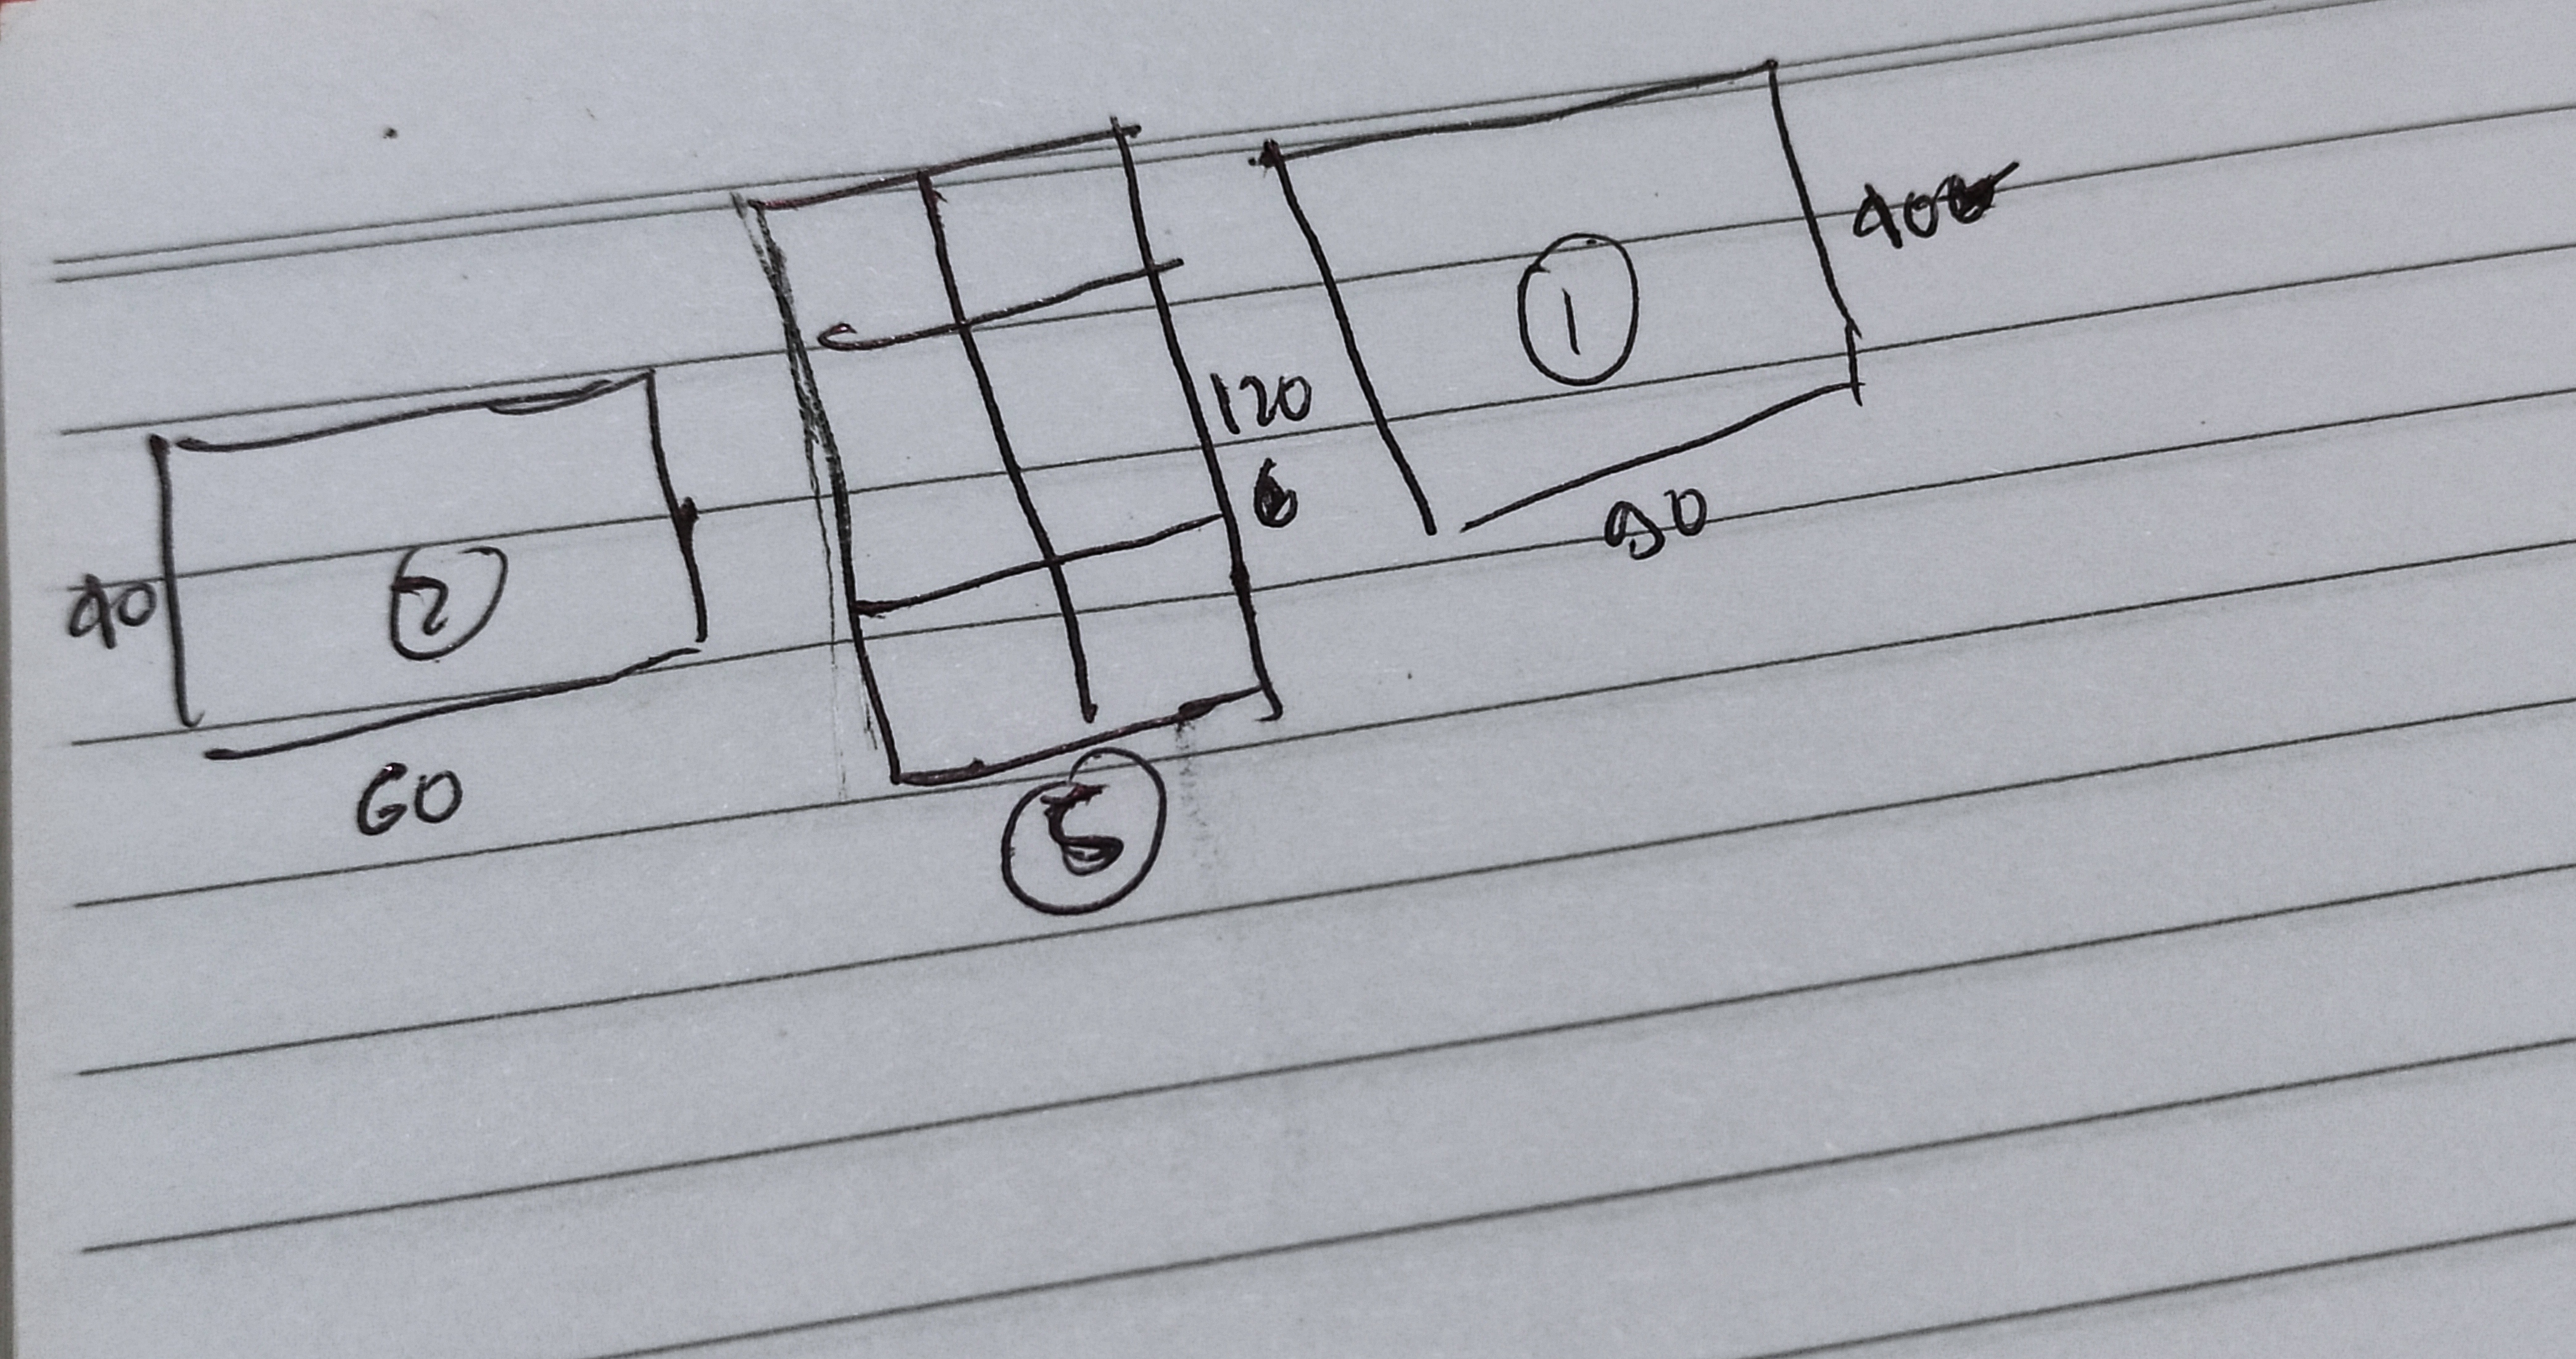
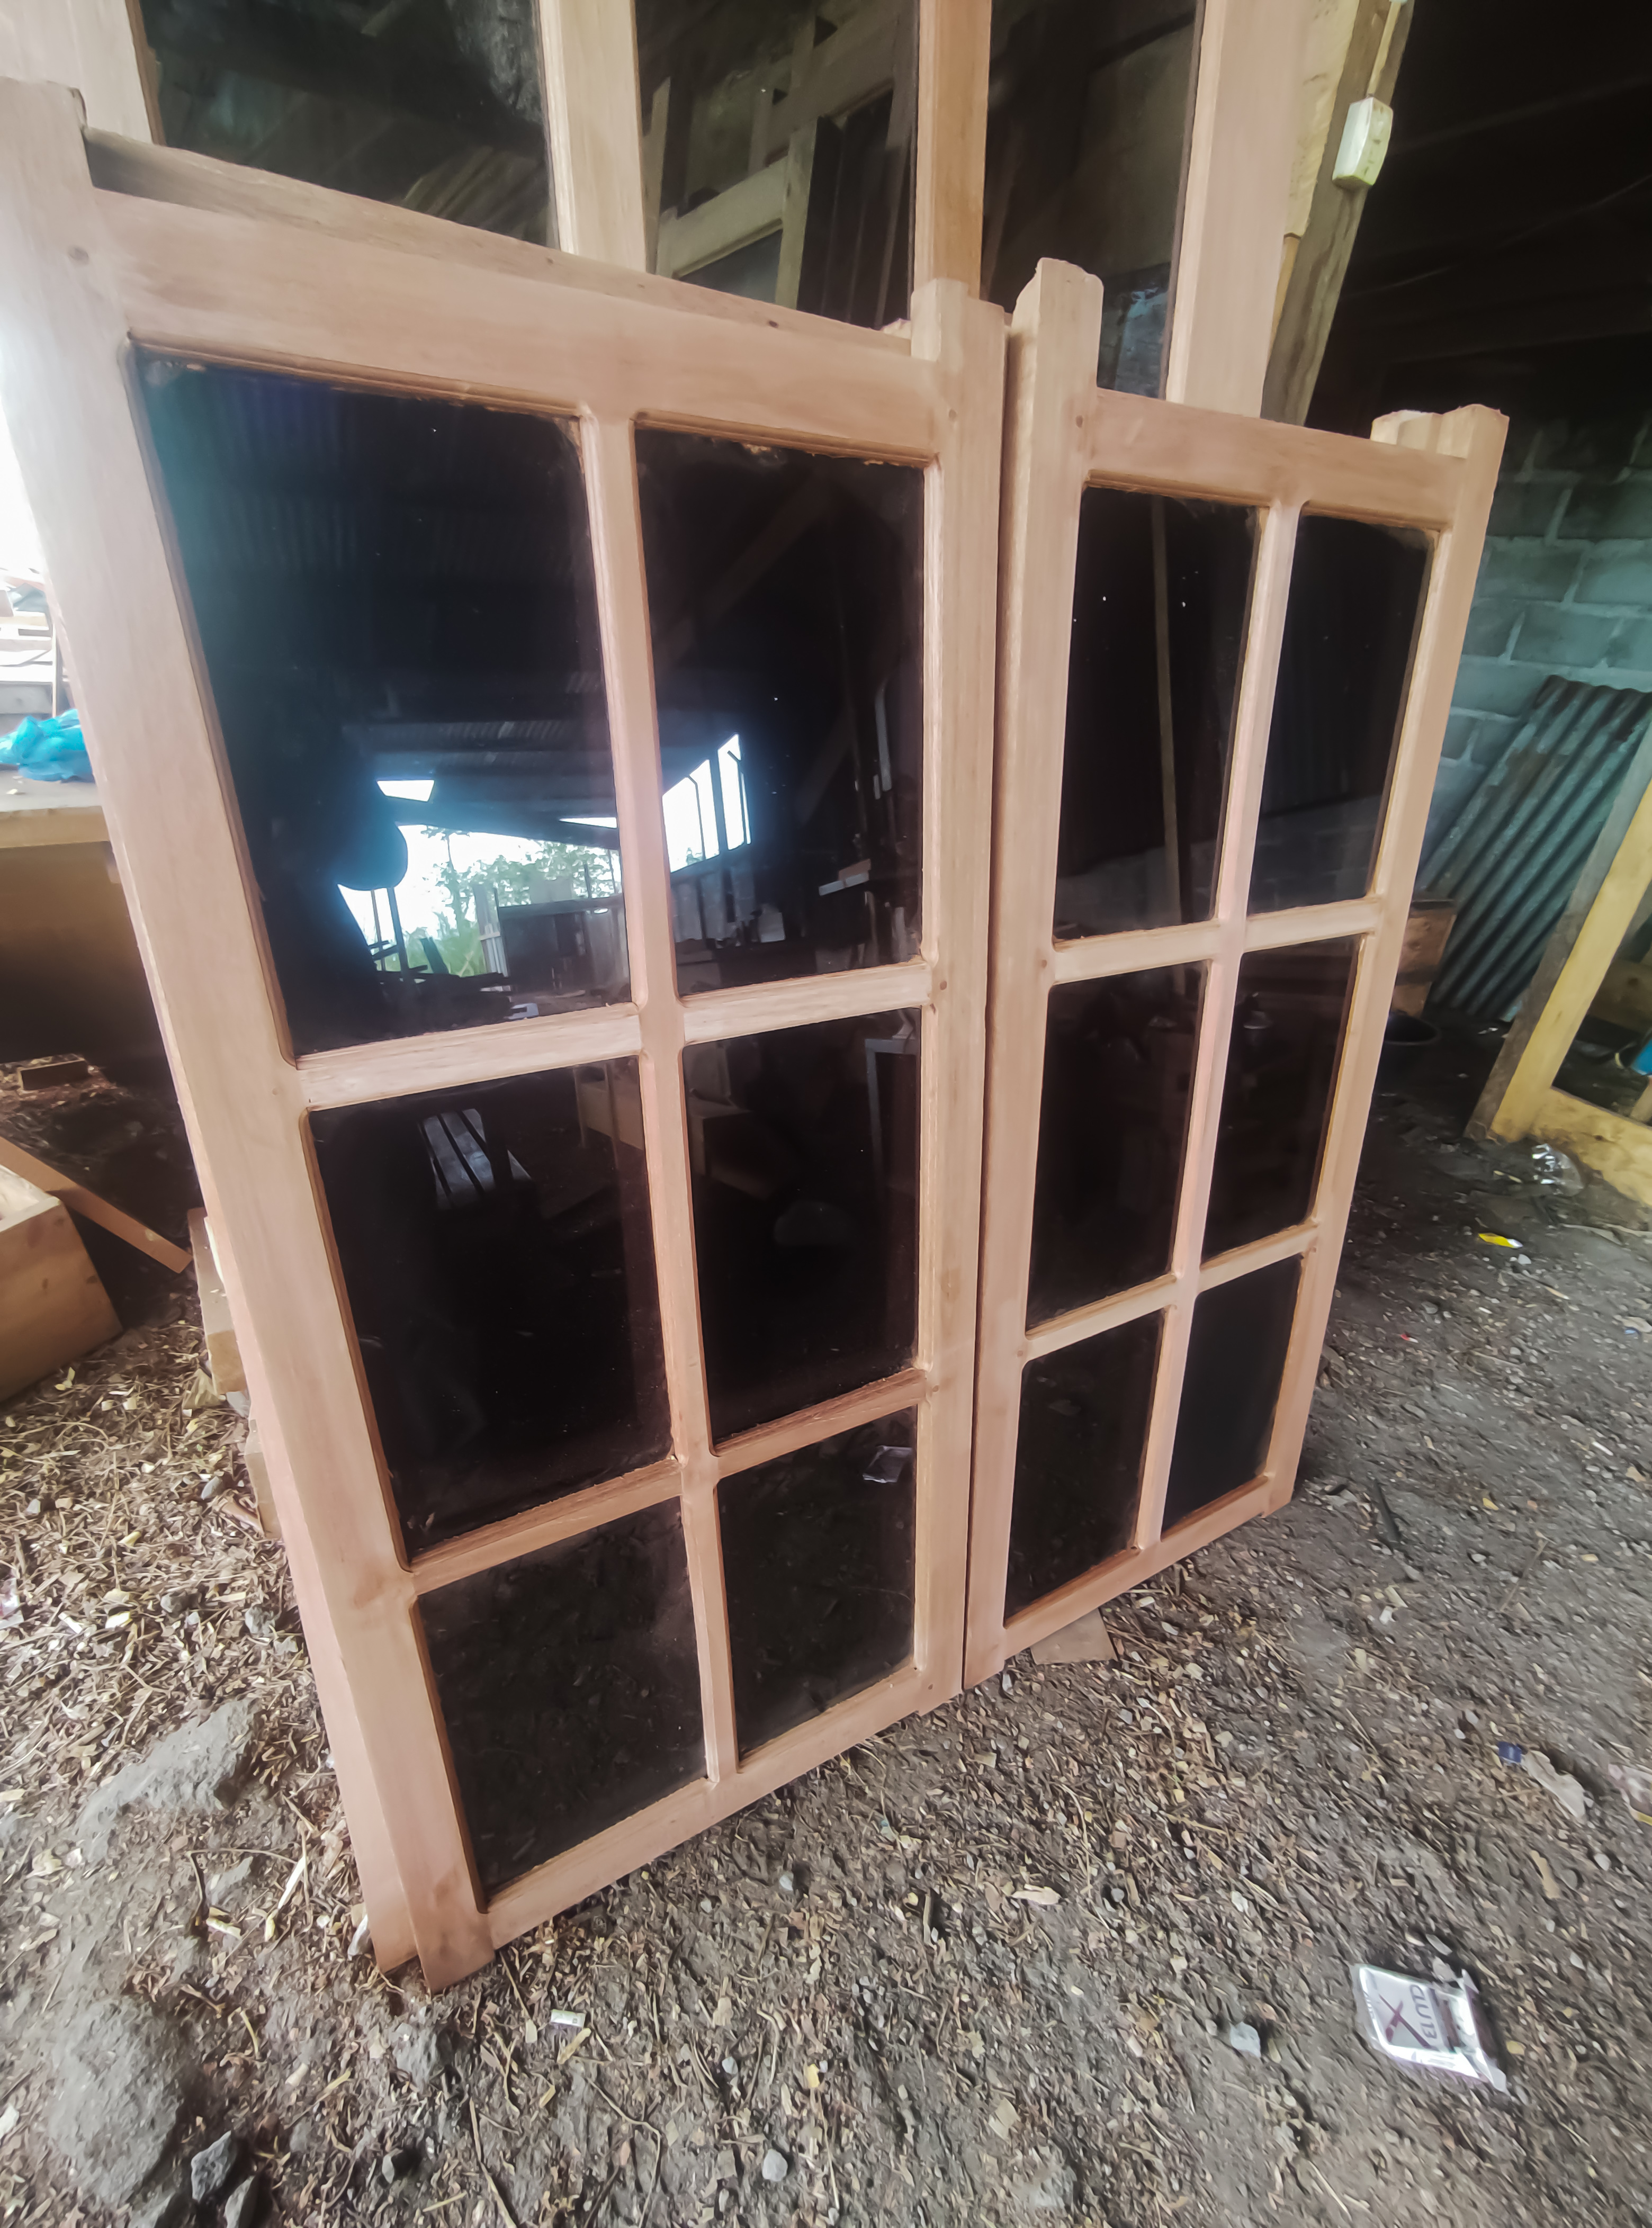
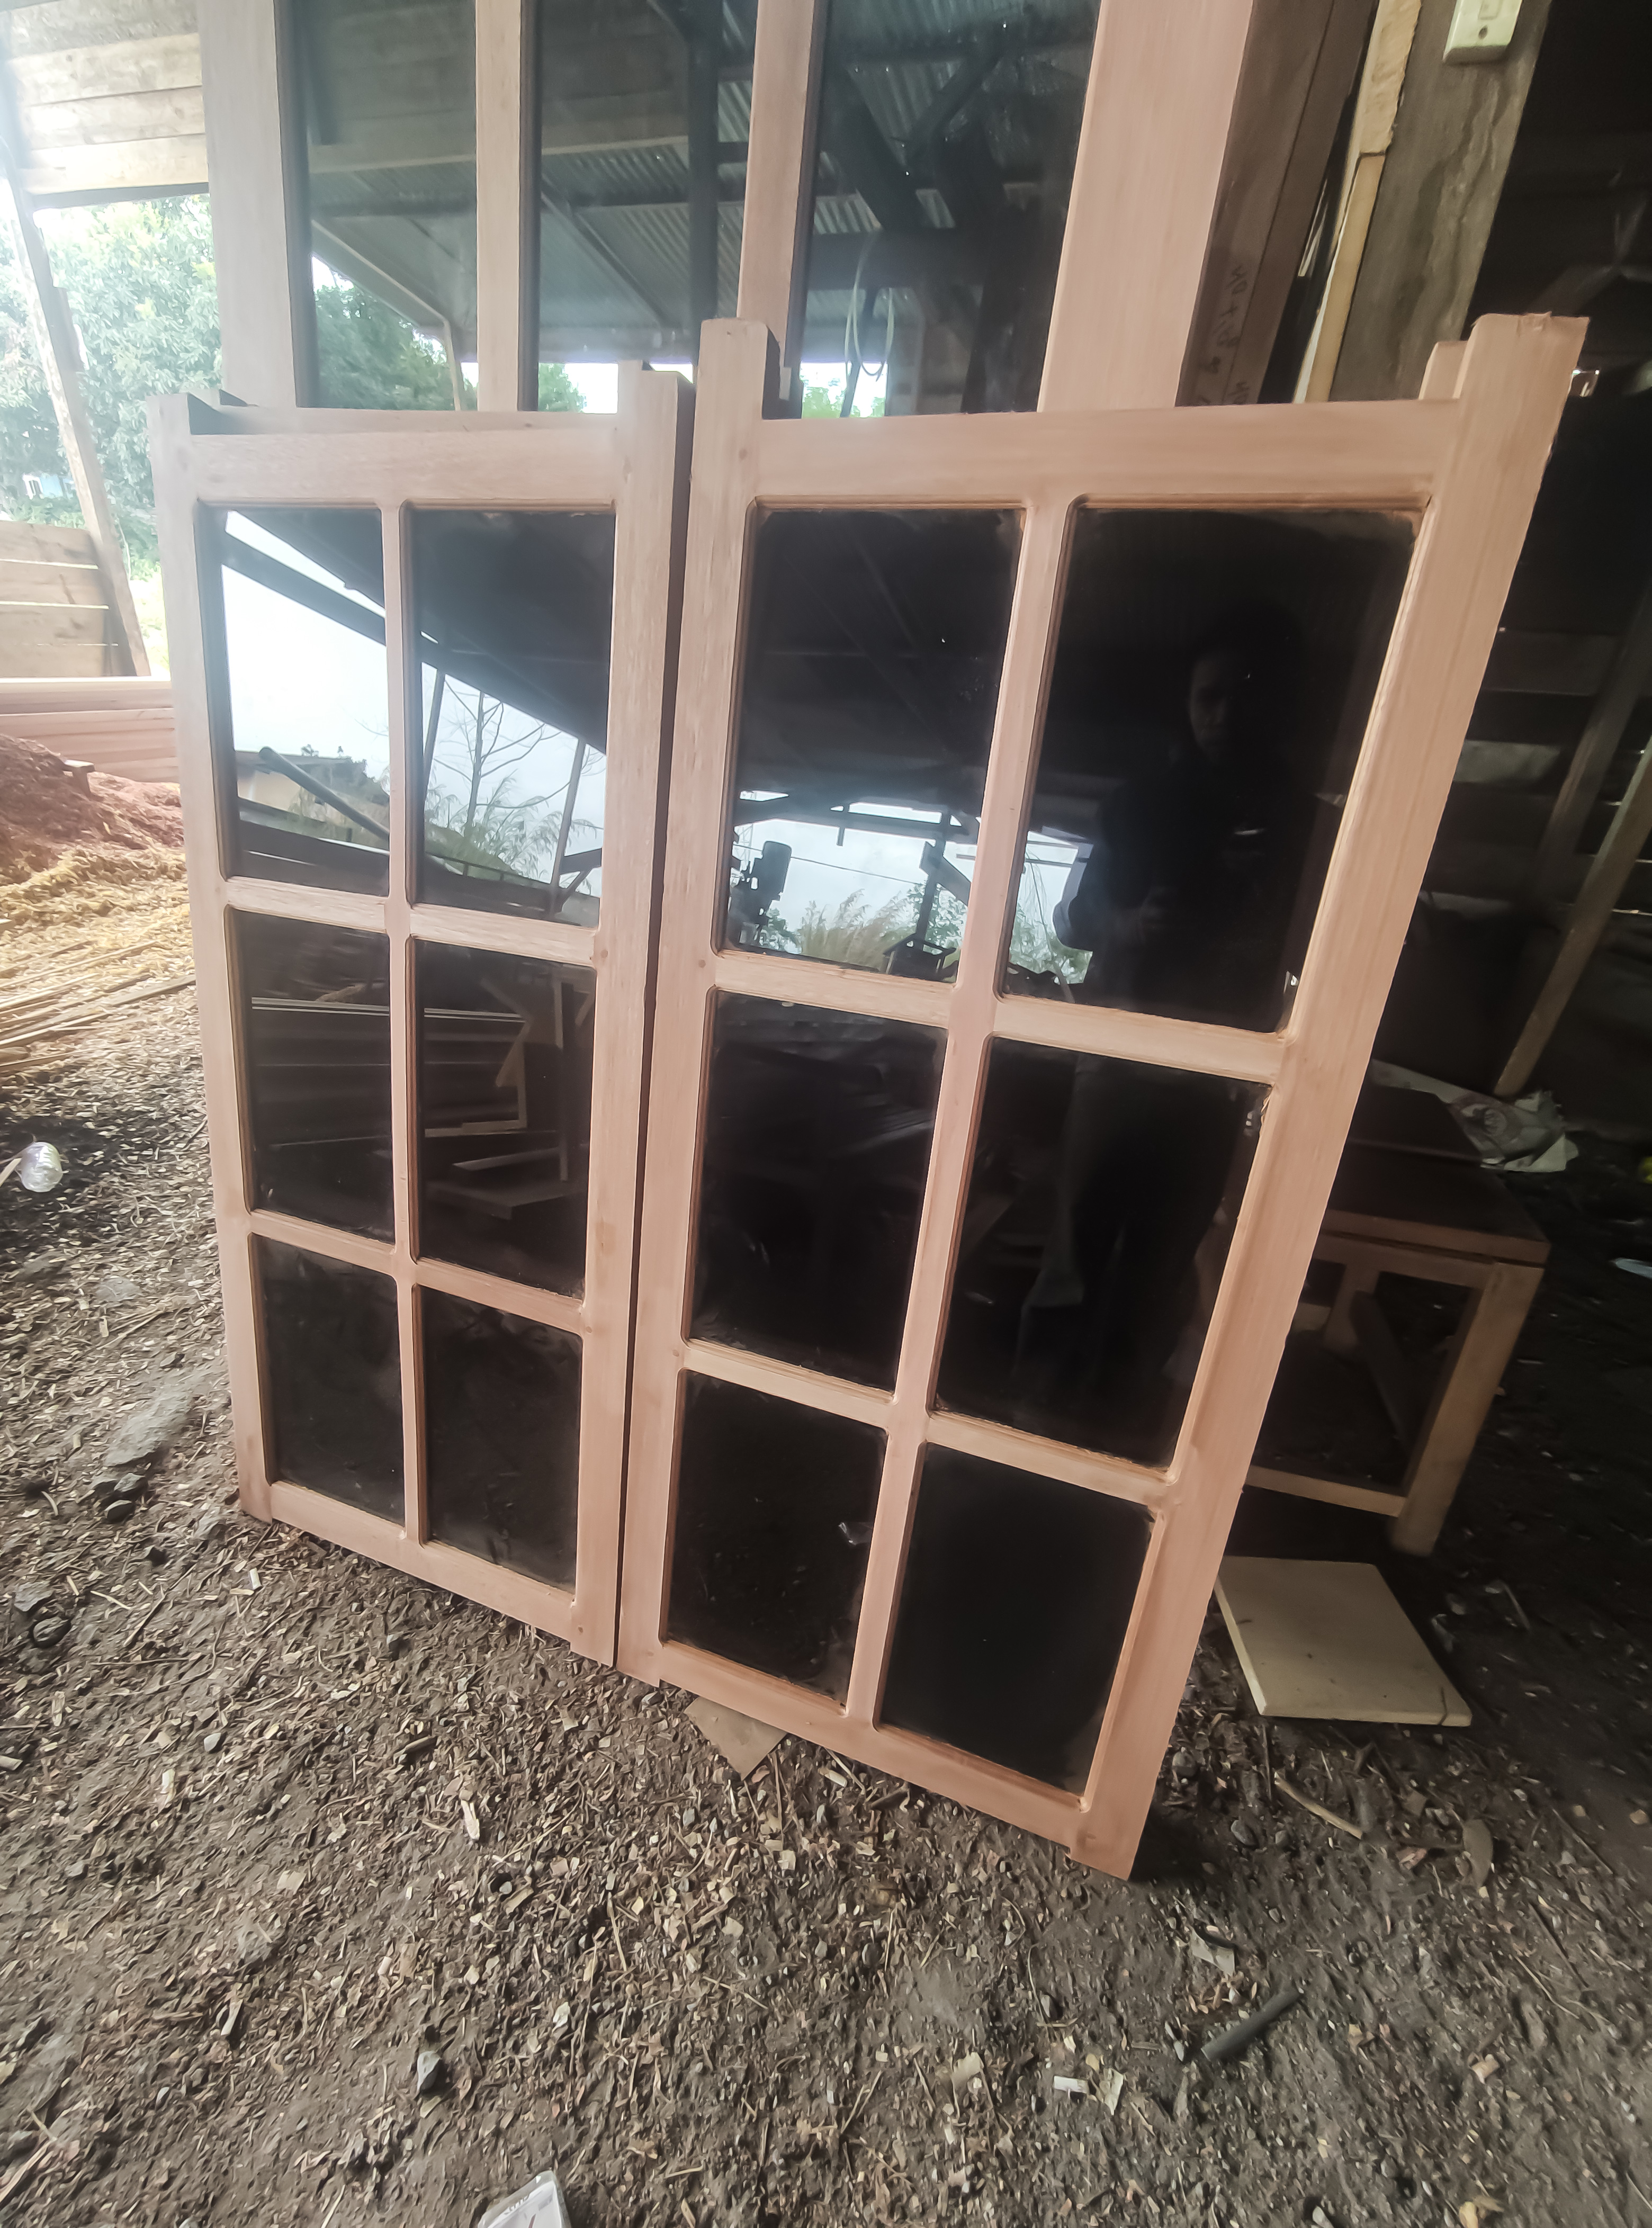
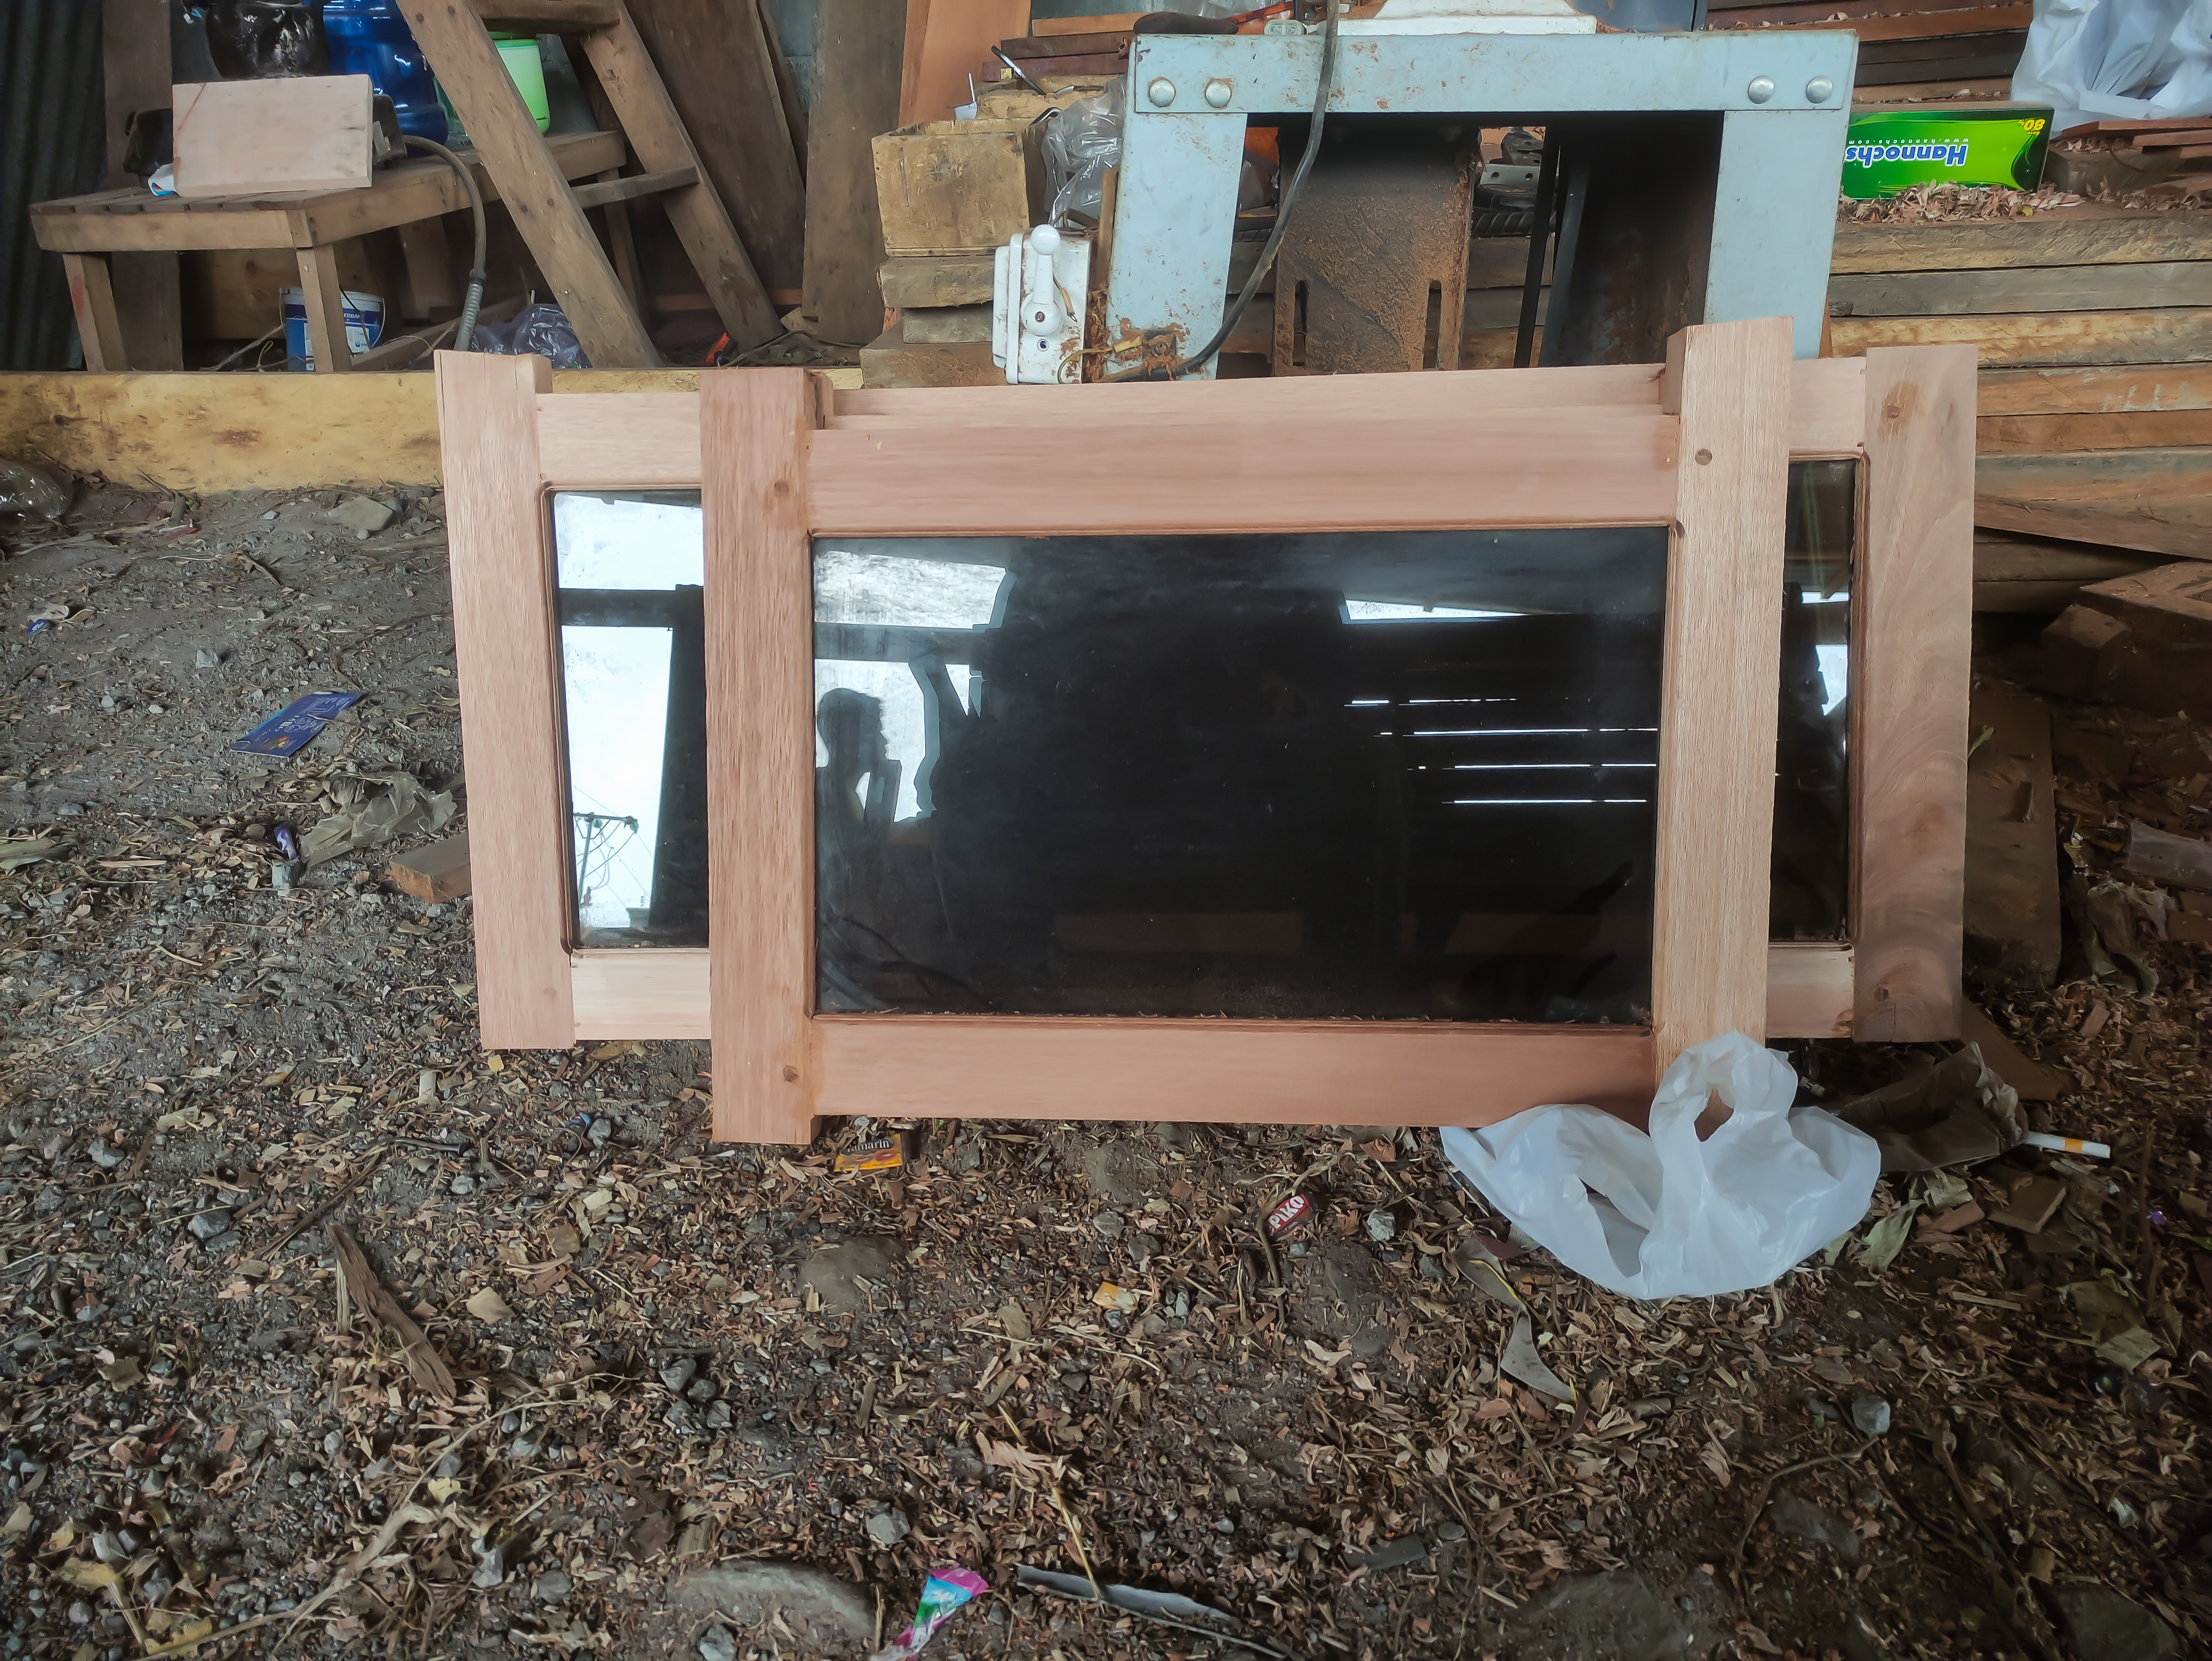
In one order package that I received this time, it contained 4 window units with a width of 60cm X height 120cm and 2 units of window jalousie measuring 60cm wide X 40 cm high and also 1 unit of door jalousie with a width of 90cm x 40 cm high.
For the design of windows and jalousies of course they have different shape designs and I work on the project according to the sizes and drawings provided by my customers.
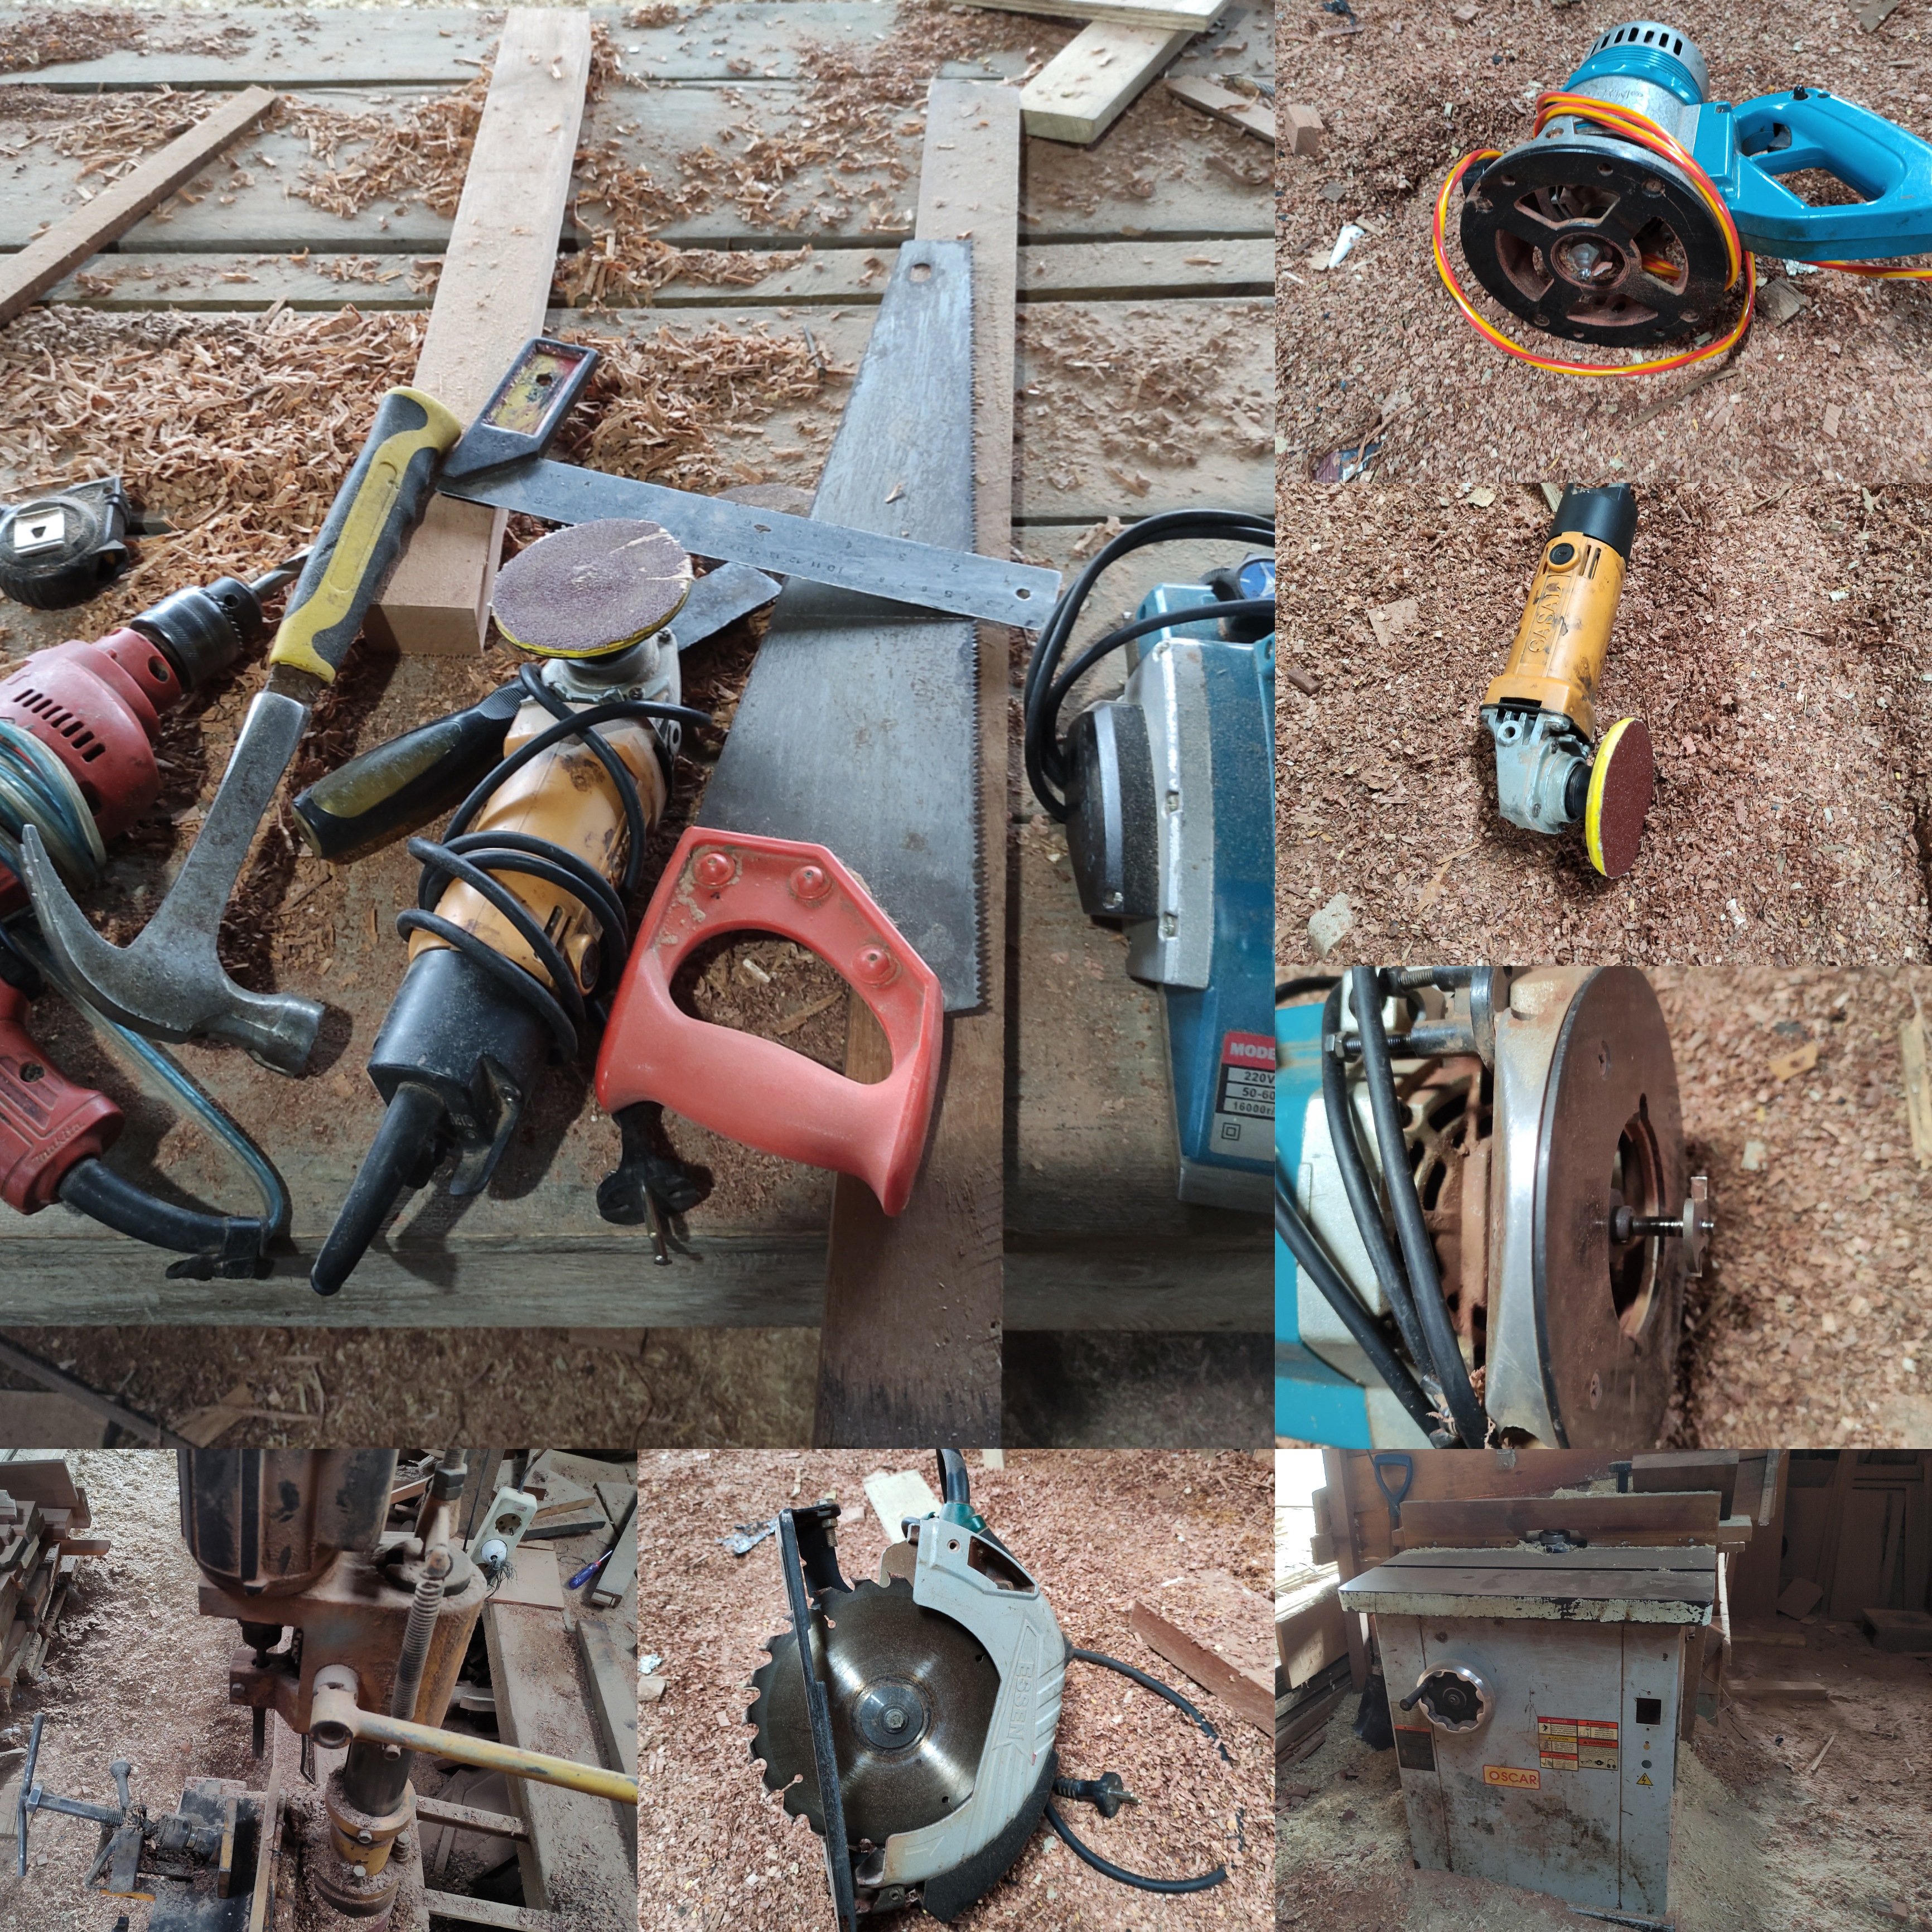
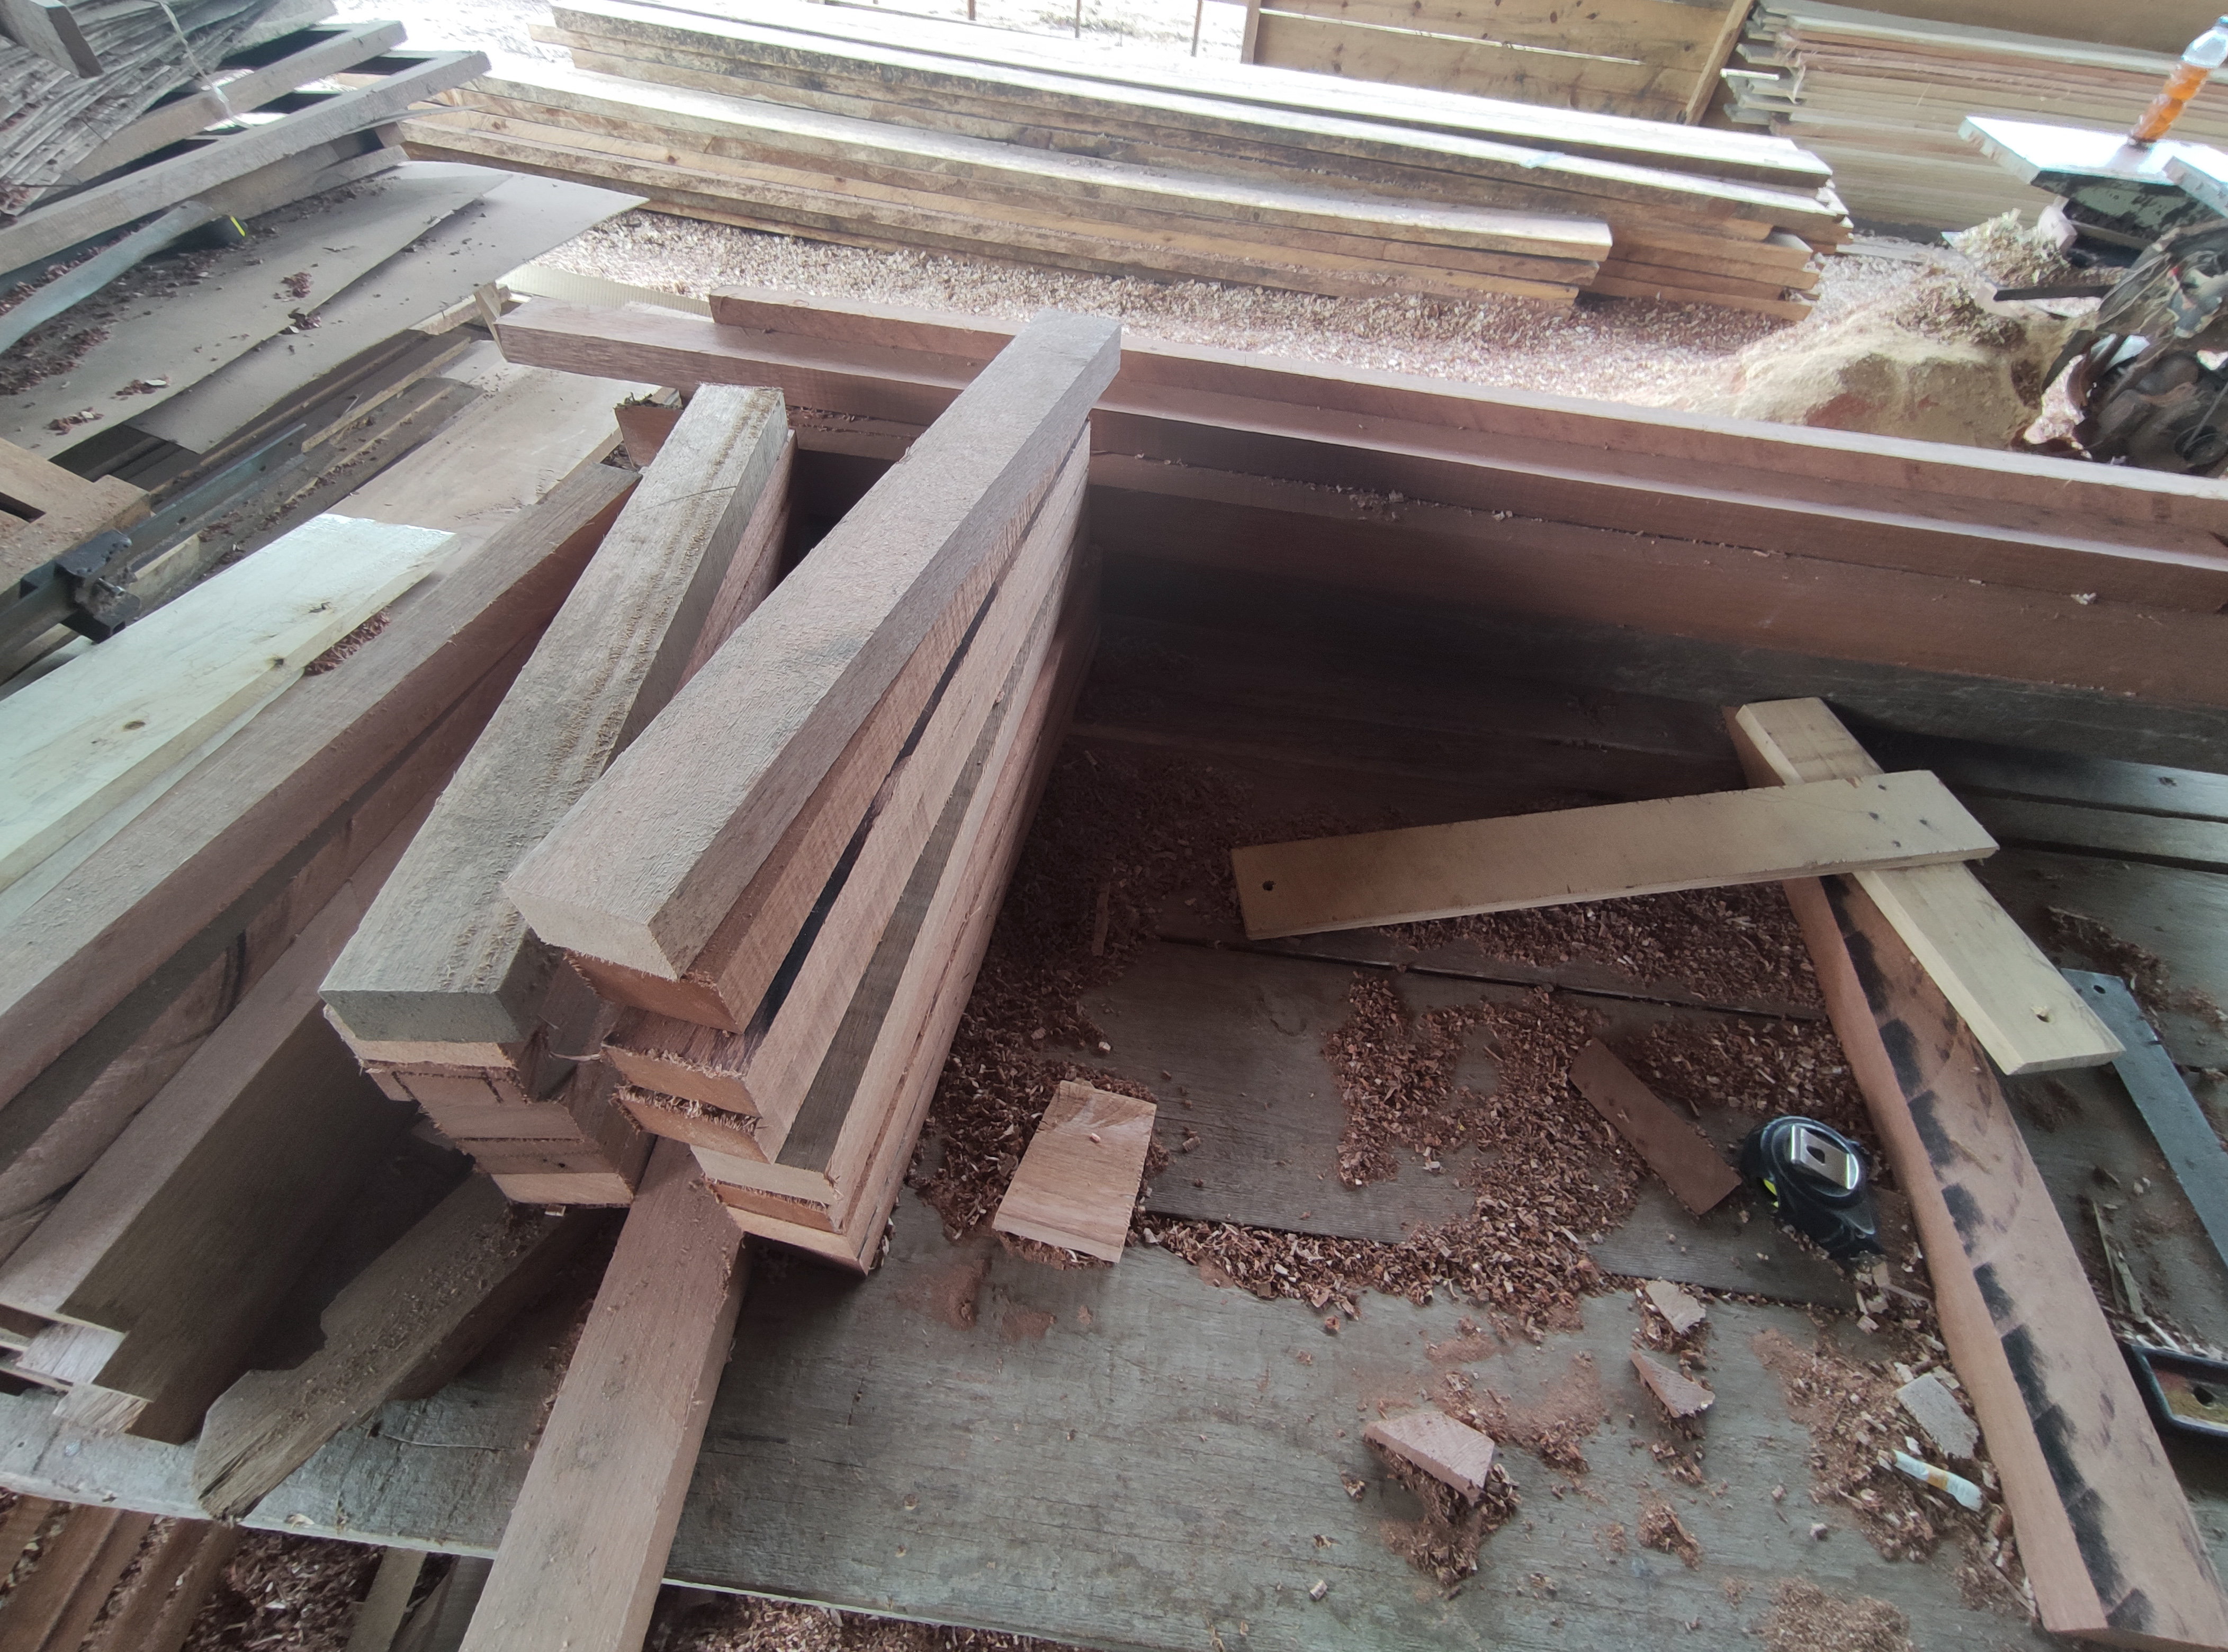
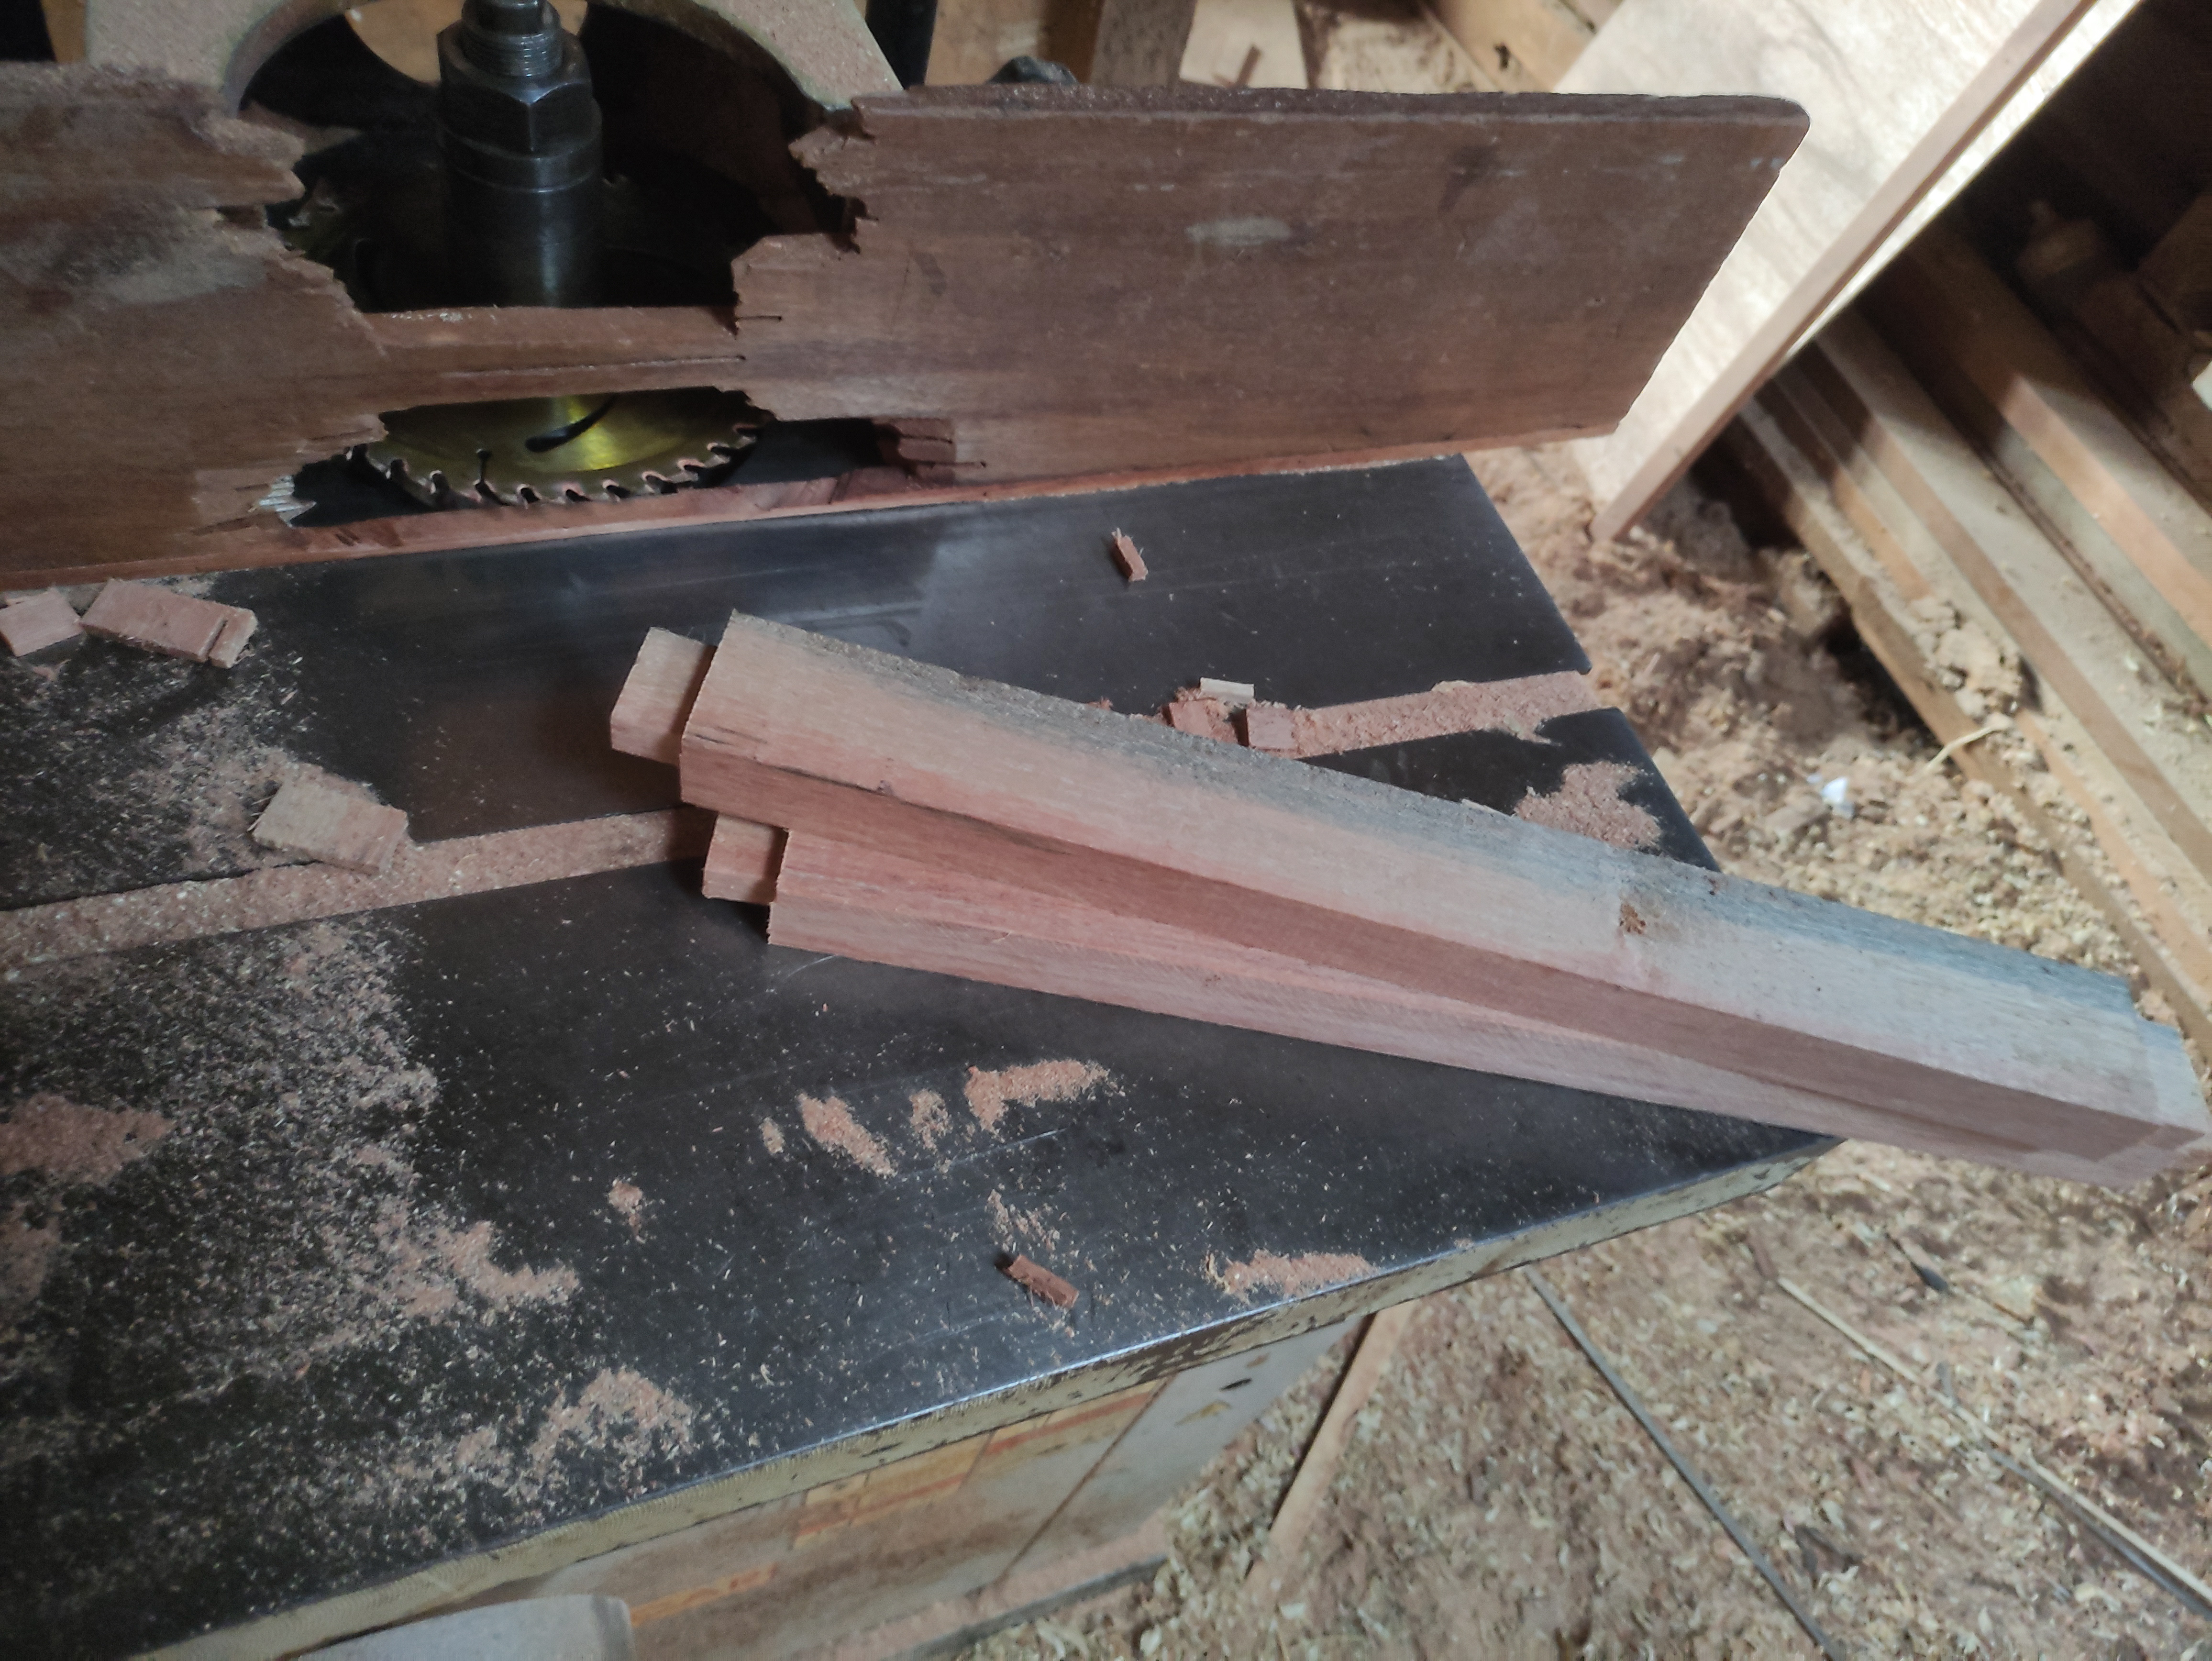
To complete the project, of course, requires some equipment for machining and wood materials with trimmed wood sizes, namely:
1.Meranti wood with a width of 6 cm x 3.5 cm thick.
2.Meranti wood measuring 3.5 cm wide x 3.5 cm thick and
3. 5mm translucent black glass.
.jpg)
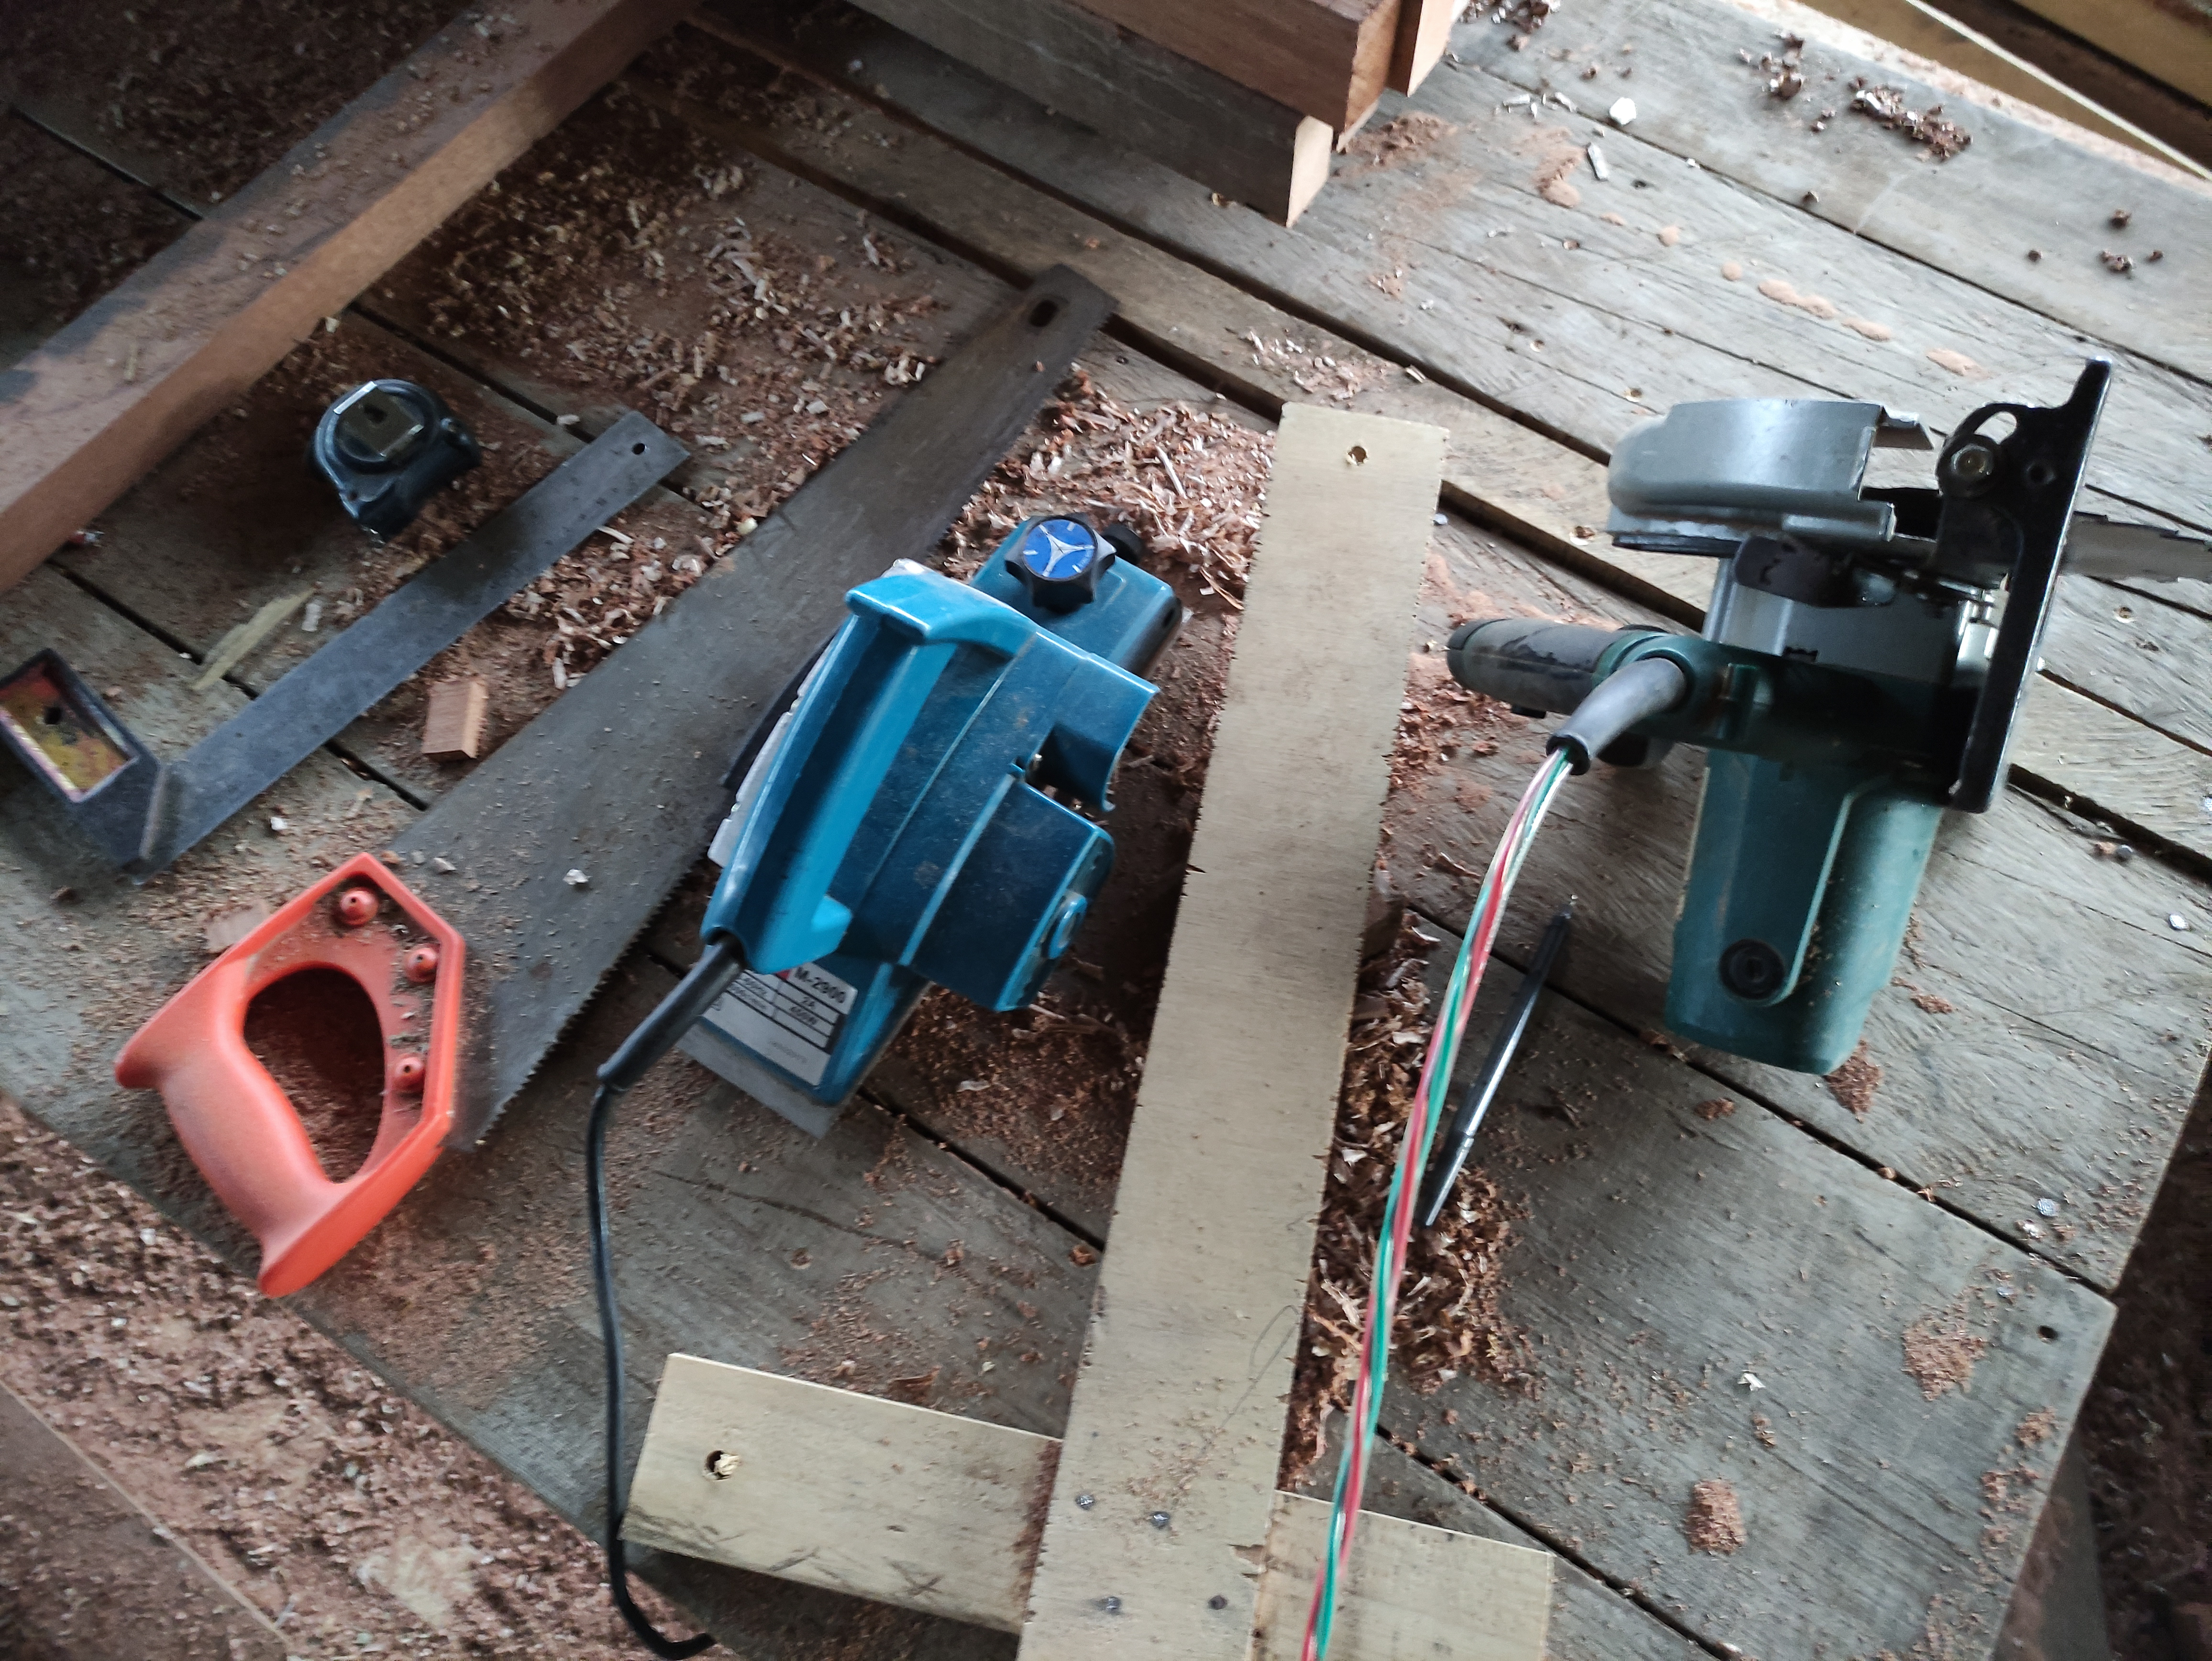
And for the machine tools I need, of course, the machine tools that I usually use every day in furniture making, namely.
•Wood cutting machine to cut all wood materials for door materials.
•Shaving machine to flatten the entire surface of the series connection and make leaf comb carvings.*
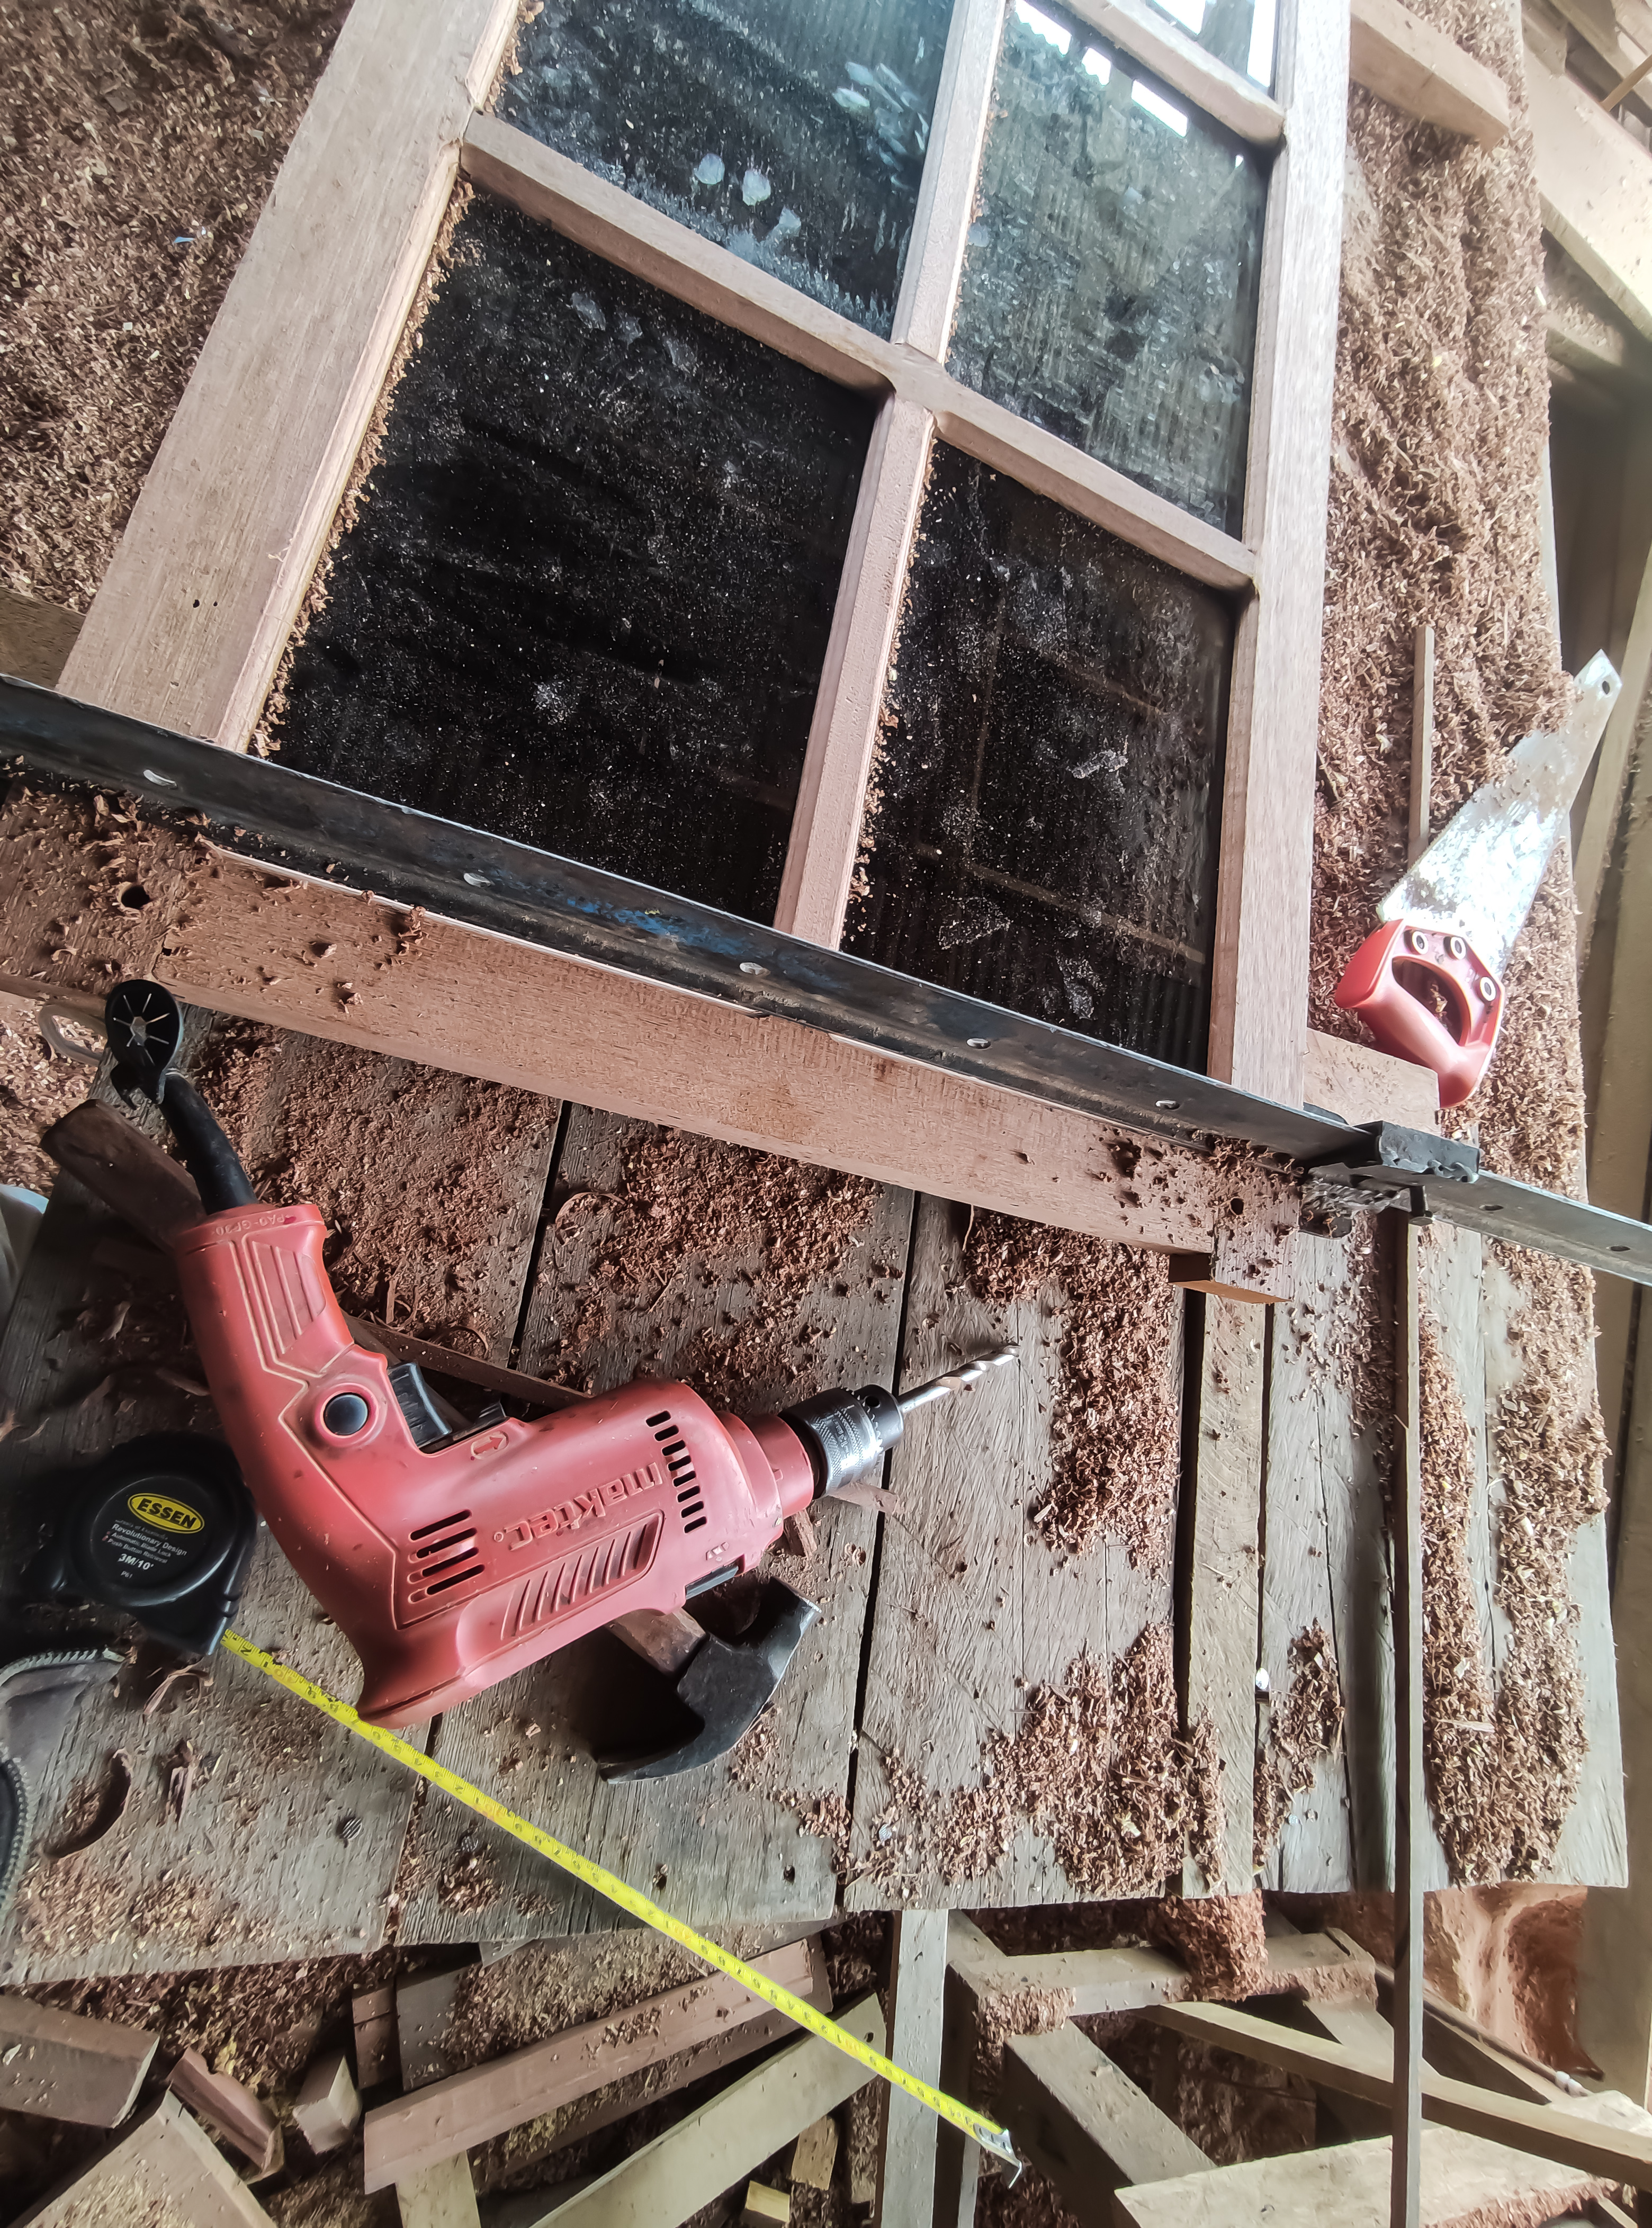
•Hand drill(to make holes in the wood when installing the pegs) and sit drill(to make holes in the bulkhead of the top and bottom of the dors).
•Meter and hammer
•Router machine(for making flowers on the inside corners of doors and making leaf holder holes of doors).
•Meter (measuring instrument)and elbow.
•Smoothing machine .
•Panel machine (to make nipple pegs on frame sets) and for door leaf flower panels and.
•Manual iron press to the door series during the process of installing the pegs.
After all the materials are available to complete the project, of course it requires a fairly long process and now we enter the first stage of the process.
1.Preparation of the frame for the first set of windows and jalousies.
For the main bones of the window and jalousie, we always use wood measuring 6cm wide x 3.5cm thick and the window is 120cm high, of course we cut the length of the wood for the main series bulkhead with a length of 125/130 cm which we deliberately added a little bit for the top and bottom nails of the main series so that the wood does not break during the process of connecting the pegs so tightly and after that we proceed to outline the drilling area for bulkhead installation, installation of window width dowels and installation of window design reinforcement bulkheads on series main pillars and the same goes for the main bulkhead of the series of jalousies that I worked on simultaneously.

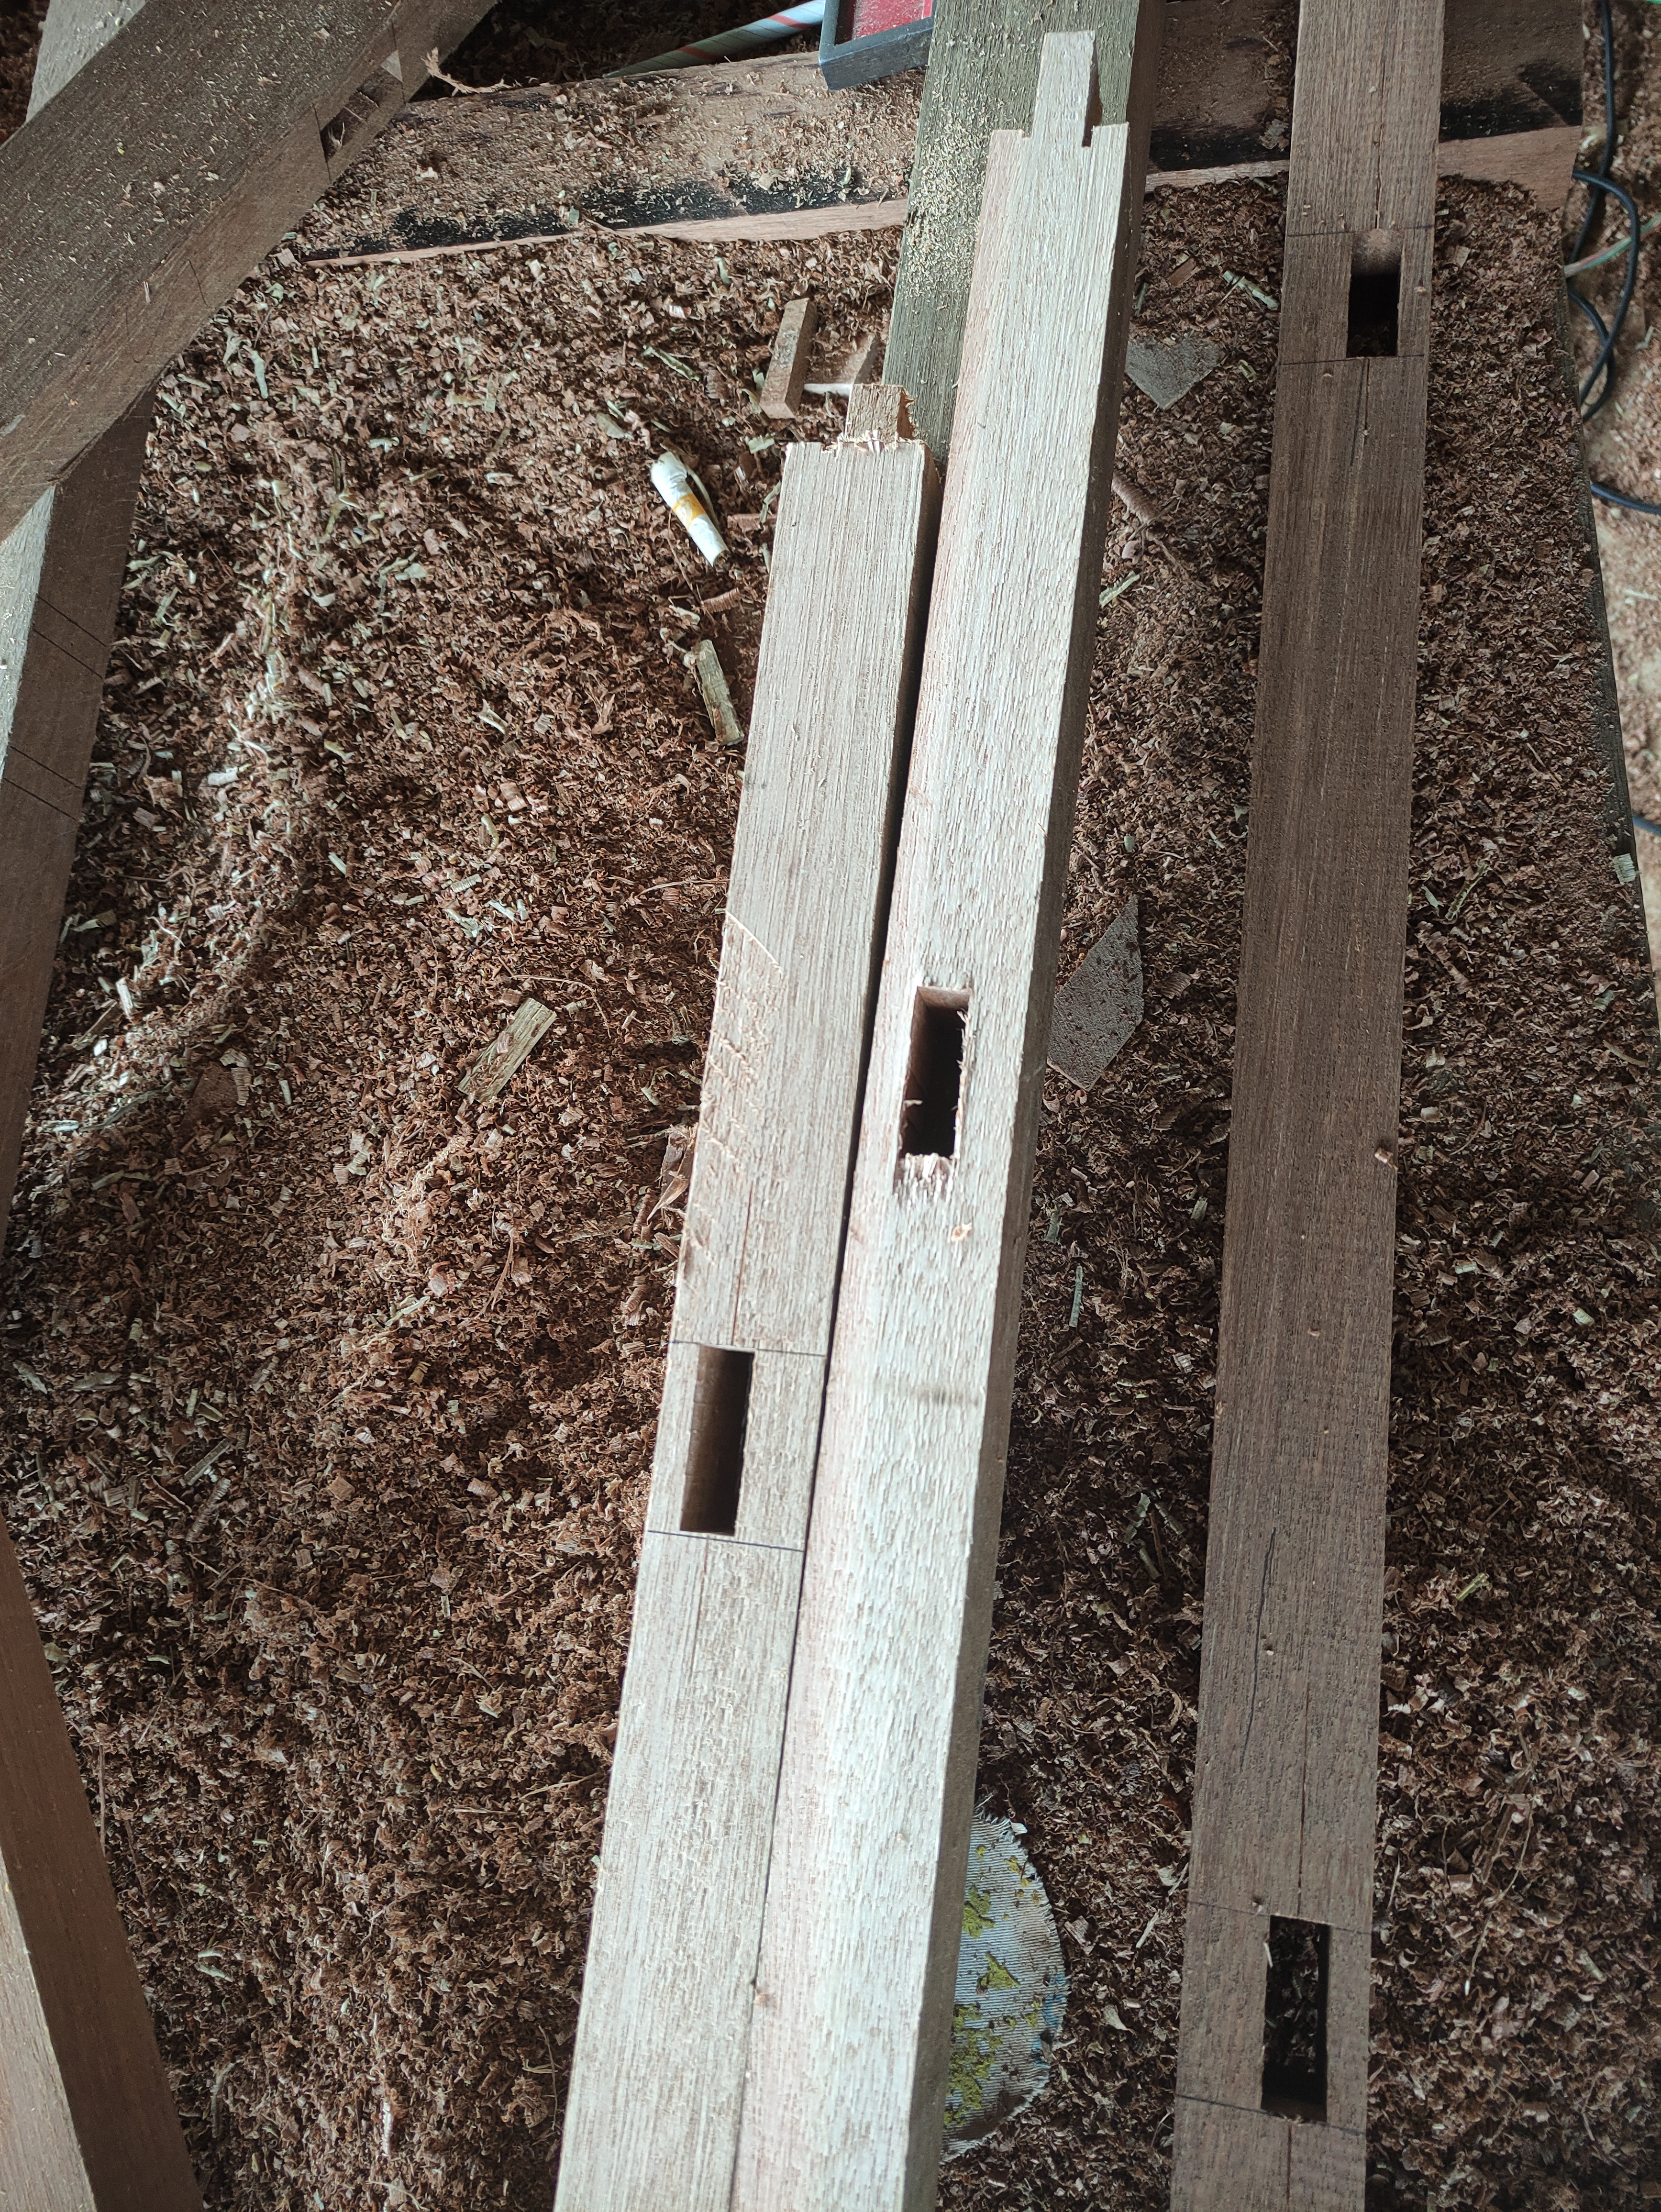
Then I continued to drill the nipple holder, the peg holder, the window wide bulkhead connection using an electric drill,with different lengths of drilling area, for the upper and lower bulkheads the drilling area is 4cm x 1.5cm and for the reinforcement bars the drilling area is 3cm x 1.5cm with an average drilling depth of 3cm.
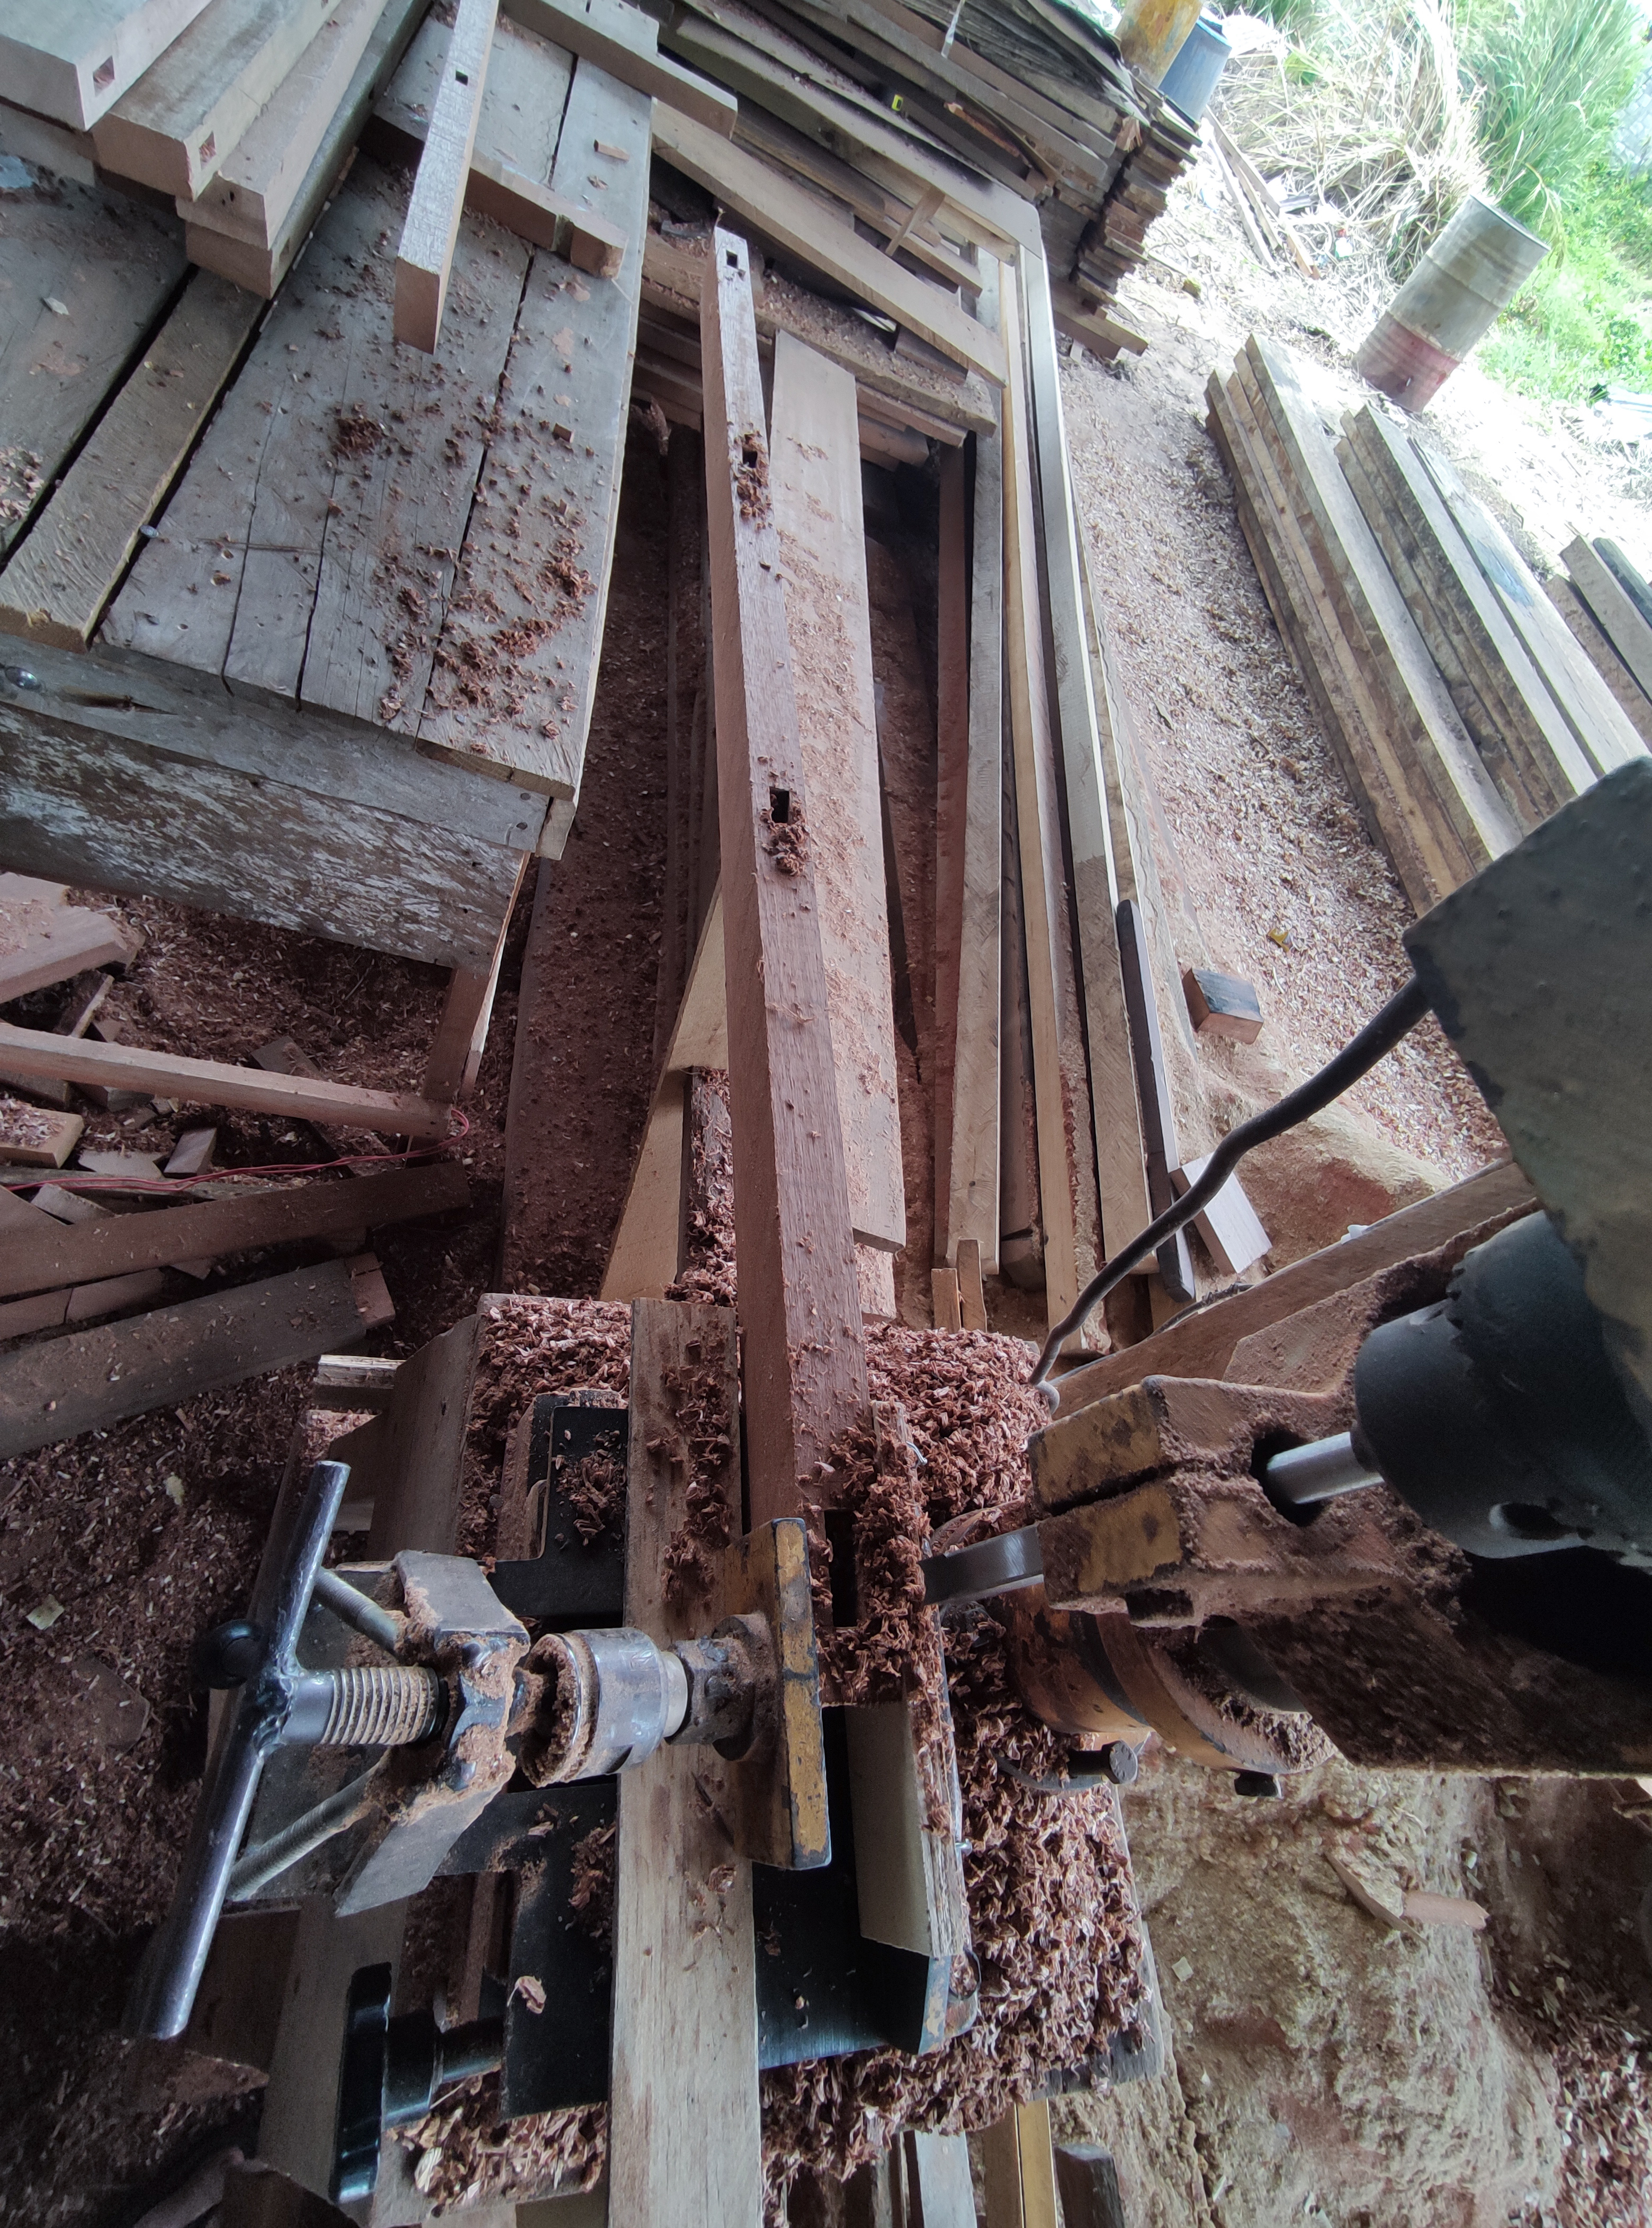
And after the assembly preparation process is complete, now we proceed to the next stage, namely the preparation of the window series of wide bulkheads followed by the window series of reinforcement bars.
2.Manufacture of window width bulkheads and window frame reinforcement bulkheads as well as wooden bulkheads for the width of these jalousies.
For the wide top and bottom of the window and jalousie we use wood with a width of 6cm x 3.5cm thickness and for reinforcement bars in the window series we use wood measuring 3.5cm thick x 3.5cm wide.
and you need to know that the size of the wood that we use for the window width is different and all of that is determined by the design of the window image and for this design window we use wood measuring 6cm wide.
The number of wooden partitions for the width of the window and the jalousies that I have to provide is.
• 10 logs measuring 54cm long by 6cm wide x 3.5cm thick which consists of 3cm left and right pegs for the top and bottom bulkheads of the 5 window units .
• 10 logs measuring 54cm long by 3,5cm wide x 3.5cm thick which consists of 3cm left and right pegs for the middle reinforcement of the 5 window units and
• 10 wooden sticks measuring 124cm long x 3.5cm wide x 3.5cm thick consisting of 3cm top and bottom pegs for the center reinforcement of that 5 window units.
And for the wide bulkhead of the jalousie as follows.
• 4 wooden sticks measuring 54cm long x 3.5cm wide x 3.5cm thick consisting of 3cm top and bottom pegs for two units of jalousie measuring 60cm wide and
• 2 wooden sticks measuring 94cm long x 3.5cm wide x 3.5cm thick consisting of 3cm top and bottom pegs for one units of jalousie measuring 90cm wide
And after all the circuit bulkhead materials for my windows and jalousies are finished, I will prepare the next step for making peg nipples using a panel machine.
3.The process of making joint post nipples for window wide bulkheads and jalousies.
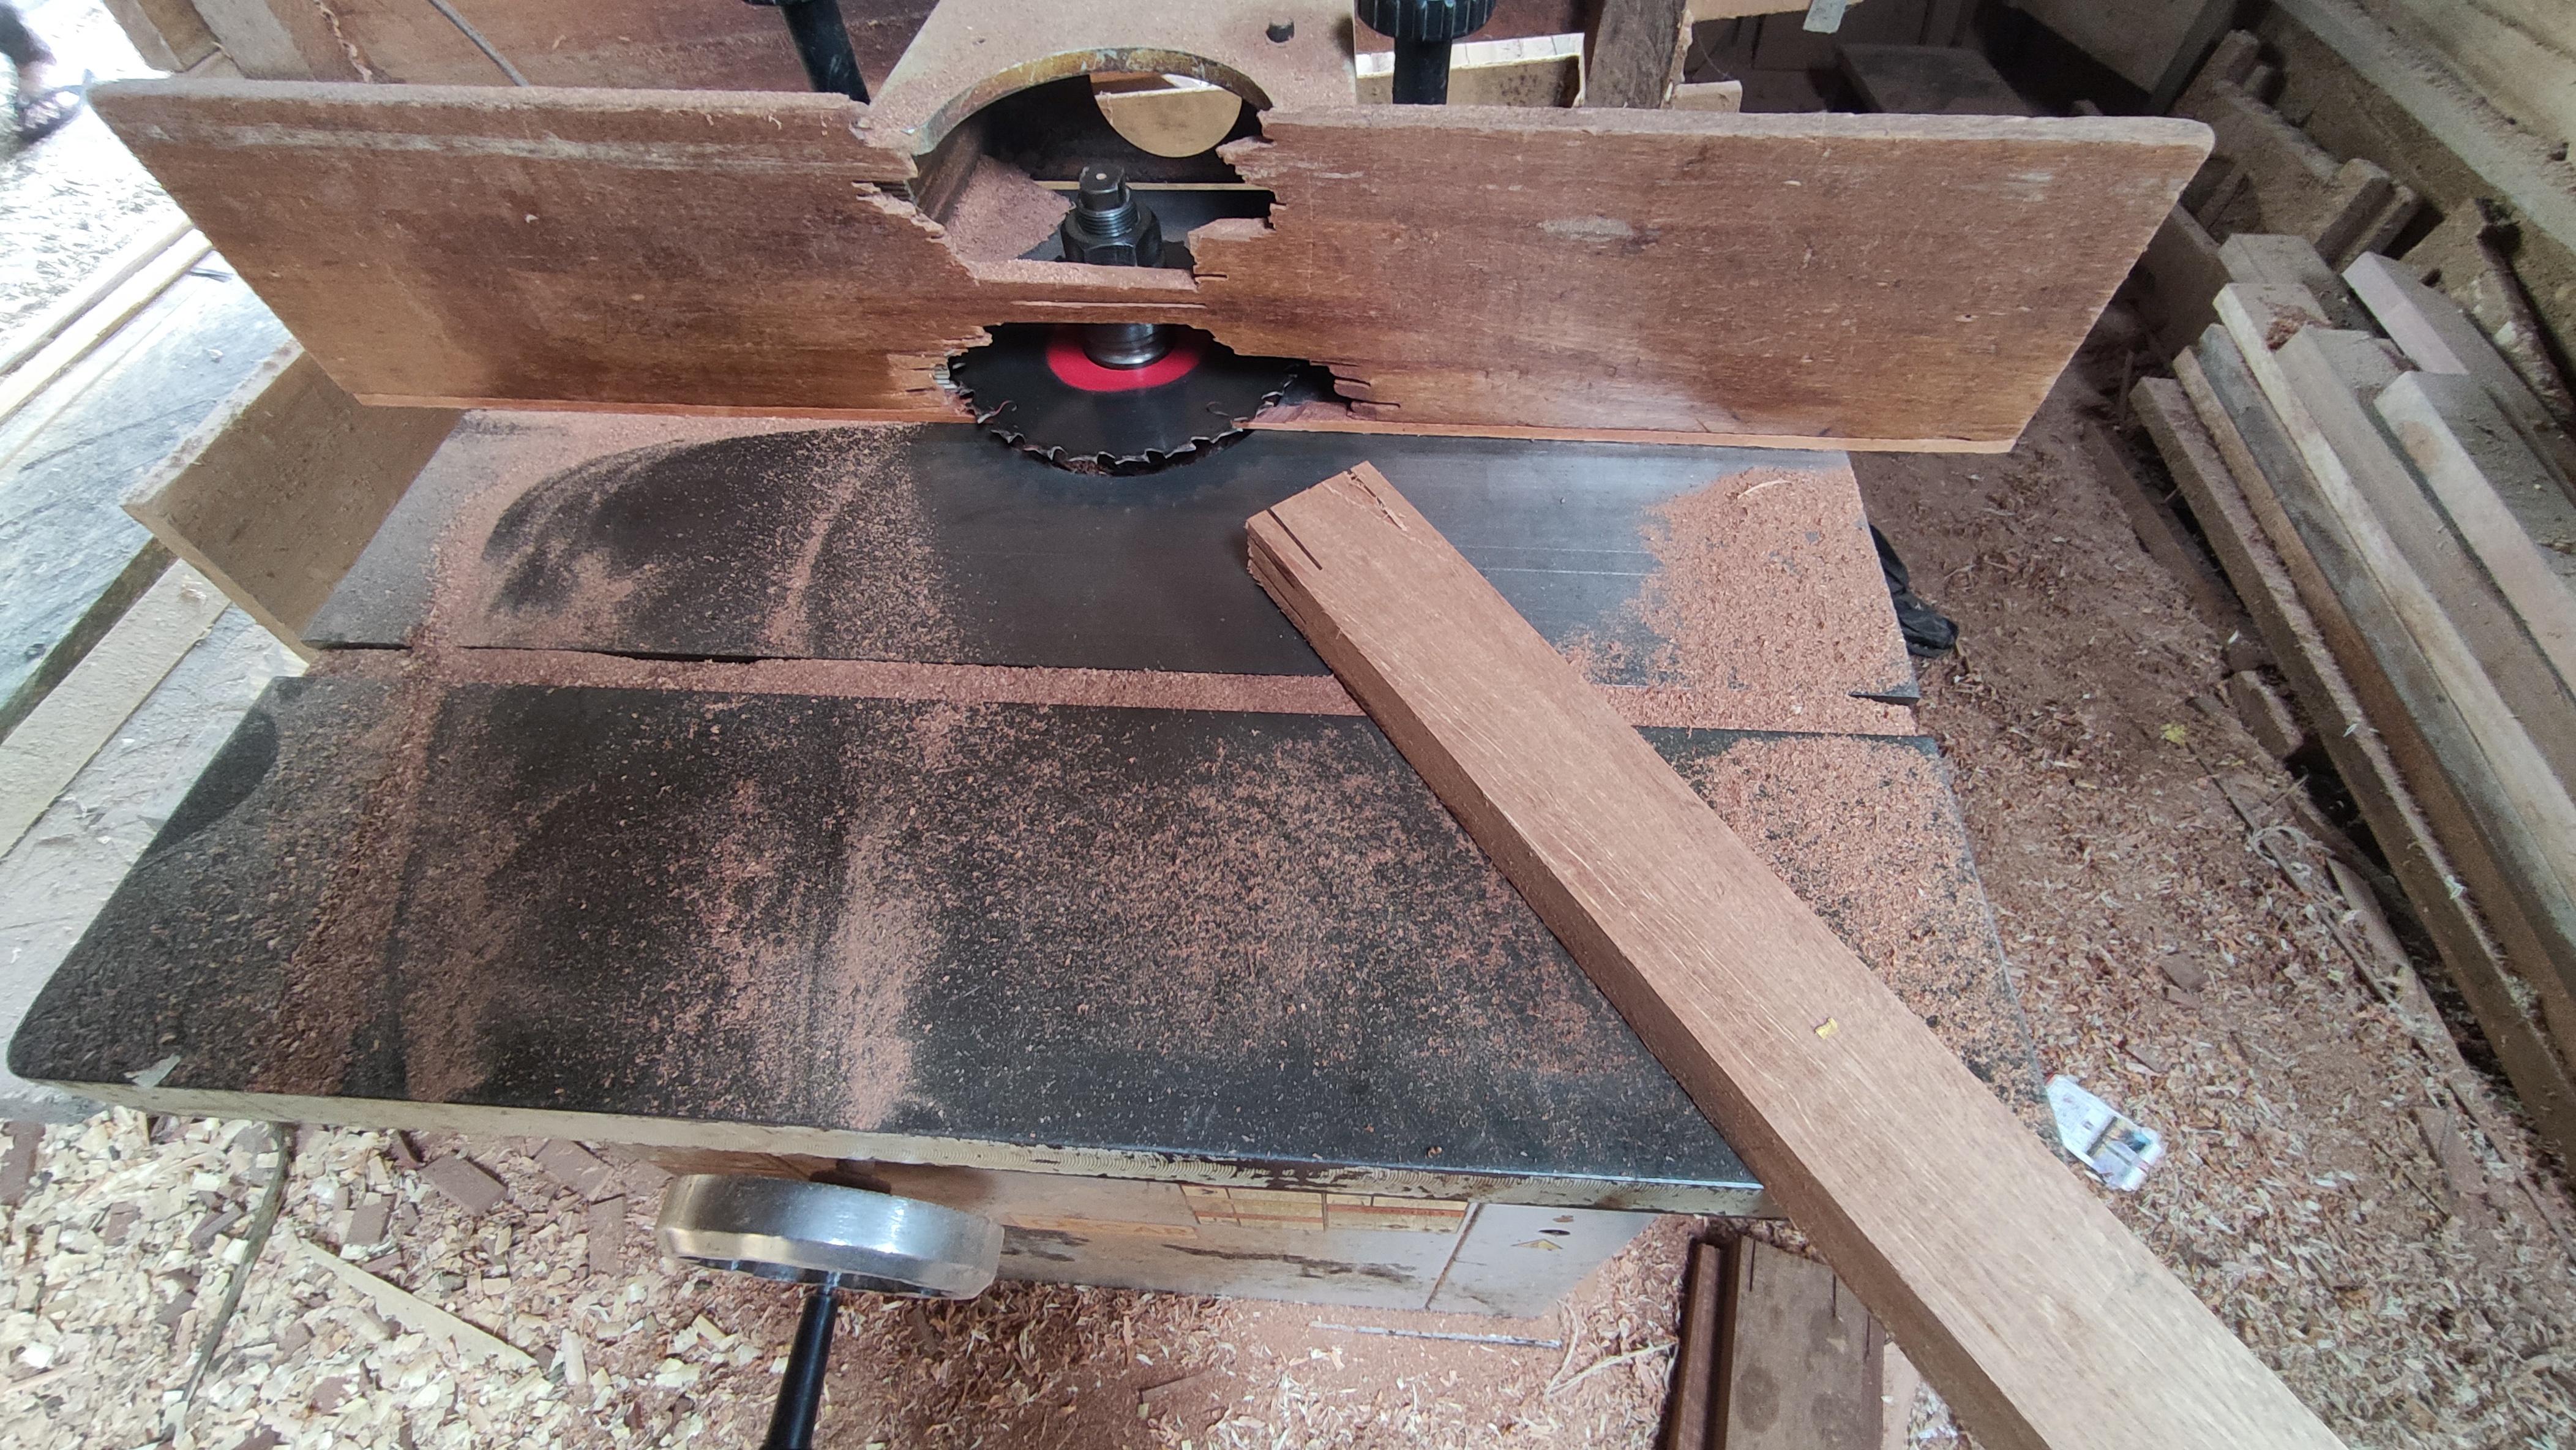
in this process we use a panel machine equipped with a saw blade so that the manufacturing process is easy and for the nipple the bulkhead pegs are 4cm wide x 1.5 cm thick consisting of 1cm spacing above and below the bulkhead.


And after the preparation of the window baffle pegs is complete, then the process of drilling the middle bulkheads of the window series is done.
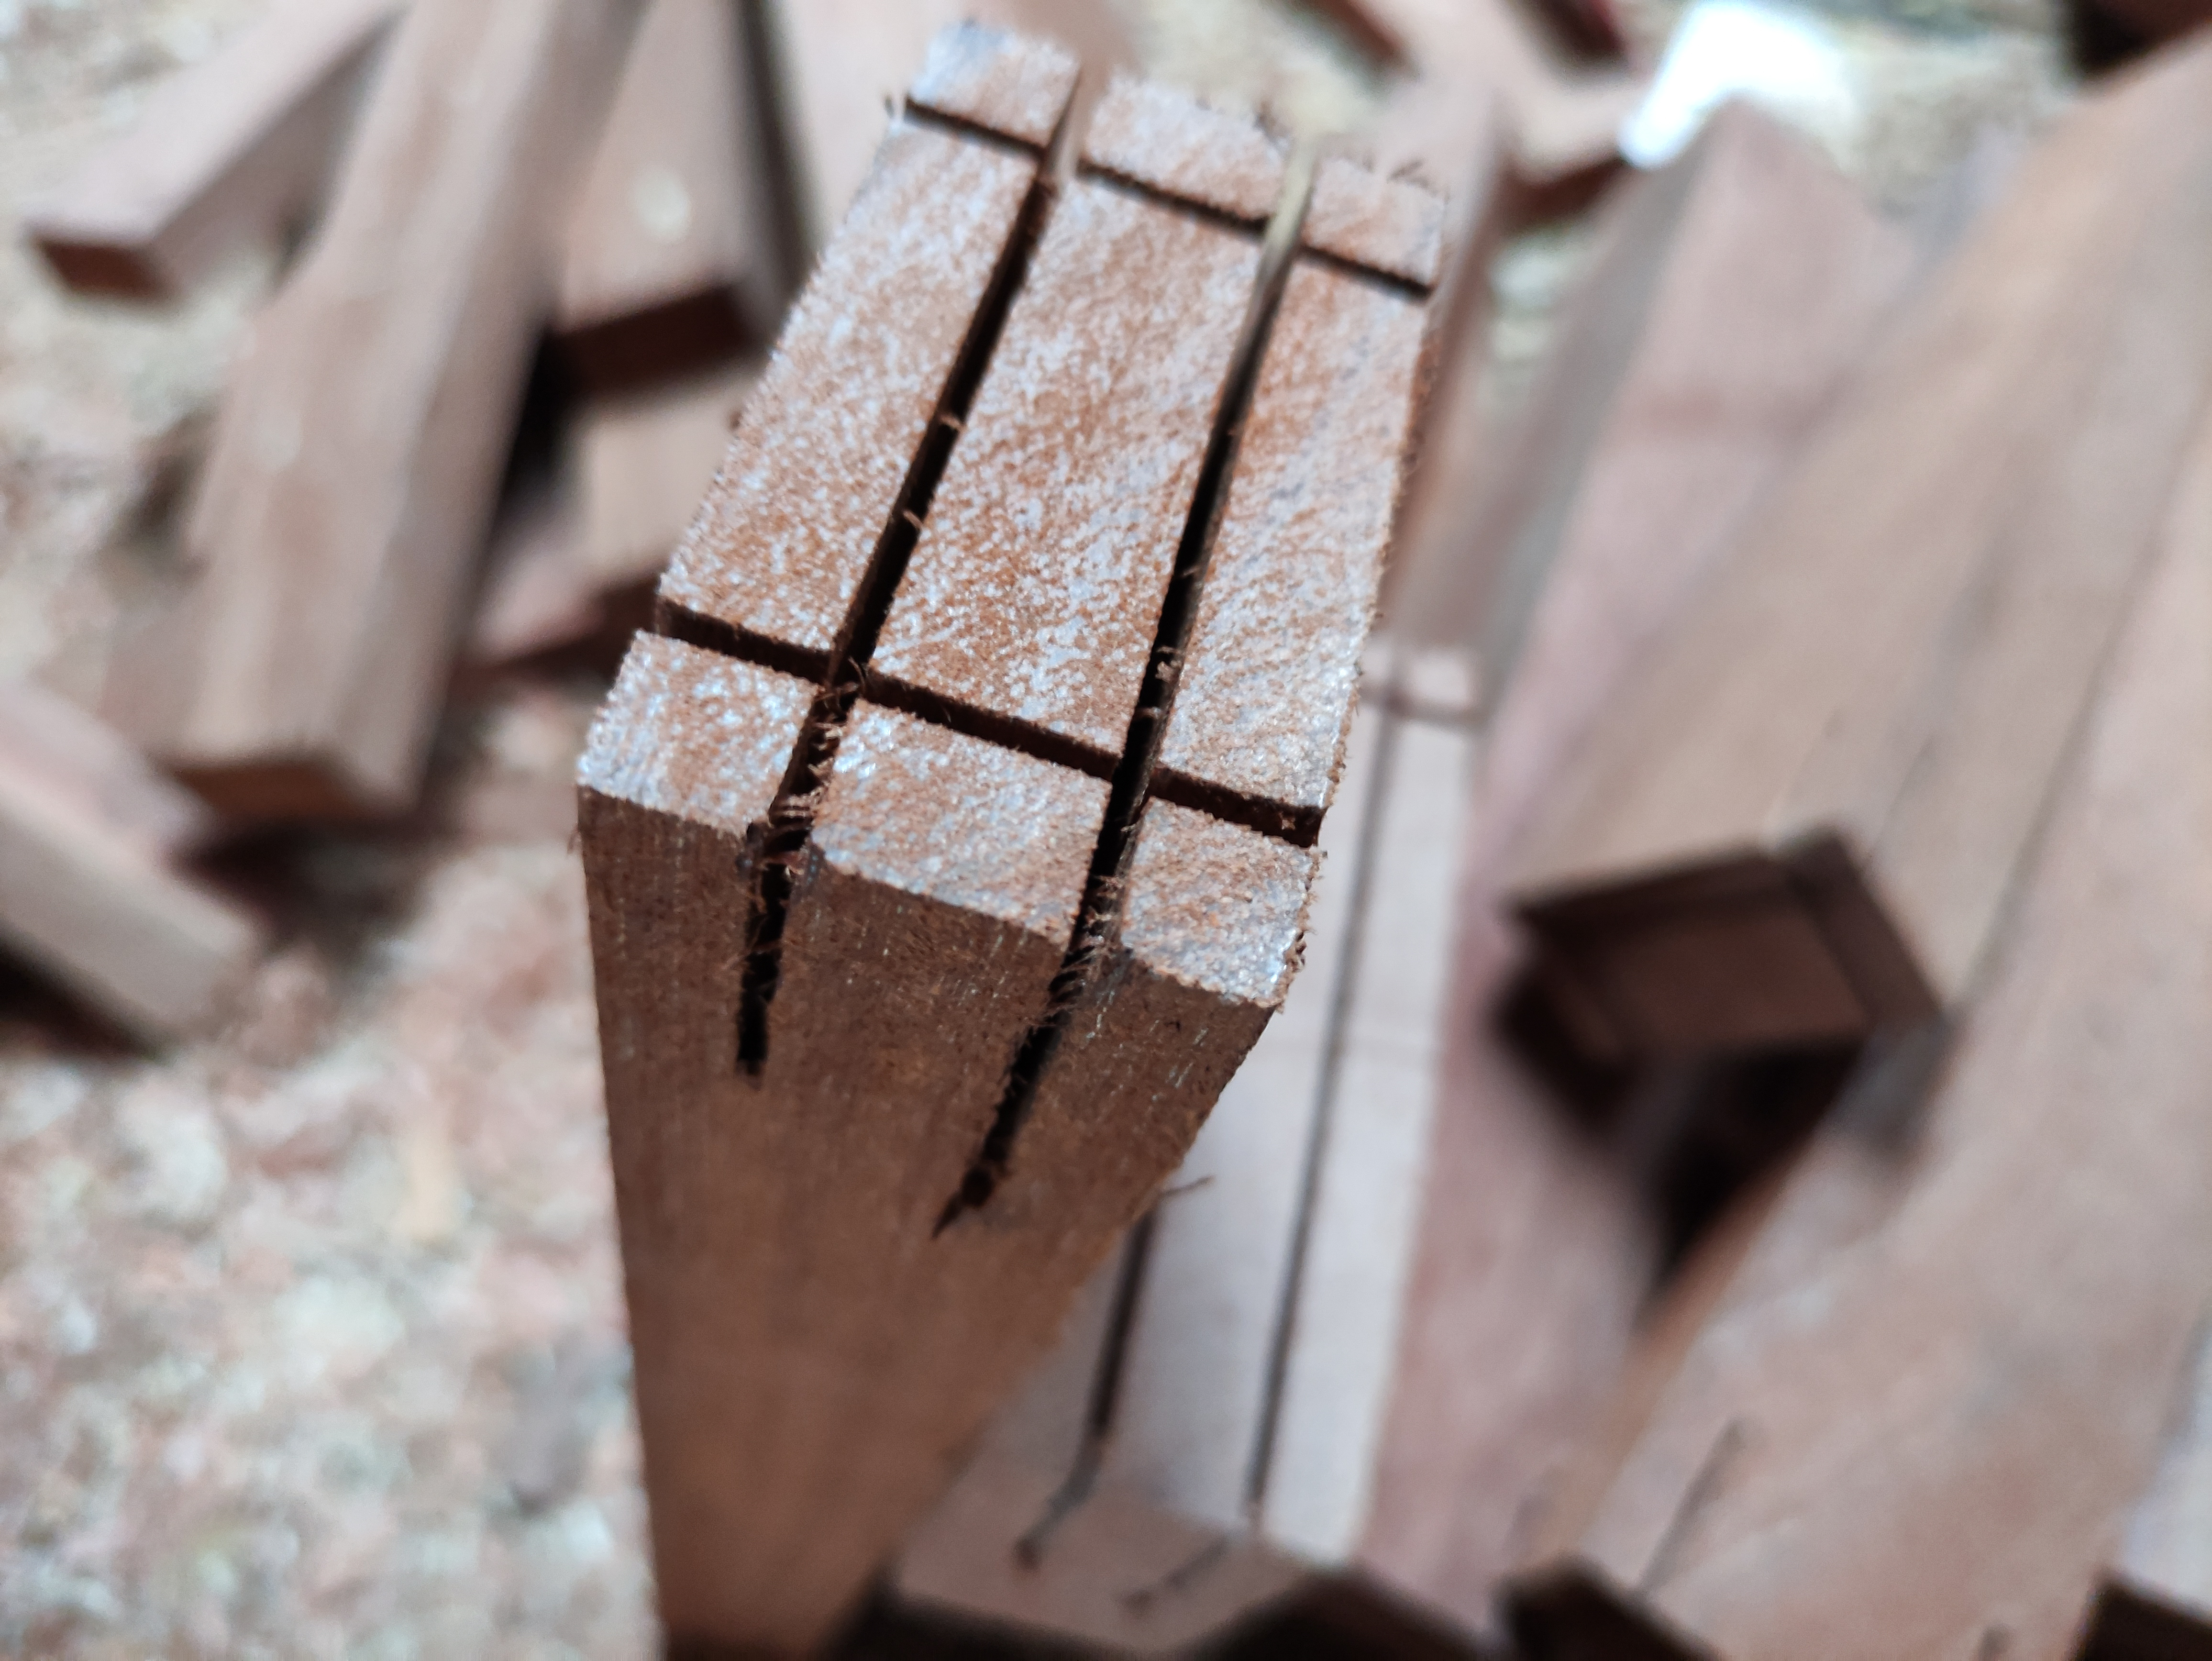
4.The process of drilling the middle bulkheads of the connection forms the window series design.
For each of the bulkheads of the middle series of the window pattern, we have to drill in the middle to provide a seat
central bulkhead posts (extending upwards) by cutting wood 1/5 parts for the layout of the unification of the series.
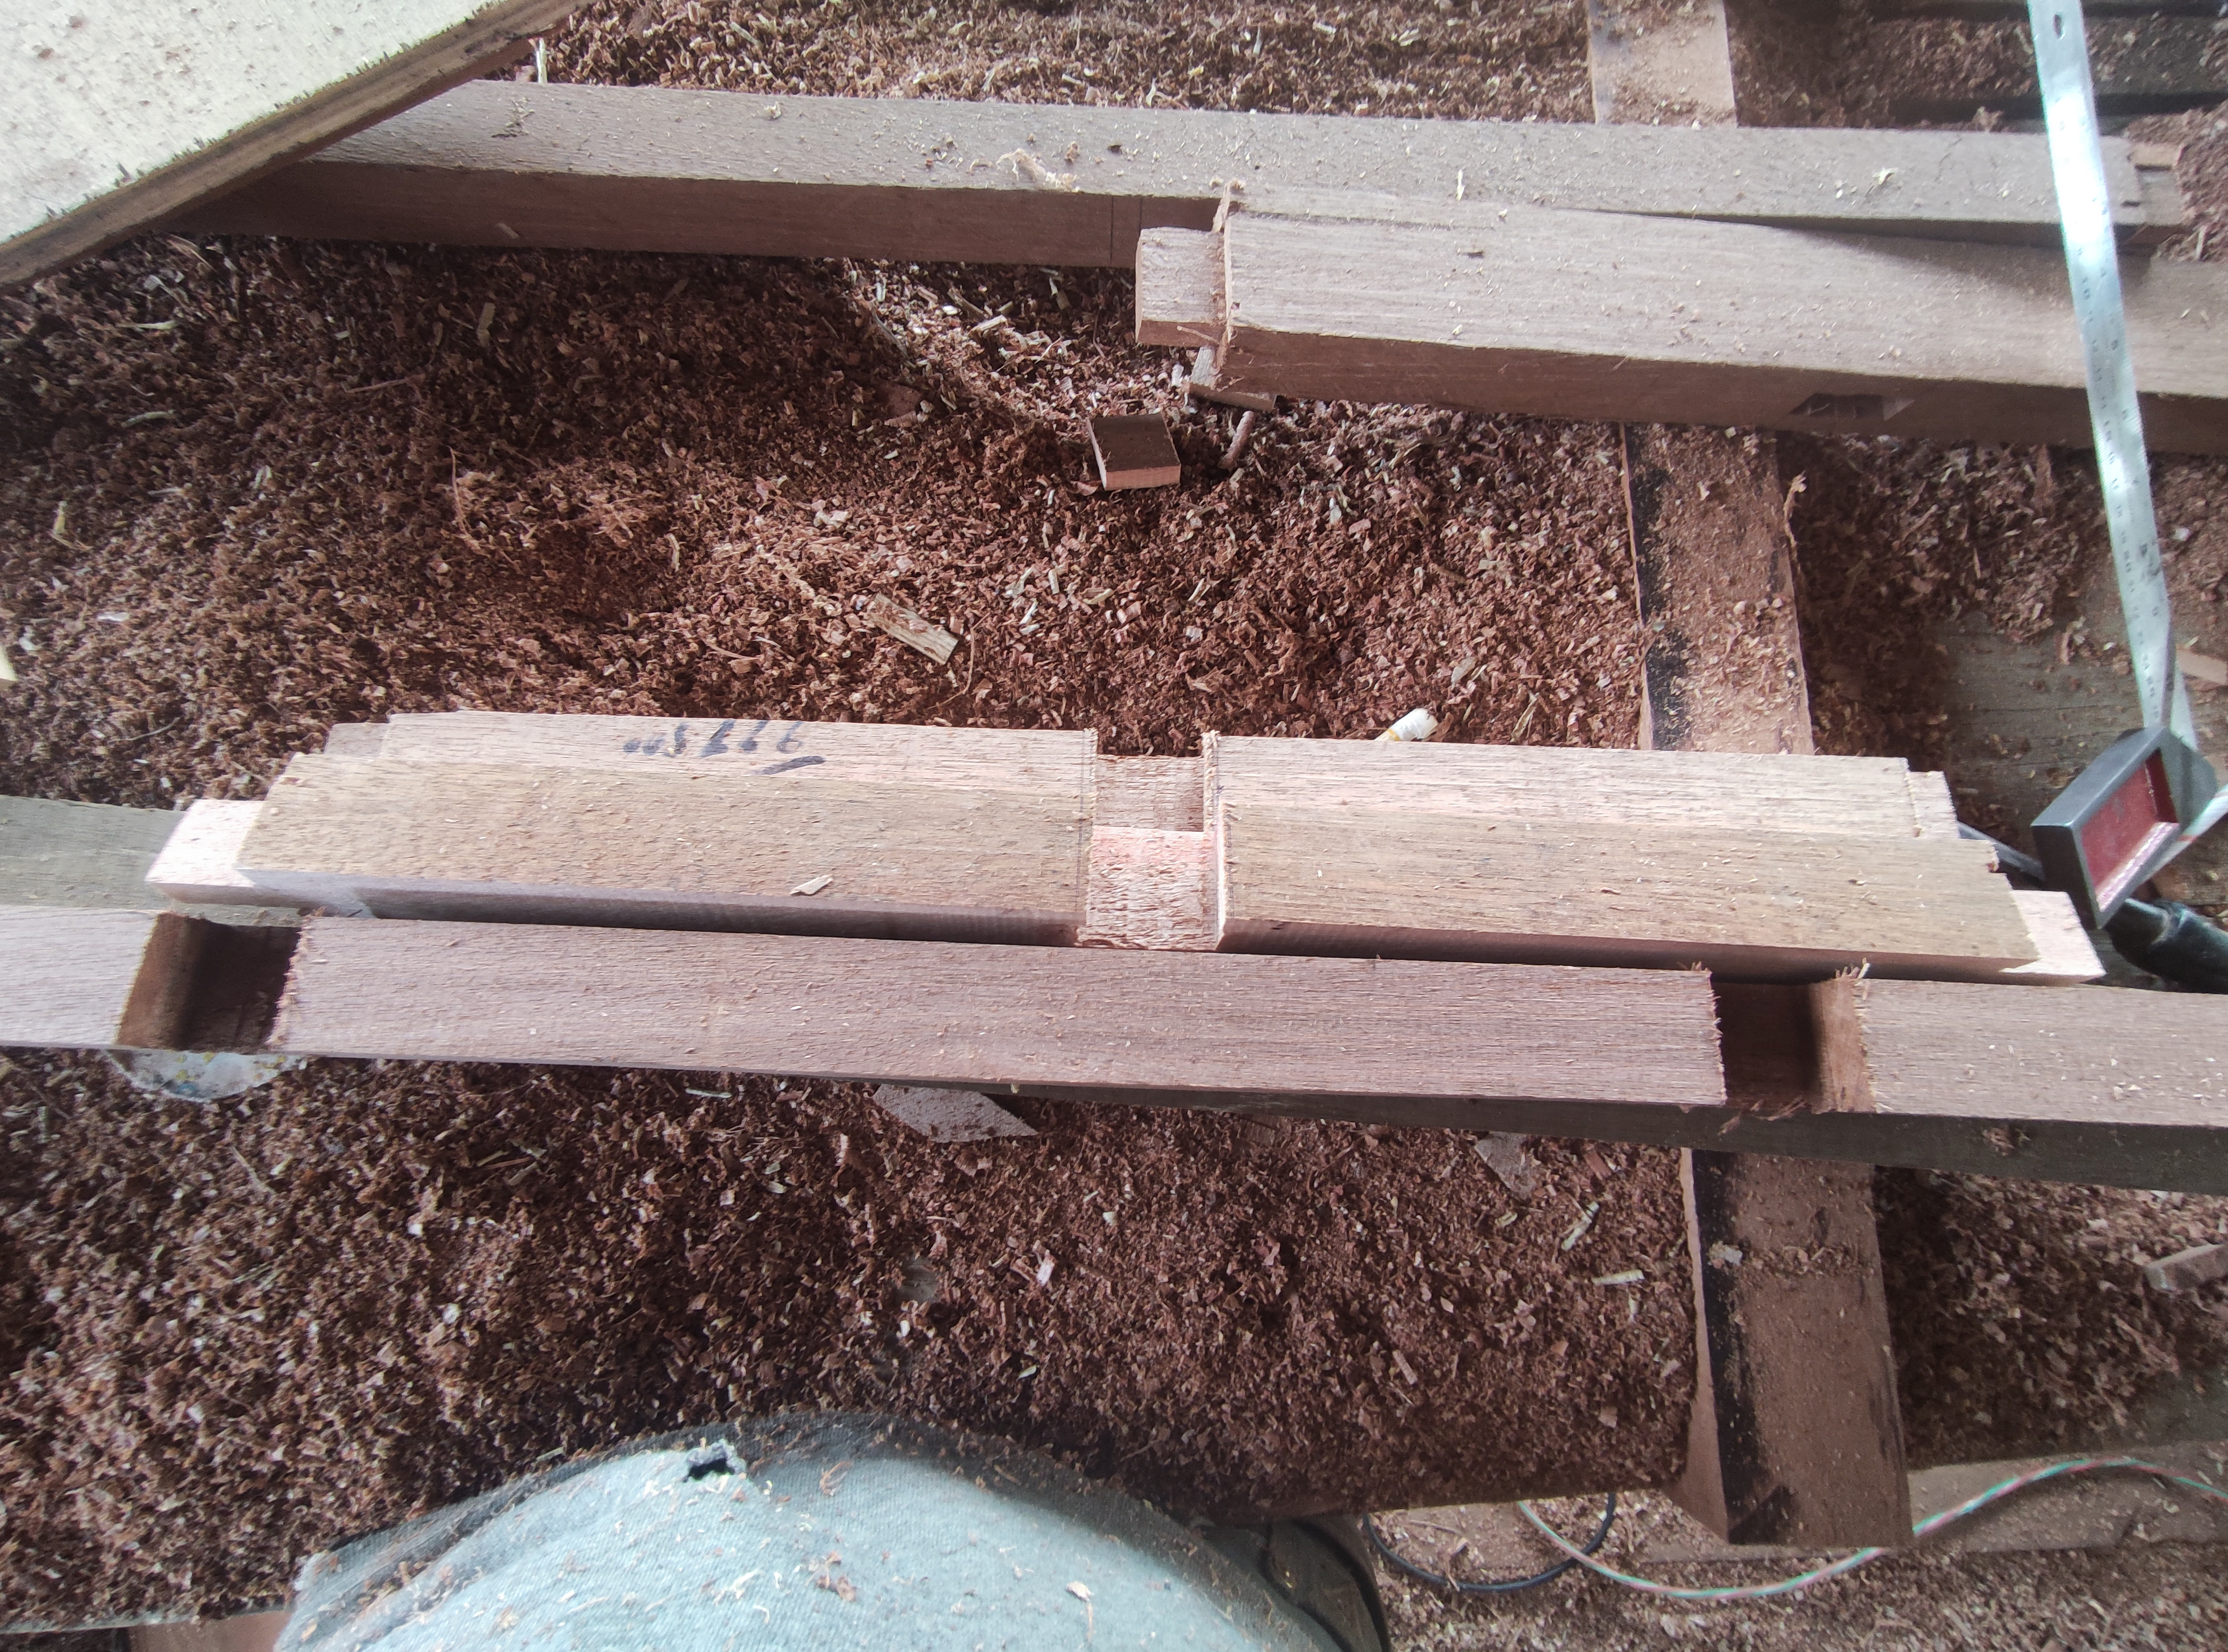
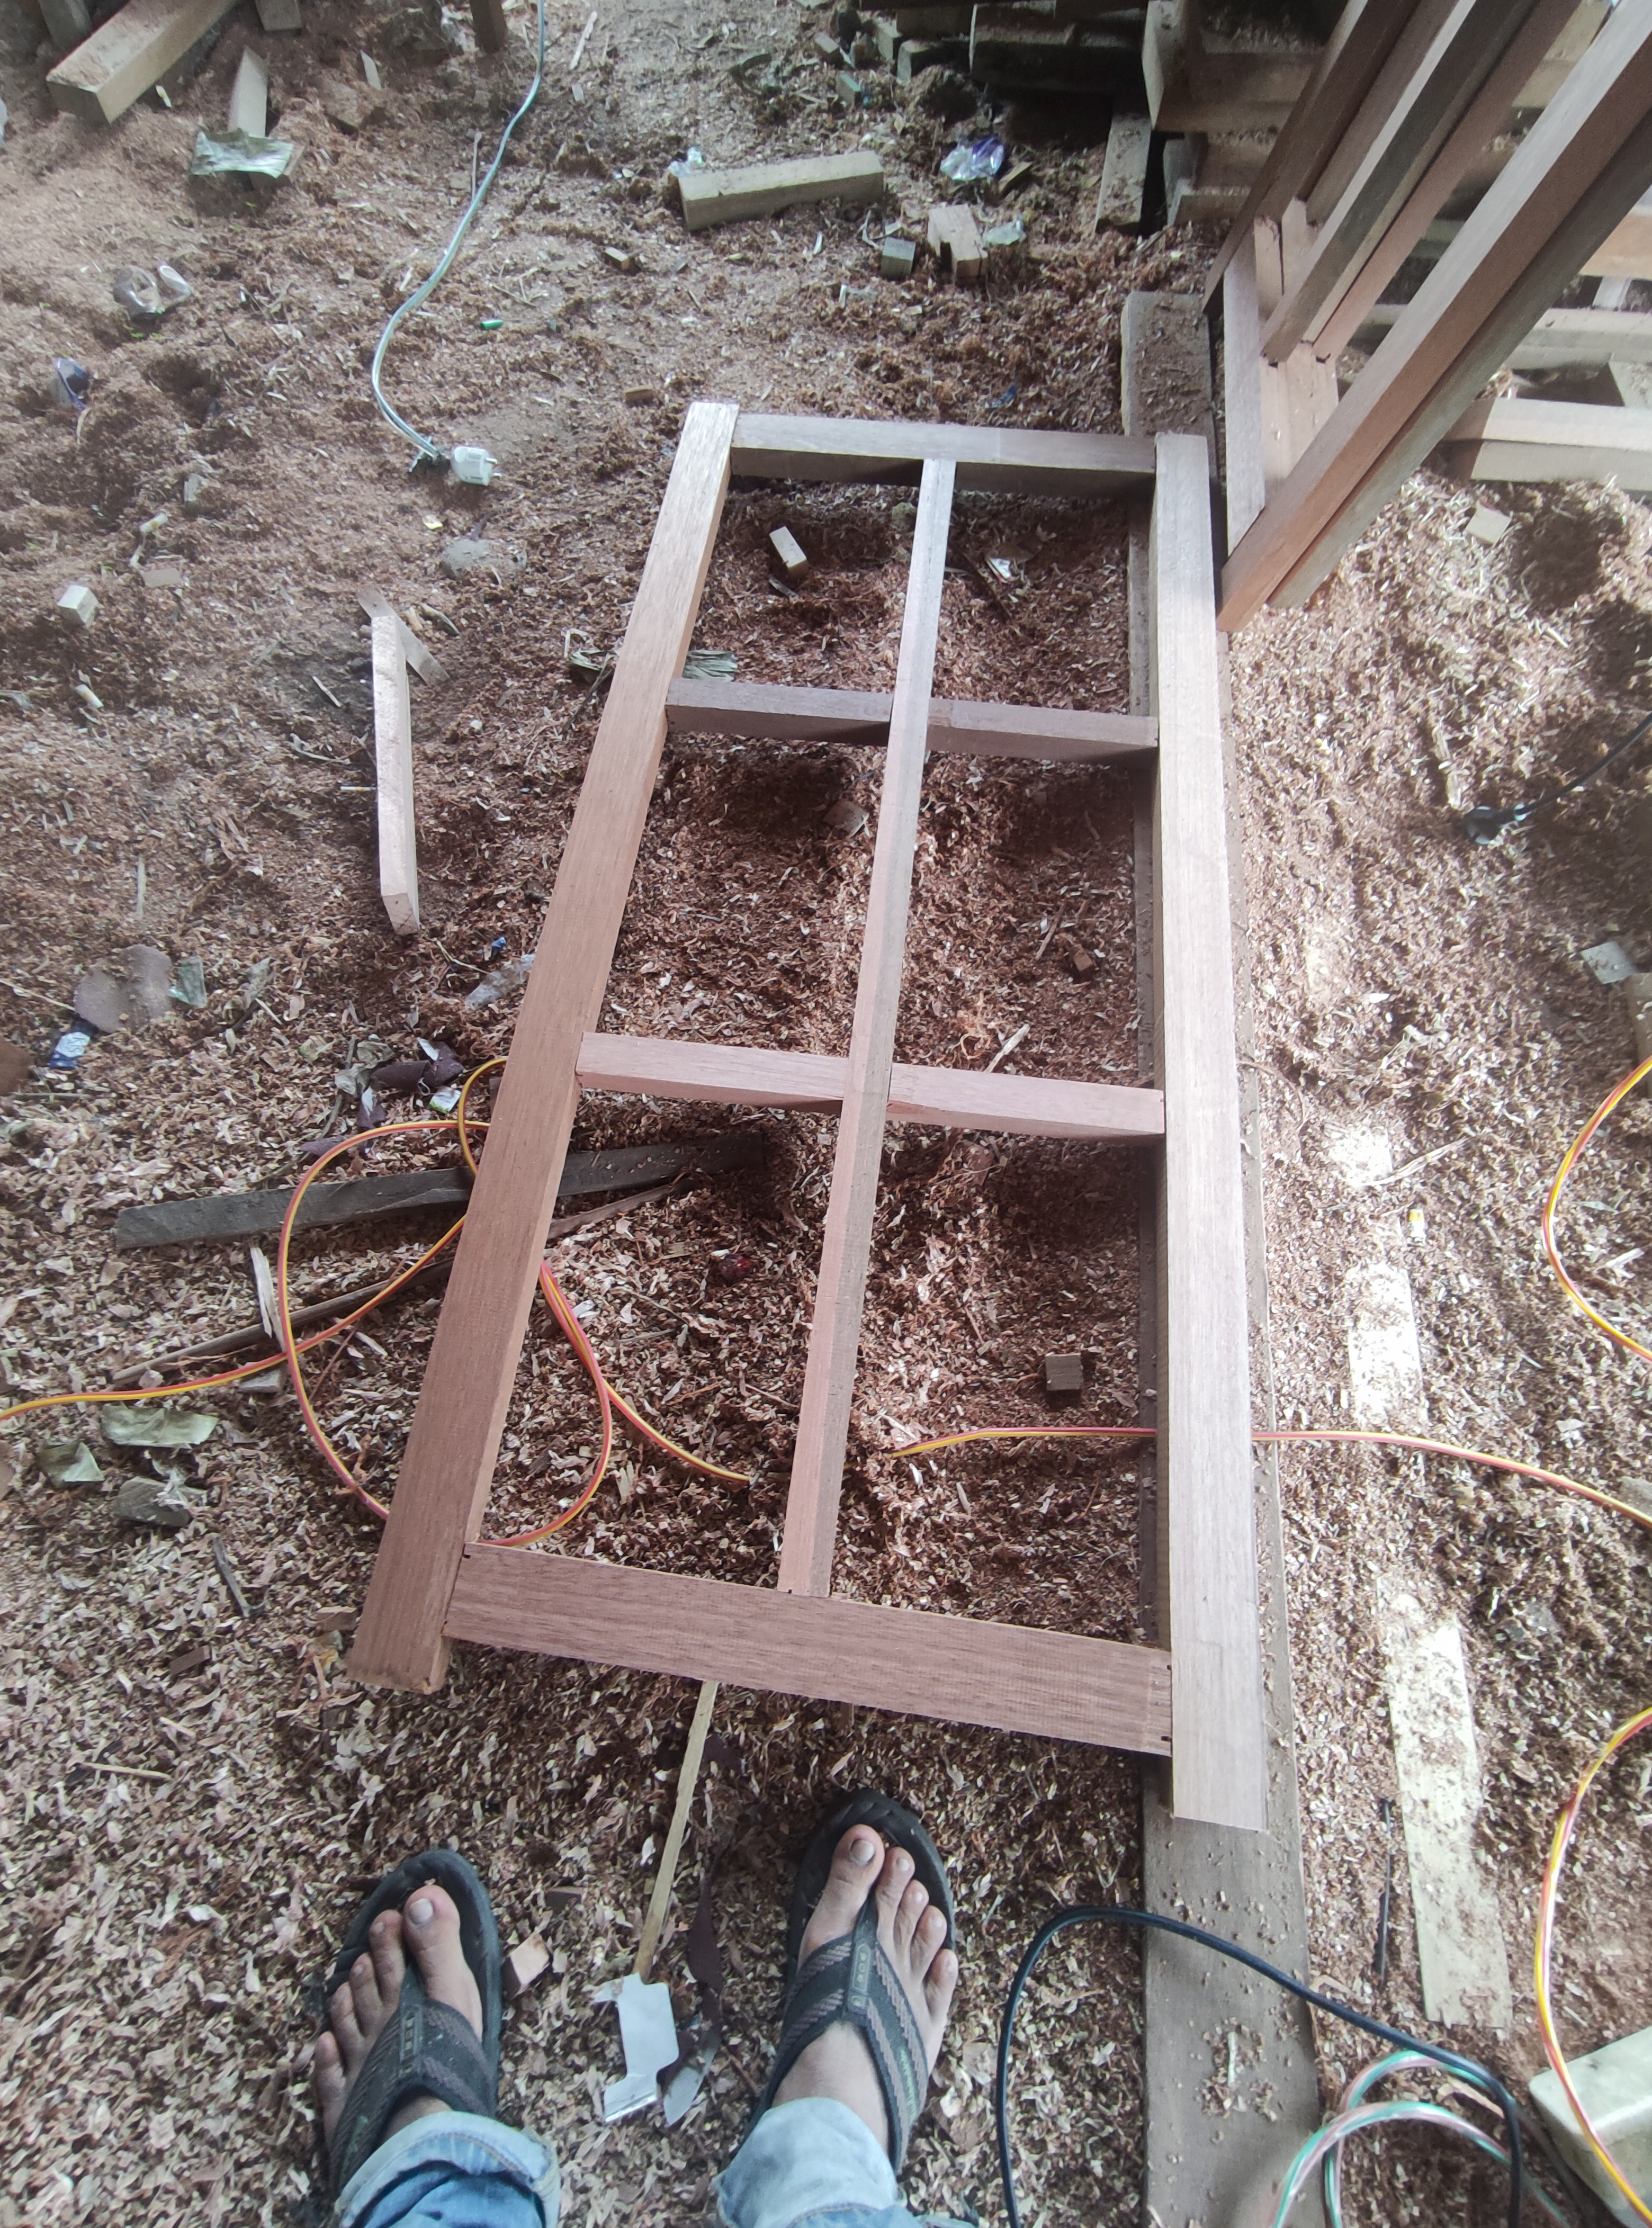
Then after the process of preparing the bulkhead holder is complete, now we proceed to the stage of unifying all the bulkheads of the circuit.
5.The unification of all the circuit materials that we have completed has gone through several initial stages.
For the first stage of compiling a series of windows for this design, of course, we must first unify the series of middle patterns and the process goes like this.

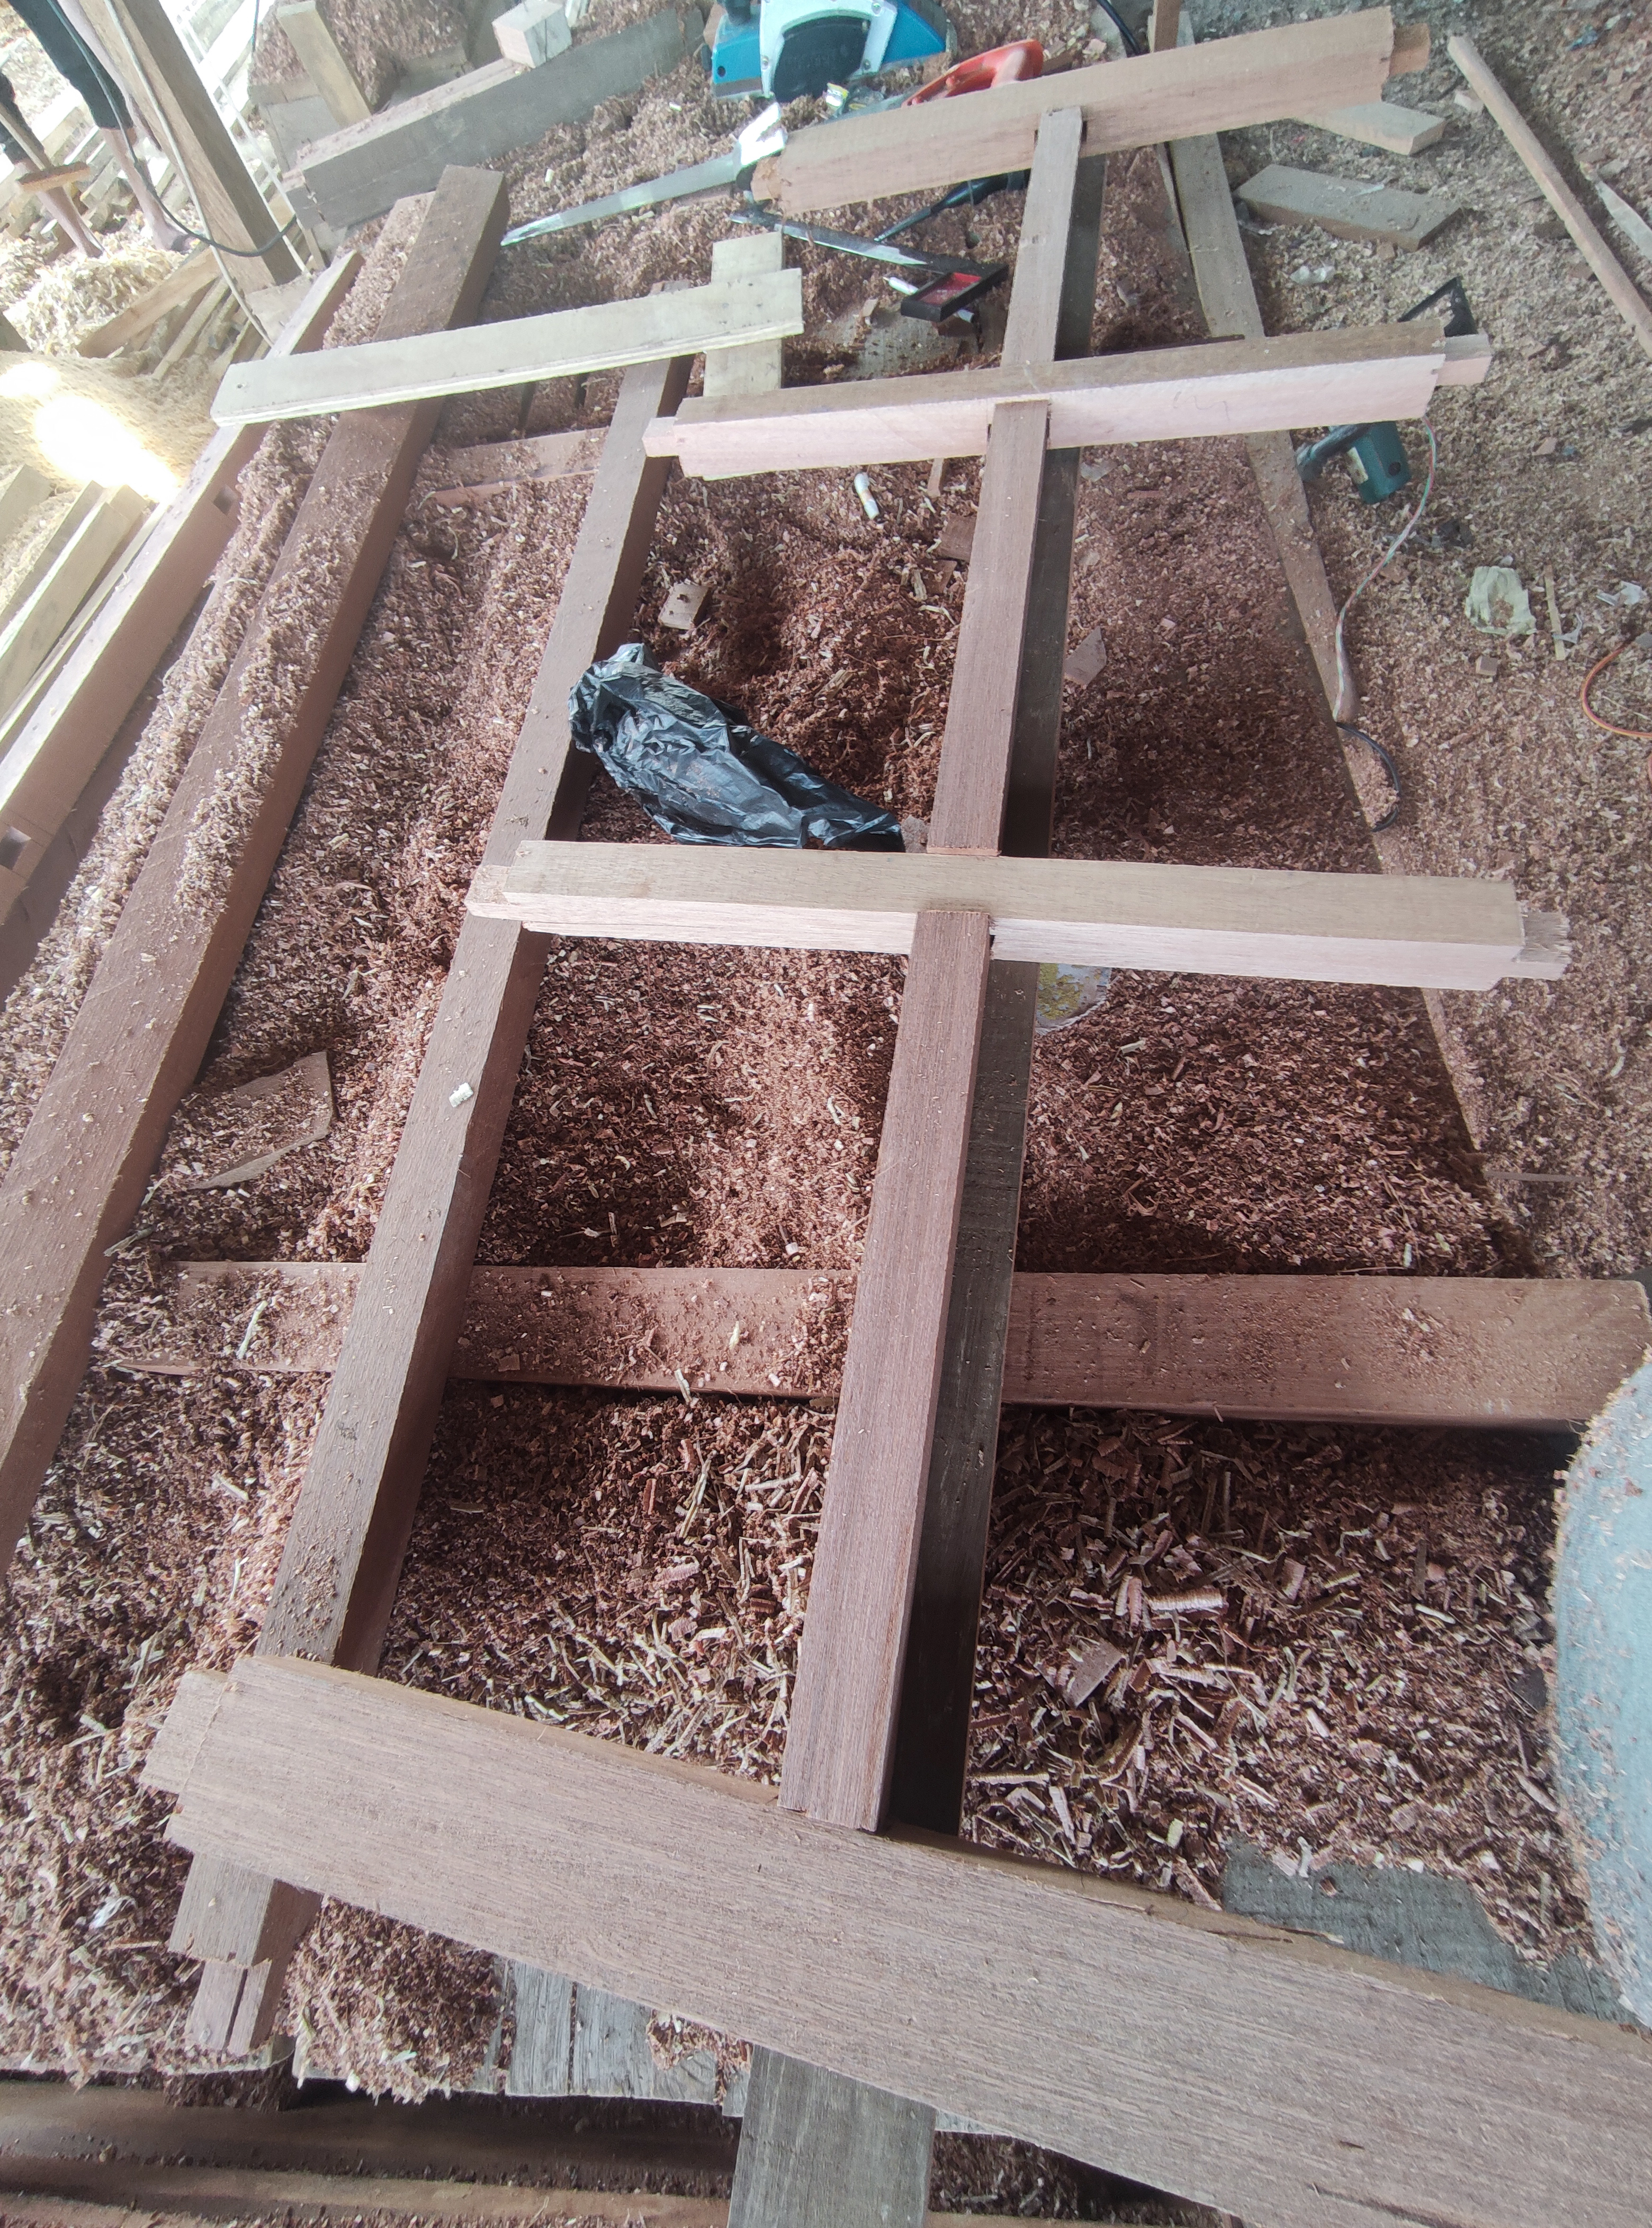
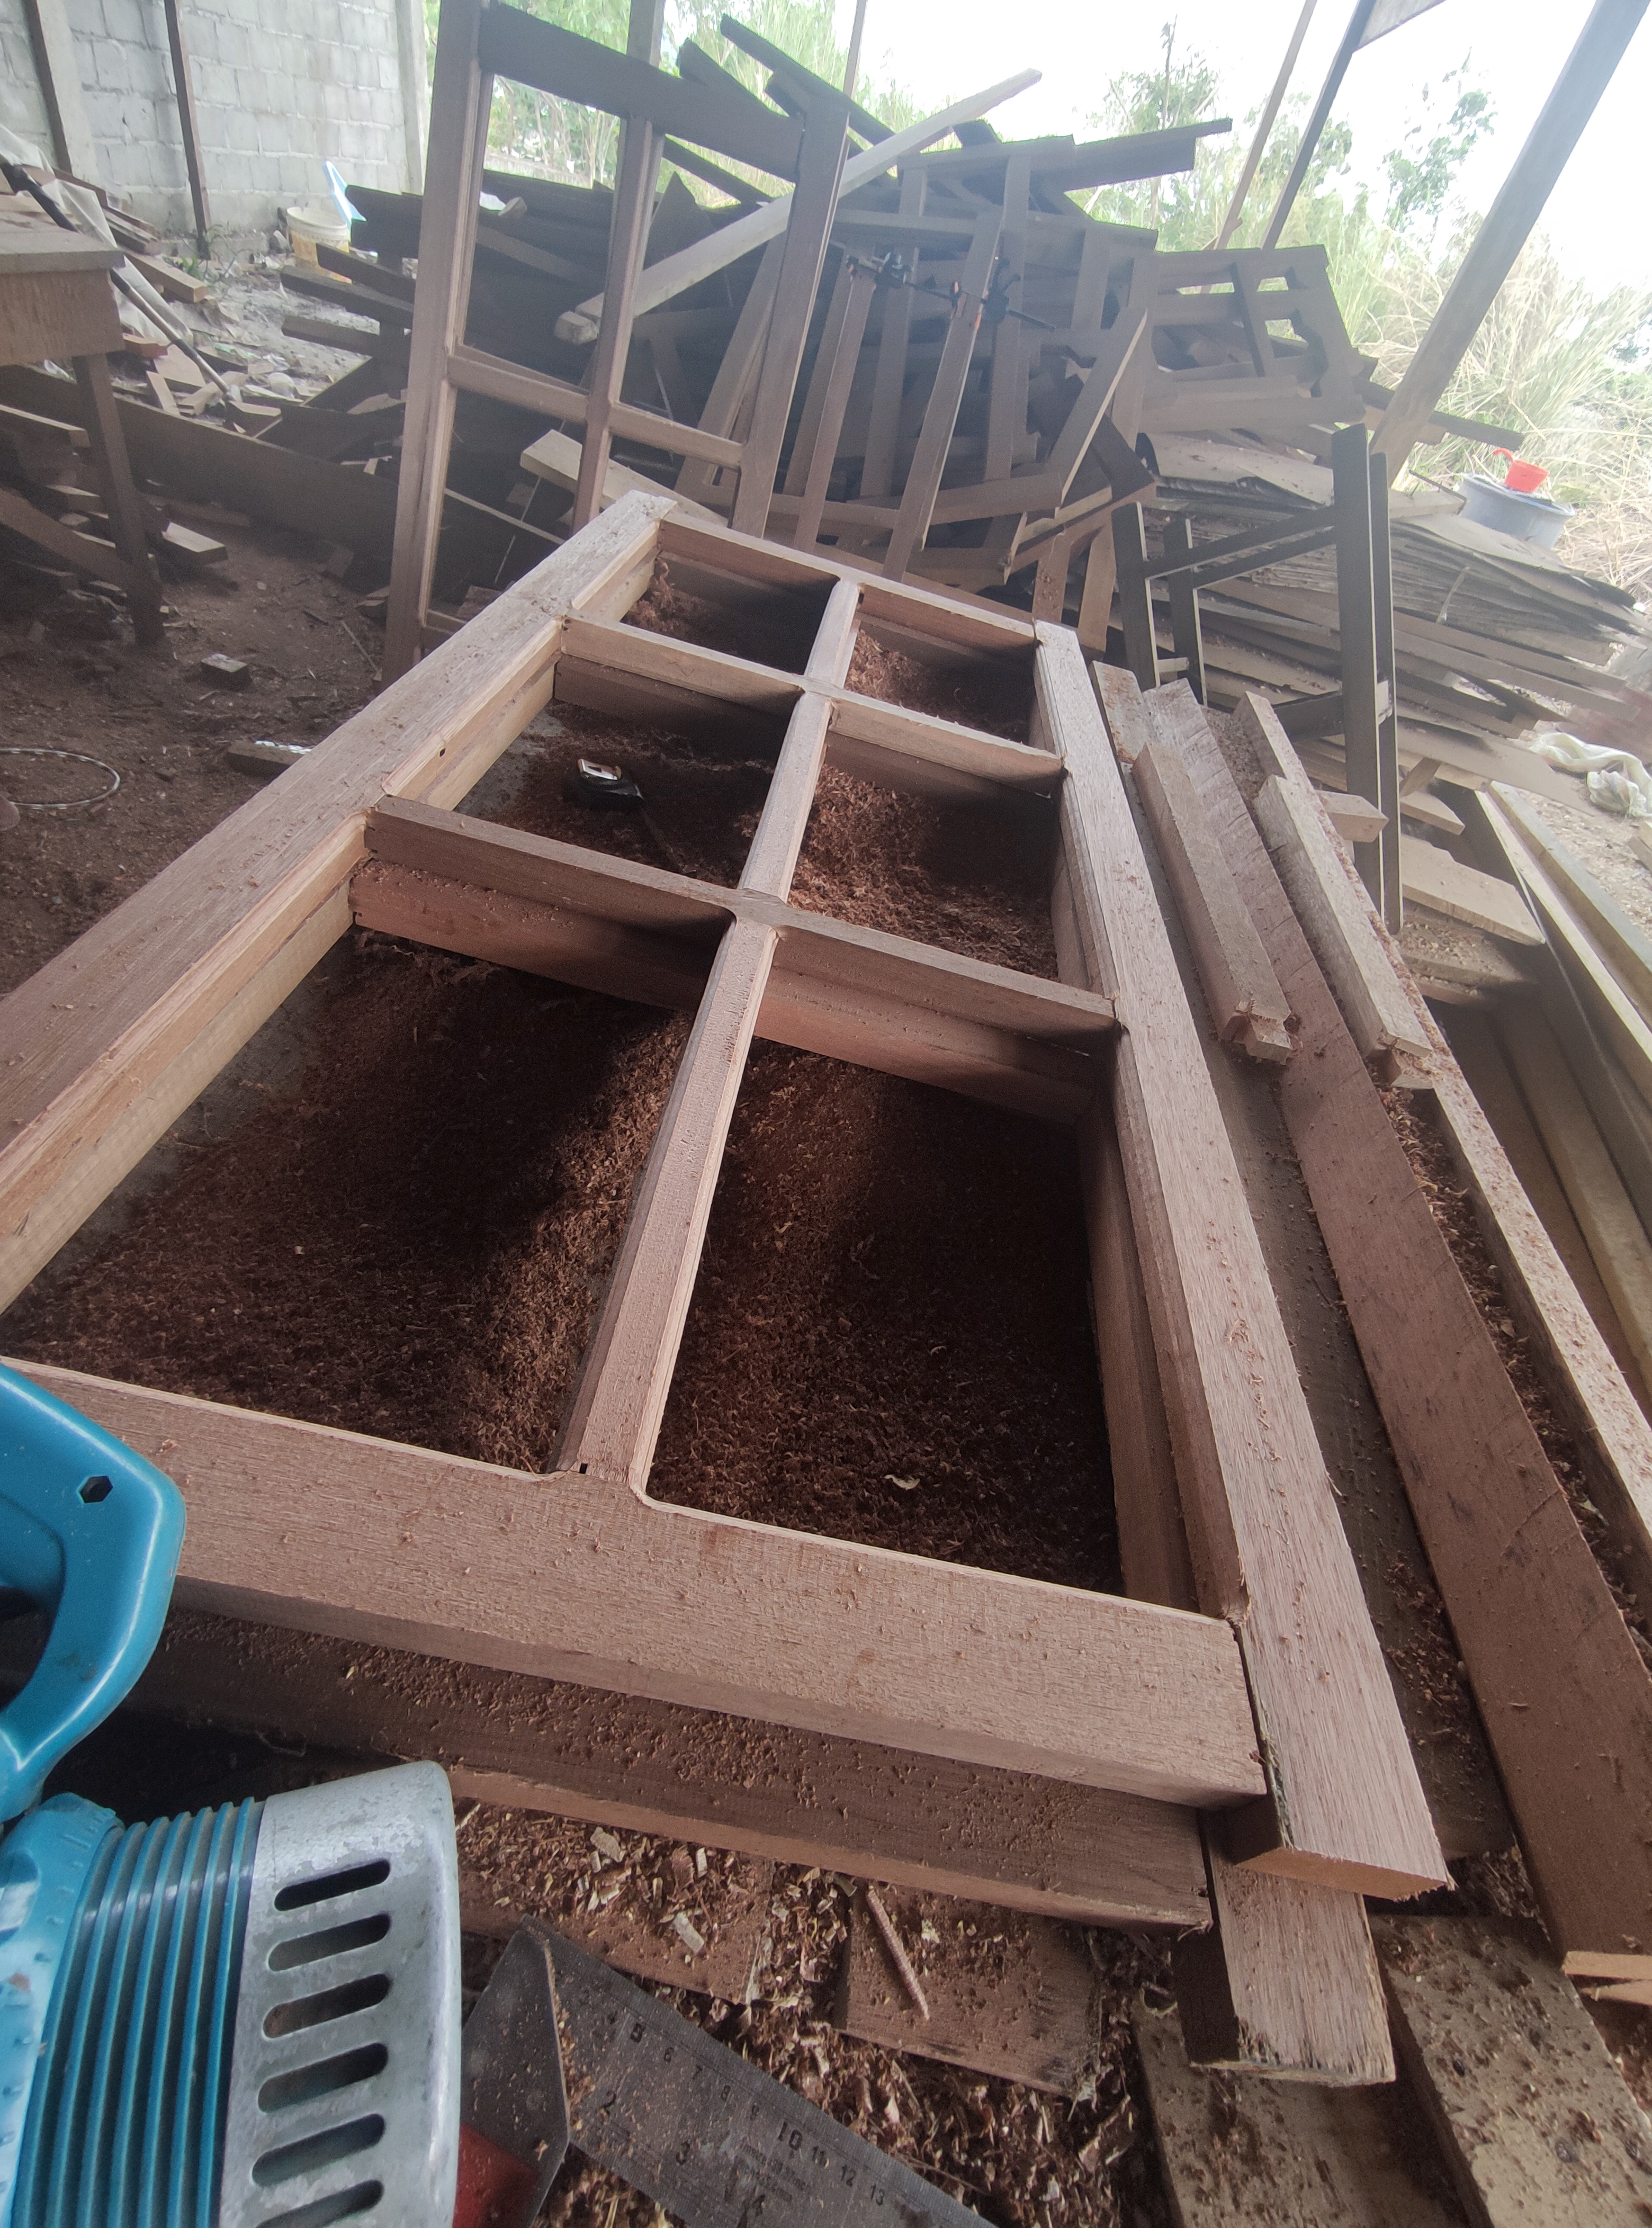
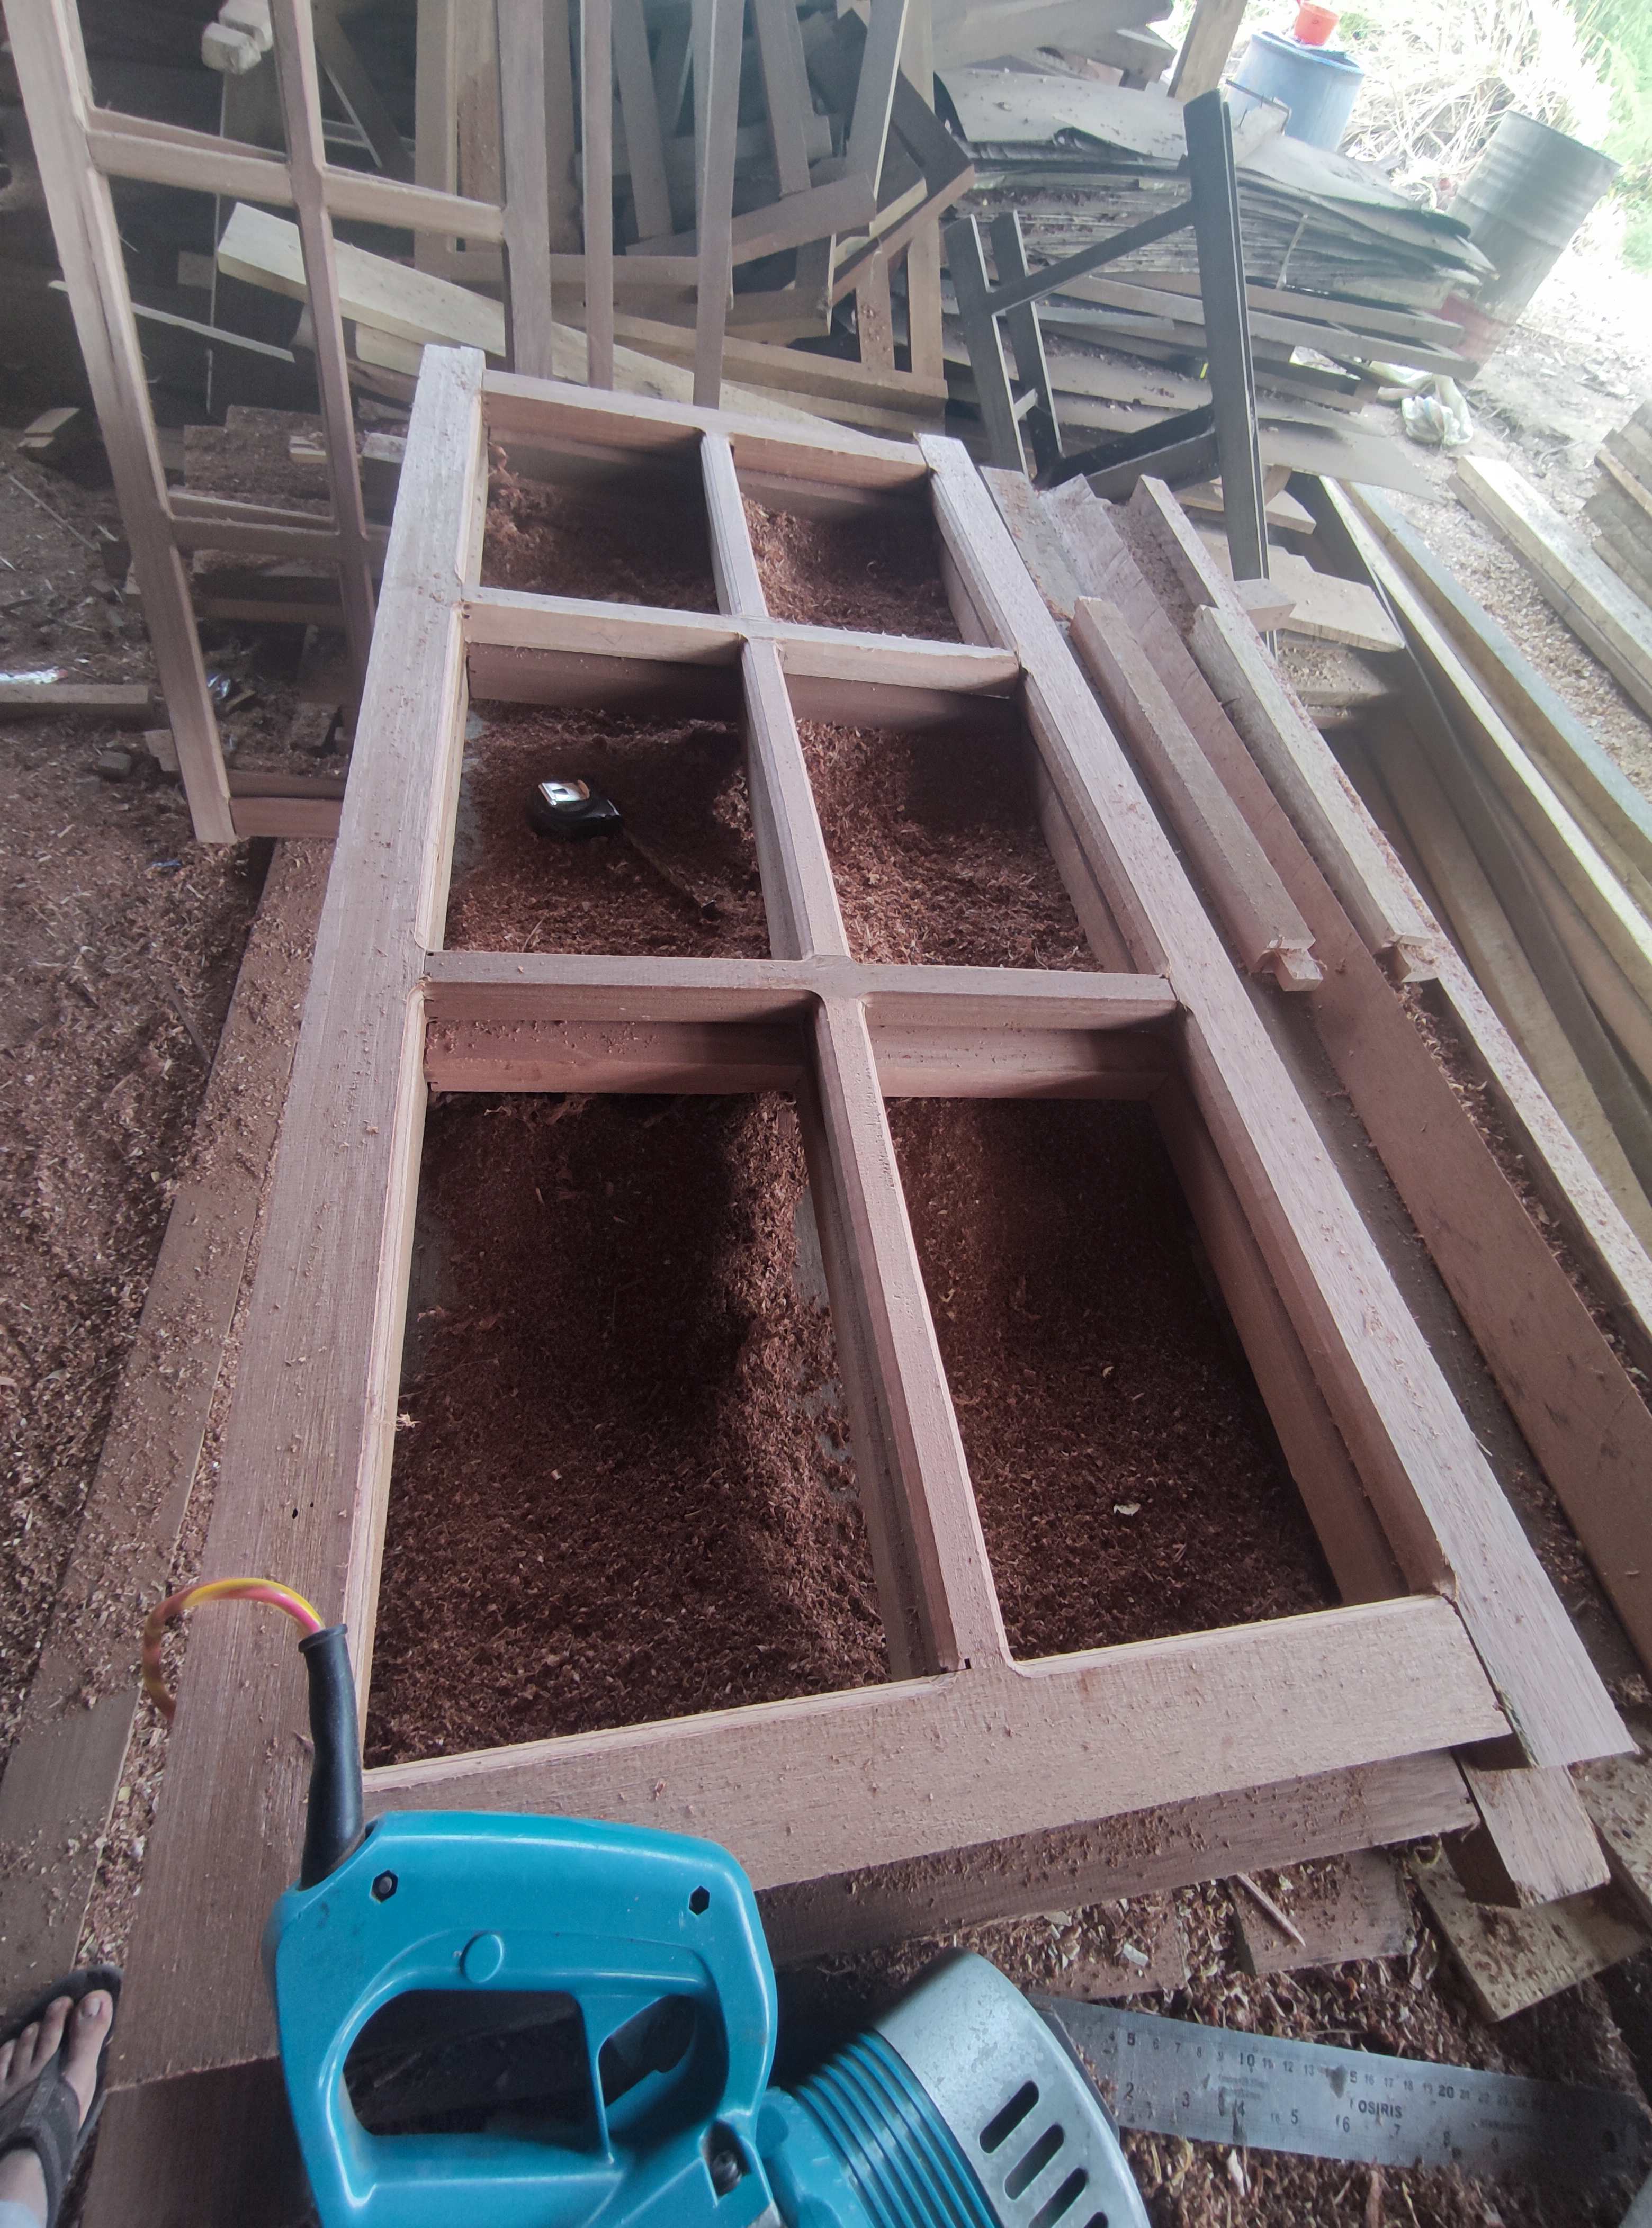
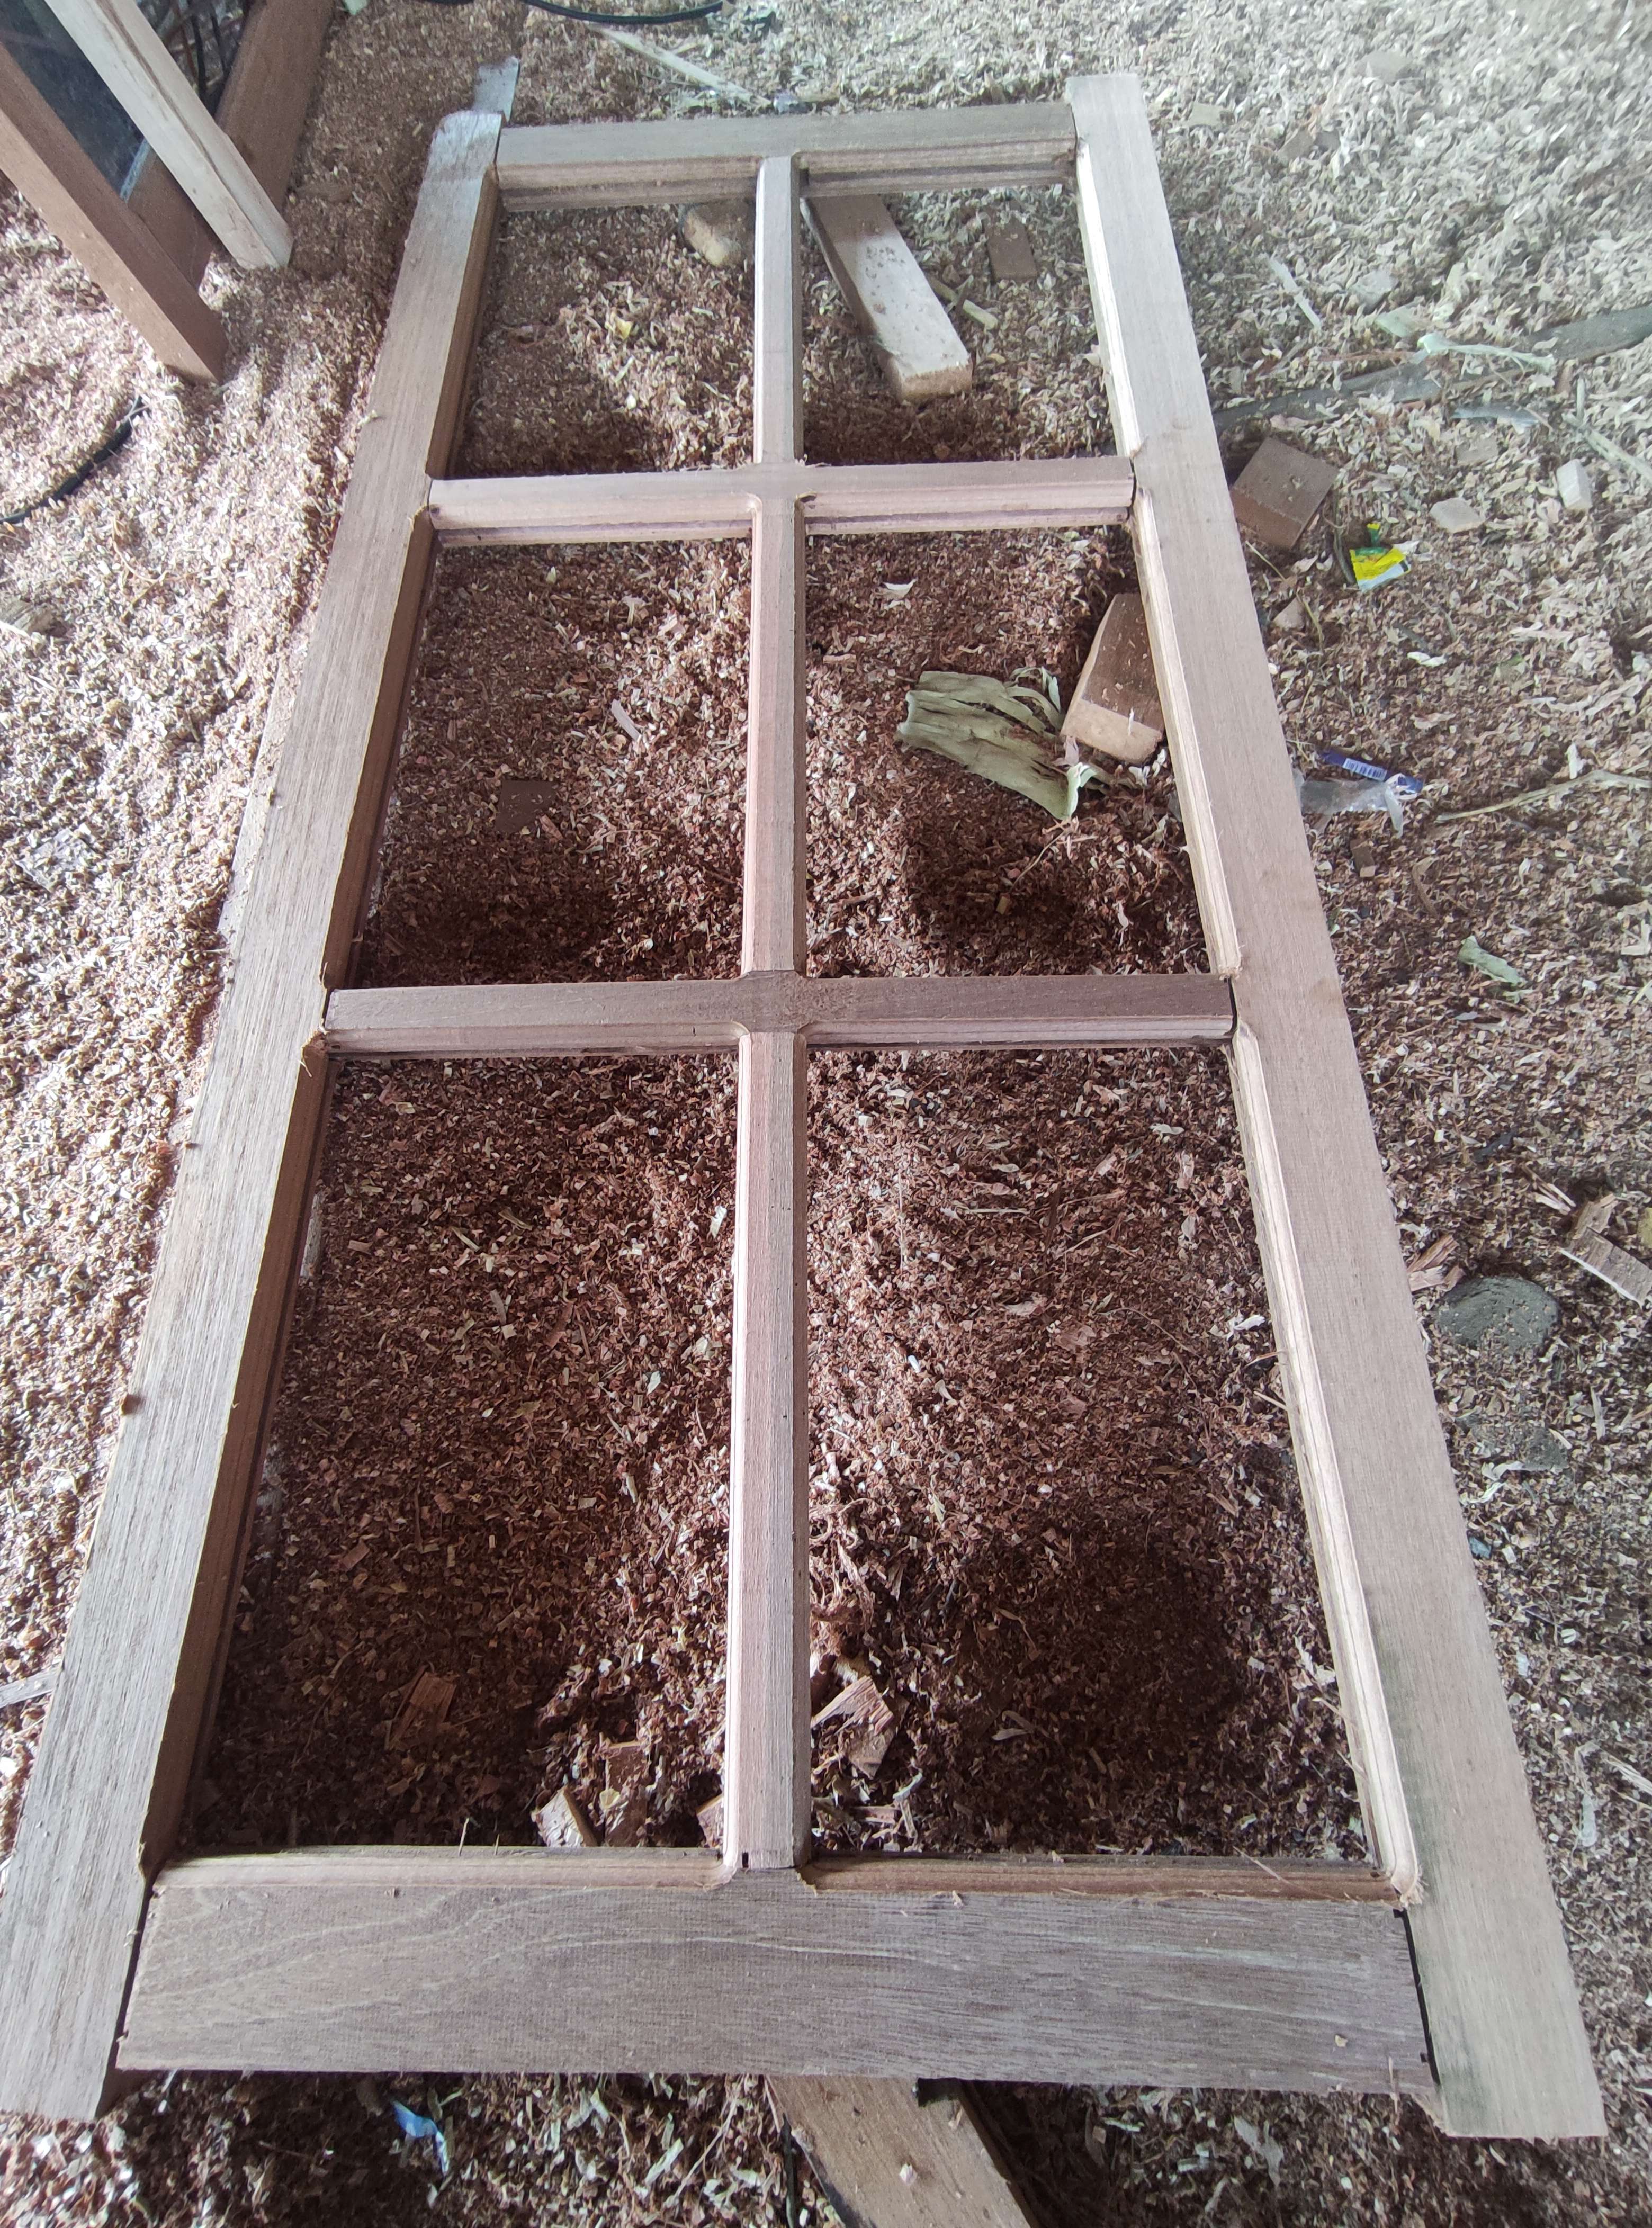
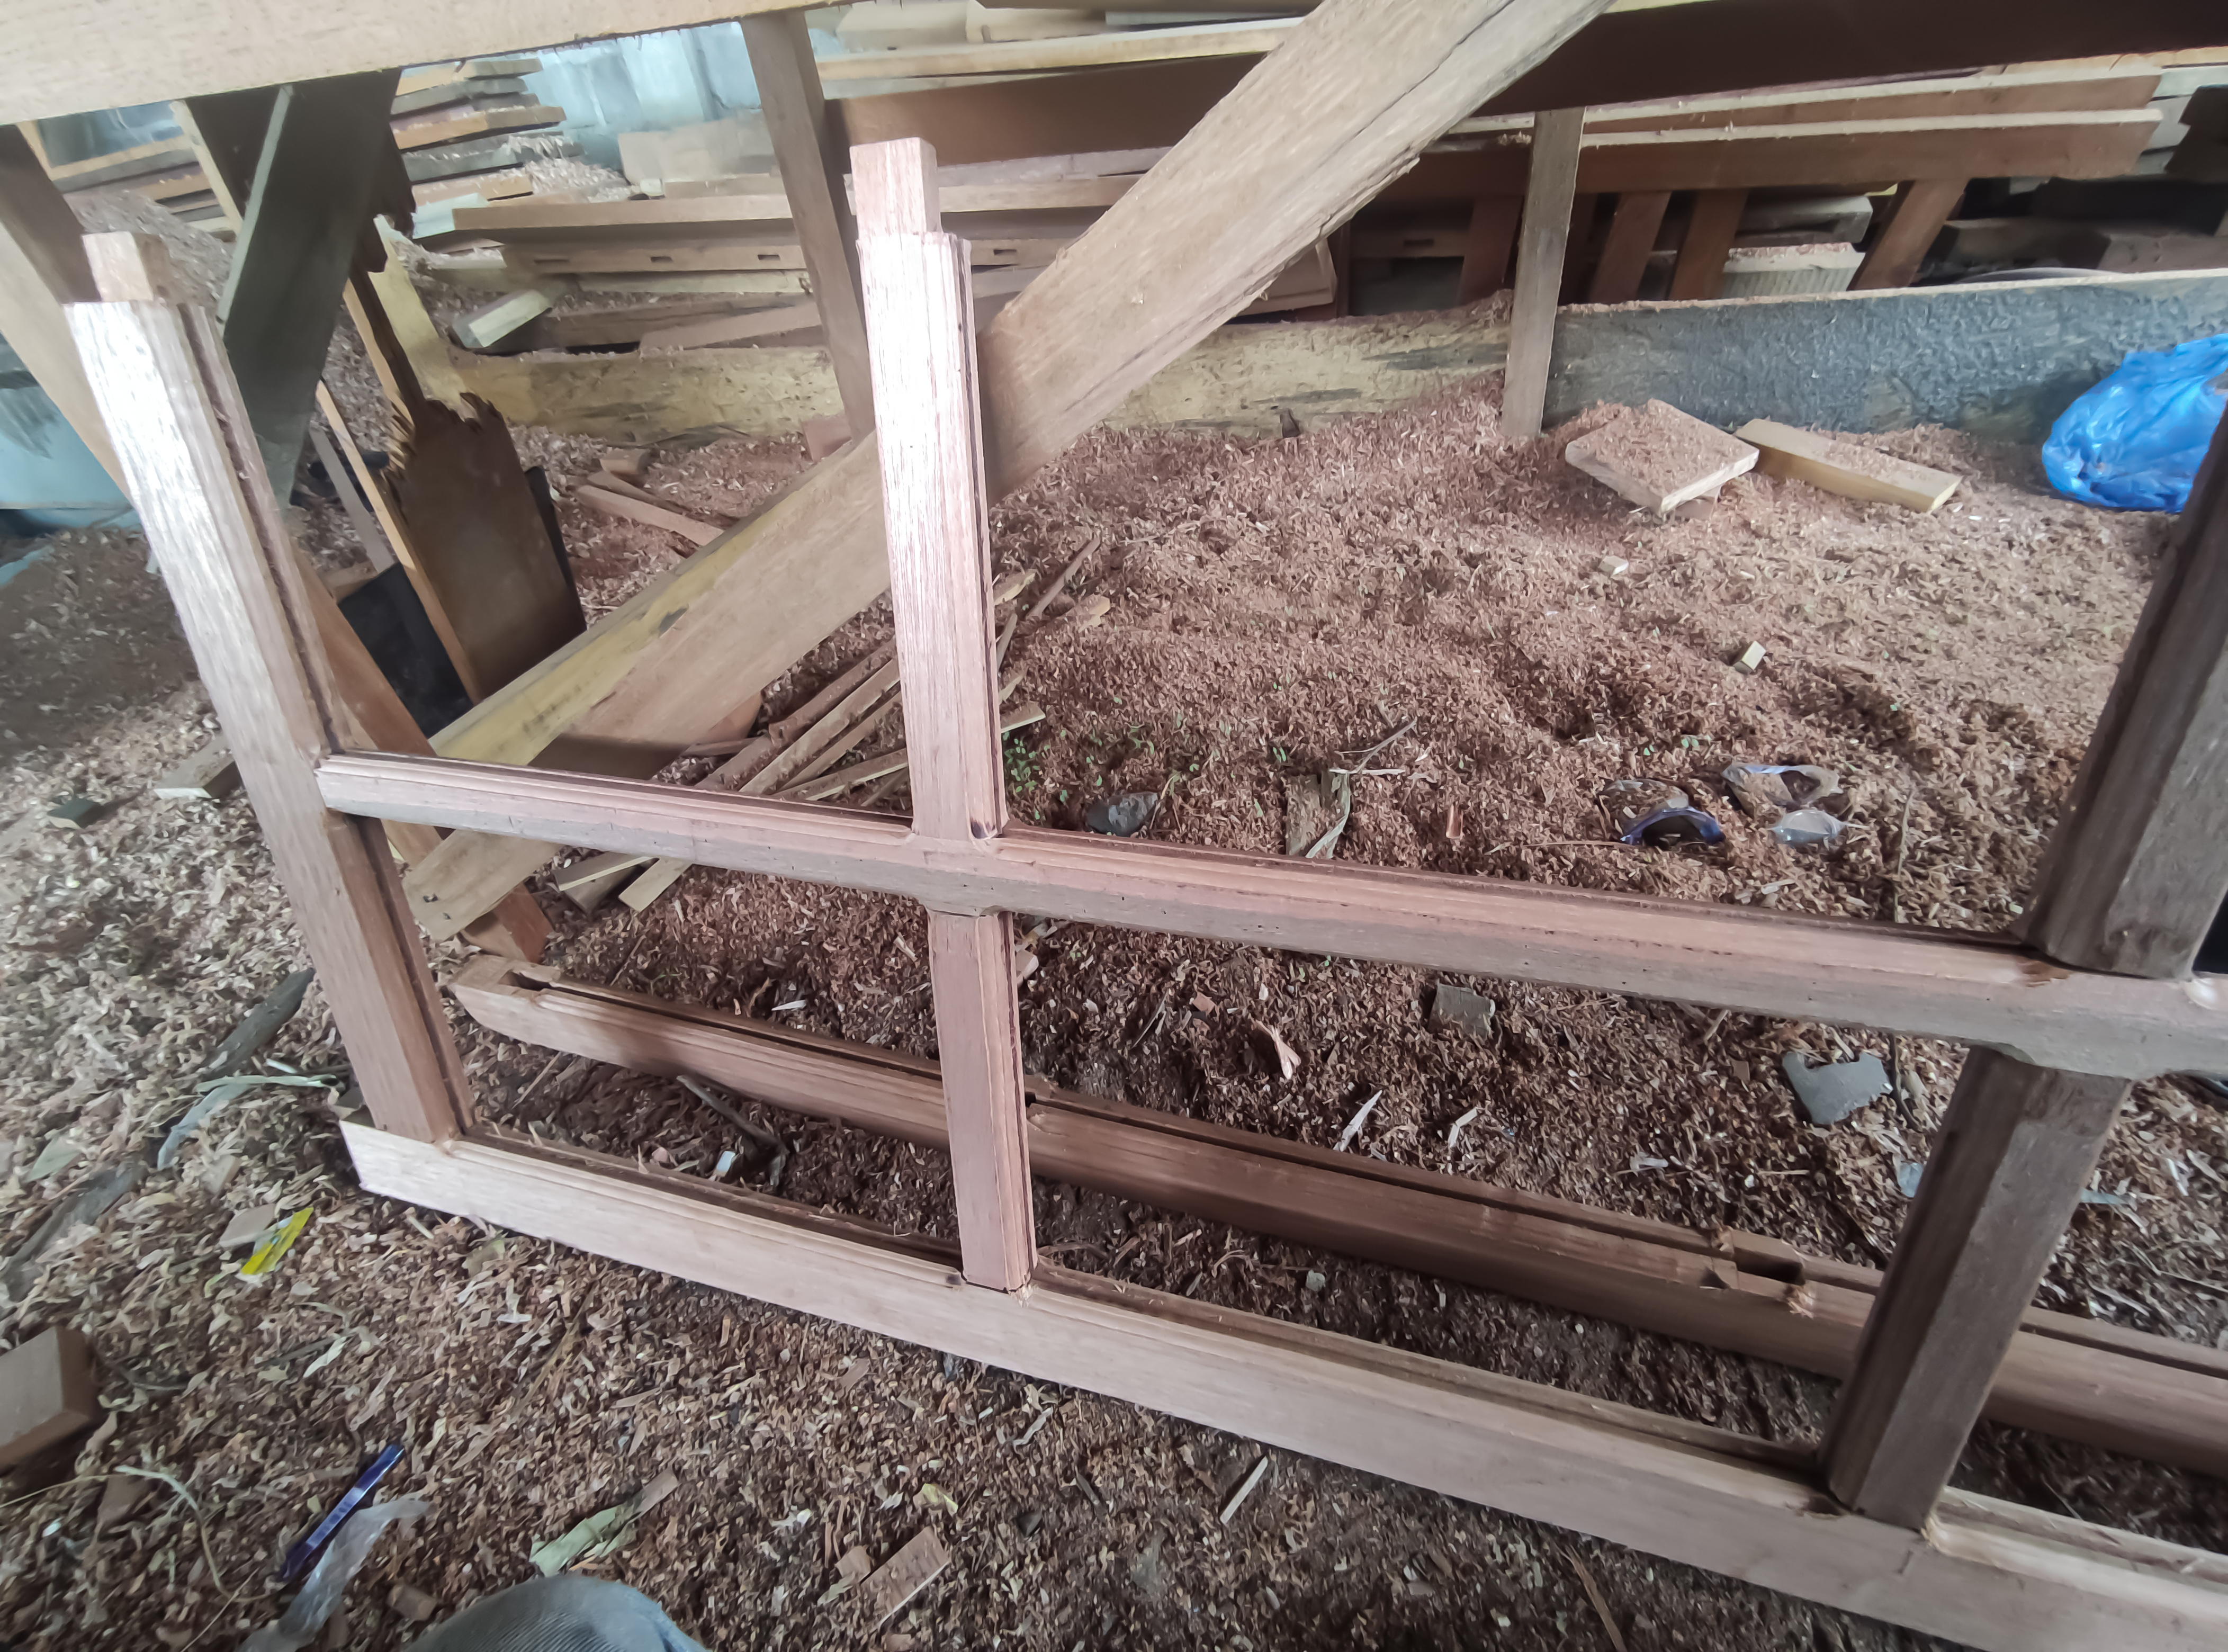
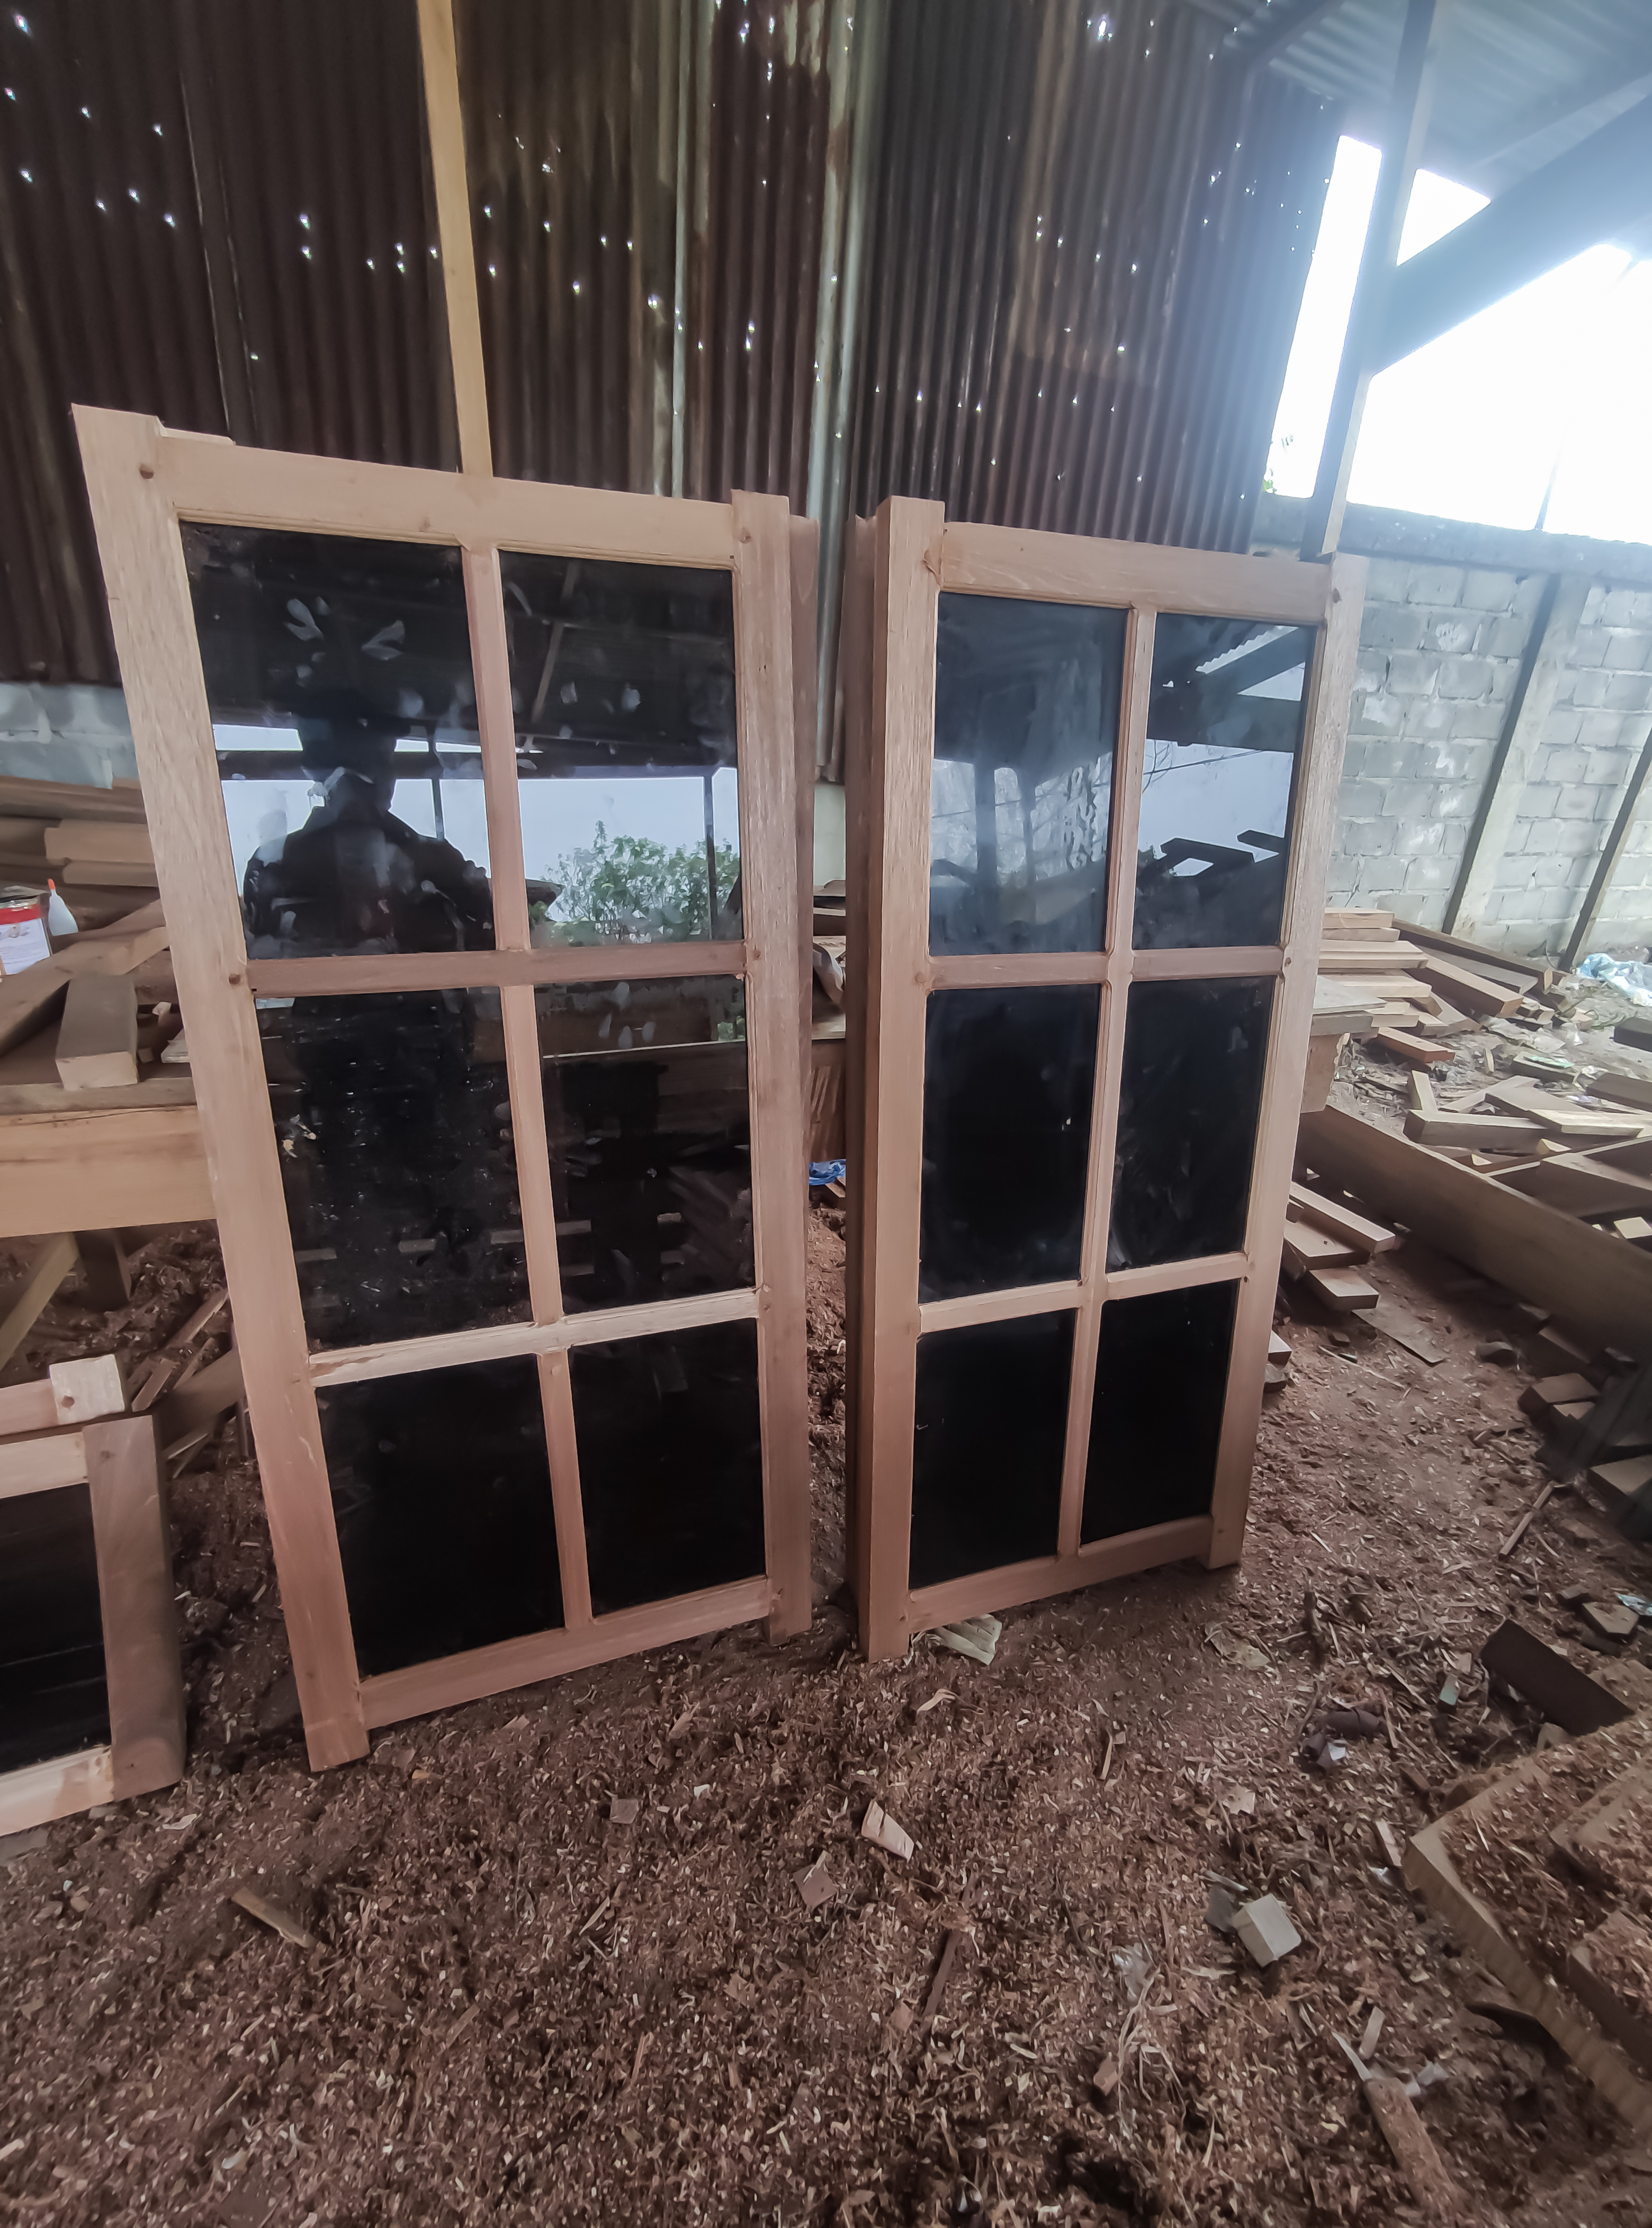
And after the process of unification of the circuit is complete the result will look like this.
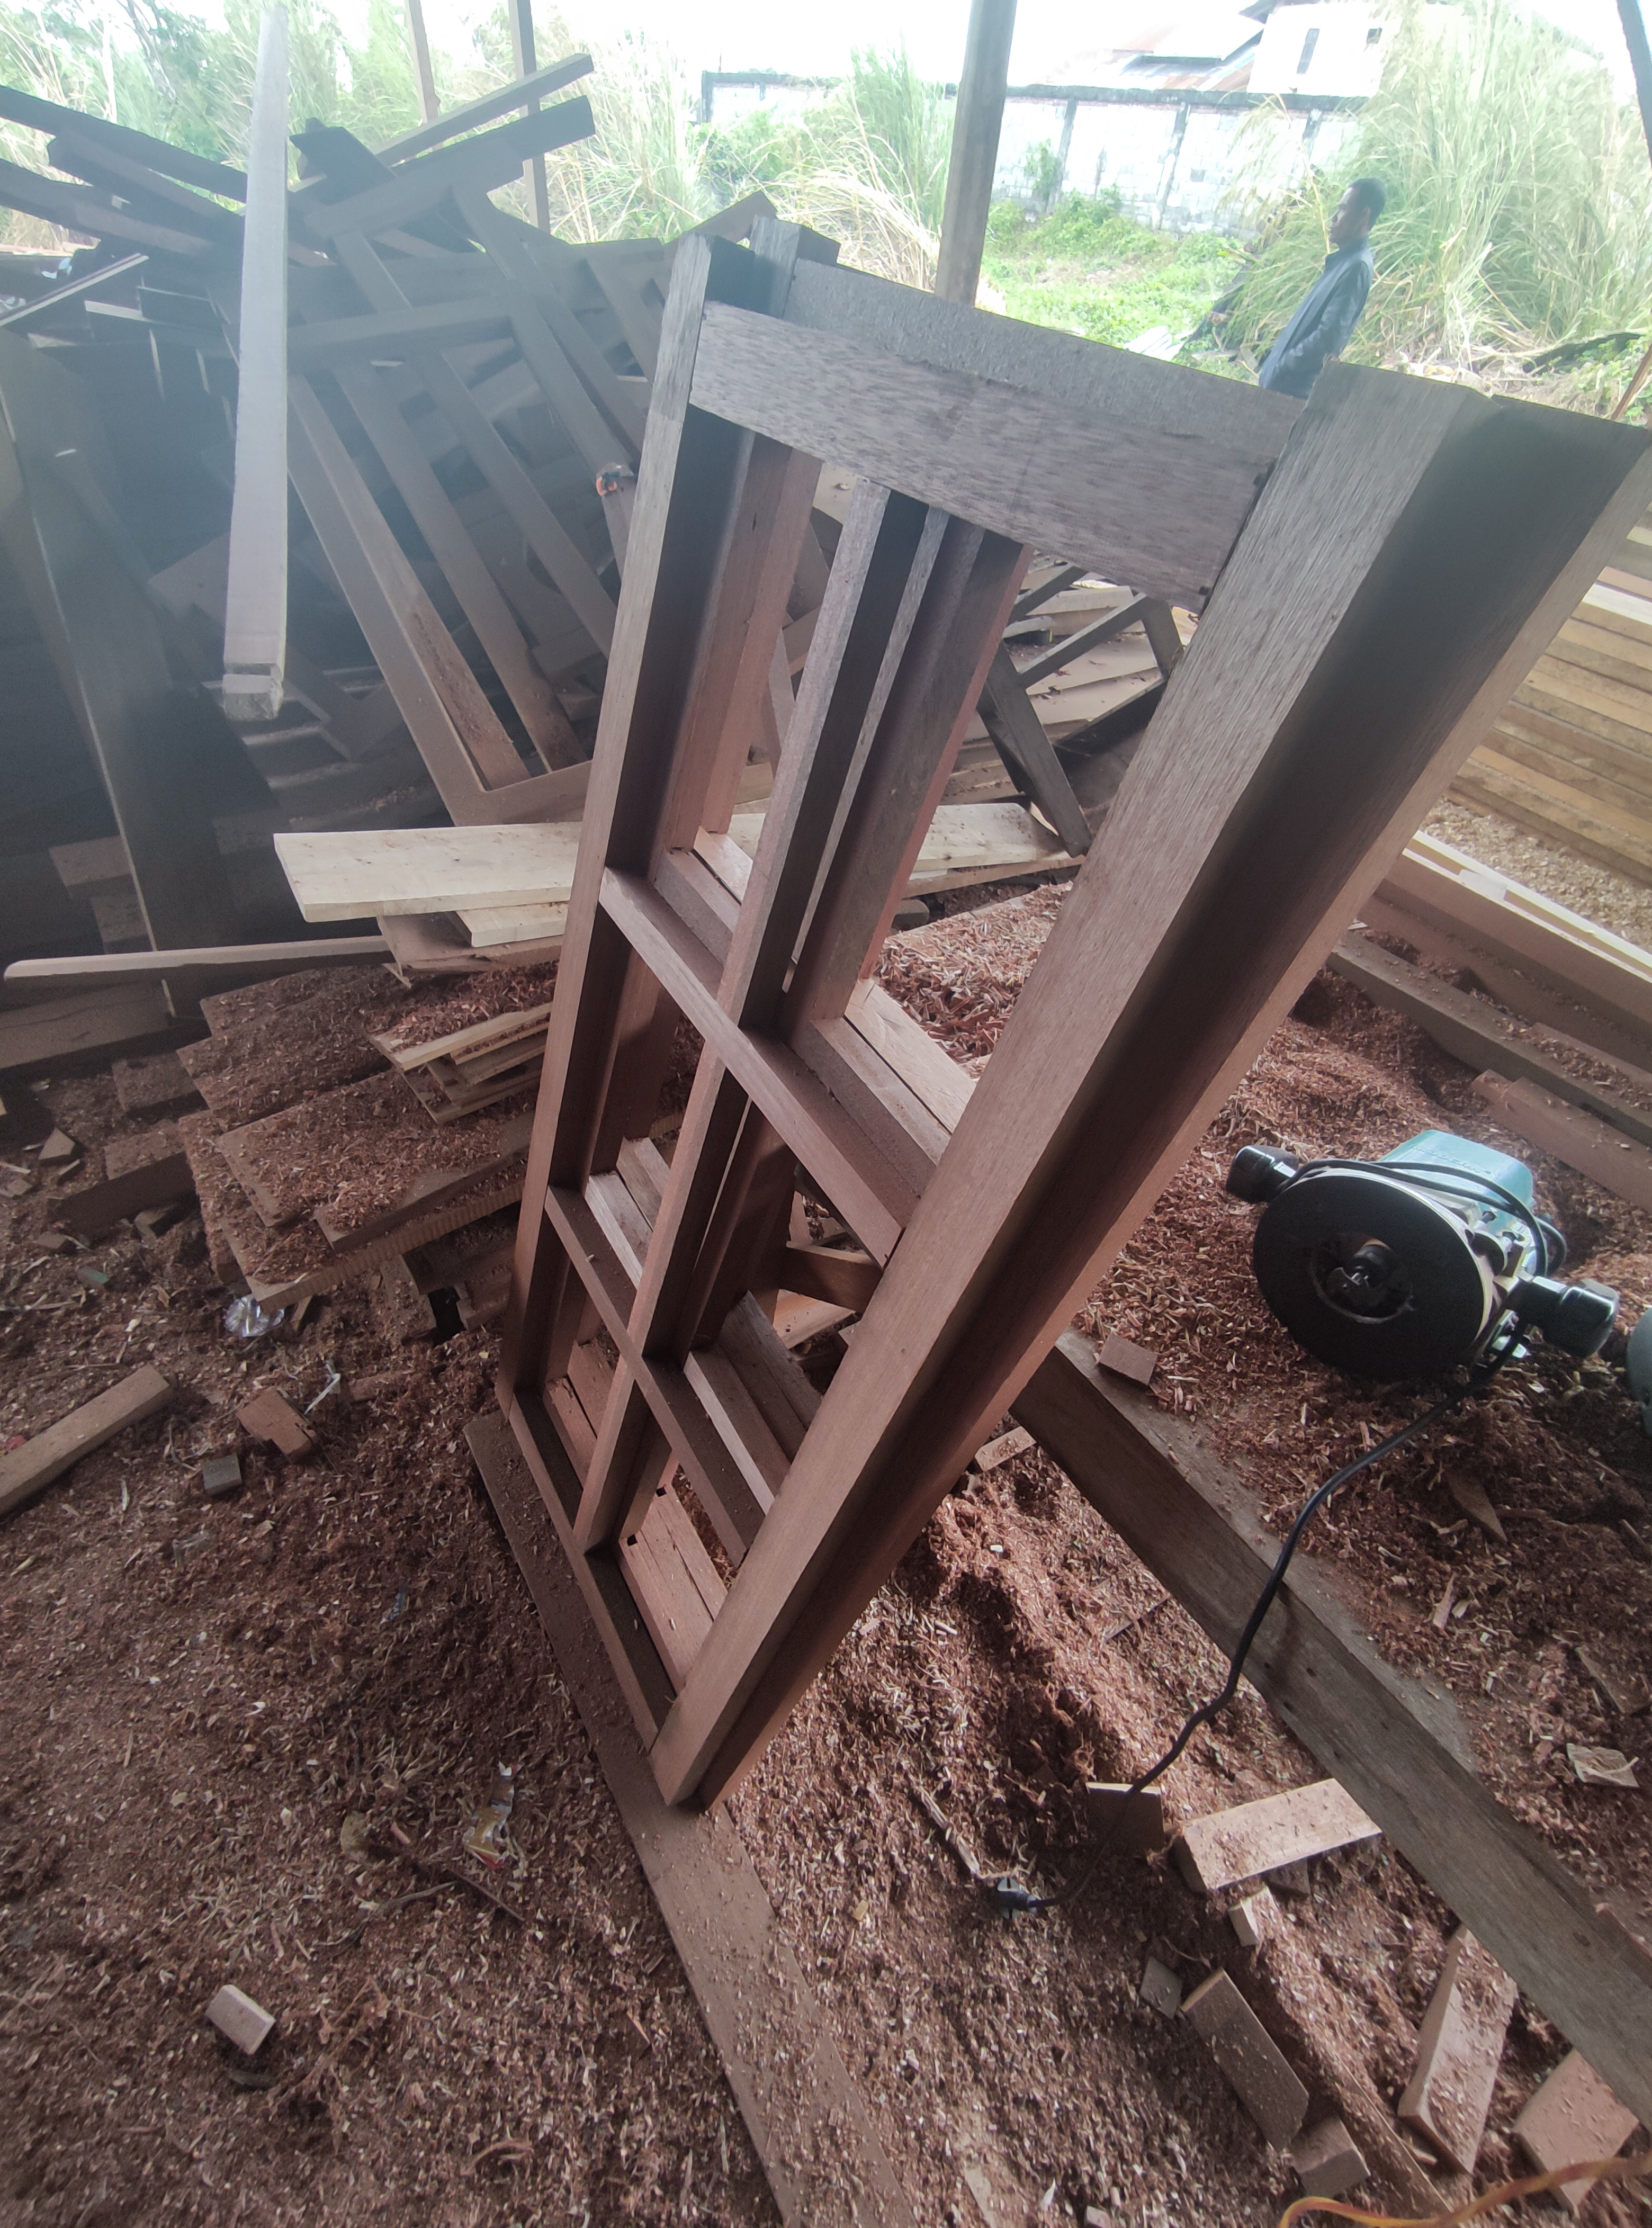
And for the next stage, namely the fireplace in all corners of the front and back of the window bulkhead connection.
6.The hearth of the corner surface of the window series bulkhead connection.
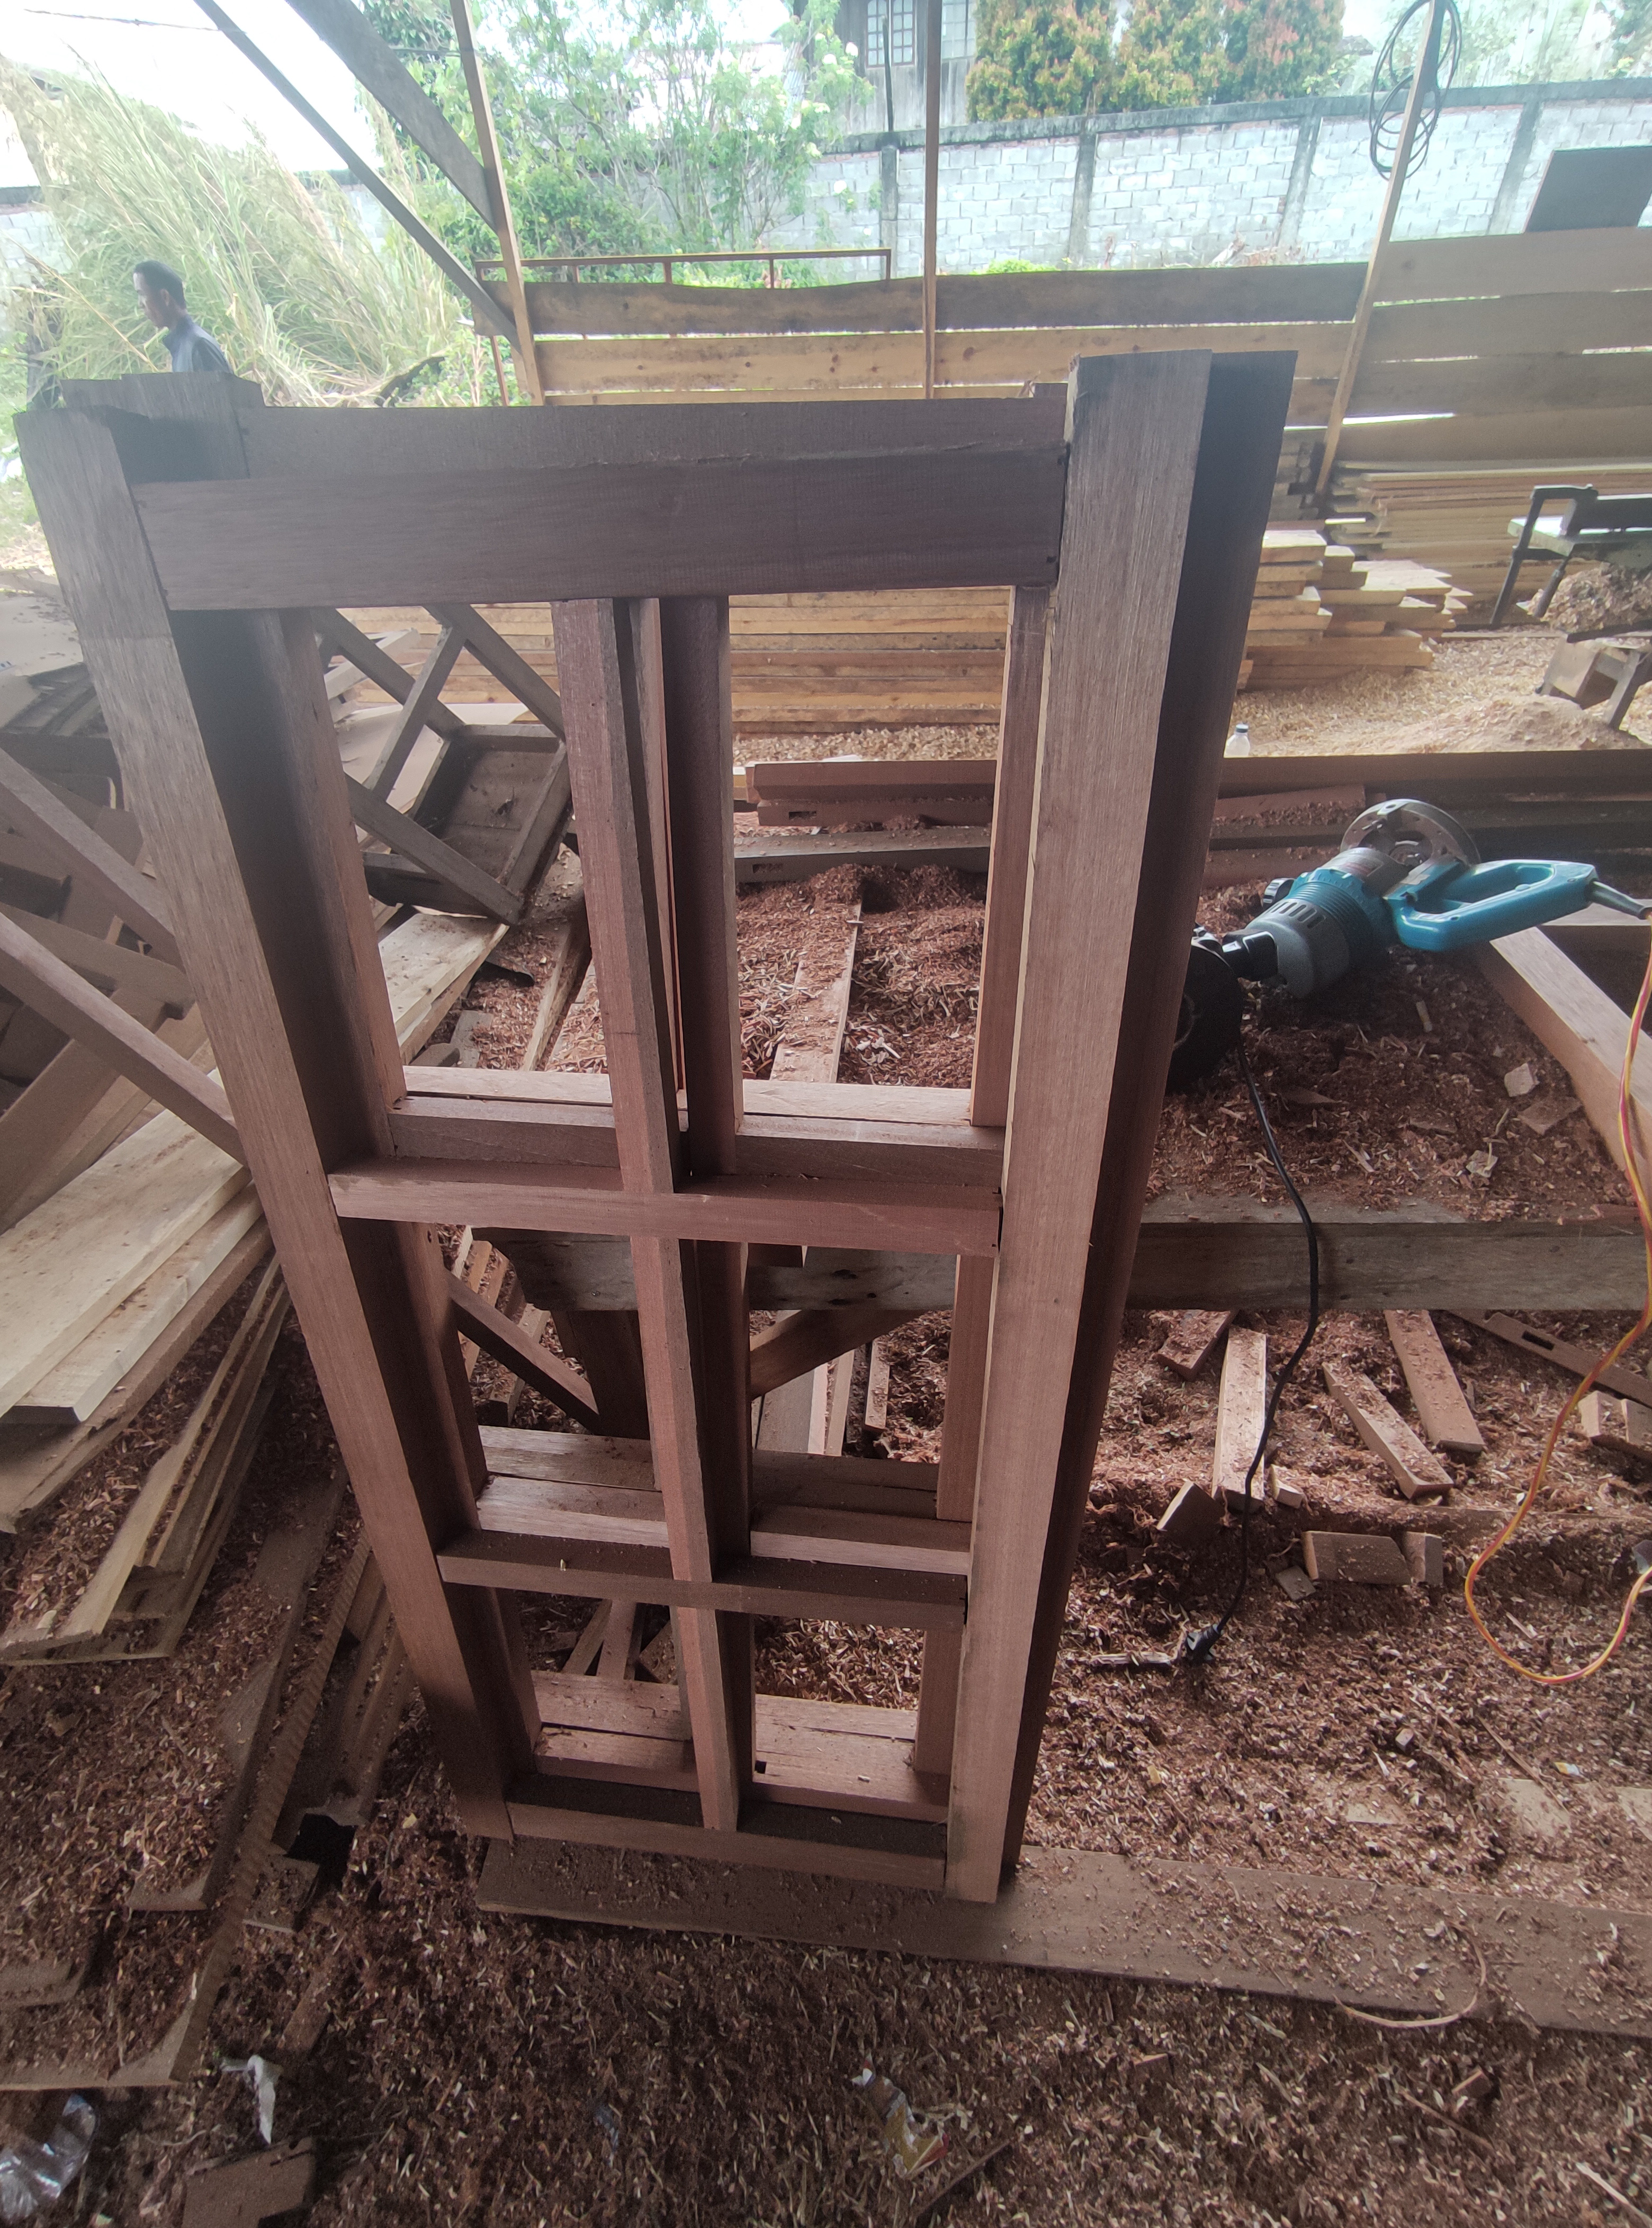
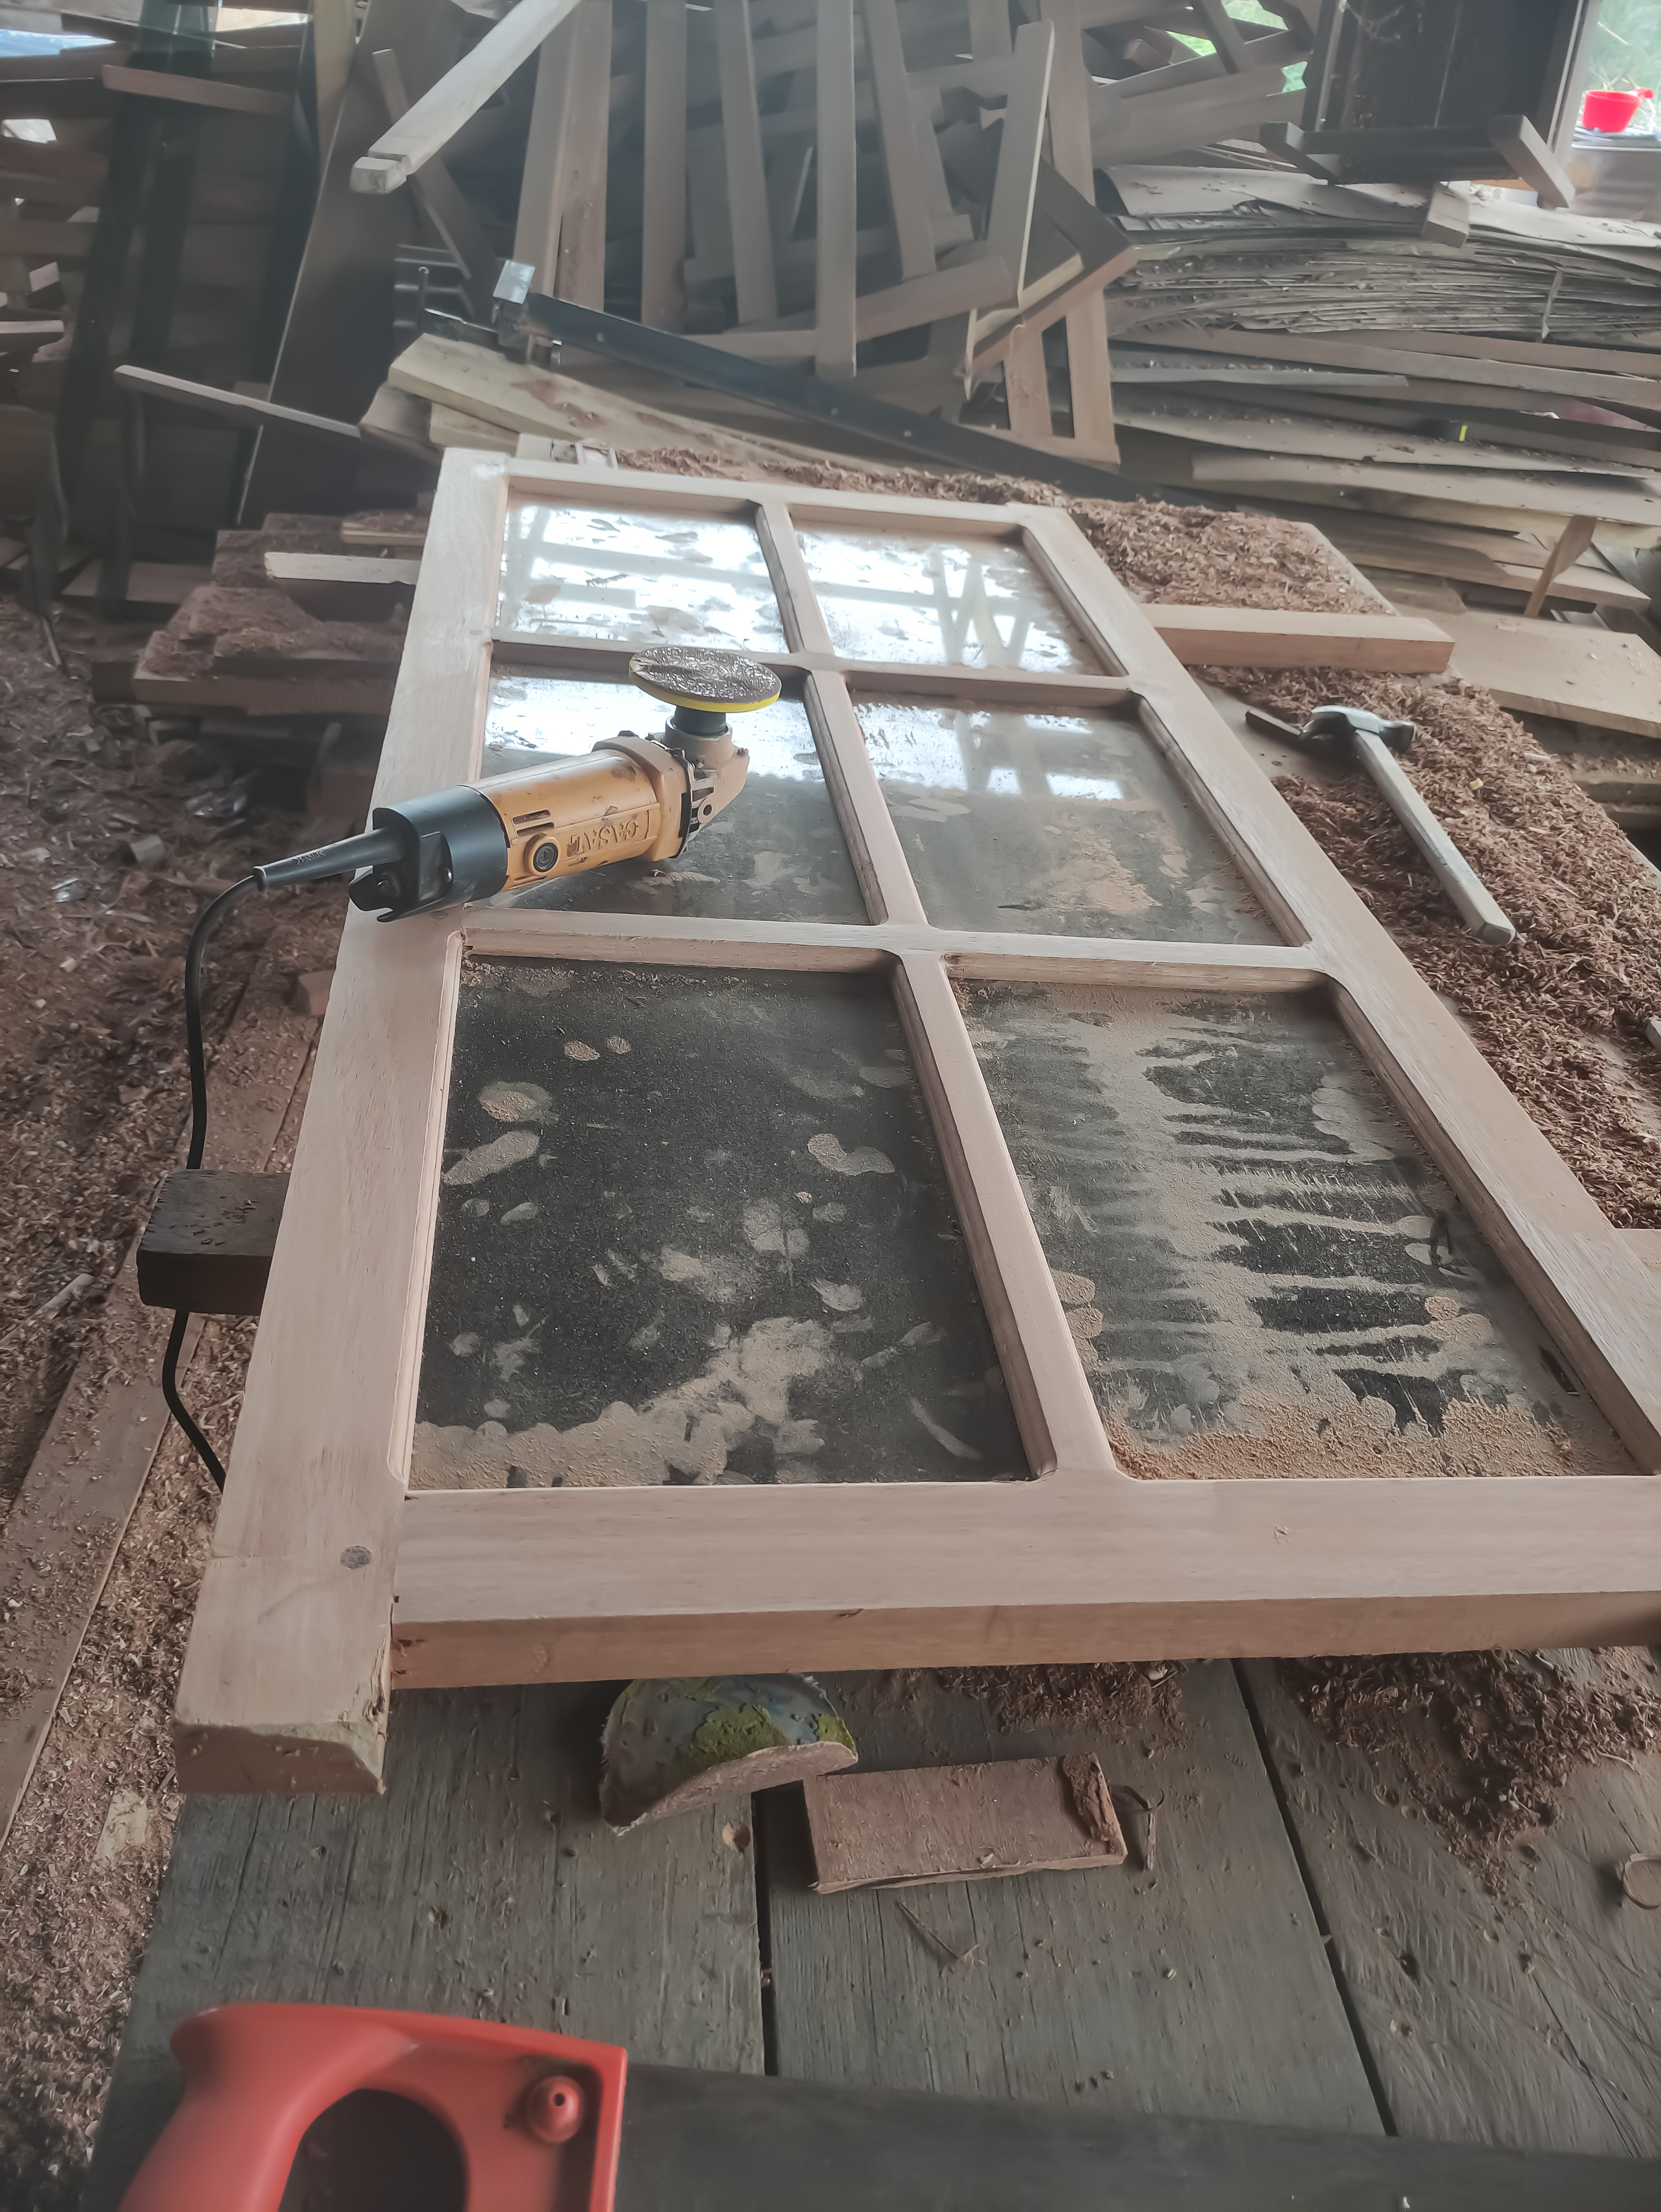
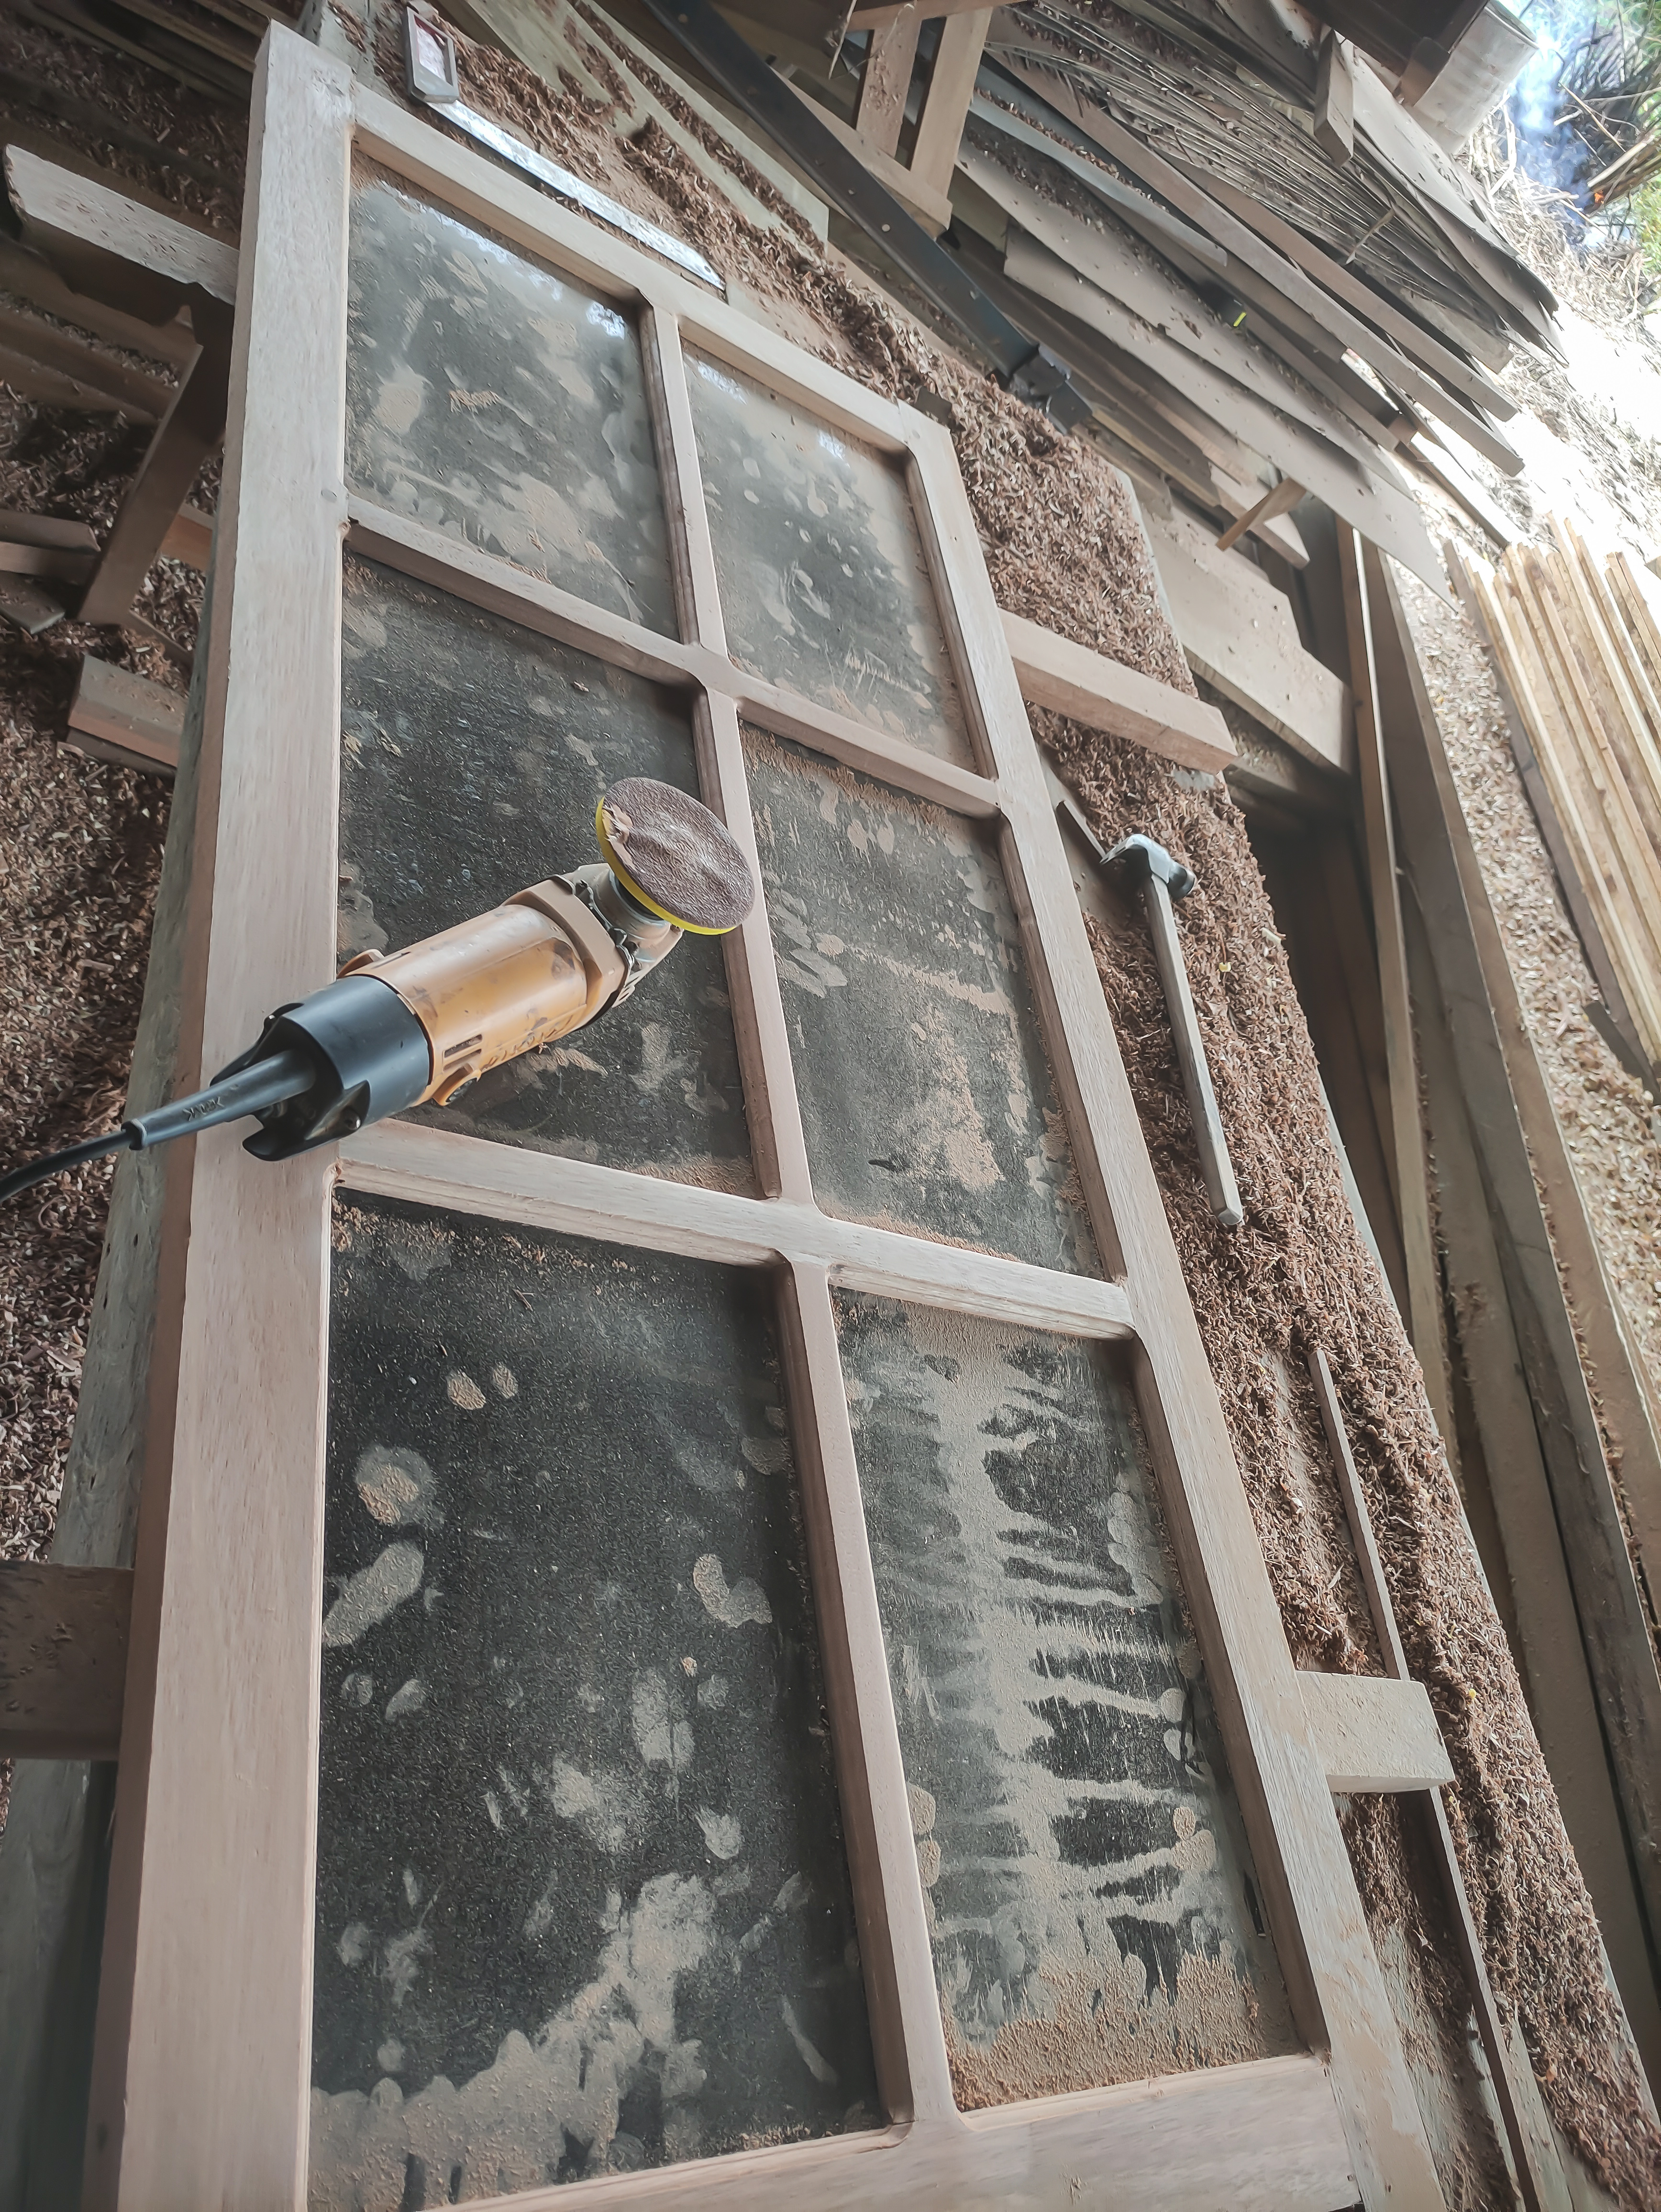
To tidy up the angle of the series connection of the window series I use a mini planer machine and after the curing process is complete the surface of the window series will look like this.
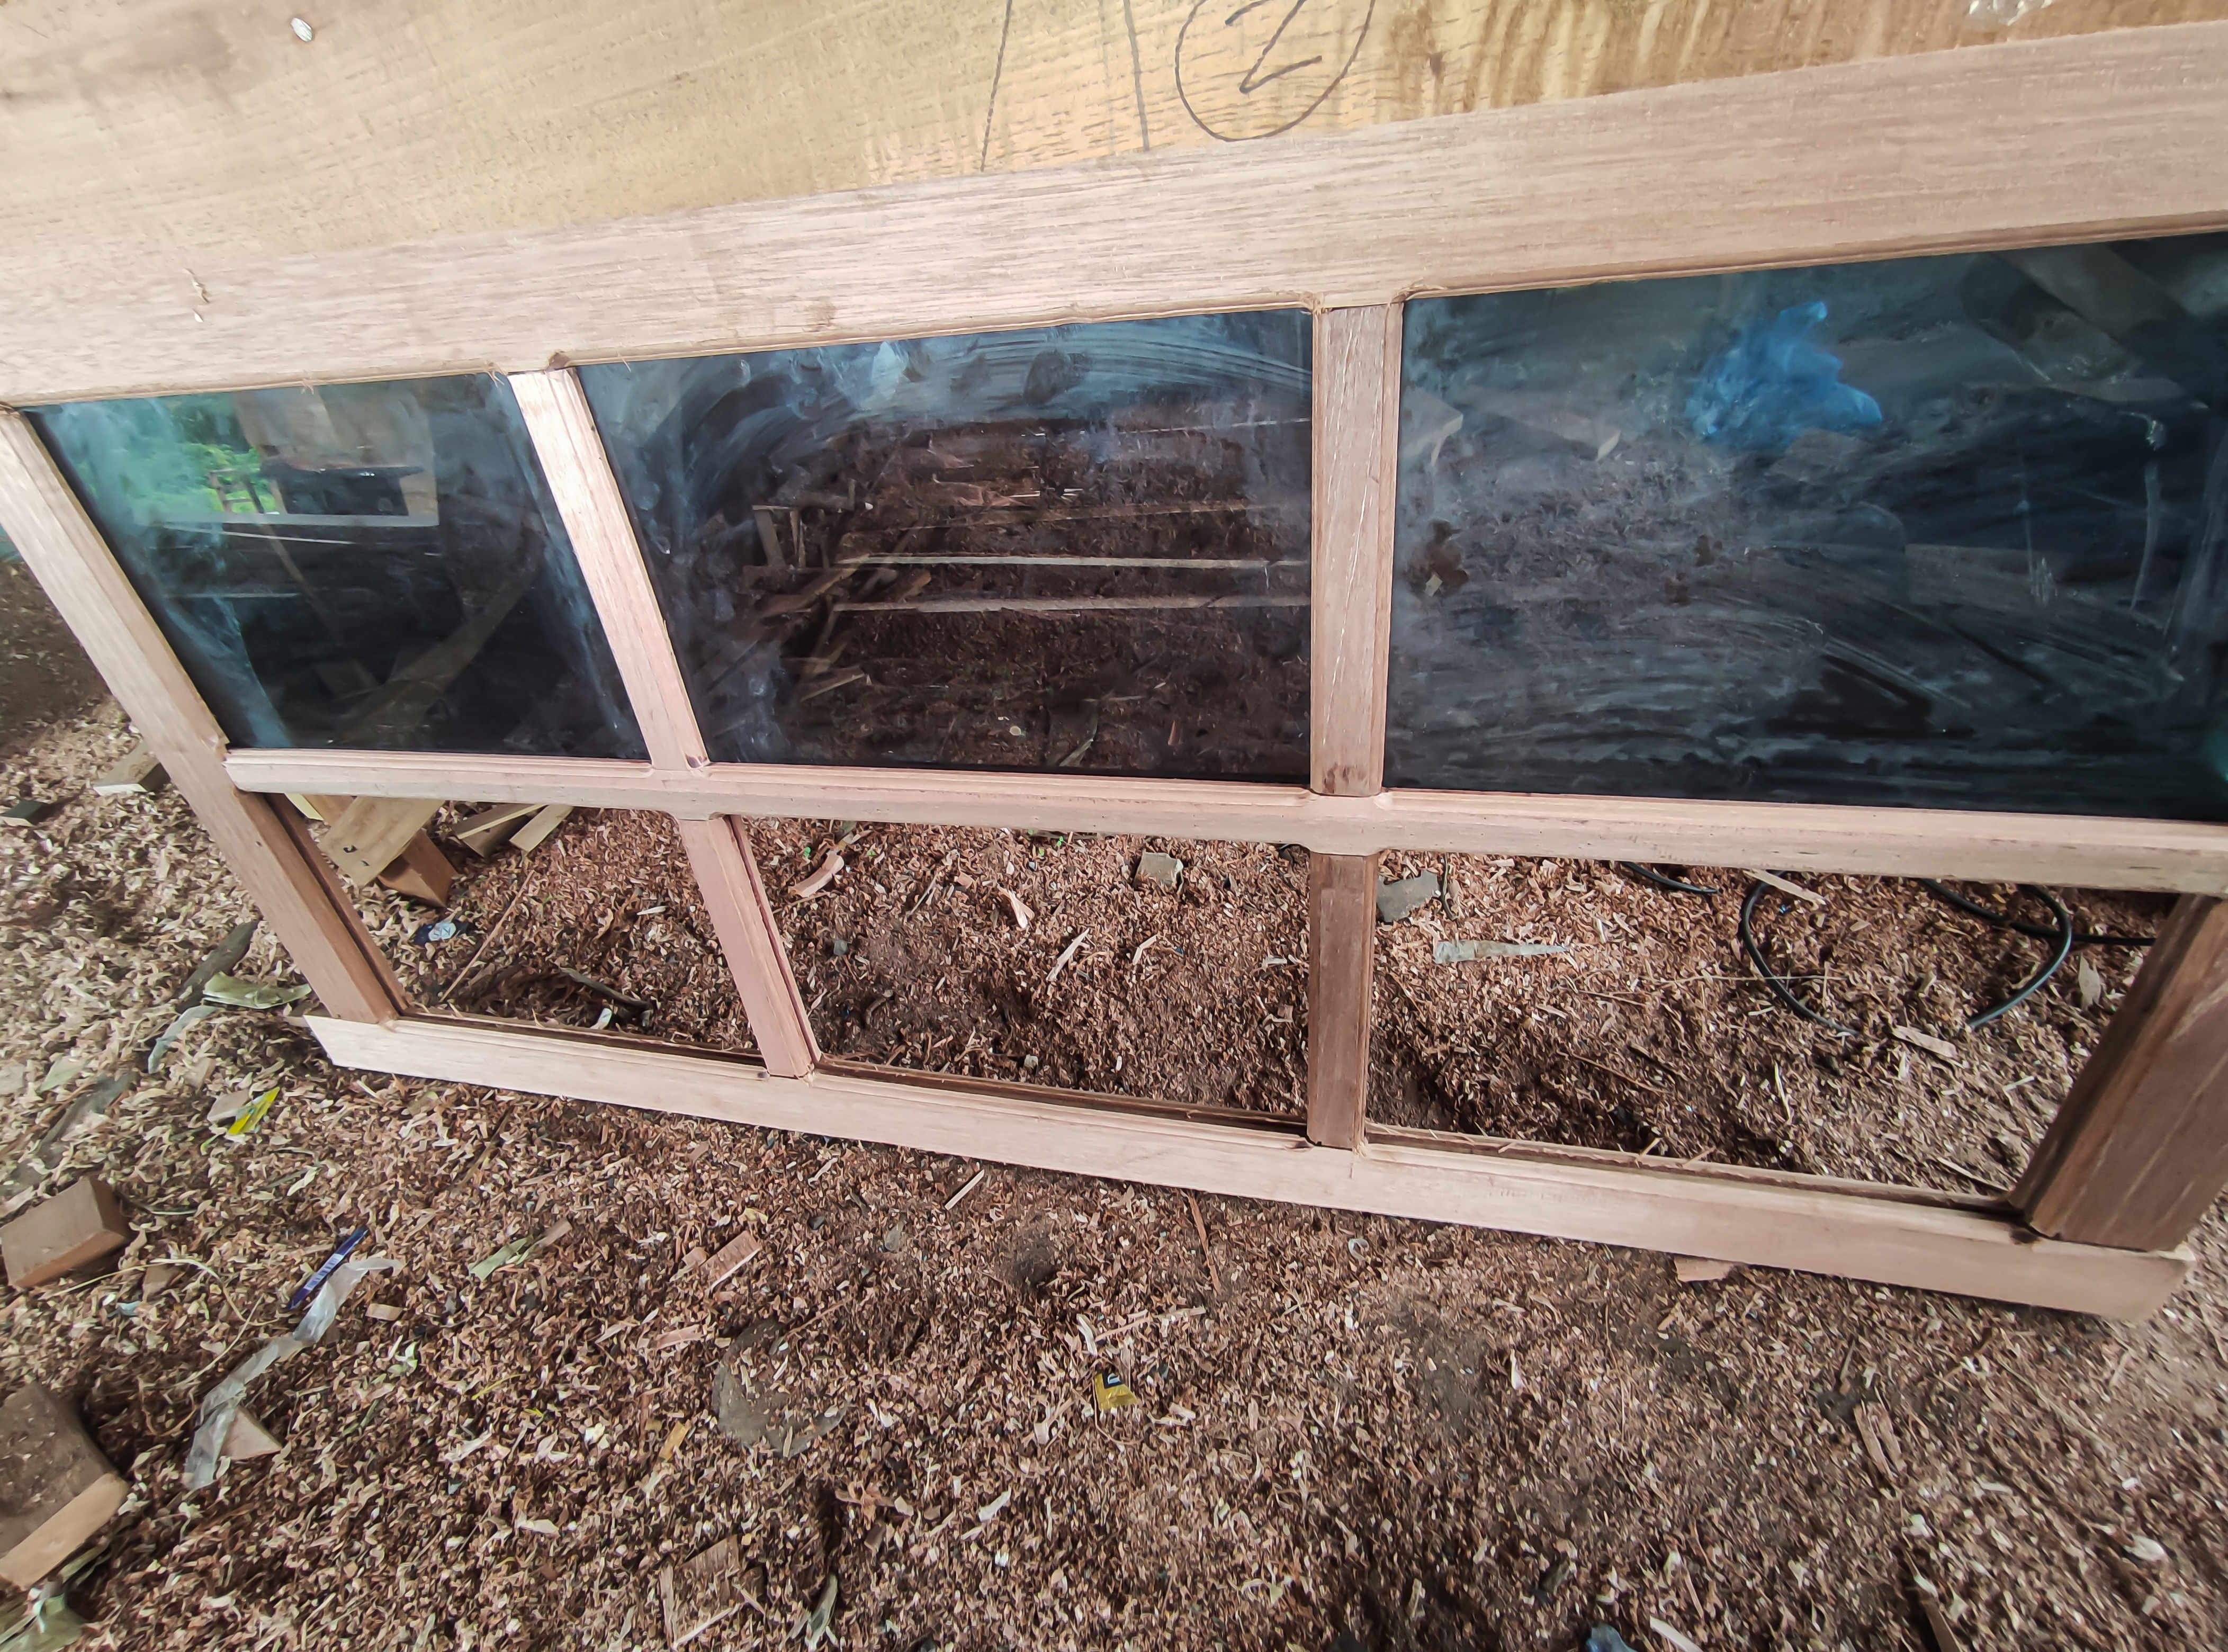
The window design looks very attractive and each box measures 21.7mm wide which is the glass mounting area.
And after the process of the fireplace series of windows is complete, then the process of giving flowers to the front and back of the window is followed by the provision of a 5mm glass holder.
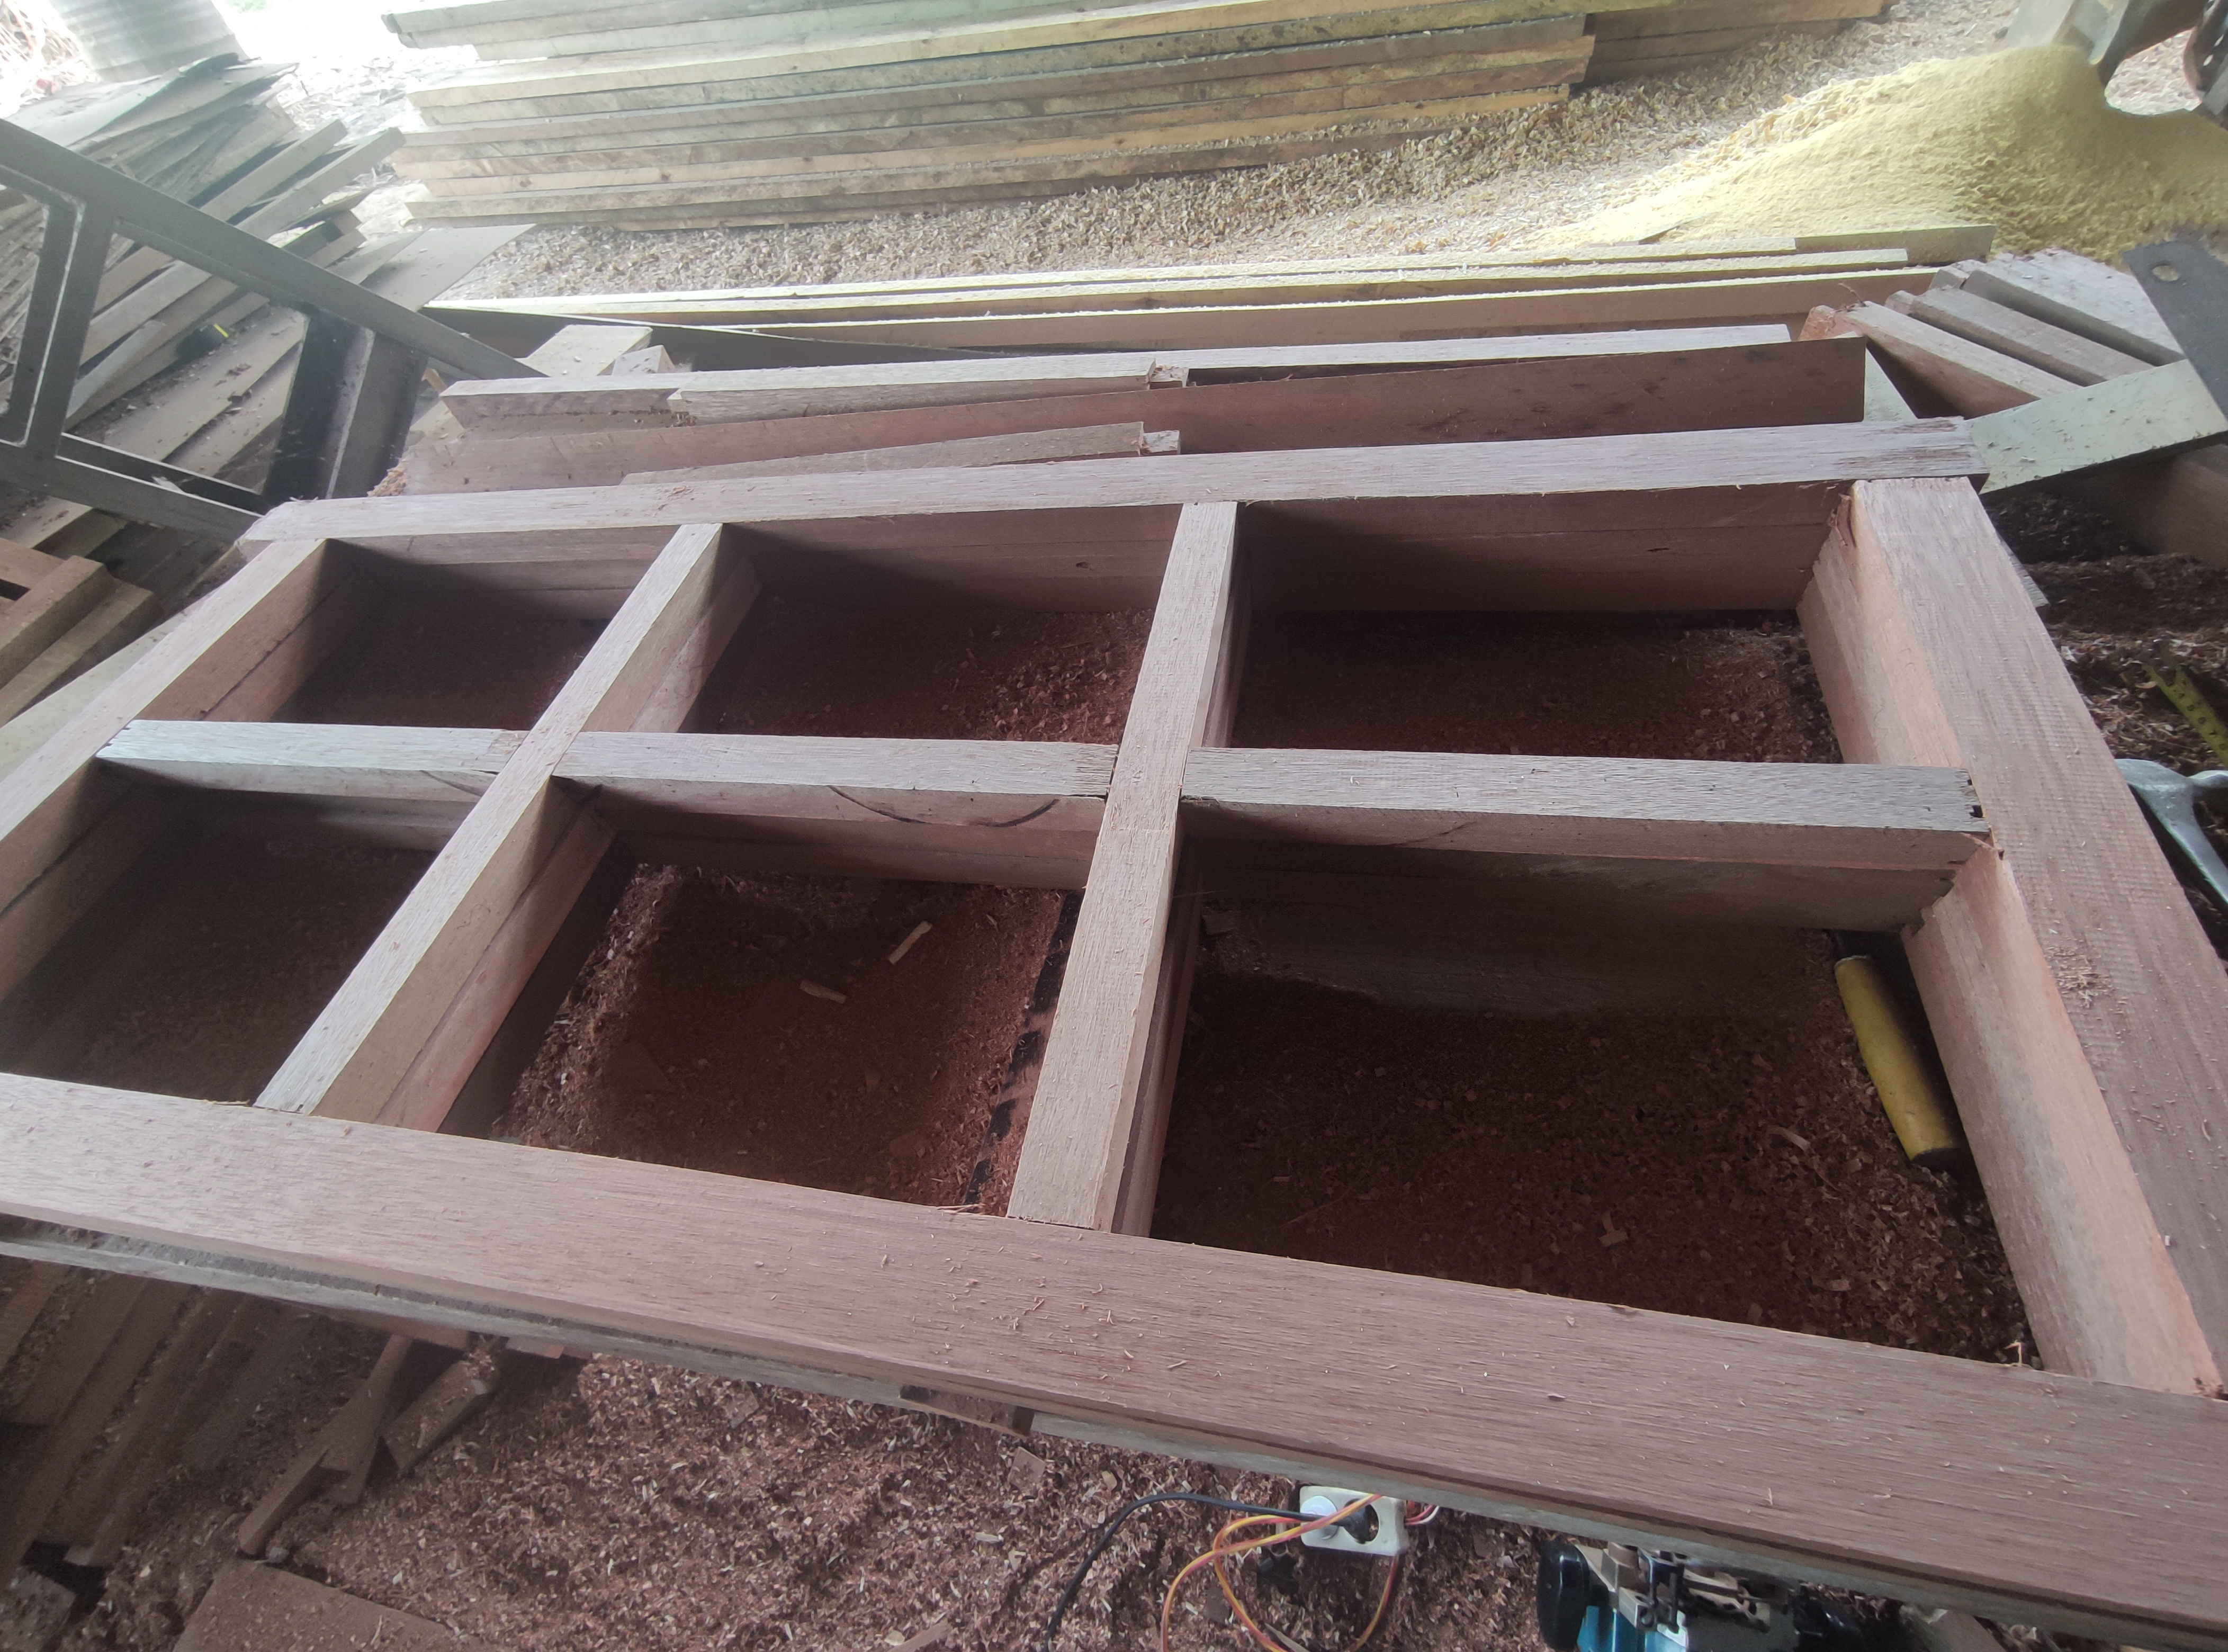
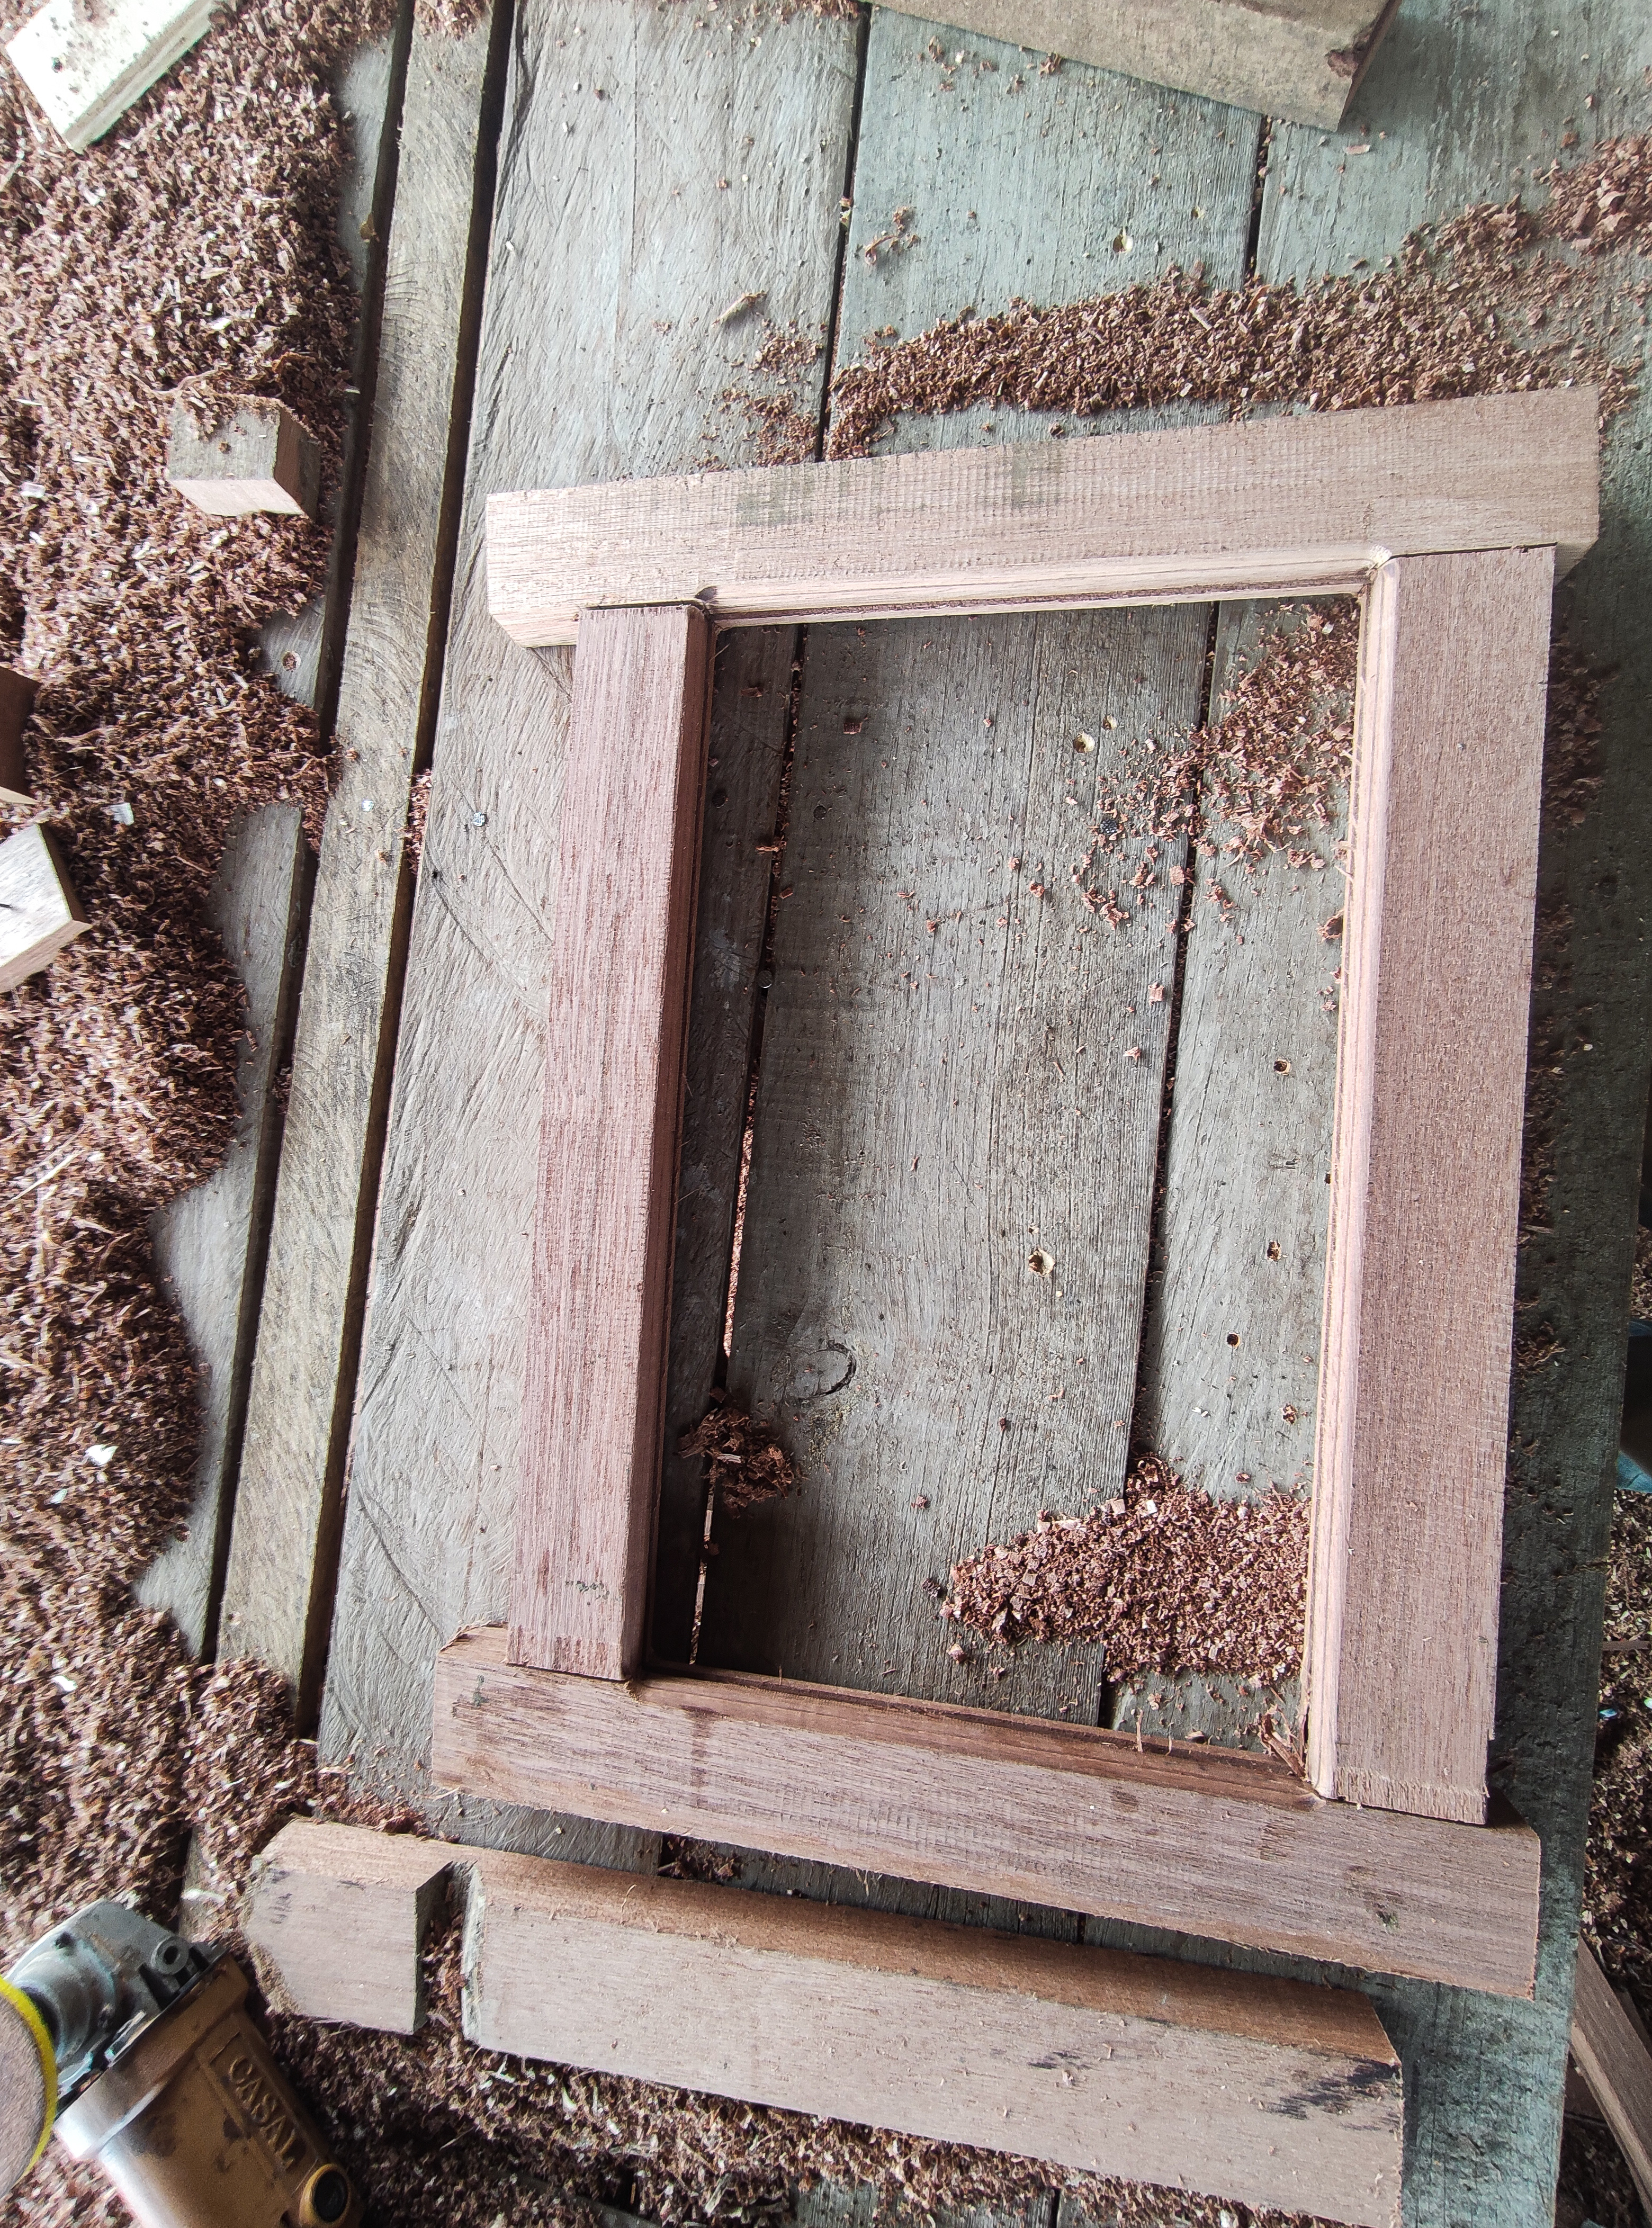
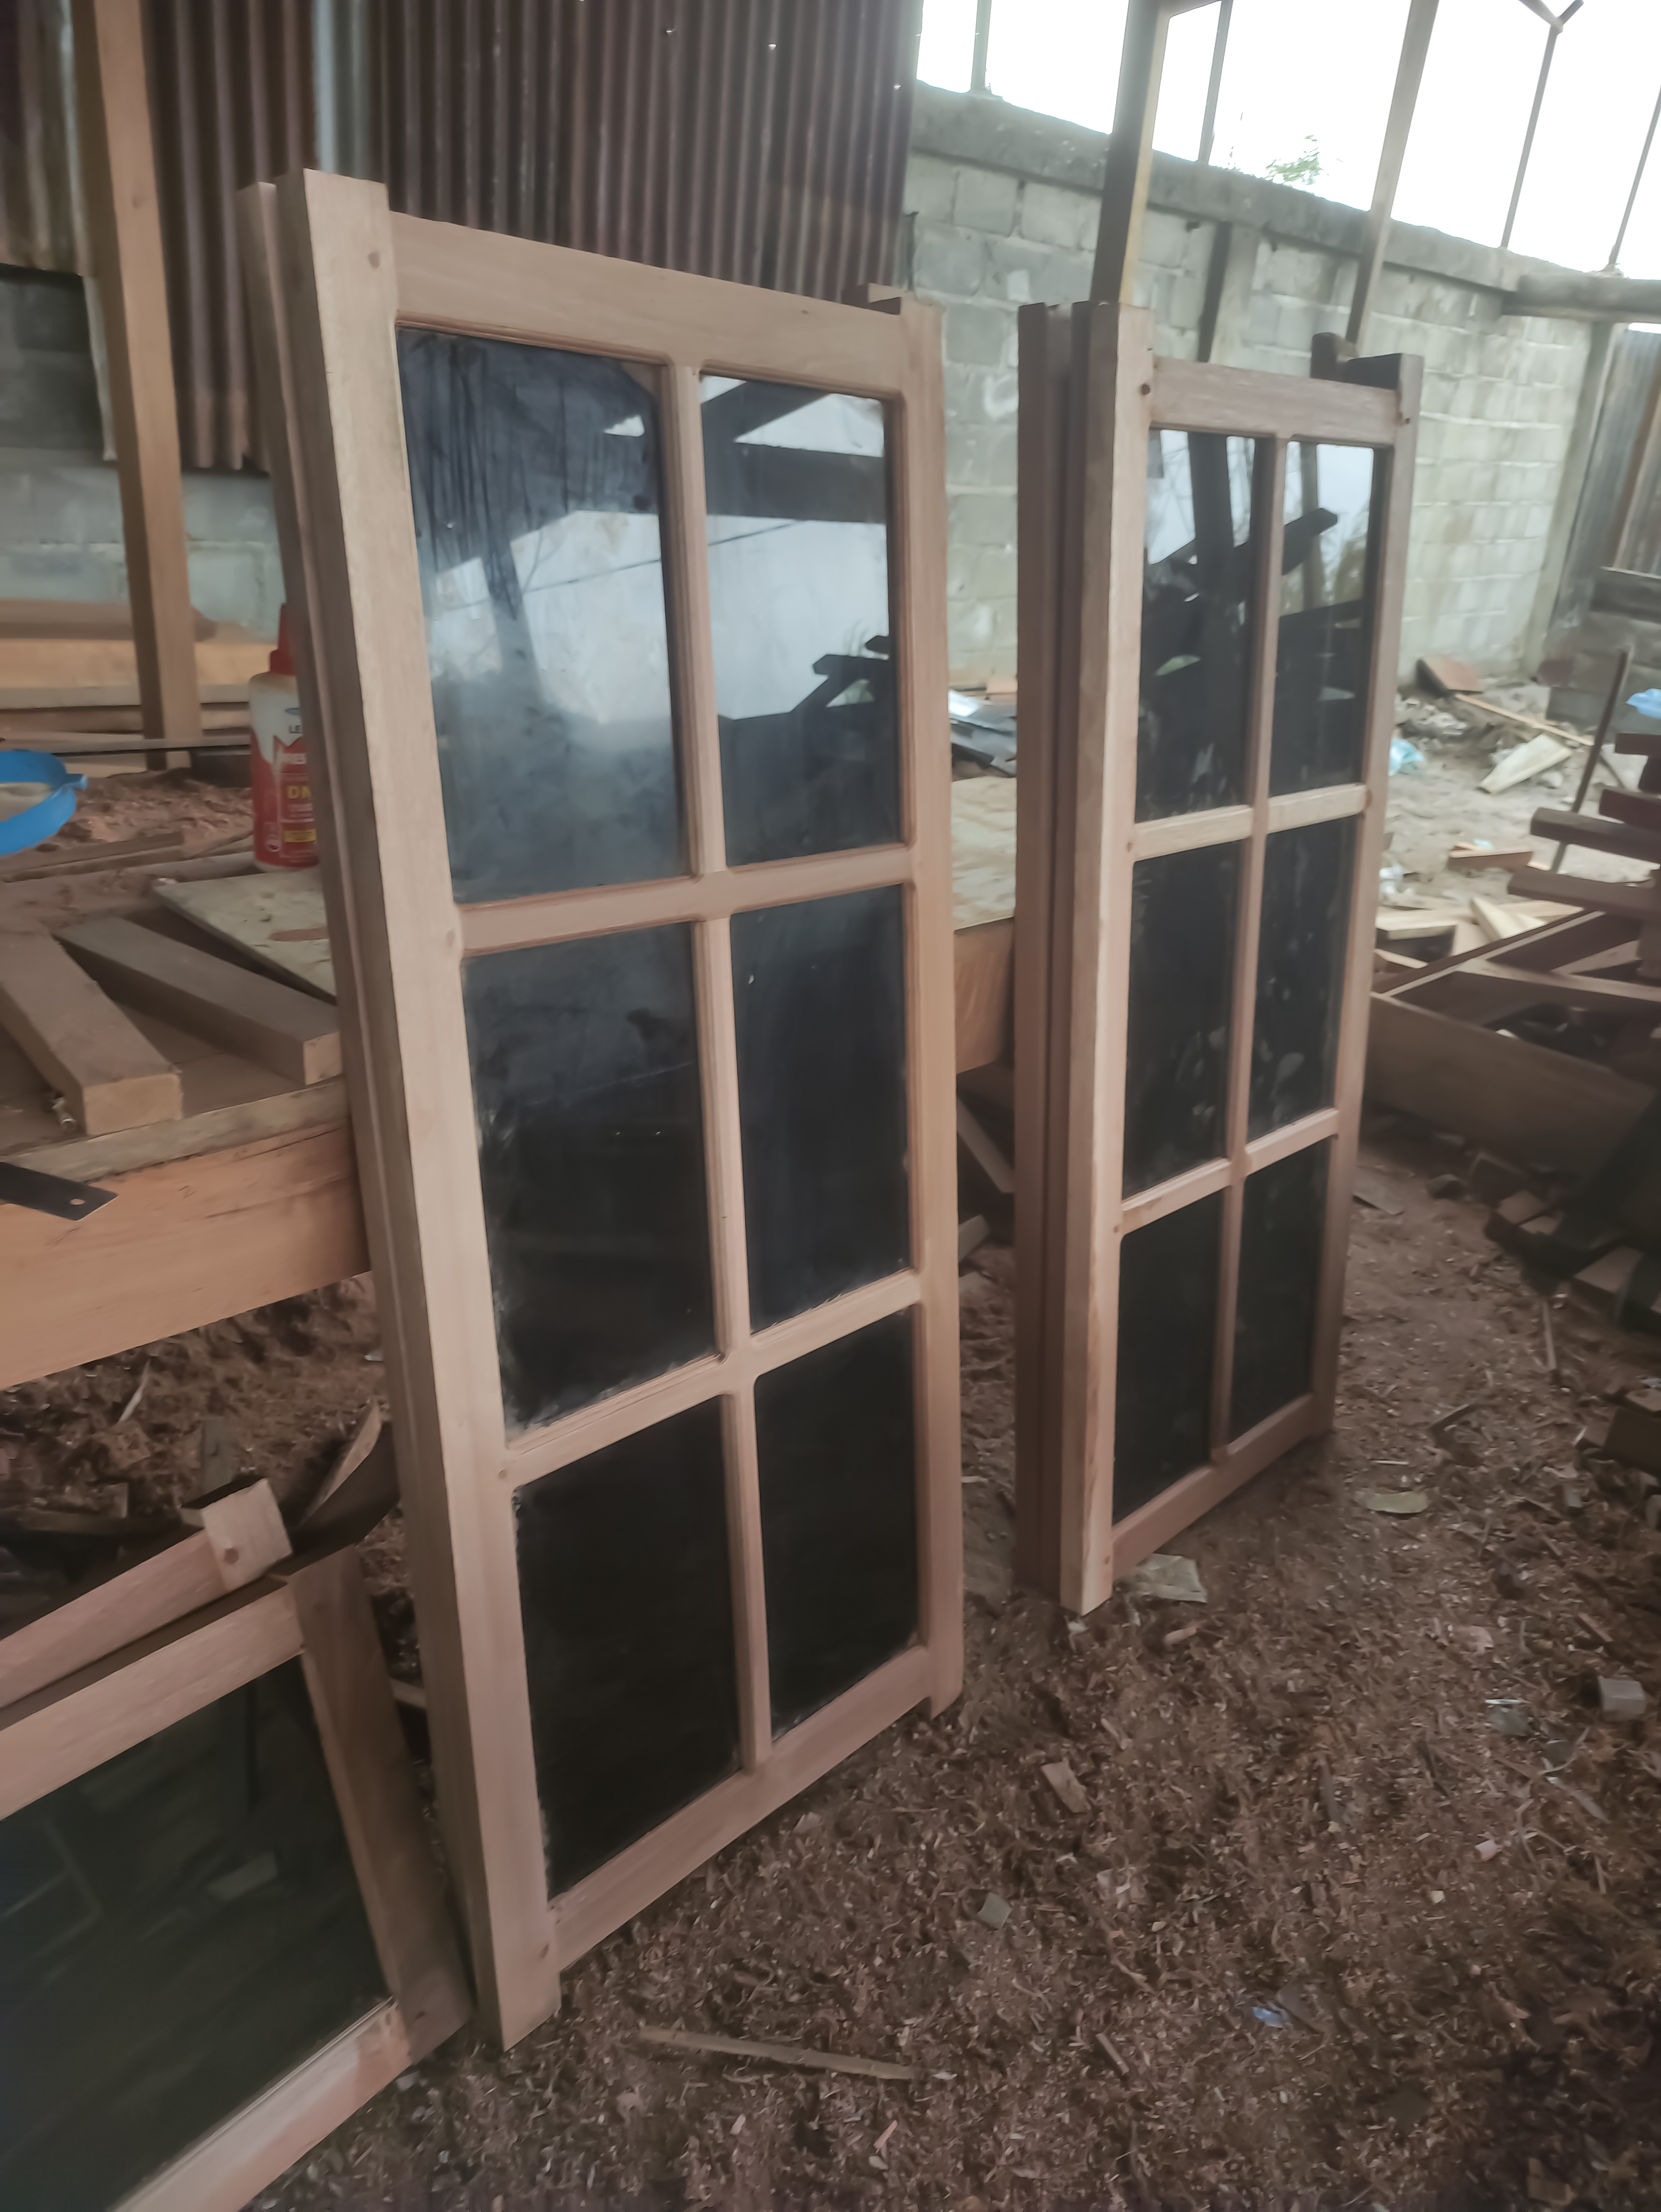
7.The stage of giving flowers on the surface of a series of windows and giving a glass holder with a planting system in a series using a router machine.
In giving flowers on the wooden surface of the window series, we used a 5mm flower machine eye and after I finished working the results around the arrangement in the window would look like this.


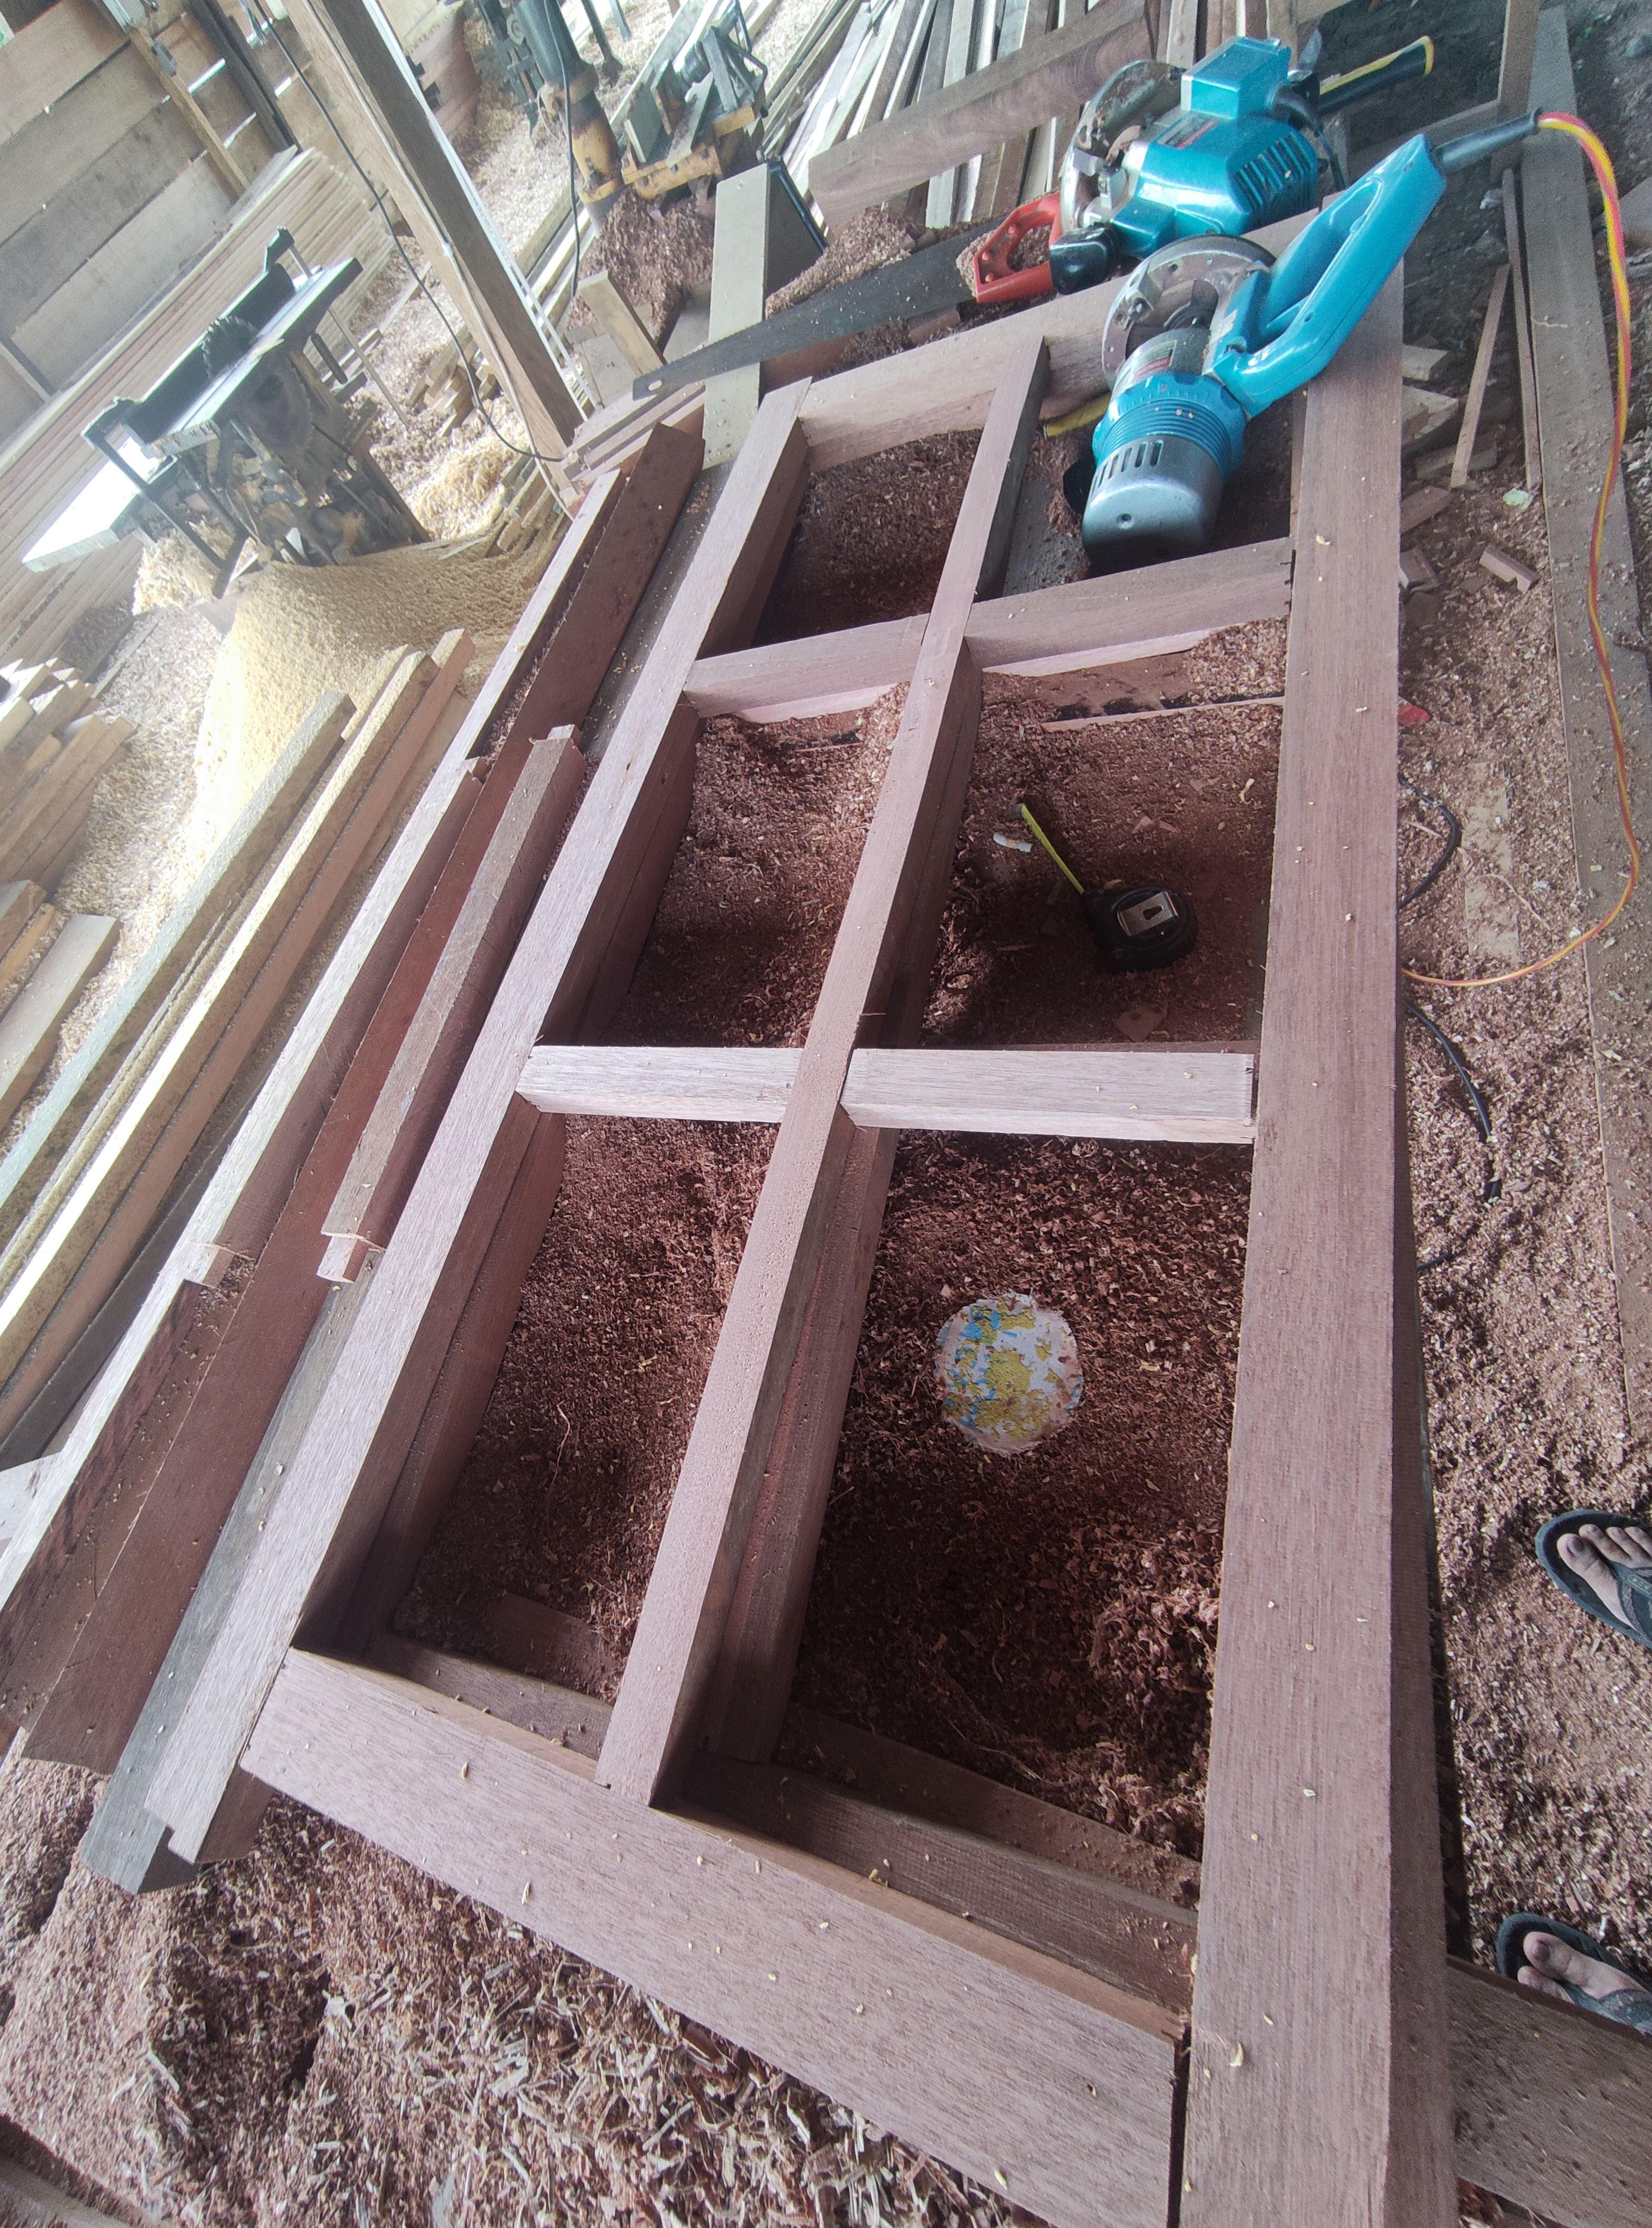
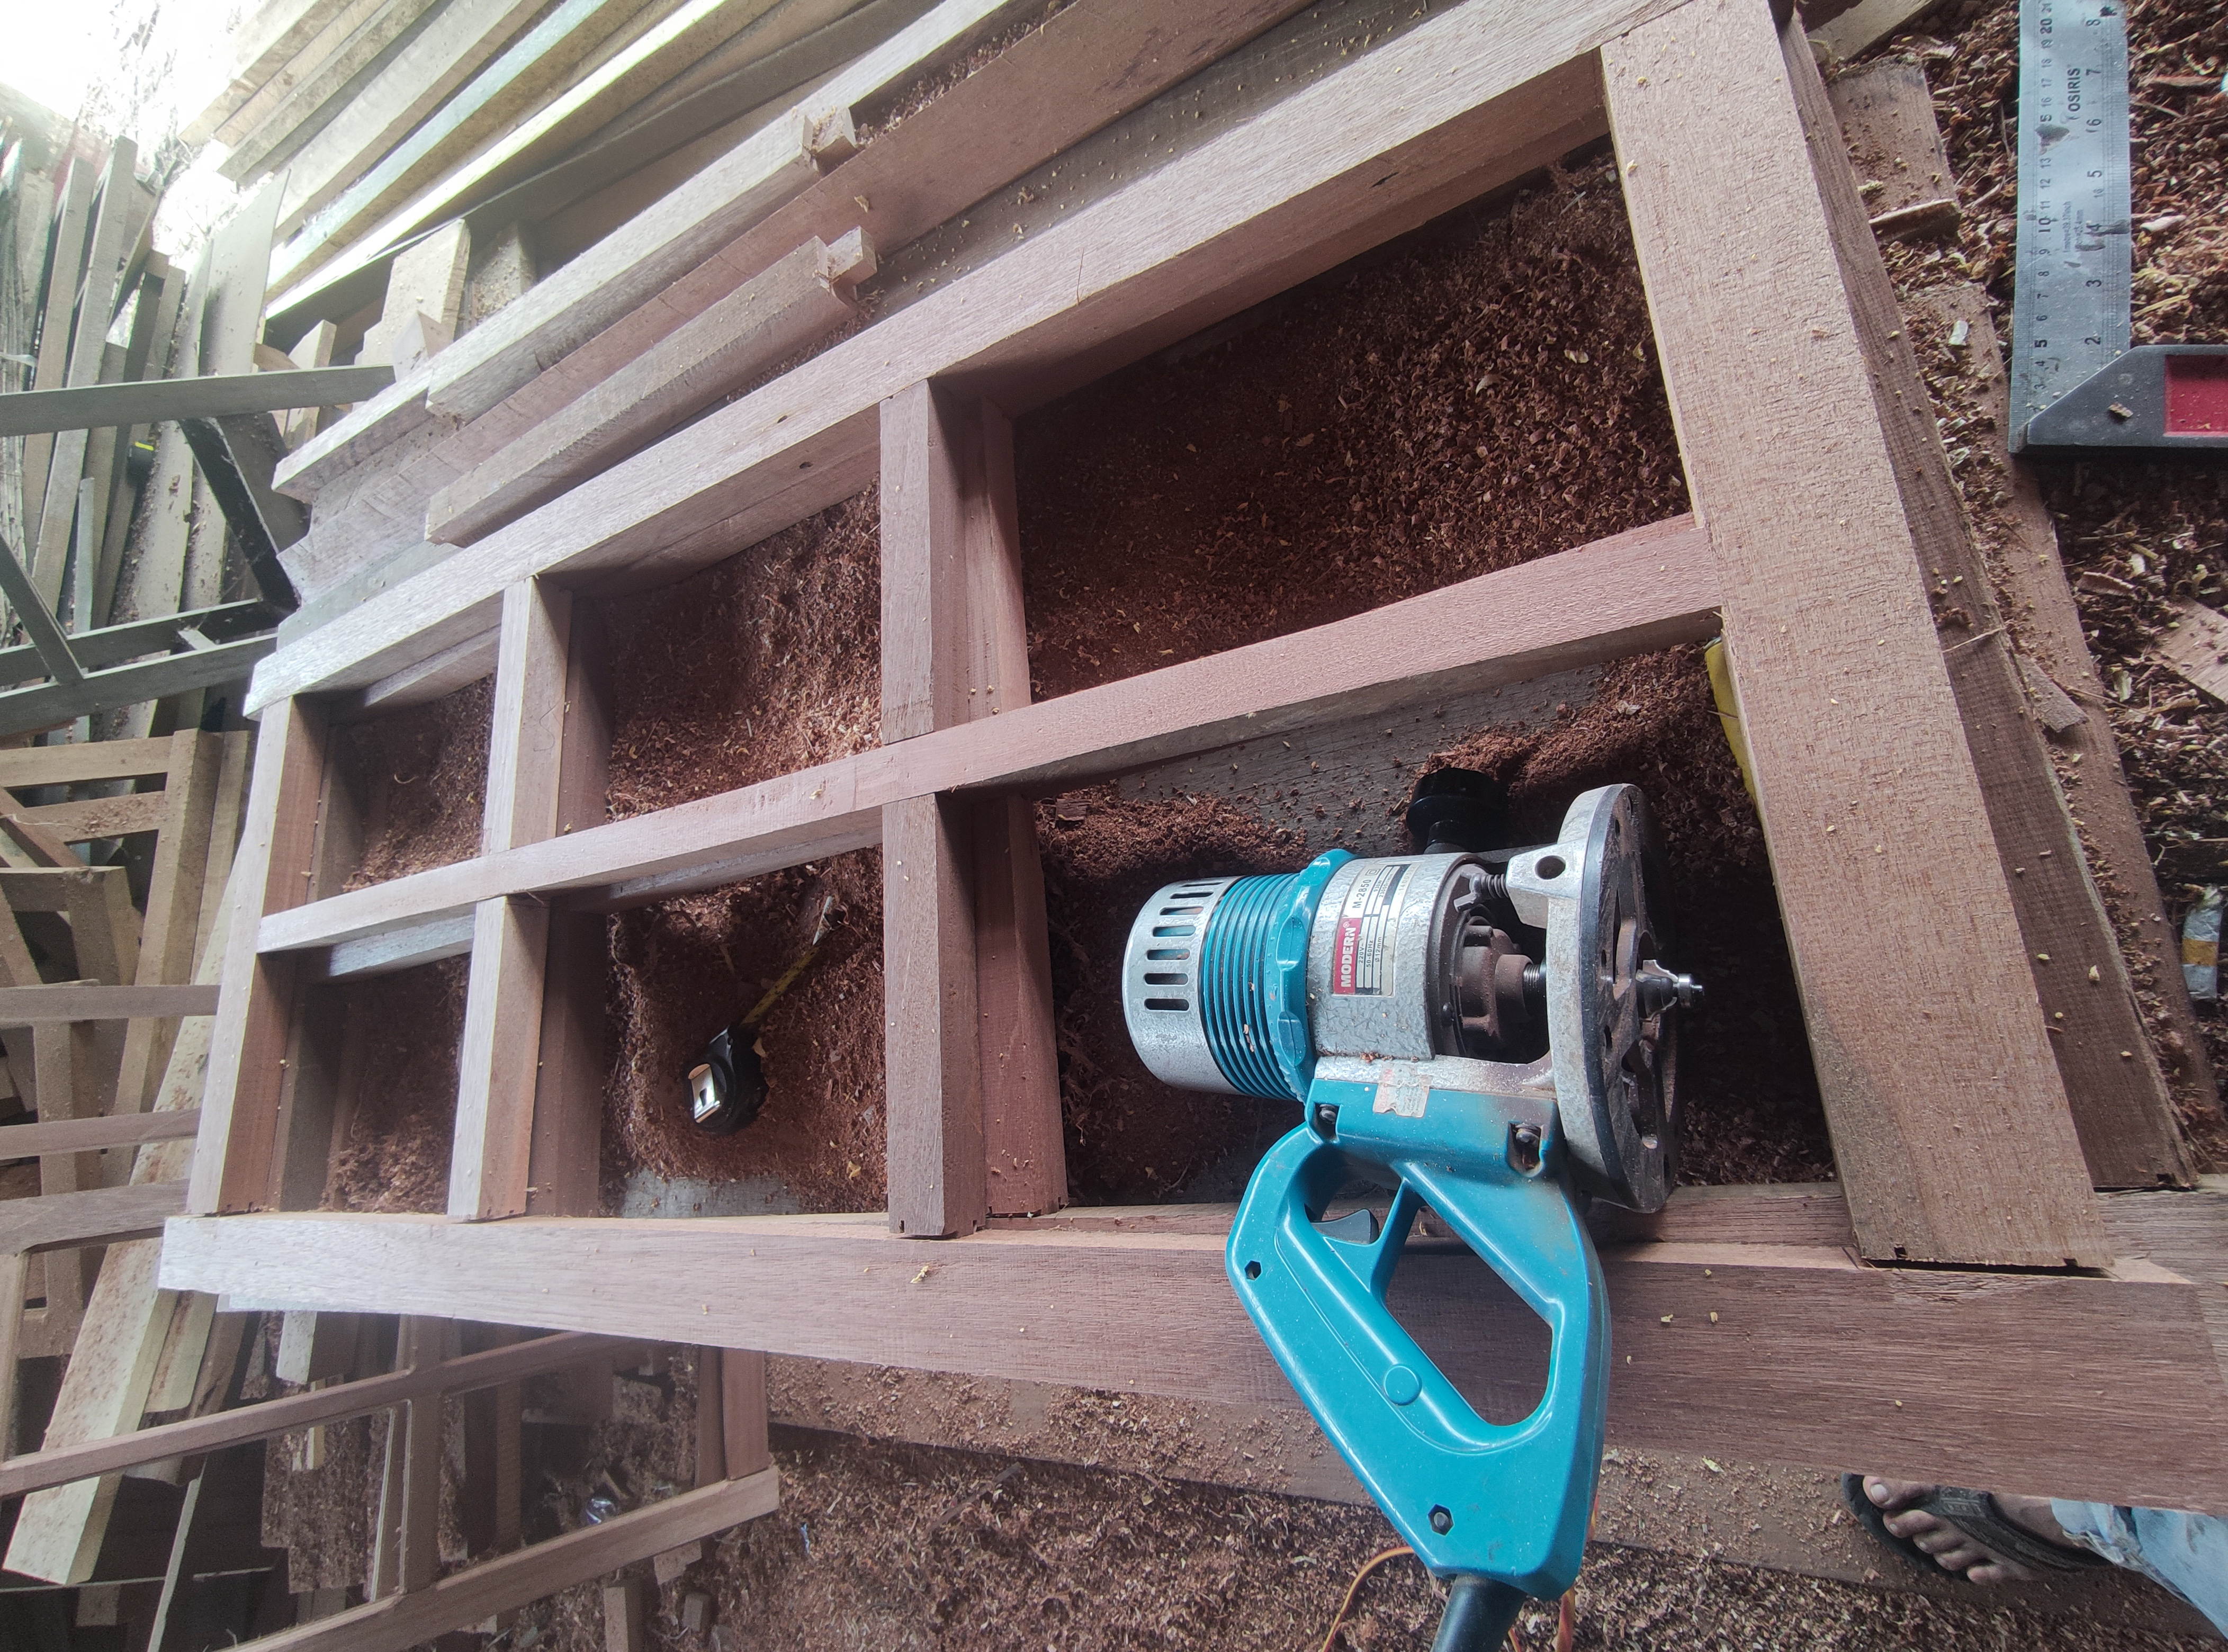
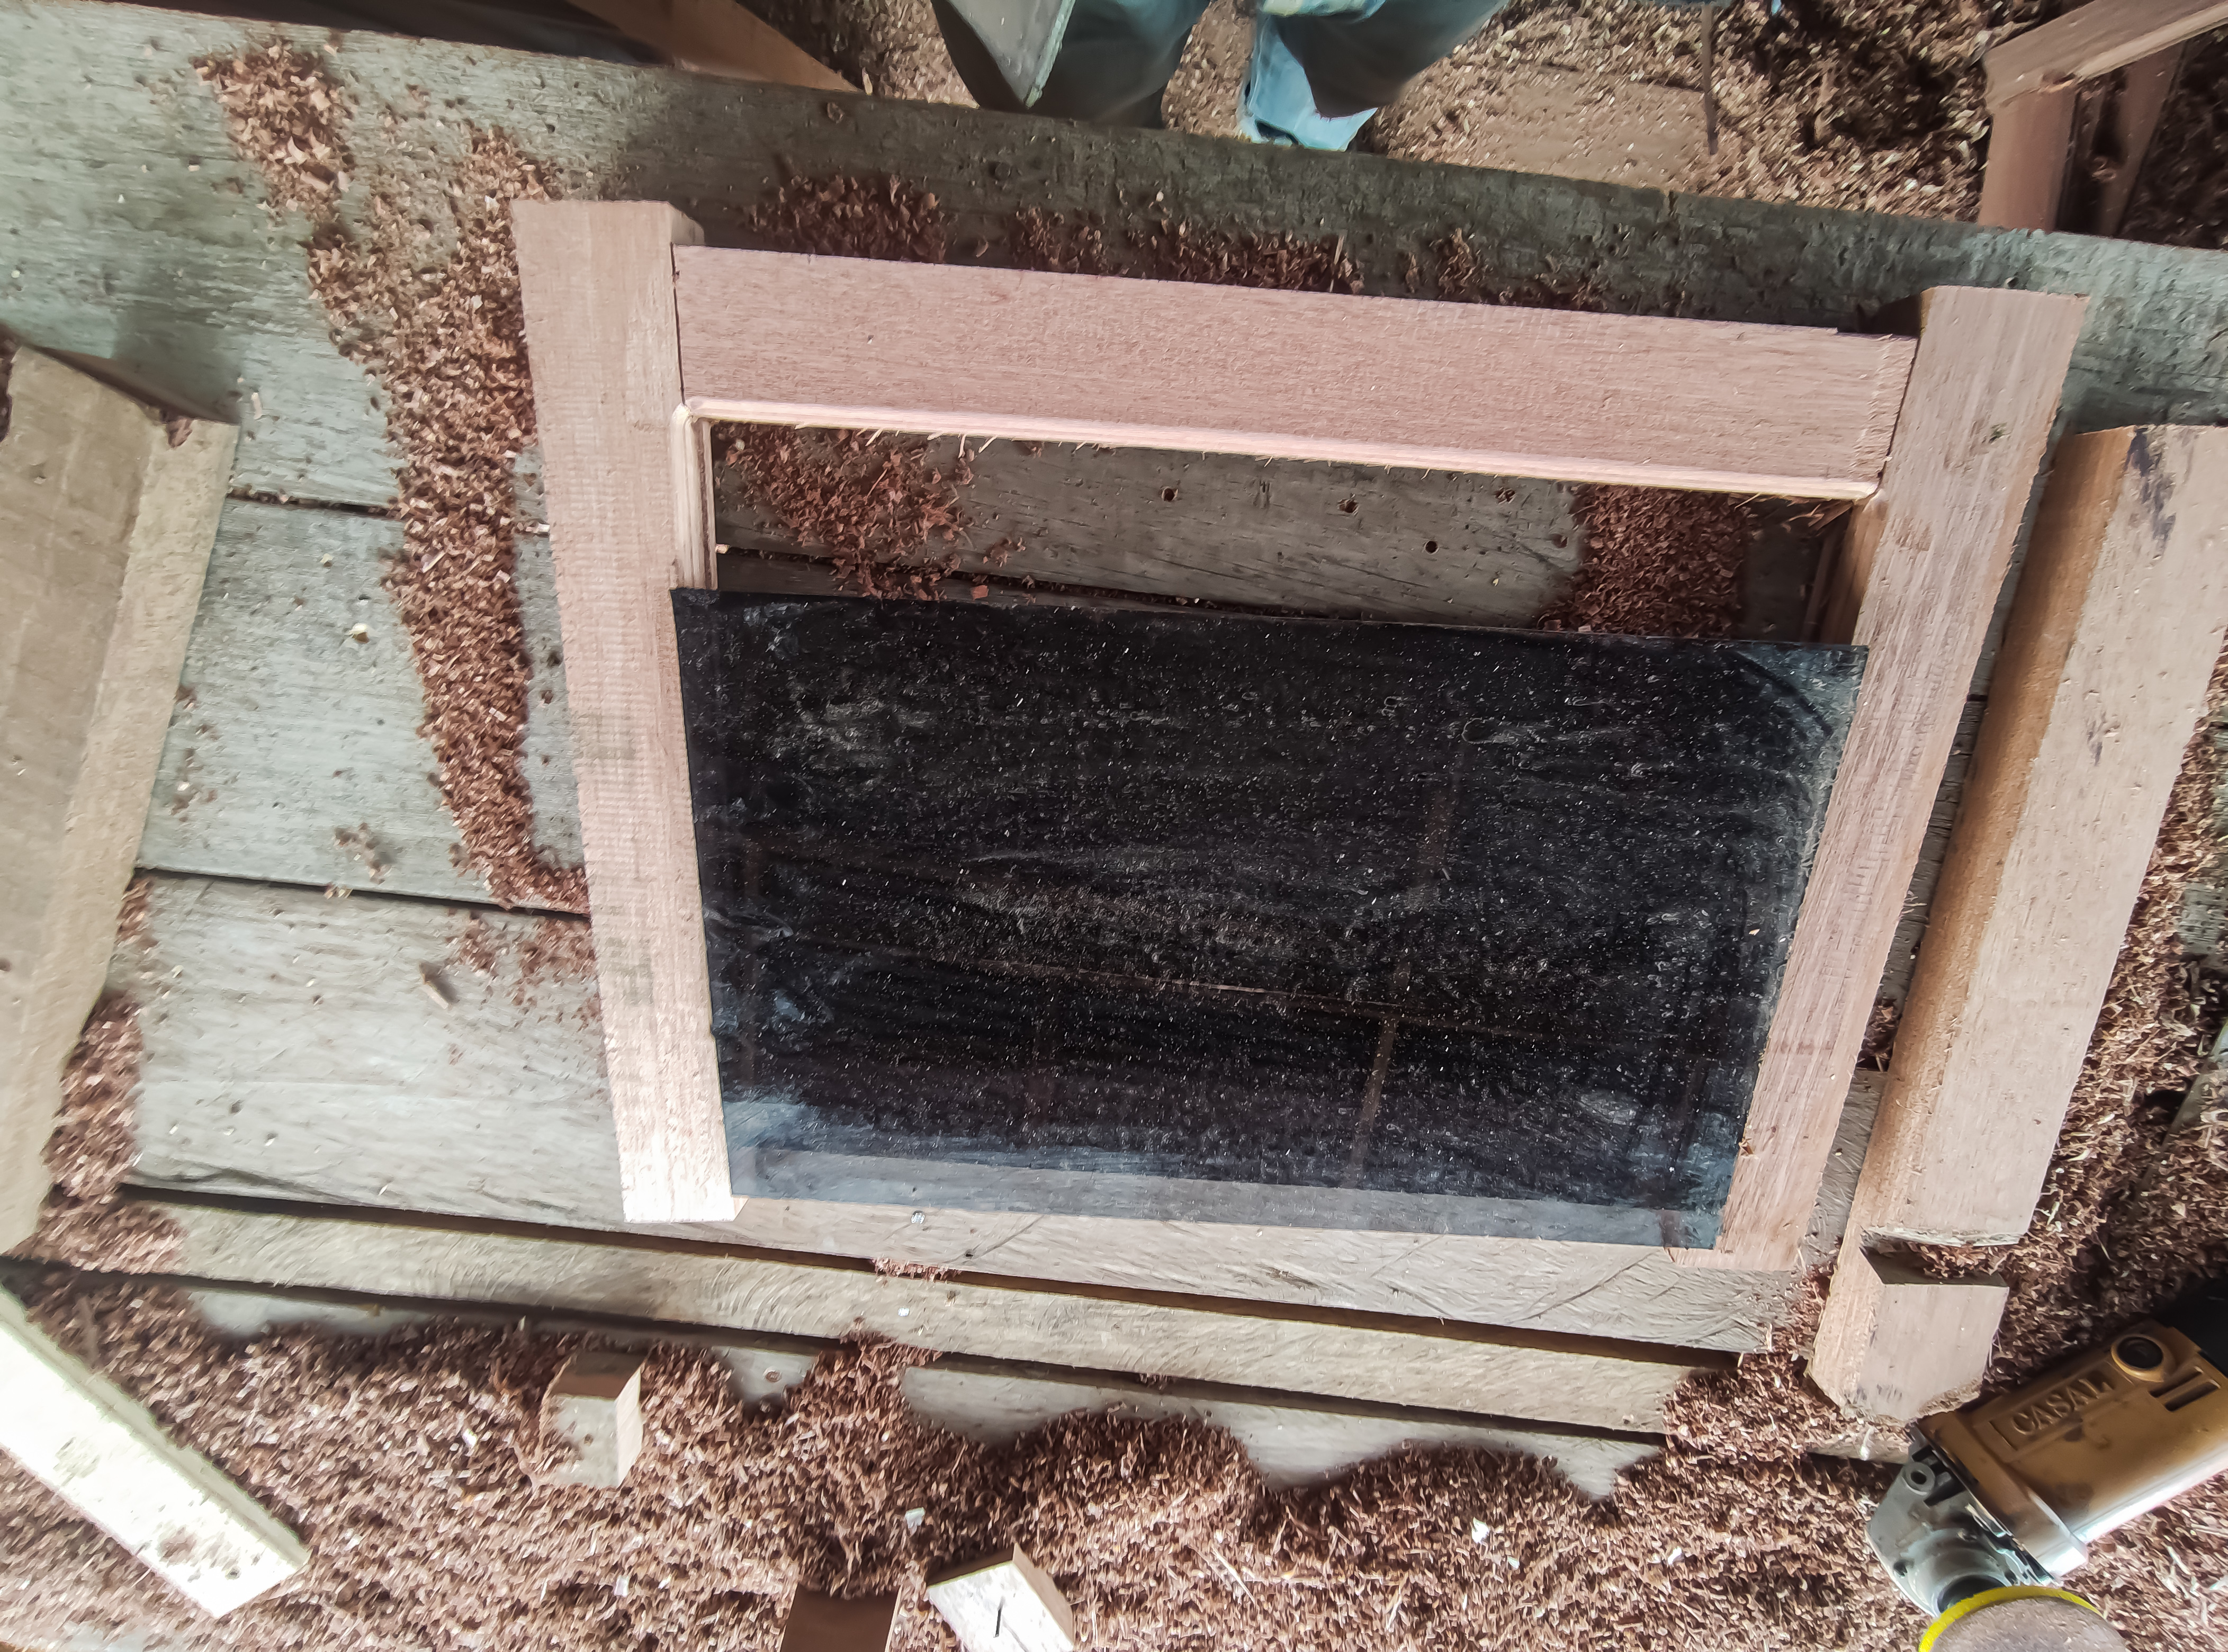
After giving the flowers to the wooden surface, I now continue the process of making the glass holder holes using a raouter machine with a 6mm blade.
.jpg)

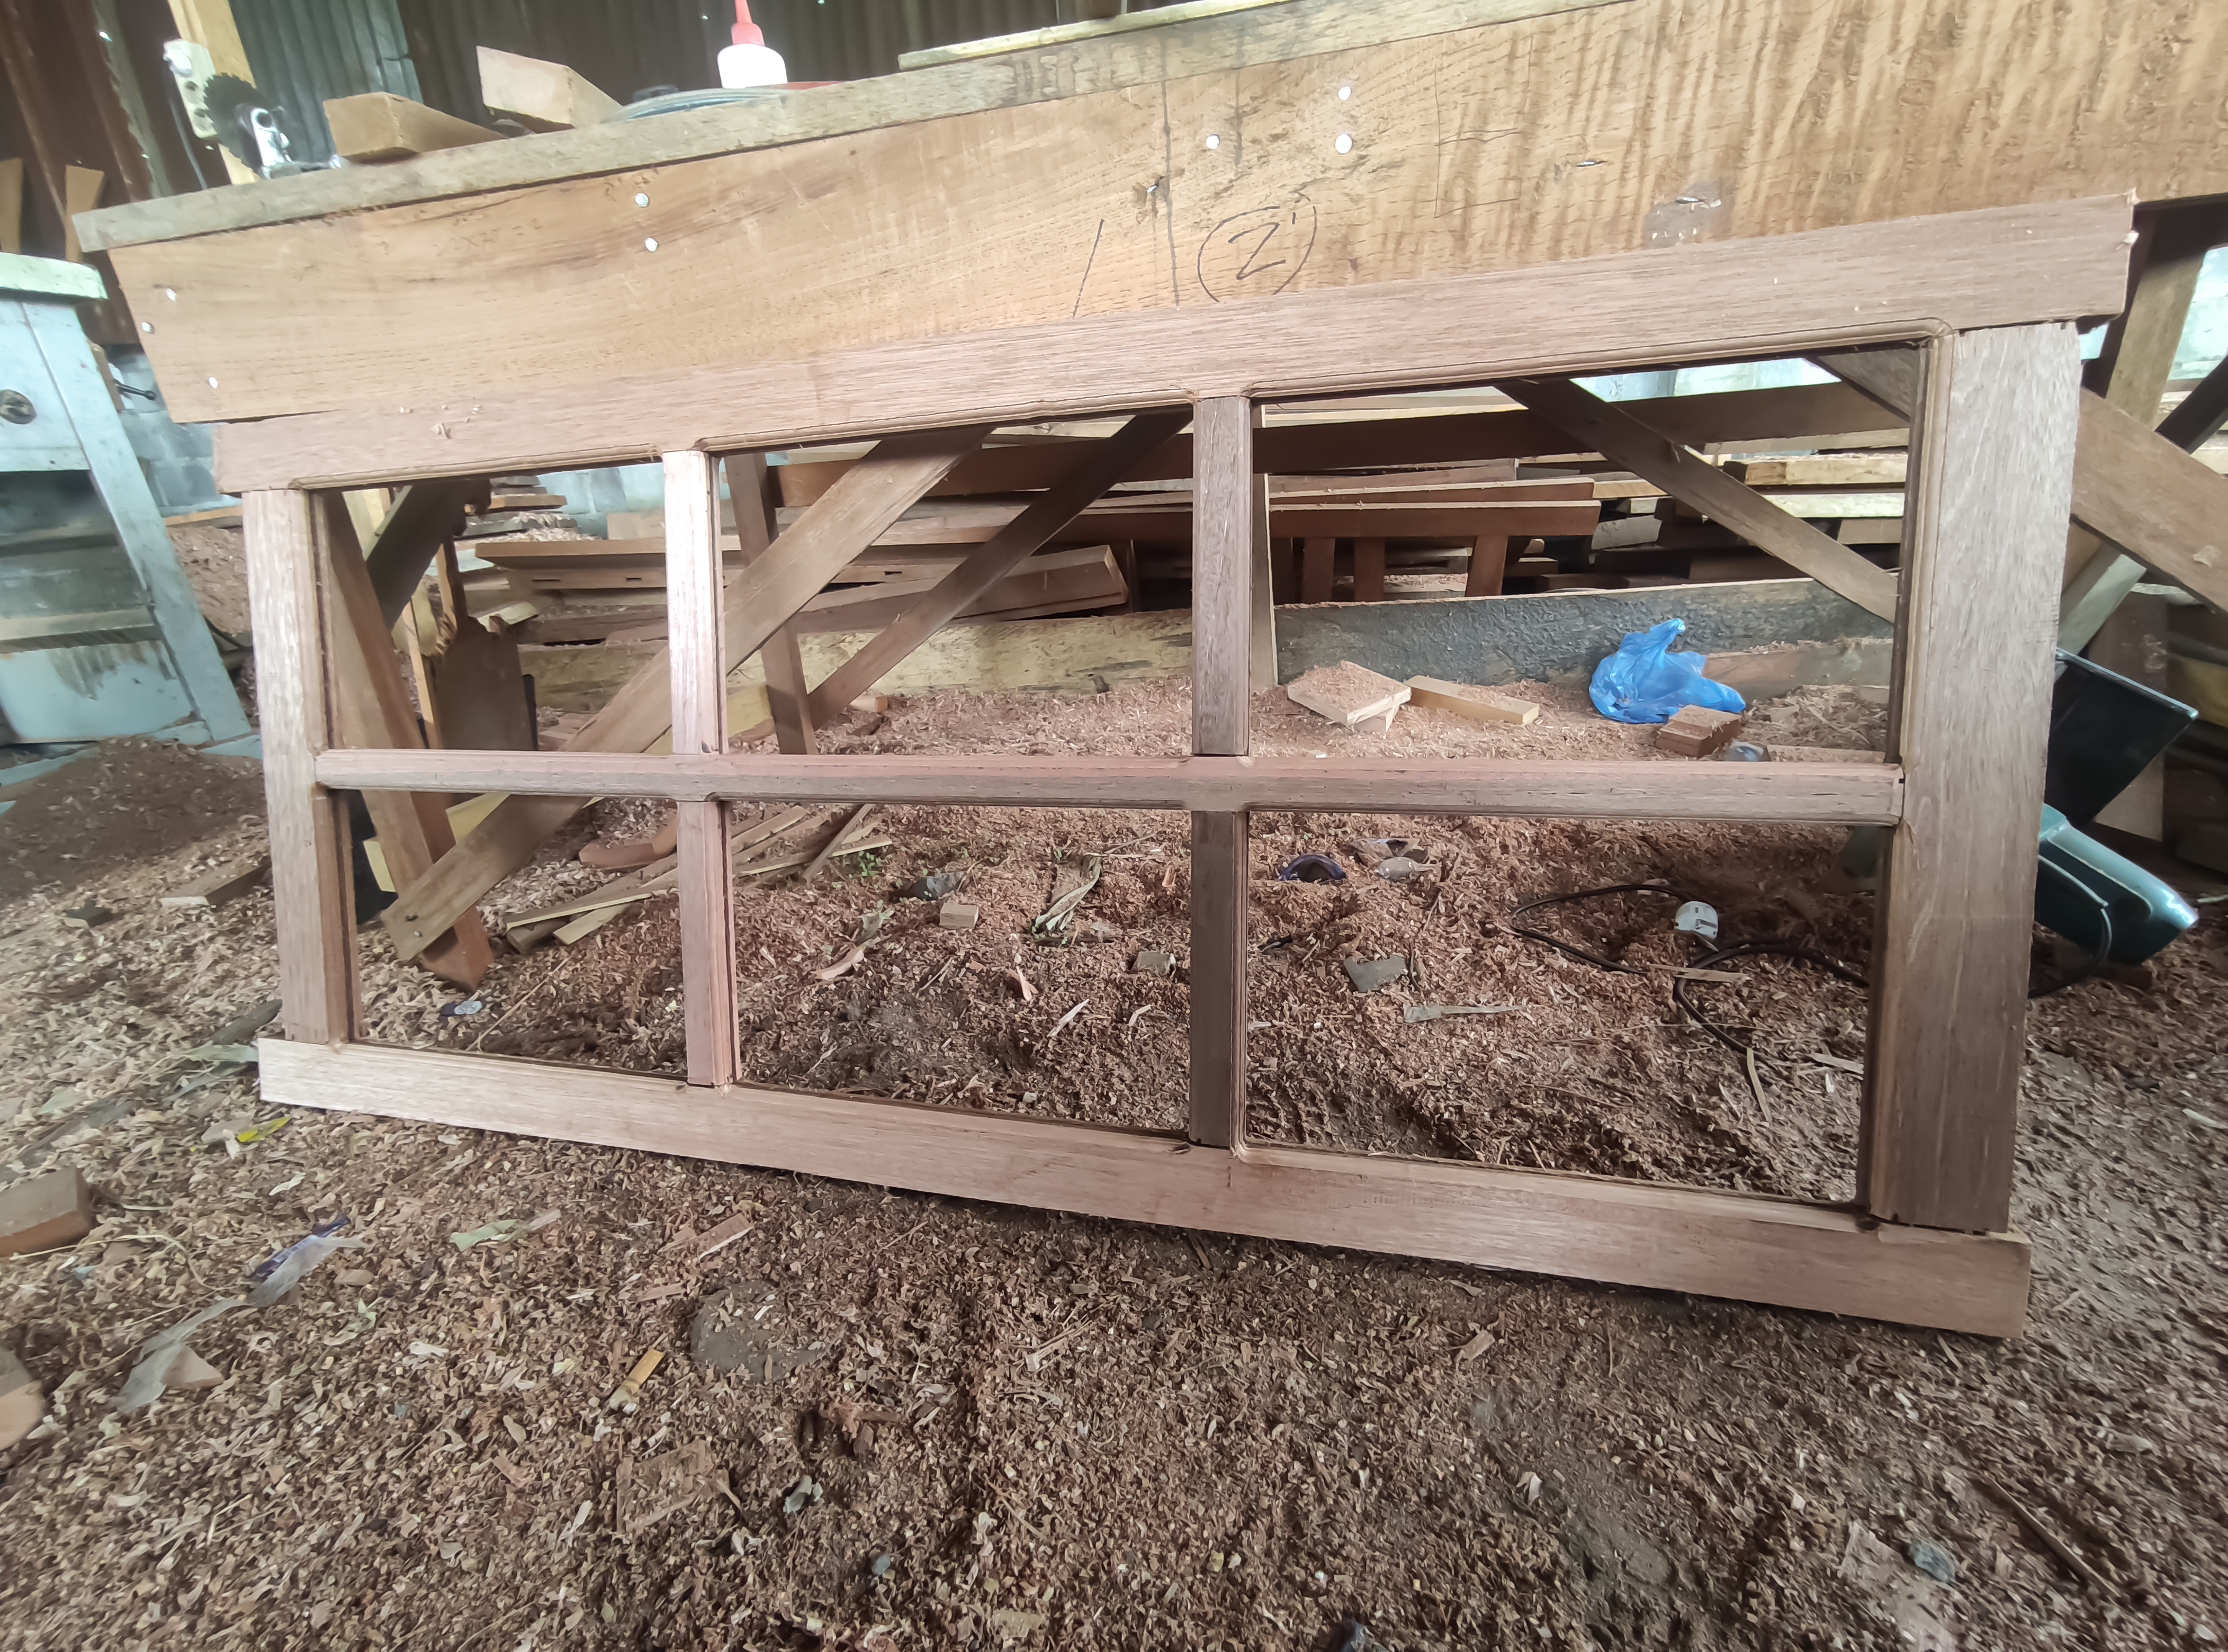
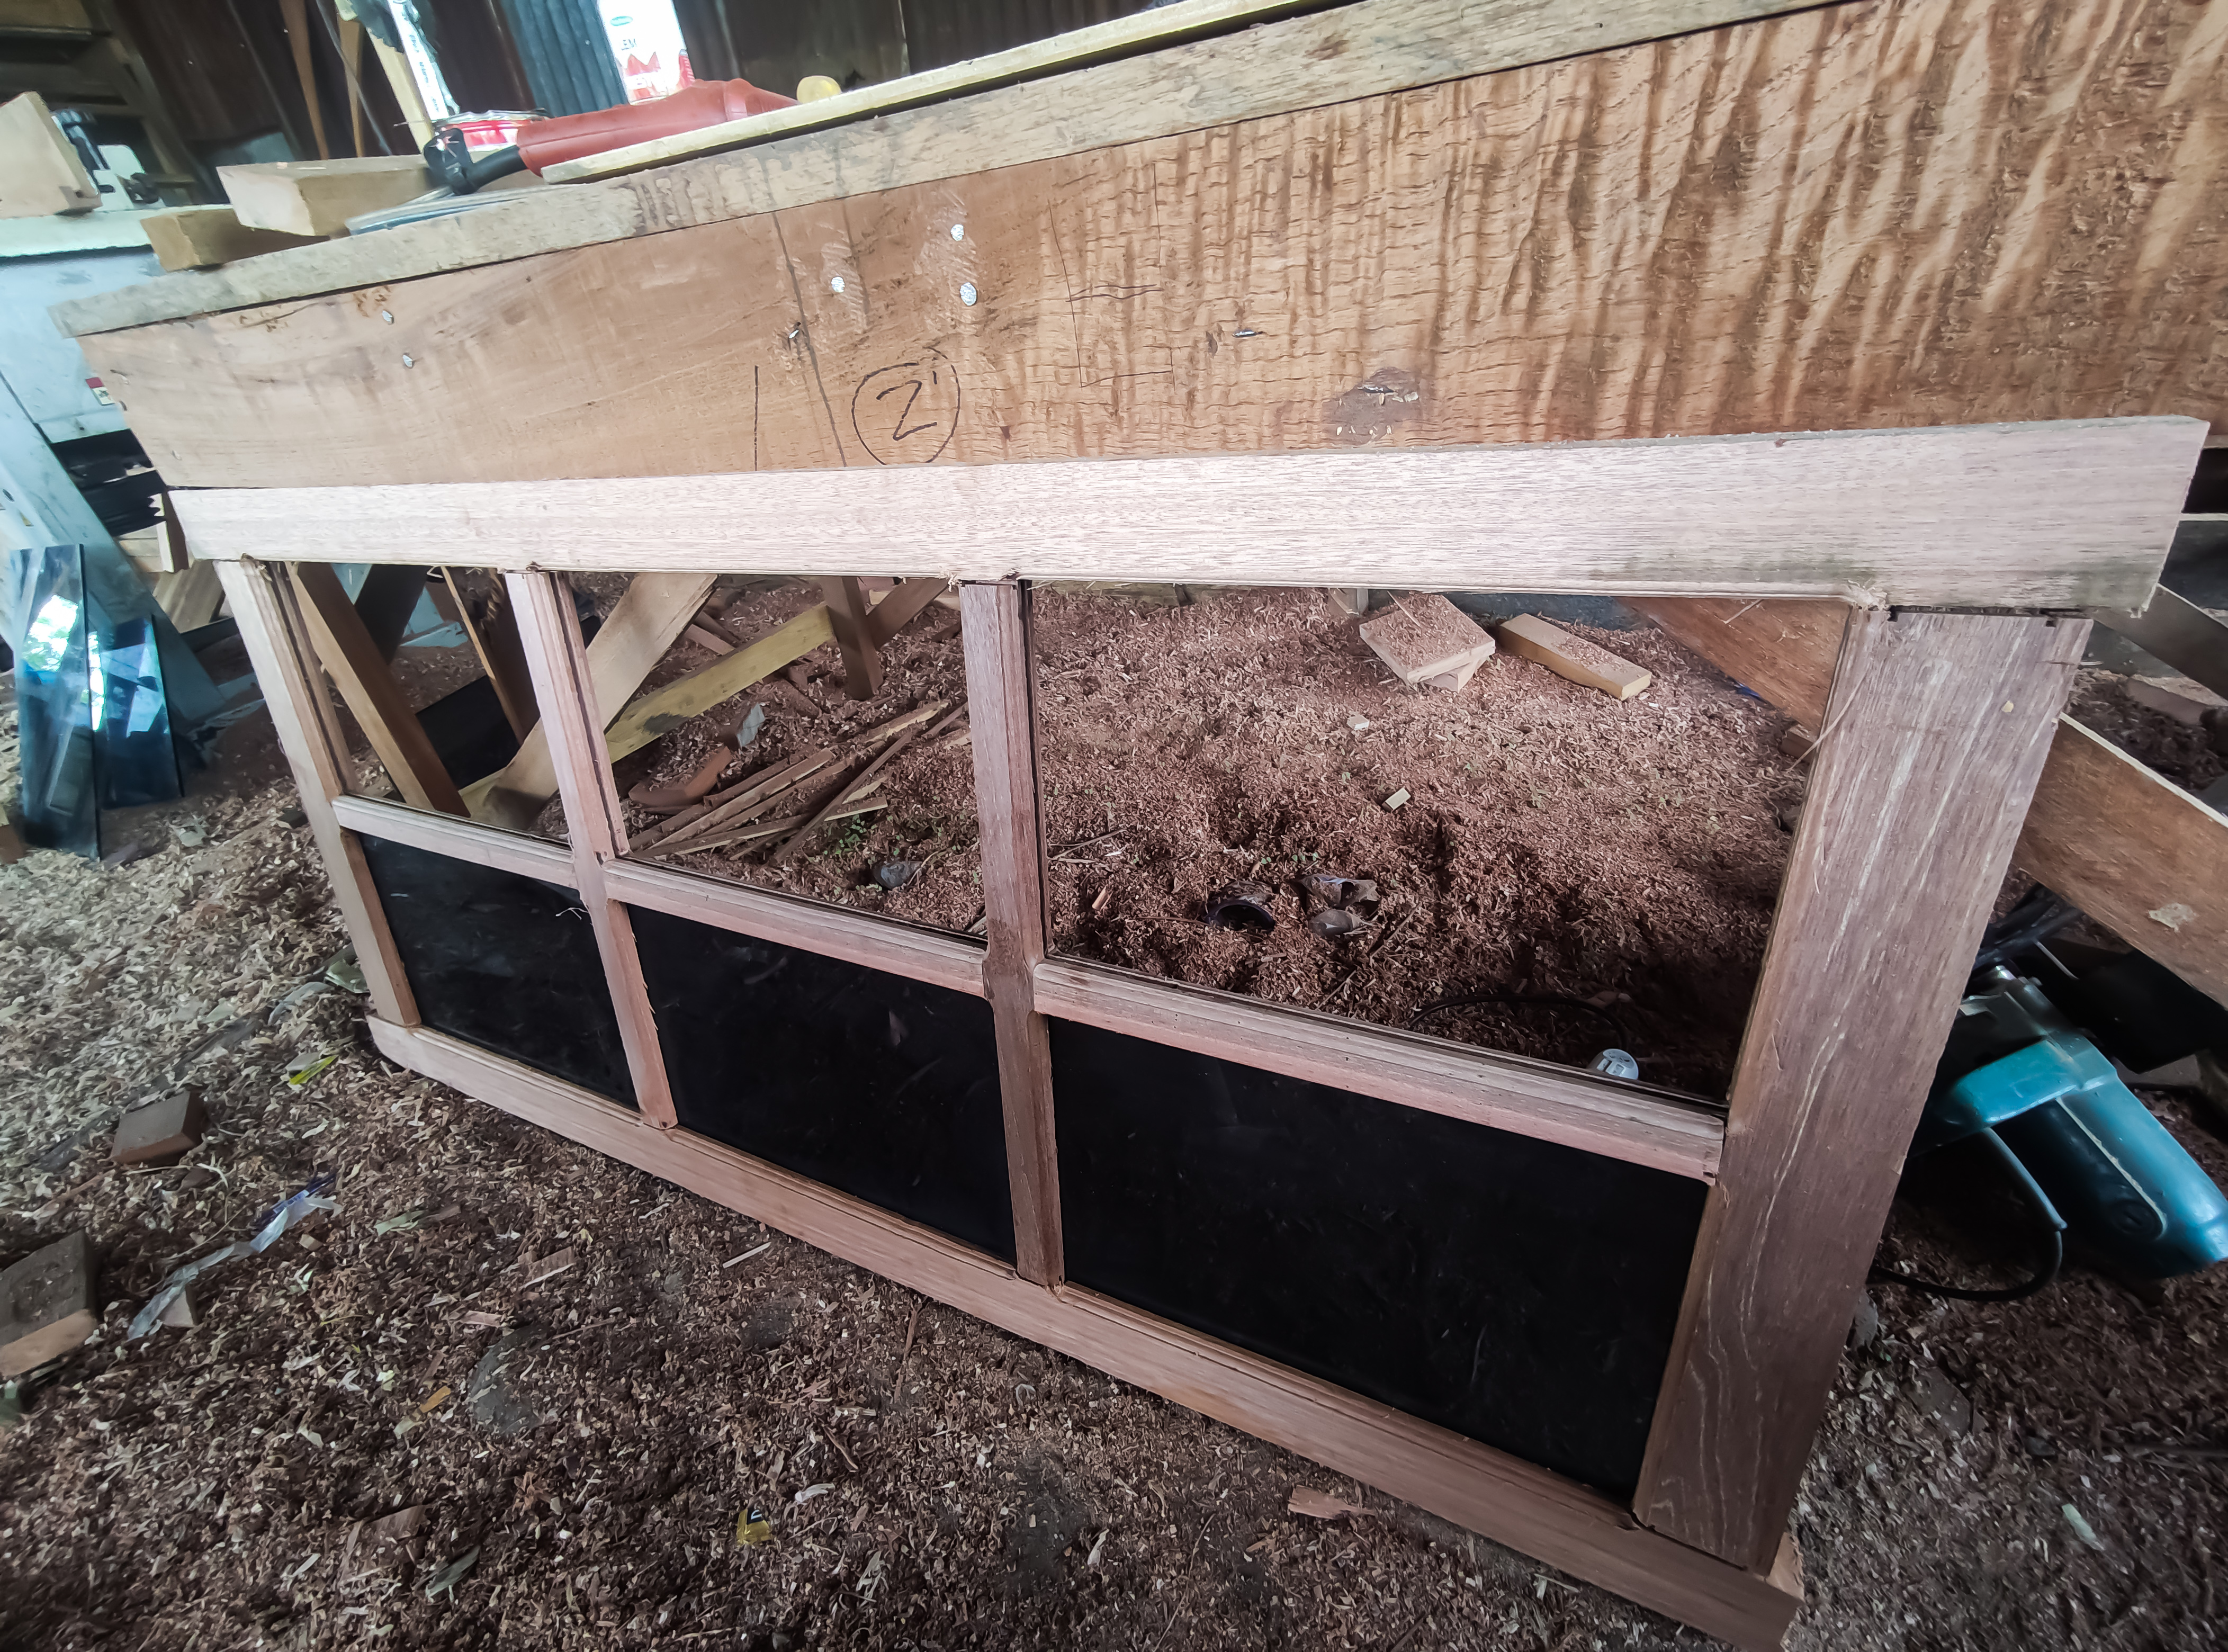
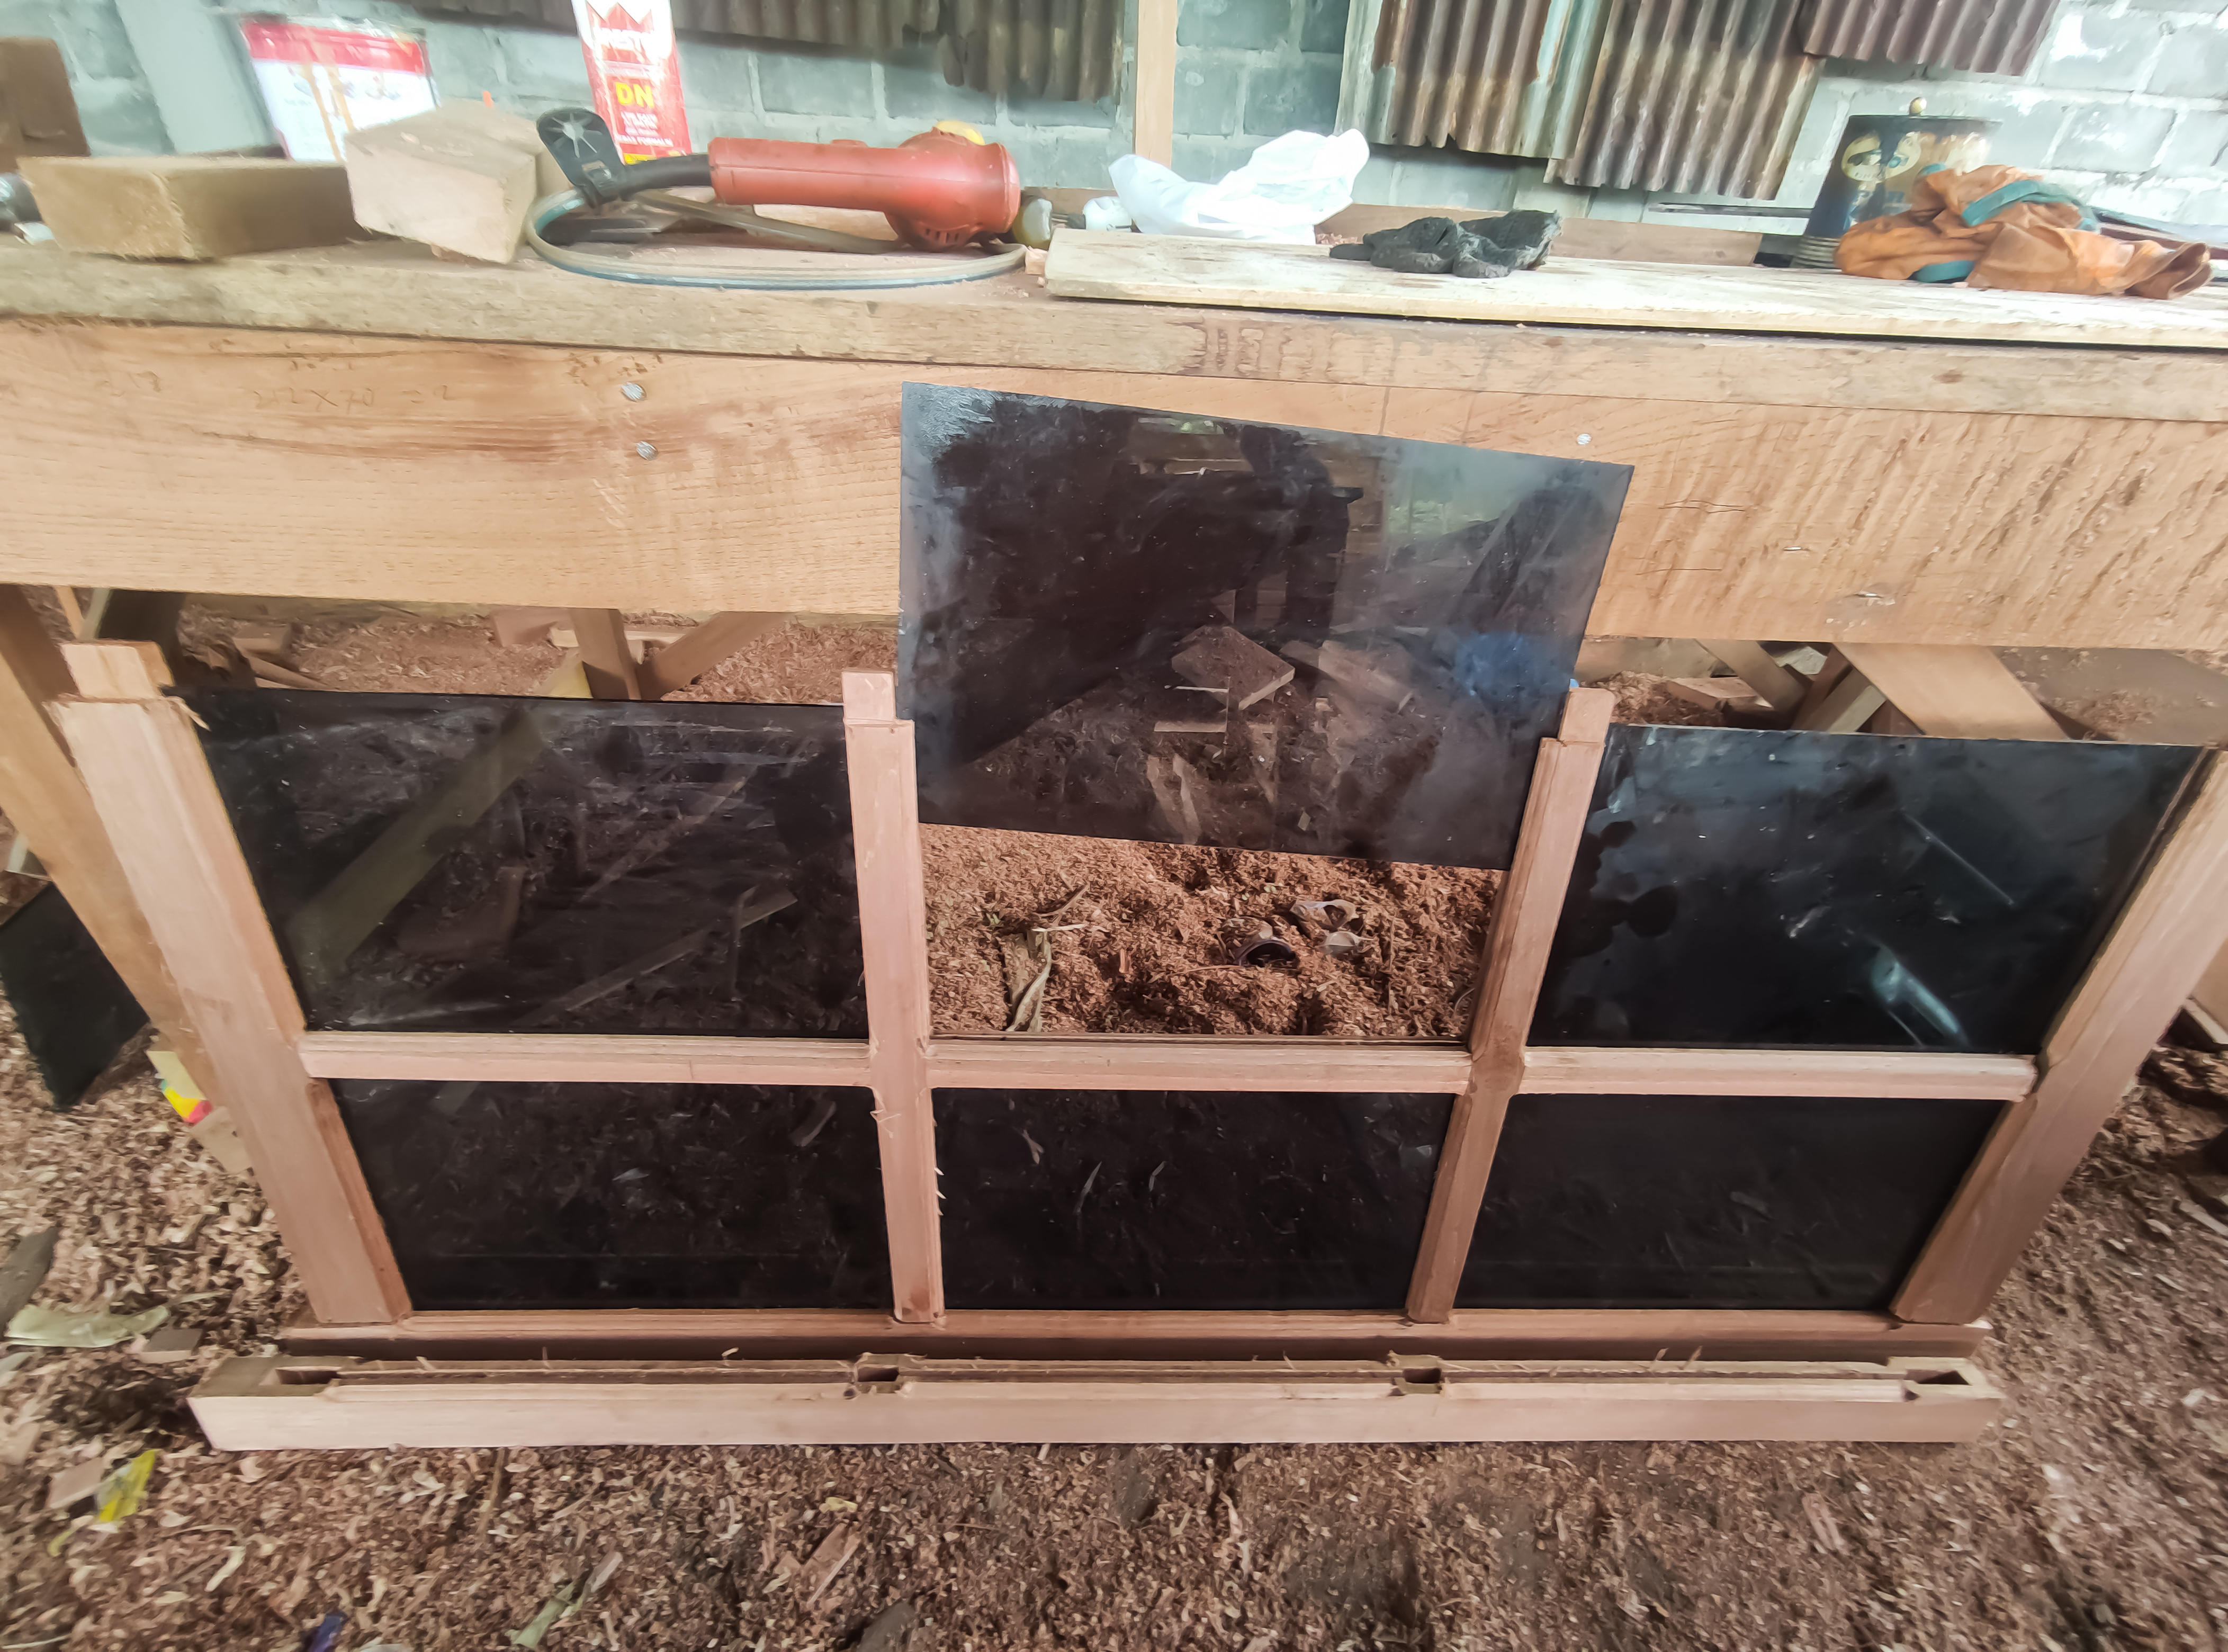
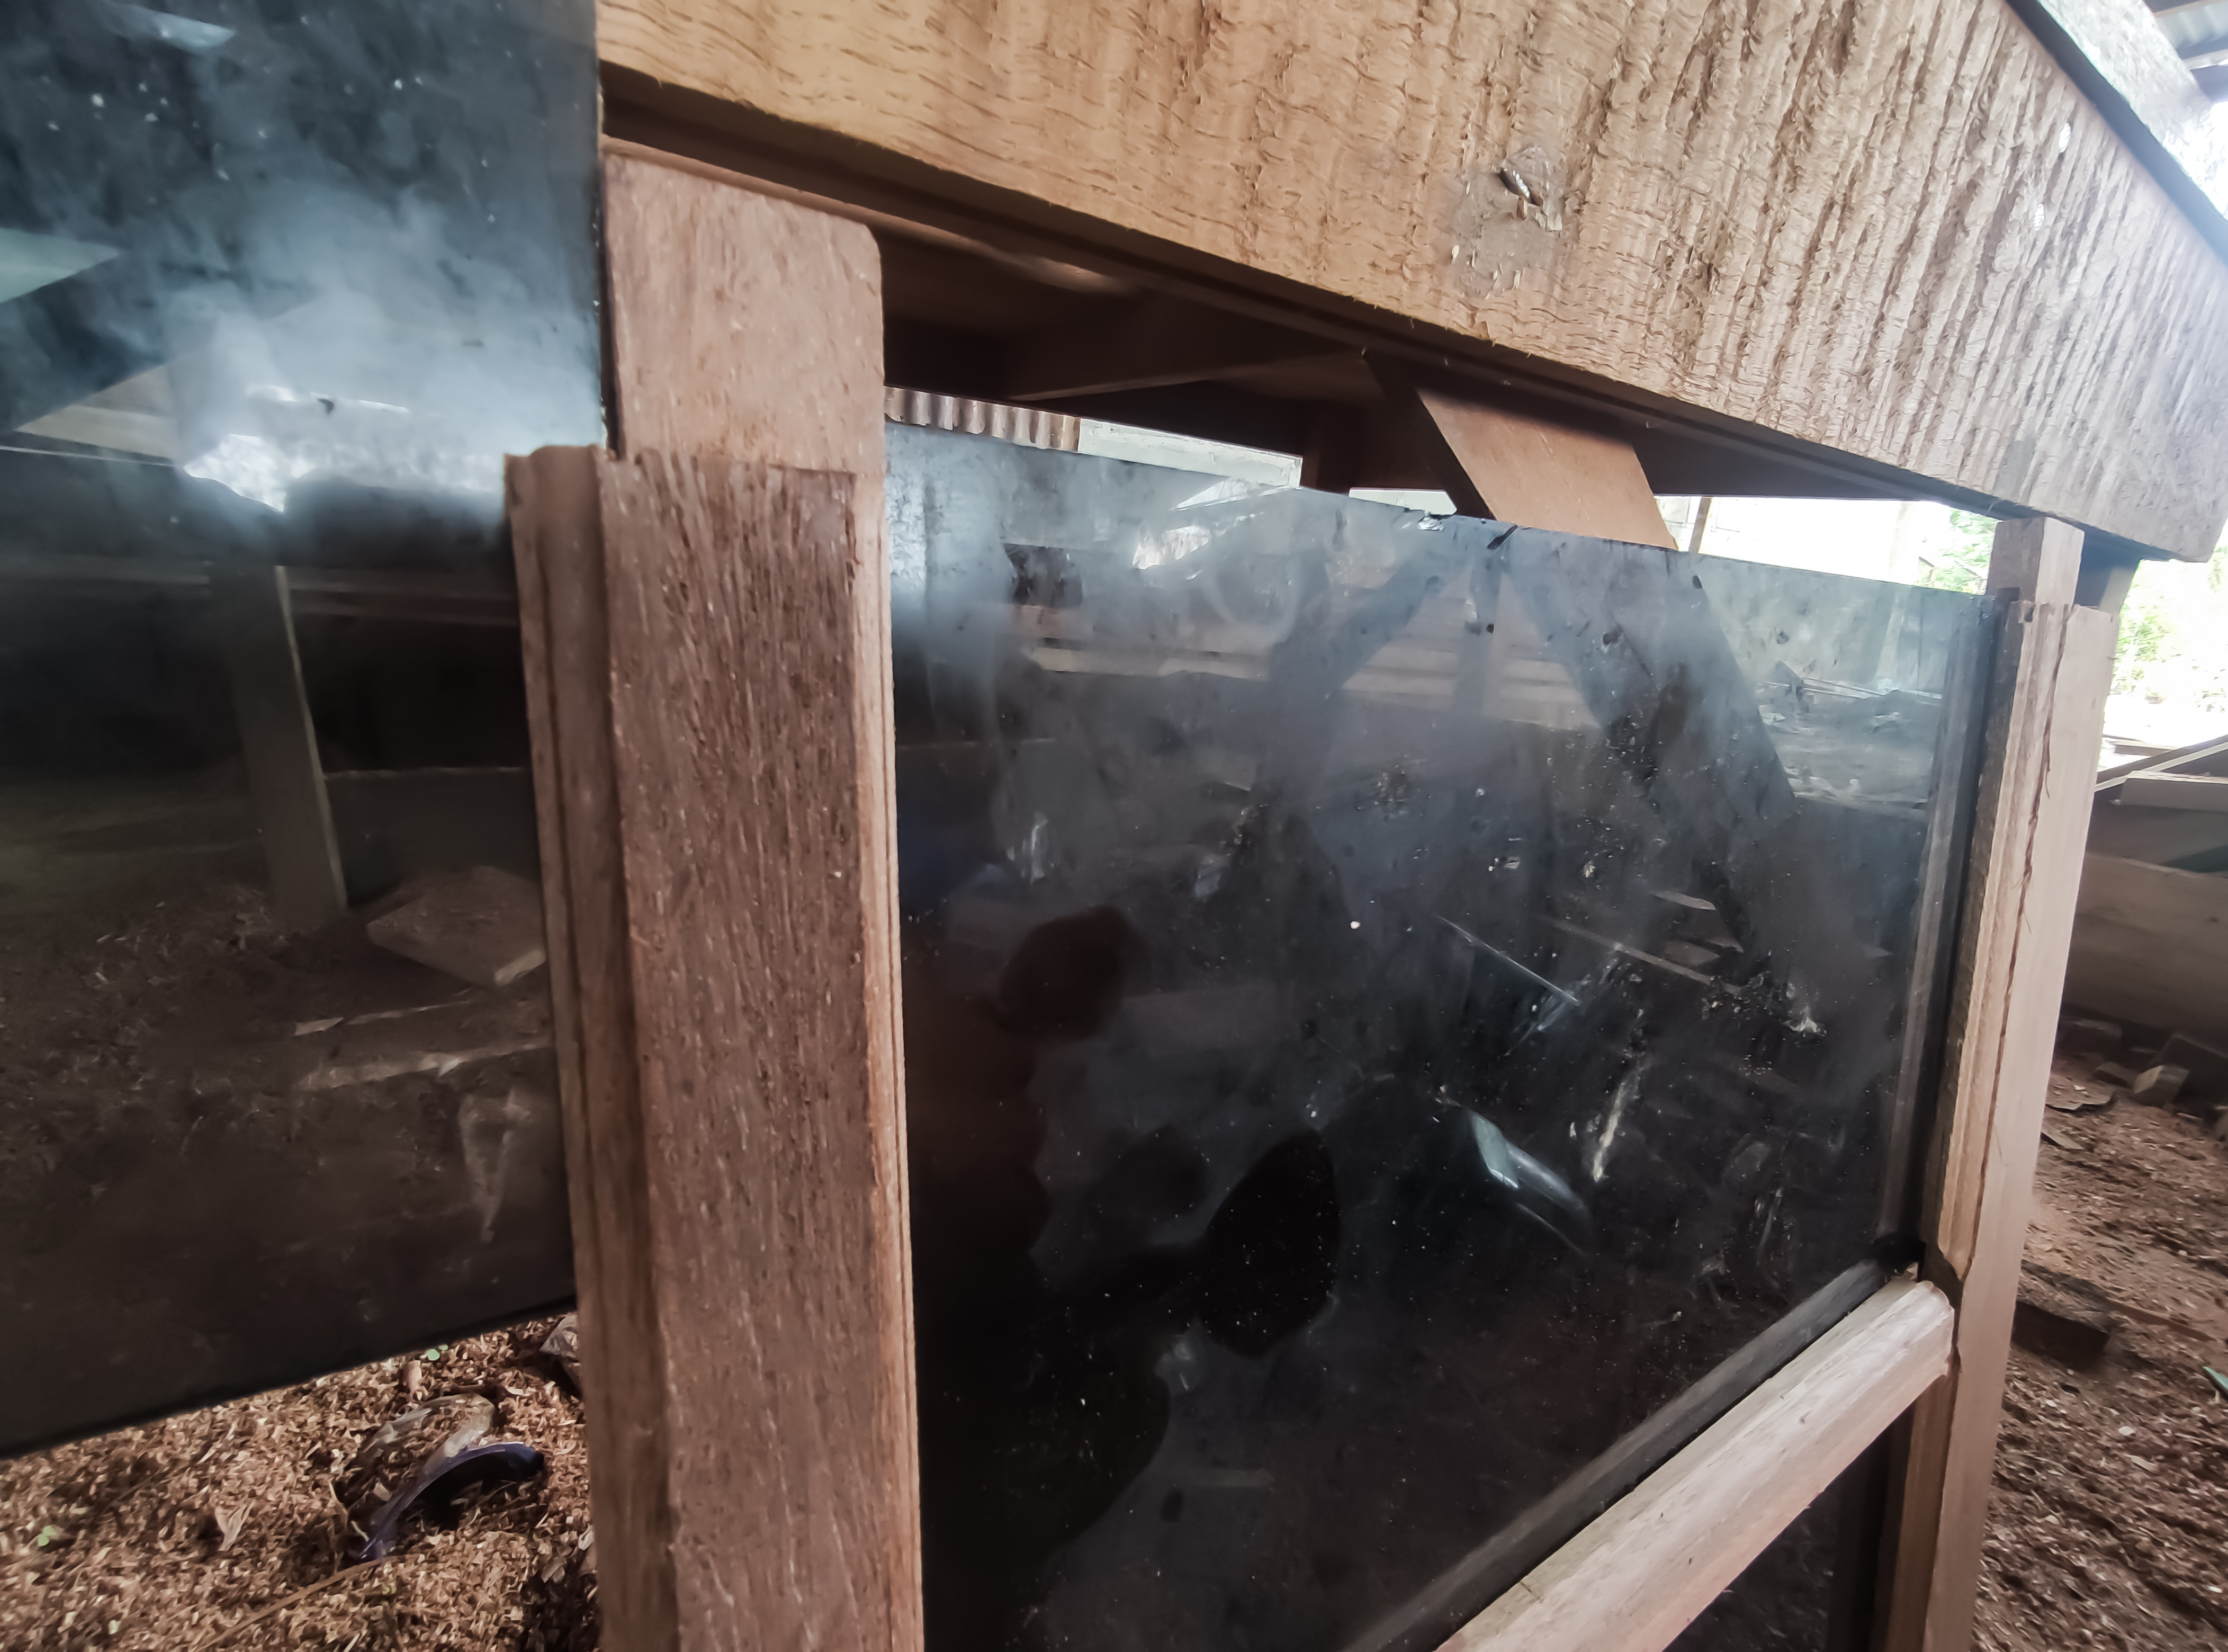
Then after the process of preparing the series of windows and jalousies is complete, then we enter the stage of installing glass on that series of windows and jalousies.
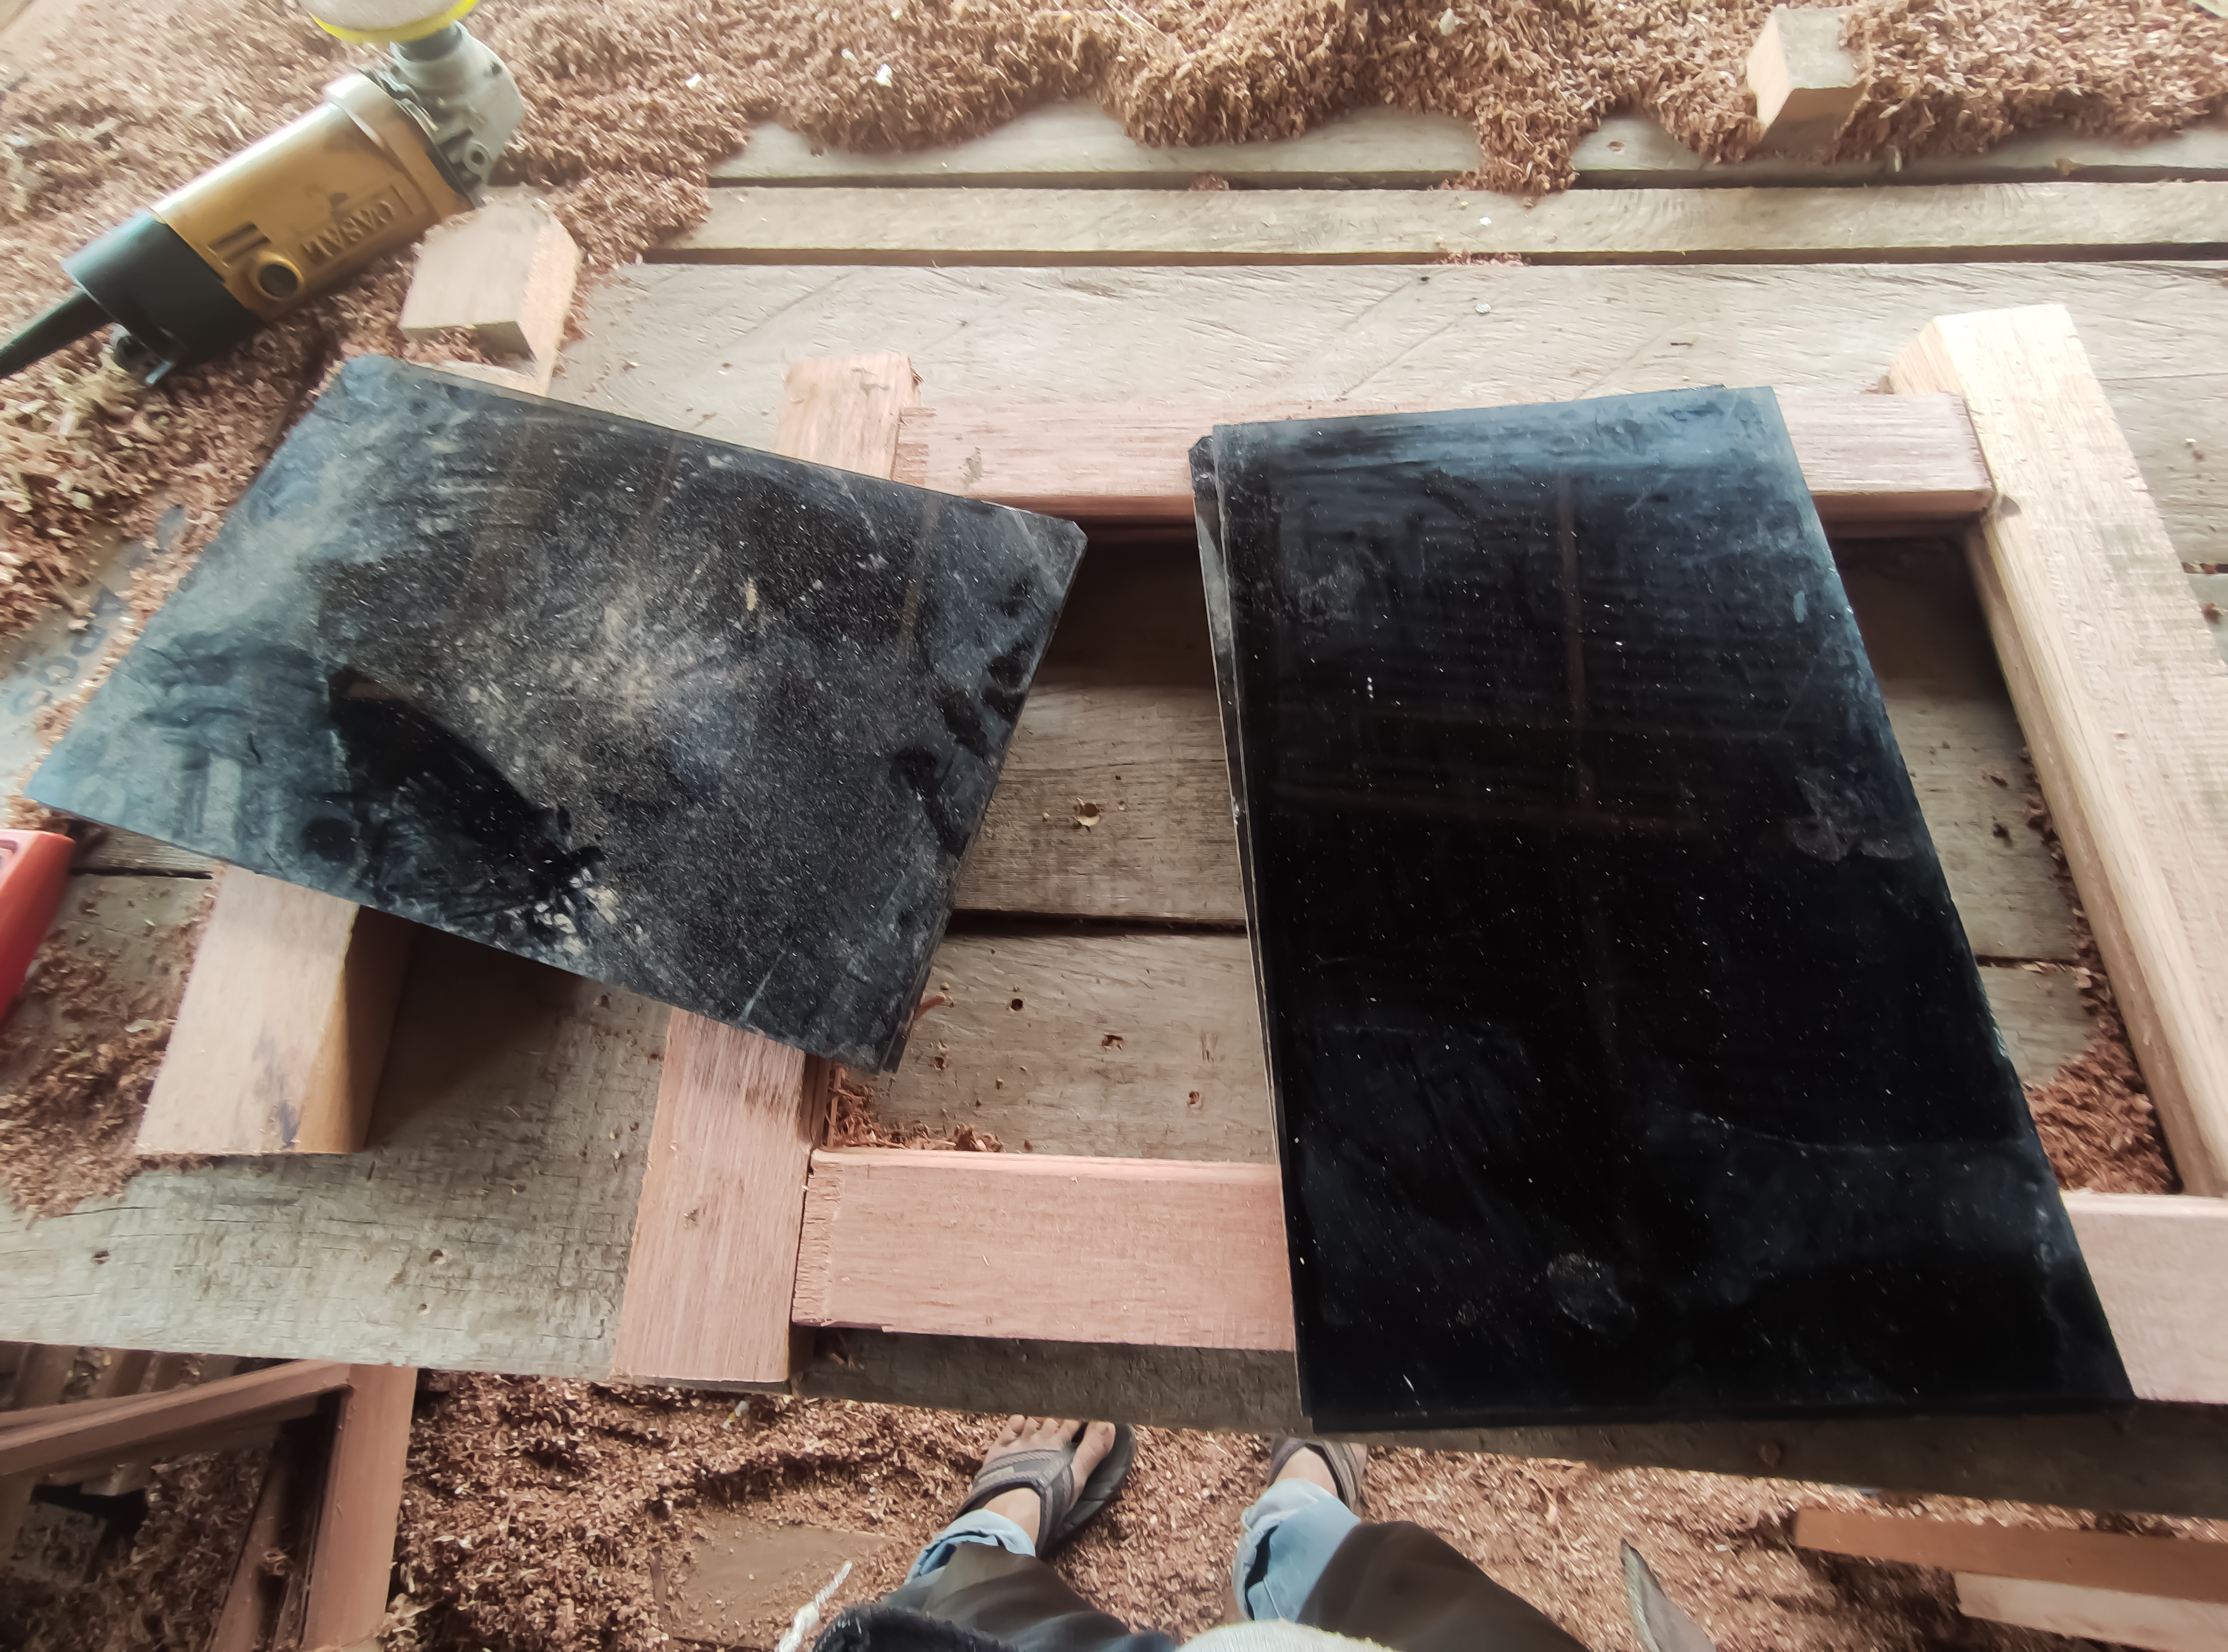
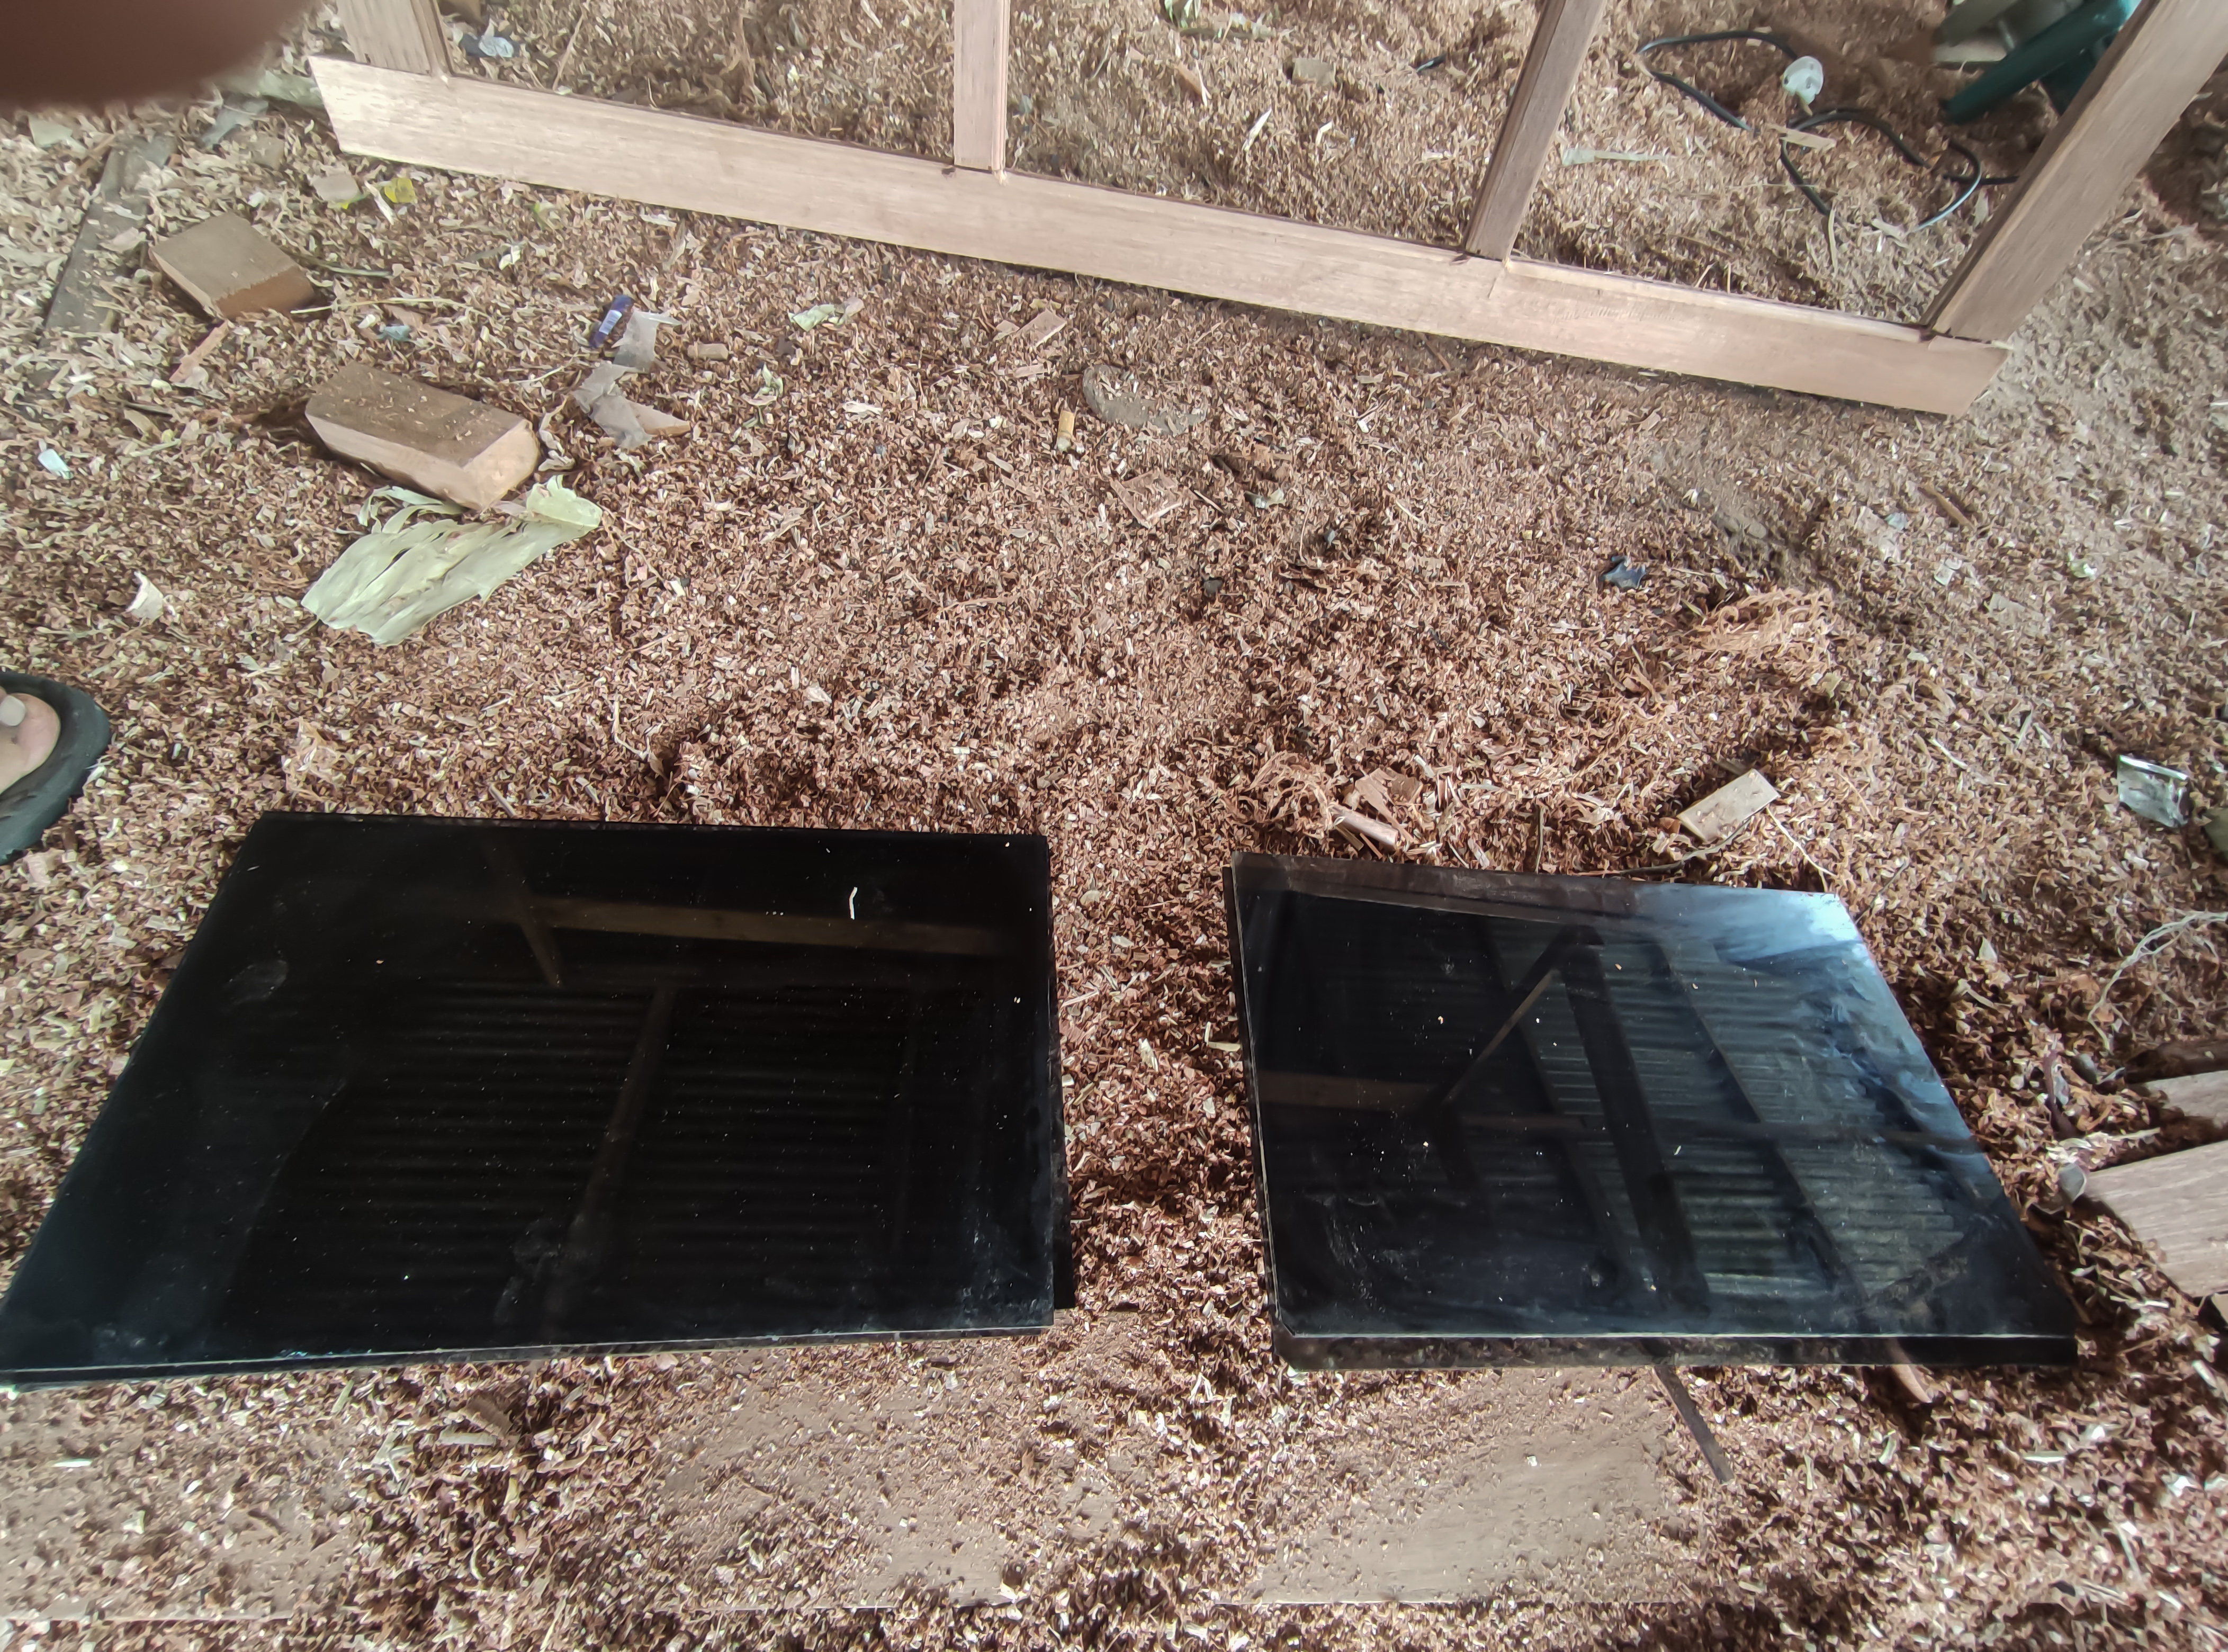
8.Installation of glass in a series of windows and jalousies.
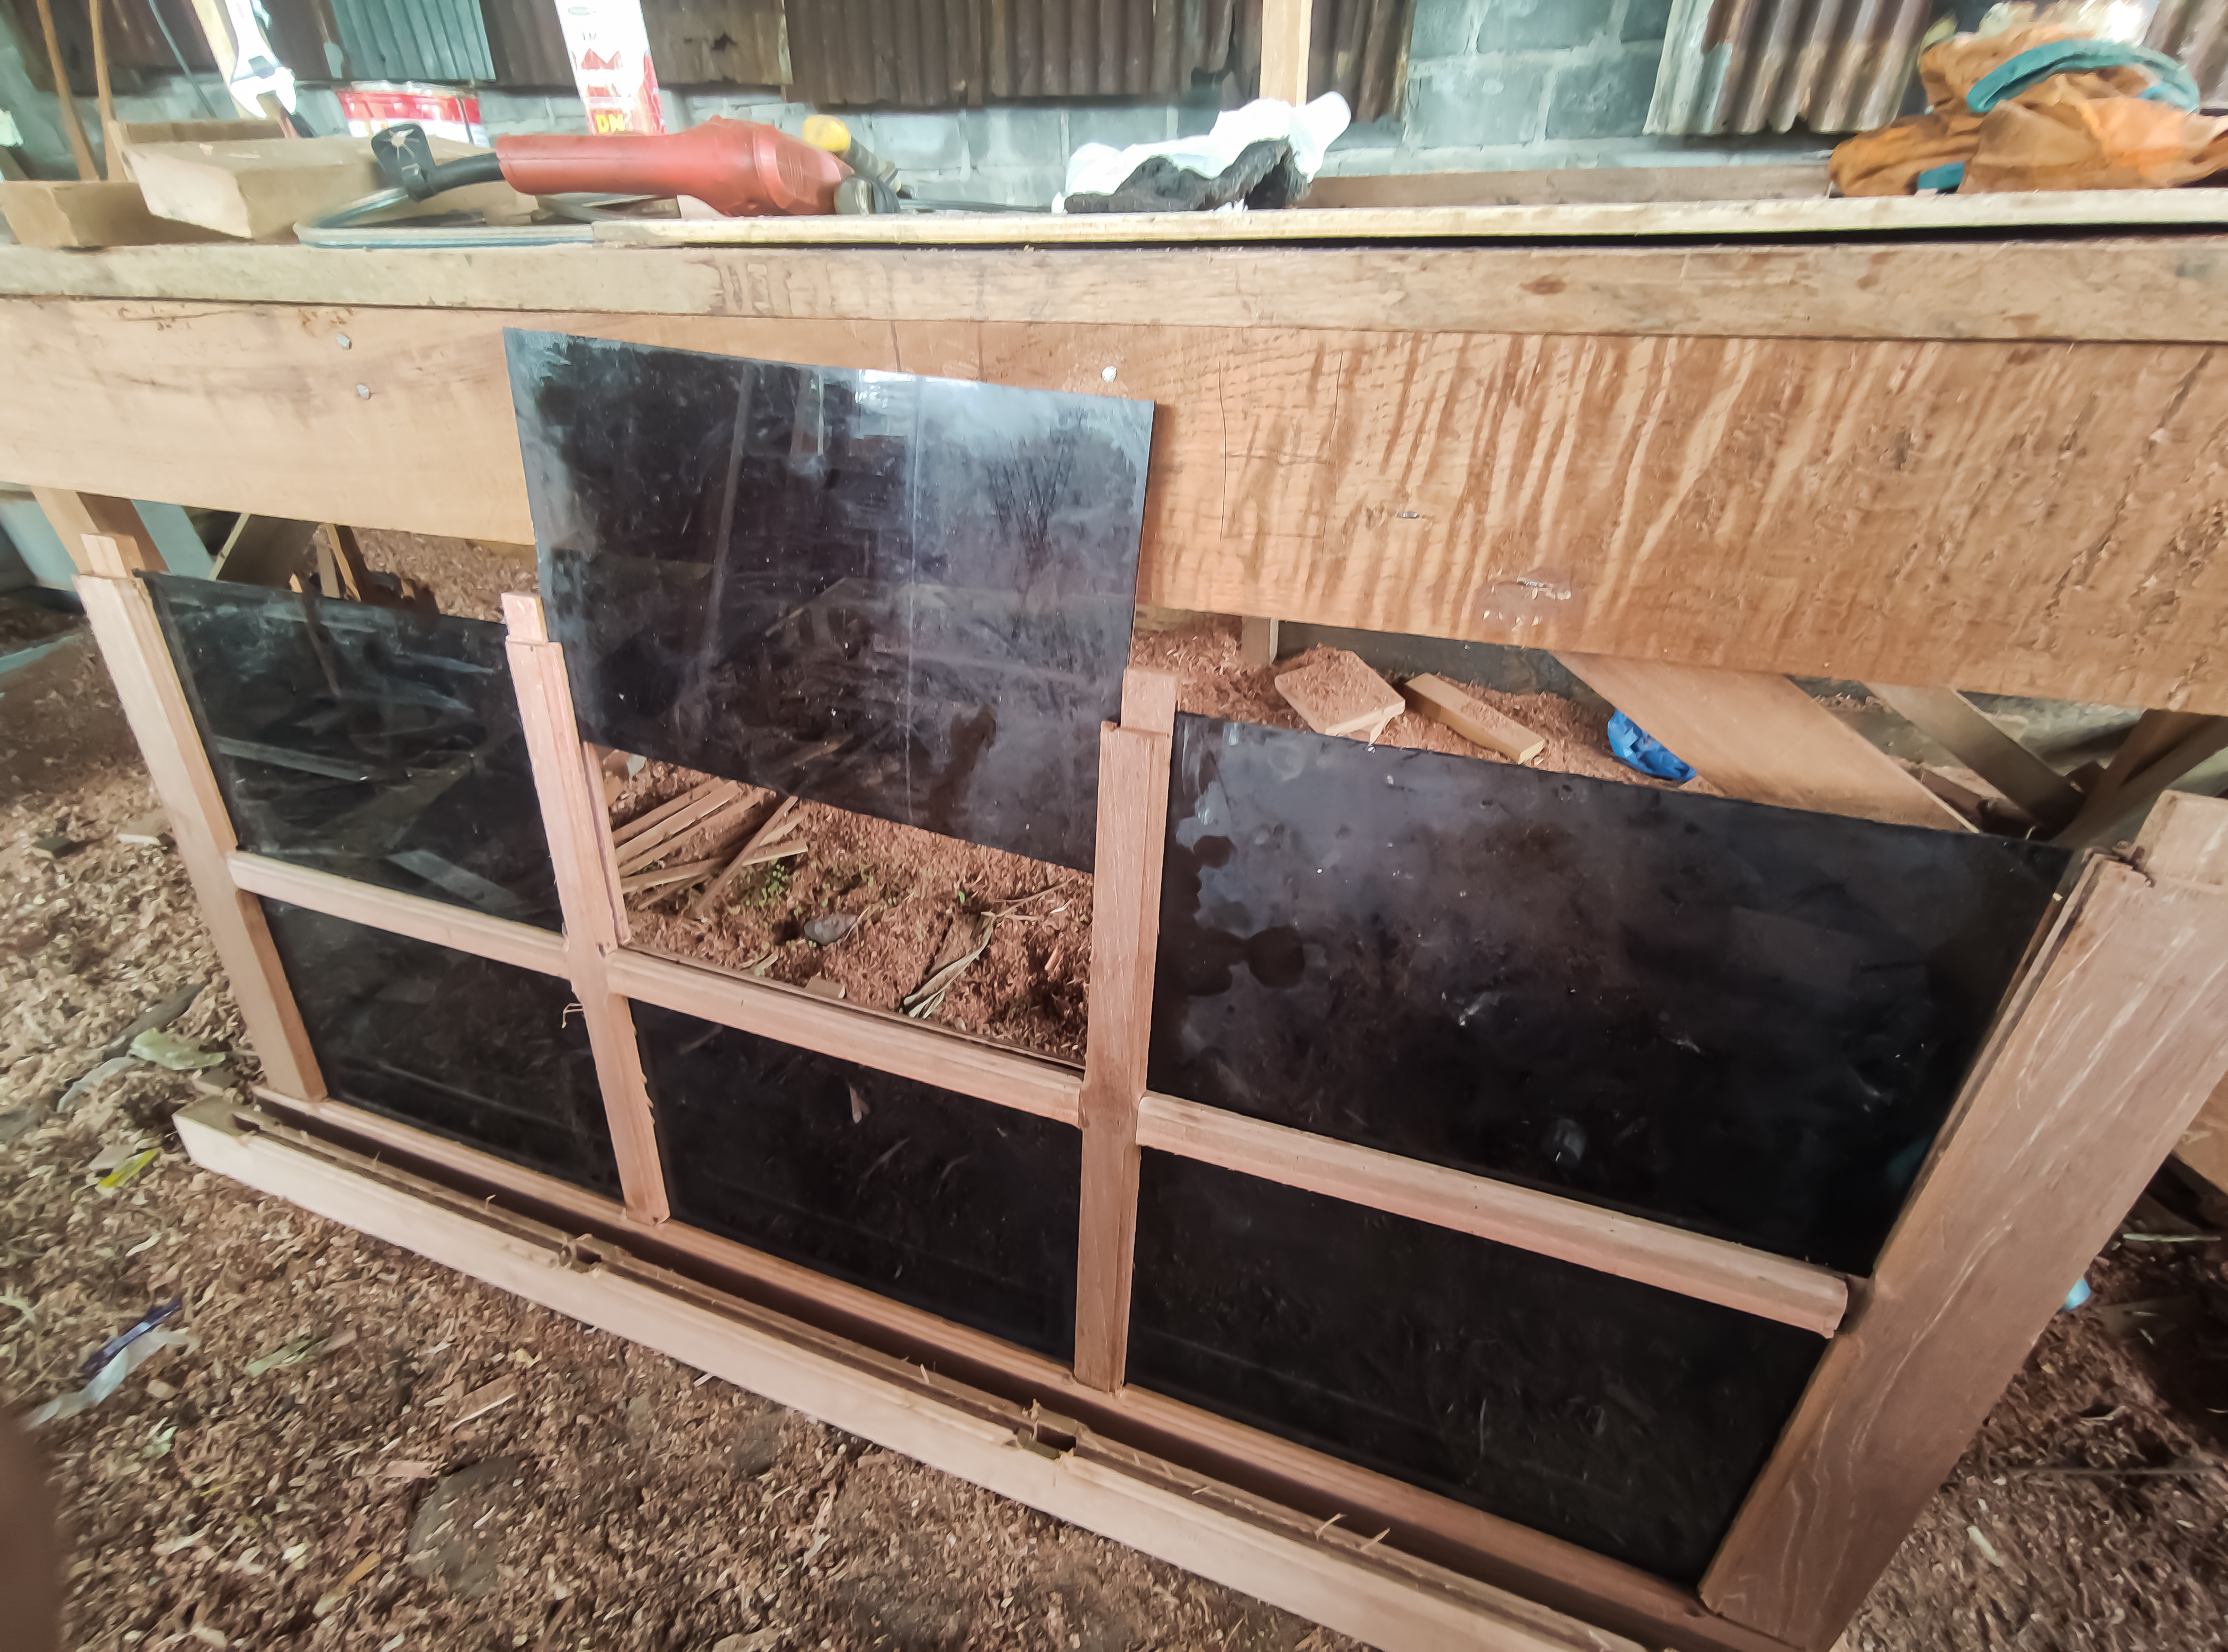
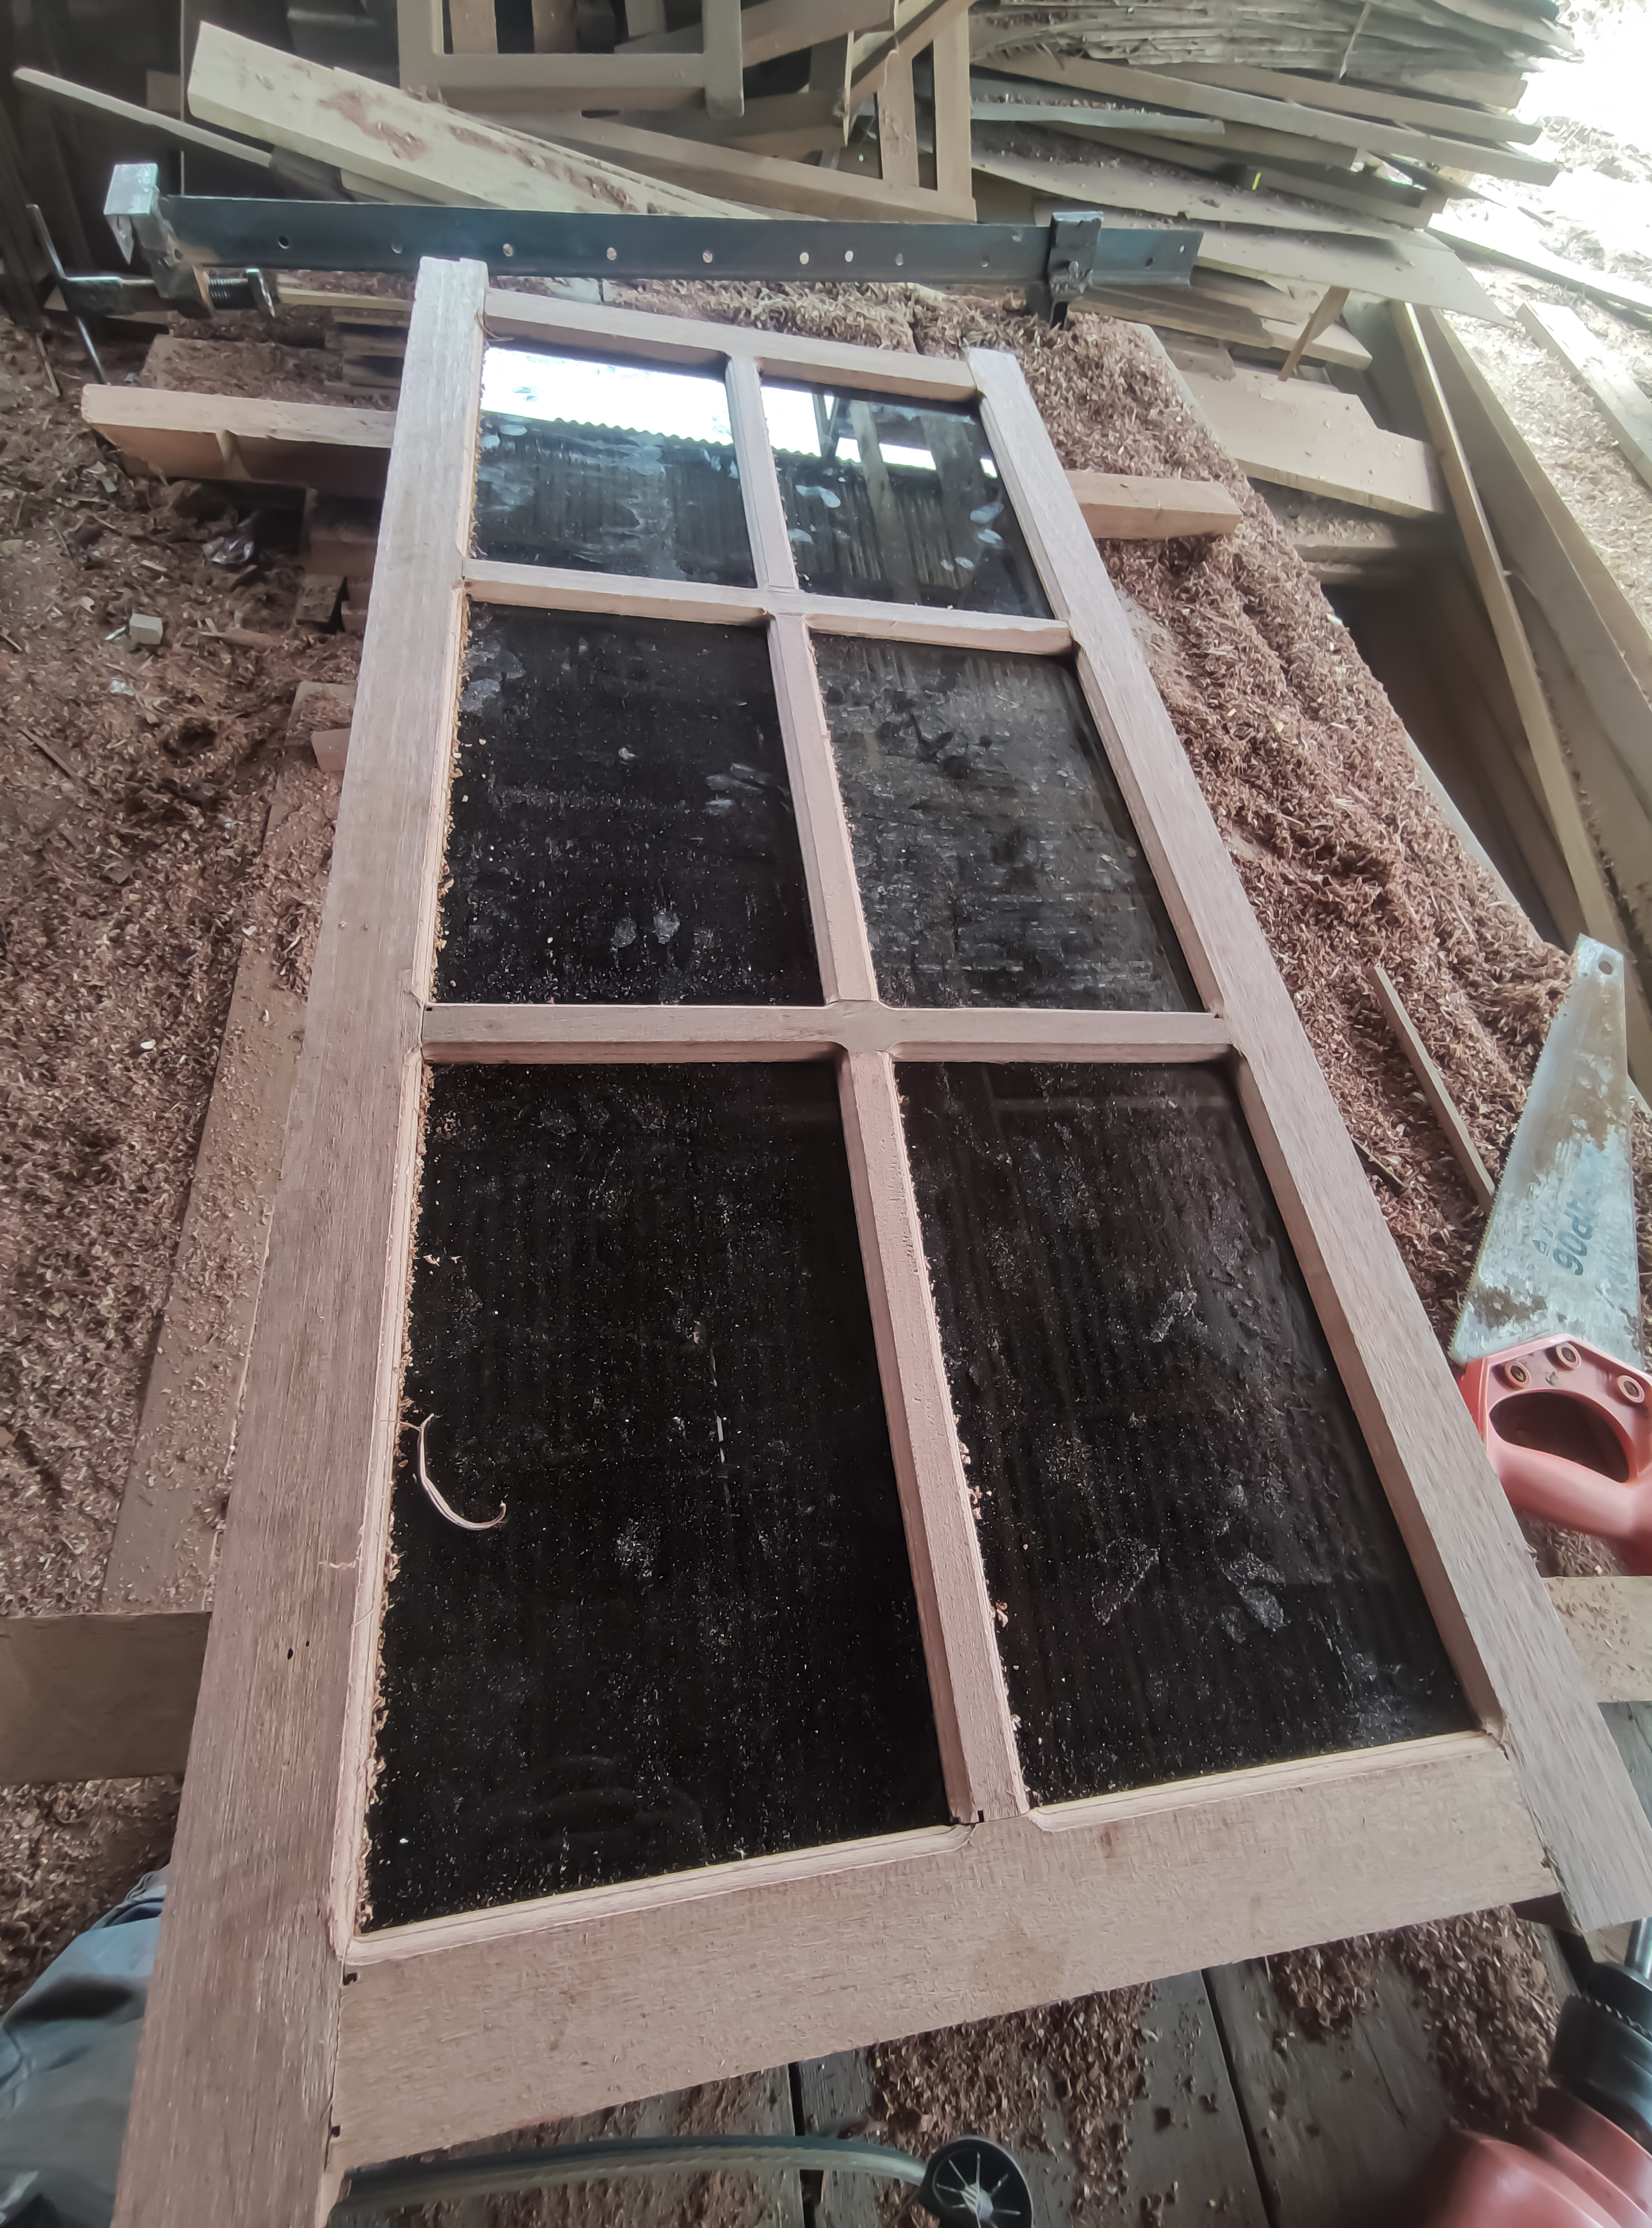
And for those windows and jalousies my customer ordered 5mm transparent black glass which is a type of glass for wooden windows that are generally used by local people and for the process of cutting glass, I wrote about it in another publication the other day and now we are directly entering the stage of installing glass on a series of windows.
For the installation of glass in the circuit, of course, a little complicated because I had to disassemble the entire structure of the window series and put it back together with the glass and the installation process went like this.
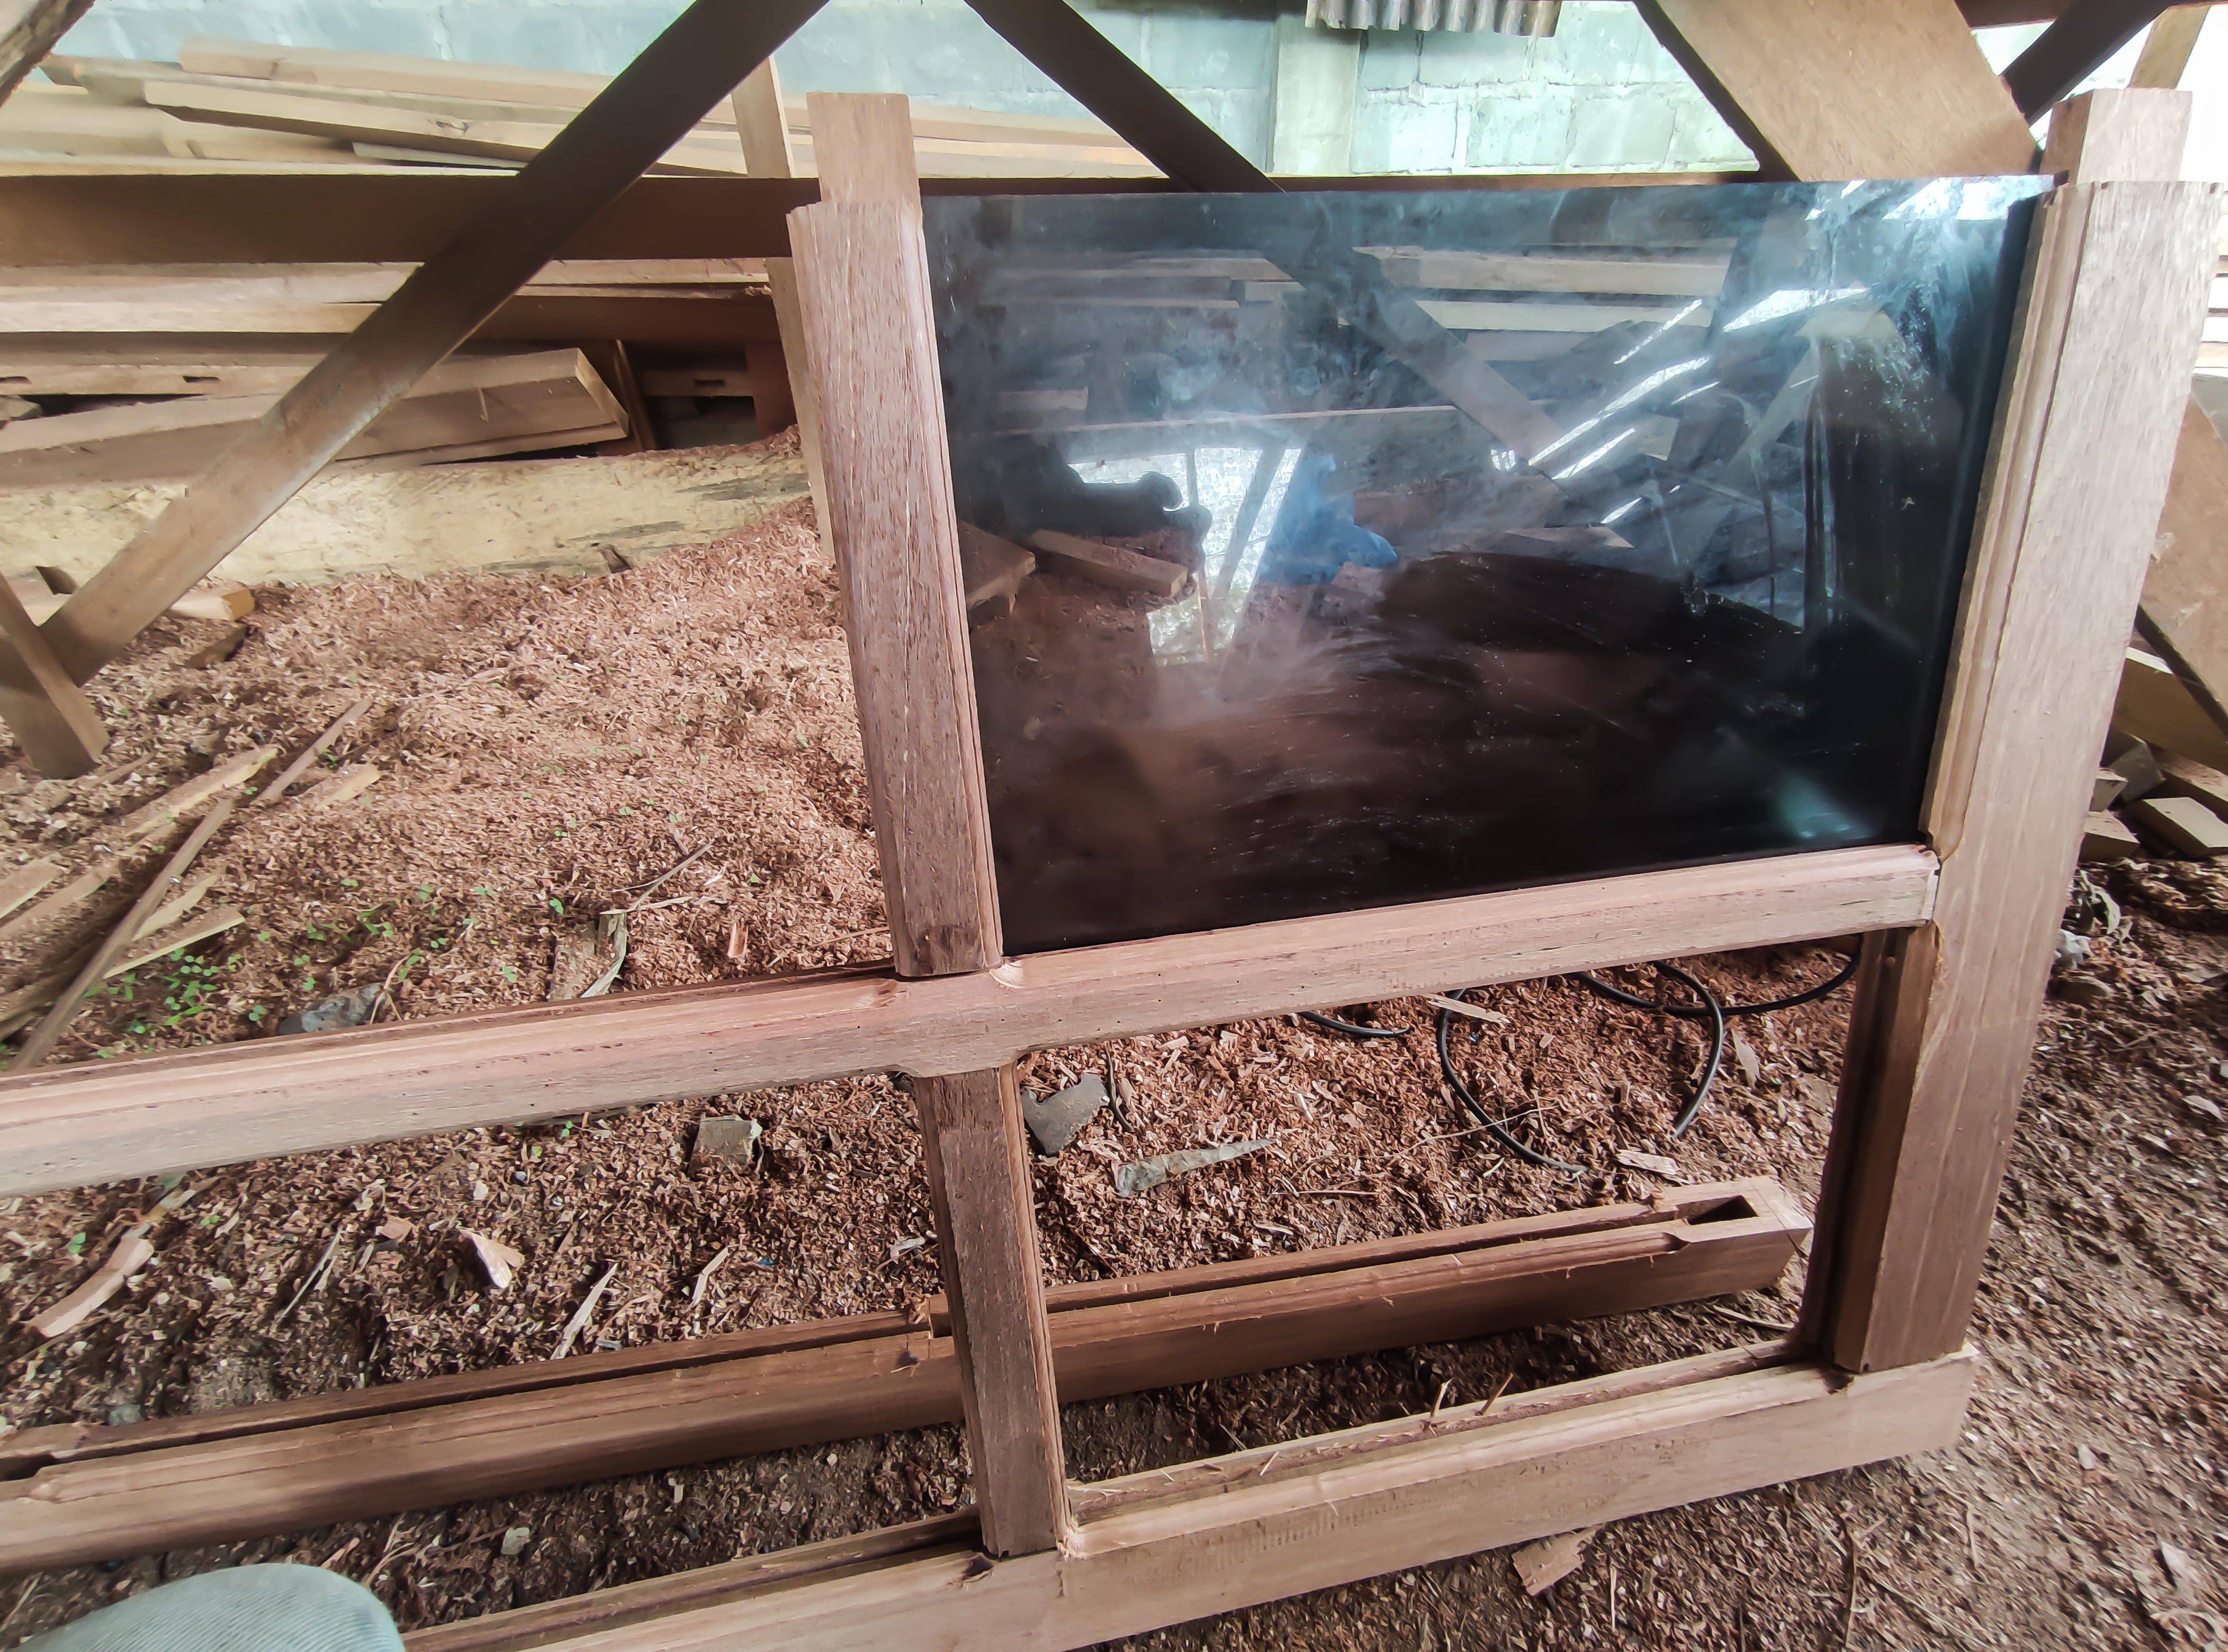


After the process of installing the glass on the window series and jalousie is complete, the next step is locking the window series bulkhead.
9.Locking of window and jalousie bulkheads.
To lock the bulkhead series of window connections and jalousies we use a wooden peg wrench by pressing and drilling each corner of the bulkhead using an electric drill and the process goes like this.

And after the process of pressing and locking the angle of the circuit connection is complete, then the process of smoothing the surface of the window and that jalousie.
10.Sanding the front and back surfaces of windows and jalousies.
For smoothing the wooden surface of the window series I did it gradually by using a sanding machine until the wood surface was really smooth.
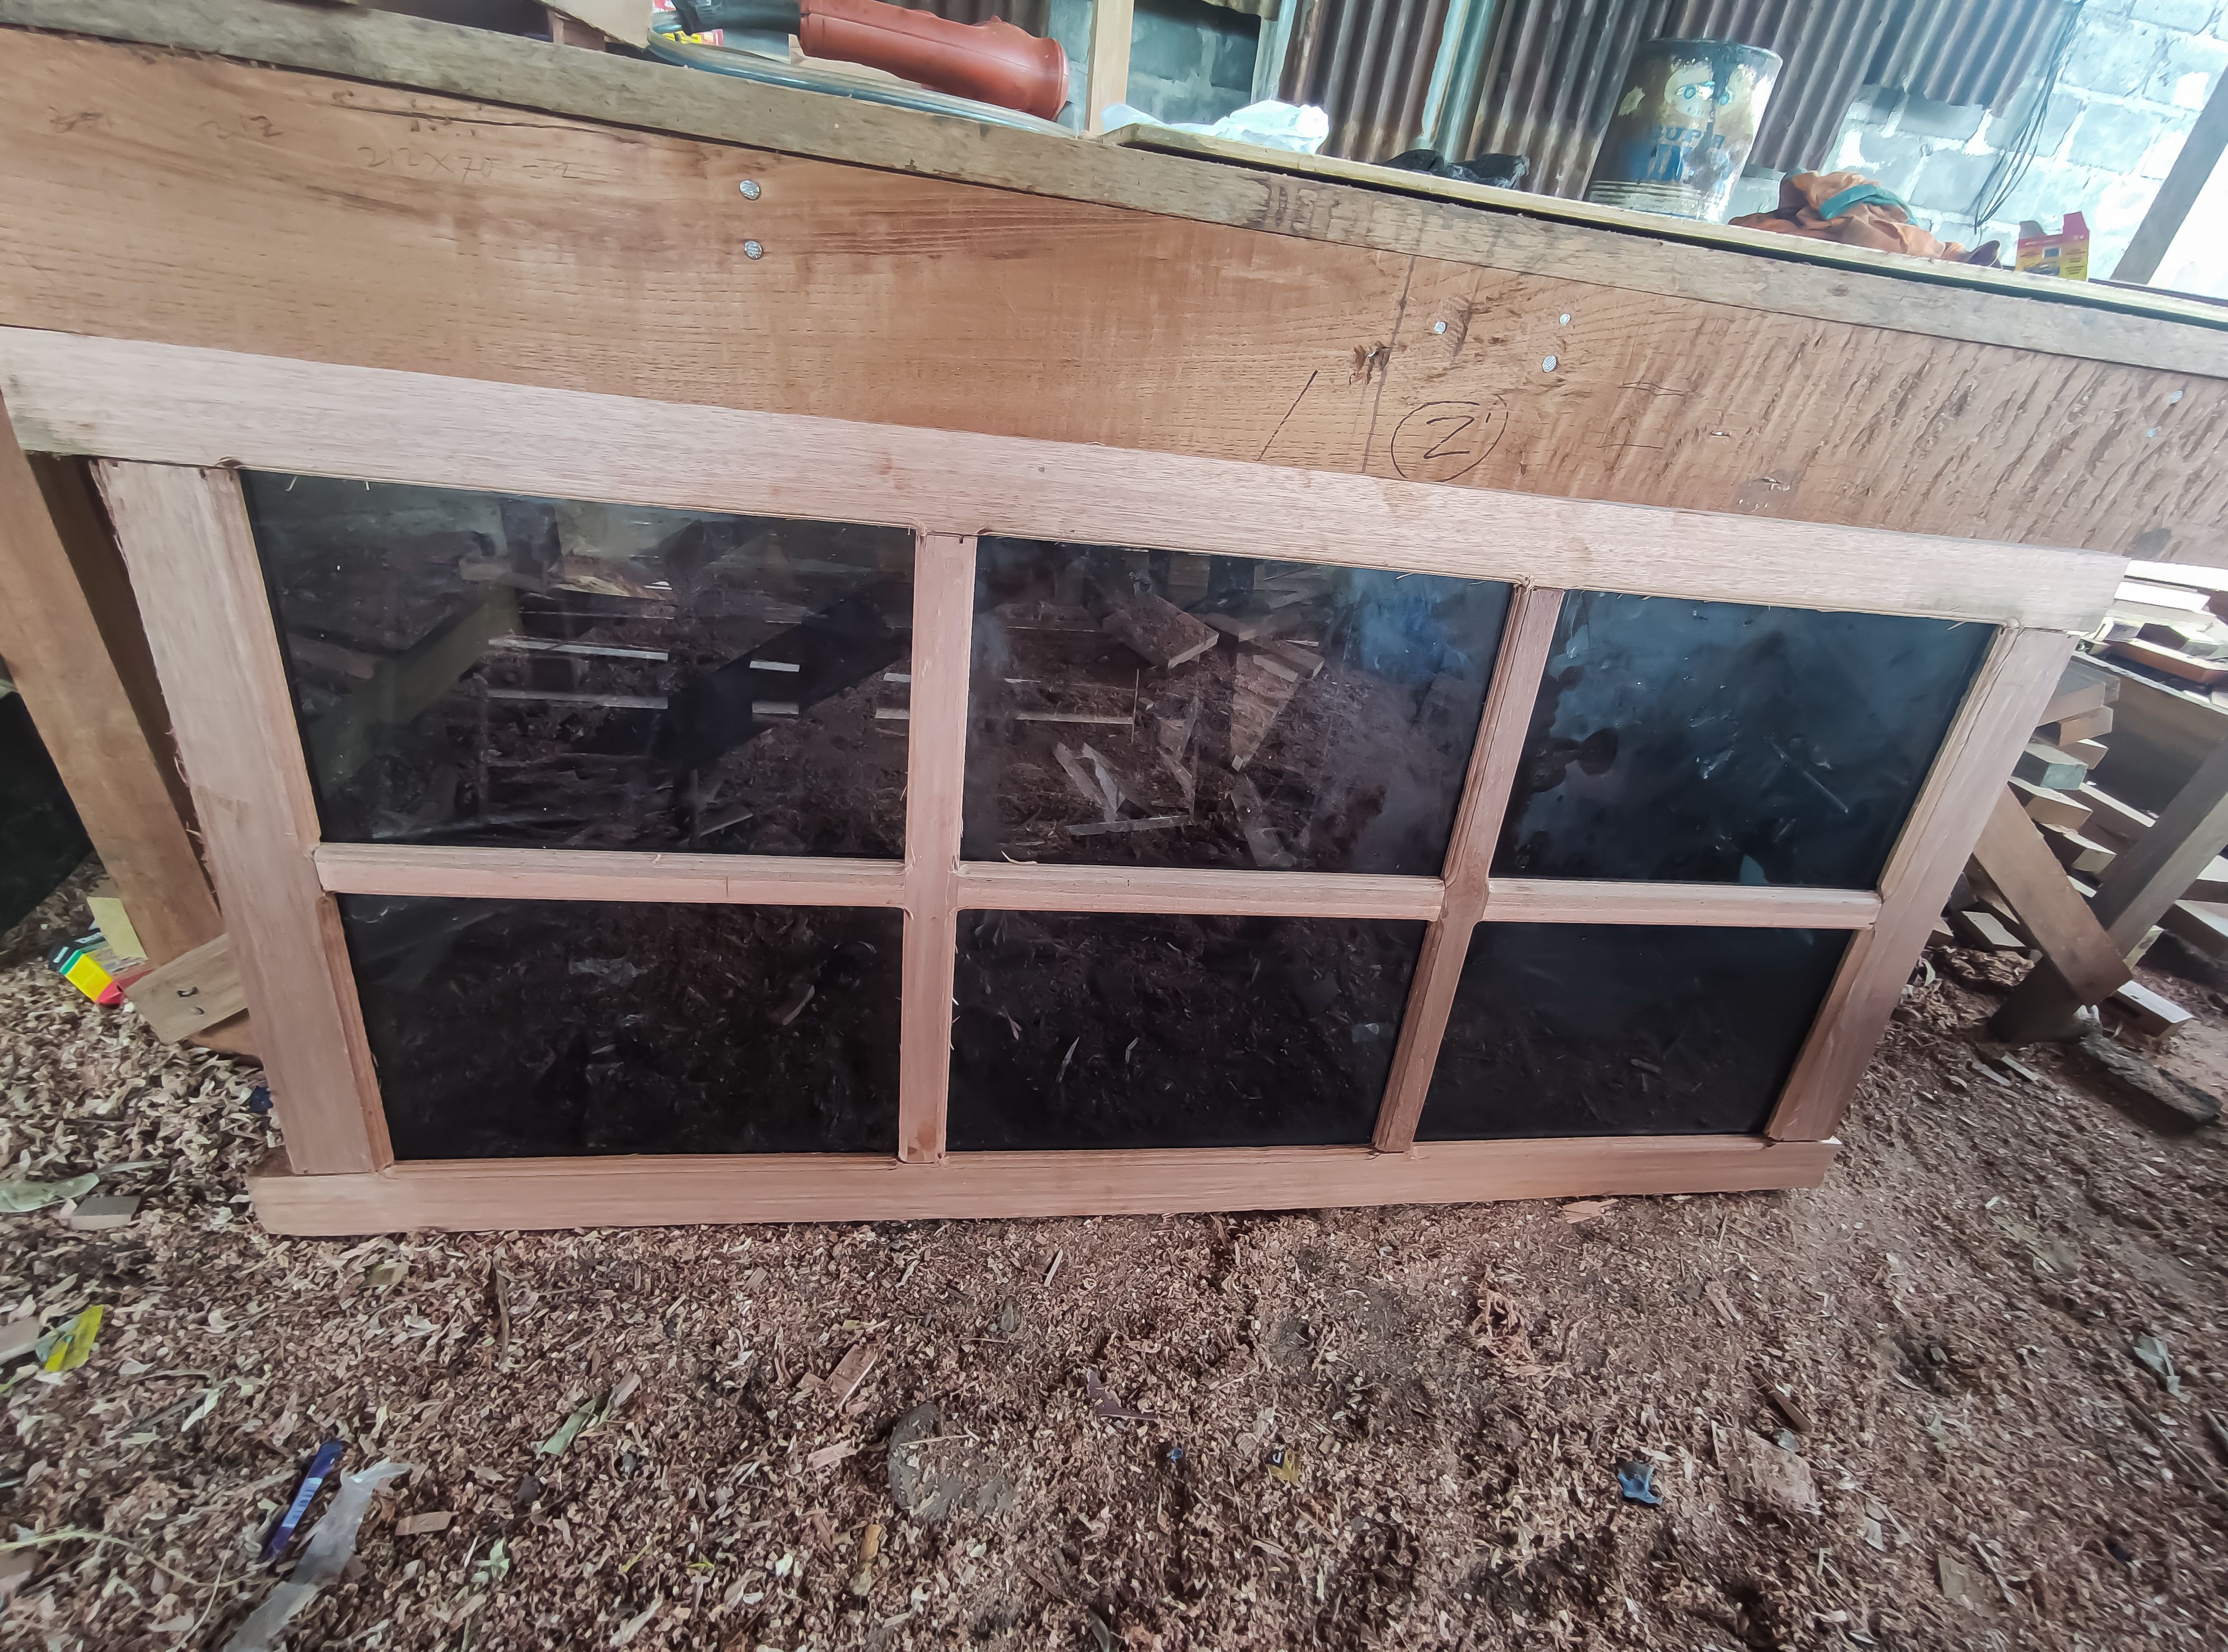
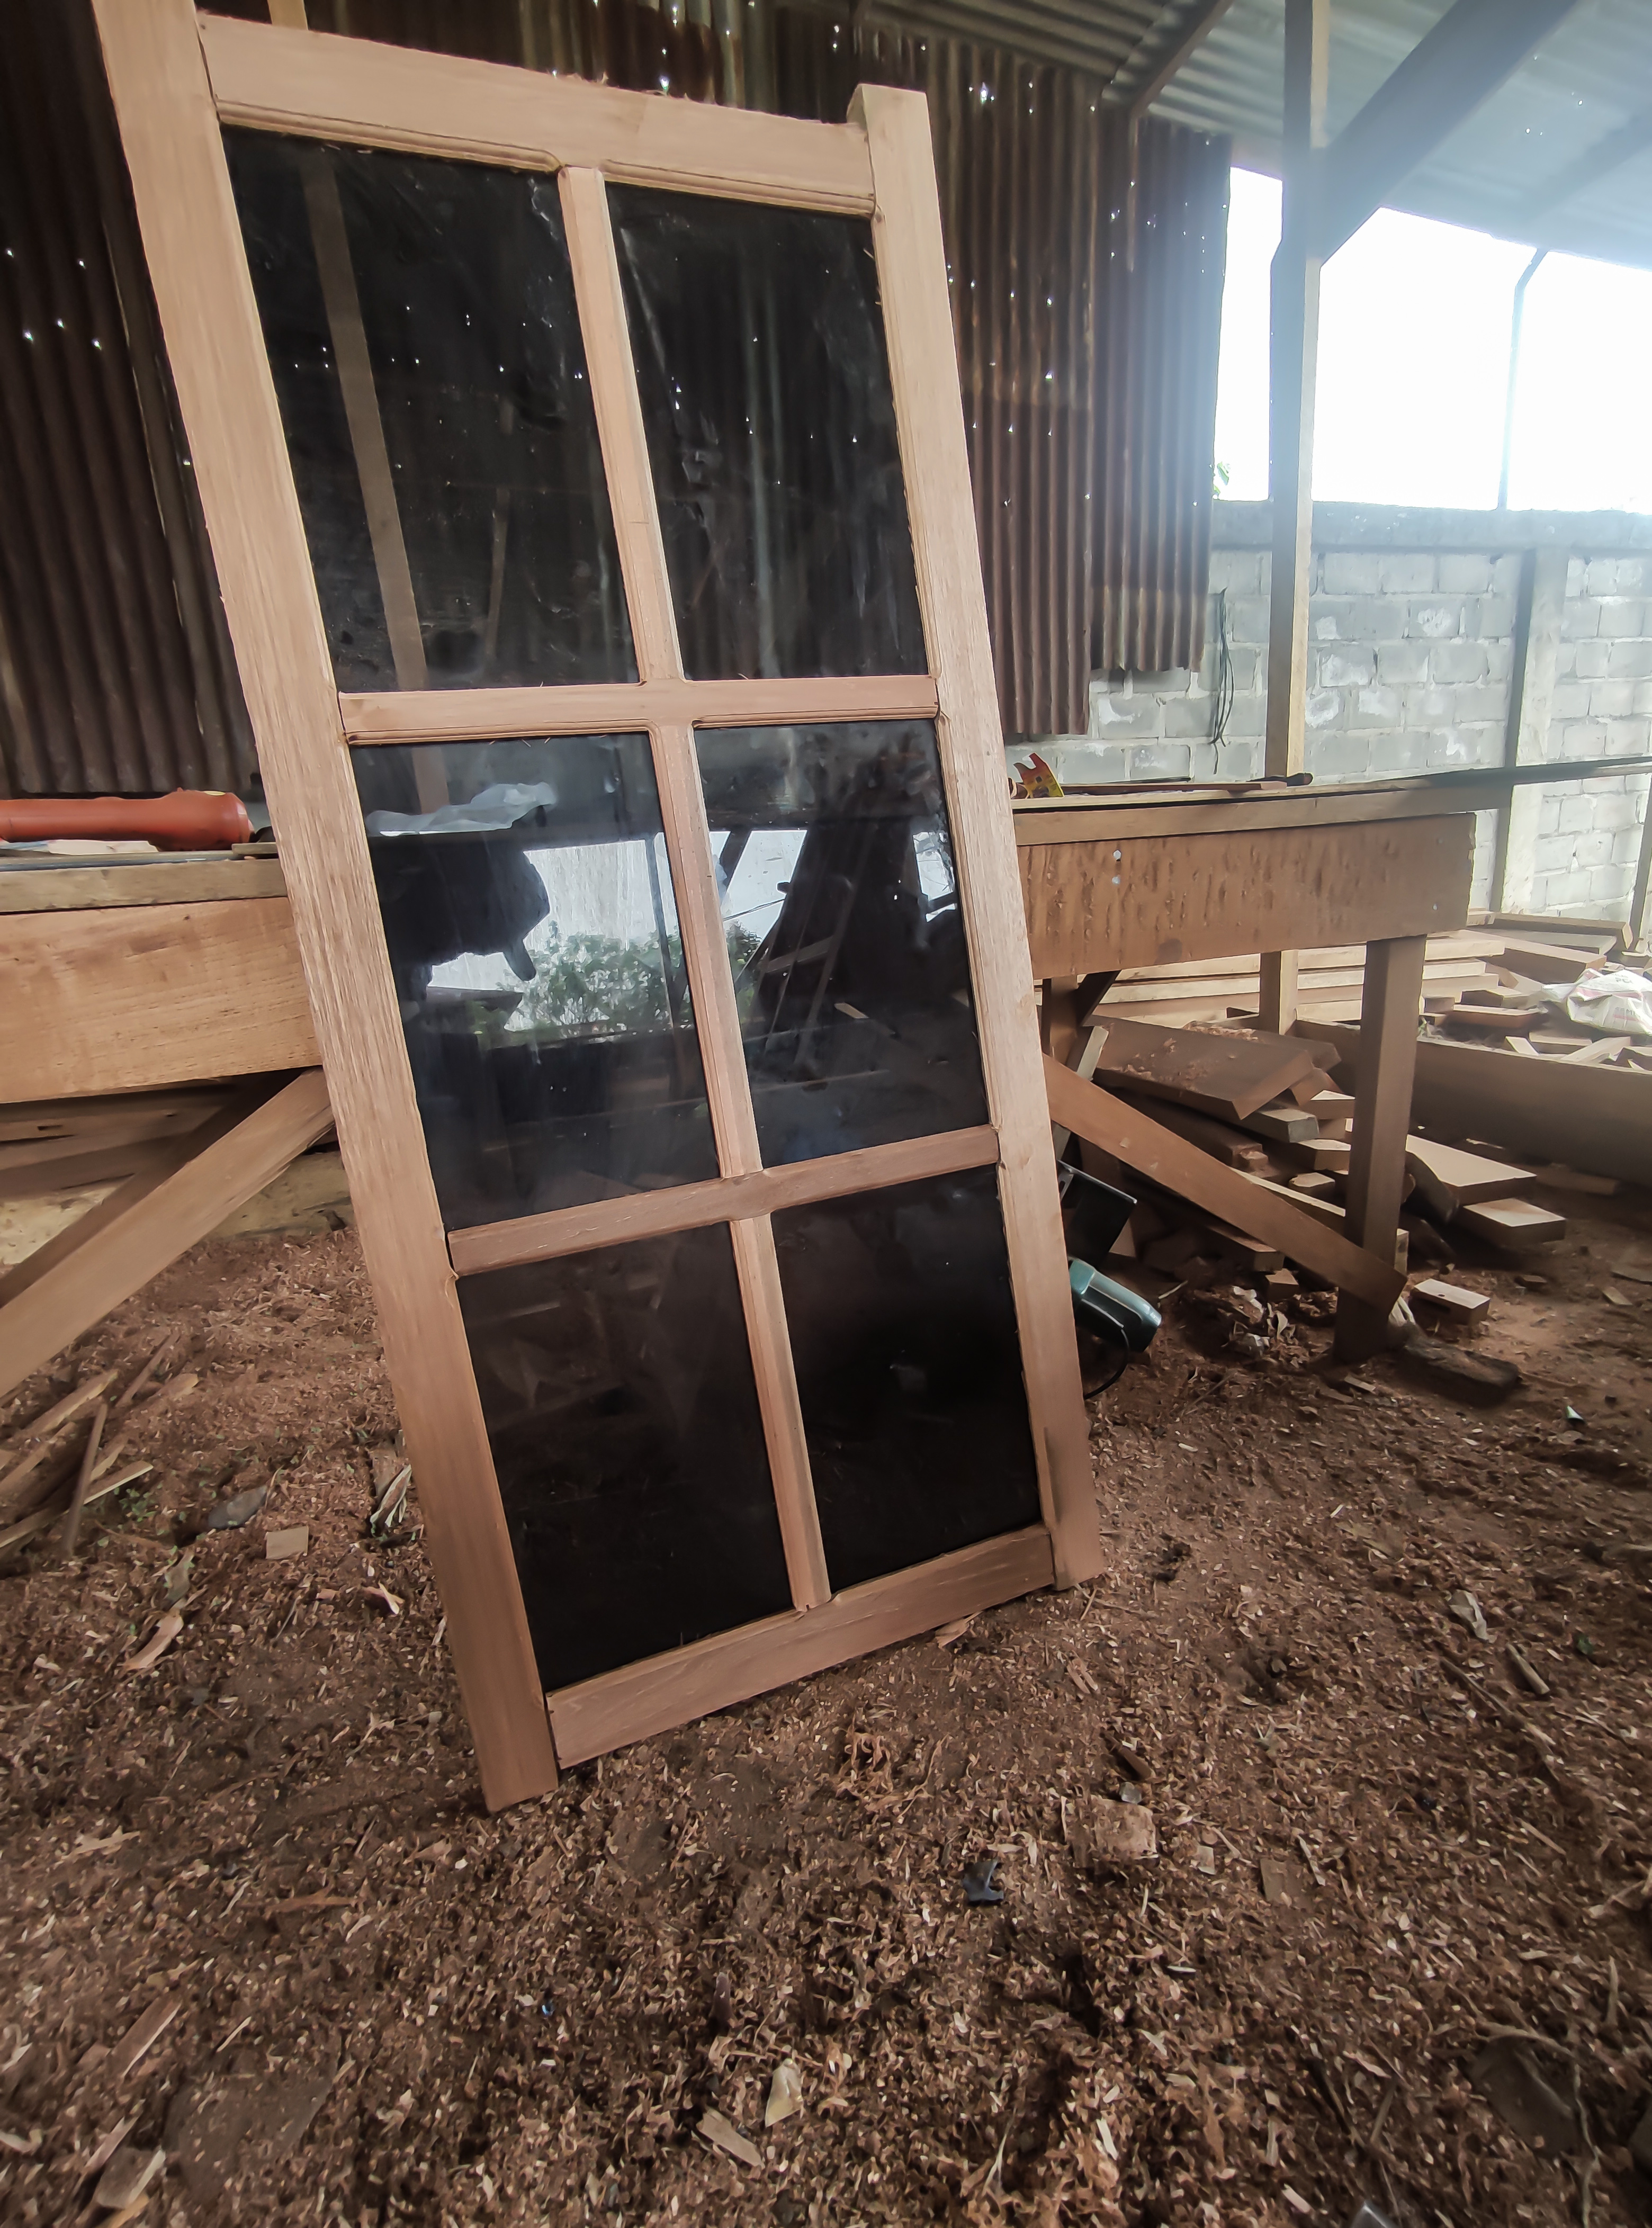
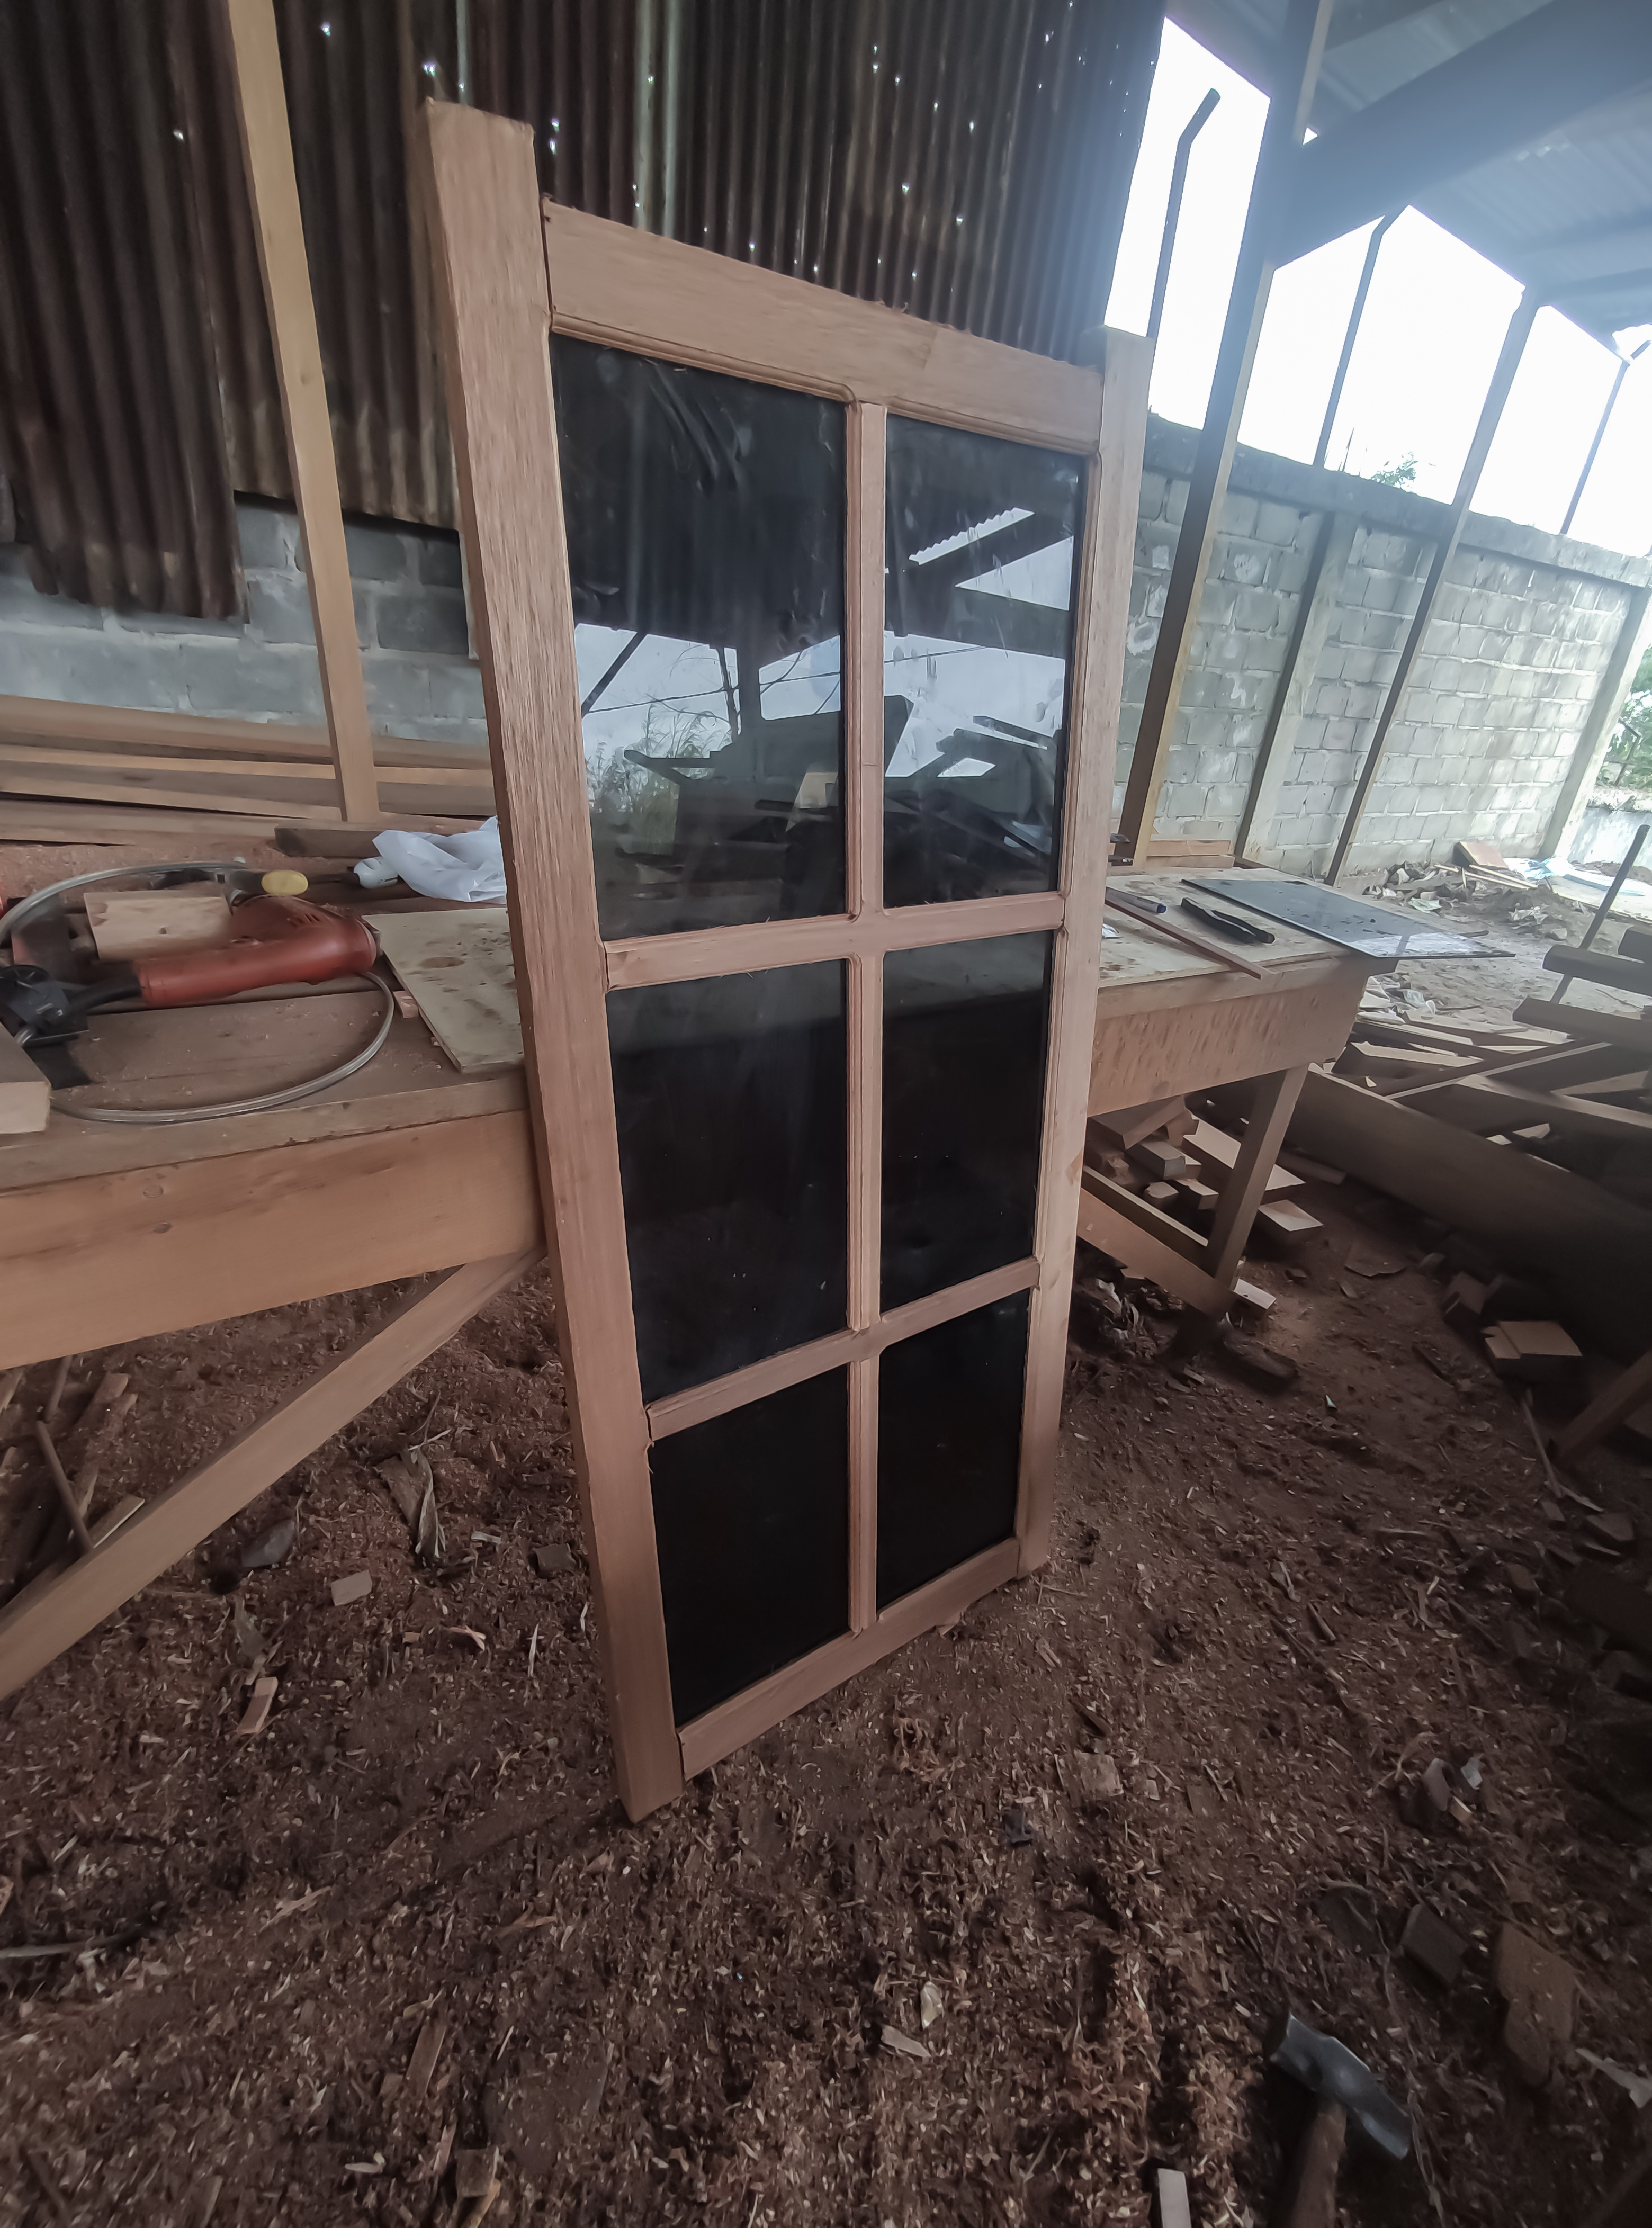
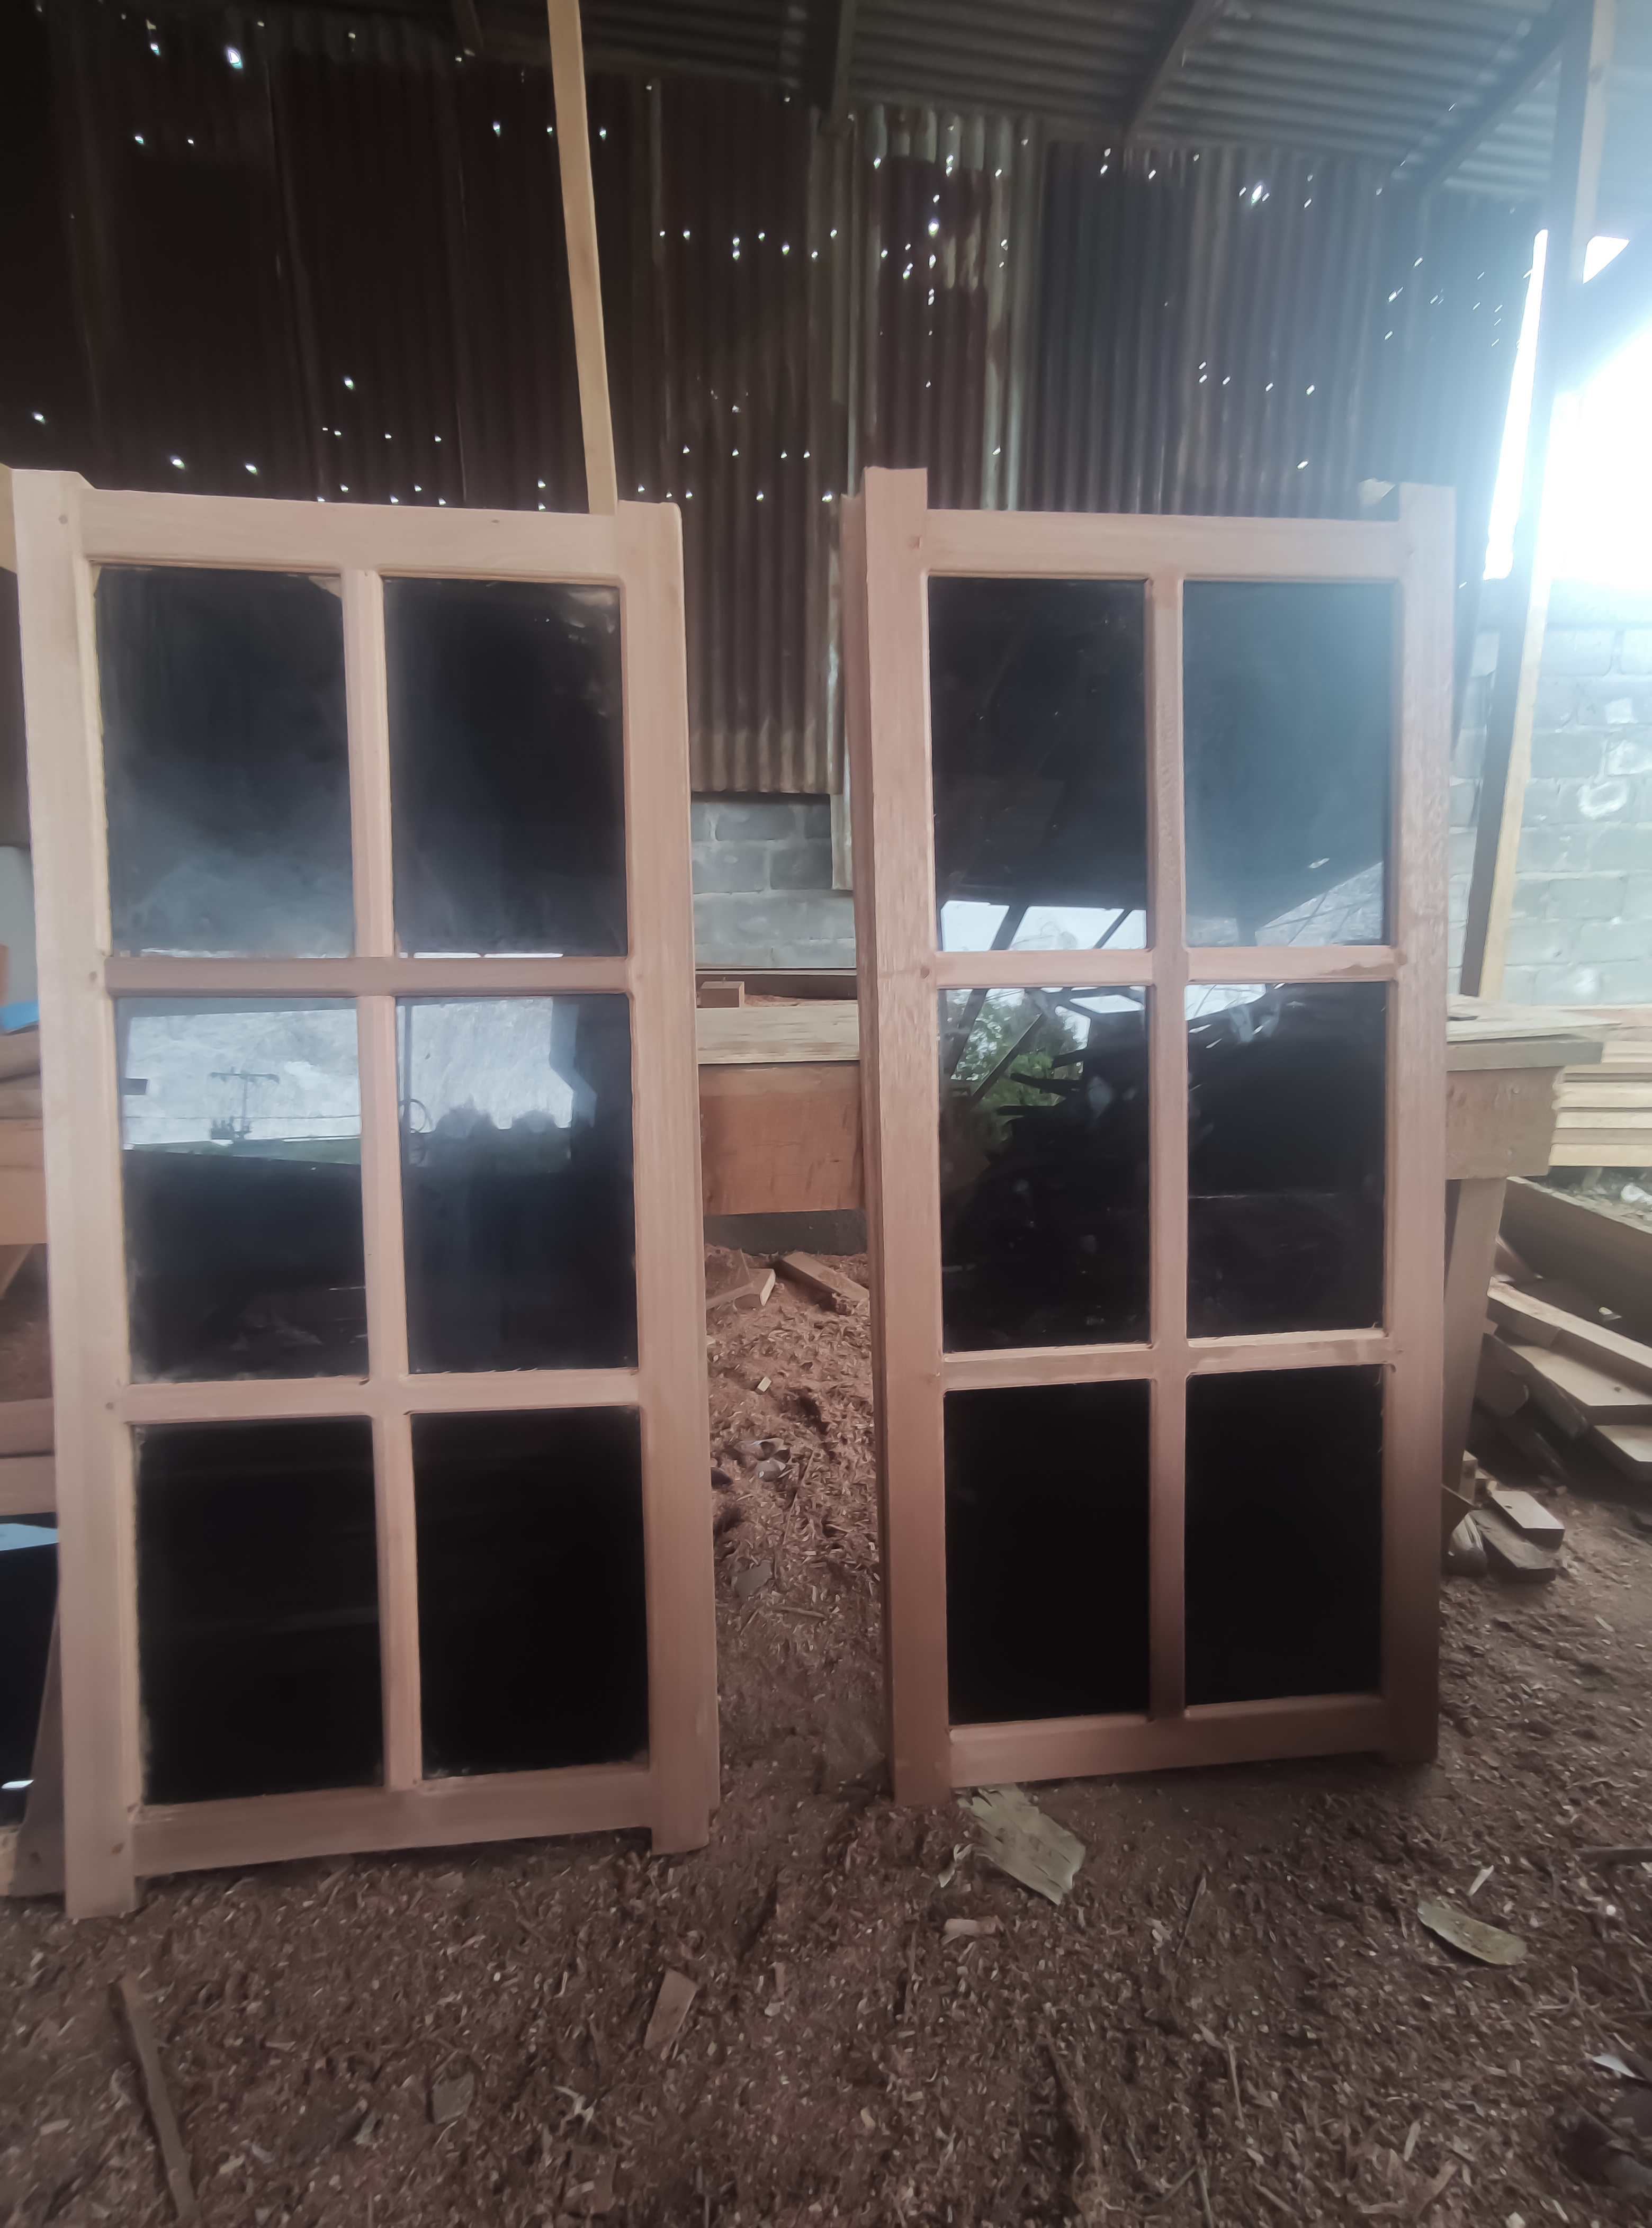
And after all stages of the process are completed, order 5 units of jalousie windows measuring 60cm wide x 120 cm high and 2 jalousie units 60cm wide x 30cm high followed by 1 unit of jalousie door measuring 90cm wide x 30 cm high made of meranti wood, 5mm transparent black glass with design drawing.. this is the result.


![]()

All of these pictures when i was working on that window and jalousie project ,all images were taken using a smartphone camera, if you want to enjoy my previous architectural design works, please visit the post link below.
1.Architectural design- simple cafe bar table
2.Architectural design - Wooden tray with natural wood color combination/utilization of wood waste
3.Architectural design - Flower vases / utilization of wood waste.
4.Architectural design-Simple architectural design of my baby crib basket.
5.Architectural design-Table simple the combination of natural wood colors and classic table tops
6.Architectural design- Shophouse frame jalousie
7.simple-minimalist-mini-wall-shelf-architectural-design-to-decorate-your-home-room
8.architectural-design-of-the-ventilation-jalousie - part 1
9.architectural-design-of-windows-house -part 1
10.interior-design-architecture-simple-makeup-mirror-frame.
11.architectural-design-simple-minimalist-wooden-window -part 2
12.architectural-design-window-designs-that-are-in-great-demand-by-local-residents
13.architectural-design-of-a-mini-table-and-a-simple-photo-frame
14.architecturaldesign-of-glass-windows-and-jalousies - house
15.Architecture + door design of local people's houses.
16.Furniture design architecture || Making multiplex doors for motorcycle workshops.
17.Architecture+furniture design || Simple comb design house door.
18.Architecture + furniture design || A pair of doors home belonging to local residents.
20.Architecture + Design || Double-faced house door part ll.
21.Architecture + design || Making window for villagers' houses.
22.Architecture+furniture design || Two-faced house door part III
23.Architecture+furniture design || Multiplex door
24.Architecture + Design || Work on minimalist house doors local residents.
25.Architecture + door design of regional community houses part II.
![]()
https://twitter.com/deltasteem/status/1574195483576508416
The rewards earned on this comment will go directly to the people( @deltasteem ) sharing the post on Twitter as long as they are registered with @poshtoken. Sign up at https://hiveposh.com.
Congratulations @deltasteem! You have completed the following achievement on the Hive blockchain and have been rewarded with new badge(s):
You can view your badges on your board and compare yourself to others in the Ranking
If you no longer want to receive notifications, reply to this comment with the word
STOPCheck out the last post from @hivebuzz:
Support the HiveBuzz project. Vote for our proposal!
Dear @deltasteem,
May I ask you to review and support the Dev Marketing Proposal (https://peakd.com/me/proposals/232) we presented on Conference Day 1 at HiveFest?
The campaign aims to onboard new application developers to grow our ecosystem. If you missed the presentation, you can watch it on YouTube.
You cast your vote for the proposal on Peakd, Ecency, Hive.blog or using HiveSigner.
Thank you!
thanks for the notification and i will gladly do it and my greetings @deltasteem I hope the team that works is always healthy there .
Thank you for your support @deltasteem, really appreciate it! 👍
They are beautiful windows, very well constructed. And I see you need a lot of tools to make them.