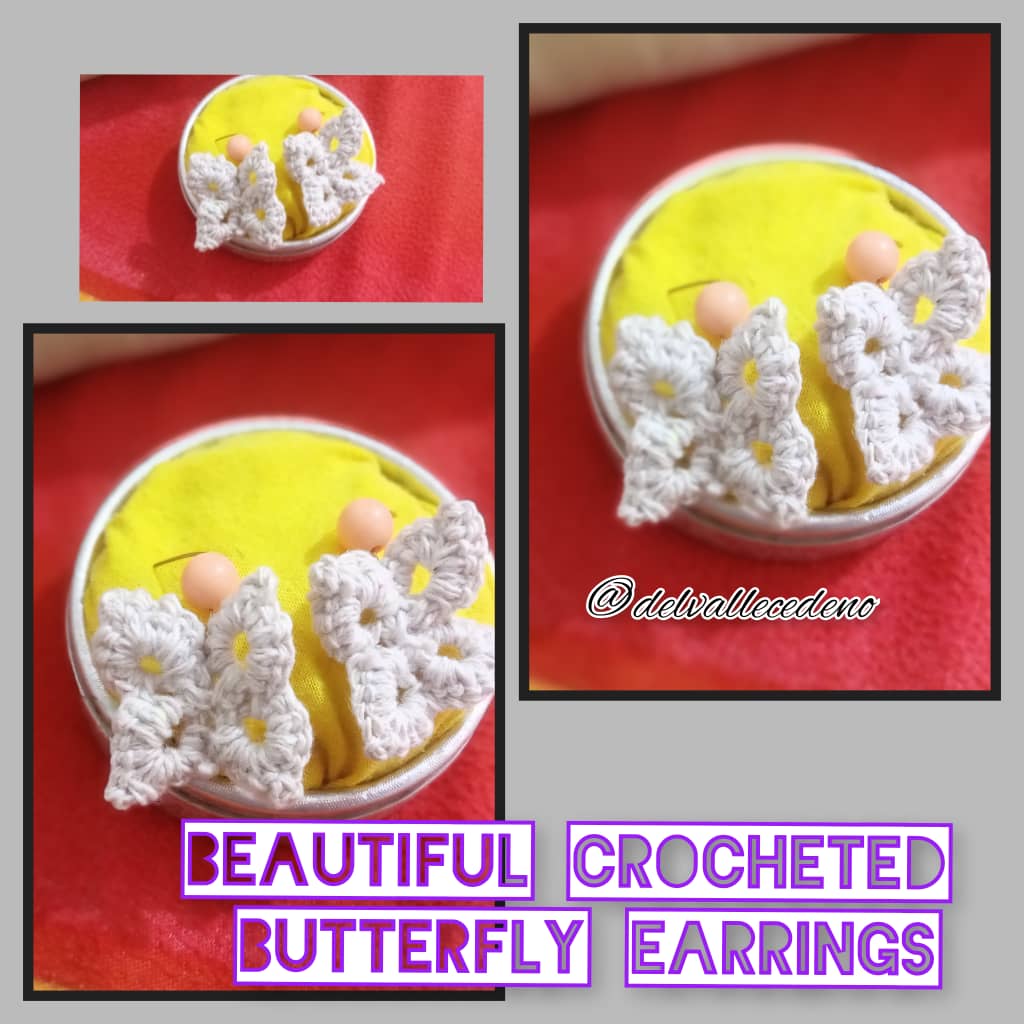
Cute crochet earrings in the shape of a butterfly. || [ESP/ENG]
Hello friends once again welcome to my blog!
Muy buenas noches amigos es un gusto hacer vida en está Magnífica comunidad de joyas un cálido abrazo para todos mis compañeros que hacen vida aquí en este mágico rincón. Saludos y bendiciones deseo que su día haya transcurrido espléndido rodeado de mucha paz y tranquilidad. Los accesorios tejidos para nosotras las damas no pasan de moda., Por eso hoy les quiero compartir unos lindos aretes en forma de Mariposa a crochet, me encantan los accesorios de mariposas ya sean zarcillos, pulsera y collares. Por eso les comparto este tutorial. Son muy fáciles de elaborar y no llevan muy trabajo su elaboración sólo necesitamos Aguja e hilo. A continuación les indicamos los siguientes pasos a seguir:
Very good evening friends, it is a pleasure to live in this magnificent community of jewelry, a warm hug to all my colleagues who live here in this magical corner. Greetings and blessings, I hope that your day has passed splendidly surrounded by much peace and tranquility. Knitted accessories for us ladies never go out of style. That's why today I want to share with you some cute crochet butterfly earrings. I love butterfly accessories, whether they are earrings, bracelets, or necklaces. That's why I share this tutorial with you. They are very easy to make and do not require much work to make, we only need a needle and thread. Below we indicate the following steps to follow:

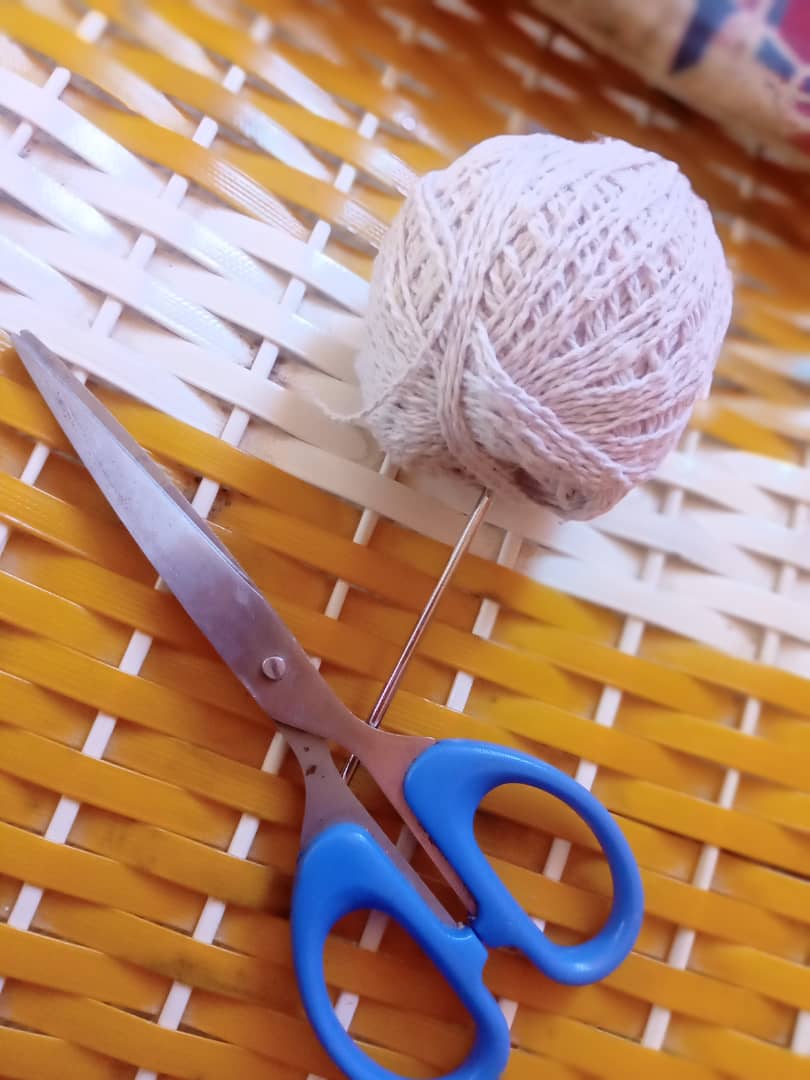
Materials.
💚Hilo pabilo.
💚Aguja de tejer.
💚Tijera.
💚Mostacilla.
💚 Anzuelo.
Materiales:
💚Wick thread.
💚Knitting needle.
💚Scissors.
💚mustacilla.
💚Fish hook
Paso a Paso
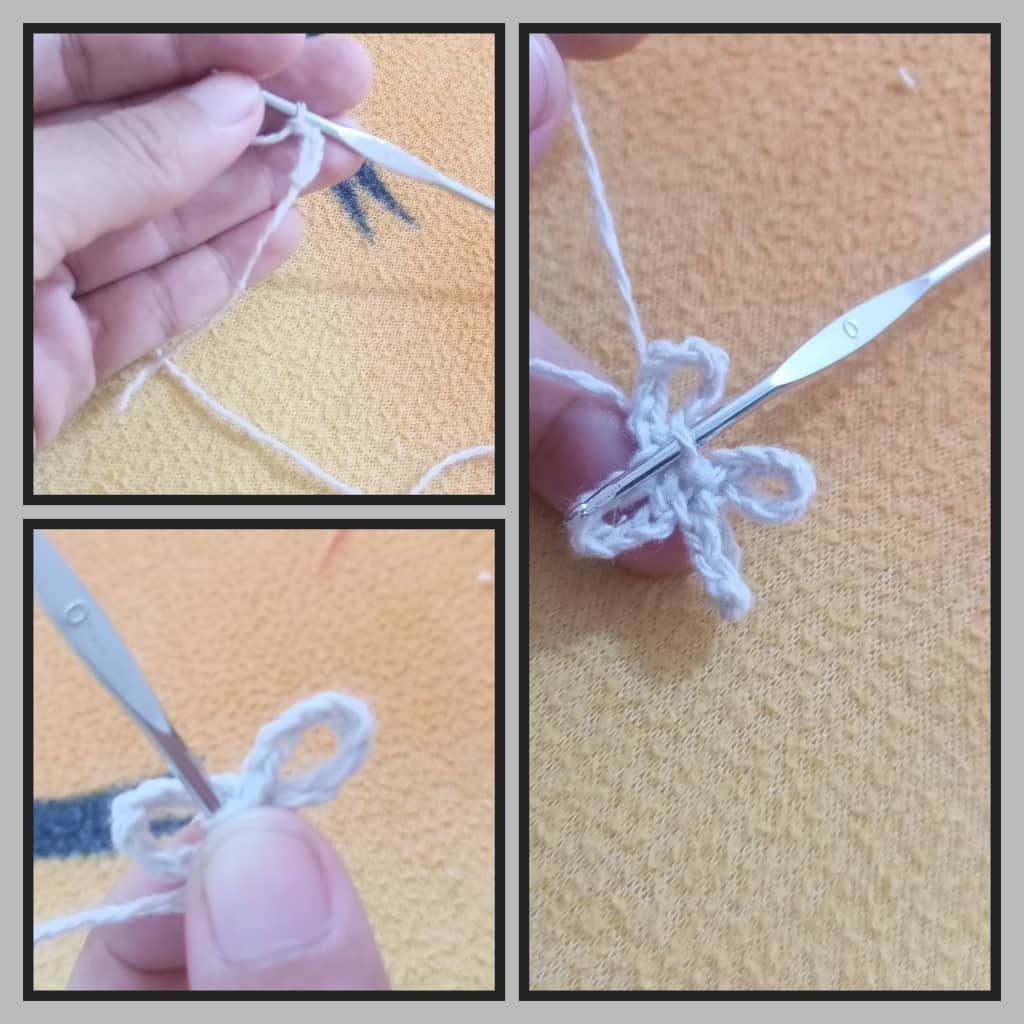
1er paso: Para dar inicio a este proyecto vamos a tomar el hilo y hacer un pequeño nudo en la punta hacemos una cadena de 8 puntos y regresar al primer punto para hacer un punto deslizado avanzar con otra cadena de 8 puntos y regresar al primer punto hacer un nudo deslizado y avanzar repetir el procedimiento 2 veces más para un total de cuatros alas, unir la pieza con un punto deslizado para forma el cuerpo de la mariposa cómo lo observan en las imágenes tomadas.
1st step: To start this project we are going to take the thread and make a small knot at the end, make a chain of 8 points and return to the first point to make a slipped stitch, advance with another chain of 8 points and return to the first point. make a slipped knot and move forward, repeat the procedure 2 more times for a total of four wings, join the piece with a slipped stitch to form the body of the butterfly as seen in the images taken.
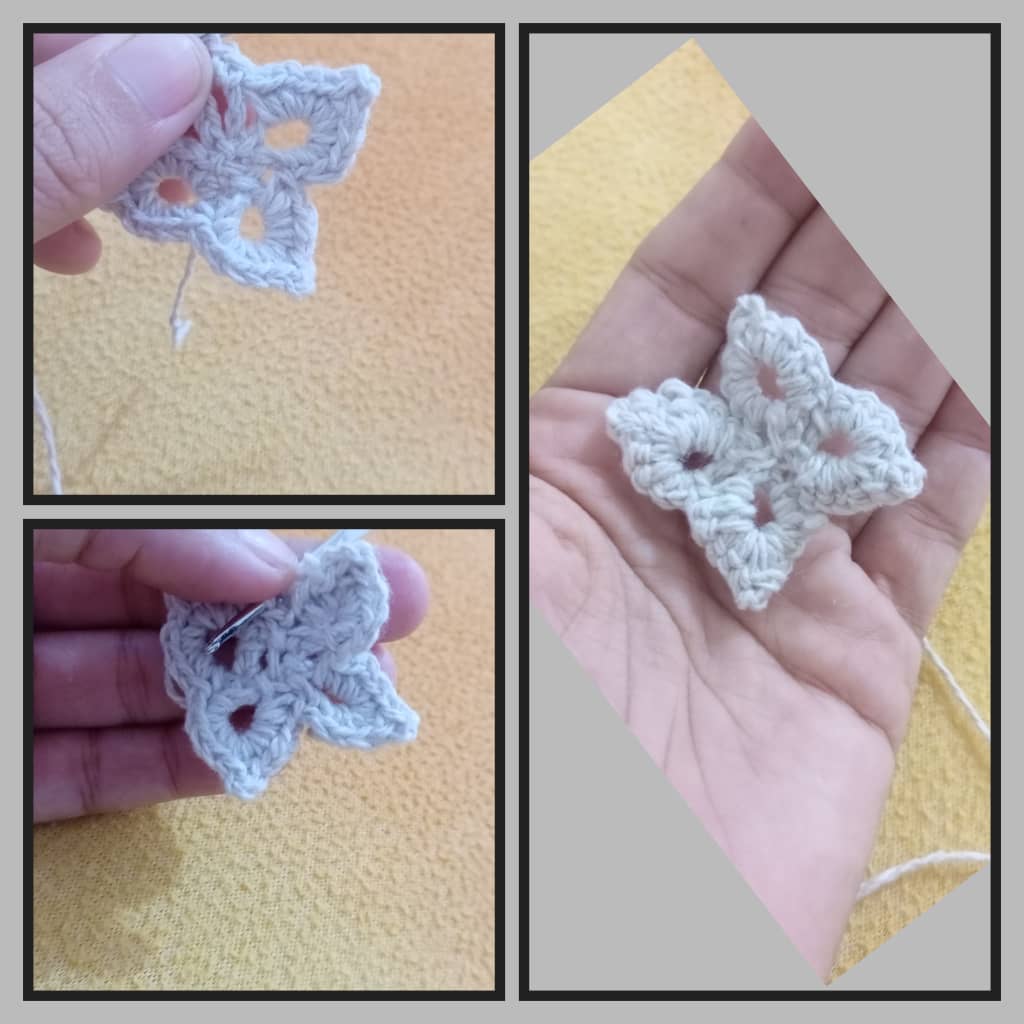
2do paso: Luego vamos a continuar rellenado las alas de nuestra mariposa partiendo con 5 puntos bajos avanzar con una cadena de 2 puntos y regresar en el mismo punto, hacemos 5 puntos más para un total de 10 puntos bajos mis amigos creativos allí la mariposa va tomando forma.
2nd step: Then we are going to continue filling the wings of our butterfly, starting with 5 single crochets, moving forward with a chain of 2 stitches and returning to the same point, we make 5 more stitches for a total of 10 single crochets, my creative friends, there the butterfly goes. taking shape.

3er paso: Seguidamente avanzar repitiendo el mismo procedimiento del paso anterior en las aletas inferiores mis amigos creativos y asi nuestra mariposa tomará más forma donde sus alas estarán rellenas por completo cómo lo notan.
3rd step: Next, move forward by repeating the same procedure as the previous step on the lower fins, my creative friends, and thus our butterfly will take on more shape where its wings will be completely filled, as you can see.
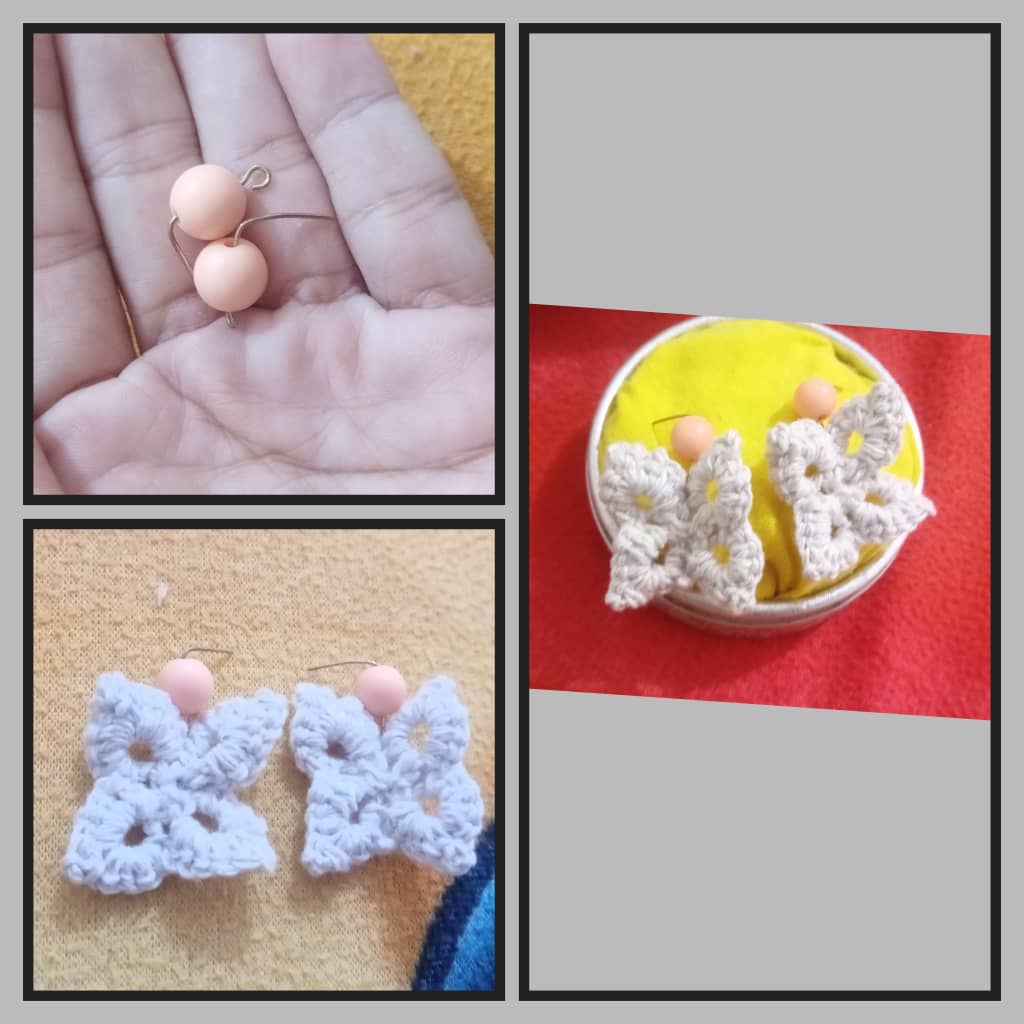
4to paso: A continuación vamos a tomar los Anzuelos colocar una mostacilla de color naranja y en la parte superior de la mariposa tejida colgar y ejercer un poco de presión para así lucir este lindo accesorio.
4th step: Next we are going to take the Hooks, place an orange bead and hang it on the top of the woven butterfly and exert a little pressure to show off this cute accessory.
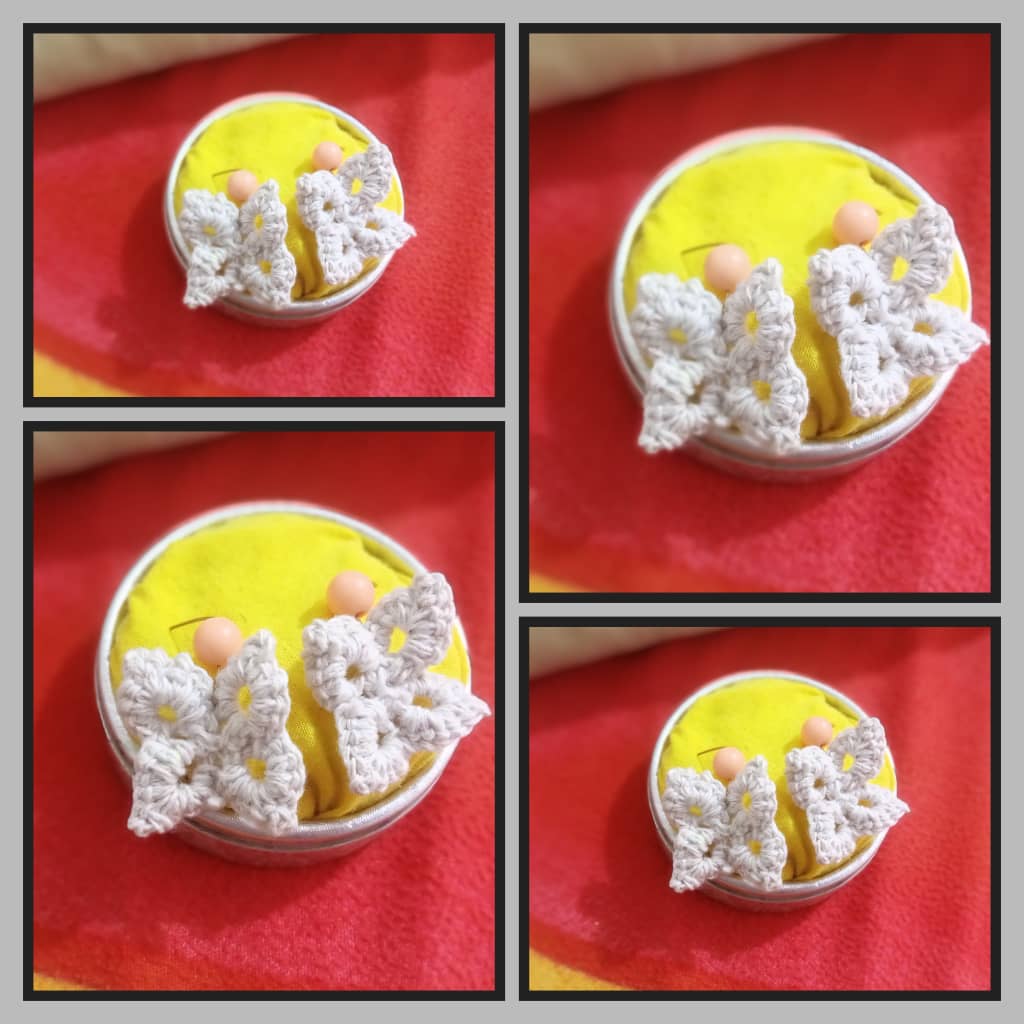
Espero les haya gustado este lindo accesorio a crochet en forma de mariposa en pocos pasos un sencillo trabajo que podemos lucir nosotras las damas que nos gustan las mariposas. Lo mejor de todo que lo puedes hacer del color de su preferencia y decorarla su gusto. Un abrazo fuerte!
I hope you liked this cute butterfly-shaped crochet accessory in just a few steps, a simple job that we ladies who like butterflies can show off. Best of all, you can make it in the color of your choice and decorate it to your liking. A big hug!
Thank you very much for reading me many blessings to all.
Muchas gracias por leerme bendiciones para todos.
Separador de Texto Source
Las fotos son editadas en el collage GridArt
Las fotos son tomadas de mi teléfono Alcatel 1s

This is lovely
Thanks You the support provided!
You are welcome
aha the earings look so beautiful you are amazing, keep up the good work.
Thanks You the support provided!