I'll teach you how to make some pretty rose-shaped earrings to crochet with dyed thread || [ESP/ENG]
Hello friends once again welcome to my blog!
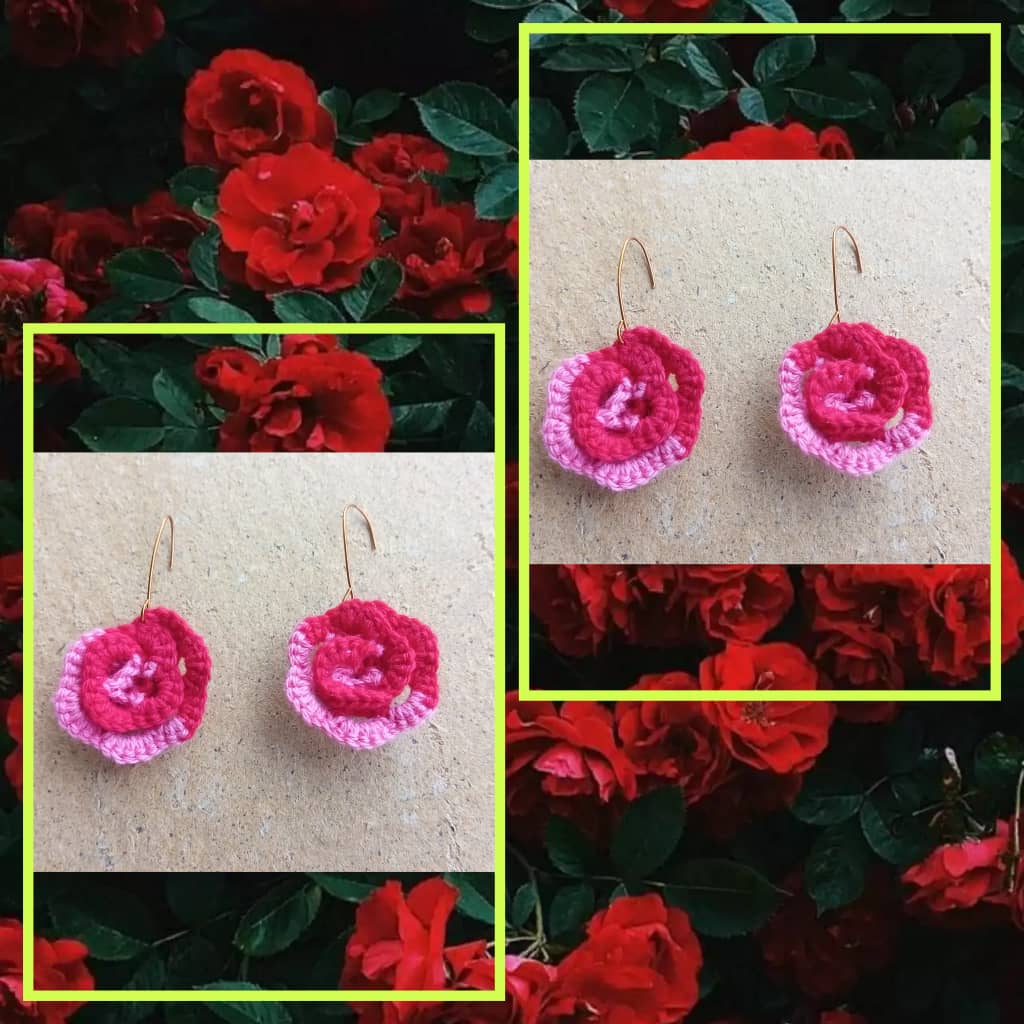
Buenas tarde colmena, feliz y bendecido sábado para todos mis amigos que hacen de este maravilloso espacio creativo que nos da brinda la comunidad @hiveDiy. Tejer es una de las cosas que me gusta y disfruto hacer en mi tiempo libre, y cuando algo me apasiona lo hago con mucho amor y dedicación ❤️ Hoy les traigo unos lindos aretes en forma de rosa que son muy fáciles de hacer. crochet en colores rosados y rojos matizados, este accesorio es un regalo para mi madre muy fácil su elaboración. Espero le guste mi paso a paso y te ayude mi tutorial. A continuación pasos a seguir:
Good afternoon hive, happy and blessed Saturday to all my friends who make this wonderful creative space that the @hiveDiy community gives us. Knitting is one of the things that I like and enjoy doing in my free time, and when I am passionate about something I do it with a lot of love and dedication ❤️ Today I bring you some cute rose-shaped earrings that are very easy to make. crochet in nuanced pink and red colors, this accessory is a gift for my mother, very easy to make. I hope you like my step by step and my tutorial helps you. Below steps to follow:

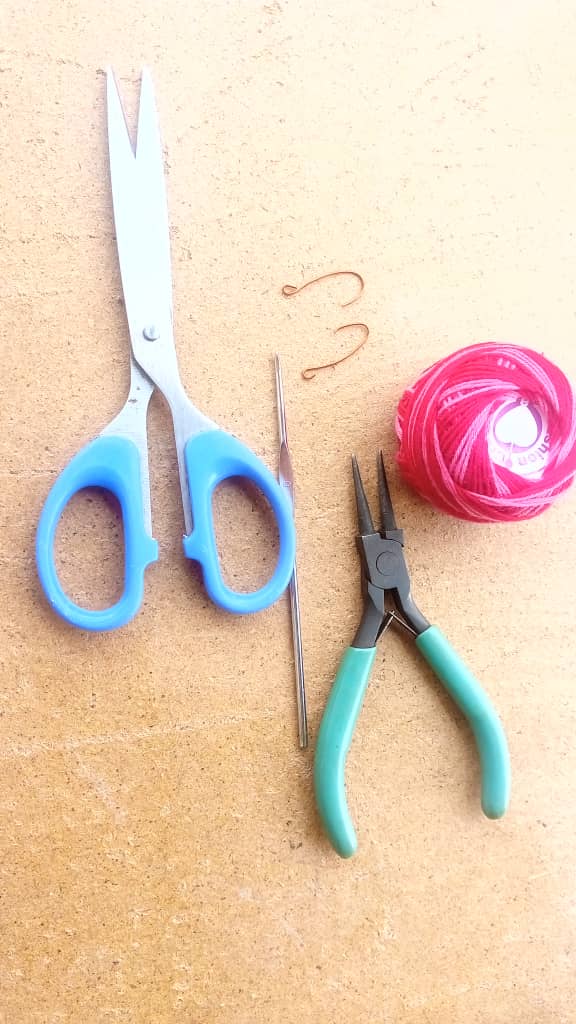
Materials.
🌹Hilo de tejer.
🌹Aguja.
🌹Tijera.
🌹Anzuelos.
Materiales:
🌹Knitting thread.
🌹Needle.
🌹Scissors.
🌹 Hooks.
Paso a Paso
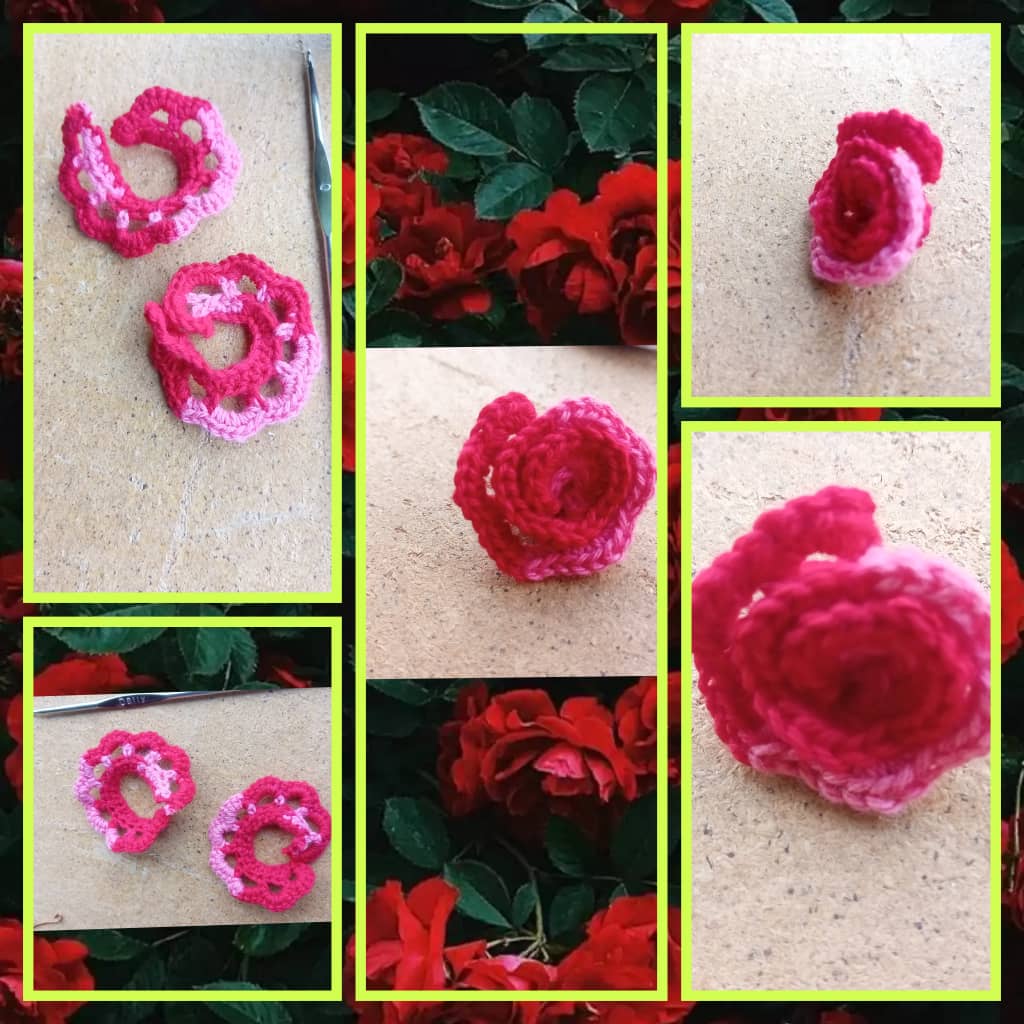
1er paso: Para dar inicio a este paso a paso vamos a tomar el hilo de tejer hacer un nudo en la punta y tejer una cadena de 20 puntos.
1st step: To start this step by step we are going to take the knitting thread, tie a knot at the end and knit a chain of 20 stitches.

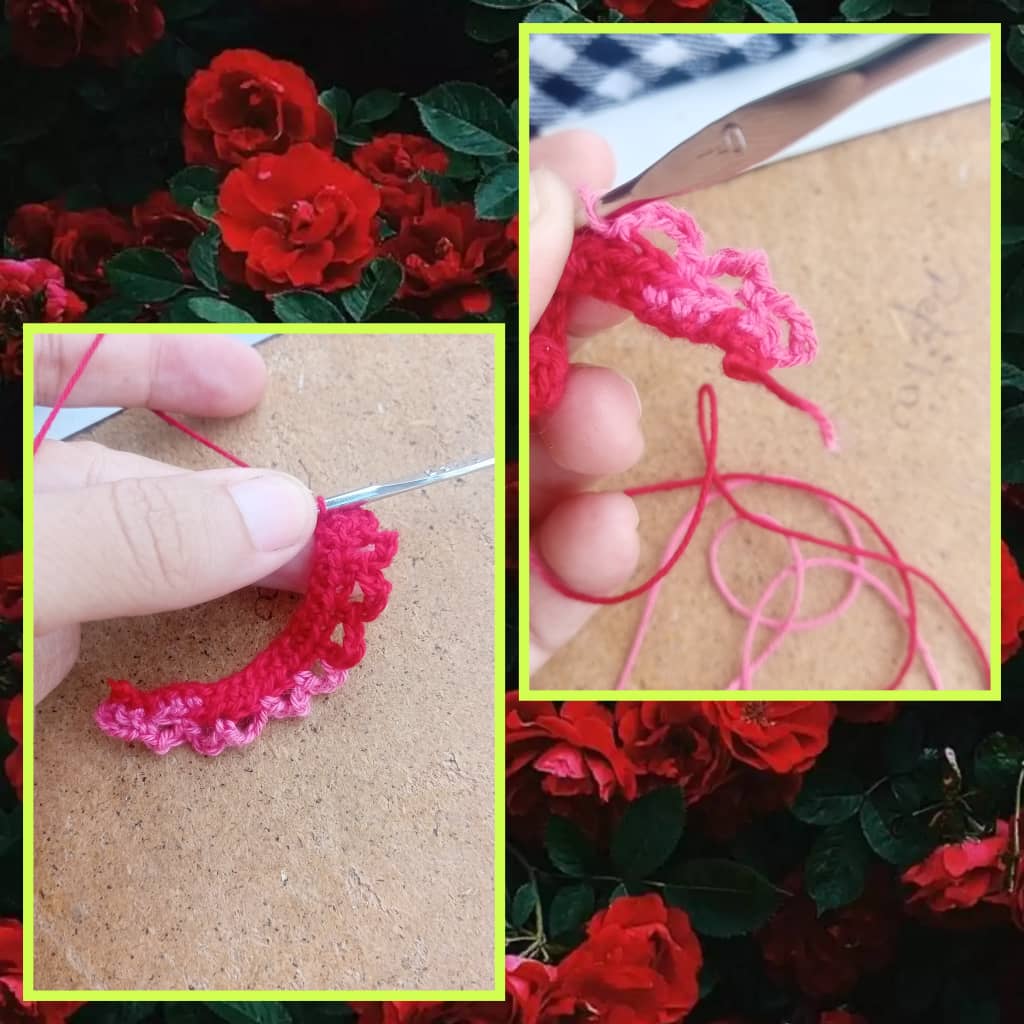
2do paso: Seguidamente vamos a avanzar en el siguiente escalón con un aumento de puntos bajos cargados en la punta y finalizando con un punto deslizado hasta completar el final para lo que será la base de nuestra rosita.
2nd step: Next we are going to advance on the next step with an increase in single crochets loaded at the tip and ending with a slipped stitch until completing the end for what will be the base of our little rose.

3er paso: Luego vamos a elevar otro aumento con una cadena de 6 puntos y dejando un punto de por medio para cerrar con un punto deslizado para un total de 10 cómo se aprecia en las imágenes tomadas.
3rd step: Then we are going to raise another increase with a chain of 6 points and leaving one point in between to close with a slipped point for a total of 10 as can be seen in the images taken.
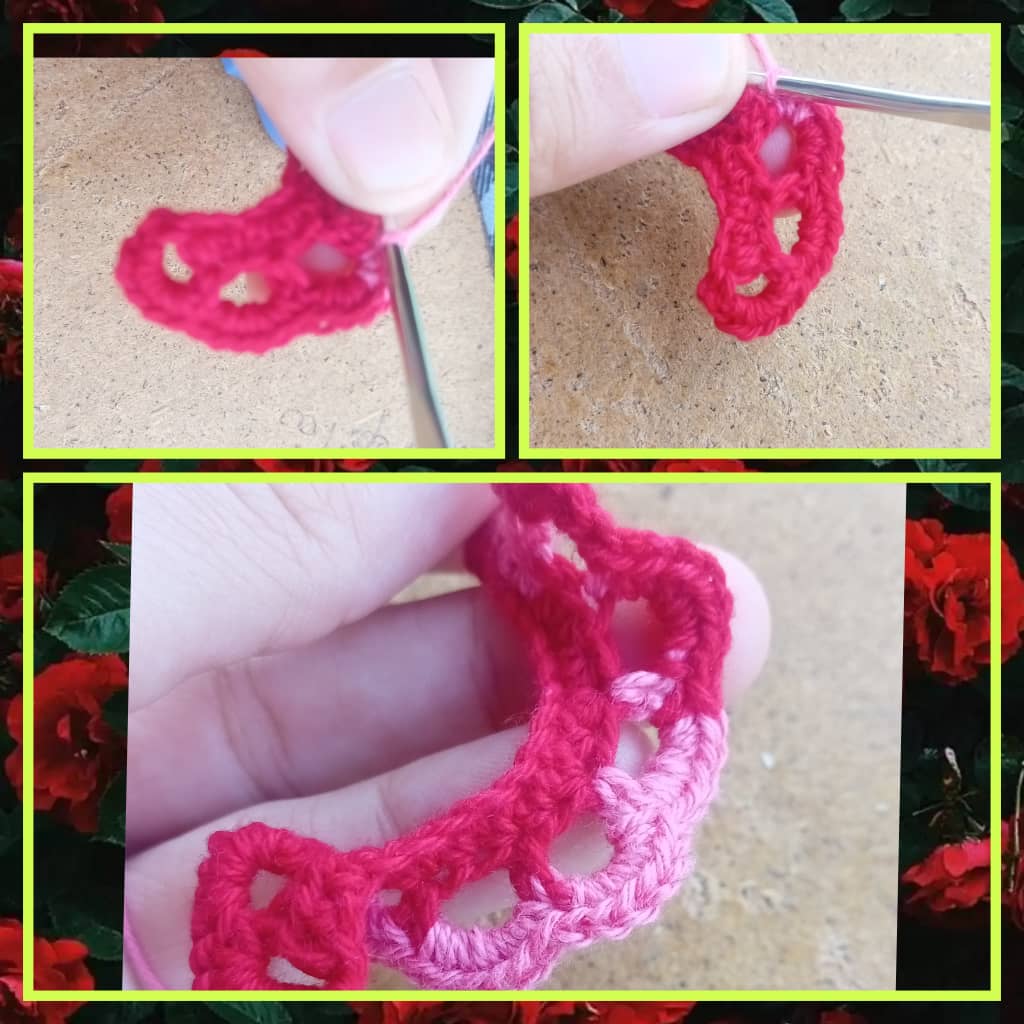
4to paso: Seguidamente rellenamos los bordes de nuestra rosita con unos 6 bajos en cada borde que serán los pétalos de nuestra rosita.
4th step: Next we fill the edges of our rose with about 6 edges on each edge that will be the petals of our rose.
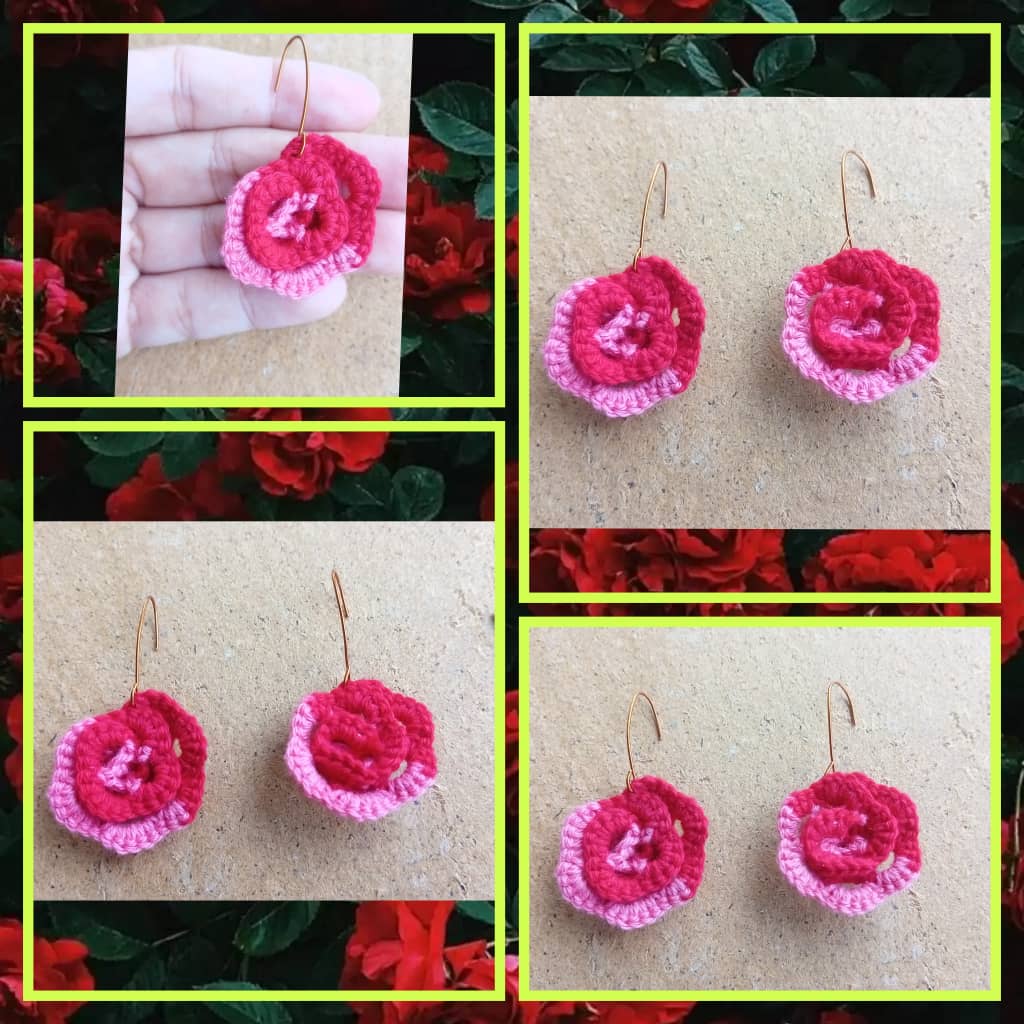
5to paso: Procedemos a enrollar para que vaya tomando forma, tomar aguja con hilo y coser, tomar en la parte superior con el anzuelo para colgar y listo para Lucir está linda creación
5th step: We proceed to roll it so that it takes shape, take a needle and thread and sew, take the hook at the top to hang and ready to show off this beautiful creation.
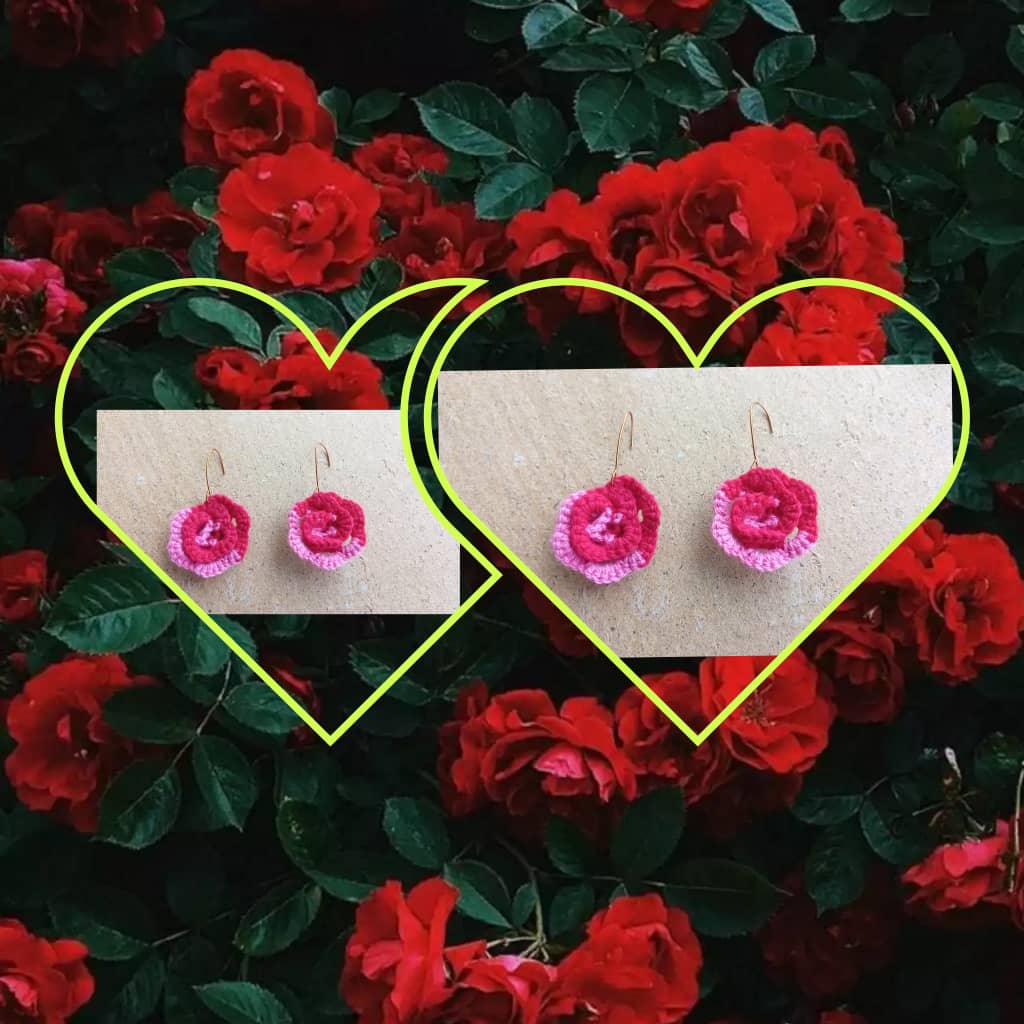
Espero les haya gustado este accesorio en forma de rosita a crochet que les comparto el Día de hoy. Lo mejor de todo que puedes hacerlo del color que más te guste y del tamaño deseado. Un cálido abrazo para todos. Bendiciones ☺️
I hope you liked this accessory in the shape of a crochet rose that I share with you today. Best of all, you can make it in the color you like the most and the desired size. A warm hug for everyone. Blessings ☺️
Thank you very much for reading me many blessings to all.
Muchas gracias por leerme bendiciones para todos.
Separador de Texto Source
Las fotos son editadas en el collage GridArt
Las fotos son tomadas de mi teléfono Alcatel 1s

¡Felicidades! Esta publicación obtuvo upvote y fue compartido por @la-colmena, un proyecto de Curación Manual para la comunidad hispana de Hive que cuenta con el respaldo de @curie.
Si te gusta el trabajo que hacemos, te invitamos a darle tu voto a este comentario y a votar como testigo por La Colmena.
Si quieres saber más sobre nuestro proyecto, te invitamos a acompañarnos en nuestro servidor de Discord.
Gracias por la visita y el apoyo brindado.
Saludos. Esta es una manera interesante de hacer zarcillos, sin embargo, te invito a repasar las reglas de la comunindad.
!discovery 35
Gracias por la visita y el apoyo brindado.!! Lo tomaré en cuenta gracias por la acotación @gaboamc2393 para una nueva publicación..
Saludos y bendiciones..
This post was shared and voted inside the discord by the curators team of discovery-it
Join our Community and follow our Curation Trail
Discovery-it is also a Witness, vote for us here
Delegate to us for passive income. Check our 80% fee-back Program
Thanks You the support provided
Se ven tan lindo en esos colores. Saludos.
Muchas gracias amiga 😘
Muchas gracias amiga por la visita y tu grato comentario ❤️
They're gorgeous!
Thanks You the support provided!
The final result is very lovely! :) thanks for sharing
Thanks You the support provided
https://twitter.com/hivediy47901/status/1779773810968809926