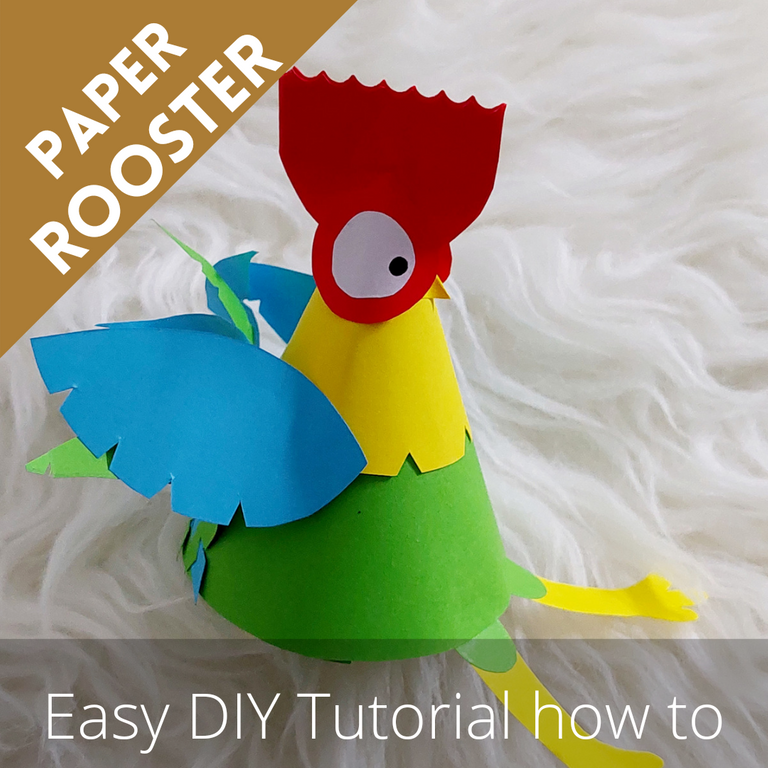
Paper Rooster – Easy DIY Tutorial how to
Hello, friends especially DIY ers!
Last night I made a totally cute rooster only from origami. It was easy and fun to make. You could copy how I made it or even teach your children to make it. Now let’s follow me..
Project Time: approximately 2 hours
Difficulty: Easy
Materials & Things needed:
- Double side origami paper in red, green, blue and yellow
- White paper
- Black marker
- Pencil
- Ruler
- Scissors, I used three kind of it the paper scissors, smaller one called craft scissors and the wavy one
- Compass
- Glue stick
How to make it:
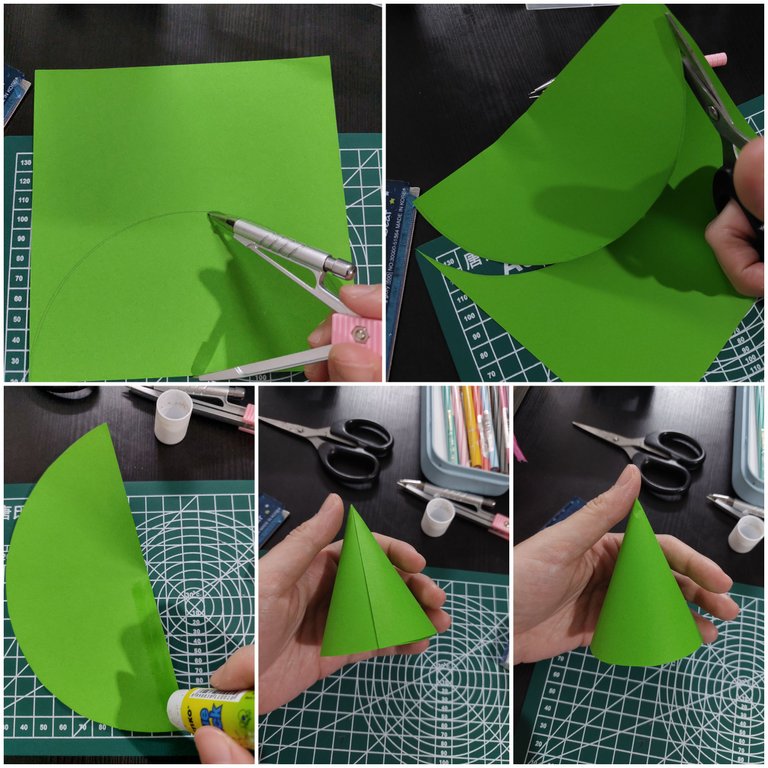
1ST
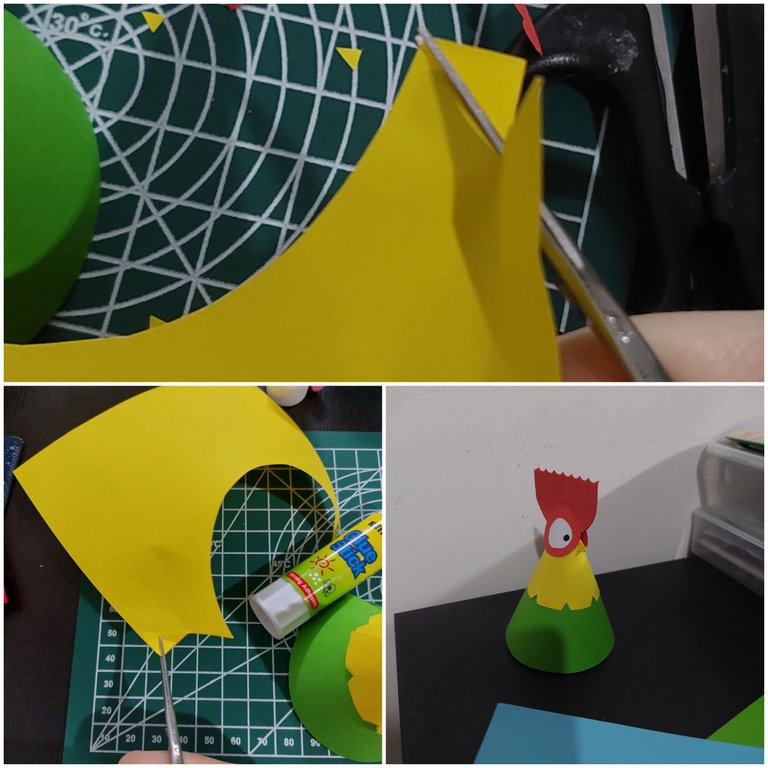
I started by making a half circle with the 16 cm diameter on my green paper with the compass. After that I cut it off then I made a cone by pasting one of its’ side to another like below.
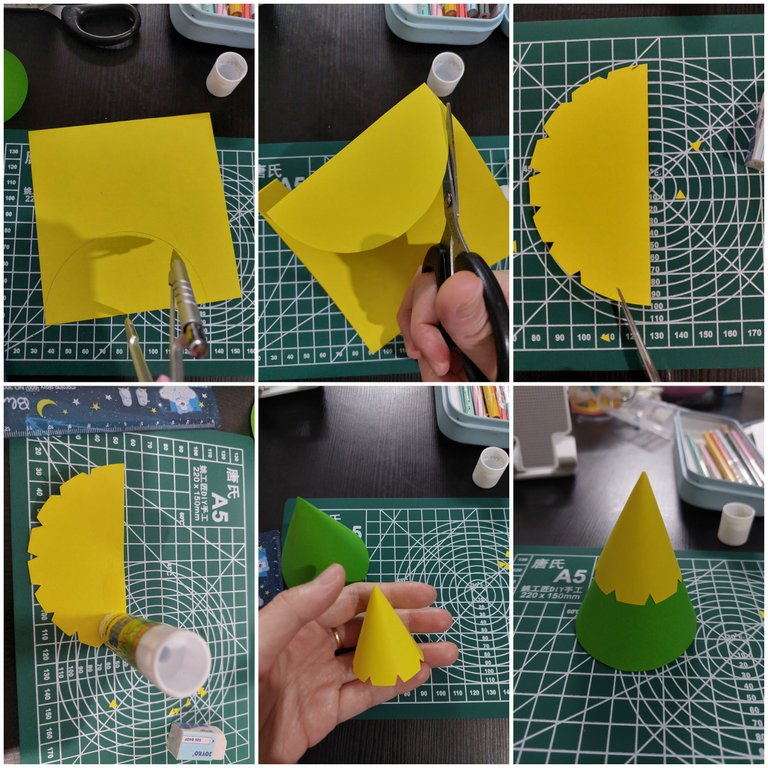
2ND
Next, I made the other smaller half circle with 10 cm diameter then I trimmed small triangles from it like below. After that I made a smaller cone with it with the glue like before. Then I pasted the two cones together, the yellow would be on the top of the green one.
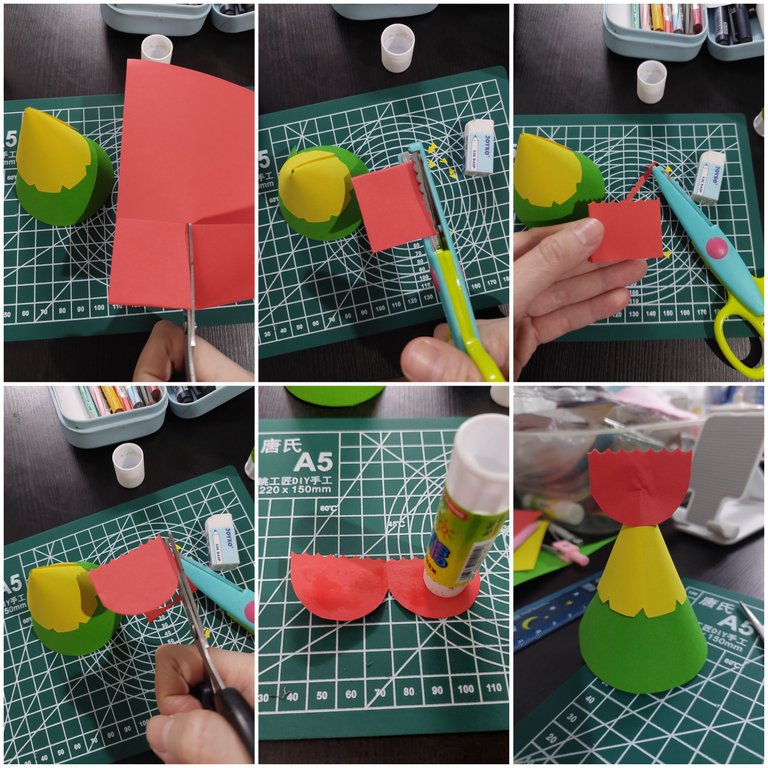
3RD
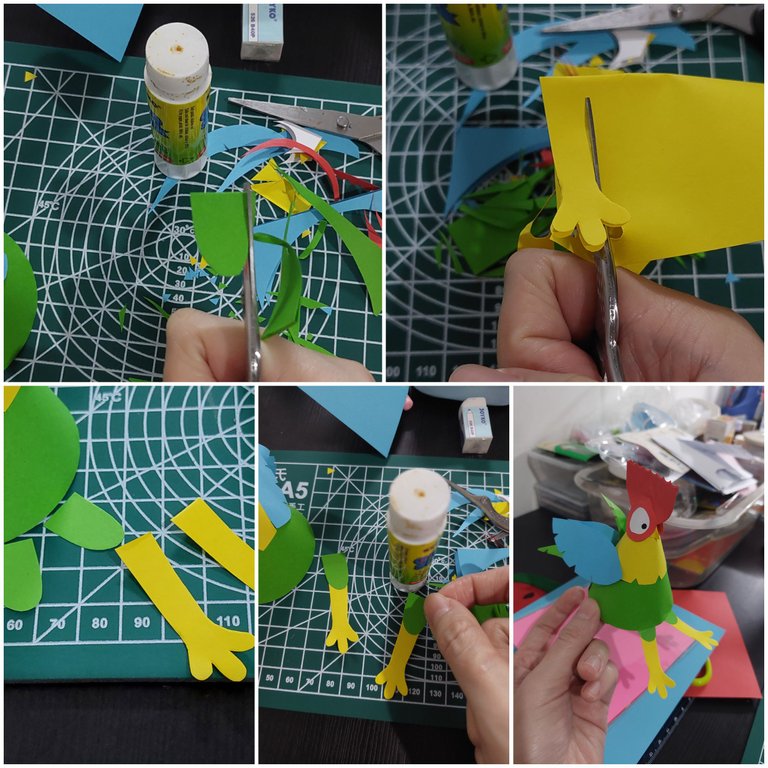
Then, I prepared the red paper. I folded a rectangle then cut it with the wavy on the top, I also trimmed the other side to get a circular corner of the paper, I then put the glue on it and placed it at the top of the yellow cone.
4TH
After that, I made the 4 circles, 2 with red and 2 smaller with white paper. After that I used the marker to make the eyes on the white paper. Then I pasted them on the red circles.
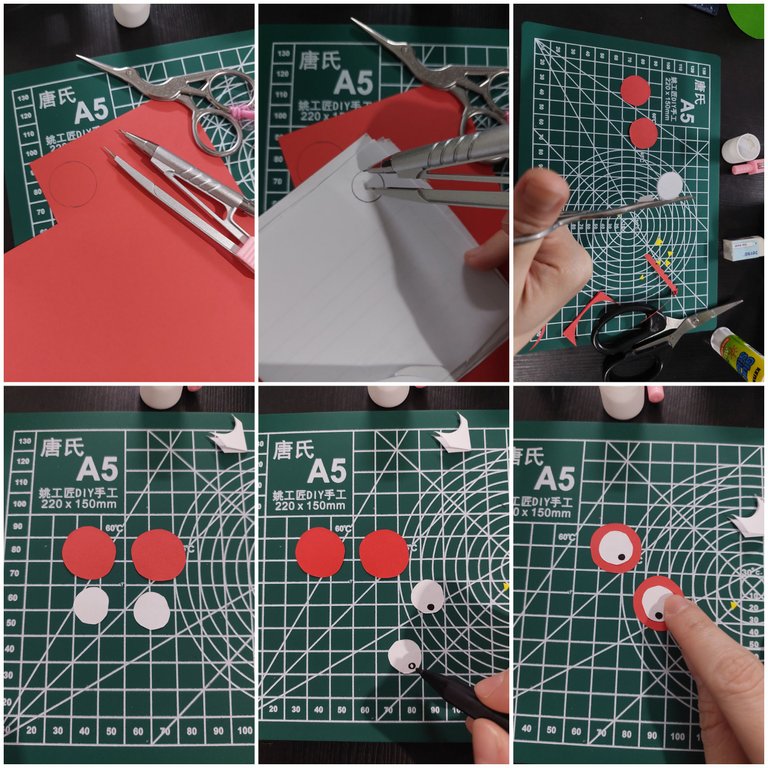
5TH
Then, I made small beak with yellow paper. After that I pasted the two eyes and beak on the cone, look the rooster shape now could be seen.
6TH
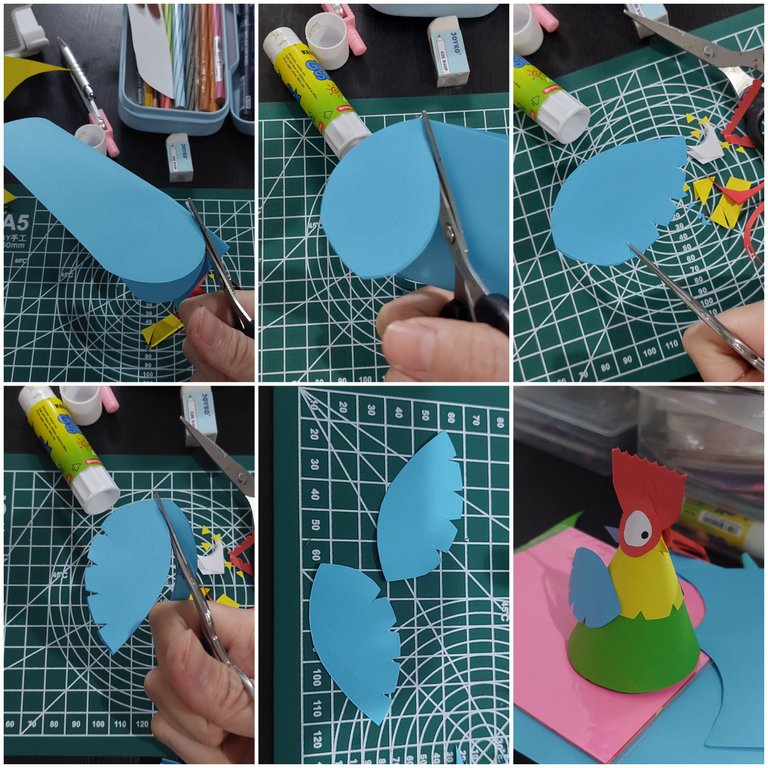
Next, I also made the two wings with the blue paper, cutting it off then also trimmed the rectangles to its’ one side like below and pasted them on the rooster.
7TH
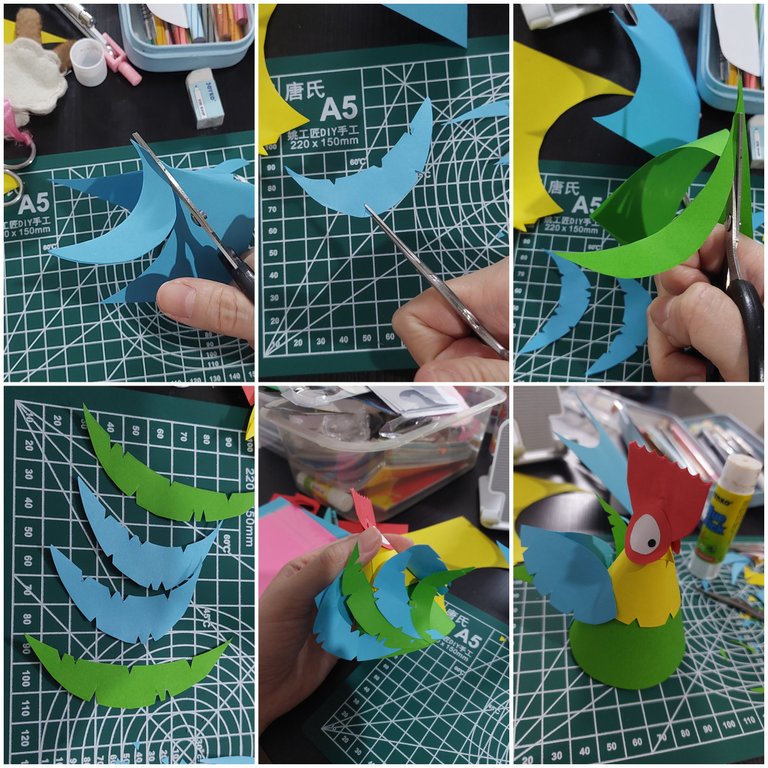
After that I also made some tail’s fur with the blue and green paper. I also trimmed small rectangles from them. Last I pasted them to the rooster’s back and curl it a bit.
8TH
Last thing I did was making the feet with the green paper and also yellow paper. Then I pasted them to the rooster. And voila, here is my paper rooster. Isn’t it cute?
Thanks for reading my article, hope you enjoy it and stay tune for more CRAFT things from me!
The photos were taken with Samsung A52 5G and I didn’t use any filters on my pictures.
A bit about the author
She works in a bank but she interests in CRAFT (CRaft, Art, Food and Travel). To pursue her art passion she does the cross stitch, embroidery, handsewing, crafts, crochet and also draws. Find hers in https://www.redbubble.com/people/de-creartique/shop?asc=u and https://decreartique.threadless.com/designs . Also find her cute collectibles pixel cat pictures here https://opensea.io/collection/pixelcryptocat .
https://twitter.com/creartique/status/1526898911381946368
The rewards earned on this comment will go directly to the person sharing the post on Twitter as long as they are registered with @poshtoken. Sign up at https://hiveposh.com.
Thank you for sharing this amazing post on HIVE!
Your content got selected by our fellow curator @rezoanulvibes & you just received a little thank you via an upvote from our non-profit curation initiative!
You will be featured in one of our recurring curation compilations and on our pinterest boards! Both are aiming to offer you a stage to widen your audience within and outside of the DIY scene of hive.
Join the official DIYHub community on HIVE and show us more of your amazing work and feel free to connect with us and other DIYers via our discord server: https://discord.gg/mY5uCfQ !
If you want to support our goal to motivate other DIY/art/music/homesteading/... creators just delegate to us and earn 100% of your curation rewards!
Stay creative & hive on!
Thank you
Hola @devyleona, oye, sencillo pero muy creativo, excelente tu post
Hola @brahiam15. Gracias :)