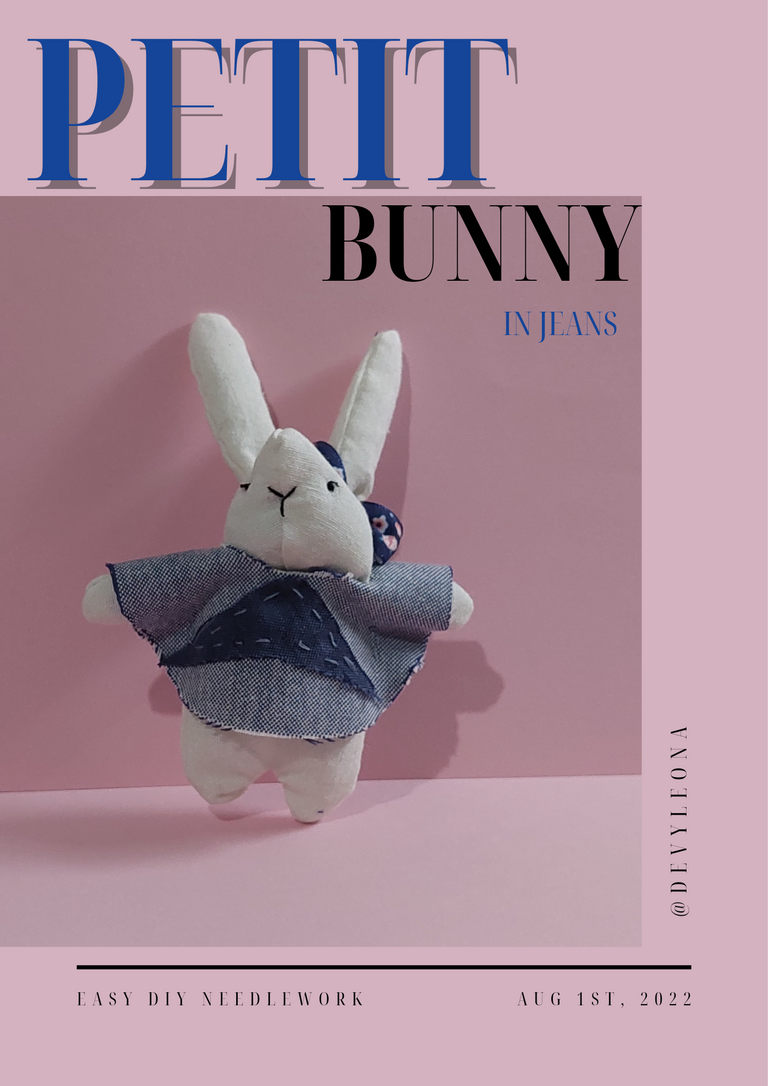
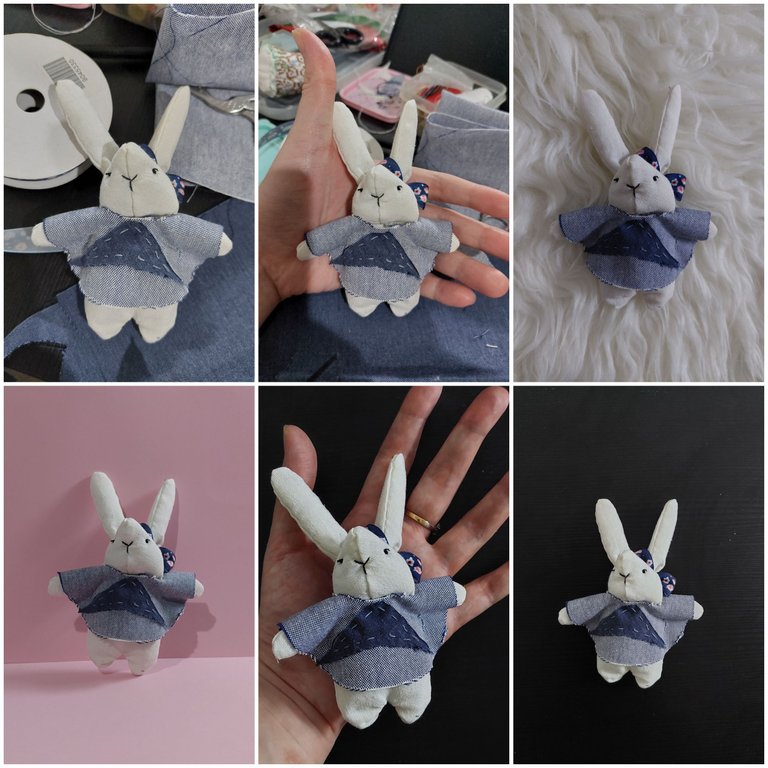
Petit Bunny in Jeans - easy DIY needlework how to
Hello, friends especially needleworkers!
Yesterday was Sunday, so I then finally could have more time to continue and finish what I had started recently, yes this petit bunny took more of my time, because I had to make the body twice because I was failed on my first attempt, and well after I finally could finish it yesterday, I was quite happy and satisfied with the result because i could make my most difficult project ever. Now let me tell you how I made it, step by step.
Project Time: approximately 9-10 hours, or more if my failed attempt counted, LOL.
Difficulty: Quite difficult for me because it had tiny body, just a palm of my hand when it was finished.
Skills Needed:
- Running stitch
- Back stitch
- Ladder stitch
- French knot
- Basic hand sewing
Materials & things needed:
- Paper for pattern
- Pencil
- Natural color fabric, it would be better if the material you used won’t be easily released
- Scissors (both paper and craft smaller one)
- Sewing needle
- Sewing thread in white and grey
- Pinset with pointed shape
- Filling stuff ( I used dacron)
- Black embroidery floss
- Denim fabrics in blue and grey
- Blue ribbon
How to make it:
1ST
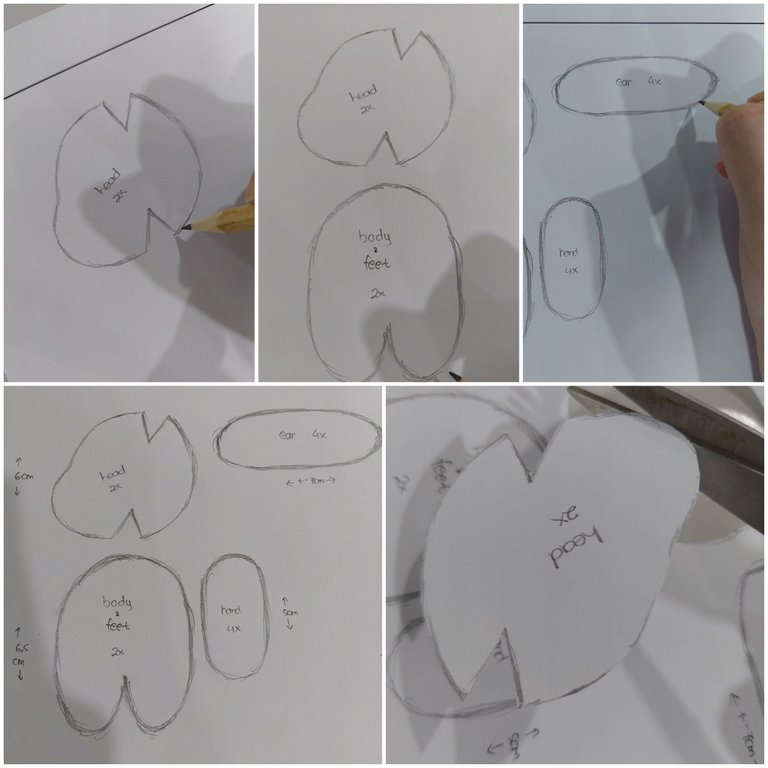
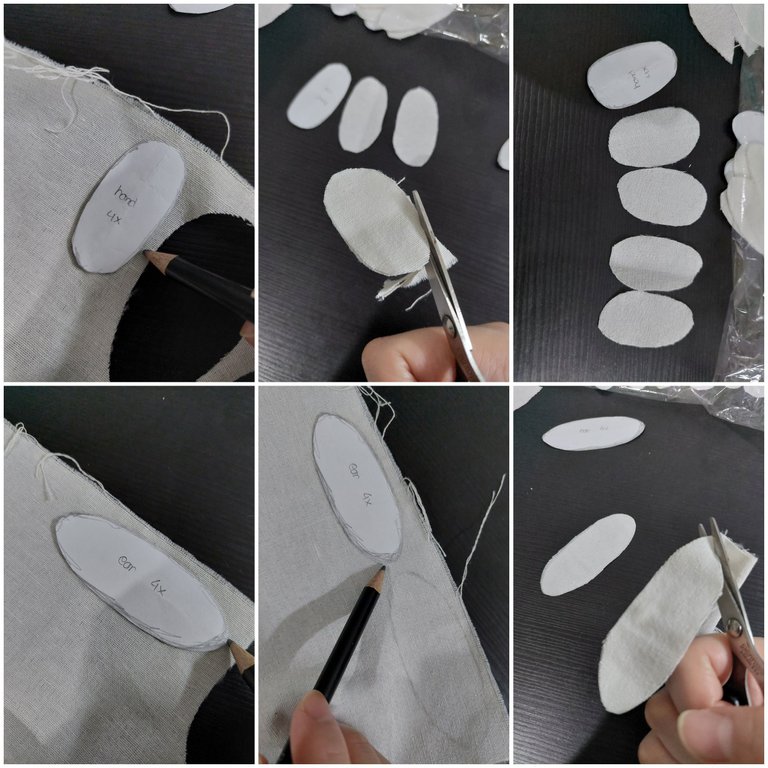
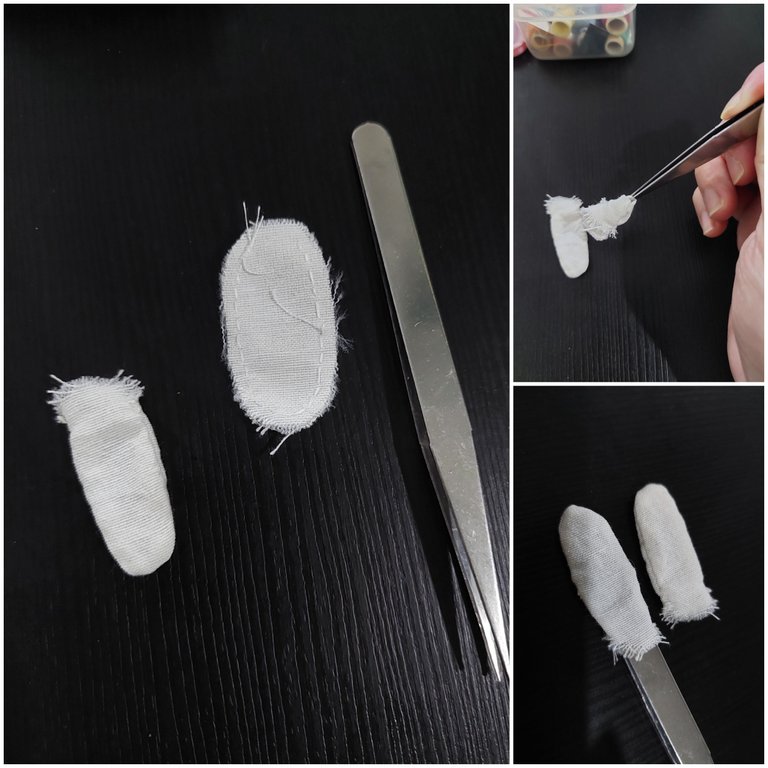
I tried to draw the pattern on the paper first, started with the head, then body, hands plus long ears. I also cut them off.
2ND
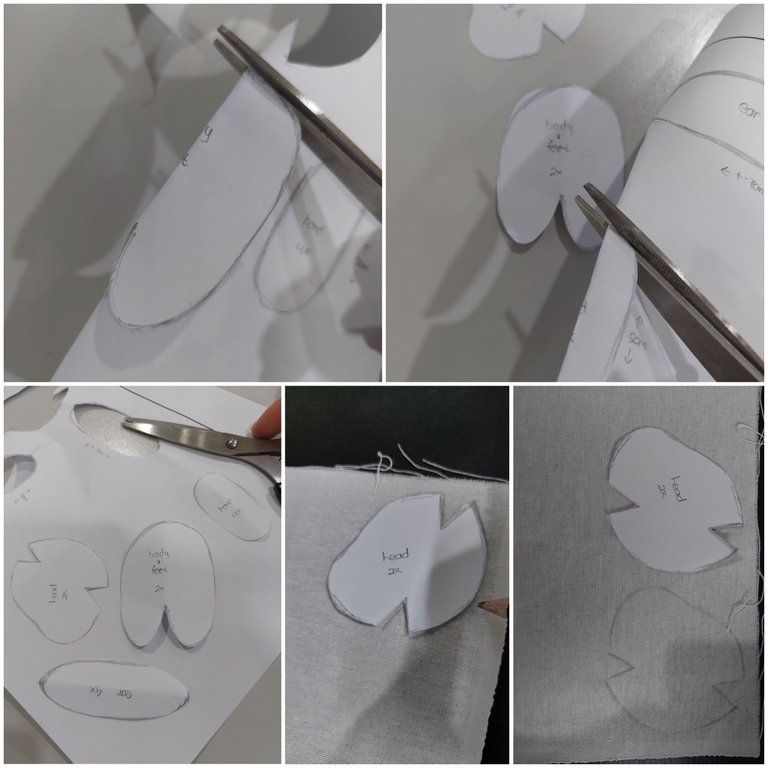
I continued cut the pattern off. Then, I copy transferred them to the natural color fabric. I made two head.
3RD
And I did the same to the body.
4TH
Continued it to both hands, and long ears.
5TH
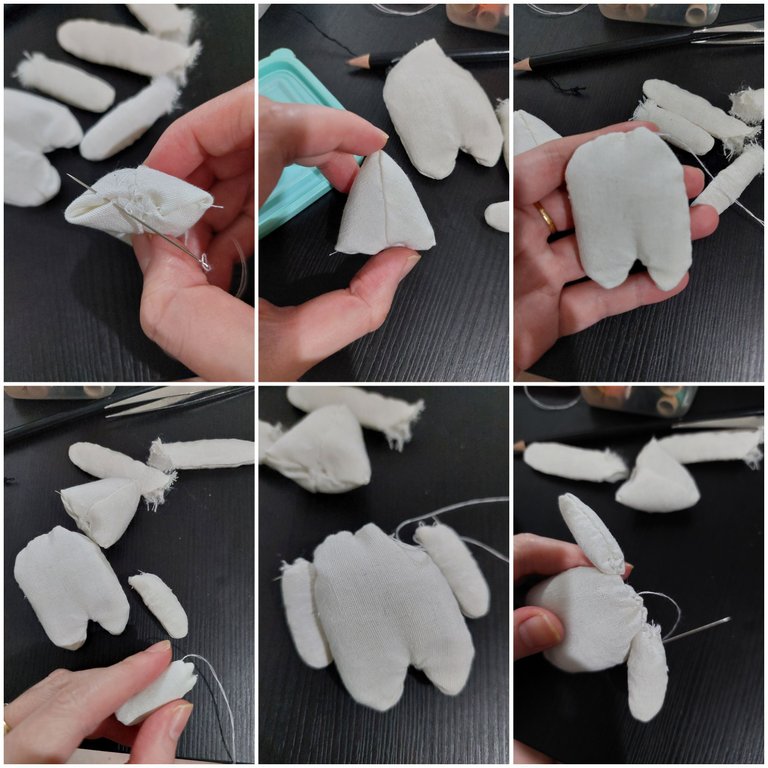
After I finished all the patterns then I sew them around. I started with the head. For this part, I first had to joined the opened area on the top and bottom of it. Then had to joined them together.
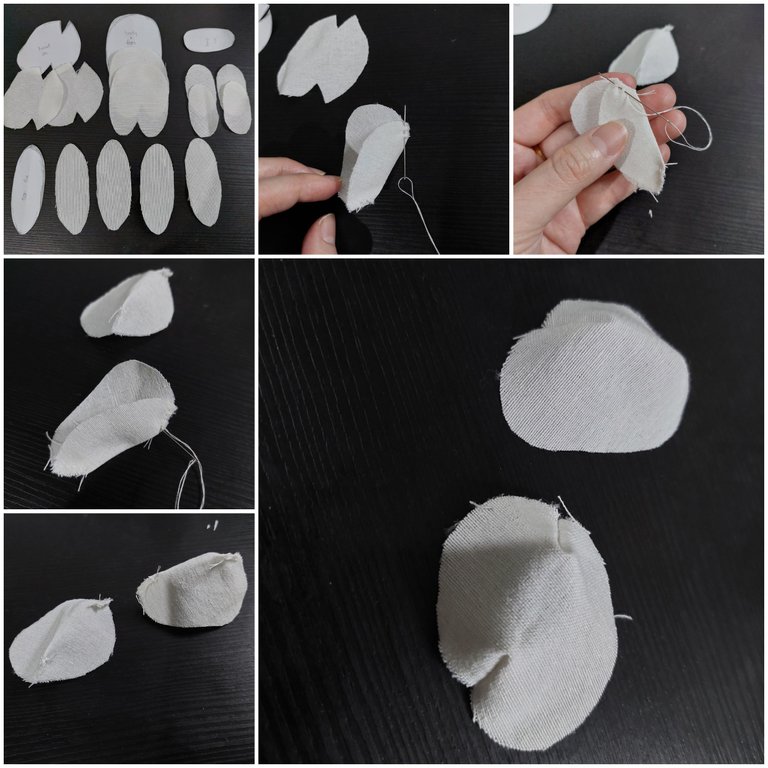
6TH
To join it need more attempt cause I failed on my first attempt, I needed to make sure that they cupped perfectly together, and I needed to hide the sewing I made first.. after finally I could make it correctly then I needed to turn it up, and the head was made. I left the bottom part to fill the dacron later.
7TH
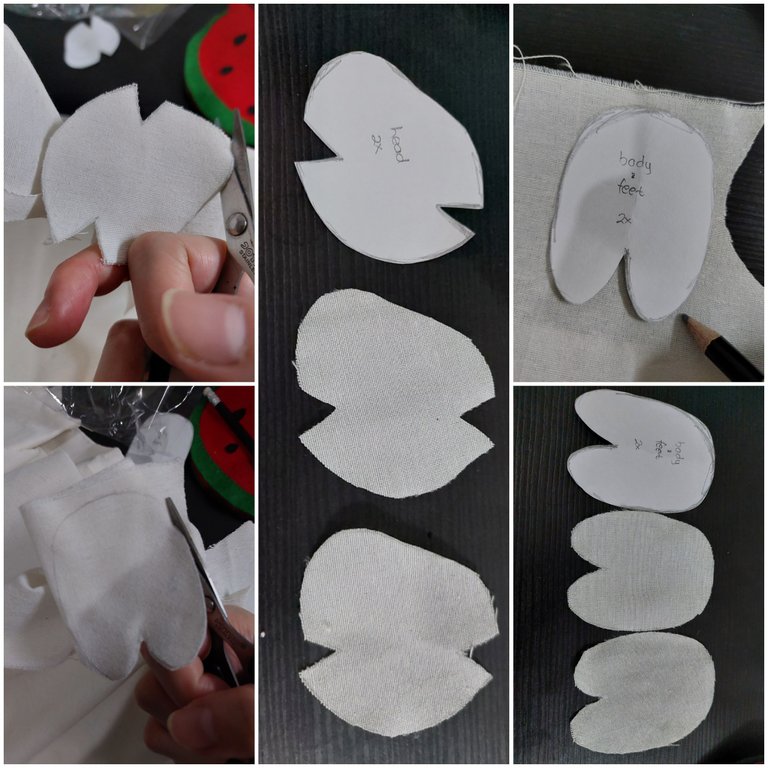
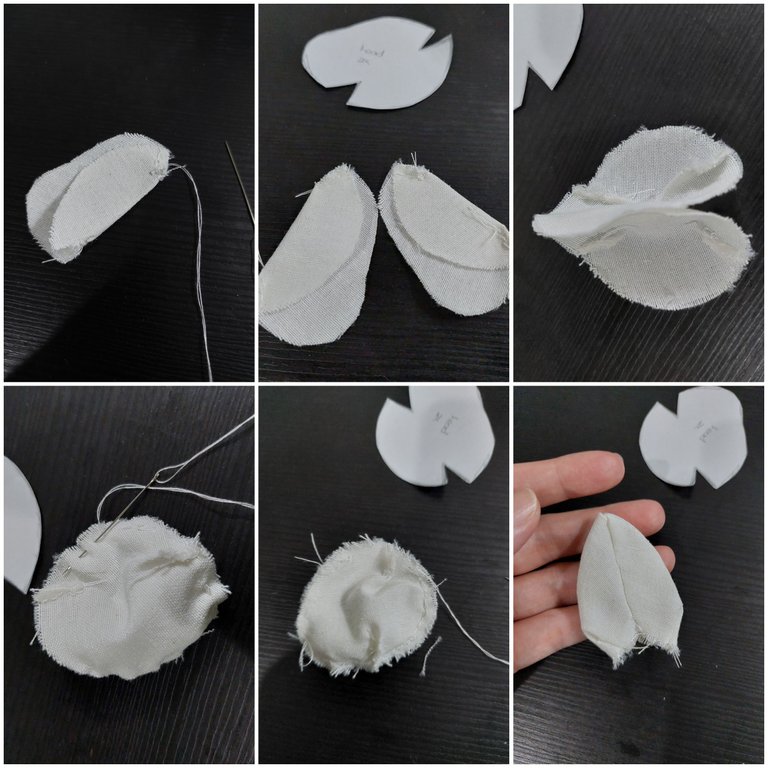
Next I sew the ear around, one by one, for this sewing I used running stitch then one more time to fill the gaps between (I did for all parts of the body, head I did before, these ears and also body plus hands). I also turned it up, with the help of the pinset, this was too hard because the small size I made.
8TH
I also did the same for both hands.
9TH
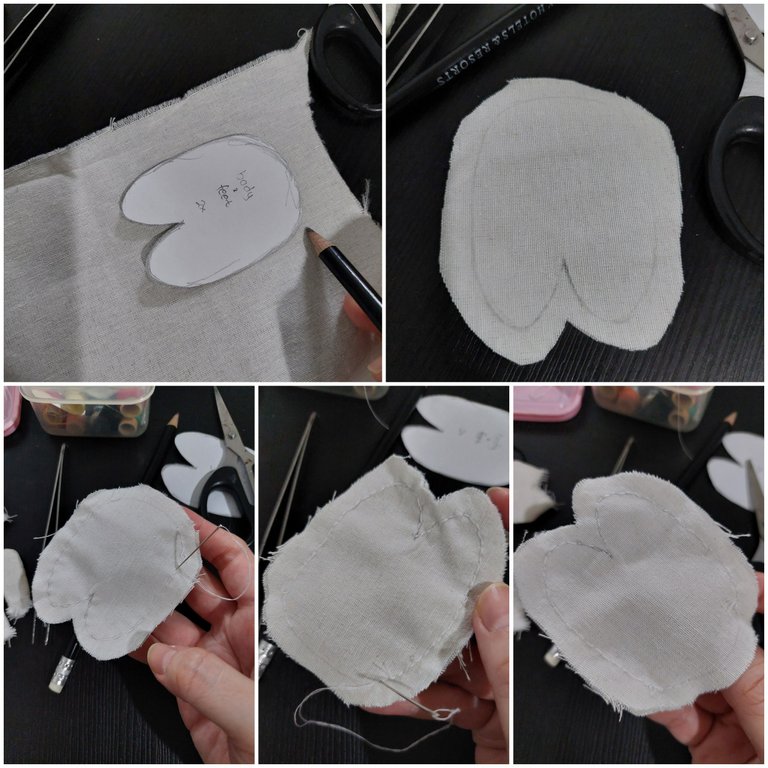
Then I did for the body, this was my second attempt because the first one was ruined, this time I made it larger so the material won’t be release and left holes easily. I redo the process again, copy the pattern then cut the fabrics and sew around.
10TH
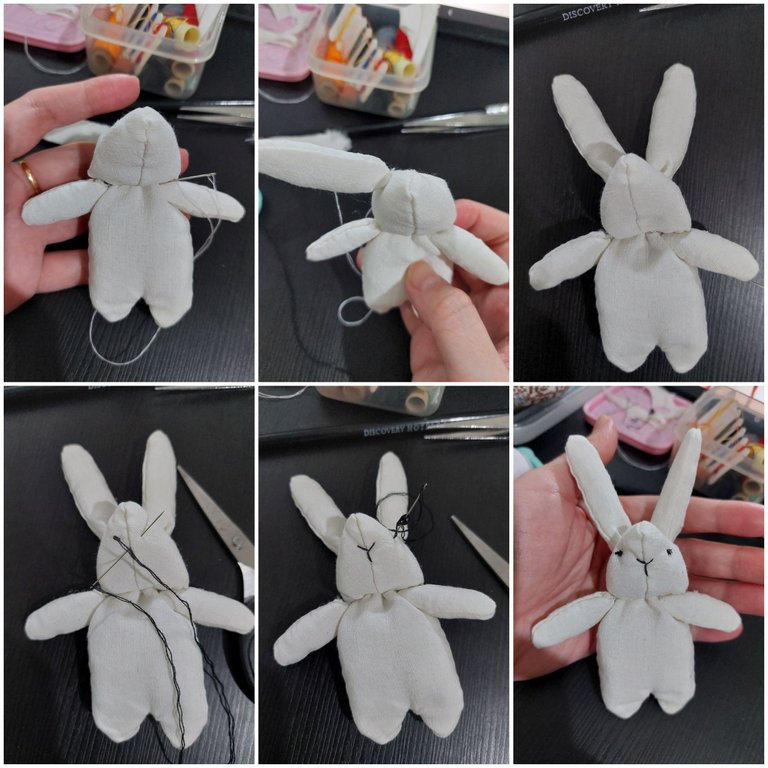
I also turned the body part up. And then fill the head with dacron. Then I closed it with ladder stitch.

11TH
Closed the body and hands, then joined them with the sewing like below.
12TH
I also joined it with the head, then the two long ears to the head. After that, I did the stitch for the nose and french knot for the eyes, these I used the black floss.
13TH
Then dressing time, I first measure the body of the bunny, I cut the round shape of the grey denim, then after I folded it in the middle, I cut it on the top for the head.

14TH
I prepared the accessories, started with the appliqué with blue denim and then running stitch it, sew both sides under the hands then prepared the bow. I sew it on the left ear.
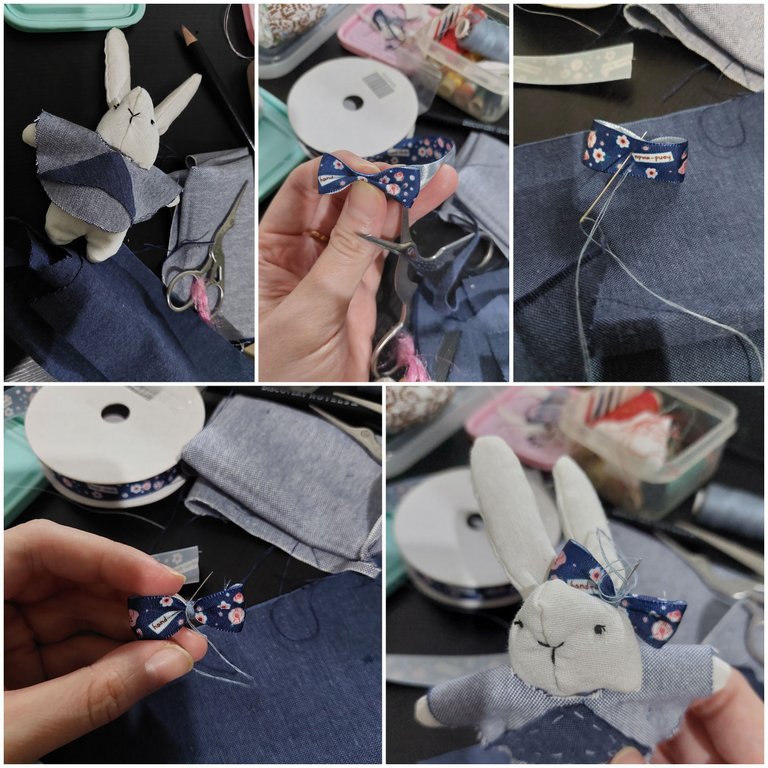
VOILA, now this petit bunny in jeans is finished, how do you think of it? Isn't it cute?
Thanks for reading my article, if you enjoy my article, upvote, reblog, follow me and stay tune for more CRAFT things from me!
All of the pictures were taken with Samsung A52 5G android phone and I used canva to make my cover picture.
A bit about the author
She works in a bank but she interests in CRAFT (CRaft, Art, Food and Travel). To pursue her art passion she does the cross stitch, embroidery, handsewing, crafts, crochet and also draws. Find hers in
https://de-creartique.redbubble.com and https://decreartique.threadless.com/designs. Also find her cute collectibles pixel cat pictures here https://opensea.io/collection/pixelcryptocat .
https://twitter.com/gentleshaid/status/1554056708858732546
The rewards earned on this comment will go directly to the people( @gentleshaid ) sharing the post on Twitter as long as they are registered with @poshtoken. Sign up at https://hiveposh.com.
Your content has been voted as a part of Encouragement program. Keep up the good work!
Use Ecency daily to boost your growth on platform!
Support Ecency
Vote for new Proposal
Delegate HP and earn more
Thank you
Wow, this is really serious work, you followed alot of process cutting and sewing to get this cutie done.
He is really cute I must tell you.
I love your cute bunny, its is wel detailed too.
Thanks for sharing.
Thanks a lot, so glad you like it 🙂😘
Thank you for sharing this amazing post on HIVE!
Your content got selected by our fellow curator @rezoanulvibes & you just received a little thank you via an upvote from our non-profit curation initiative!
You will be featured in one of our recurring curation compilations and on our pinterest boards! Both are aiming to offer you a stage to widen your audience within and outside of the DIY scene of hive.
Join the official DIYHub community on HIVE and show us more of your amazing work and feel free to connect with us and other DIYers via our discord server: https://discord.gg/mY5uCfQ !
If you want to support our goal to motivate other DIY/art/music/homesteading/... creators just delegate to us and earn 100% of your curation rewards!
Stay creative & hive on!
Thanks