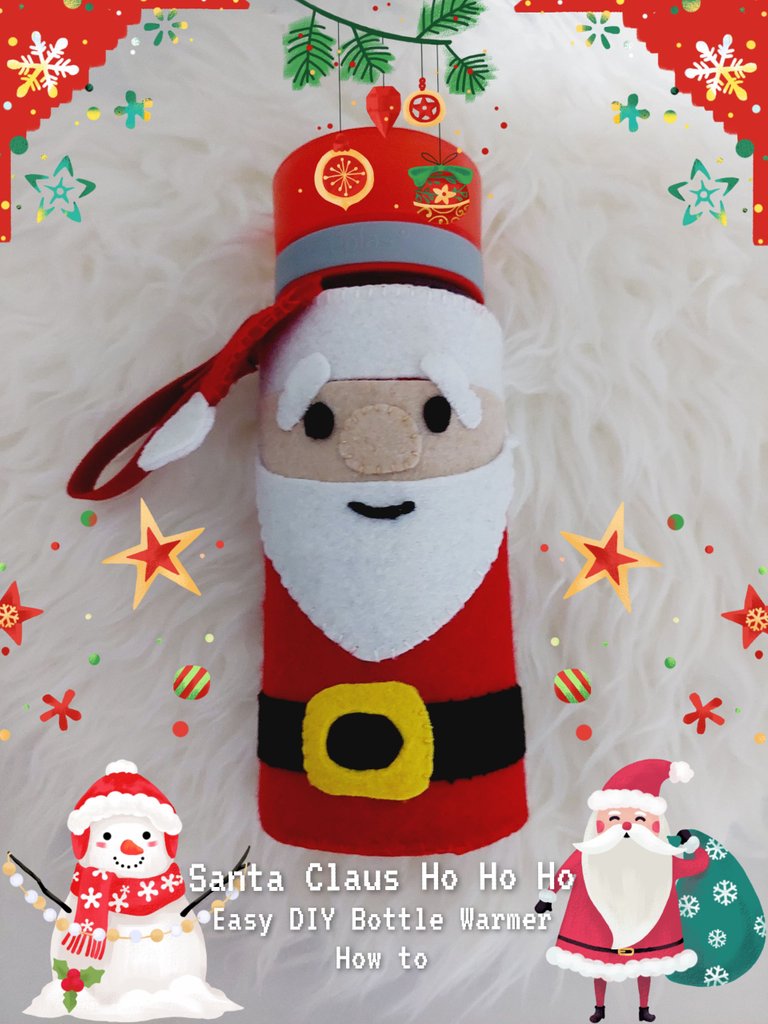
Santa Claus Ho Ho Ho – easy DIY Bottle Warmer/Cover How to
Hello, Friends!
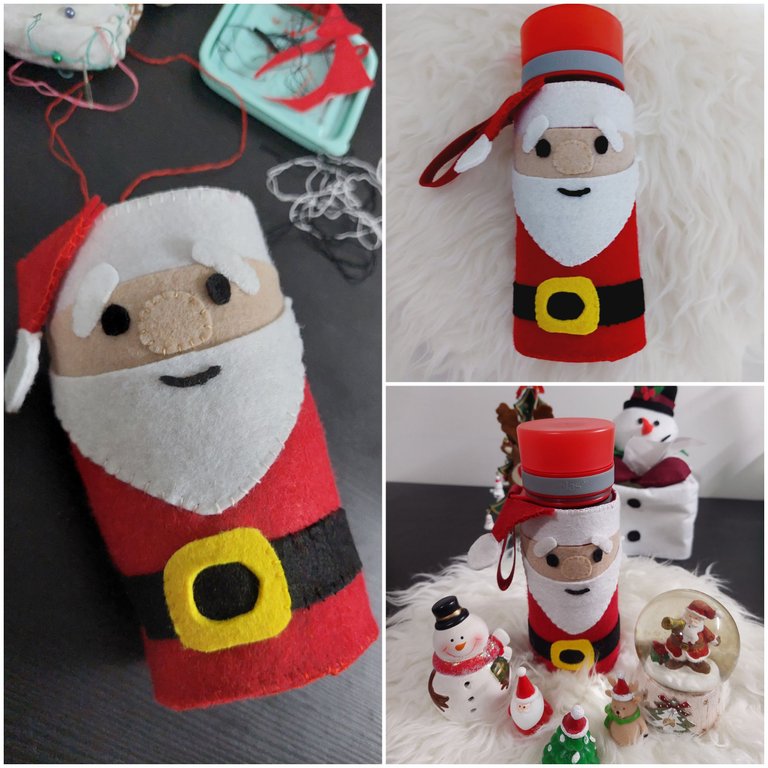
Like usually, yesterday was Sunday, and I was not going anywhere, just sitting and doing my hobby. This time I got the inspiration to make myself, a bottle warmer, in the form of Santa Claus, one of my favorite Christmas character. Here I would try to explain briefly of the process how I made it, and also showing you the pictures of this process.. So just check it out!
MATERIALS & THINGS NEEDED:
In this project I just needed the
• felt fabric as the main material, in red, white, beige cream, black and yellow color.
Then the other things I needed were just the
• scissors,
• embroidery threads and also
• sewing needle. My tips for choosing this needle, I used the thin one with the medium size here, cause too thick would make the result not good.
THE SKILLS NEEDED:
• Blanket stitch
• Whipped stitch
• Running stitch
I think it would be not too easy, but also not a difficult to make too, it was just in medium difficulty.
THE TIME TO DO THIS PROJECT: around 3-4 hours.
HOW TO MAKE IT:
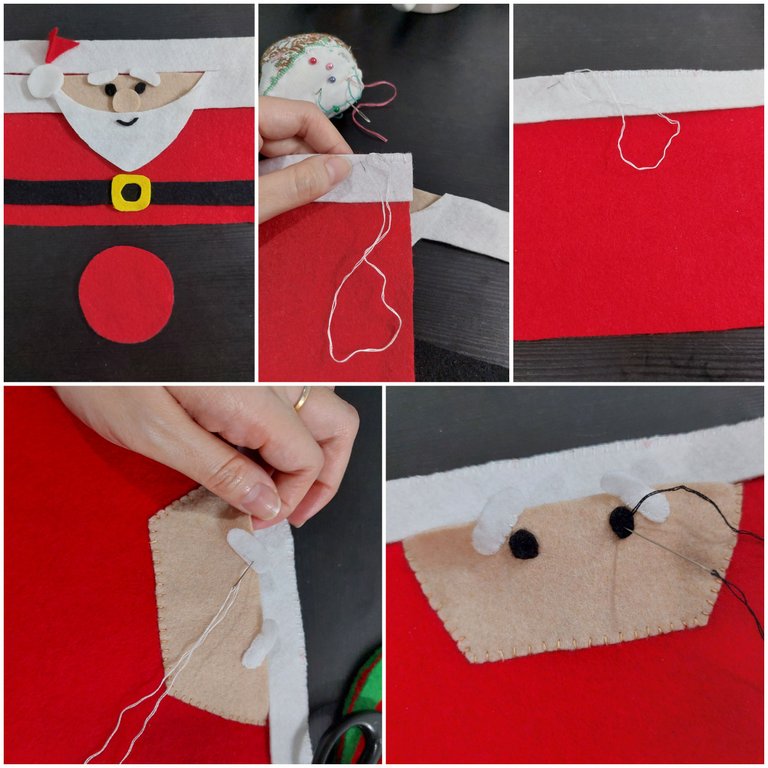
1ST
First, I started by measuring my bottle to the red fabric. This would be customize, the size of this bottle warmer would be well fitted to my bottle, if you want to make one for you too, better measuring the bottle directly to your fabric, as I did here. After I measure the correct height and also width, I cut it off, and I also cut some other fabrics, like white for the top line, two white eyebrows, black for the eyes, beige cream for the nose,
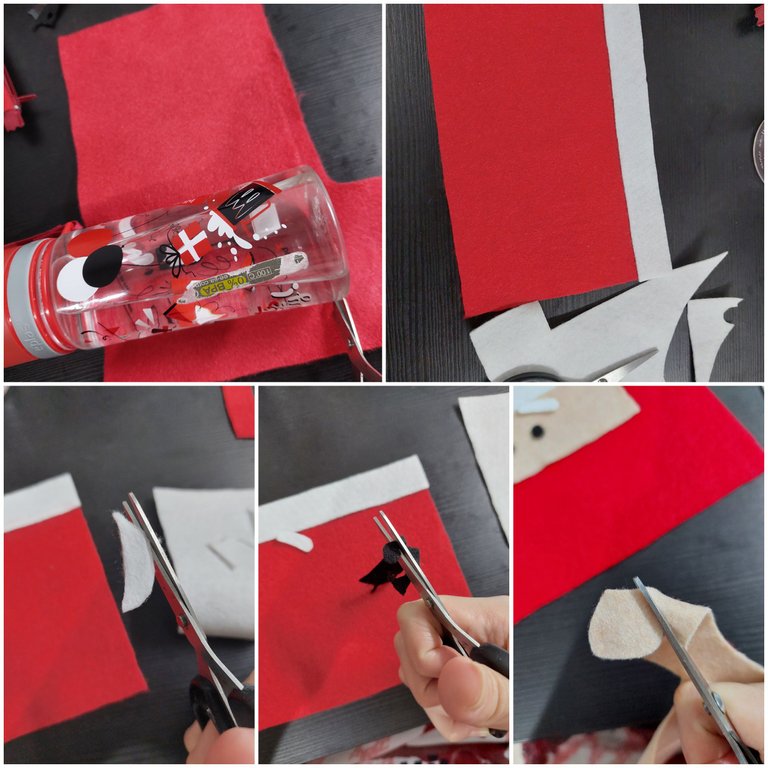
2ND
Then I continued it by cutting the white beard, face again with beige cream, and white for the hair.
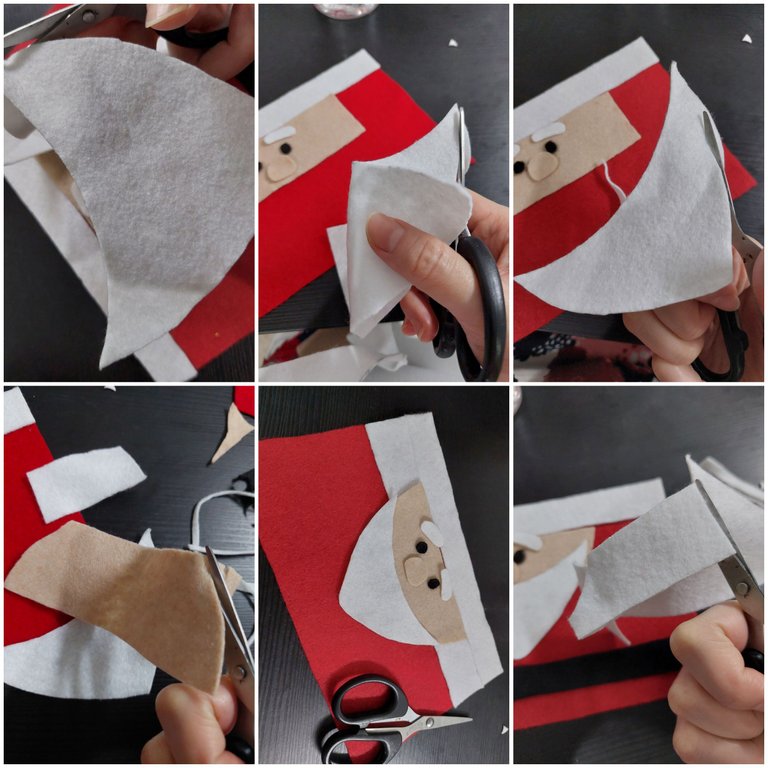
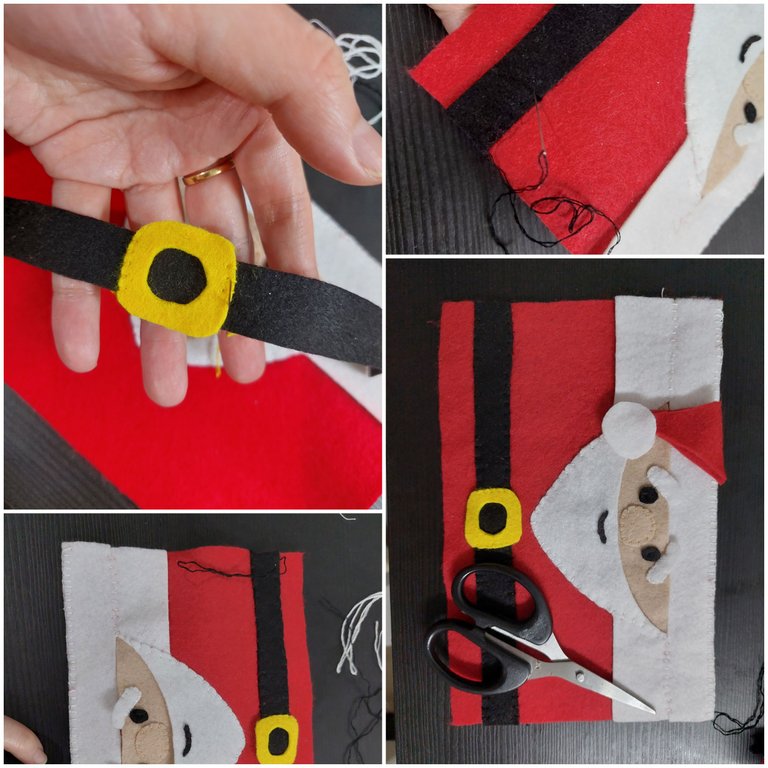
3RD
And also yellow for the head of the belt, black line for the belt, a bit red and also white for the hat plus a little black mouth. Last thing to do in this cutting part was to measure was the bottle’s bottom part, then cut it off too.
4TH
After getting all the parts, I then join them together, I started to join the red big rectangle and the white line as the top part, top with the blanket stitch, then I whipped stitch the face part, then whipped stitch the eyebrows and then I sew the two black eyes.
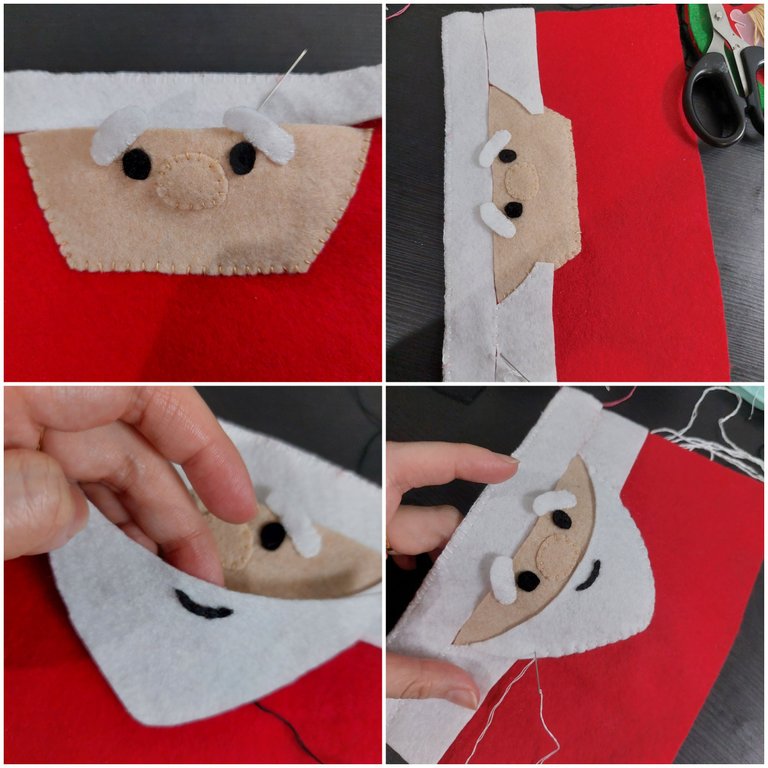
5TH
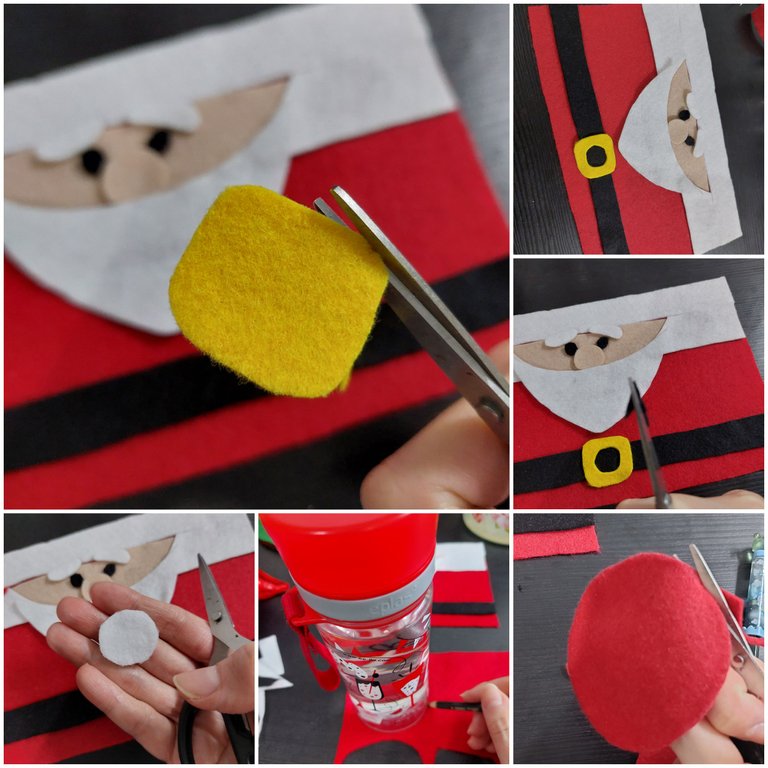
After that, I whipped stitch the nose, running stitch the mouth, then whipped stitch the white hair to the face, whipped stitch the beard too.
6TH
Then, I whipped stitch the yellow part to the black belt part. Also I whipped stitch the black belt to the red body part.
7TH
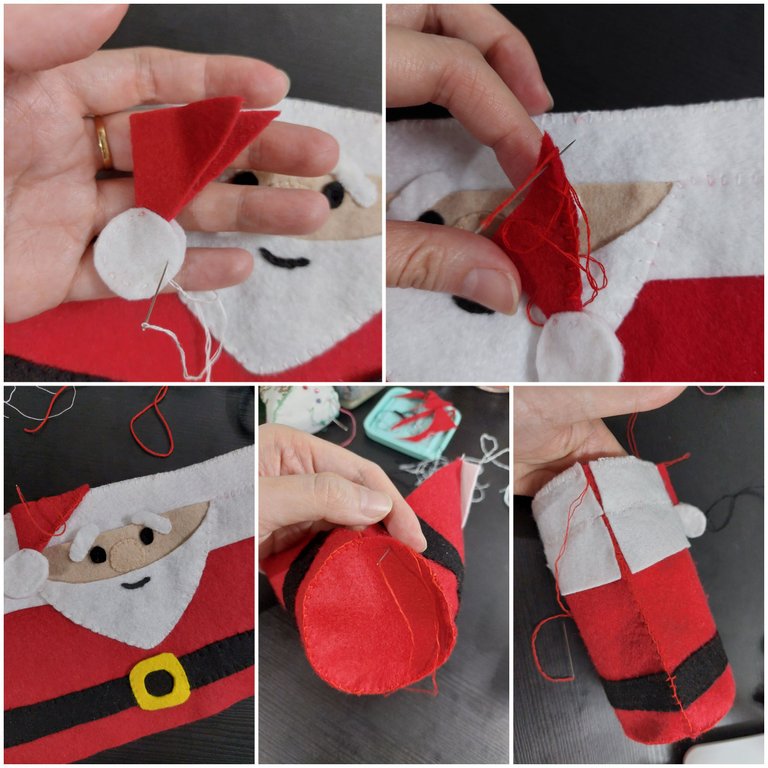
Now, I did the running stitch for the white parts of the hat, then blanket stitched the triangle to close it, joined it to the head part also with the blanket stitch. Last thing to do was blanket stitching the bottom part to the body part, then joined the open body part, also with the blanket stitch.
8TH
Ta Da, the Santa Claus Ho Ho Ho is finished now, I then put my bottle in it, look it perfectly fit and also it was nice to let it around my Christmas décor.. Aren’t they cute together?
Thanks for reading my article friends, hope you enjoy it and stay tune for more CRAFT things from me!
Happy Monday!
¡Que lindo santa claus! que buen trabajo ¡saludos!
Si :) gracias