Crocheting the Perfect Hat for the Summer Sun.
Hello Needleworkers! How's the weather on your side? Hope your day is going great as well? 🤗
Lately, on my end, it's been scorching hot and while the summer sun was shining, I was itching to make something fun and stylish. That's when I got the idea to crochet a bucket hat. Though, I'd never crocheted a hat before, I was up for the challenge.
So, in this blog post, I'll be sharing my experience crocheting the bucket hat, as well as some tips for anyone who wants to give it a try.
At first, I thought about which yarn colour would be befitting for my project and eventually, I settled with yellow. I just thought it'd be nice to use a bright and cheerful colour. However, it didn't work out... everything from the colour to the pattern and process just didn't seem right.
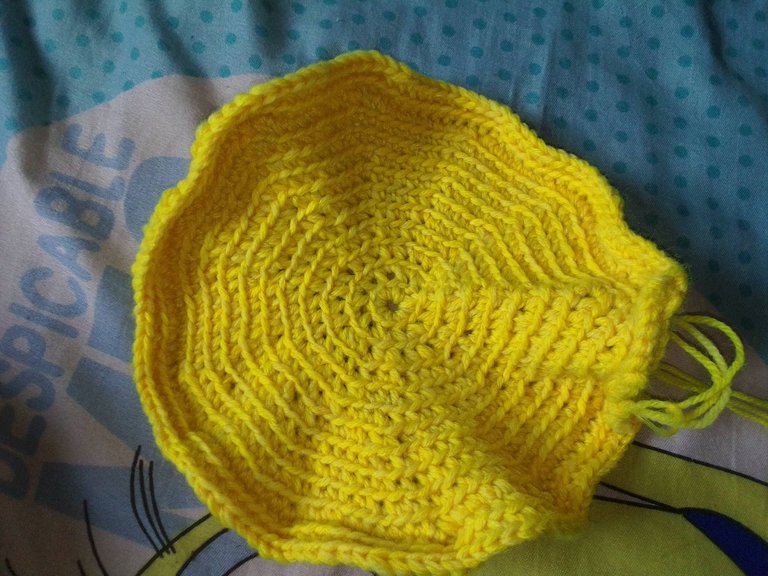
First attempt gone wrong 😂😭
Turns out, I was doing it all wrong despite having previously watched a YouTube tutorial on it. In an attempt to make my own difference, rather than the double crochet pattern used in the video, I was doing a single crochet in the wrong loops for that matter. So in essence, my first attempt ended in fatal failure.
But I didn't give up just yet. I gave it another trial and a fresh start with black yarns instead. And this time, I decided to use the same pattern as in the YouTube tutorial and guess what? I pulled this one off pretty good!
Below are the materials as well as the making process of my bucket hat:
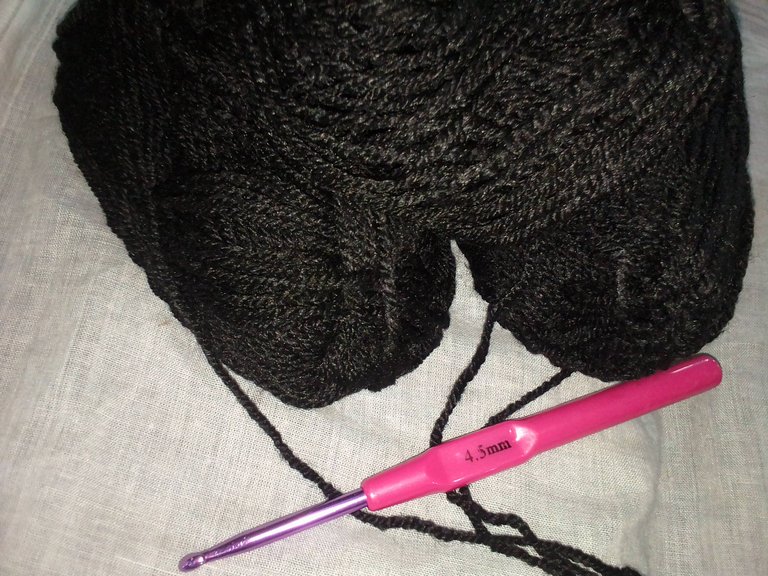
Materials used:
- 9 balls of black yarns (45g Acrylic).
- 4.5mm hook.
- Scissors.
- Sewing needle.
The making process:
Since I wanted my hat thicker, I tripled my yarns and started by forming a ring with the tail of my yarn whilst leaving out a bit of the ends. Then I inserted my hook in the middle of the ring, yarned over and pulled through the yarn to make my slip loop, then chained 2.
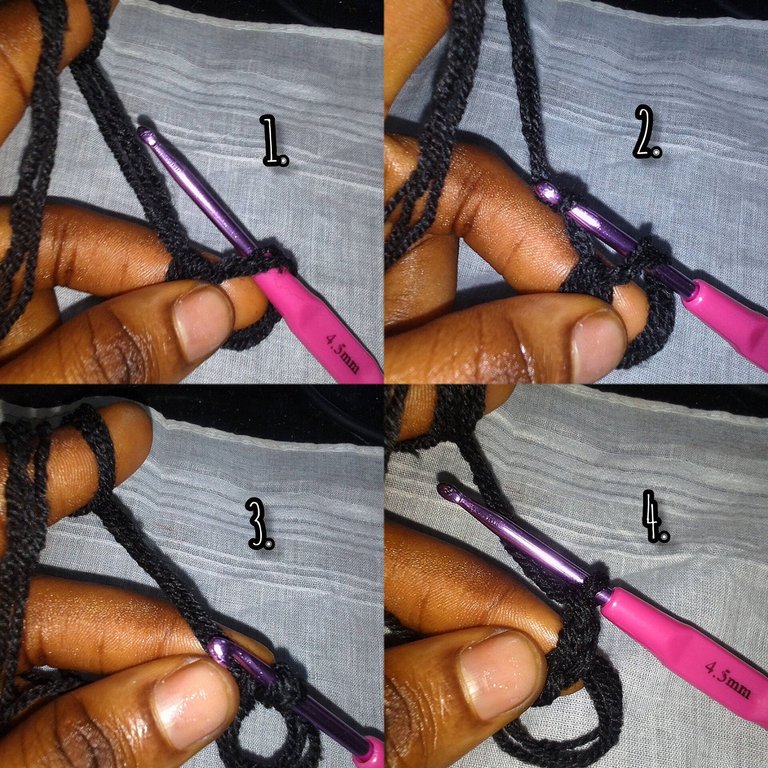
Afterwards, I did 10 double crochets in the middle of the ring and tightly pulled on the tail ends of my yarn to closen up the ring. Then I did a slip stitch into the bottom loop of my very first double crochet.
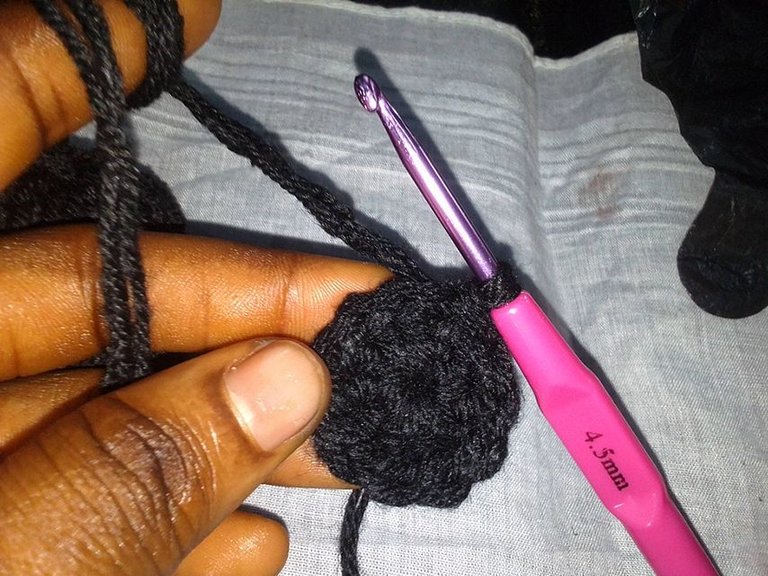
For round two, I chained 2 and did an increase of two double crochet into every stitch and ended with a slip stitch. For round 3, I did my increase in the second stitch. For round 4, I did my increase in the third stitch. For round five, I did my increase in the fourth stitch and ended my rounds on 6 whereby I did my increase in the fifth stitch.
And mind you, I started every round with an increase of 2 chains and ended each round with a slip stitch. You can decide to do more or less until the circle becomes the circumference of your head because this part is the top of the hat.
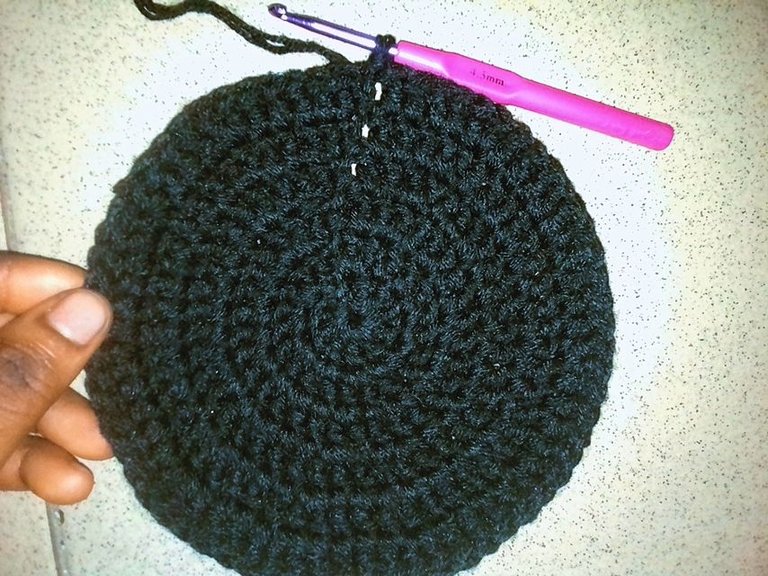
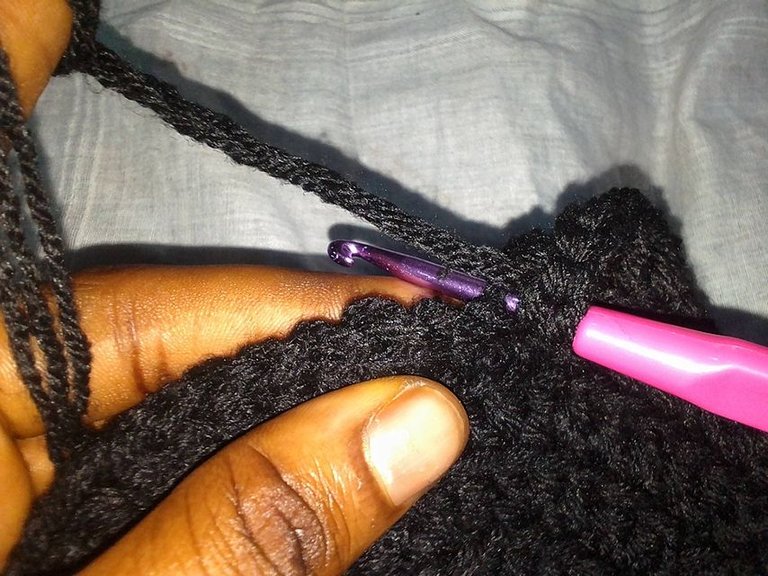
The next part of the making process is crocheting the body of the hat (the portion between the top and brim of the hat). To begin, I did double crochets into every stitch from the back loops only. And as usual, I ended this round with a slip stitch. If you notice, crocheting in the back loops forms a sort of fold.
For the next few rounds of the body part, I didn't continue in the back loops but I did six more rounds of one double crochet into the bottom of the loops.
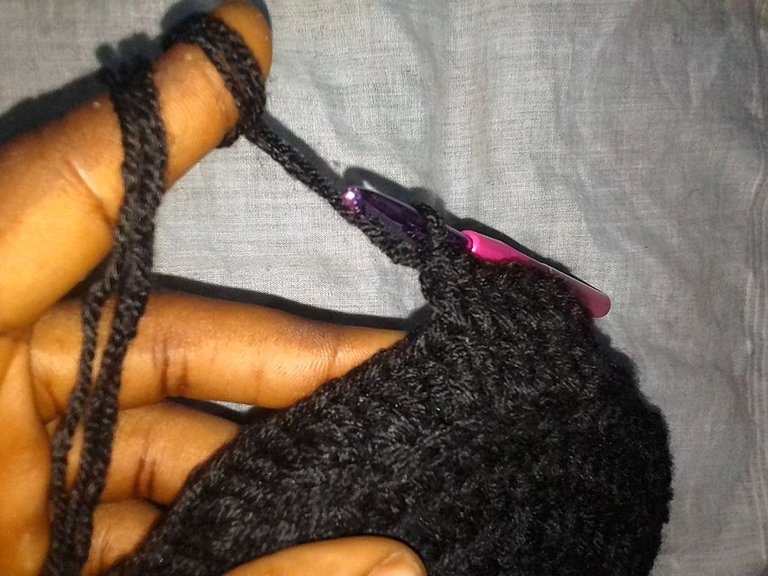
And for the last part which is the brim of the hat, I started my row with one double crochets into the front of the loops which causes this part to pop out. For the second row, I did an increase of two double crochets on every fourth stitch. For the third row, I did one double crochets into every stitch. For the fourth, I did two double crochets into the bottom of the loops. I ended my rows on the fifth with one single crochets into the bottom of the loops. But finished off with a borderline of single crochets into the bottom of the loops.
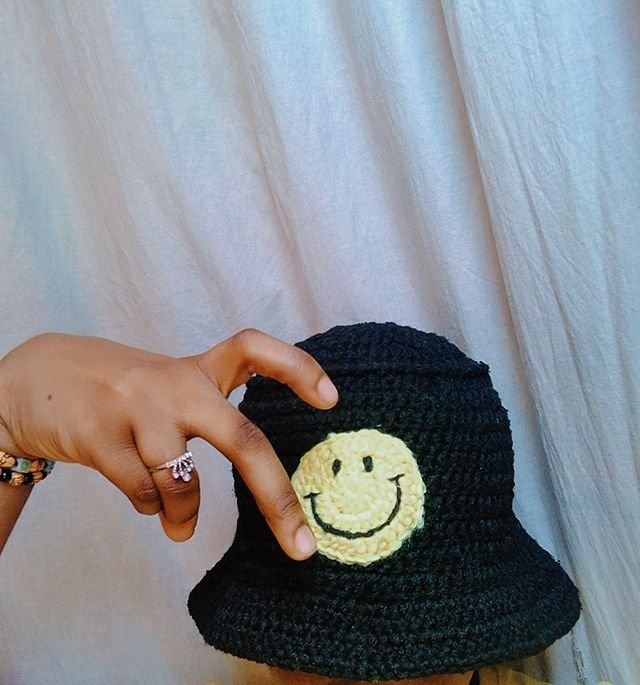
For the final finishing touch, I decided to add a small design on the middle of my hat. So I made do with the yellow yarns I abandoned and crocheted a smiley. It's actually not hard at all. All I did was follow the same process of making the first three rows of the top of my hat.
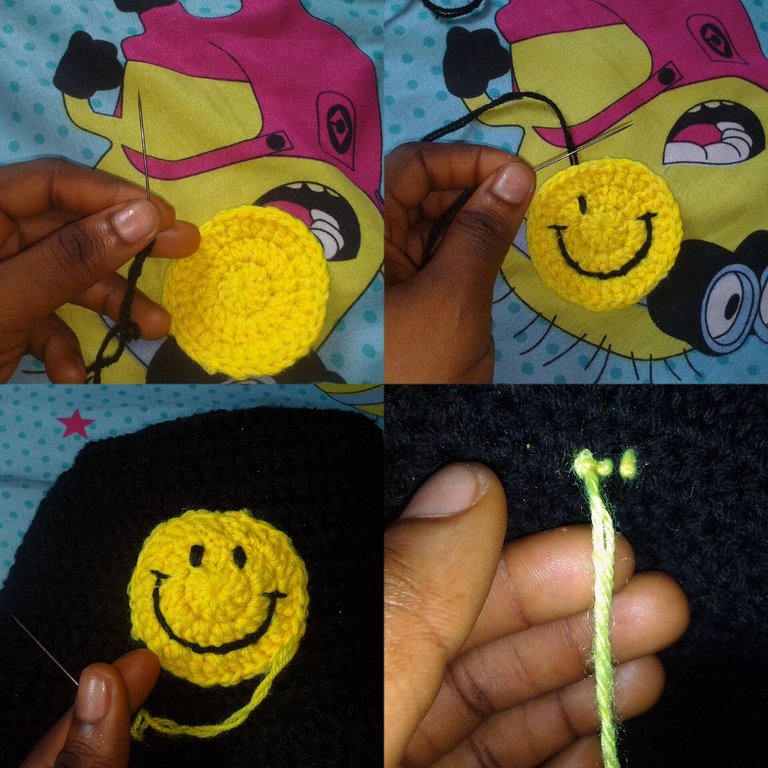
Then, I threaded my yarn using a sewing needle to make the eyes and mouth of my smiley and attach it to my hat. I made sure to tie up any tail ends into a knot and cut them off with a scissors.
Voila! ✨ The perfect hat for the summer sun is ready to wear 🤠...
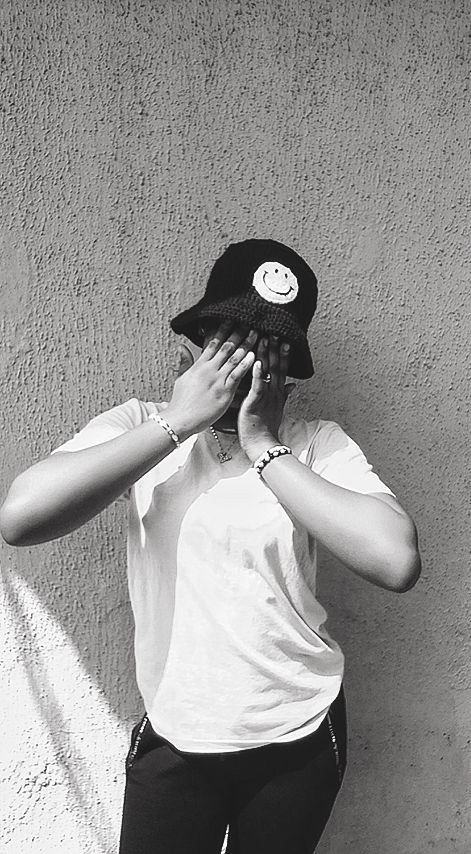
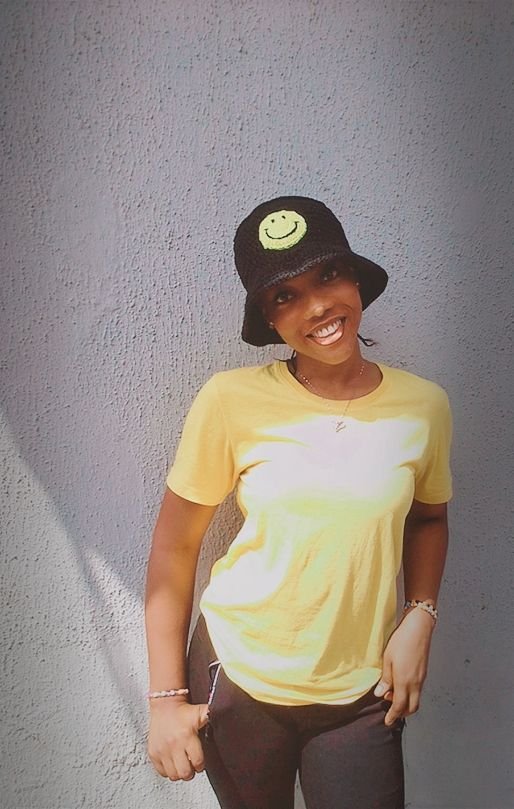
Being a hat lover, I had such a wonderful and fun experience crocheting this bucket hat. It gladdens me to see that I could recreate something I love and it took me only a day and a half to do it. The best part is that this one's very comfortable (it's not tight or itchy at all), feels light but it's thick and protects my face from direct sunlight. I may not have started off easy but the outcome was satisfying and definitely worth it. Couldn't be more proud of myself 🤭.
What do you think of my project? Please feel free to share your thoughts in the comments 😊.
THANKS FOR READING! ❤️
This post has been manually curated by @steemflow from Indiaunited community. Join us on our Discord Server.
Do you know that you can earn a passive income by delegating to @indiaunited. We share more than 100 % of the curation rewards with the delegators in the form of IUC tokens. HP delegators and IUC token holders also get upto 20% additional vote weight.
Here are some handy links for delegations: 100HP, 250HP, 500HP, 1000HP.
100% of the rewards from this comment goes to the curator for their manual curation efforts. Please encourage the curator @steemflow by upvoting this comment and support the community by voting the posts made by @indiaunited.
This is so nice on you and you're cute too😍
Awwn thank you dear 🥰
The hat turned out spectacular, the emoji detail is my favorite part, it gives it a fresh and youthful style.
Happy weekend!
It sure did... Yes, it's my favorite part too.
Thank you for your kind words. Have a splendid week ahead! 💕
Wow
This is incredible.
You have magic and talented hands.
I love the hat.
Rock it girl!
Hahaha, I'm glad you think so 😍... Thank you, I sure will!
You are welcome dear
Hello Dima. It's great that despite the setbacks with your initial project you were able to finish it satisfactorily. This knitted hat is very cute, congratulations ❤️.
Hi Laura. Thank you so much for your kind and encouraging words. I'm glad you liked it.
Have a splendid week ahead! ❤️