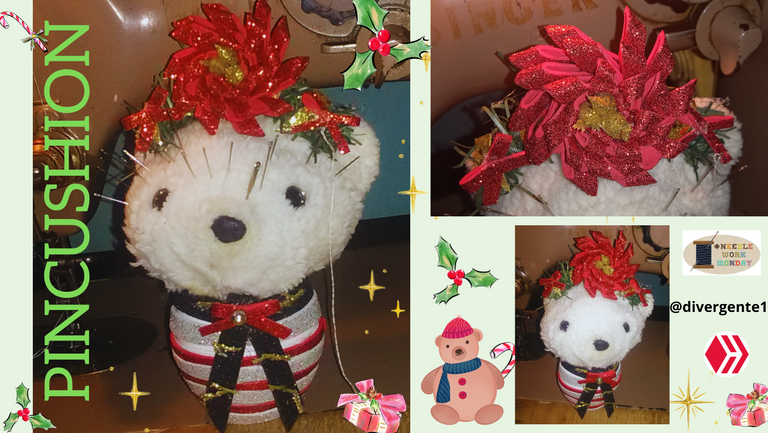
🐻 Design and Create a Cute Christmas Bear Pincushion // 🐻 Diseña y Crea un lindo Alfiletero de Oso de Navidad 🐻

Hello dear friends of Hive and NeedleWorkmonday, it is a pleasure to write in this community where I have recently started. I want to thank you for each of your comments and above all for the support I have received from each of you, infinite thanks for that.
I love the Christmas season because it is a time to share, to be with family but also to overflow with creativity and joy in our homes. Being able to create designs to keep things in order in our homes is essential. It is the relationship between order and beauty, very necessary when talking about sewing.
Today I want to show you the making of a Christmas teddy bear pincushion 🐻. Using recycle materials and teddy bear fabric.
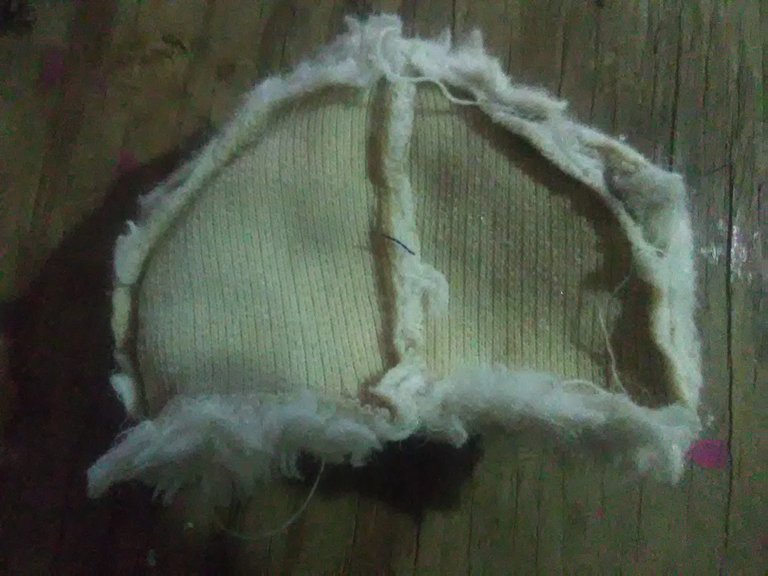
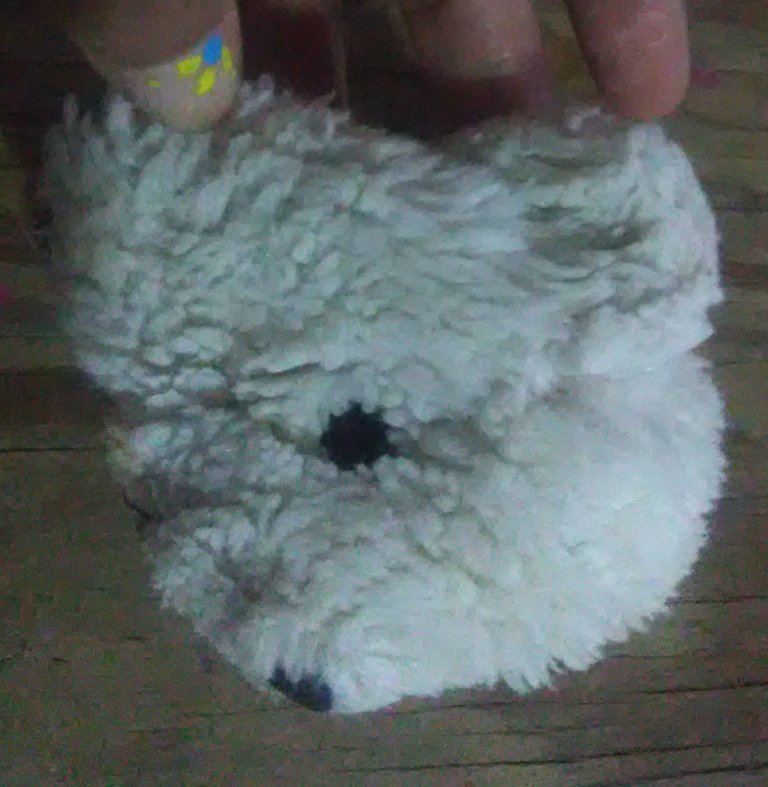
The head of the teddy bear is assembled in such a way that it is sewn.
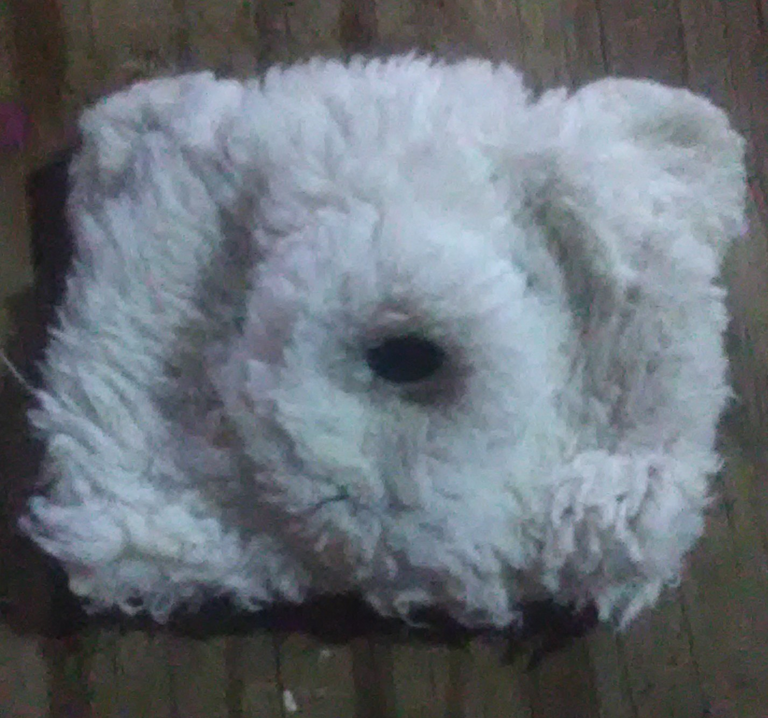
Then flip the piece over and create the nose of the bear.
Then they are added to the face of our bear.
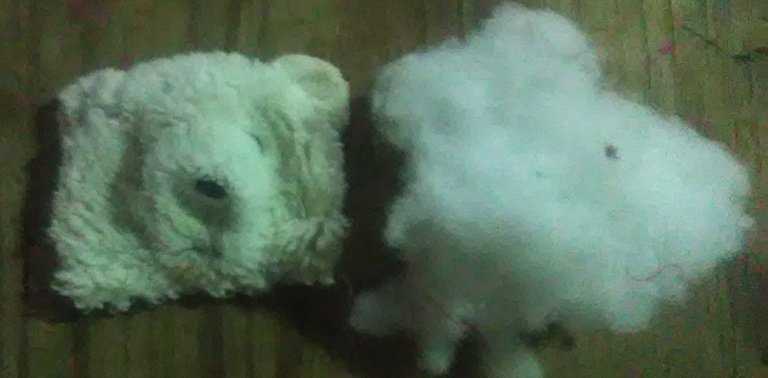
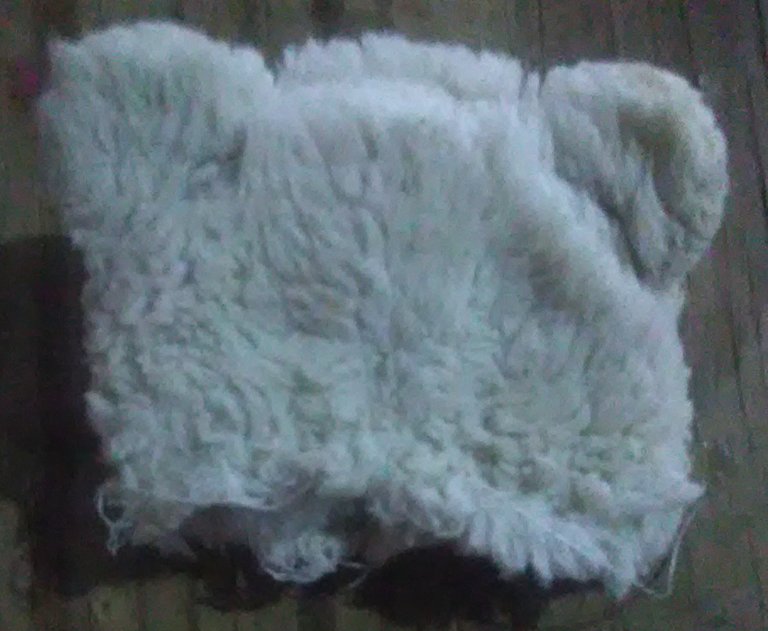
Afterwards, the stuffing will be added to our bear's head.
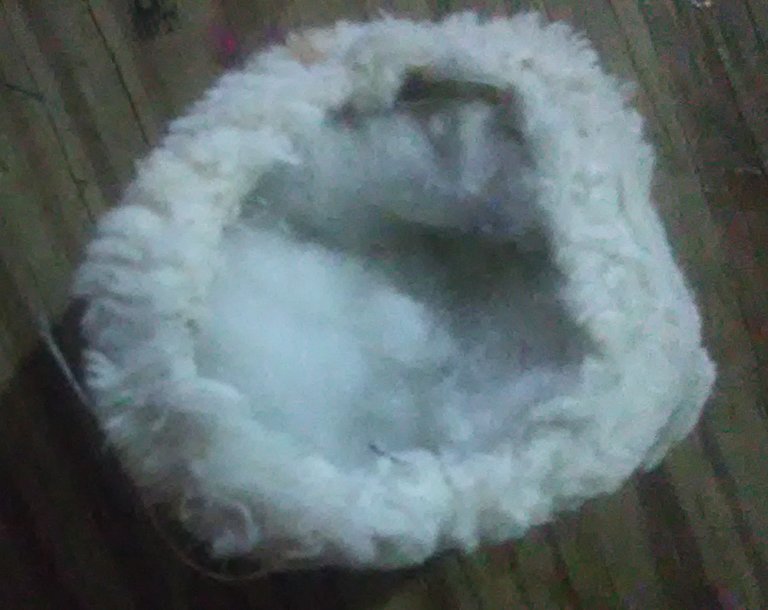

Then sew the bottom area of the bear's head to prevent the stuffing from coming out.
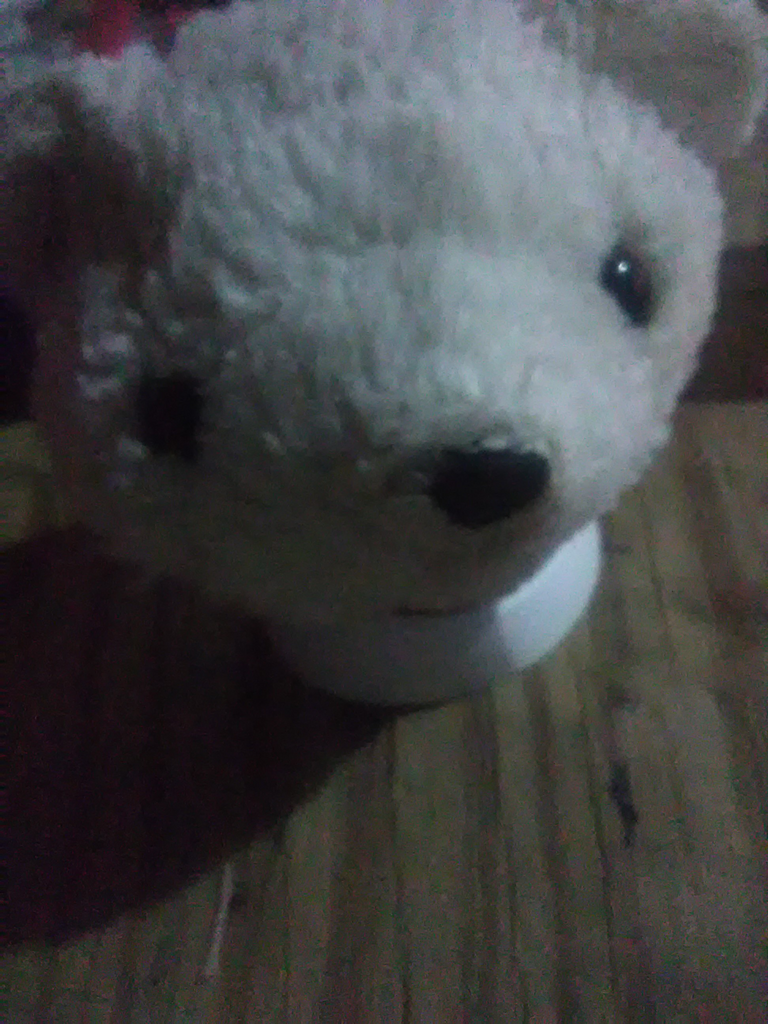
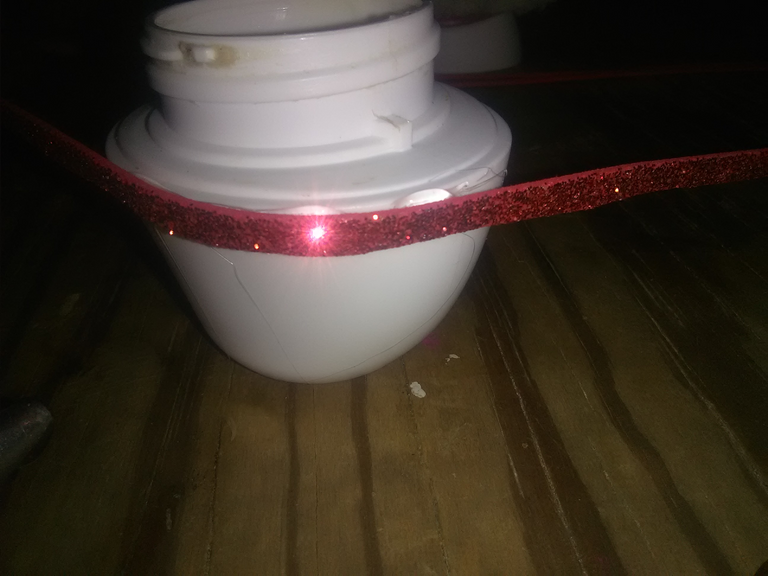
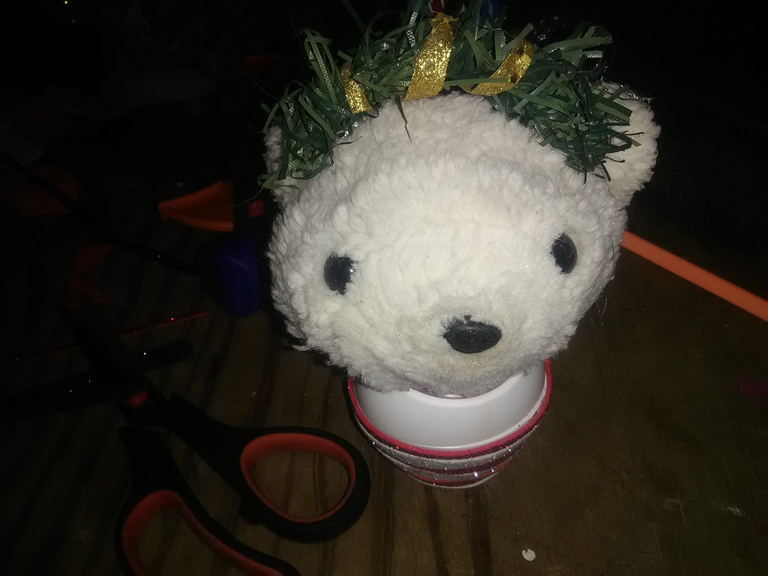
A small container with a lid is placed and the bear's head is glued on the lid with hot glue.
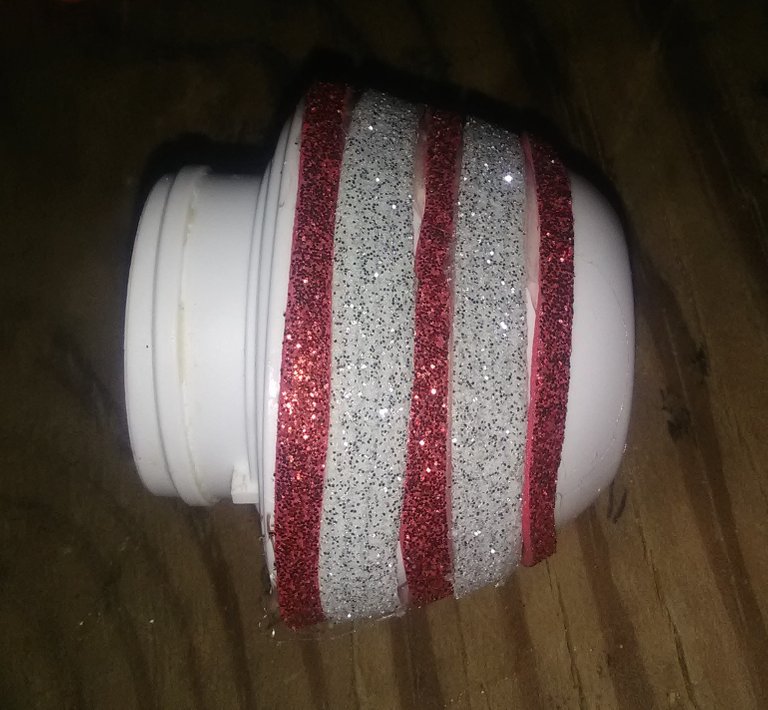
Then for the base, decorate with red and silver frosted foami.
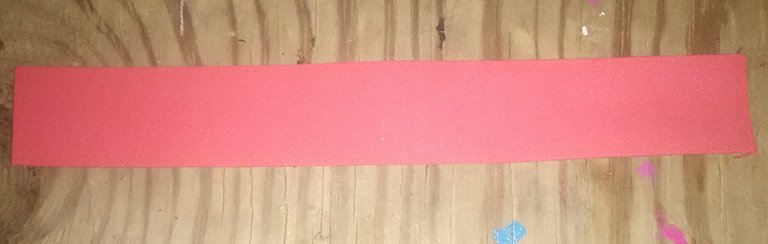
Cut a red foami ribbon of 5 centimeters approximately.

Fold in half both ends of the frosted foami strip and cut at an angle.
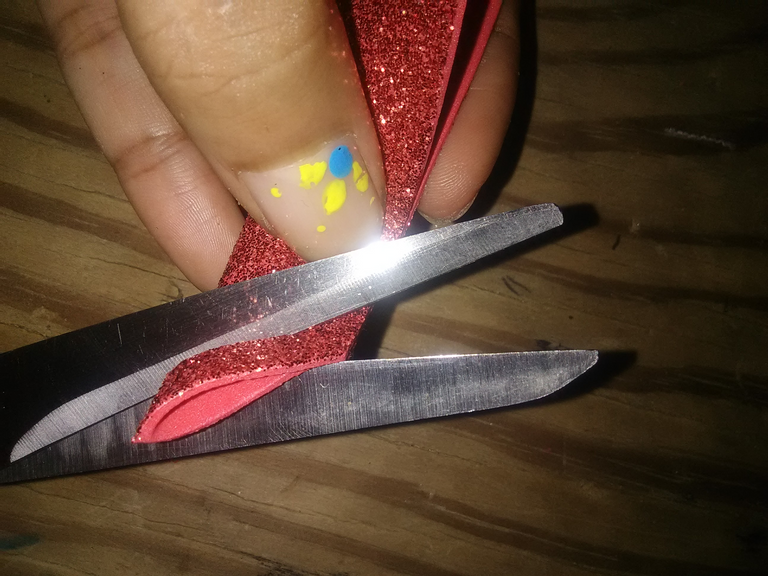
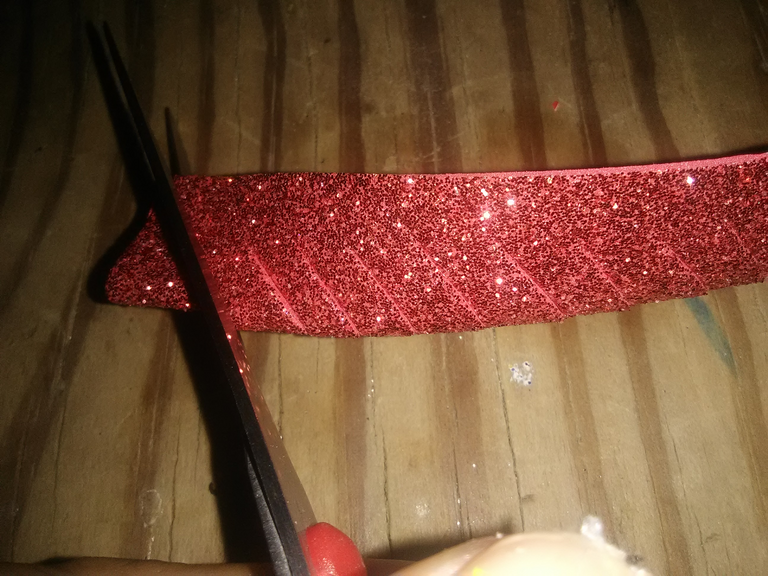
Then cut the folded material vertically but do not cut all the way through the folded material.
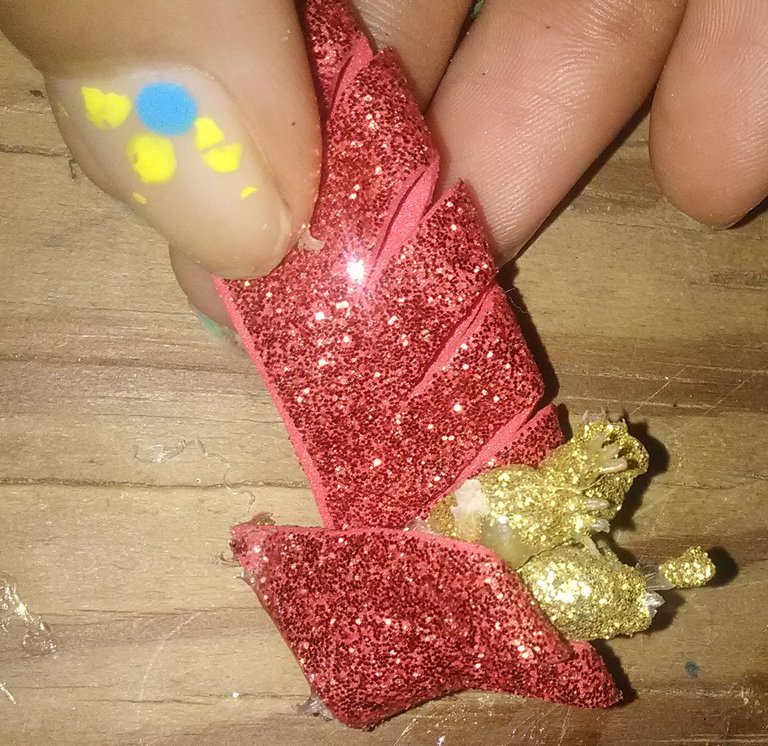
Then roll the foami material around some golden sticks.
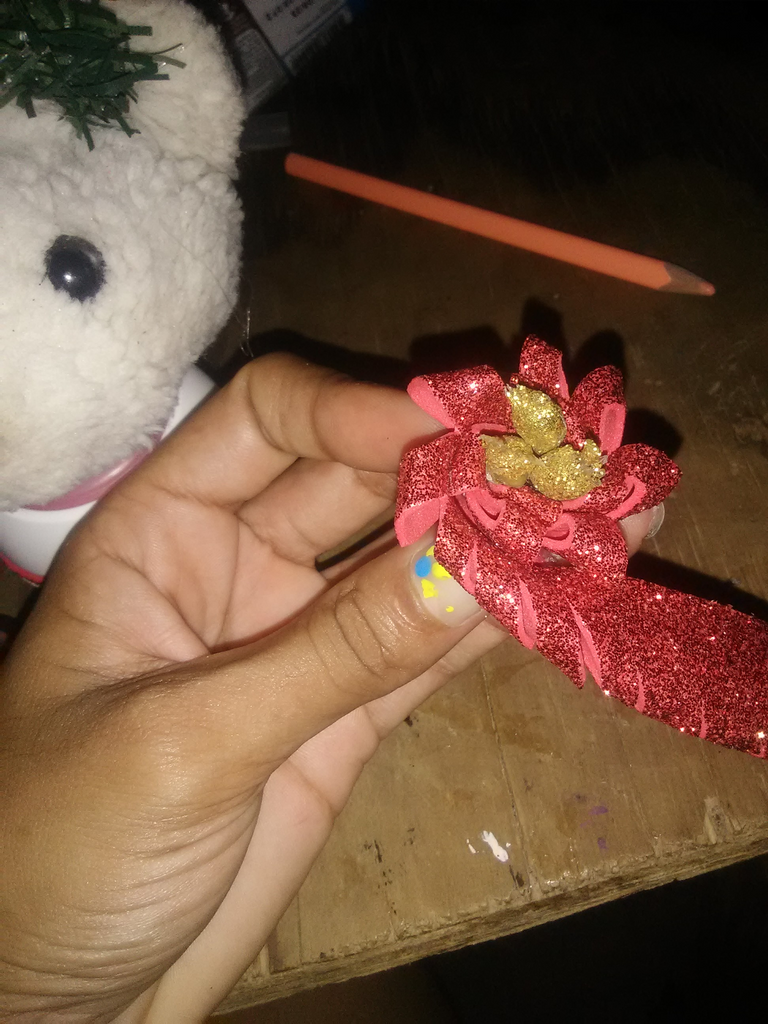
A headband is made to decorate the bear's head.
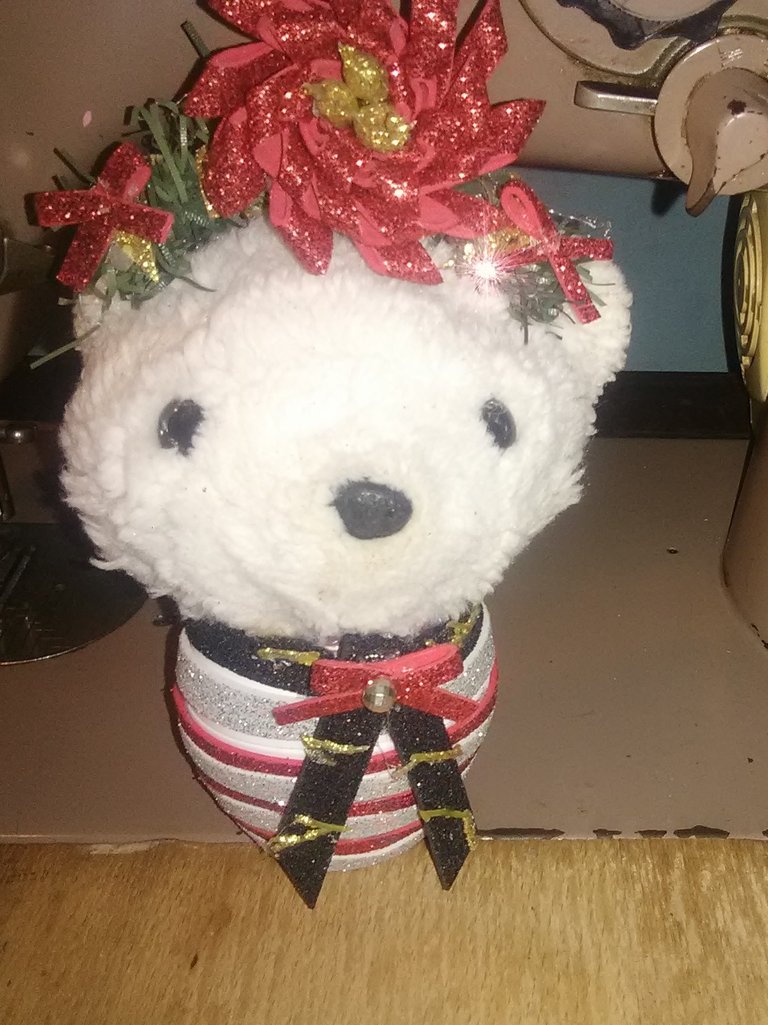
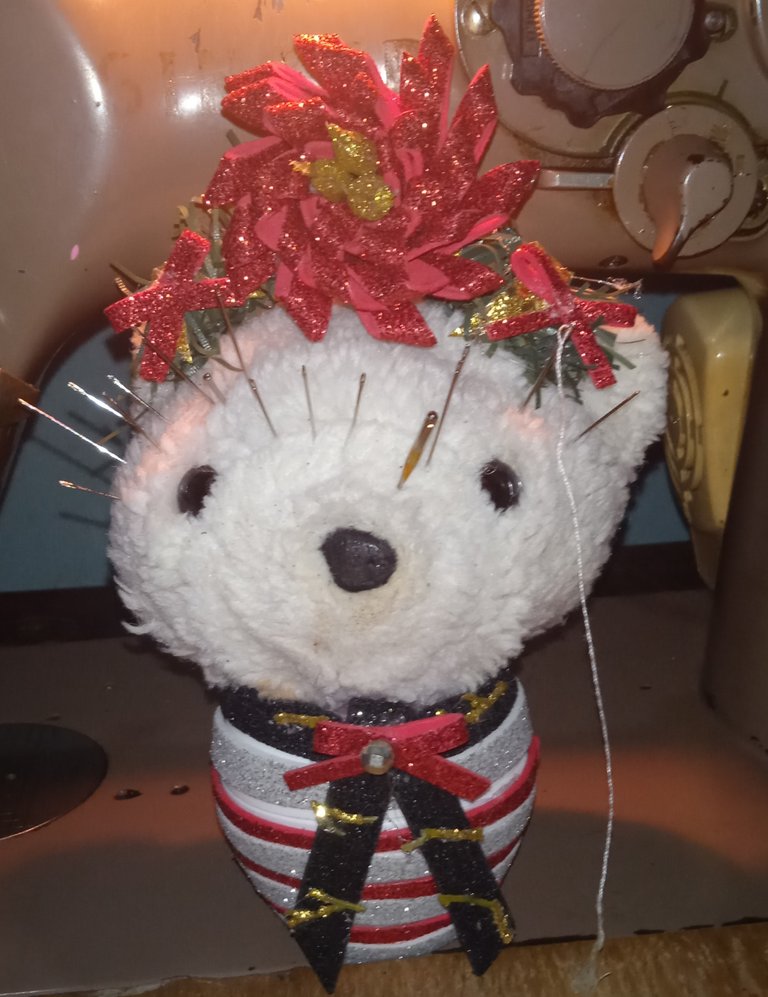
This is how we get this cute pincushion. I hope you like the proposal. It is a beautiful Christmas bear.
May the energy of the universe be with you and may you always share beautiful moments with your family and friends.
The images are my own and were taken with a ZTE BLADE phone.
Translator utilization: Deepl
The editing of the photos was done using the Polish Photo Editor application and separators were edited in canva.

Hola queridos amigos de Hive y NeedleWorkmonday, es un gusto escribir en esta comunidad donde me he iniciado recientemente. Quiero agradecer por cada uno de sus comentarios y sobre todo por el apoyo que he recibido de cada unos de ustedes, infinitas gracias por ello.
Me encanta la época de la navidad porque es una fecha para compartir, estar en familia pero además para desbordar de creatividad y alegría nuestros hogares. Poder además crear diseños para mantener el orden de las cosas en nuestros hogares es esencial. Es la relación entre el orden y lo bonito, muy necesario cuando se habla de costura.
Hoy quiero mostrarle la elaboración de un alfiletero de osito de navidad 🐻. Utilizando materiales de reciclaje y tela de peluche.
Se arma la cabeza del osito de tal forma que se cose esta.
Luego se voltea la pieza y se crea la nariz del osito.
Luego se añaden a la cara de nuestro oso.
Posteriormente se le va a colocar el relleno a nuestra cabeza de oso.
Luego se cose el área de abajo de la cabeza del oso para evitar que el relleno de salga.
Se ubica un envase pequeño con tapa, y en la tapa se va a pegar la cabeza del oso con silicon caliente.
Luego para la base, se decora con foami rojo y plateado escarchado.
Se corta una cinta de foami rojo de 5 centimetros aproximadamente.
Se dobla a la mitad ambas puntas de la tira de foami escarchado y se corta de forma inclinada.
Luego se corta el material doblado en forma vertical pero si hacer un corte total del material doblado.
Posteriormente enrolla el material de foami alrededor de unos palitos dorados.
Se hace un cintillo para la decoración de la cabeza del oso.
Así obtenemos este lindo Alfiletero. Espero les guste la propuesta. Es un bello osito de Navidad.
Que la energía del universo les acompañe y que siempre puedan compartir bonitos momentos con sus familiares y amigos.
Las imagenes son de mi autoria y fueron Tomadas a traves de un Telefono ZTE BLADE.
Traductor utilizado: Deepl
La edicion de las fotos la realicé mediante la aplicaciones Editor de Fotos Polish y los separadores se editaron en canva.
Thank you for sharing this post on HIVE!
Your content got selected by our fellow curator rezoanulvibes & you just received a little thank you upvote from us for your great work! Your post will be featured in one of our recurring compilations which are aiming to offer you a stage to widen your audience within the DIY scene of Hive. Next time make sure to post / cross-post your creation within the DIYHub community on HIVE and you will receive a higher upvote ;) Stay creative & HIVE ON!
Please vote for our hive witness <3
Está hermoso amiga y muy útil ❤️
Muchas gracias! 💗
Hola Liss. Que lindo que se ve este alfiletero de osito, aunque con todos esos pinches parece algo de voo-doo? jajaja. Solo bromeo, se ve bien y útil. Te felicito ❣️
Permitime hacerte algunas sugerencias en cuanto a la publicación. Solo unos consejos en cuanto a las fotos: asegurate de tomar fotografías con buena iluminación para que se vean un poco mejor. Las fotos en luz natural siempre son las mejores, pero sino en algún lugar con una buena lámpara también estaría bien. Estos detalles le dan más valor a las publicaciones y ese esfuerzo puede ser recompensado :)
Espero que te sirva esta información. Cualquier otra duda que tengas no dudes en consultar. No sé si estas en nuestro servidor de Discord pero igual te dejo la invitación: https://discord.gg/zsrp6Tkx.
¡¡Saludos ❤️!!
Hola. muchas gracias . Si, mi tlf no es muy util en cuanto a la captura de las imagenes en horario nocturno. obtaré por utilizar la luz natuarl. Gracias por la sugerencia. Saludos. 💗
Yay! 🤗
Your content has been boosted with Ecency Points, by @divergente1.
Use Ecency daily to boost your growth on platform!
Support Ecency
Vote for new Proposal
Delegate HP and earn more
Beautiful design