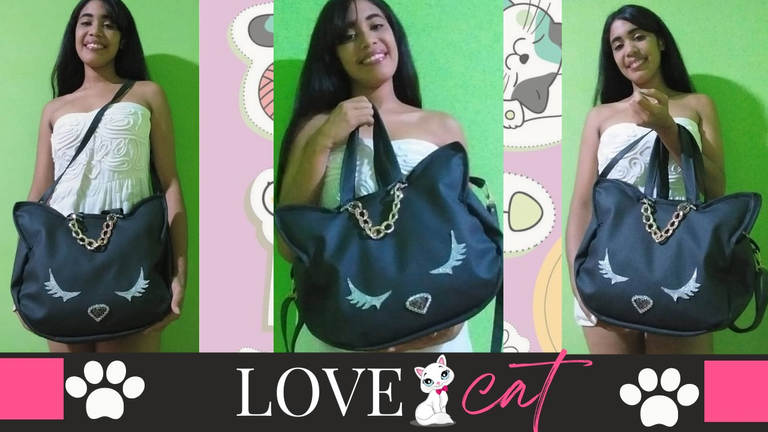
Diseña un Hermoso Bolso de Gato | Design a Beautiful Cat Bag
Español
Hola queridos amigos de Hive, es un gusto saludarles. En Nuestra querida comunidad de DIY-Hub, se nos ha brindado la oportunidad de elaborar diseños, manualidades y todo tipo de bricolaje con la tematica de gatos, esto a propósito del día internacional del gato que se celebra el 8 de agosto de cada año.
Los gatos sin duda alguna forman parte de nuestras vidas, de nuestros corazones y tambien de nuestros accesorios. Su diseño siempre brinda elegancia y belleza en cada uno de nuestras creaciones.
En esta oportunidad quiero brindarle la elaboración de una hermosa cartear de cuero con diseño de gato. Espero les guste!
Materiales
- 1/2 metro Cuero negro
- Hilo de coser negro
- Relleno
- Cinta Plateada
- Cartulina (Patrones del diseño del gato)
- Brillo de uña escarcchado.
- Carton o material reciclado de placas.
- Pega instantánea
- Cierre
- Cristales
- Cadena
- Nylon fino
Paso a Paso
1
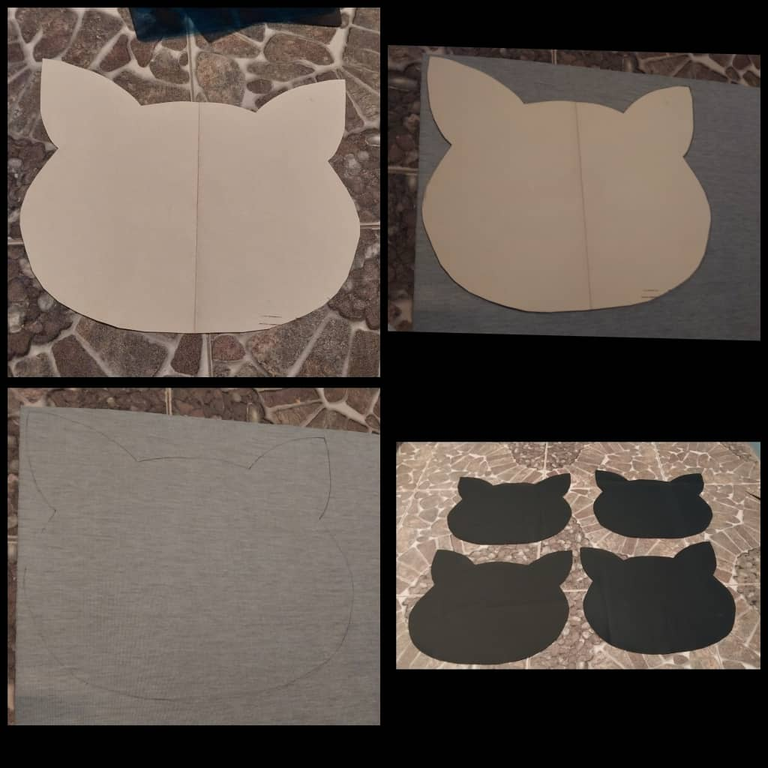
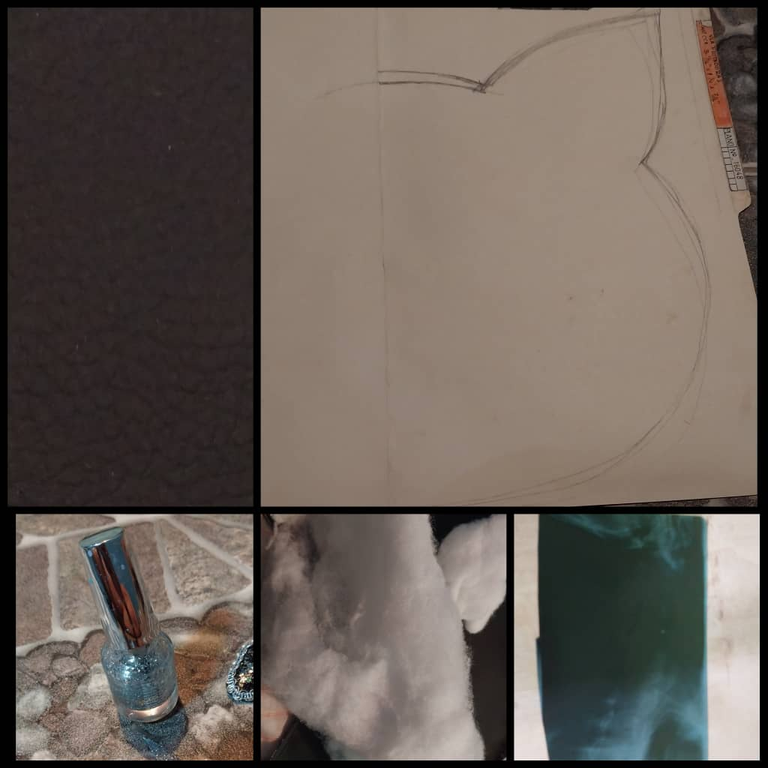
Se toma la cartulina y sobre esta se traza el diseño de la forma anatómca de la cabeza de nuestro gato. Luego se debe calcar ese patron sobre el cuero. Se deben trazar cuatro caras y luego recortar el diseño.
2
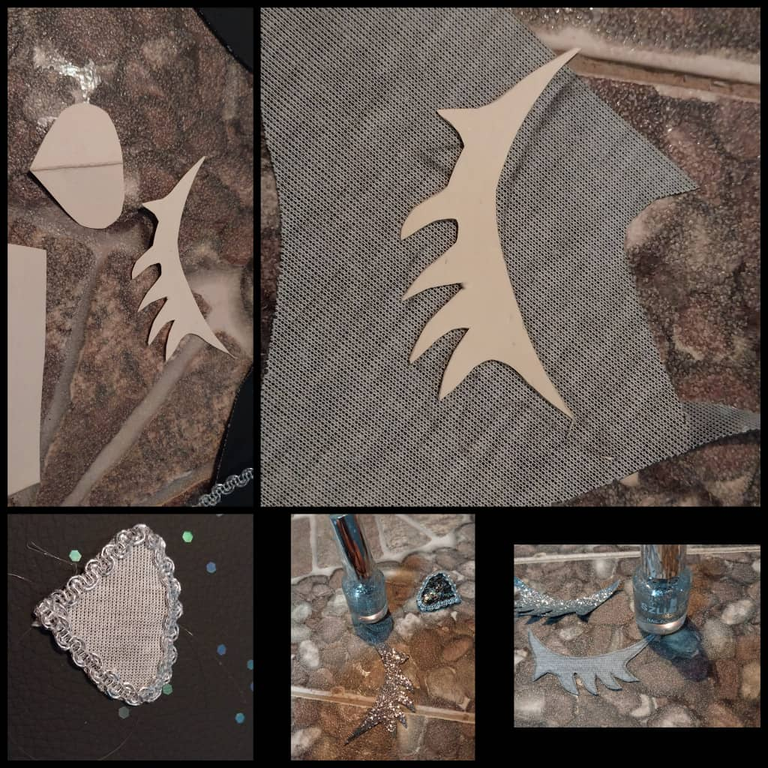
Seguidamente se debe trazar sobre la cartulina las pestañas y la nariz de nuestro gatop, una vez que se tenga la forma deseada se debe calcar dos pestañas y la nariz sobre el cuero.
Seguidamente se debe recortar y luego se aplicar el brillo de uña sobre la tela de cuero.
3
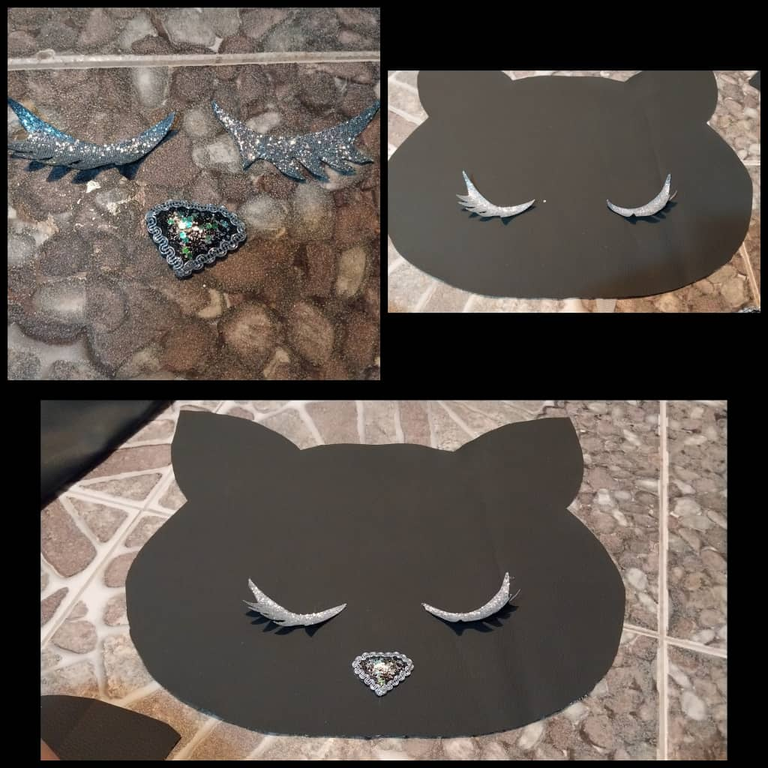
Luego se toma la cinta plateada y se pega esta sobre el borde de la nariz del gato. Seguidamente con la pega instantánea se deben pegar las pestañas y la nariz.
4

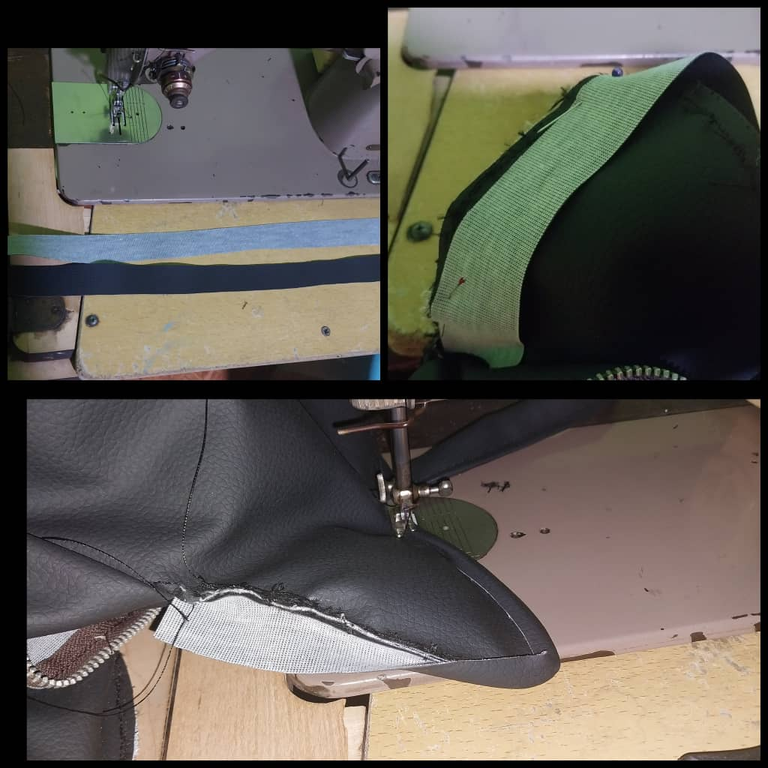
Luego se deben coser ambas caras hasta la parte media sin coser las orejas del gato. Es decir amos a obtener dos caras dobles del material de cuero. Seguidamente se debe tomar don cintas de cuero y coser estas en ambos lados de las caras de los gatos en la parte trasera debajo de las orejas, para fijar en estas el cierre.
5

Seguidamente con el material de placa o algun otro material que proporcione estabilidad en las orejas se procede a formar una orejas de gatos, tomando las medidas exactas de las orejas del gato de nuestro bolso. Este material de placa es muy versatil porque al momento de coser en la maquina el proceso se hace sencillo.
Seguidamente se cose y se sella todo el borde de las orejas.
6

Luego se debe tomar una cinta de cuero y del grosor de su preferencia, en este caso he utilizado 12 cm de gtosor y 42 cm de largo. Esta cinta se debe coser desde el borde donde inicia las orejas del gato, hasta el otro extremo.
Se hace lo mismo con la otra cara del gato y es la que permite unir en conjunto nuestro bolso.
7

La parte media del gato es la unica zona que nos hace falta coser, se ha dejado asi,con el propósito de que se puedan colocar las asas de nuestro bolso.
Para ello se toma una cinta de cuero de 24 cm de largo y 8 cm de ancho. De esta manera Esta se dobla a la mitad y se cose en la maquina de coser.
Se fijan estas en la zona media del bolsoen ambos lados del bolso se debe fijar las asas.
8
Luego se debe coser todo el borde superior de las orejas de nuestro gato, para corregir los bordes de las orejas. De esta manera, se toma una cinta de 4 cm de ancho y 14 cm de largo. Se cose primero en uno de los bordes a lo largo y luego se dobla y se cose de forma muy cuidadosa el borde de la oreja.
9
Luego para decorar tambien el bolso se toma un poco de material de cuero y se hacen flecos, tambien se decora con algunos cirstales.
Tambien se fija una cadena en la parte central del bolso con la ayuda de hilo de Nylon fino.

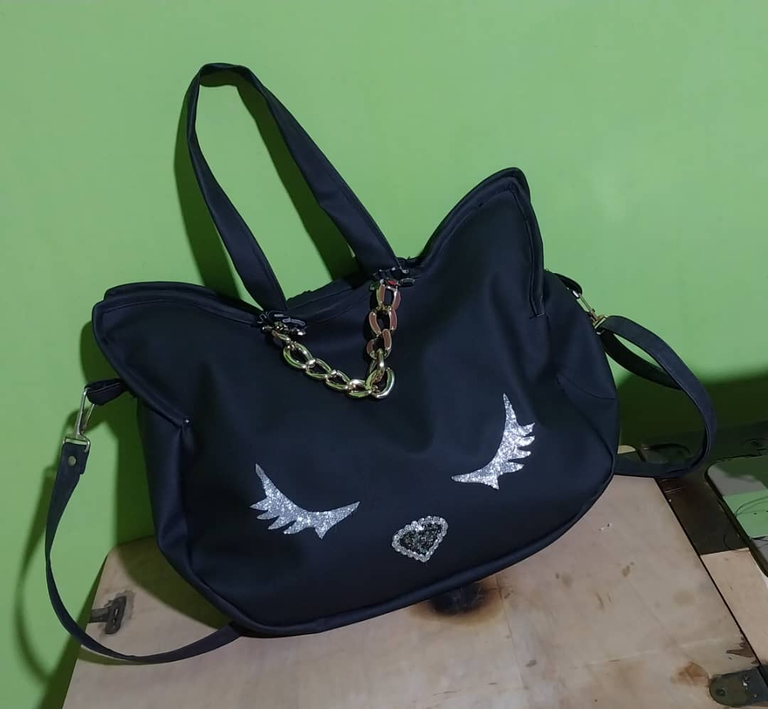
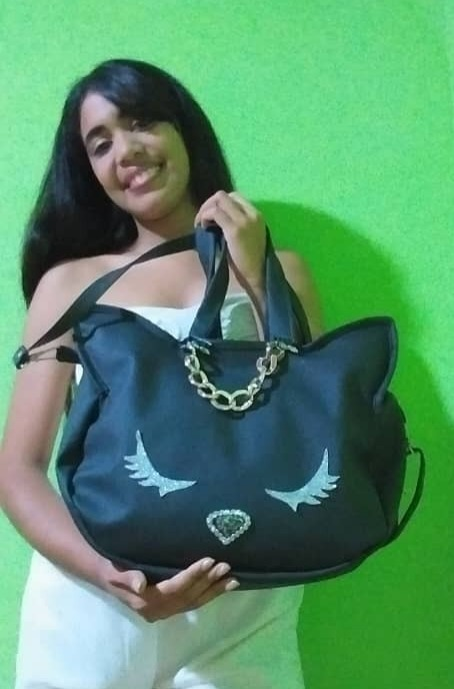
Espero les guste el diseño de este bolso gatubelo.
Saludos amigos, espero tambien se animen a crear y participar en el concusrso en homenaje a uno de los flinos más encantadores, como lo son los gaticos.
Gracias
- Las imágenes me pertenecen
- Traductor: Deepl Traslator
- Banners: Canva
English
Hello dear friends of Hive, it is a pleasure to greet you. In our beloved DIY-Hub community, we have been given the opportunity to develop designs, crafts and all kinds of DIY with the theme of cats, this on the occasion of the international cat day which is celebrated on August 8 each year.
Cats are undoubtedly part of our lives, of our hearts and also of our accessories. Their design always brings elegance and beauty in each of our creations.
In this opportunity I want to bring you the elaboration of a beautiful leather cartear with cat design. I hope you like it!
Materials
- 1/2 meter Black leather
- Black sewing thread
- Stuffing
- Silver Ribbon
- Cardboard (Cat design patterns)
- Frosted nail glitter.
- Cardboard or recycled plate material.
- Instant glue
- Clasp
- Crystals
- Chain
- Thin nylon
Step by Step
1
Take the cardboard and trace on it the design of the anatomical shape of the head of our cat. Then you must trace this pattern on the leather. You must trace four faces and then cut out the design.
2
Next, trace the eyelashes and the nose of our cat on the cardboard. Once you have the desired shape, trace two eyelashes and the nose on the leather.
Then cut it out and apply the nail polish on the leather fabric.
3
Then take the silver tape and glue it on the edge of the cat's nose. Then with the instant glue, glue the eyelashes and the nose.
4
Then sew both sides up to the middle part without sewing the cat's ears. In other words, we are going to obtain two double sides of the leather material. Next, take two leather strips and sew them on both sides of the cat's faces at the back under the ears, in order to fix the clasp on the ears.
5
Then with the plate material or some other material that provides stability in the ears we proceed to form the ears of cats, taking the exact measurements of the ears of the cat of our bag. This plate material is very versatile because at the time of sewing in the machine the process is simple.
Next, the entire edge of the ears is sewn and sealed.
6
Then you must take a leather ribbon and the thickness of your preference, in this case I used 12 cm thick and 42 cm long. This tape should be sewn from the edge where the cat's ears start, to the other end.
The same is done with the other side of the cat and it is the one that allows to join together our bag.
7
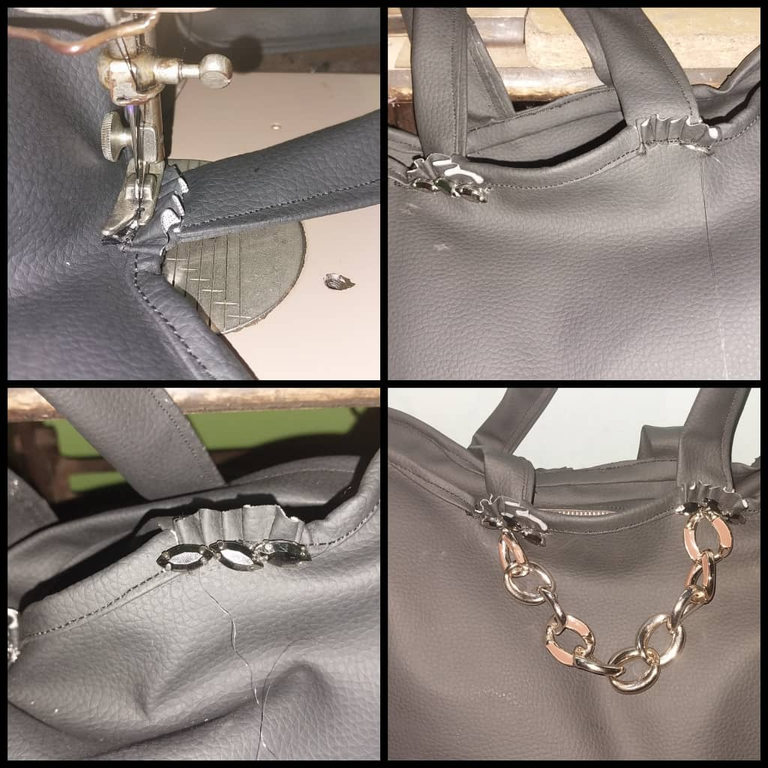
The middle part of the cat is the only area that we need to sew, it has been left like this, in order to be able to place the handles of our bag.
To do this we take a leather band 24 cm long and 8 cm wide. This is folded in half and sewn in the sewing machine.
These are fixed in the middle area of the bag on both sides of the bag should be fixed handles.
8
Then sew the entire upper edge of the ears of our cat, to correct the edges of the ears. In this way, a 4 cm wide and 14 cm long ribbon is taken. It is first sewn on one of the edges lengthwise and then folded and sewn very carefully the edge of the ear.
9
Then to decorate also the bag you take some leather material and make bangs, you also decorate it with some cirstals.
A chain is also attached to the central part of the bag with the help of fine nylon thread.
I hope you like the design of this bag gatubelo.
Greetings friends, I hope you are also encouraged to create and participate in the contest in honor of one of the most charming flinos, as are the kittens.
Thank you.
- Images belong to me
- Translator: Deepl Traslator
- Banners: Canva
Que cuchitura de bolsito recreando a un gatito, me encanto, el color y cada detalle esta muy lindo. Mucha suerte en el concurso @divergente1 🐱💕
!DIY
Muchas gracias querida amiga! 😍
You can query your personal balance by
!DIYSTATSExcellent work, the bag is beautiful, it is very well made. A cat lover would love to have one like this. Thank you for entering the contest. Good luck! // Excelente trabajo te quedo bello el bolso, esta muy bien confeccionado. Un amante de los gatos, le encantaria tener uno asi. Gracias por participar en el concurso. Suerte!
Muchas garcaias!
Te quedó bello amiga muy práctico...de lujo....
. Muchas gracias amiga! ❤️
Muy lindo trabajo 😻 ..! Me encantaría llevarlo a la playa 👙
Si, es muy cómodo y espacioso. Saludos!
😉
Quiero uno así de hermoso! jeje
Te felicito amiga!
Gracias❤️🎶
Mil gracias amiga. Saludos
Ah Quedado muy hermoso 😊 Increíble Diseño único .
Gracias mana!
Que bello,sencillo y delicado 😍☺️.
I congratulate you friend it is a versatile bag, it is great to wear it in this season. good luck in the contest.💖
Te felicito amiga es un bolso versátil, es genial para lucirlo en esta temporada. suerte en el concurso.💖
que bonito
Hermoso bolso amiga quedó muy lindo