Design and Create a beautiful Squirrel Titter / Diseña y Crea un hermoso Titere de Ardilla
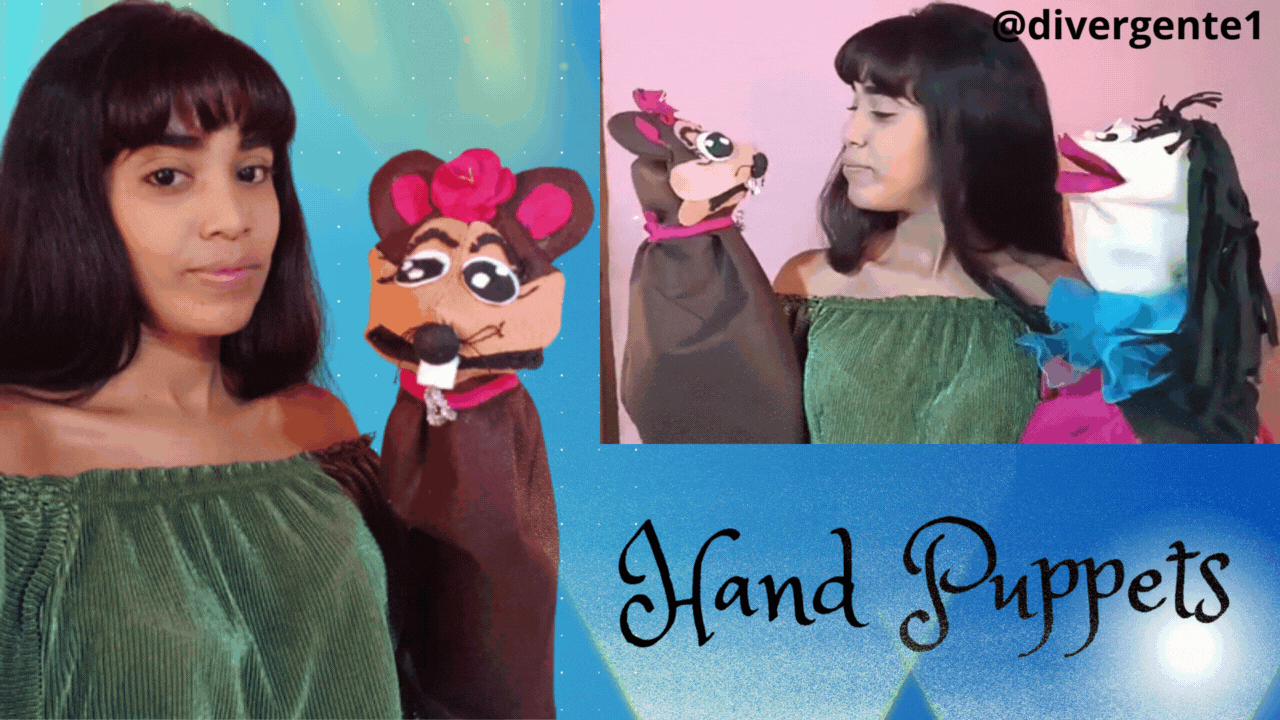
Dear friends of Hive, I hope you are feeling well. Today I want to share with you the elaboration of a very easy and quick to make Squirrel puppet. I hope you like it, and also help me to find an appropriate name for my new creation.

- Brown Felt
- Ochre felt
- White felt
- Scissors
- Silicone
- Cardboard
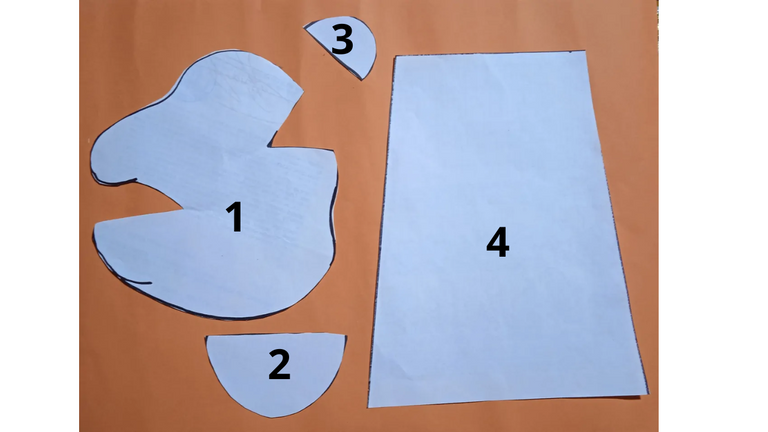
- Patterns of the puppet's head and body

| Step 1 |
|---|
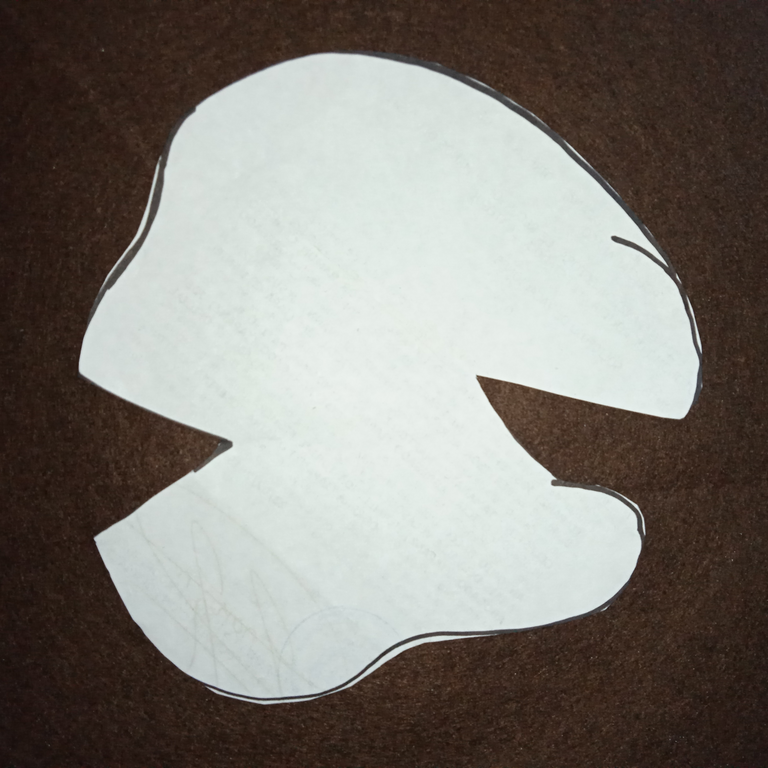
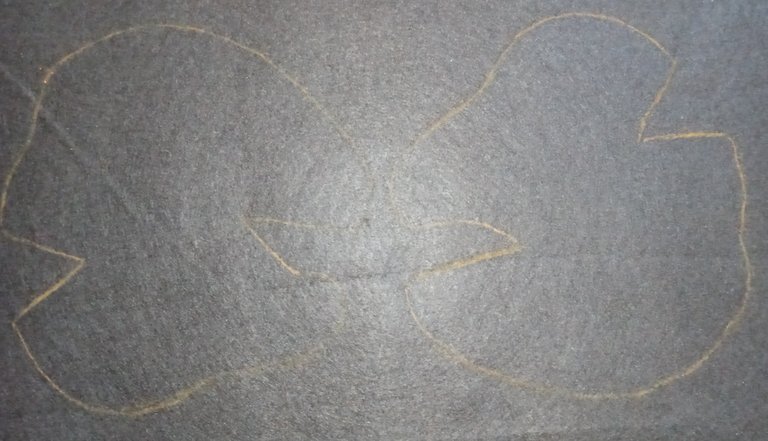
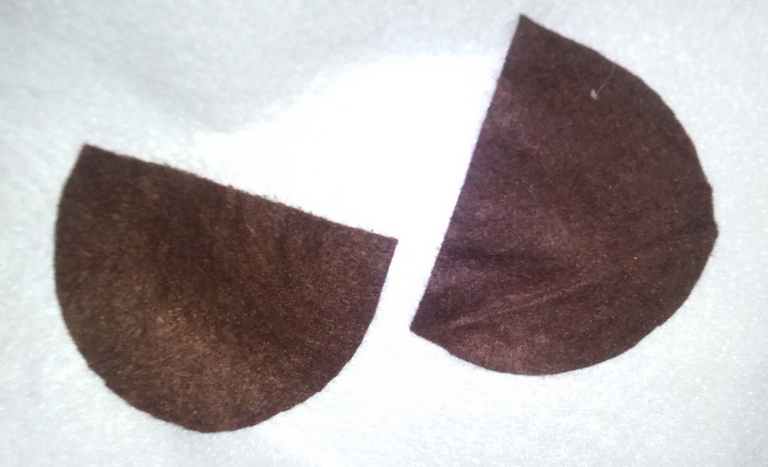
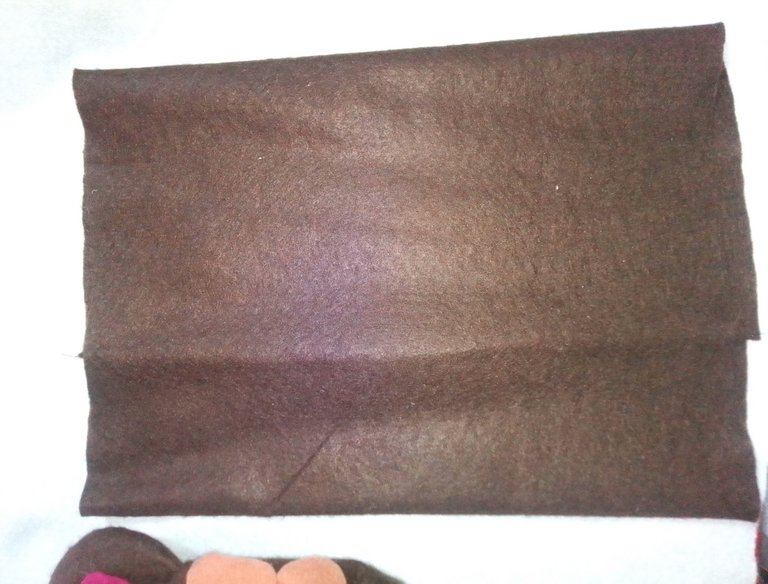
Take the figure number 1, which corresponds to the head of our squirrel and place it on the brown felt fabric. Mark the pattern on the fabric.
2
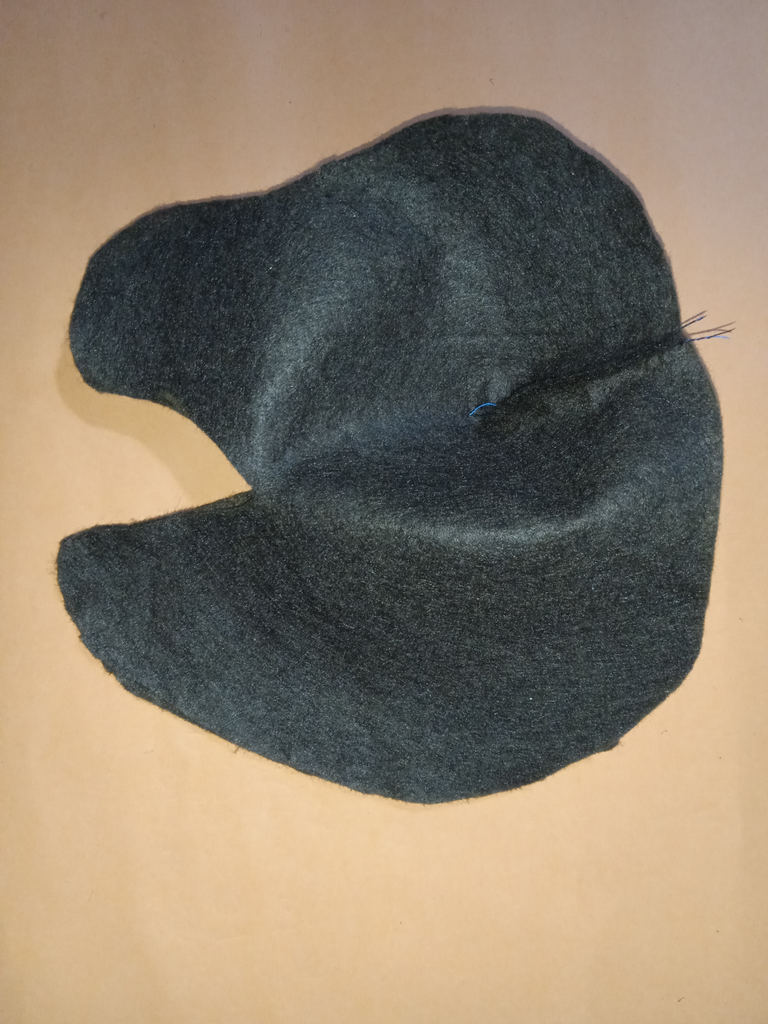
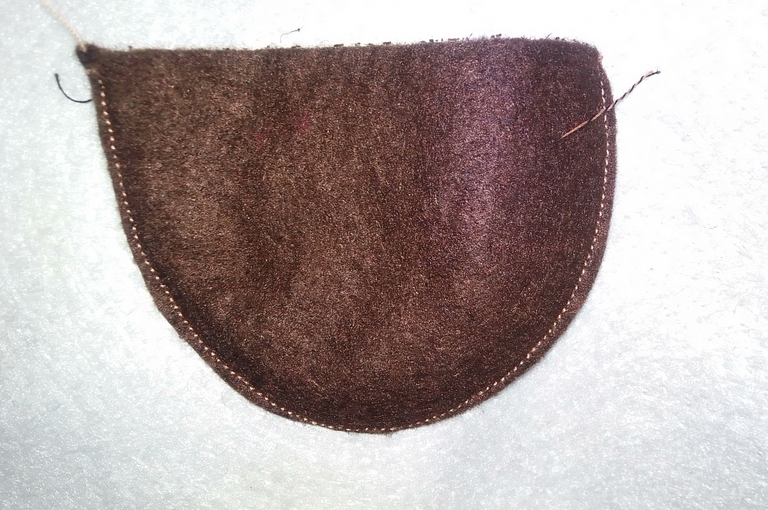
Afterwards, sew the clamp shown in the figure so that each side of the face is in the shape shown above in the image.
Then it's time to join both sides, sewing the face on the reverse side.
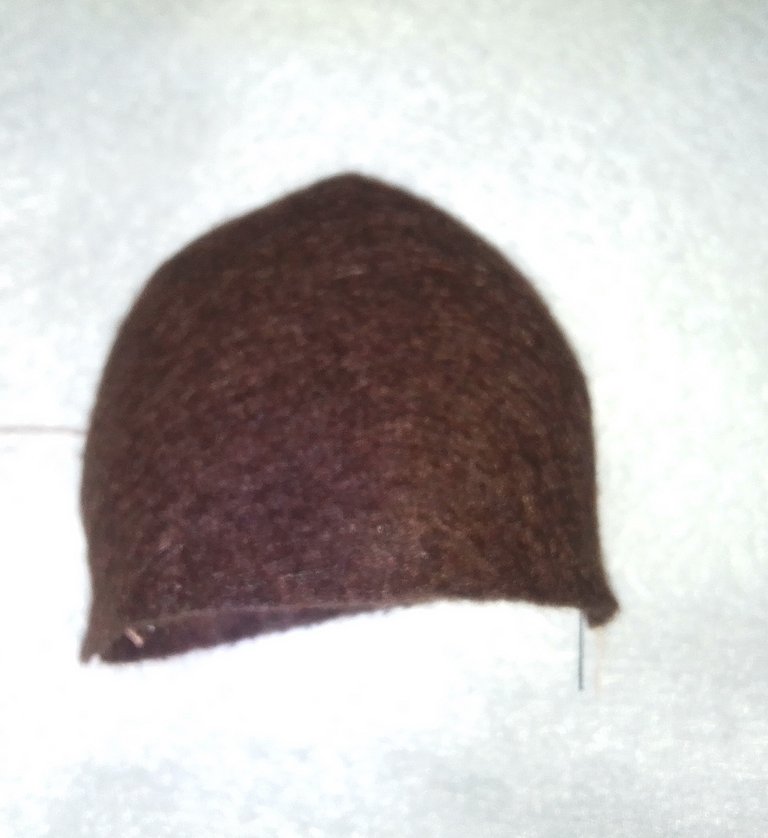
This is how the squirrel's head should look.
3
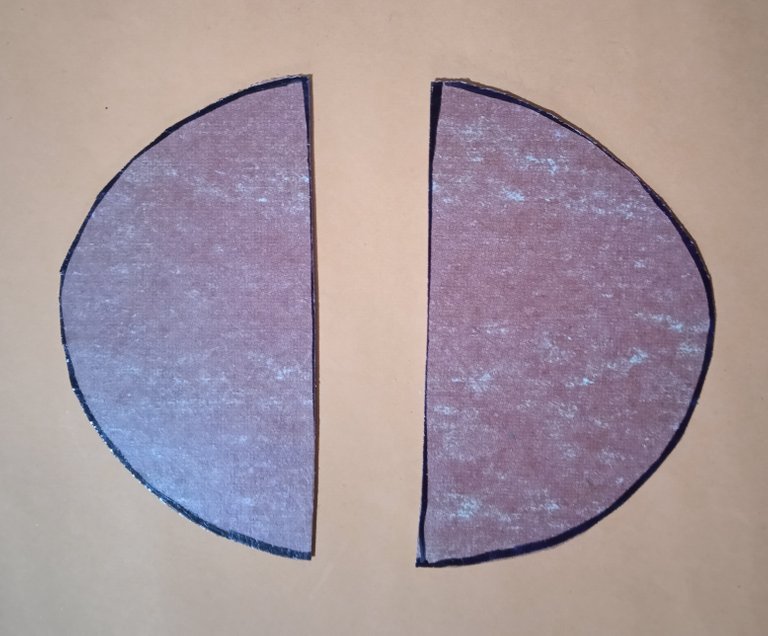
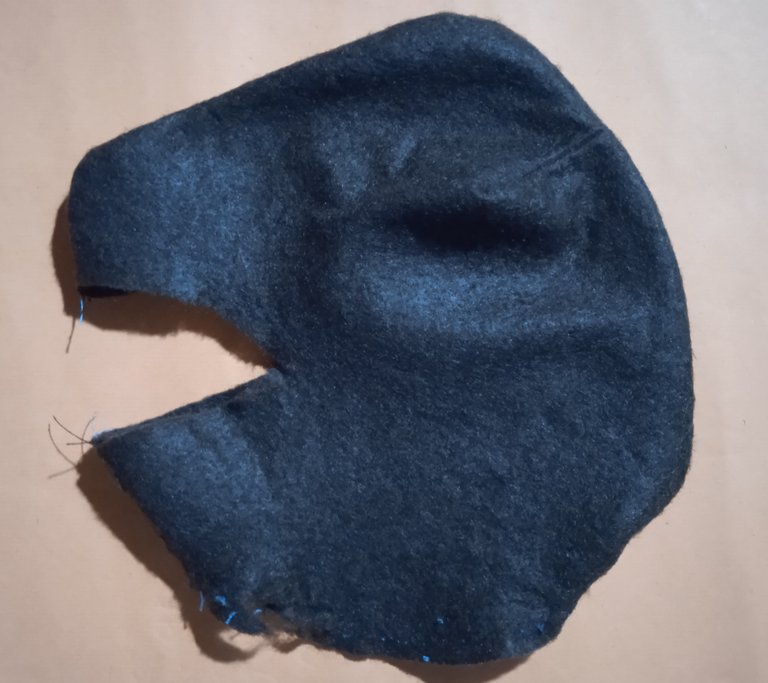
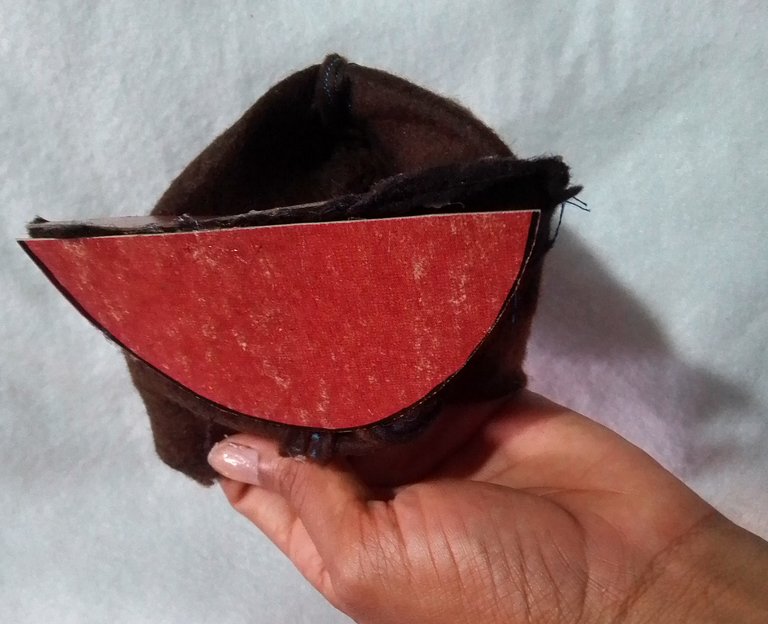
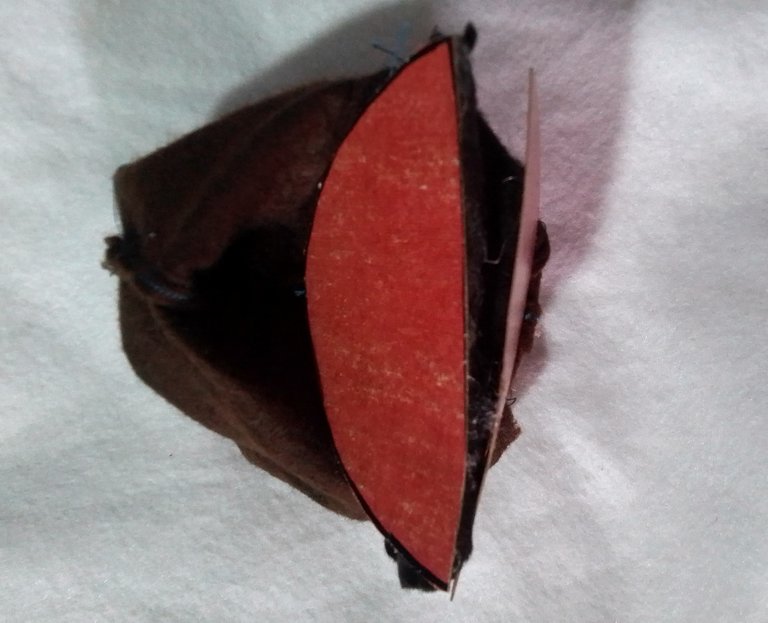
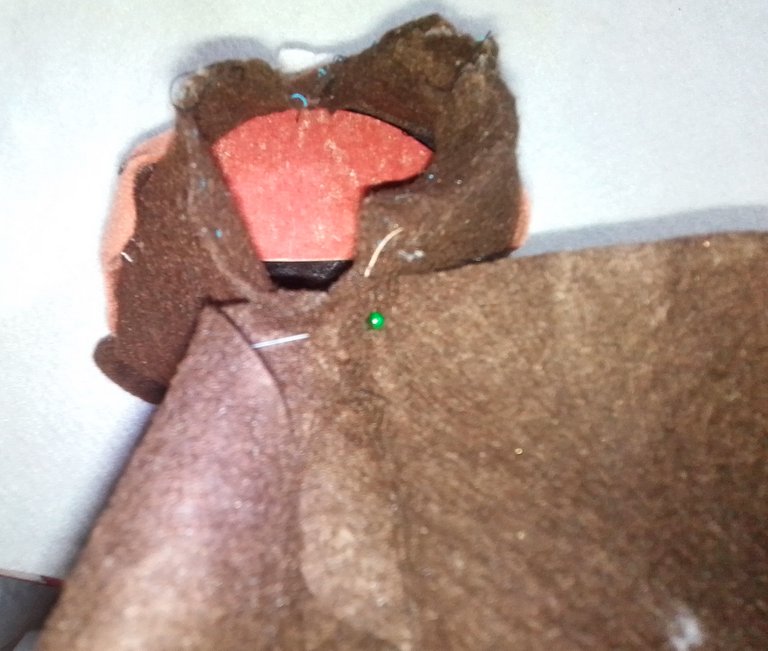
We proceed to take out on cardboard the figure number 2; this corresponds to the base of the mouth for the one that carries inside the tietere and that allows the movement of the mouth.
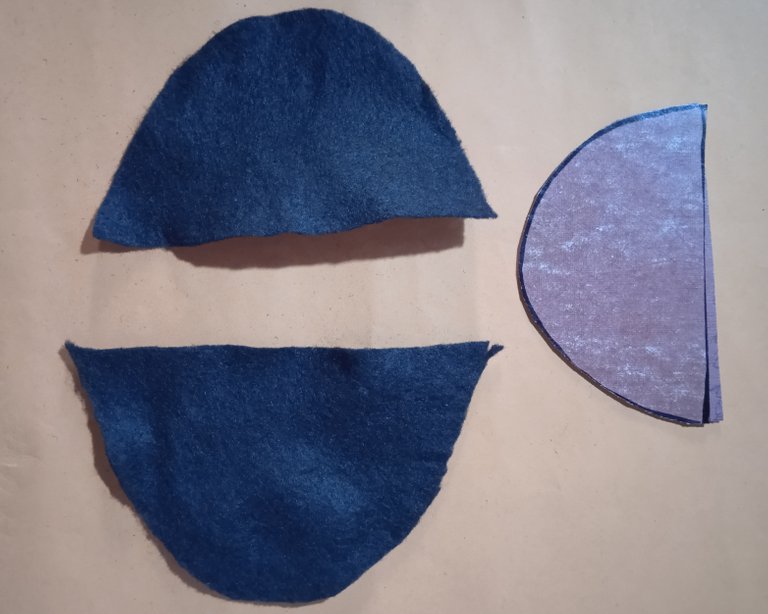
This design should be drawn on black felt.
4
Then flip the area of the squirrel's mouth and glue both black felts with their respective cardboard supports.
This should be the result.
5
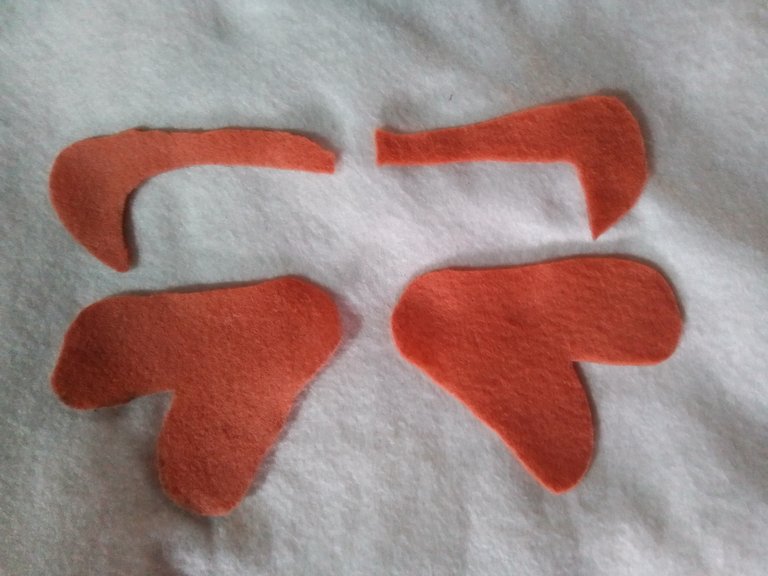
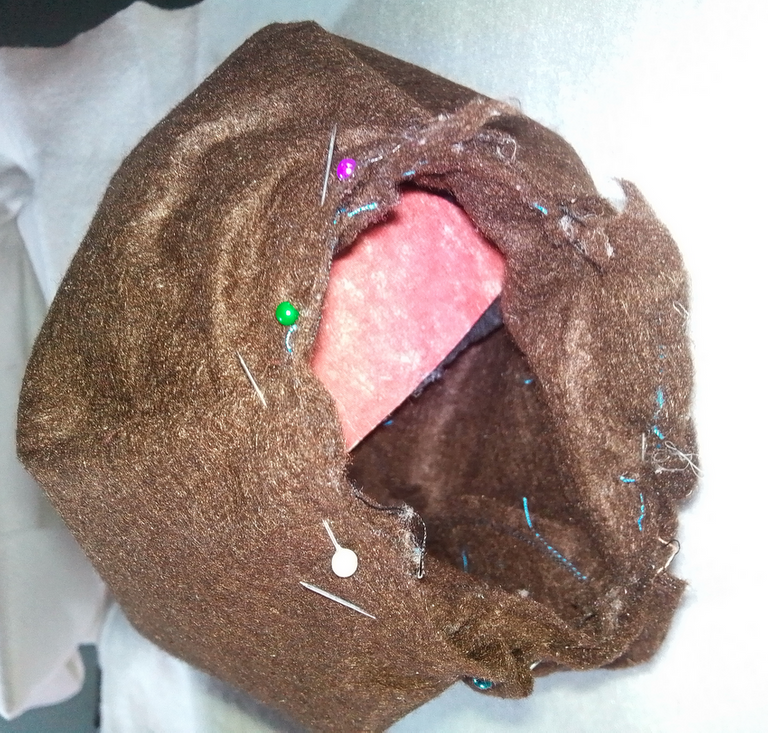
To create the face and enhance the details of the squirrel's face, I used ochre-colored fietro.
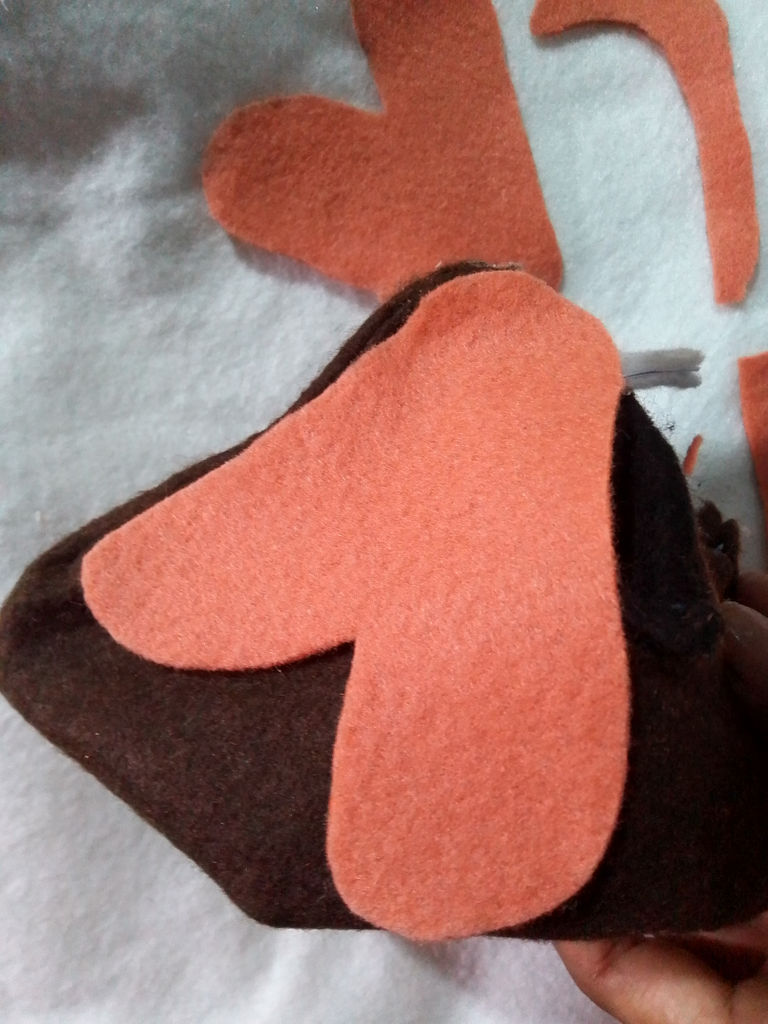
In this way the figure is glued by gluing the area where the squirrel's eyes and cheeks go.
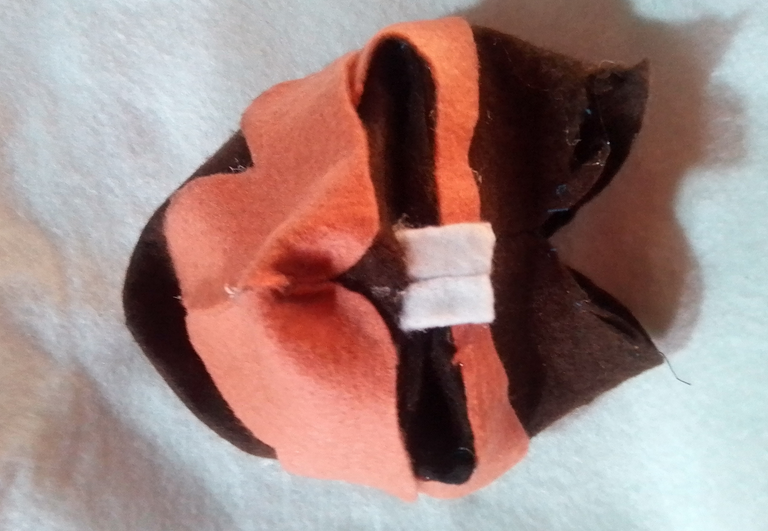
Then glue under the squirrel's snout the other two ochre-colored figures, and also add some teeth in the central area of the mouth to characterize our squirrel.
6

A small ball is made with the black fiber and is fastened with black thread to prevent it from coming loose.
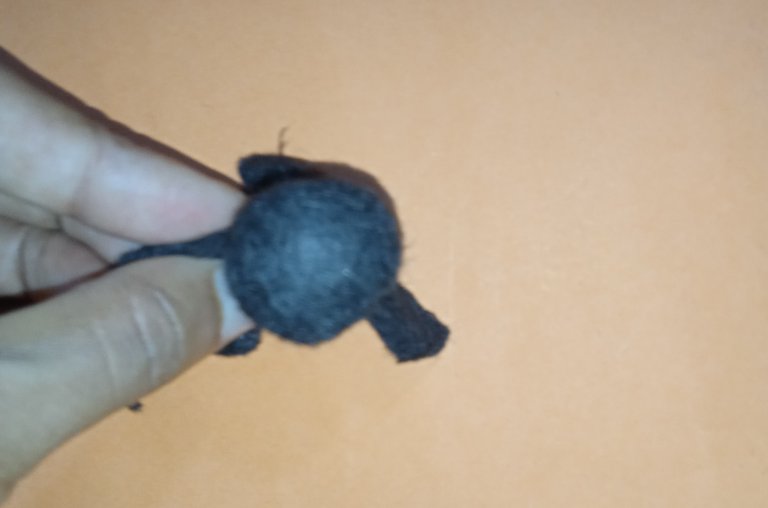
Then cut off the excess felt material.
In this way we glue the nose to the design of our puppet. To place the nose we must undulate the felt a little at the tip.
8
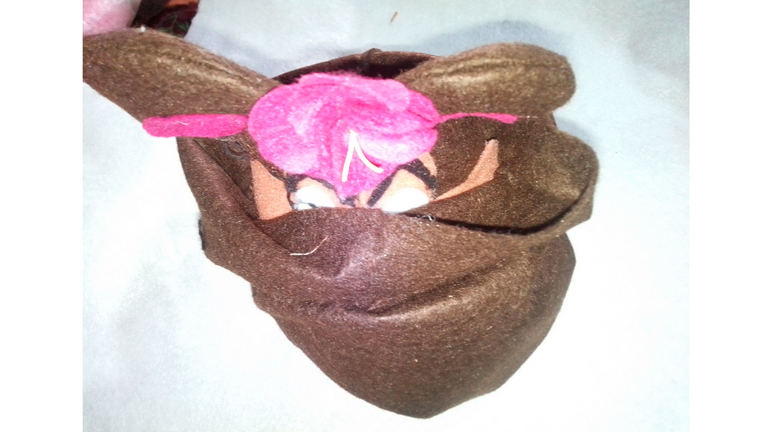
The design of the eyes of our ardiña was made by making two circles in white felt and a slightly smaller black one, then glue the black felt over the white one and inside the black circles glue two small white circles.
9
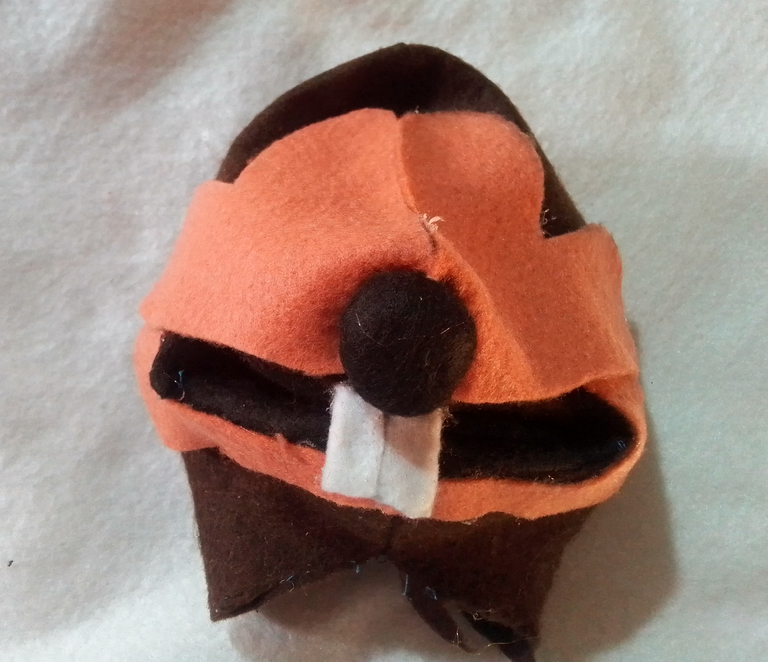
Then take figure 3 to design the ears of our puppet.
The two pieces are sewn together.
Then we turn the ears design to the reverse side.
Then glue the ears on the squirrel's head and also make a pink circle to glue on the ear.
10
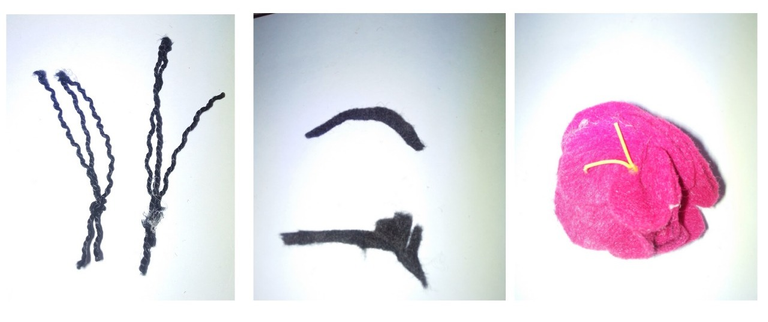
Whiskers are made with black thread. To design the eyebrows use black fietro and make a curve to resemble the shape of the squirrel's eyebrows. A fuchsia flower is also added to our decoration.
The eyebrows are fixed to the squirrel's face.
The whiskers are also glued on both sides of the face and the flower in the central part of the squirrel's face.
11
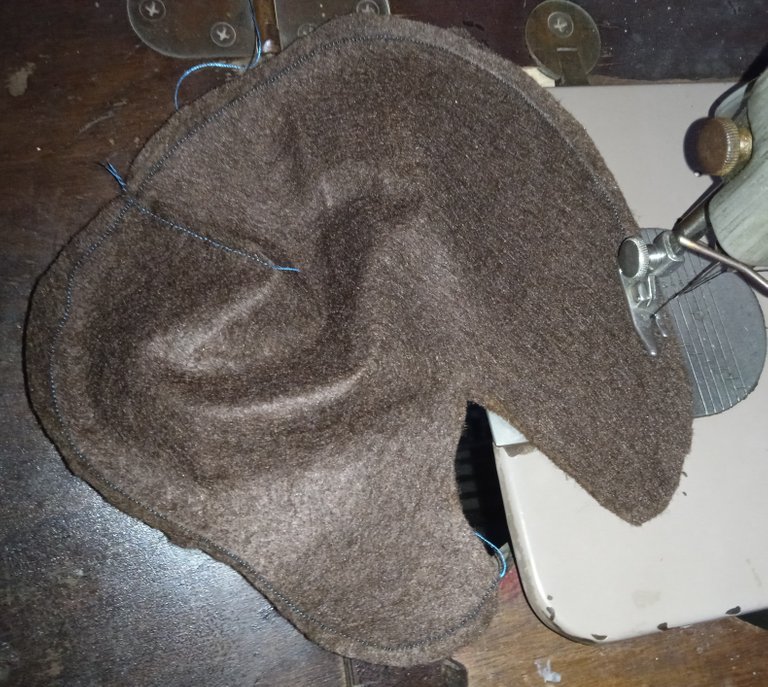
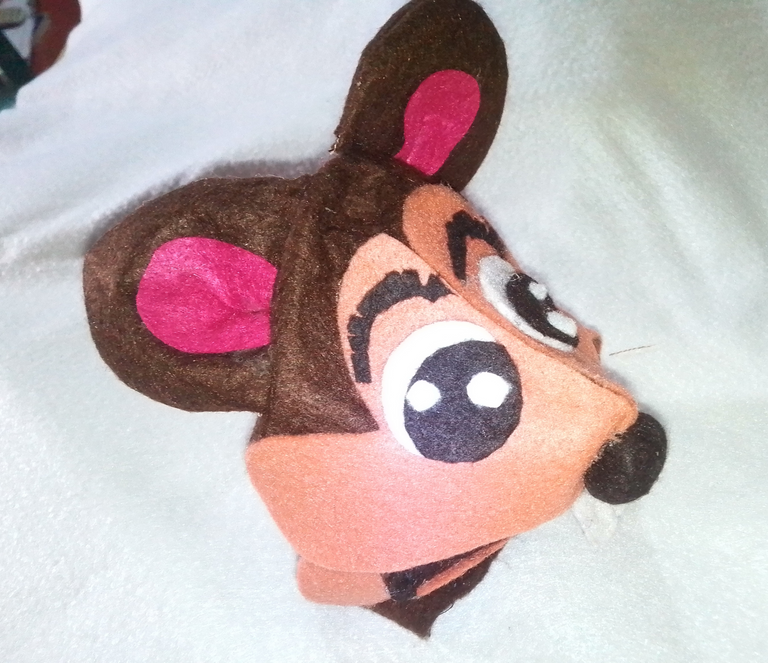
Then take the figure 4 to form part of the body of the squirrel, to remove it, place the fabric in a double way and cut it out.
Then the fabric is glued to the head of the squirrel and fastened with pins.
Sew on the reverse side to join the pieces together.
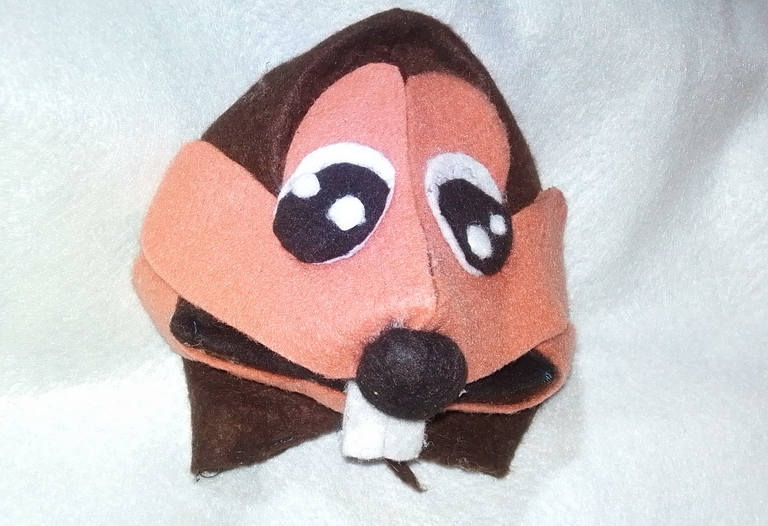
Finally our puppet is placed on the right side.
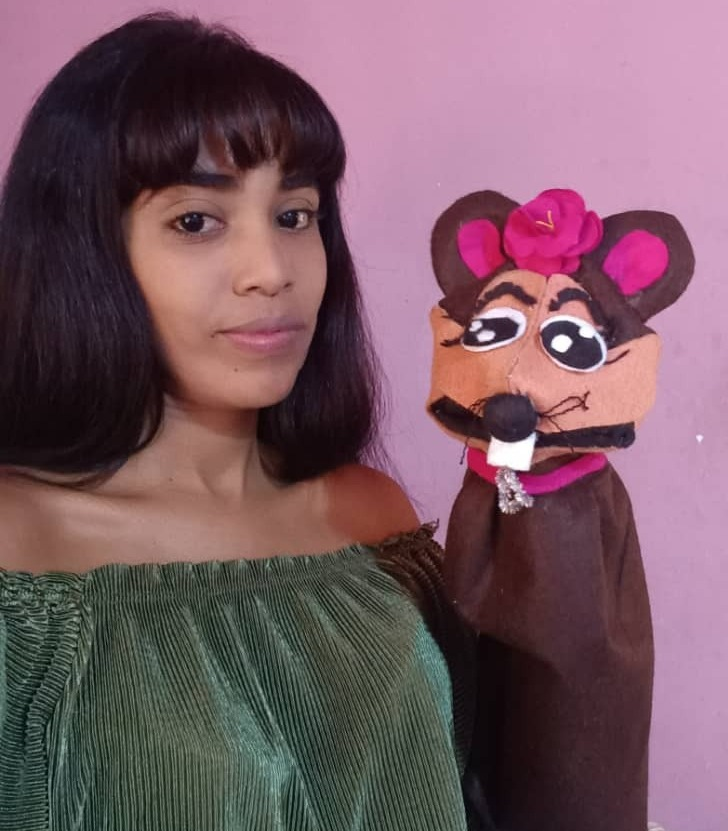
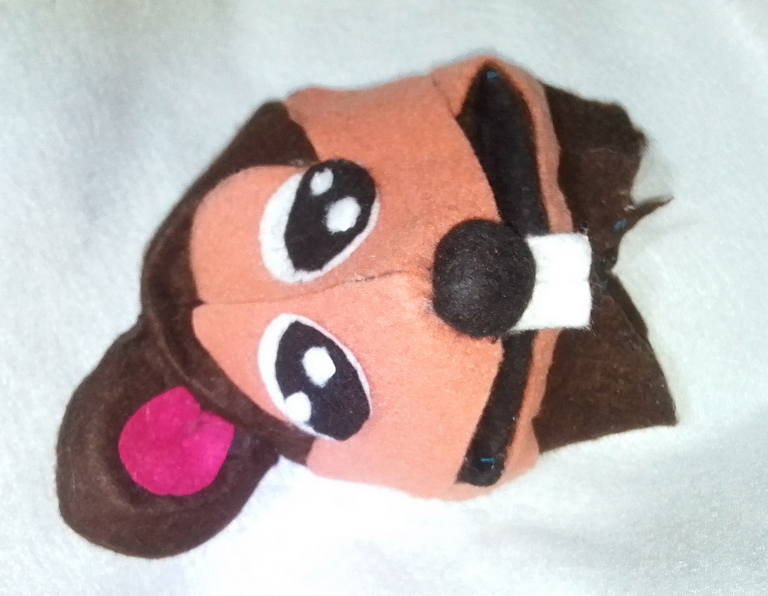
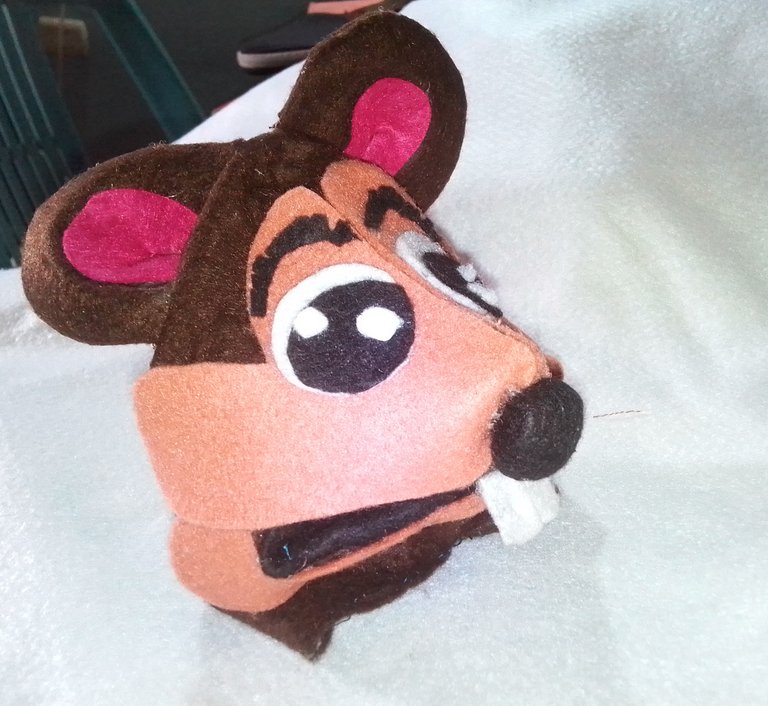
This is how we have finished making our cute little squirrel.
I hope you like it.

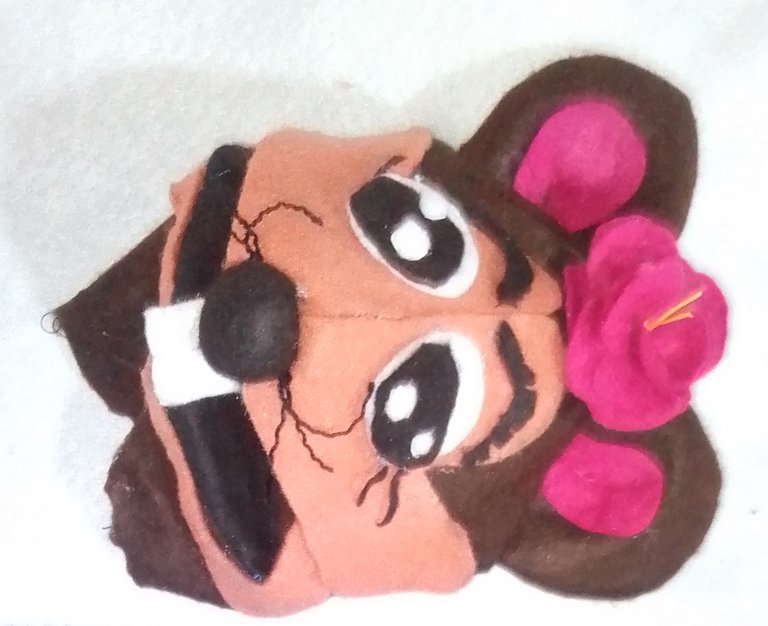
I have thought of some names for our cute puppet, because of her big eyebrows and her eccentric flower I thought of Frida the Squirrel, in honor of Frida Kahlo, a great woman and pride of Latin America! What do you think?
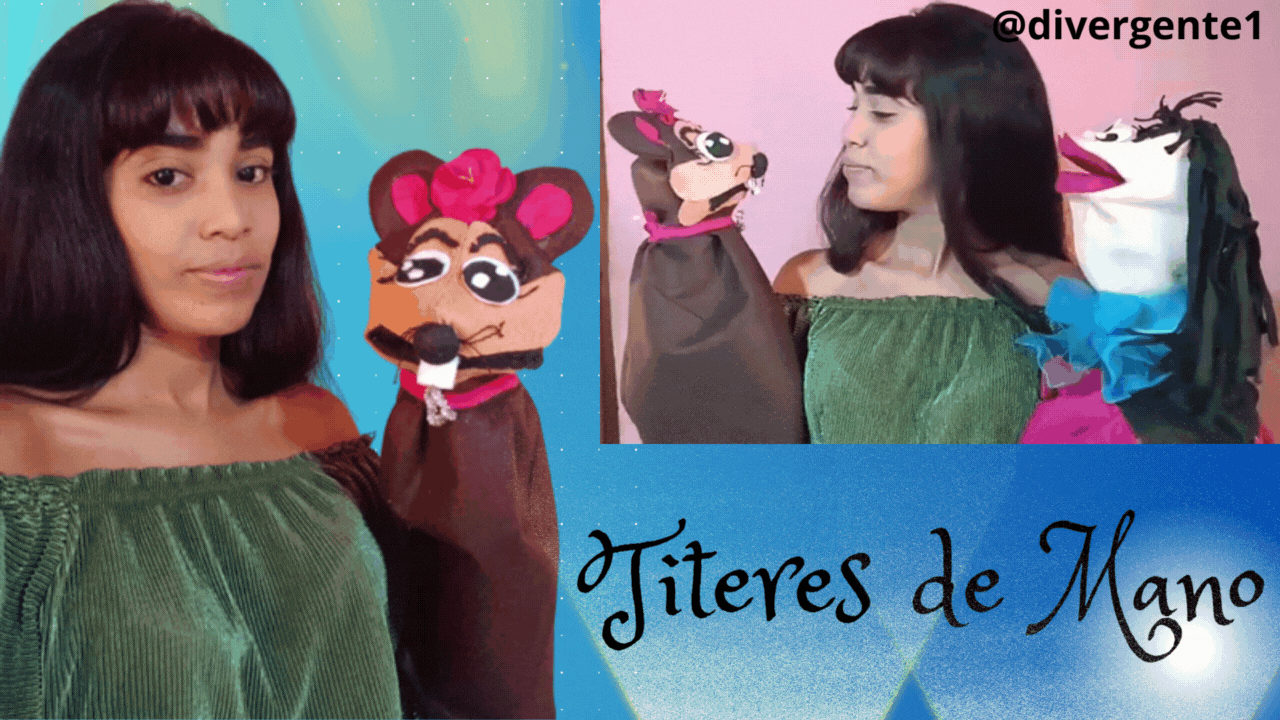
You can also see other of my creations next to Frida the Squirrel, that soon I will be sharing with all of you!
Greetings and thank you very much Hive family!
The images are my own and were taken with a Redmi Note 9 phone.
Translator used: Deepl
I edited the pictures using canva.
Queridos amigos de Hive, espero se encuentren muy bien. Hoy quiero compartir con ustedes la elaboracion de un titere de Ardilla muy facil y rapido de hacer. Espero les guste, y me ayuden también a buscar un nombre apropiado para mi nueva creación.

- Fieltro marrón
- Fieltro Ocre
- Fietro blanco
- Tijera
- Silicón
- Cartón
- Patrones de la cabeza y del cuerpo del títere

| Paso 1 |
|---|
Se debe tomarla figura numero 1, que corresponde a la cabeza de nuestra ardilla y se coloca esta sobre la tela de fieltro marron. Se marcan del patron sobre la tela.
2
Posterirormente se debe coser la pinza que se encuenta en la figura. para que cada lado de la cara quede en la forma que se muestra arriba en la imagen.
Luego corresponde unir ambas caras, cosiendo el rostro del lado revés.
Esta es la forma en la que debe quedar la cabeza de la ardilla.
3
Se procede a sacar sobre carton la figura numero 2; esta corresponde a la base de la boca para para que lleva por dentro el tietere y que permite el movimiento de la boca.
Se debe sacar este diseño en fieltro negro.
4
Luego se debe voltear el area de la boca de la ardilla y se pega ambos fieltros negros con sus respectivos soportes de cartón.
Este debe ser el resultado.
5
Para crear el rostro y mejorar los detalles de la cara de la ardilla, utilicé fietro de color ocre.
De esta manera se pega la figura cbriendo el aréa donde van los ojos y las mejillas de la ardilla
Luego se pega debajo del hocico de la ardilla los otras dos fihuras de color ocre, además tambien se le agrega unos dientes en la zona central de la boca para caracterizar a nuestra ardilla.
6
Se hace una pelotica con el fietro negro y se sujeta con hilo negro para evitar que esta se suelte.
Luego cortamos el excedente de material de fieltro.
De esta manera se pega la nariz al diseño de nuestro titere. para colocar la nariz se debe undir el fieltro un poco en la punta.
8
El diseño de los ojos de nuestra ardiña se realizó haciendo dos circulos en fieltro blanco y uno negro un poco más pequeño, luego se pegó el fieltro negro sobre el blanco y dentro de los circulos negros se pegaron dos pequeños circulos blancos.
9
Luego se toma la figura 3 para diseñar las orejas de nuestro titere.
Se unen ambas piezas mediante costura.
Luego se pasa al lado revés el diseño de las orejas.
Luego se pegan las orejas en la cabeza de la ardilla y tambien se hace un circulo rosado para pegarlo en la oreja.
10
Se hacen unos bigotes con hilo negro. Para diseñar las cejas se utiliza fietro negro y se hace una curva que permita asemejar la forma de las cejas de la ardilla. También se une a nuestra decoración una flor de color fucsia.
Se fijan las cejas al rostro de la ardilla
Se pegan además los bigotes de lado y lado del rostro y la flor en la parte central del rostro de la ardilla.
11
Luego se toma la figura 4 para formar parte del cuerpo de la radilla, para sacar este se de debe colocar la tela de forma doble y se recorta.
Luego se va pegando la tela en la cabeza de la ardilla y se van sujetando con los alfileres.
Se cose del lado reves para unir las piezas.
Finalmente se colaca del lado derecho nuestro titere.
Asi hemos terminado de realizar nuestra linda ardilla.
¡Espero que les guste!
He pensado en algunos nombres para nuestro lindo titere, por sus grandes cejas y su ecentrica flor pensé en Frida la Ardilla, en honor a Frida Kahlo una gran mujer orgullo latinoamericano! ¿Qué opinan?
También pueden ver otras de mis creaciones al lado de Frida la Ardilla, que proximamente estaré compartiendo con todos ustedes!
Saludos y muchas gracias familia de Hive!
Las imagenes son de mi autoria y fueron Tomadas a traves de un Telefono ZTE BLADE.
Traductor utilizado: Deepl
La edicion de las fotos la realicé mediante canva.

https://twitter.com/1603401468836454400/status/1639005309040730112
The rewards earned on this comment will go directly to the people sharing the post on Twitter as long as they are registered with @poshtoken. Sign up at https://hiveposh.com.
hey dear @divergente1 I found this so cute and funny! It looks very easy to do and I think it is also a very good idea to recycle fabric from clothes that are torn or worn and we no longer want to use!
I would definitely call it "Cheeks".
A big hug for you.
Hello dear friend! Thank you very much for your words. I like the name Cheeks! hahaha
A big hug!
Hey esto está genial... Muy creativo.. me pongo de pie y te aplaudo jeje
jeje. Hola amigo! Muchas gracias... 💮
Está bellísimo amiga, me encanta 💗
Muchas gracias mi querida amiga! 💮
Cool... and they look also funny 😅😁🍹👌👌👌👌 i hope you make more them.
Thank you very much for your words my friend! Regards
Npr :).... happy to see good post and work.
Mira que bonito y muy creativo, amiga, tienes talento para esto, te felicito, gracias por compartirlo, saludos.
Muchas gracias @ikigaidesing! Saludos de vuelta. 💮
Wow amiga te quedó geniaaaal,me hiciste recordar a mi niñez cuando iba teatro bengala a mi escuela jajajajajaja
jajaja! gracias amigo. Saludos!
Yay! 🤗
Your content has been boosted with Ecency Points, by @foxkoit.
Use Ecency daily to boost your growth on platform!
Support Ecency
Vote for new Proposal
Delegate HP and earn more
Como para montar un show de títeres ajaja, imagino que puedo seguir este tutorial a mano la versatilidad en las creaciones es algo que me gusta mucho, te envío un saludo.
Hola querida amiga, muchas gracias! un abrazo