DIY: PASO A PASO DE QUIMONO DE MEDICO (I PARTE) | DIY: STEP BY STEP OF A DOCTOR'S KIMONO (PART I)
Hola queridos amigos de Hive. Espero se encuentren muy bien. Es un gusto poder traerles una de mis creaciones, que sin duda alguna fue todo un reto. Reto, mi hermano es estudiante de enfermeria en una escuela técnica, y por ende debe usar su uniforme correspondiente a la asignatura.
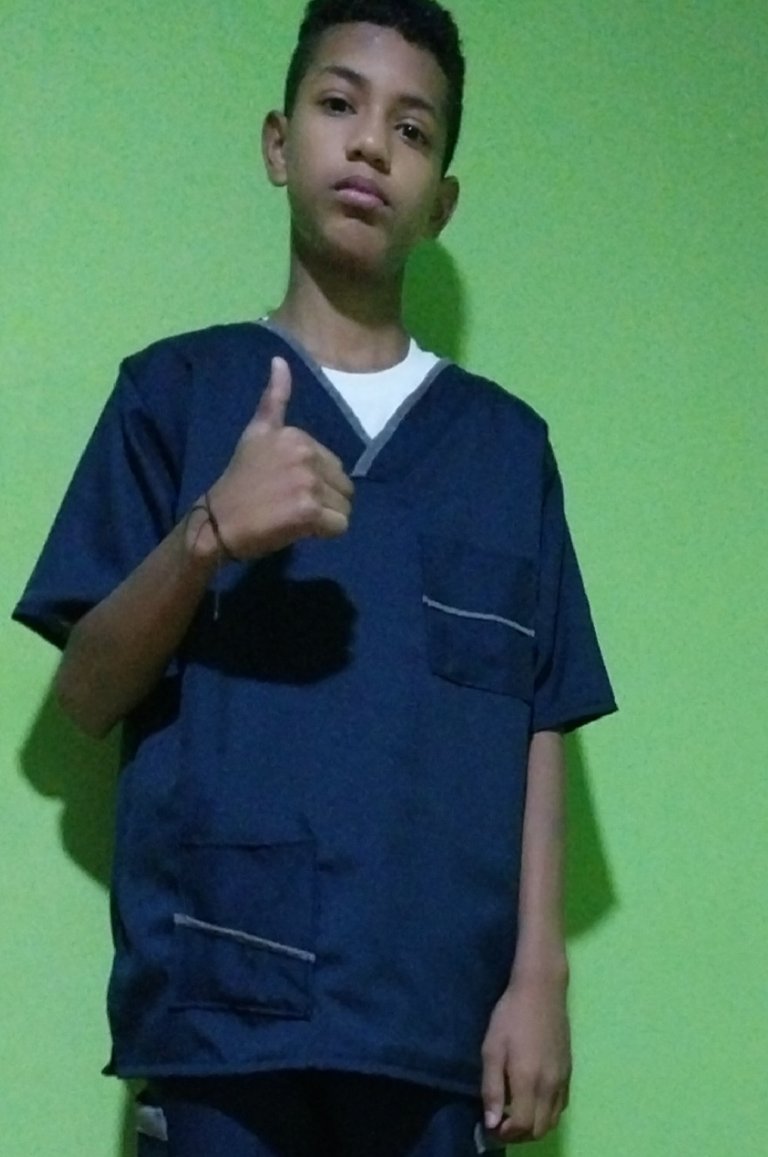
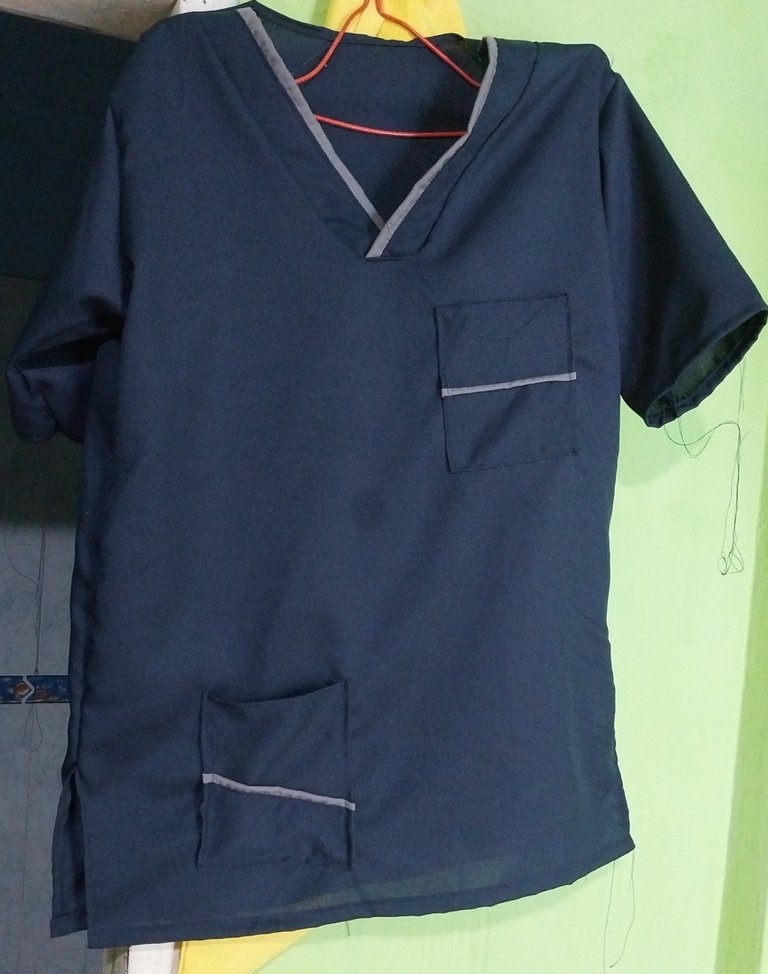
Así que me di a la tarea de crear un diseño fácil, pero también bonito. Y he aquí el resultado. Espero les guste!
En esta primera parte elaboraremos la parte superior de nuestro Quimono.
1
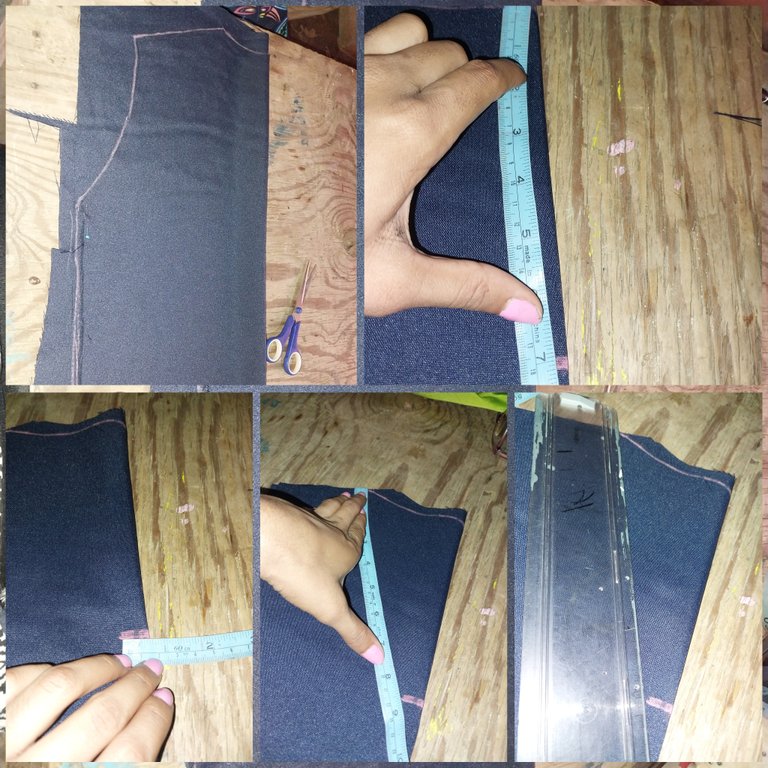
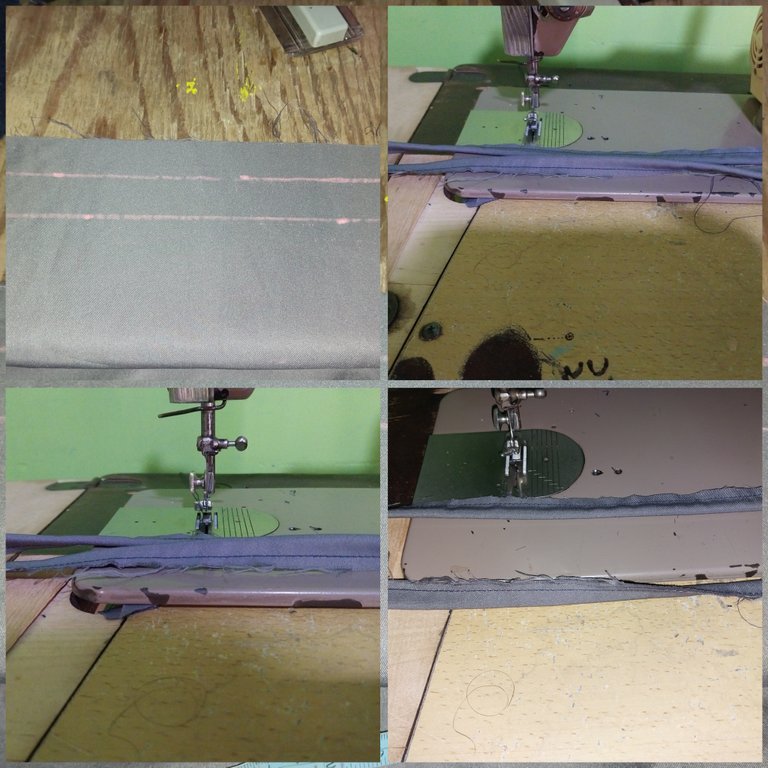
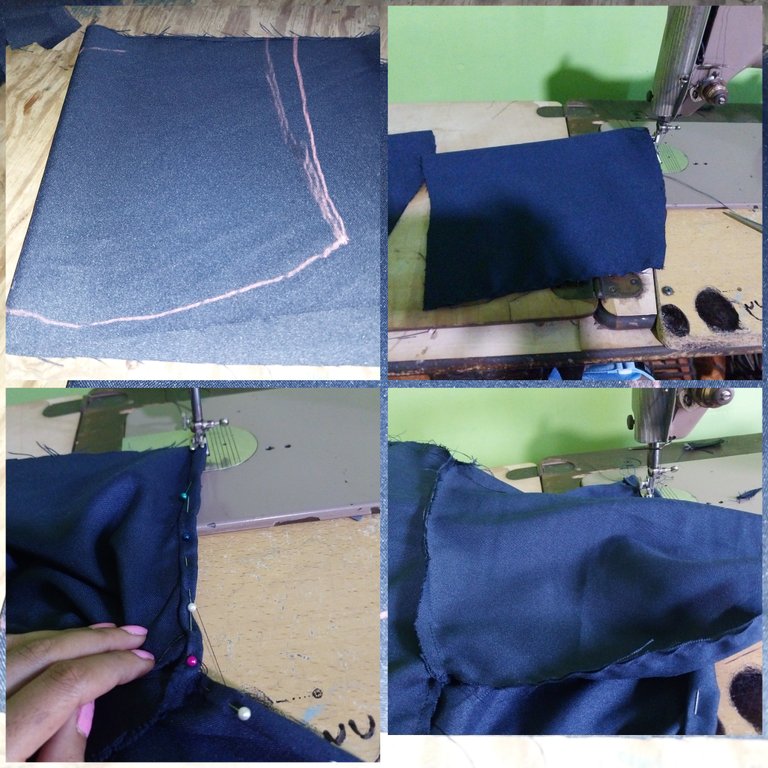
Debemos marcar la silueta de la par5e superior de nuestra camisa. Lu3go desde ñanparte central del cuello debemos marcar 12 pulgadas de largo y luego 1,5 pulgadas de ancho. Seguidamente desde esta zona hacia arriba marcamos una línea inclinada.
2
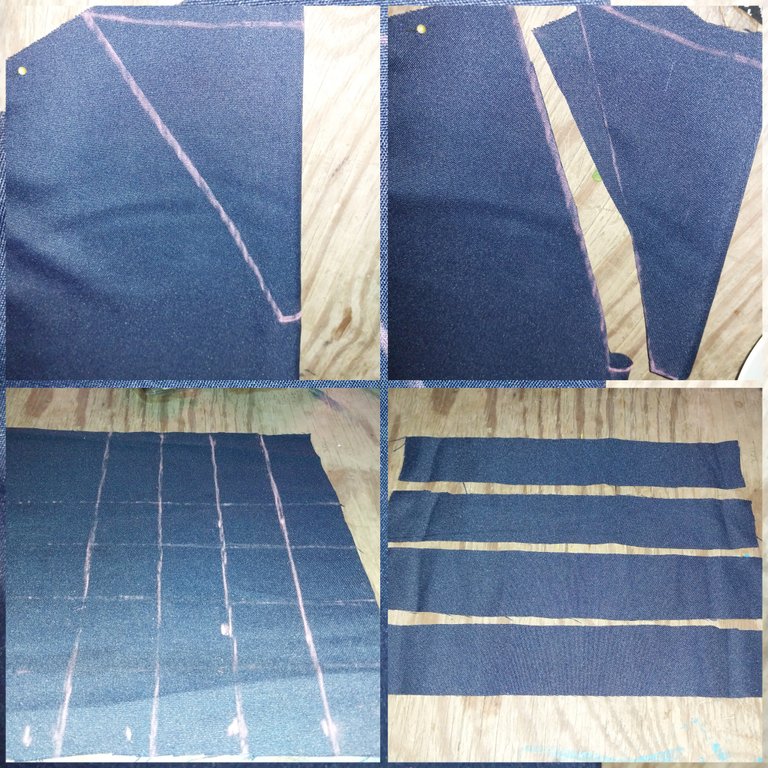
Esta es la forma en la que debe de quedar nuestra camisa. Y recortamos con la tijera el diseño que marcamos.
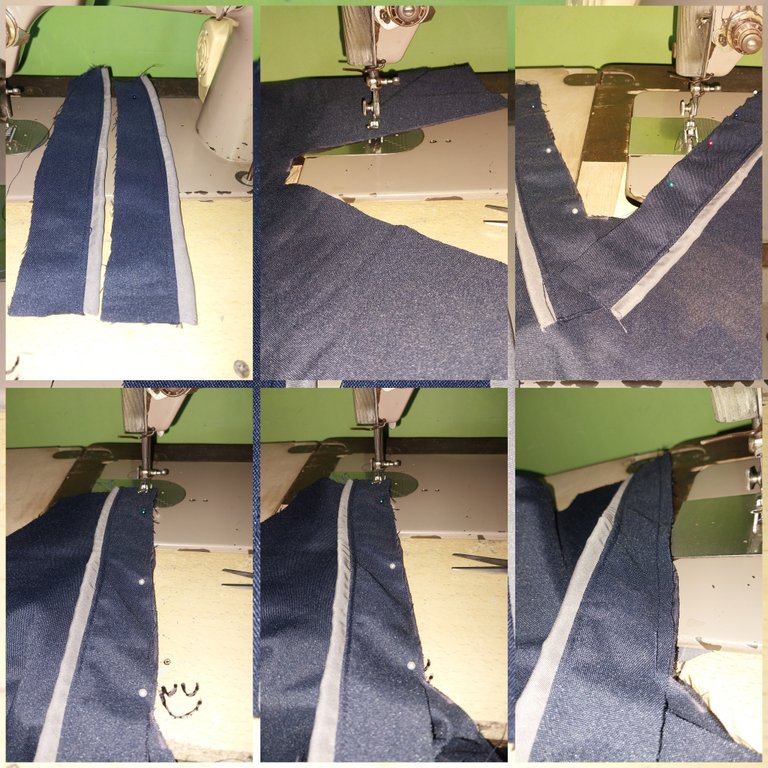
Sobre la tela vamos a marcar 4 cintas de 13 pulgadas y 2,5 pulgadas de ancho. Luego debemos recortar.
,3
Seguidamente trazamos 2 líneas de 13 pulgadas y 1,5 pulgadas de ancho. Y seguidamente cosemos esta a la mitad.
4
Luego debemos meter la cinta gris pequeña dentro de la costura de las cintas a ilustrar marino y cosemos ambas cintas.
5
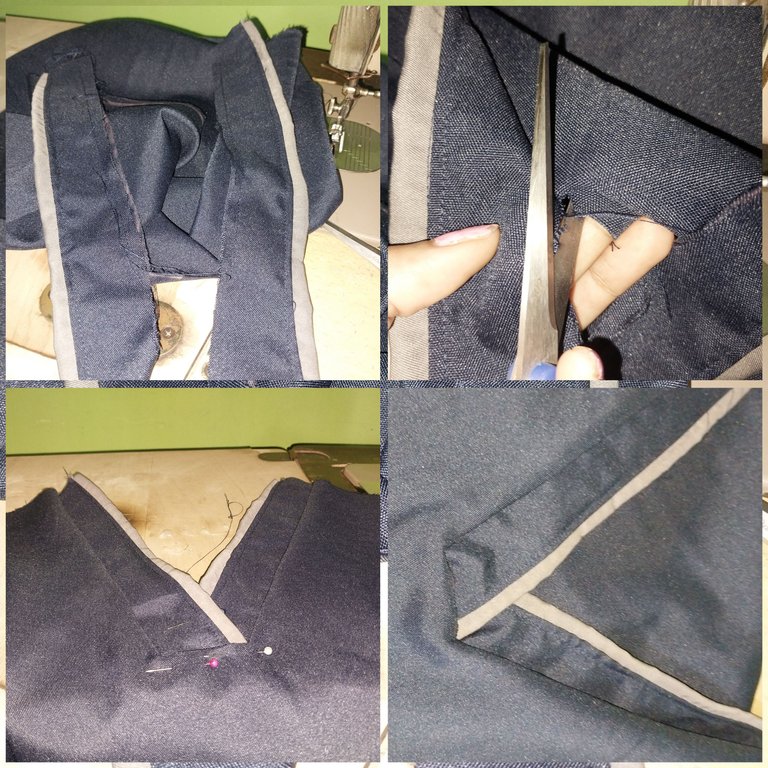
Luego las cintas se deberán coser en el cuello a lo largo de este con excepción de la zona del medio de la camisa. Cortamos con una tijera la zona del medio solo medio pulgadas. Seguidamente pasamos hacia atrás las cintas y con la ayuda de un alfiler fijamos ña parte central, para luego coser.
6
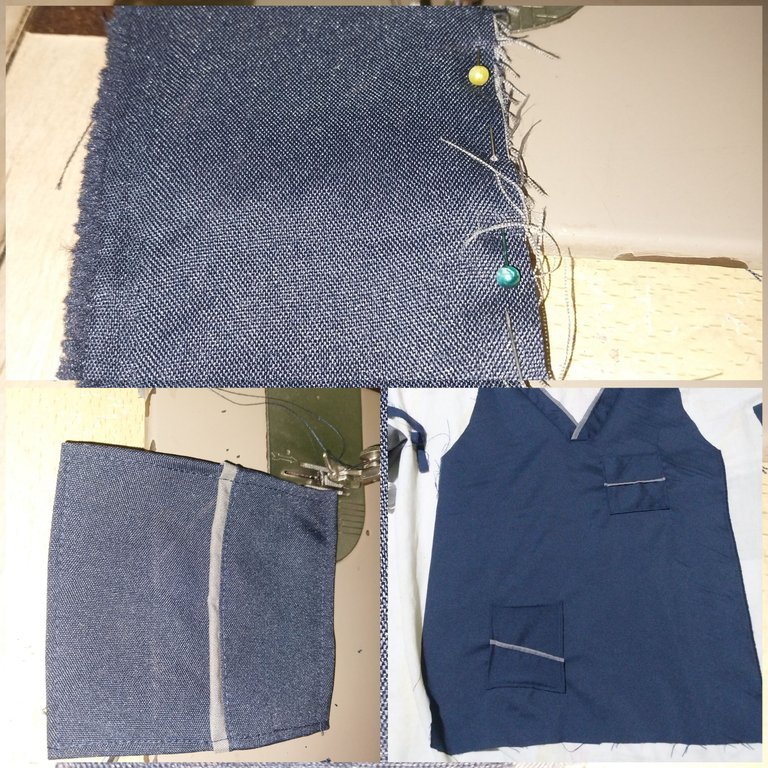
Luego debemos de hacer las mangas, estas se cosen y luego se fijan a la sisa de la camisa.
7
Por último cosemos los bolsillos y los fijamos a la parte delantera de la camisa. Por último cosemos ambas partes, la delantera y la trasera y tenemos nuestra camisa.
Espero les guste!
Esperen la segunda parte
- Las imágenes me pertenecen
- Traductor: Deelp traslator
- Edicion: Canva
So I set myself the task of creating an easy design, but also a nice one. And here is the result. I hope you like it!
In this first part we will elaborate the upper part of our Quimono.
1
We must mark the silhouette of the upper par5e of our shirt. Then from the center part of the collar we should mark 12 inches long and then 1.5 inches wide. Next from this area upwards we mark a slanted line.
2
This is the way our shirt should look. And we cut with the scissors the design that we marked.
On the fabric we are going to mark 4 ribbons of 13 inches and 2.5 inches wide. Then we must cut out.
,3
Then we trace 2 lines of 13 inches and 1.5 inches wide. And then we sew this one in half.
4
Then we should tuck the small gray ribbon inside the seam of the ribbons to be illustrated and sew both ribbons together.
5
Then the ribbons should be sewn on the collar along the collar except for the middle area of the shirt. Cut the middle area with a scissors only half an inch. Then we pass back the ribbons and with the help of a pin we fix the central part, and then sew.
6
Then we must make the sleeves, these are sewn and then attached to the armhole of the shirt.
7
Finally we sew the pockets and attach them to the front of the shirt. Finally we sew both the front and the back and we have our shirt.
I hope you like it!
Wait for the second part
- Images belong to me
- Translator: Deepl Traslator
- Editing: Canva
Te quedó magnífico te felicito
Gracias amiga
Tu reto fue todo un éxito, te felicito amiga, gracias por compartir.
Ayy que linda. Gracias amiga!
Cool to see, you have maid this very fell 🥁👌👌👌👌 i am sure it was took a lot of time to do also. 😅👌👌
Cool post 😋👌☕
Thank you very much Foxkoit, for your words of motivation.
Just not stop 🙏👌👌 you have strong pages and work you do. ☺☺☺😋👌
So cool of you to make the dress for your brother
This is really nice and it looks nice on him
You did great with the whole process
Thanks ❤️💋
You’re welcome
Me gustó mucho como te quedó el juego de bata de guardia médica 🤗 ya quisiera unas así para mis noches de guardias de enfermerías ☺️
Muchas gracias amigo. 😎
Las tendrás muchas más con el favor de Dios. Saludos
Si que te esmeraste mucho 😁👍 te quedó genial, seguro tu hermano está muy agradecido por su uniforme 😊
Muchas gracias bella amiga
It looks great. It shows your skills and creativity. Nice work! Keep it up!
Thanks. ❤️
Es muy lindo y realmente le queda bien a tu hermano. Buen trabajo.