HERMOSO SUETER DE RAYAS | BEAUTIFUL STRIPED SWEATER
Hola que tal amigos de Hive. Mis saludos y mi aprecio como siempre, saludando especialmente a nuestra querida comunidad de Hive. Espero se encuentren super bien.

Quiero presentarles unos de mis proyectos recientes.se trata de un bonito sueter de rayas con un diseño de recorte a mitad de las mangas. ESPERO les guste.
Estos son los materiales que necesitaremos:
- 1 metro de tela Beberly
- Tijeras
- Hilo
- Maquina de coser
- Patrón (sueter)
PASO A PASO
1
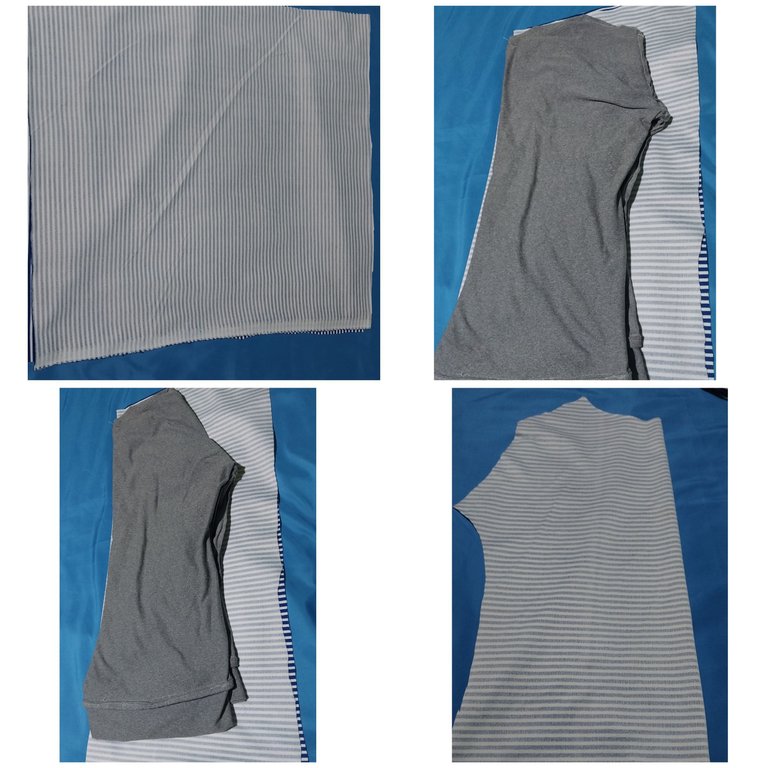
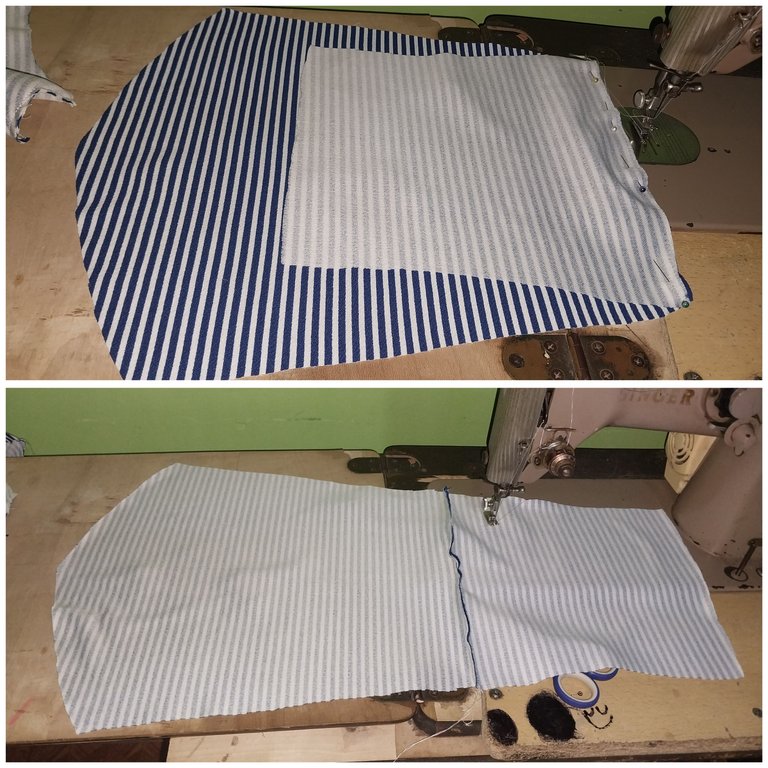
Iniciaremos con doblar justo a la mitad el sueter que tenemos de Patrón. Una vez que lo doblamos vamos a doblar también nuestra tela a la mitad. Seguidamente vamos a trazar la silueta de este marcando la sisa, de forma que doblamos la manga del sueter del patrón para poder marcar esta.
2
Seguidamente debemos marcar otra pieza para hacer la parte trasera del tronco del sueter. Luego doblamos la tela a lo largo y Colocamos la zona de la sisa para guiarnos y hacer las mangas.
3
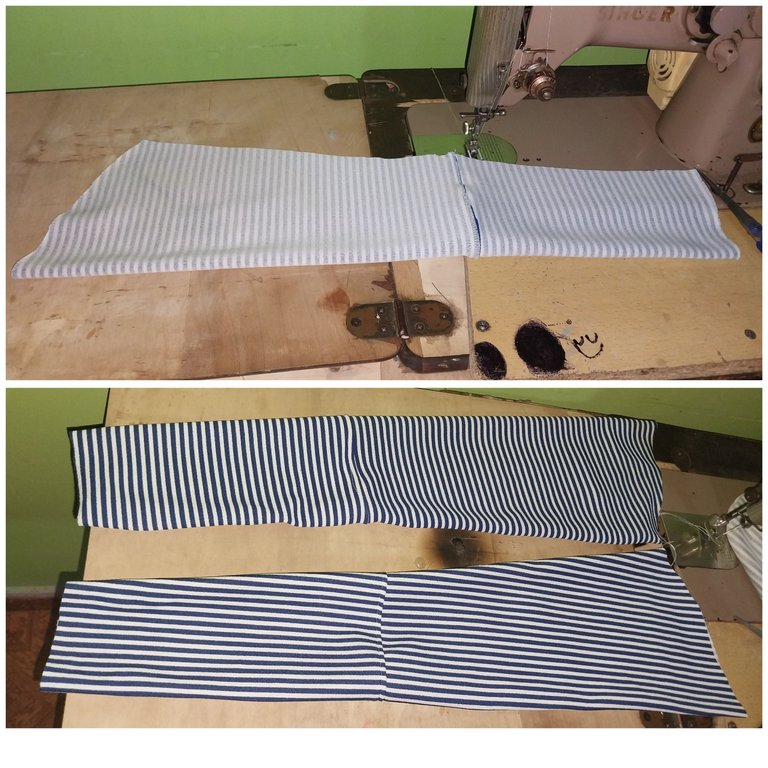
De esta manera marcamos las mangas y para nuestro diseño debemos cortar la manga a la mitad y luego seguir trazando sobre la tela la segunda pieza que llega hasta nuestras manos.
4
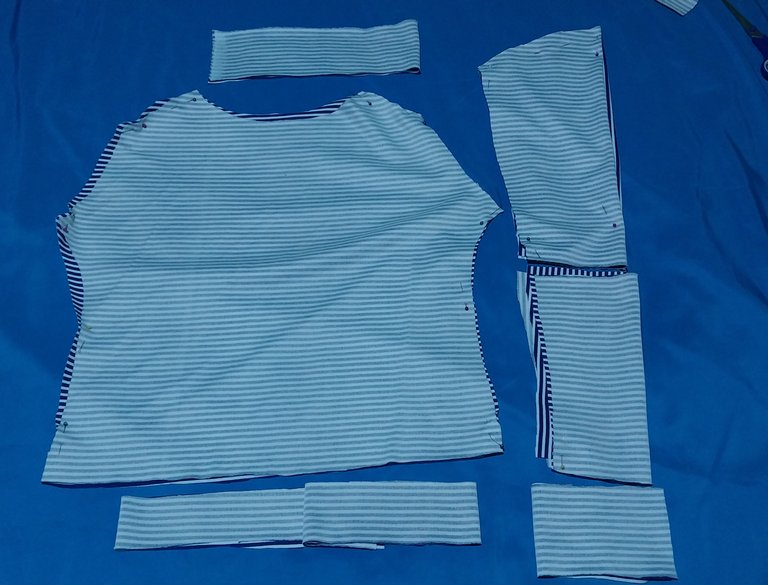
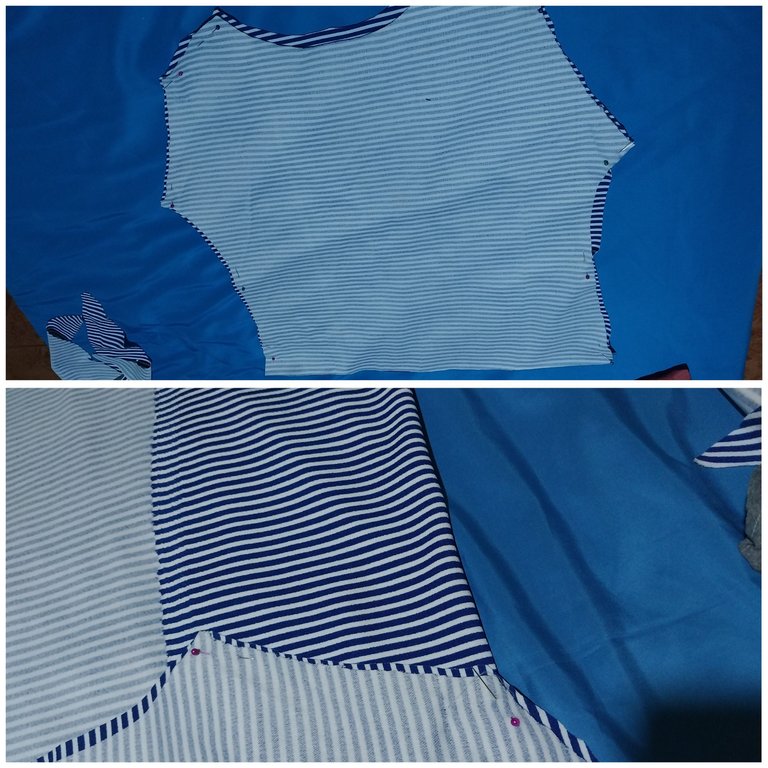
Es decir nos quedarían las siguientes piezas; el tronco, las dos mangas, una cinta para la zona del cuello, otra cunta para la zona inferior de la orilla del sueter y otra cinta para la culminación de las mangas.
5
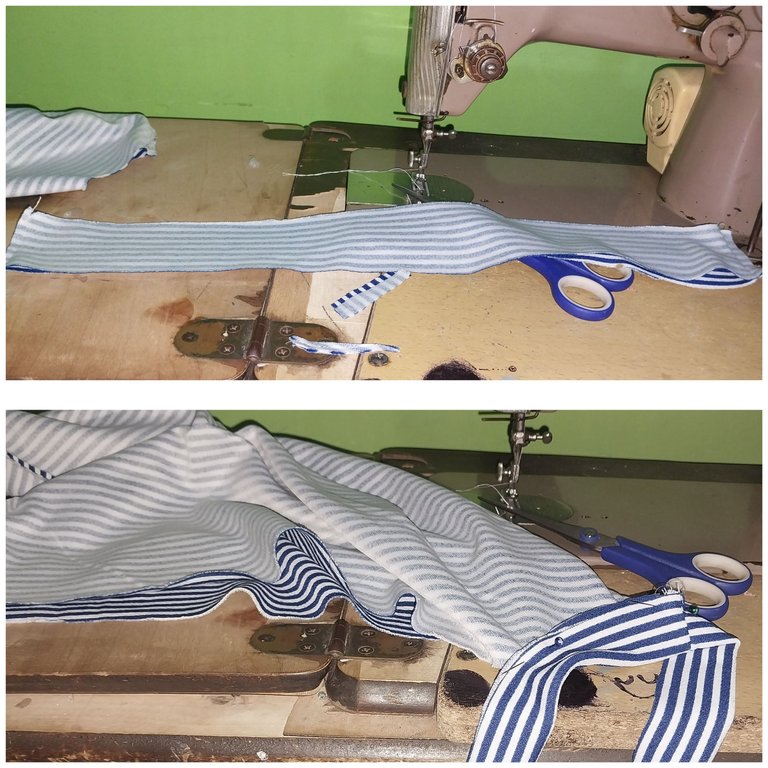
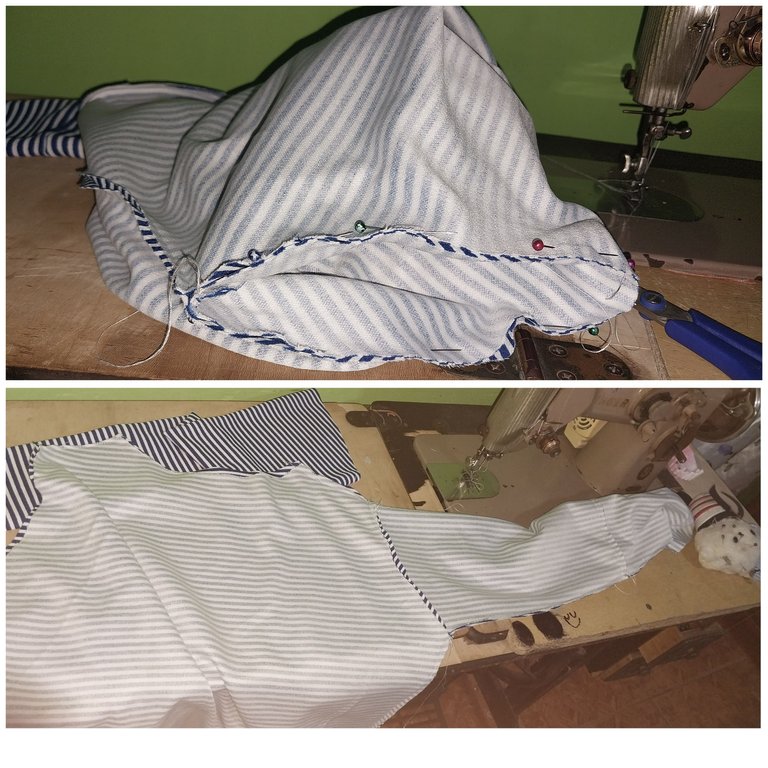
Tomamos las mangas y las debemos unir con costura, uniendo así ambas piezas.
Luego pasamos una costura a lo largo de la manga.
De esta manera cosemos también la otra manga.
6
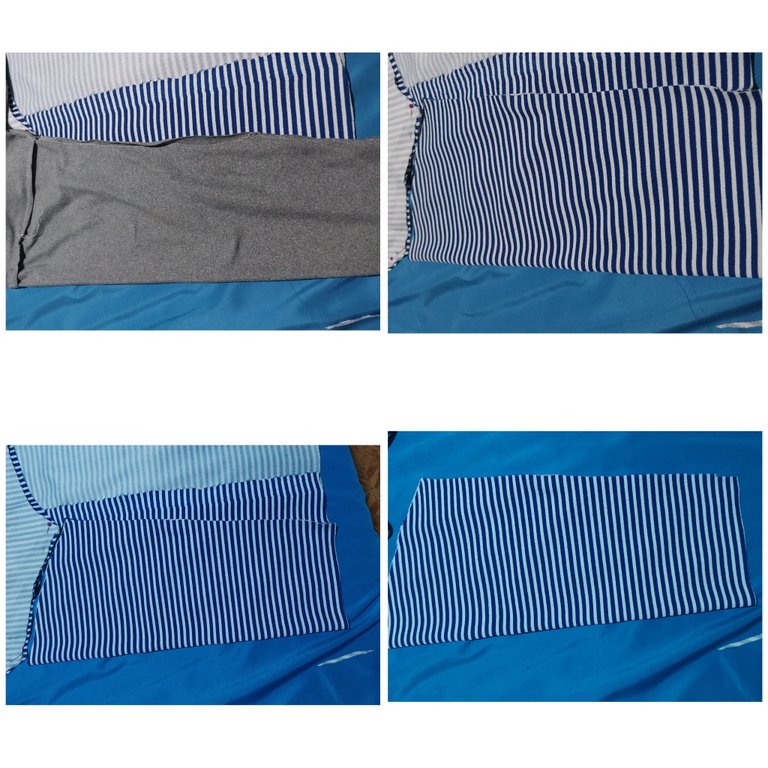
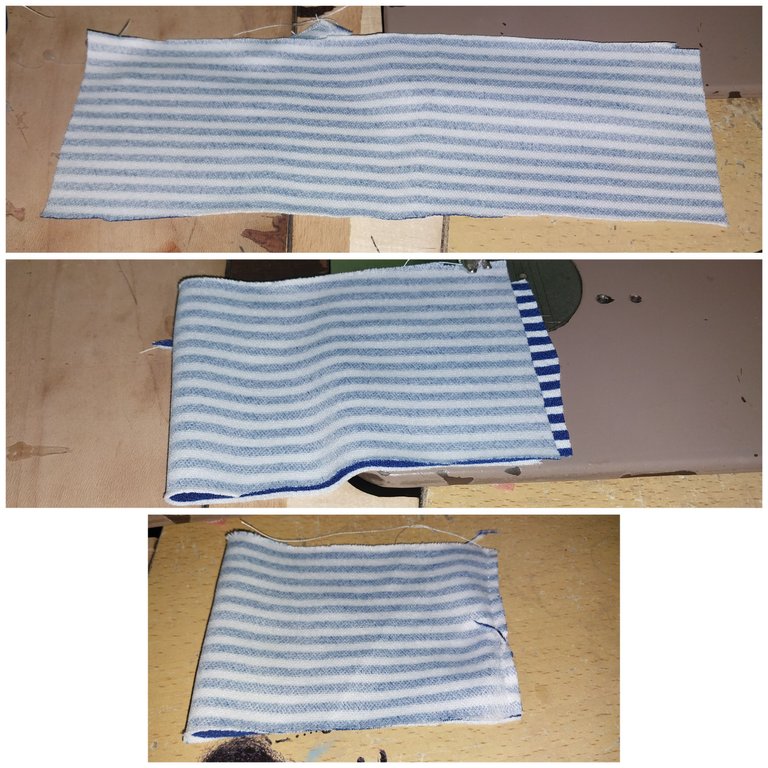
Seguidamente vamos a coser la cinta en la zona inferior del sueter.
7
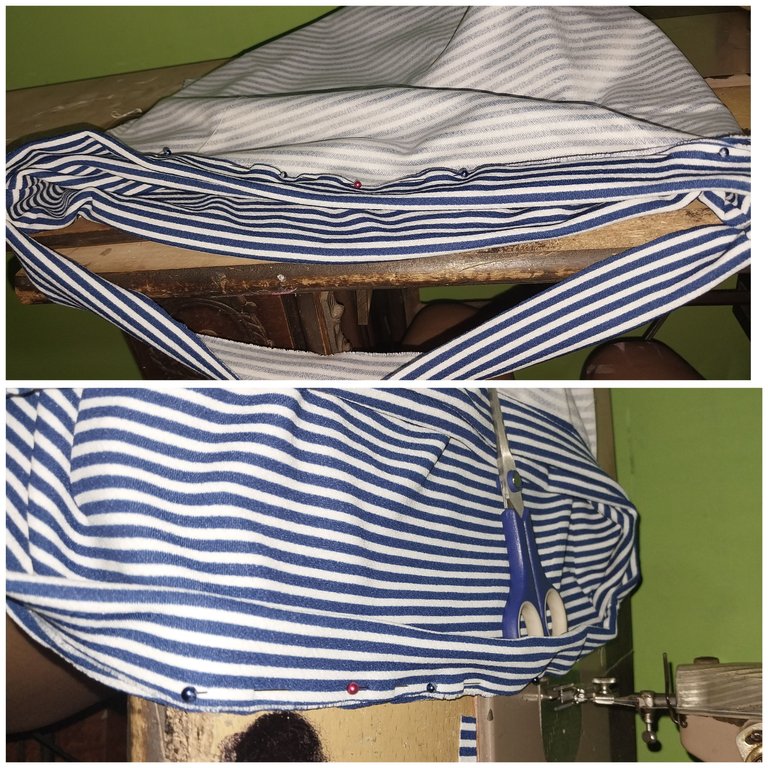
De esta manera sujetamos la cinta con la ayuda de los Alfileres y cosemos en la máquina.
También cosemos la zona del cuello de la misma forma
8
Posteriormente debemos unir la manga a la sisa del sueter unimos la parte más alta a la parte superior de la sisa y pasamos costura.
9
Finalmente debemos coser la cinta en cada una de las mangas para culminar el proceso.

Es así que nos debería de quedar.
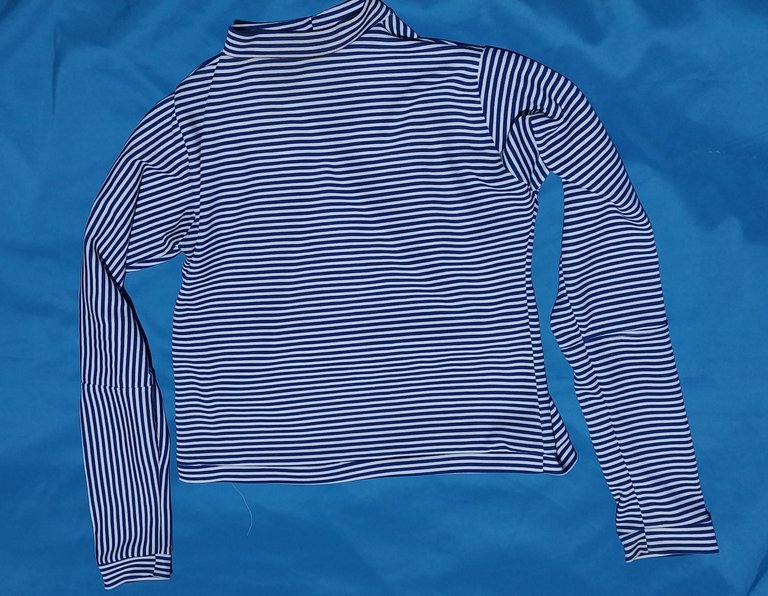
Este sería el resultado final de nuestro lindo sueter de rayas. Espero les guste!

Muchas Gracias
- Las imágenes me pertenecen
- Traductor: Deelp traslator
- Edicion: Canva
Hi there Hive friends. My greetings and my appreciation as always, greeting especially to our dear Hive community. I hope you are doing great.
I want to present you one of my recent projects.This is a nice striped sweater with a cutout design in the middle of the sleeves. I hope you like it.
These are the materials we will need:
- 1 yard of Beberly fabric
- Scissors
- Thread
- Sewing machine
- Pattern (sweater)
STEP BY STEP
1
We will start by folding right in half the sweater we have as a Pattern. Once we fold it we will also fold our fabric in half. Next we are going to trace the silhouette of this marking the armhole, so that we fold the sleeve of the sweater of the pattern to be able to mark this.
2
Next we need to mark another piece to make the back of the trunk of the sweater. Then we fold the fabric lengthwise and place the armhole area to guide us and make the sleeves.
3
In this way we mark the sleeves and for our design we must cut the sleeve in half and then continue tracing on the fabric the second piece that reaches our hands.
4
In other words, we would be left with the following pieces: the trunk, the two sleeves, a ribbon for the neck area, another ribbon for the lower edge of the sweater and another ribbon for the end of the sleeves.
5
We take the sleeves and sew them together, thus joining both pieces.
Then we pass a seam along the sleeve.
Polish_2024030306_091908391.jpg]()
In this way we also sew the other sleeve.
6
Next we are going to sew the ribbon in the lower area of the sweater.
7
In this way we fasten the ribbon with the help of the pins and sew on the machine.
We also sew the neck area in the same way.
8
Afterwards we must join the sleeve to the armhole of the sweater we join the highest part to the top of the armhole and pass seam.
9
Finally we must sew the ribbon on each of the sleeves to finish the process.
This is how it should look.
This would be the final result of our nice striped sweater. I hope you like it!
Thank you very much
- Images belong to me
- Translator: Deepl Traslator
- Editing: Canva
Hola está muy linda tu prenda de vestir que bueno que puedas diseñar y crear está muy lindo y elegante.saludos.
Muchas gracias mana. ✨️
A very well done craft, a post like this is always cool to look at ☺👌👌👌👌🍷..... I hope someone will buy it from you soon this work 👌🥁🙏🙏🙏😋😋😋😋
I wate your next post 😋👌👌👌
Thank you very much ✨️
Very nice words❤️✨️😘
Thanks for sharing @divergente1
Your post is well explained and creative
aha great dress, thanks for sharing. thanks for sharing the steps. keep up the good work. have a great day and week ahead.
Thanks ❤️
That’s a beautiful stripped sweater
The process seems simple even for me who is a beginner in sewing
I love it