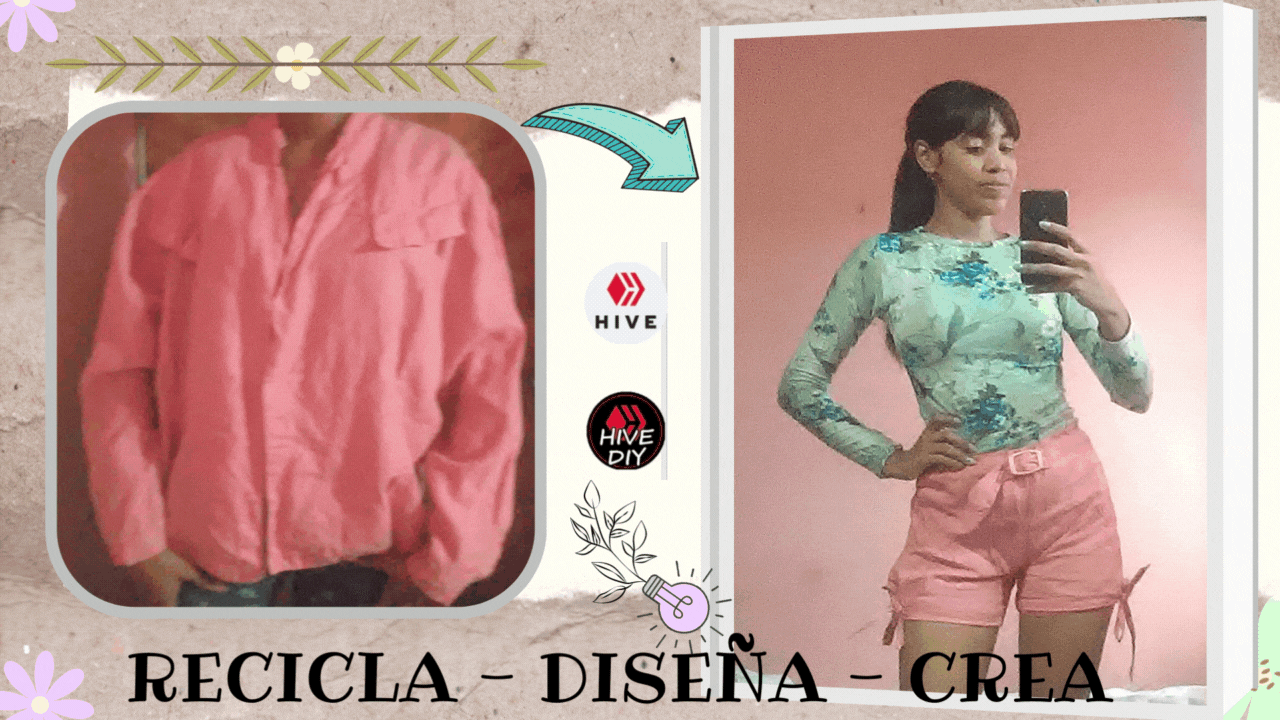
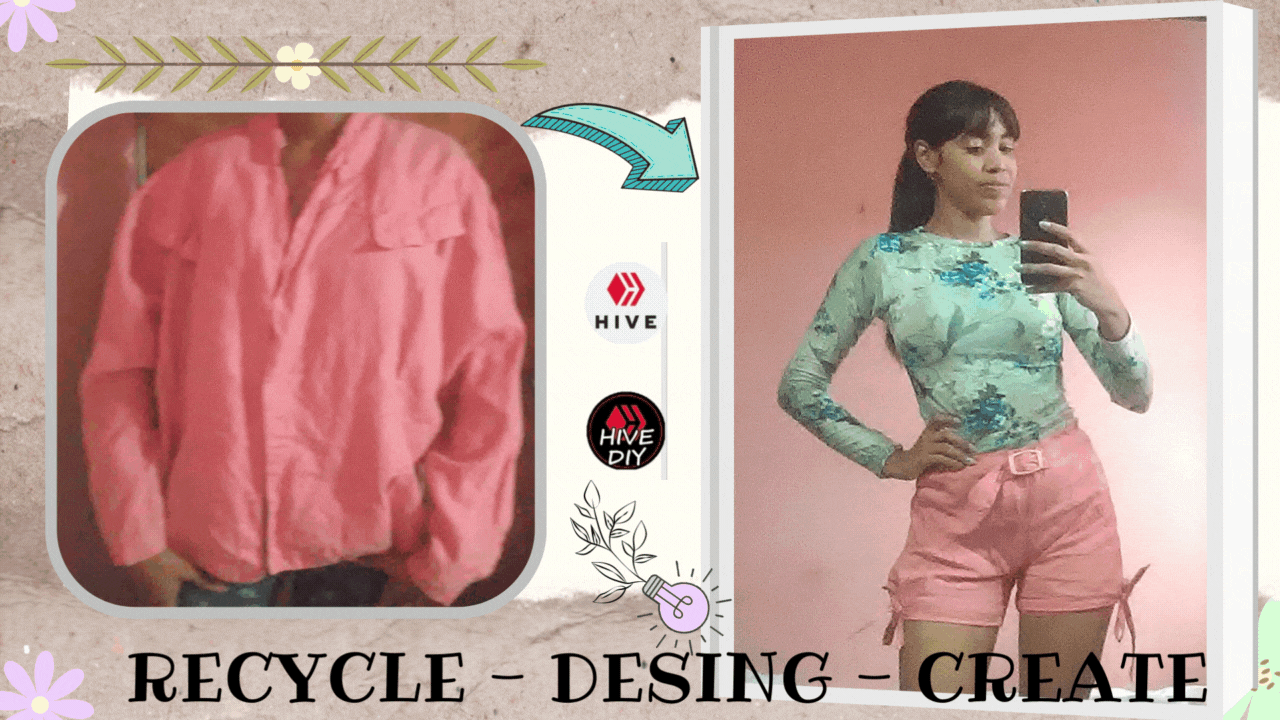
Recicla, Diseña y Crea un Short desde un Bleizer Antiguo // Recycle, Design and Create a Short from an Old Blazer ( Esp - Eng)
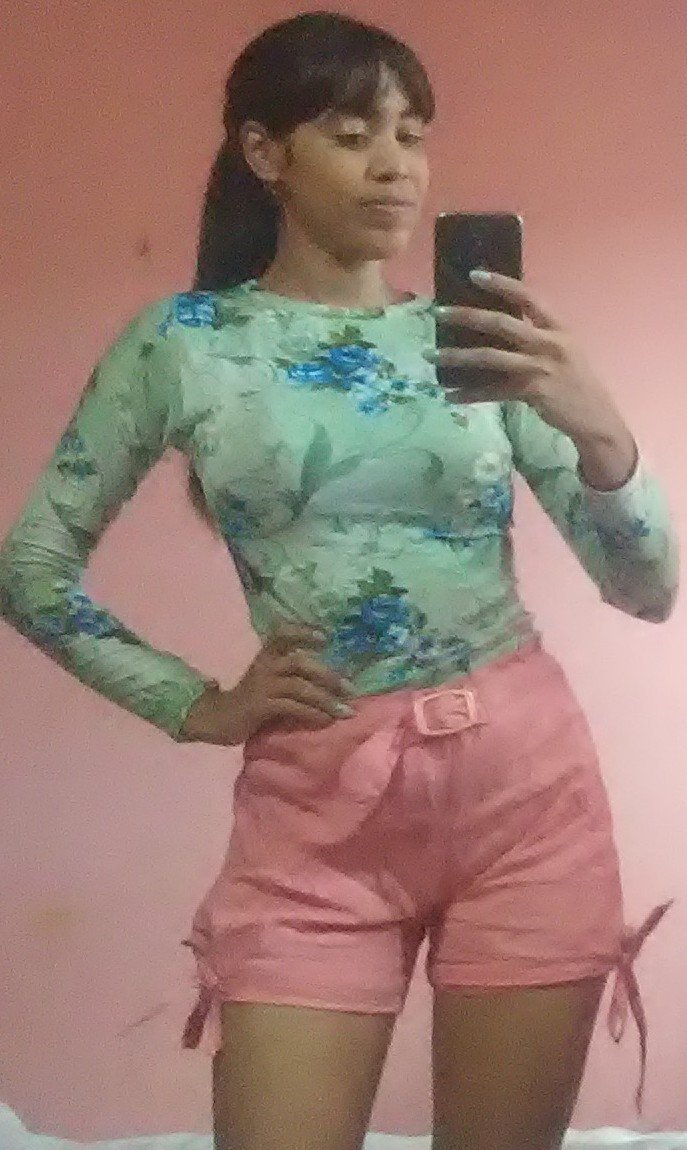
Hola amigos, espero esten muy bien. Felicidades por todos sus maravillosos post. Esta semana si duda alguna estuvo llena de mucha creatividad y pasión en cada publicación. El dia de hoy les quiero presentar un super cambio de 180° que realicé con un Bleizer (de los años mil seiscientos), el cual no se utilizaba ya en casa. Se me ocurrió de esta forma convertirlo en un lindo Short. Espero les guste la propuesta!
Manos en la tijera y a cortar!
MATERIALES UTILIZADOS
- Bleizer
- short para sacar el patron guía
- Tijera
- Elastica
- Hilo
- Maquina de Coser
PROCEDIMIENTO
Primer Paso
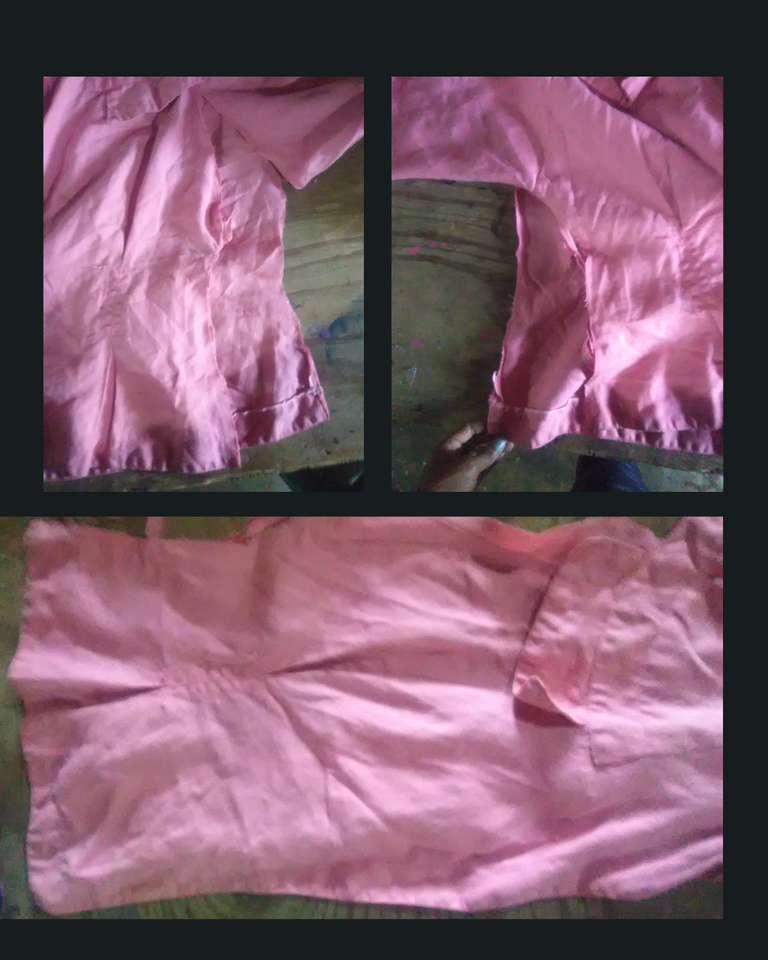
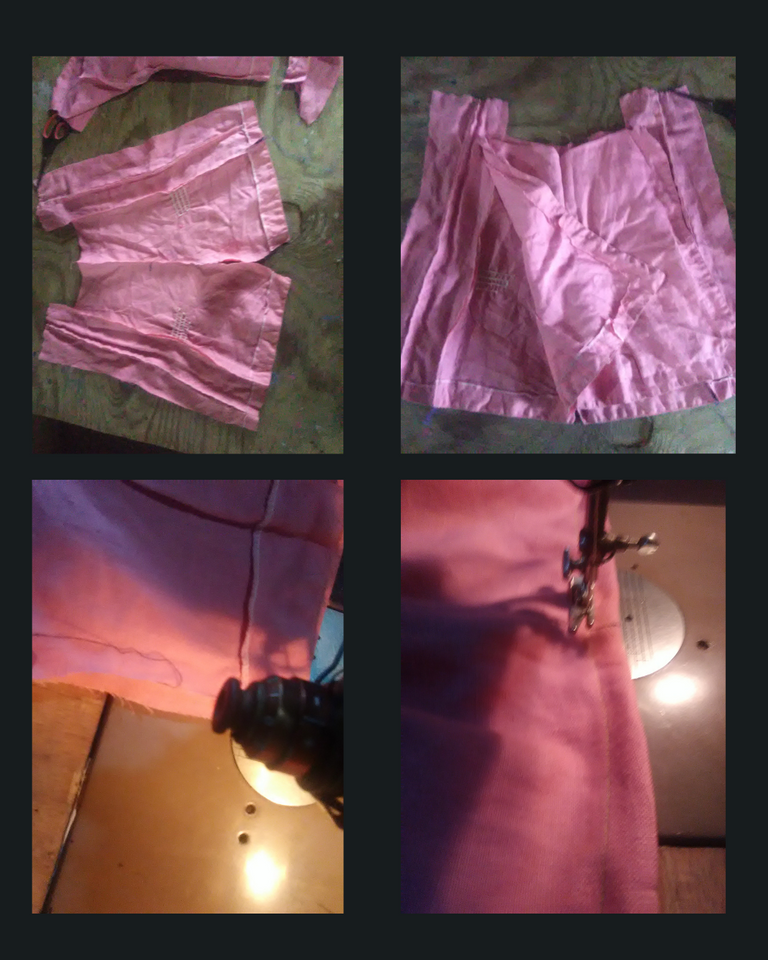
Tomamos el bleizer y se procede a abrir con la tijera los laterales del mismo. Se quitan las pinzas que tiene el bleizer para evitar que este quede arrugado al momento de sacar los patrones.
Segundo Paso
Luego se dobla a la mitad la tela del bleizer y el short también, se dobla el short y se coloca sobre la tela para sacar la parte trasera de la prenda. Luego de quedar marcada esta sobre la tela, se procede a recortar esta con la tijera. Tambien se recorta la parte que une ambas tela a la mitad y quedarían estas dos piezas por separado.
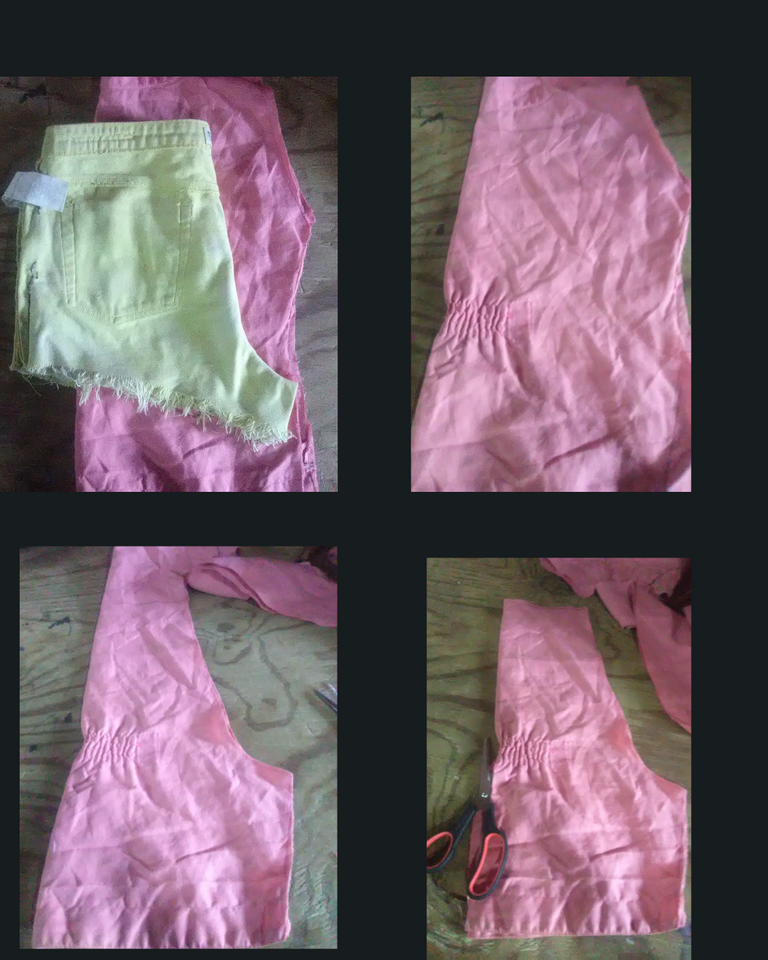
Tercer Paso
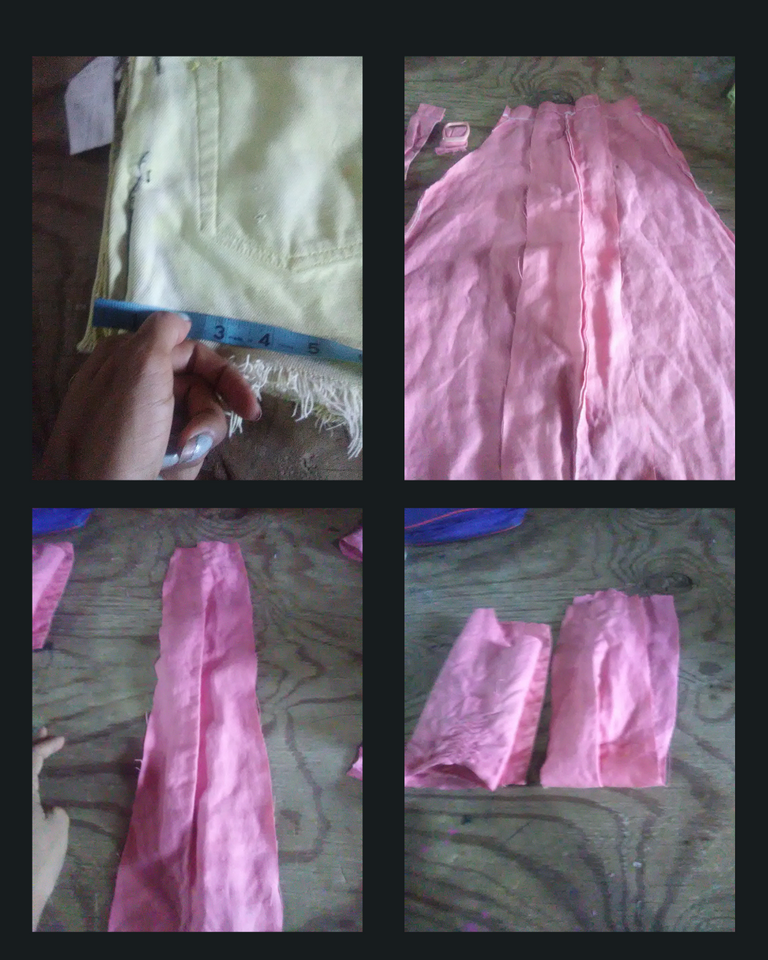
Como pudieron apreciar una parte del short amarillo sobresale de la prenda, esto lo hice asi debido a que la prenda no es del todo grande para trabajar la zona trasera del short, aun asi se puede realizar el trabajo, ya que ese espacio sobrante del short lo medi y aproximadamente faltaban casi 3 pulgadas.
De tal manera que se cortan dos tiras de tres pulgadas sobre una de las mangas del bleizer.
Cuarto Paso
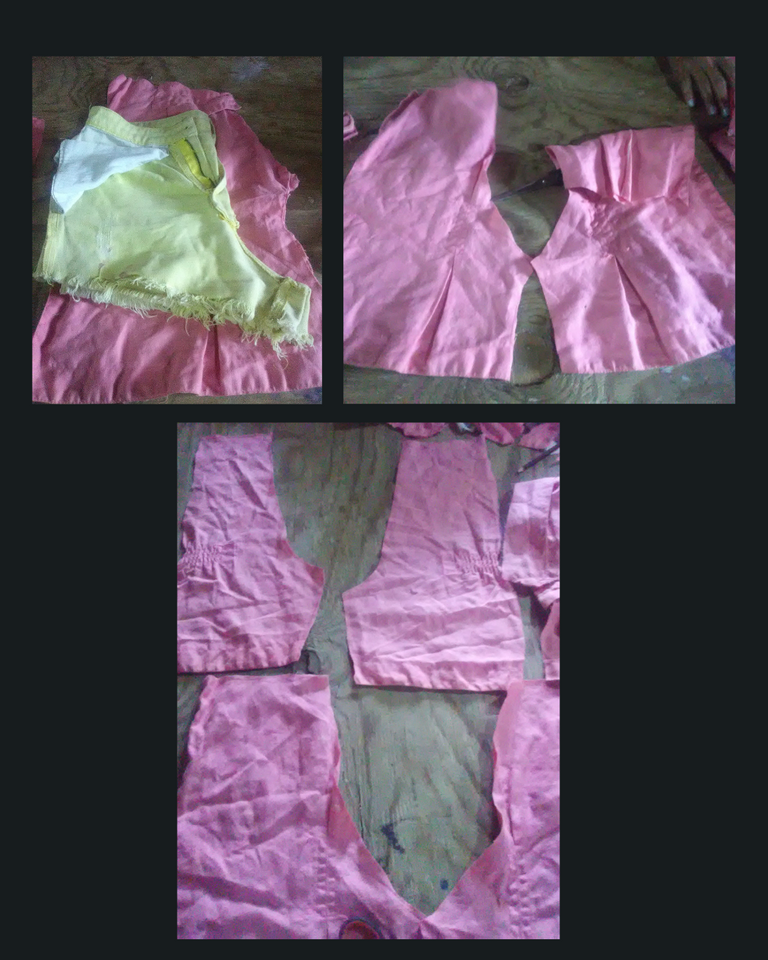
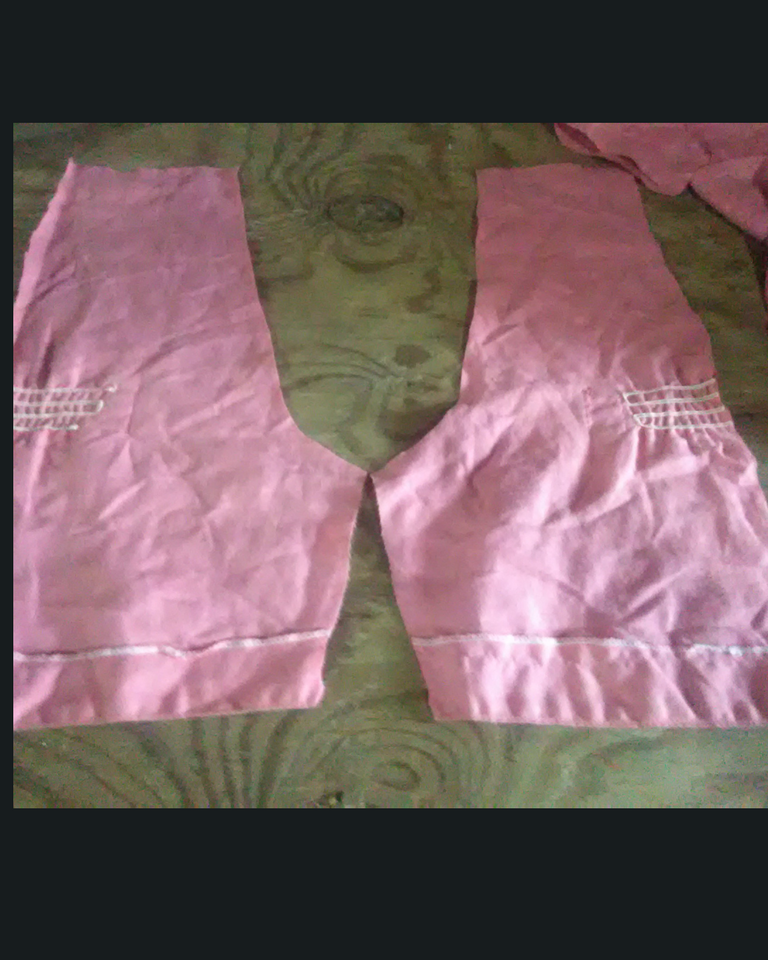
Luego se dobla el short amarillo para sacar la silueta sobre la tela rosada. Se marca y se recorta. De esta manera tenemos las 4 piezas que forman la parte delantera y trasera del short más las dos tiran que iran en los laterales del mismo, para aumentar la zona trasera.
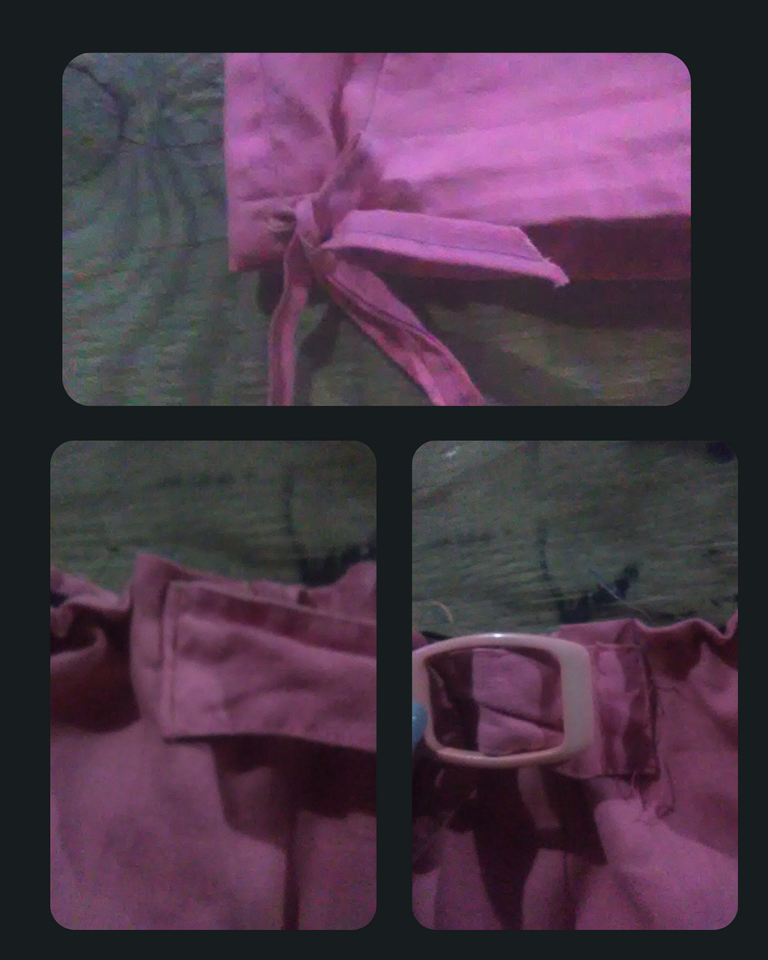
Quinto Paso
Luego se unen las dos piezas en la maquina de coser solo hasta la punta o el triangulo que se observa en la primera imagen del collage. Posteriormente se cosen las tiras en los laterales de la parte trasera.
Asi mismo, se cose la parte delantera del short. Solo hasta el punto del vertice.
Sexto Paso
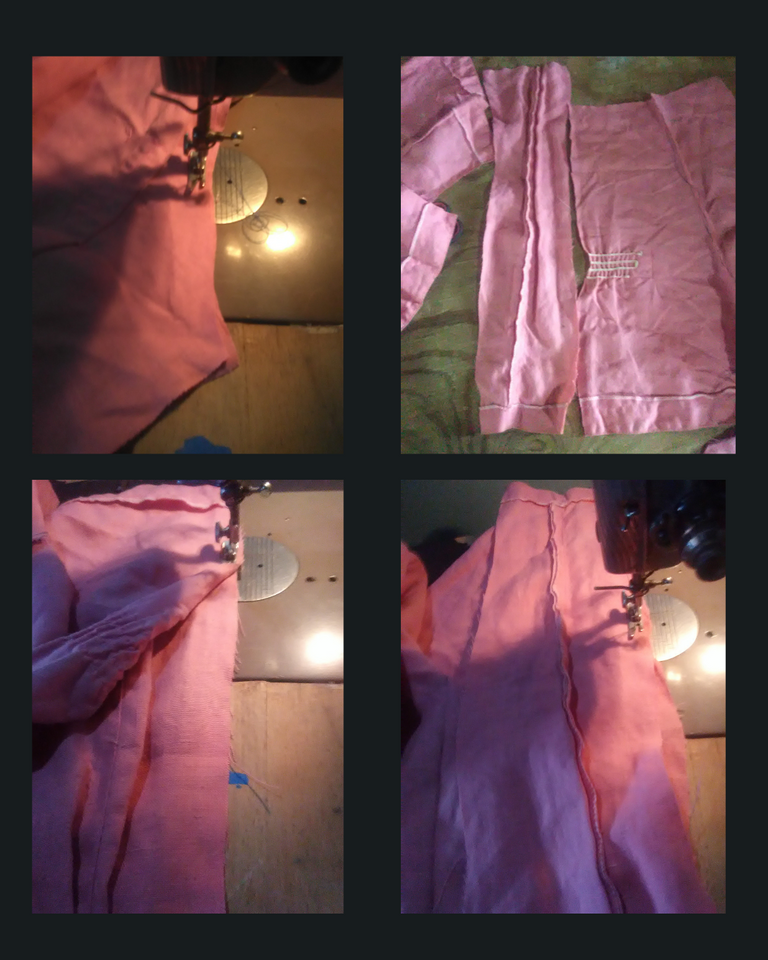
Se deben unir las ambas piezas, estas se cosen en los laterales y en la parte de abajo del short. Además se realiza el dobladillo del pantalón.
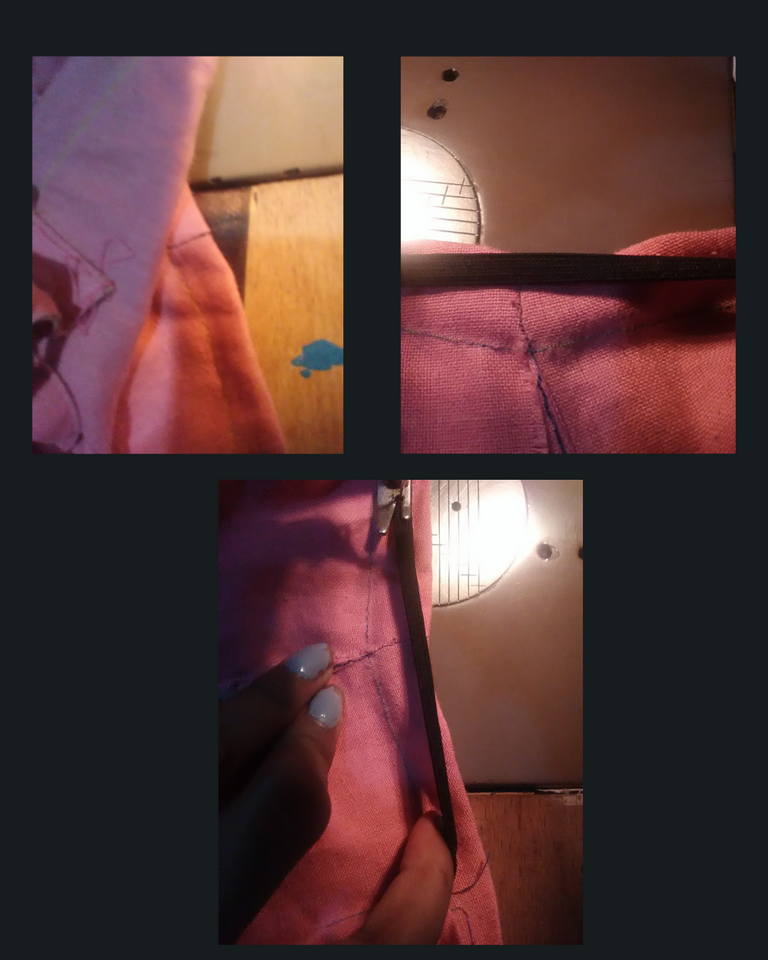
Se cose además, la zona de la cintura y se coloca la elástica sobre esta.
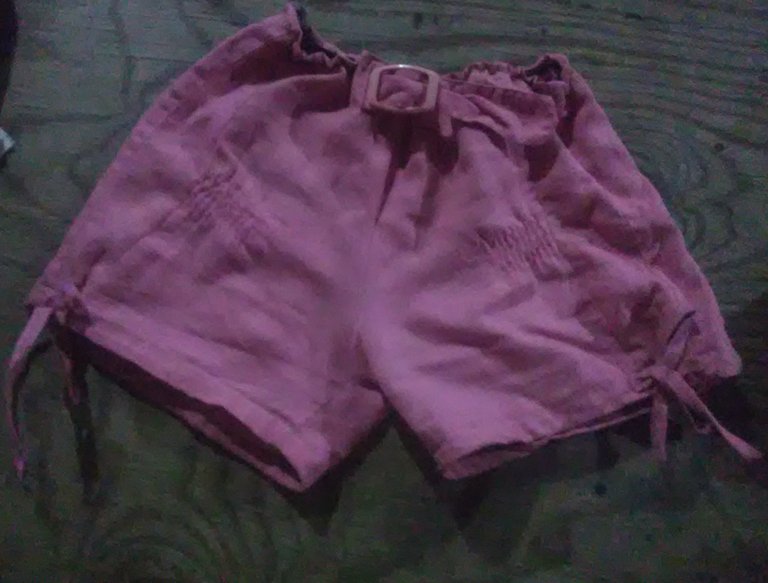
Septimo Paso
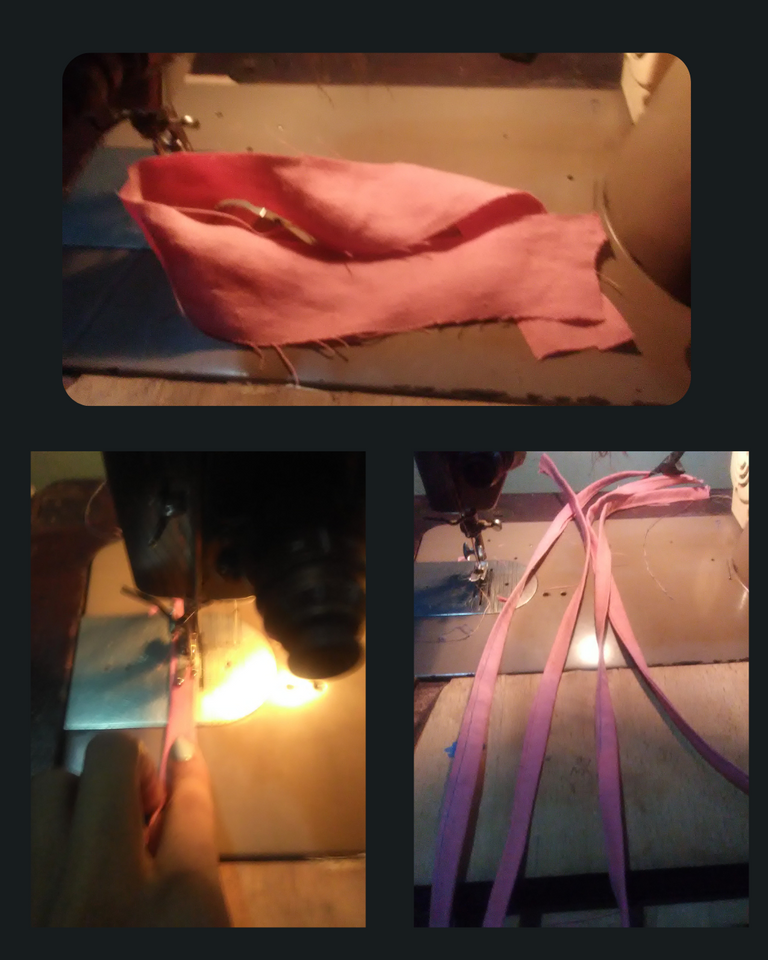
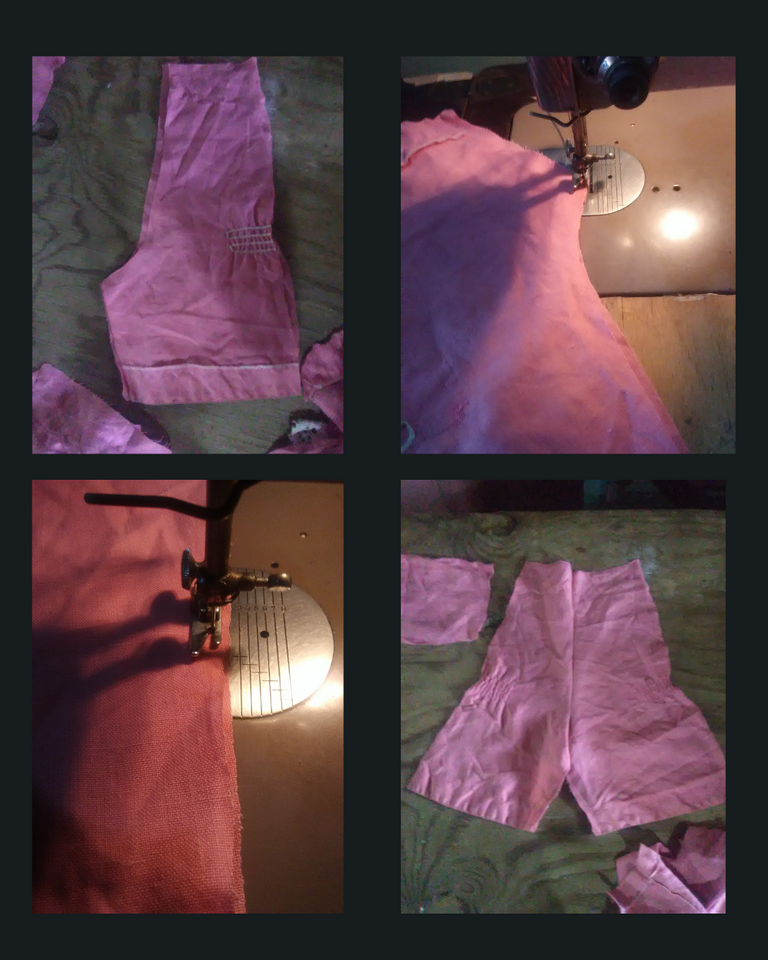
Se marcan y se recortan 4 tiras de 2,5 pulgadas sobre la otra manga del bleizer que ha sobrado. Estas tiras se van a doblar dos veces y se cosen en la máquina de coser.
Estas tiras se fijan sobre el borde inferior y lateral del pantalón y se cosen. se deben coser dos de las tiras en ambas botas con la finalidad de poder hacer entre ellas un lazo.
Octavo Paso
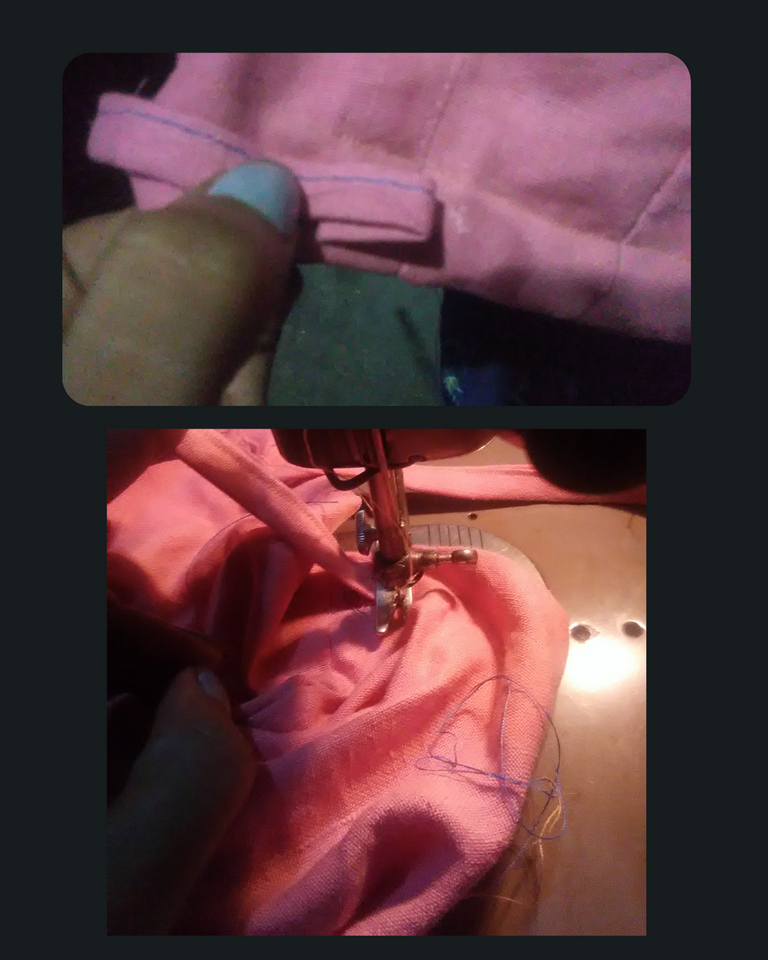
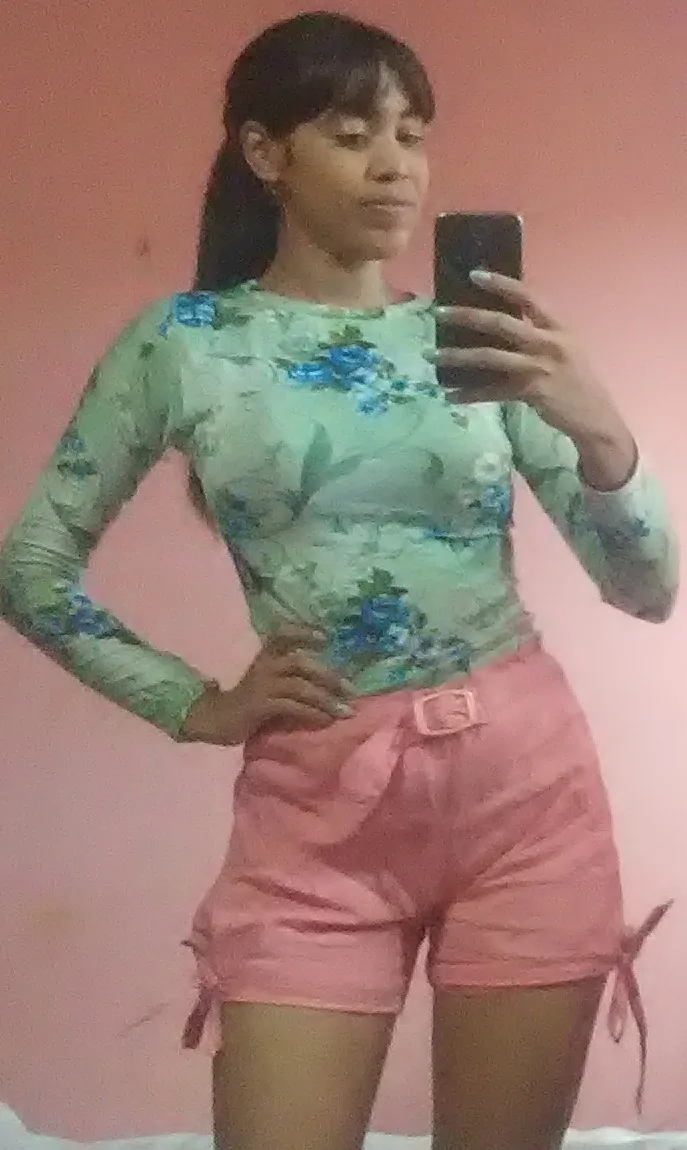
De esa manera quedan las cintas sobre las botas del short. También cosí en la parte central del short un cinturón que tenía el bleizer. Así que pueden aprovechar cualquier adorno o accesorio que tenga la prenda y añadirlo al diseño del short.
De esta manera, hemos terminado el diseño! Espero les guste el diseño del short.
Como siempre les deseo mucha energía y toda la buena vibra del universo!
Gracias!
Hello friends, I hope you are doing very well. Congratulations for all your wonderful posts. This week was definitely filled with a lot of creativity and passion in every post. Today I want to present you a super 180° change that I made with a Bleizer (from the sixteen hundred years), which was no longer used at home. I had the idea of turning it into a nice Short. I hope you like the proposal!
Hands on the scissors and start cutting!
MATERIALS USED
- Bleizer
- short to draw the pattern guide
- Scissors
- Elastic
- Thread
- Sewing Machine
PROCEDURE*.
Step 1
Take the bleizer and proceed to open its sides with the scissors. Remove the clamps from the bleizer to prevent the bleizer from getting wrinkled when taking out the patterns.
Step 2
Then fold the bleizer fabric and the shorts in half, fold the shorts and place them on the fabric to remove the back of the garment. After this is marked on the fabric, proceed to cut it out with the scissors. Also cut the part that joins both fabrics in half and these two pieces will remain separately.
Step 3.
As you can see a part of the yellow shorts protrudes from the garment, I did this because the garment is not quite big enough to work the back of the shorts, even so the work can be done, since that space left over from the shorts was measured and approximately 3 inches were missing.
So two strips of three inches are cut on one of the sleeves of the bleizer.
Step 4
Then fold the yellow shorts to get the silhouette on the pink fabric. Mark it and cut it out. In this way we have the 4 pieces that form the front and back of the shorts plus the two strips that will go on the sides of the shorts, to increase the back area.
Step 5
Then join the two pieces in the sewing machine only up to the point or triangle that can be seen in the first image of the collage. Then sew the strips on the sides of the back.
In the same way, sew the front part of the shorts. Only up to the vertex point.
Step 6
Join the two pieces together, sew them on the sides and on the bottom of the shorts. In addition, the hem of the pants is made.
The waistband area is also sewn and the elastic is placed over it.
Step 7
Mark and cut out 4 strips of 2.5 inches on the other sleeve of the leftover bleizer. These strips are to be folded twice and sewn on the sewing machine.
These strips are then pinned over the bottom and side edge of the pants and sewn together. Two of the strips should be sewn on both boots in order to be able to make a loop between them.
Step 8
This way the ribbons stay on the boots of the shorts. I also sewed a belt that had the bleizer in the middle of the shorts. So you can take advantage of any ornament or accessory that the garment has and add it to the design of the shorts.
This way, we have finished the design! I hope you like the design of the shorts.
As always I wish you lots of energy and all the good vibes of the universe!
Thank you!

Está hermoso y se ve sencillo para poder crear algo que nos guste y lo podamos usar, a partir de una camisa que no nos gusta como nos queda. ❤️
muchas gracias!
Me gusta el chort y la modelo también está muy bonita.. oye parece algo totalmente nuevo nadie creería que tu misma lo hiciste y menos aun reutilizando algo que ya no era importante.
Gracias @frankrey11 . Saludos!
¡Wow! Increíble la forma en que le diste una nueva oportunidad a esa prenda vieja y aburrida. Adoro las transformaciones porque se pueden lograr maravillas como esta. ¡Excelente post!
@suezoe gracias por tus palbras!
Gran transformación!! soy fan de reutilizar todo. Hay mucha creatividad en esta idea y en tu diseño💐💐
muchas gracias @imena ☺️
Hi @divergente1
Do you know you could have used #diy tag for this post to earn some BUIDL tokens?
In case you are not aware, read this post to know the kinds of content you could post using #diy tag.
Because most people are not aware of the potential of BUIDL token, it can still be bought at very cheap price now.
me encanta esta super hermoso, y tine un toque playero .
¡Felicidades! Esta publicación obtuvo upvote y fue compartido por @la-colmena, un proyecto de Curación Manual para la comunidad hispana de Hive que cuenta con el respaldo de @curie.
Si te gusta el trabajo que hacemos, te invitamos a darle tu voto a este comentario y a votar como testigo por La Colmena.
Si quieres saber más sobre nuestro proyecto, te invitamos a acompañarnos en nuestro servidor de Discord.
Congratulations @divergente1! You have completed the following achievement on the Hive blockchain and have been rewarded with new badge(s):
Your next target is to reach 4750 upvotes.
You can view your badges on your board and compare yourself to others in the Ranking
If you no longer want to receive notifications, reply to this comment with the word
STOPCheck out the last post from @hivebuzz:
Support the HiveBuzz project. Vote for our proposal!
Waooo, si que fue un giro de 180° jeje me encanto el resultado final.😍 necesito aprender a coser yaaaa😂
gracias amiga! si, siempre es bueno aprender de todo.
Wow! Quién se imaginaria que ese short era una camisa antes 🤩 ¡Me encantó! Esa es la magia de saber coser ✨
gracias inmensas por tus palabras
Vaya manera de reciclar. El otro día yo me senté a hacer cositas así y la verdad no me salieron. Mi mamá me prestó su máquina de cocer y nada me quedó bien jajaja el hilo se enredaba, las costuras se salían... no sé, me falta práctica jajaja aunque me gusta y más adelante seguiré intentándolo, pero a usted le quedó muy bonito su trabajo, excelente.
jajaja. Gracias @gaboamc2393 , siempre los comienzos son difíciles, también cuando inicie le tenía miedo al pedal de la maquina, rompí muchas agujas , aprendí sola porque mi mamá no mete ni siquiera el hilo en la aguja. Aun sigo aprendiendo, aún queda mucho camino por recorrer porque tambien amo coser, así que mucha suerte sé que lo lograrás porque tienes mucho talento se nota en cada publicación que haces.