Recycle, Design and Create a Cute Bracelet with Electrical Cables //Recicla, Diseña y Crea una Linda Pulsera con Cables Eléctricos

Hello dear friends of Hive and Jewelry, it is a pleasure to be able to greet you again and also to share another day with this wonderful community. It is always good to get feedback on ideas and knowledge, and this is what this group does. Every tutorial you have shared has been very useful for my growth in Hive, I thank you for it and for every suggestion; from the administrators to every Hive user. You already know that I like to recycle and reuse objects, today while I was arranging and tidying certain objects I found some loose wires and since I saw them I visualized a bracelet. So I wanted to share with the whole community the step by step to make a bracelet with electrical wires, this being a very nice option to reuse those wires that are no longer useful and turn it into a nice accessory.
MATERIALS USED:
- 1.5 meters of red wire
- 1.5 meters of yellow wire
- Beads
- Hooks for accessories
PROCEDURE
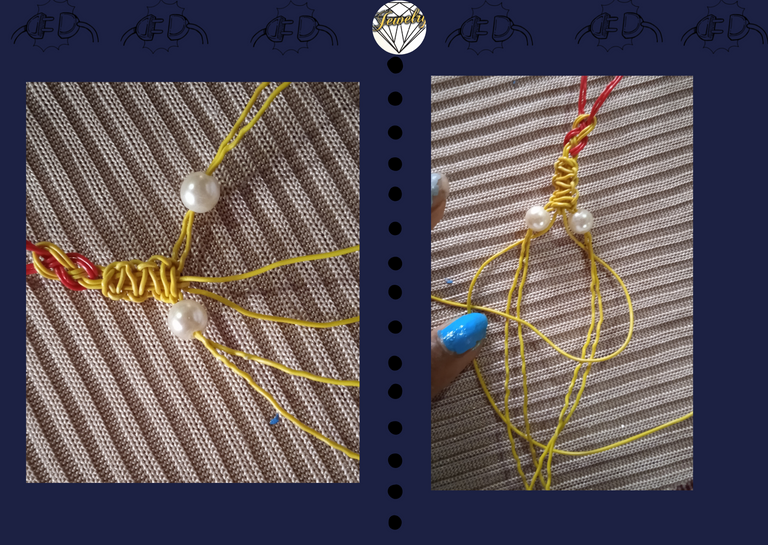
Step 1

Take one meter of the yellow wire and cut it in half. Then these two pieces of wire are bent to form an oval, and the red wire is passed under the yellow oval, then a bend is made with the red wire and passed over it to form an infinite knot.

Then force toward the center by pulling both ends of the wires together to form a tight knot.
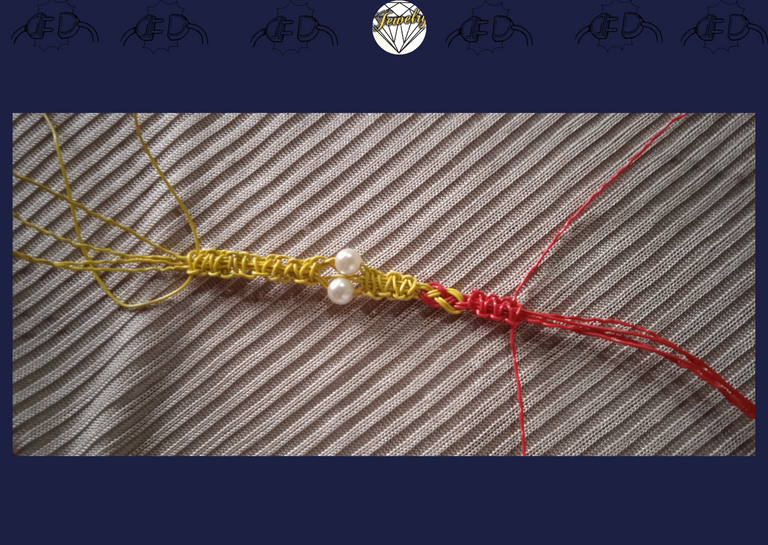
Step 2

Then place a piece of yellow wire underneath the four wires. With the yellow wire, form a loop over the middle four wires. Then the wire that is below and to the left is passed under the right wire and over the four wires in the middle, then it is introduced through the first curve that was formed and is forced towards the center to form the corresponding knuckles.

The same step as above must be done to form the entire weave between the wires. And this is the way in which the bracelet is going to be.
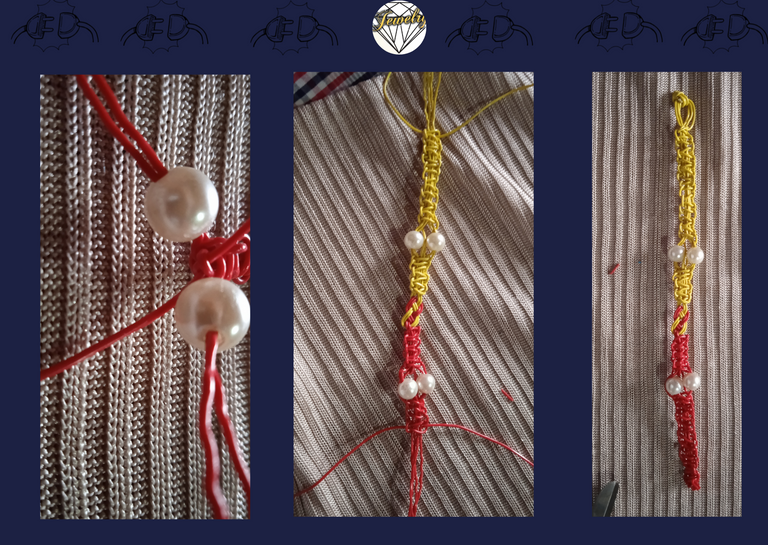
Step 3
After making 7 knots, insert two beads between the wires that have been left at both ends of the weave, leaving the two central ones free. Then proceed to fold the wire from the right to the left.
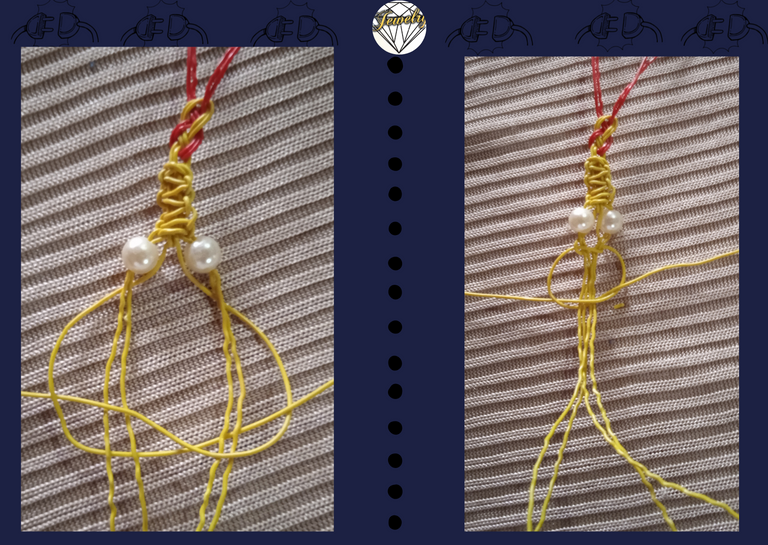
Then the wire that are on the left side of the weave are passed to the right side of the weave over the first wire that formed the curve to the left and under the four central wires. Subsequently, it exits upwards over the first wire. In this way the weave is pulled back into the center to press the wires together to form the knot.

This is the way the knots or weave should look on the bracelet.
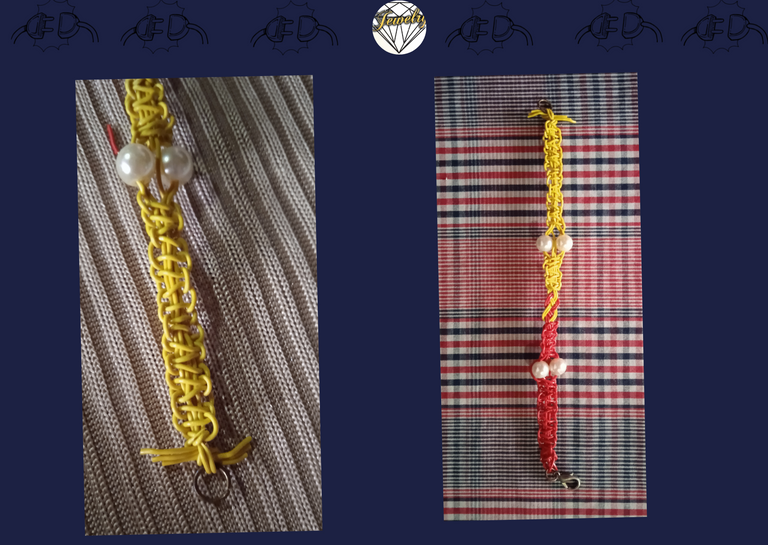
Step 4
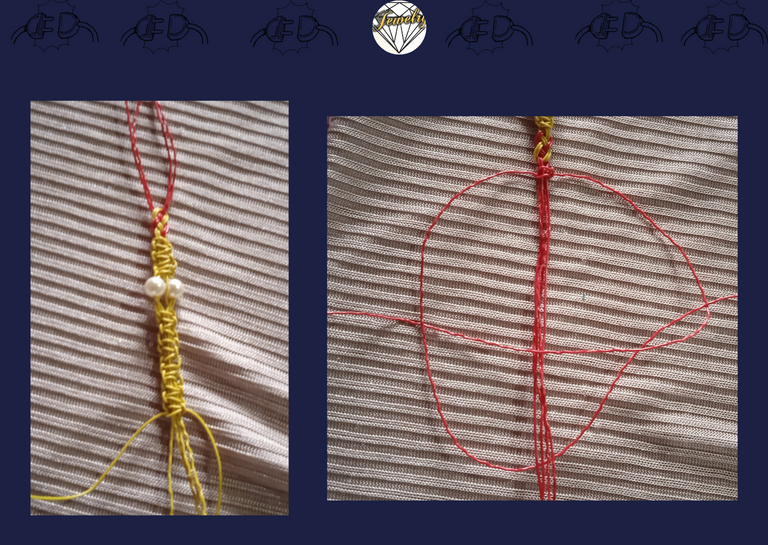
Repeat all the previous steps with the red wires.
In this way all the previous steps have been copied on the red wires and this is the result. Then when you finish weaving the bracelet to the desired size. In this case I made 7 knuckles before introducing the beads and after introducing them, I made 11 knuckles.
Then cut off the excess material.
Finally, insert a ring at one end and a hook at the other end.
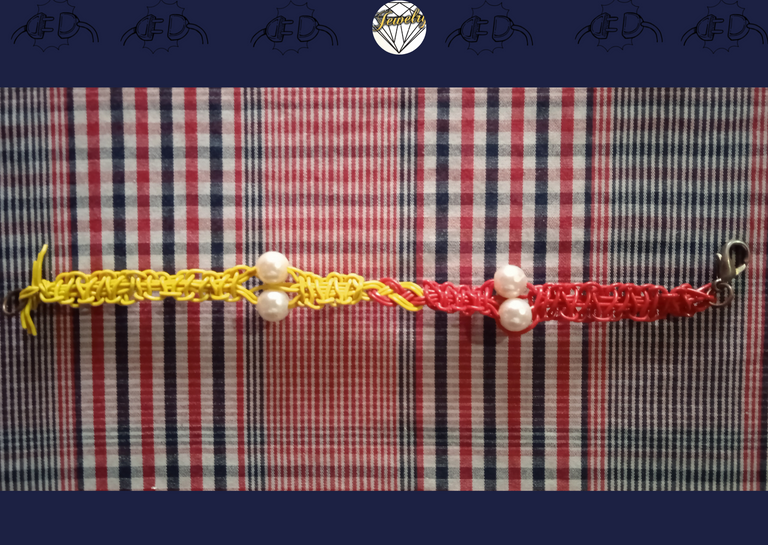
This is the final result of our bracelet created with electrical wires.
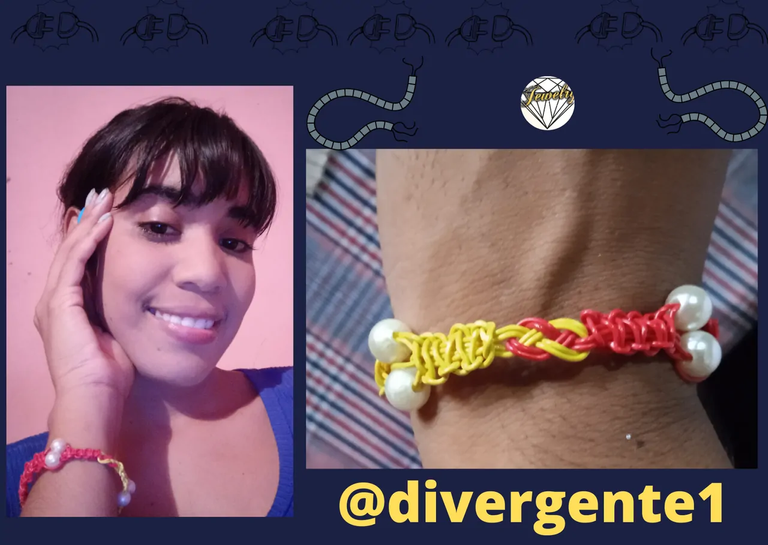
It's a nice way to reuse and turn those wires into cute accessories. Happy day to all! Thanks for reading.
The images are my own and were taken with a ZTE BLADE phone.
Translator utilization: Deepl
The editing of the photos was done using the Polish Photo Editor application and separators were edited in canva.

Hola queridos amigos de Hive y Jewelry, e un gusto poder saludarles nuevamente y además compartir un día más con esta maravillosa comunidad. Siempre es bueno retroalimentarse de las ideas y conocimientos, y esto es lo que hace este grupo. Me han servido muchísimo cada tutorial que han compartido para mi crecimiento en Hive, les agradezco por ello y por cada sugerencia; desde los administradores a cada usuario de Hive. Ya saben que me gusta reciclar y reutilizar los objetos, hoy mientras arreglaba y ordenada ciertos objetos me encontré con algunos cables sueltos y desde que los vi visualicé una pulsera. De esta manera quise compartir con toda la comunidad el paso a paso para realizar una pulsera con cables eléctricos, siendo esta una opción muy agradable para reutilizar esos cables que ya no sirven y convertirlo en un lindo accesorio.
MATERIALES UTILIZADOS:
- 1,5 metros de cable rojo
- 1,5 metro de cable amarillo
- Perlas
- Ganchos para accesorios
PROCEDIMIENTO
Paso 1
Se toma un metro del cable amarillo y se corta a la mitad. Luego estos dos pedazos de cable se doblan para formar un óvalo, y se pasa el cable rojo por debajo del óvalo amarillo, luego se realiza una curva con el cable rojo y se pasa por encima de este para formar un nudo infinito.
Luego se hace fuerza hacia el centro jalando ambos extremos de los cables para formar un nudo ajustado.
Paso 2
Posteriormente se va a colocar por debajo de los cuatro cables un pedazo de cable amarillo. Con el cable amarillo se va a formar una curva que pase por encima de los cuatro cables del medio. Luego el cable que está por debajo y a la izquierda se pasa por debajo del cable derecho y por encima de los cuatro cables del medio, luego se introduce por l primera curva que se formó y se hace fuerza hacia el centro para formar los nudillos correspondientes.
Se deben realizar el mismo paso anterior para formar todo el tejido entre los cables. Y esta es la forma en la cual va a ir quedando la pulsera.
Paso 3
Al realizar 7 nudos se introduce dos perlas entre los cables que han quedado en ambos extremos del tejido, dejando los dos centrales libres. Luego se procede a doblar el cable de la derecha hacia la izquierda.
Luego el cable que están en la parte izquierda del tejido se pasan hacia la derecha del tejido por encima del primer cable que formó la curva hacia la izquierda y por debajo de los cuatro cables centrales. Posteriormente este sale hacia arriba por encima del primer cable. De esta forma nuevamente el tejido, se realiza fuerza hacia en centro para presionar entre sí los cables y formar el nudo.
Esta es la forma en la que debería de quedar los nudos o el tejido en la pulsera.
Paso 4
Se repiten todos los pasos anteriores con los cables rojos.
De esta manera se han copiado todos los pasos anteriores en los cables rojos y este es el resultado. Luego al terminar de tejer la pulsera al tamaño deseado. En este caso yo realicé 7 nudillos antes de introducir las perlas y luego de introducirlas, realicé 11 nudillos.
Luego se debe cortar el material sobrante.
Para finalizar se debe introducir una argolla en uno de los extremos y en el otro extremo se debe introducir un gancho.
Este es el resultado final de nuestra pulsera creada con cables eléctricos.

Es una bonita forma de reutilizar y convertir esos cables en lindos accesorios. Feliz dia para todos! Gracias por leer.
Las imágenes son de mi autoría y fueron Tomadas a través de un Teléfono ZTE BLADE.
Traductor utilizado: Deepl
La edición de las fotos la realicé mediante la aplicaciones Editor de Fotos Polish y los separadores se editaron en canva.

Me encanta, es muy original la utilización de cables para la realización de esta pulsera. Mucho éxito 🤗
gracias amiga!
gran idea para reutilizar los cables. que fino
gracias
Excelente tutorial amiga @divergente1 nos encanta como pudiste darle forma a todos los nudos, y creaste una pulsera hermosa, felicidades 👏
gracias
Wow, congratulations. It's a nice idea. You are very creative and innovative.
Congratulations @divergente1! You have completed the following achievement on the Hive blockchain and have been rewarded with new badge(s):
Your next target is to reach 6000 upvotes.
You can view your badges on your board and compare yourself to others in the Ranking
If you no longer want to receive notifications, reply to this comment with the word
STOPCheck out the last post from @hivebuzz:
Support the HiveBuzz project. Vote for our proposal!