👚 Three Ways to Fix Holes in Clothing 👗// 👚Tres Formas de Arreglar los Agujeros de la Ropa 👗

Hello dear friends of Hive and Hive Diy. I hope you are with all the good vibes and energy that always characterizes you. Being able to solve unforeseen situations, reuse and improve the appearance of our clothes is a solution that gives us the sewing. Generally when a garment is damaged and those hateful holes appear, being able to solve this problem is a great result for our savings.
Today I want to show you 3 ways or alternatives to make those holes disappear from our clothes, and that will give our clothes a new look and a new style to our clothes.
To fix these holes we only need:
- Needles
- Yarn of worsted thread
- Bead
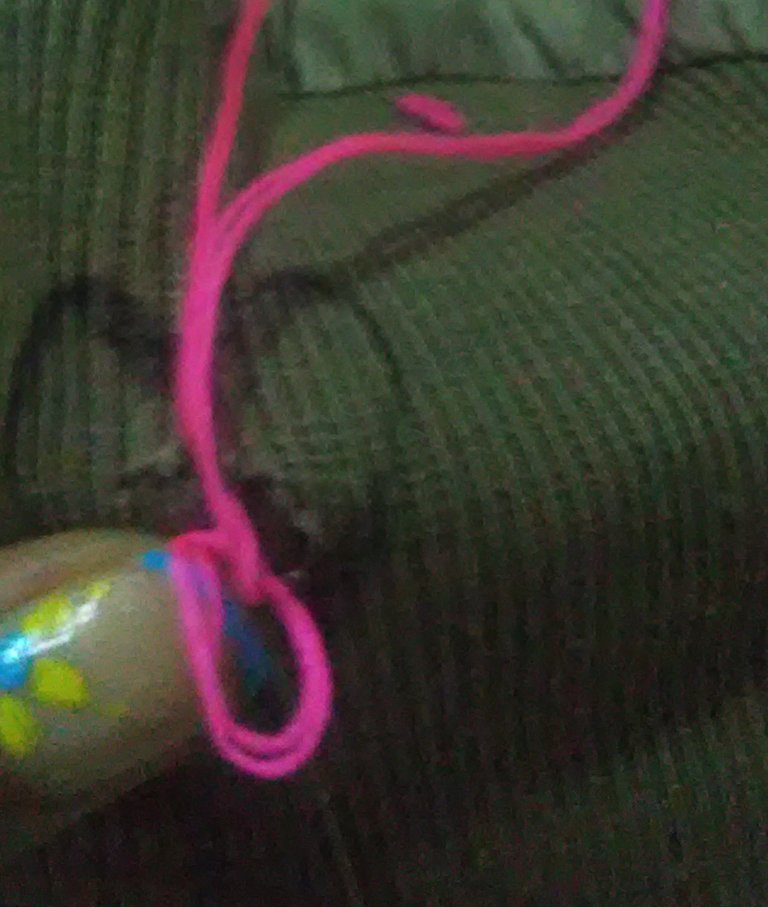
First Design
👗 Step 1.
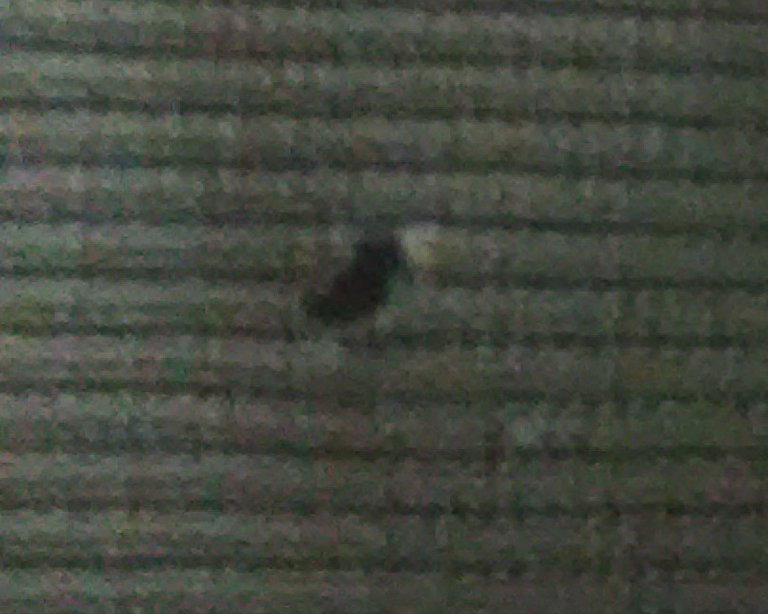
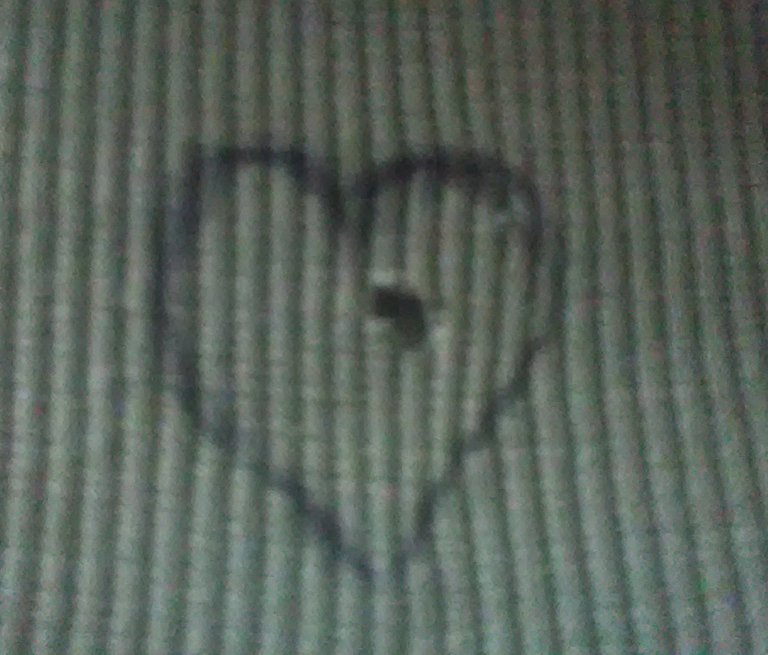
On our hole we are going to draw the shape of a heart, it doesn't matter if the hole is not in the center of the heart, the important thing is that it is within the limits of the heart shape.
👗 Step 2
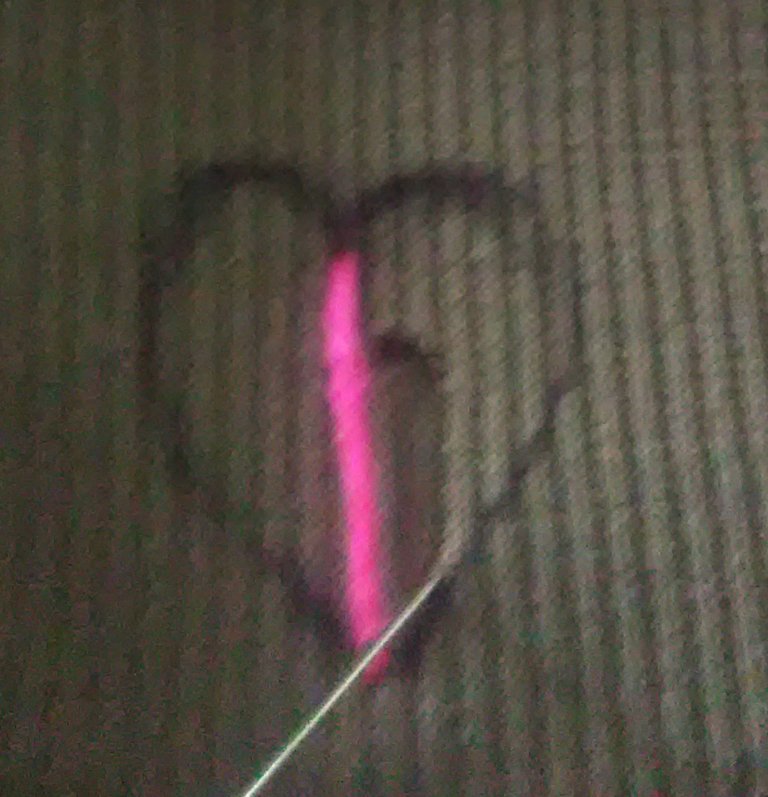
With the thread on the needle, make vertical lines from the top of the heart to the bottom of the heart, always respecting the limits of the heart shape.
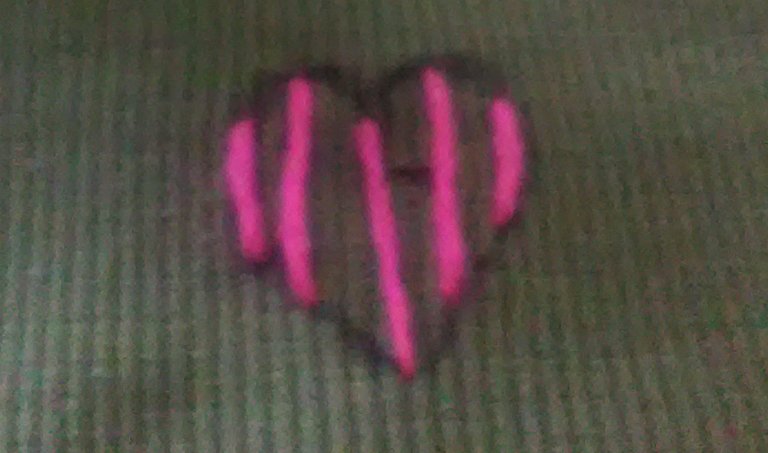
In this way you will be inserting straight vertical lines of worsted yarn on the heart.
👗 Step 3
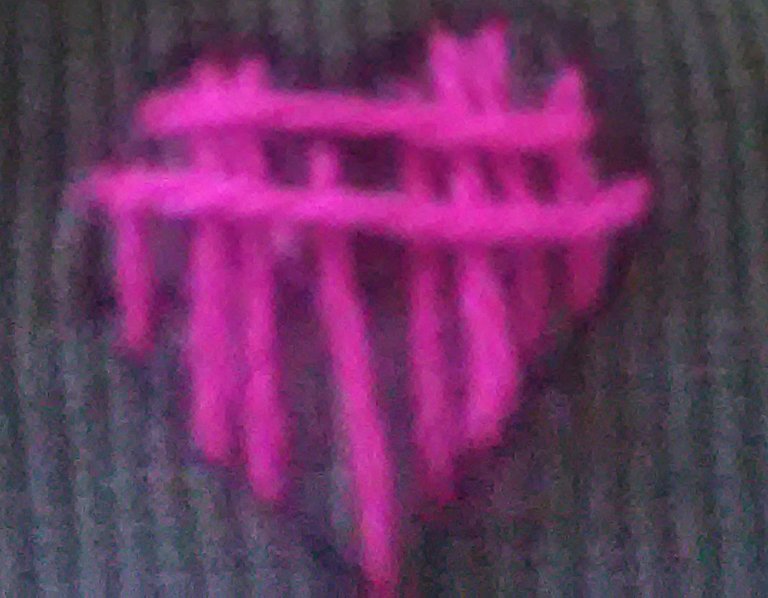
Then sew horizontal straight lines over the vertical lines that have been previously formed.
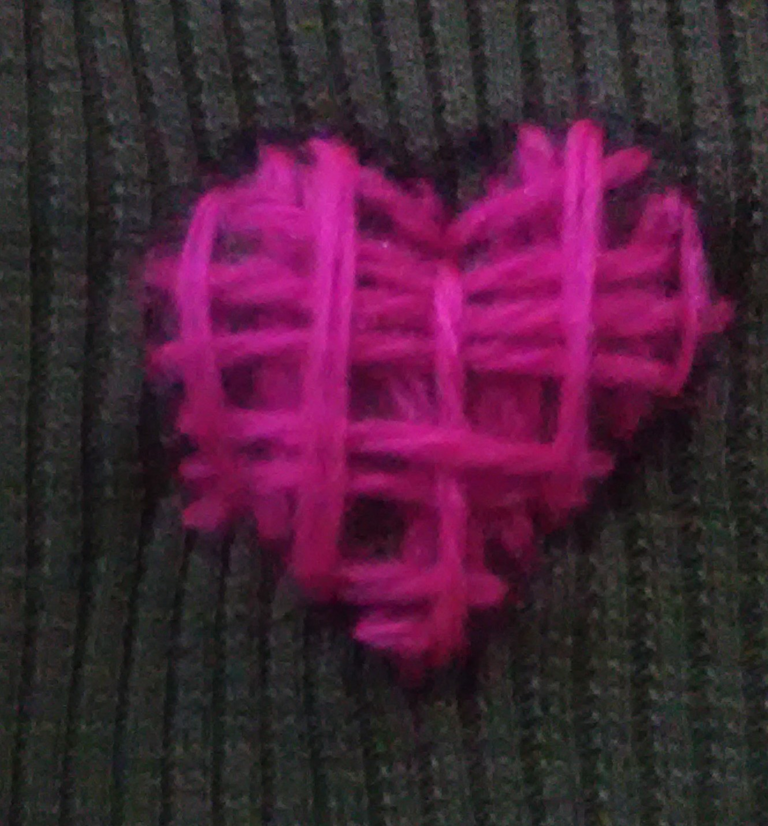
This is the final result of design 1 to cover the holes.
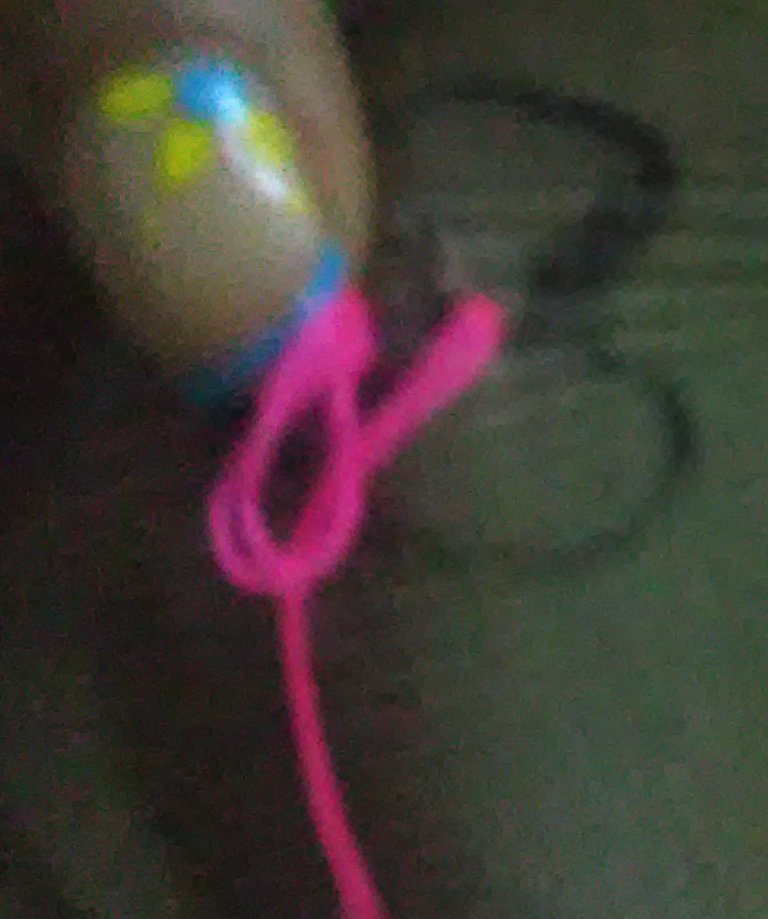
Design 2
👗 Step 1

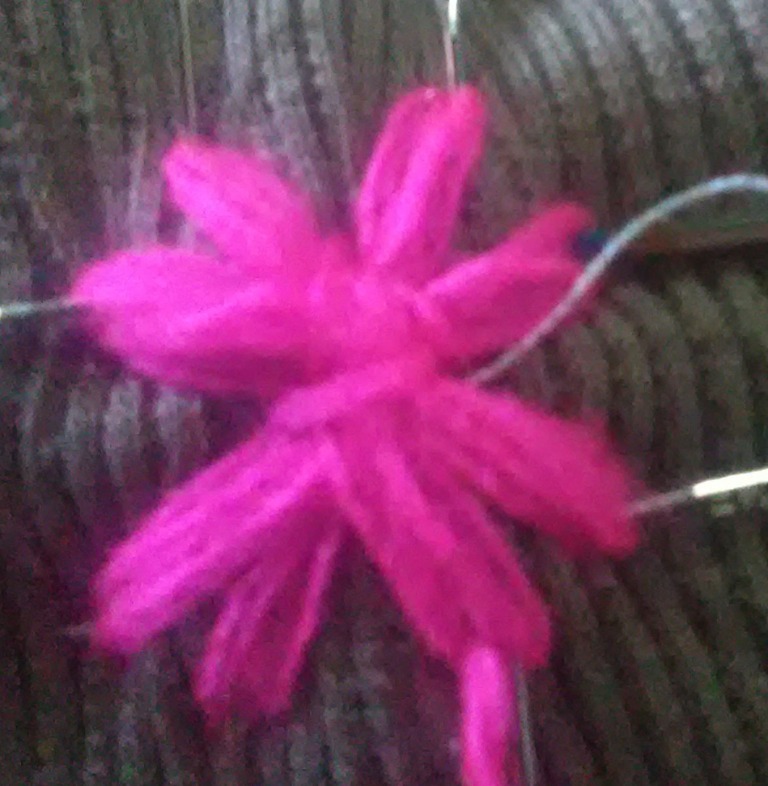
Around the hole we are going to create a crosshatch in the shape of a numeral.
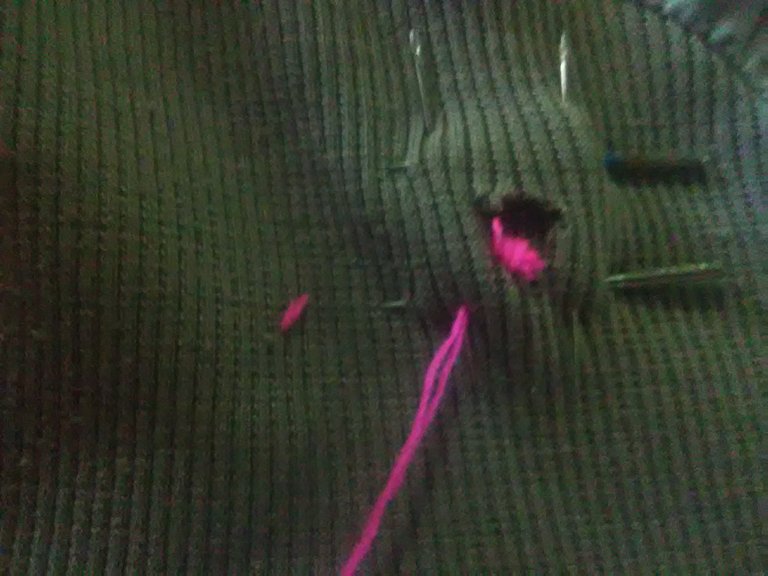
Insert the needle with worsted yarn into the hole.
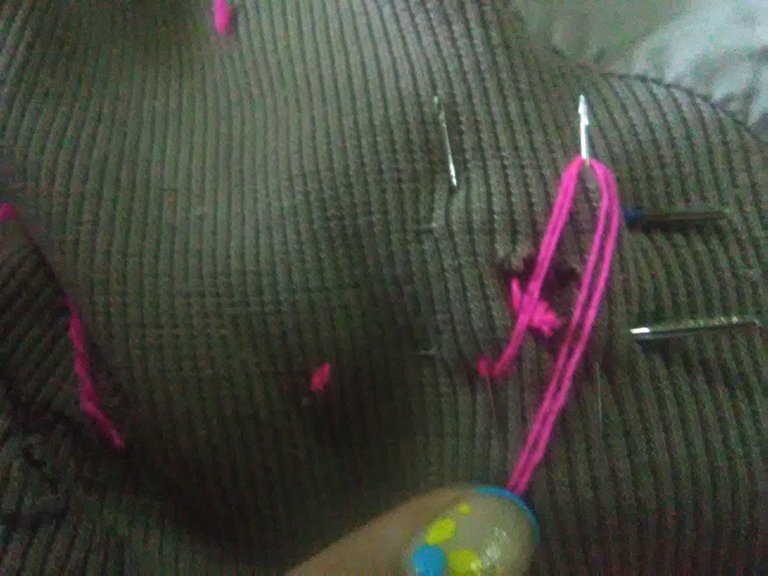
Afterwards, you are going to crisscross diagonally with worsted yarn between each of the needles that make the shape of the numeral.
Then cross the yarn over the two needles that are horizontal.
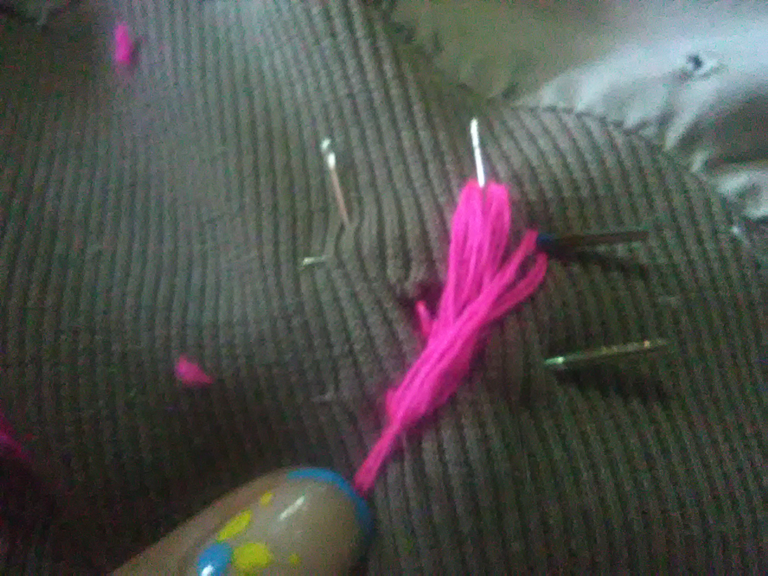
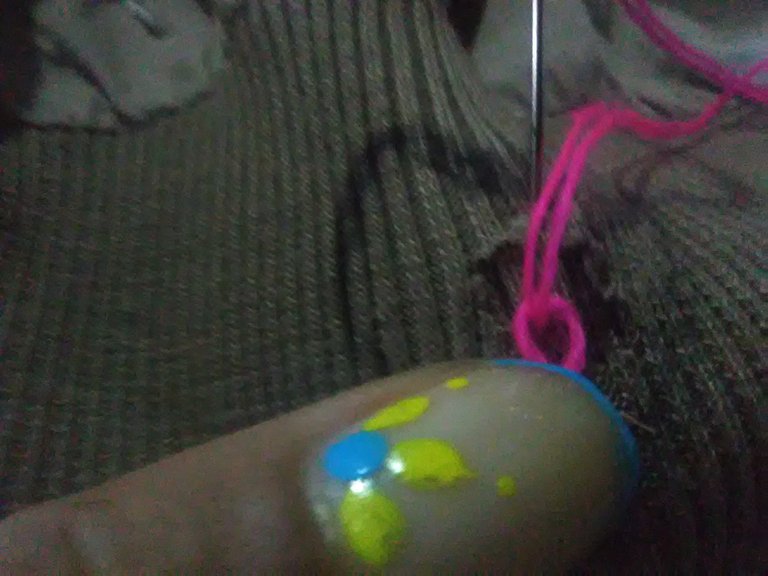
👗 Step 2
Cross each other as shown in the figure.
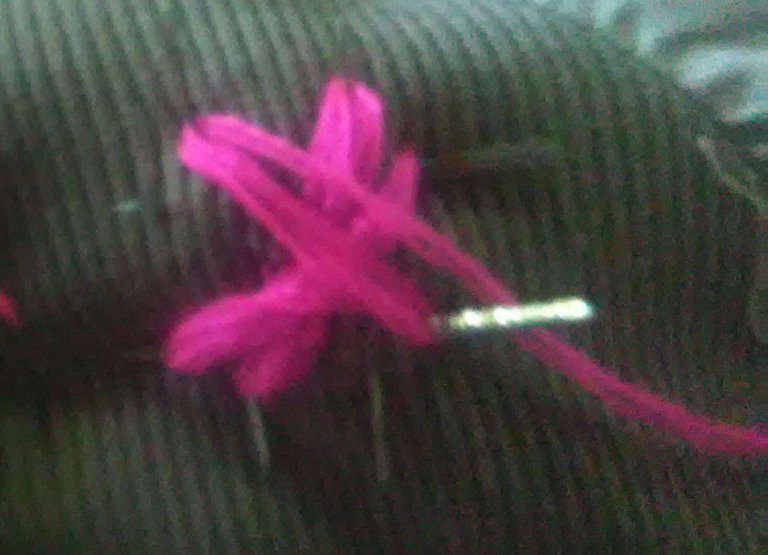
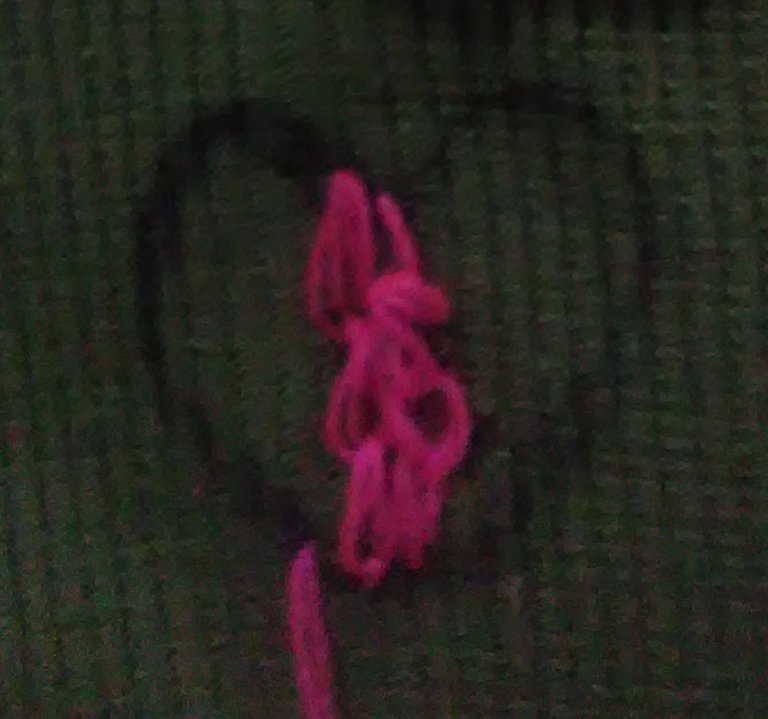
👗 Step 4
With the needle and thread, pass the thread from one end horizontally to the other end to tighten the design a little. And then vertically.
This is the form in which the design is left.
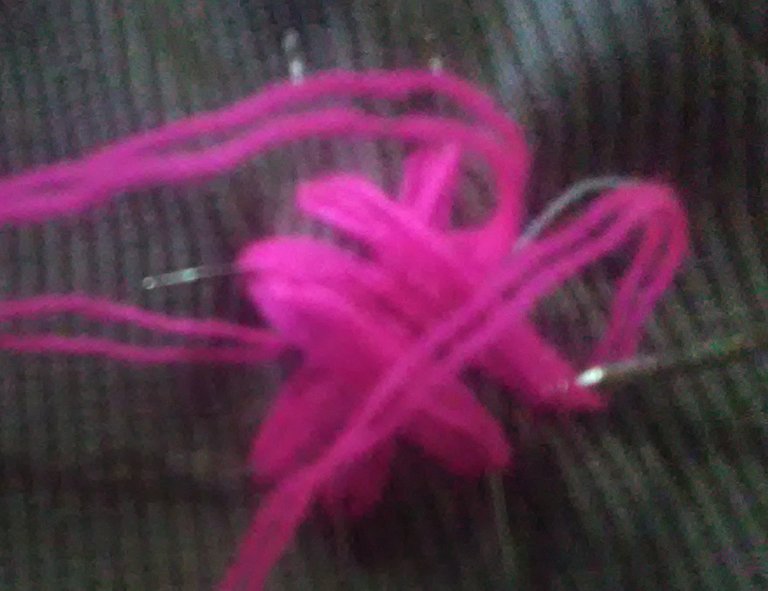
👗 Step 5
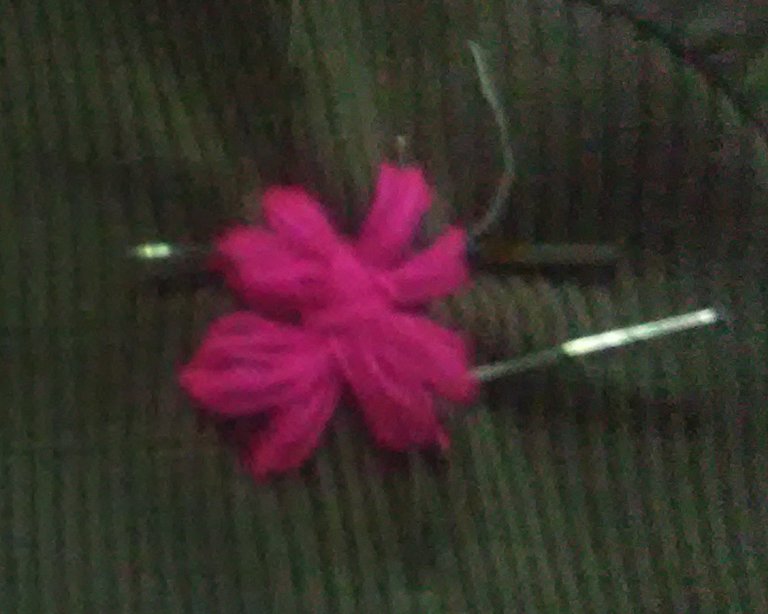
Then remove the needles that formed the numeral.
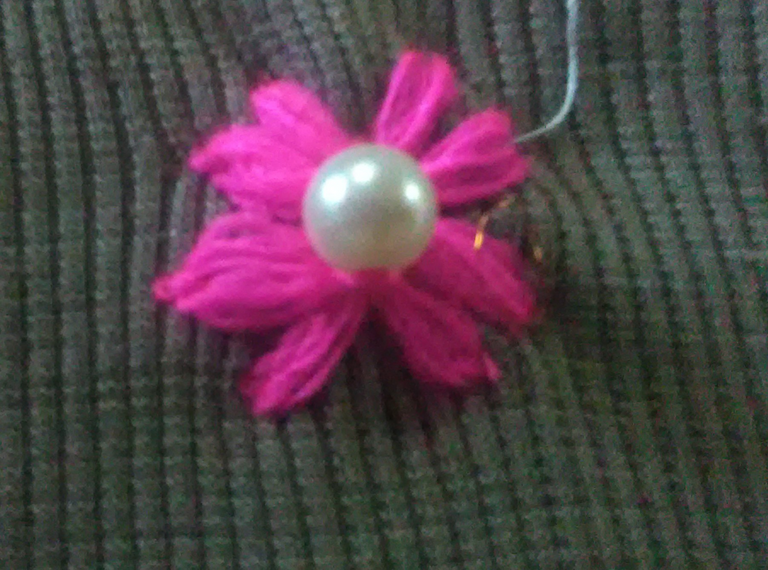
Then a pearl should be placed on the worsted yarns.
Design 3
👗 Step 1
We continue with the heart-shaped designs.

The needle should be inserted into the fabric, then very close to that first stitch the needle should be inserted again. The needle is inserted from below at a distance of 0.5 mm upwards from the fabric.
👗 Step 2
The needle should then be inserted through the ear that has been formed.
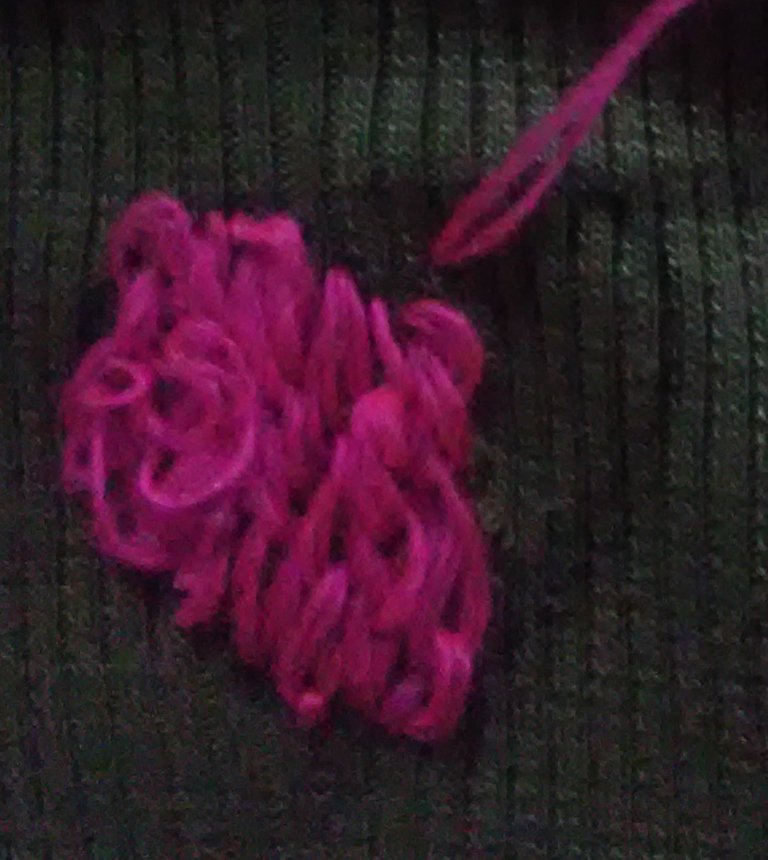
This is the design that you want to obtain around the heart that you have traced.
Here you can see the progress of the design. Two rows have been made vertically to the heart.

Form 4 rows following the same step.
👗 Step 3
This step is actually a sequence of the previous ones.
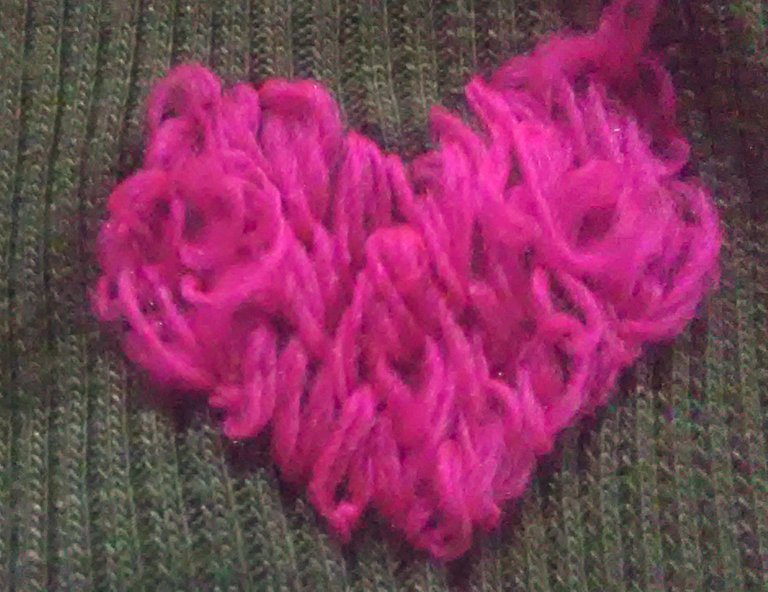
Final result of design 3 to repair the holes in our clothes.
Thus we have been able to create three useful designs to repair the holes in our clothes. Many infinite blessings from the universe to each of you.
The images are my own and were taken with a ZTE BLADE phone.
Translator utilization: Deepl
The editing of the photos was done using the Polish Photo Editor application and separators were edited in canva.

Hola queridos amigos de Hive y Hive Diy. Espero se encuentren con toda la buena vibra y energía que siempre los caracteriza. Poder resolver situaciones imprevistas, reutilizar y mejorar la apariencia de nuestras ropas es una solución que nos brinda la costura. Generalmente cuando se nos daña una prenda y aparecen esos odiosos agujeros poder solucionar esta problemática es un gran resultado para nuestro ahorro.
El dia de hoy quiero mostrarles 3 formas u alternativas para hacer desaparecer esos agujeros de nuestras ropas, además que le brindara a nuestra ropa una nueva vista y un nuevo estilo a nuestra vestimenta.
Para arreglar estos agujeros solo necesitamos:
- Agujas
- Hilo de estambre
- Perla
Primer Diseño
👗 Paso 1
Sobre nuestro agujero se va a dibujar la forma de un corazón, no importa que el agujero no quede en el centro del corazón, lo importante es que este quede dentro de los límites de la figura de corazón.
👗 Paso 2
Con el hilo en la aguja se van hacer líneas verticales desde la parte superior del corazón hasta la zona inferior del mismo, siempre respetando los límites de la figura del corazón.
De esta manera se van a ir insertando sobre el corazón líneas rectas verticales de hilo de estambre.
👗 Paso 3
Posteriormente se van a coser líneas rectas horizontales sobre las líneas verticales que se han formado anteriormente.
Este es el resultado Final del diseño 1 para tapar los agujeros.
Diseño 2
👗 Paso 1
Alrededor del agujero se va a crear un cruce de agujas en forma de un numeral.
Se va a insertar dentro del agujero la aguja con hilo de estambre.
Posteriormente se va a ir entrecruzado de forma diagonal con hilo de estambre entre cada una de las agujas que hacen la forma de numeral.
Lugo se cruzan el hilo sobre las dos agujas que están en forma horizontal.
👗 Paso 2
Se cruzan entre si com se muestra en la figura.
👗 Paso 3
Lugo con la aguja y el hilo se debe pasar el hilo desde un extremo horizontal hasta el otro extremo para apretar un poco el diseño. Y ssí mismo, en forma vertical.
Esta es la forma en la cual queda el diseño.
👗 Paso 4
Posteriormente se deben sacar las agujas que formaban el numeral.
Después se debe colocar una perla sobre los hilos de estambre.
Diseño 3
👗 Paso 1
Continuamos con los diseños en forma de corazón.
Se debe insertar la aguja en la tela, luego muy cerca de esa primera punzada se debe volver a insertar la aguja, Esta se inserta desde abajo a una distancia de 0,5 mm hacia arriba de la tela.
👗 Paso 2
Luego por ese orejita que se ha formado se debe introducir la aguja.
Ese es el diseño que se desea obtener alrededor del corazón que se ha trazado.
Aquí se puede observar el avance del diseño. se han realizado dos hileras de forma vertical al corazón.
Se forman 4 hileras siguiendo el mismo paso.
👗 Paso 3
Este paso en realidad es una secuencia de los otors anteriores.
Resultado final del diseño 3 para remediar los agujeros en nuestras ropas.
Así hemos podido crear tres diseños útiles para reparar los orificios a nuestras prendas de vestir.
👗Muchas bendiciones infinitas desde el universo para cada uno de ustedes.👗

Las imagenes son de mi autoria y fueron Tomadas a traves de un Telefono ZTE BLADE.
Traductor utilizado: Deepl
La edición de las fotos la realicé mediante la aplicaciones Editor de Fotos Polish y los separadores se editaron en canva.
Vaya, qué interesante y bonito! Saludos
💗 gracias!
Está hermoso y además muy útil para poder arreglar la ropa que nos guste y tengan un hueco ❤️
Es muy interesante y efectivo este post...has ganado mi más alta calificación 20/20
¡Felicitaciones!
1. Invierte en el PROYECTO ENTROPÍA y recibe ganancias semanalmente. Entra aquí para más información.
3. Suscríbete a nuestra COMUNIDAD, apoya al trail de @Entropia y así podrás ganar recompensas de curación de forma automática. Entra aquí para más información sobre nuestro trail.
4. Creación de cuentas nuevas de Hive aquí.
5. Visita nuestro canal de Youtube.
Atentamente
El equipo de curación del PROYECTO ENTROPÍA
Me encantan, se los veo a otros y es wow. Felicidades por ese talento 🙂