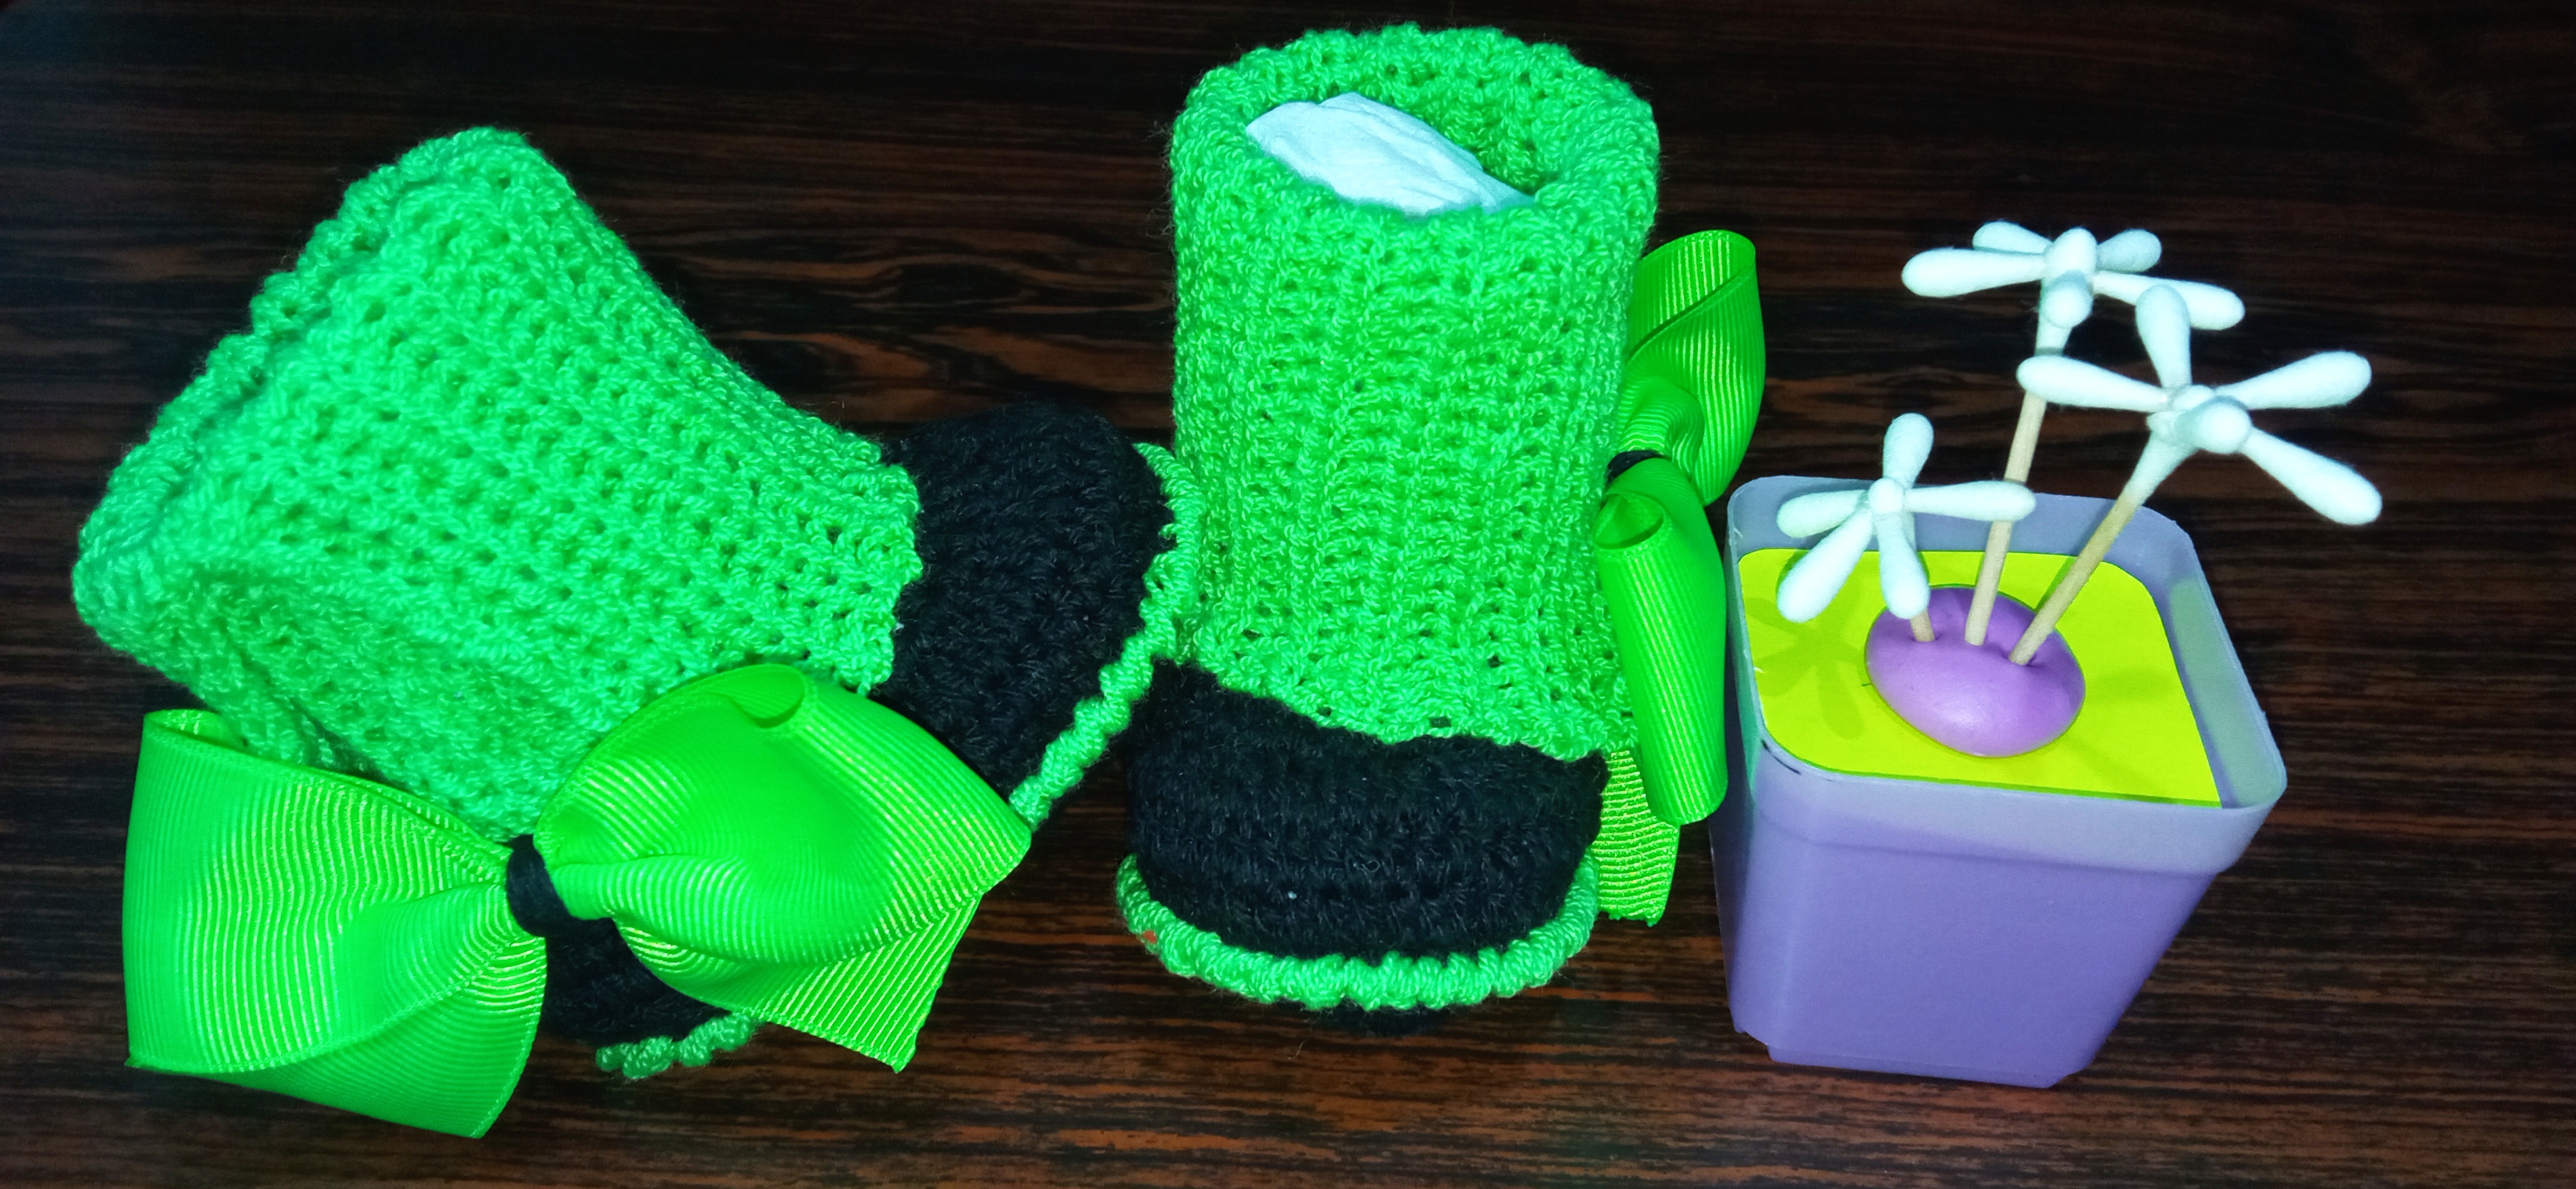
Knitted winter boots | Botas tejidas para invierno
Knitted winter boots | Botas tejidas para invierno
Hello dear friends of #hivediy, it is a pleasure to be able to present my work in this beautiful community.
Hola queridos amigos de #hivediy es un placer poder presentar mi trabajo en esta preciosa comunidad.
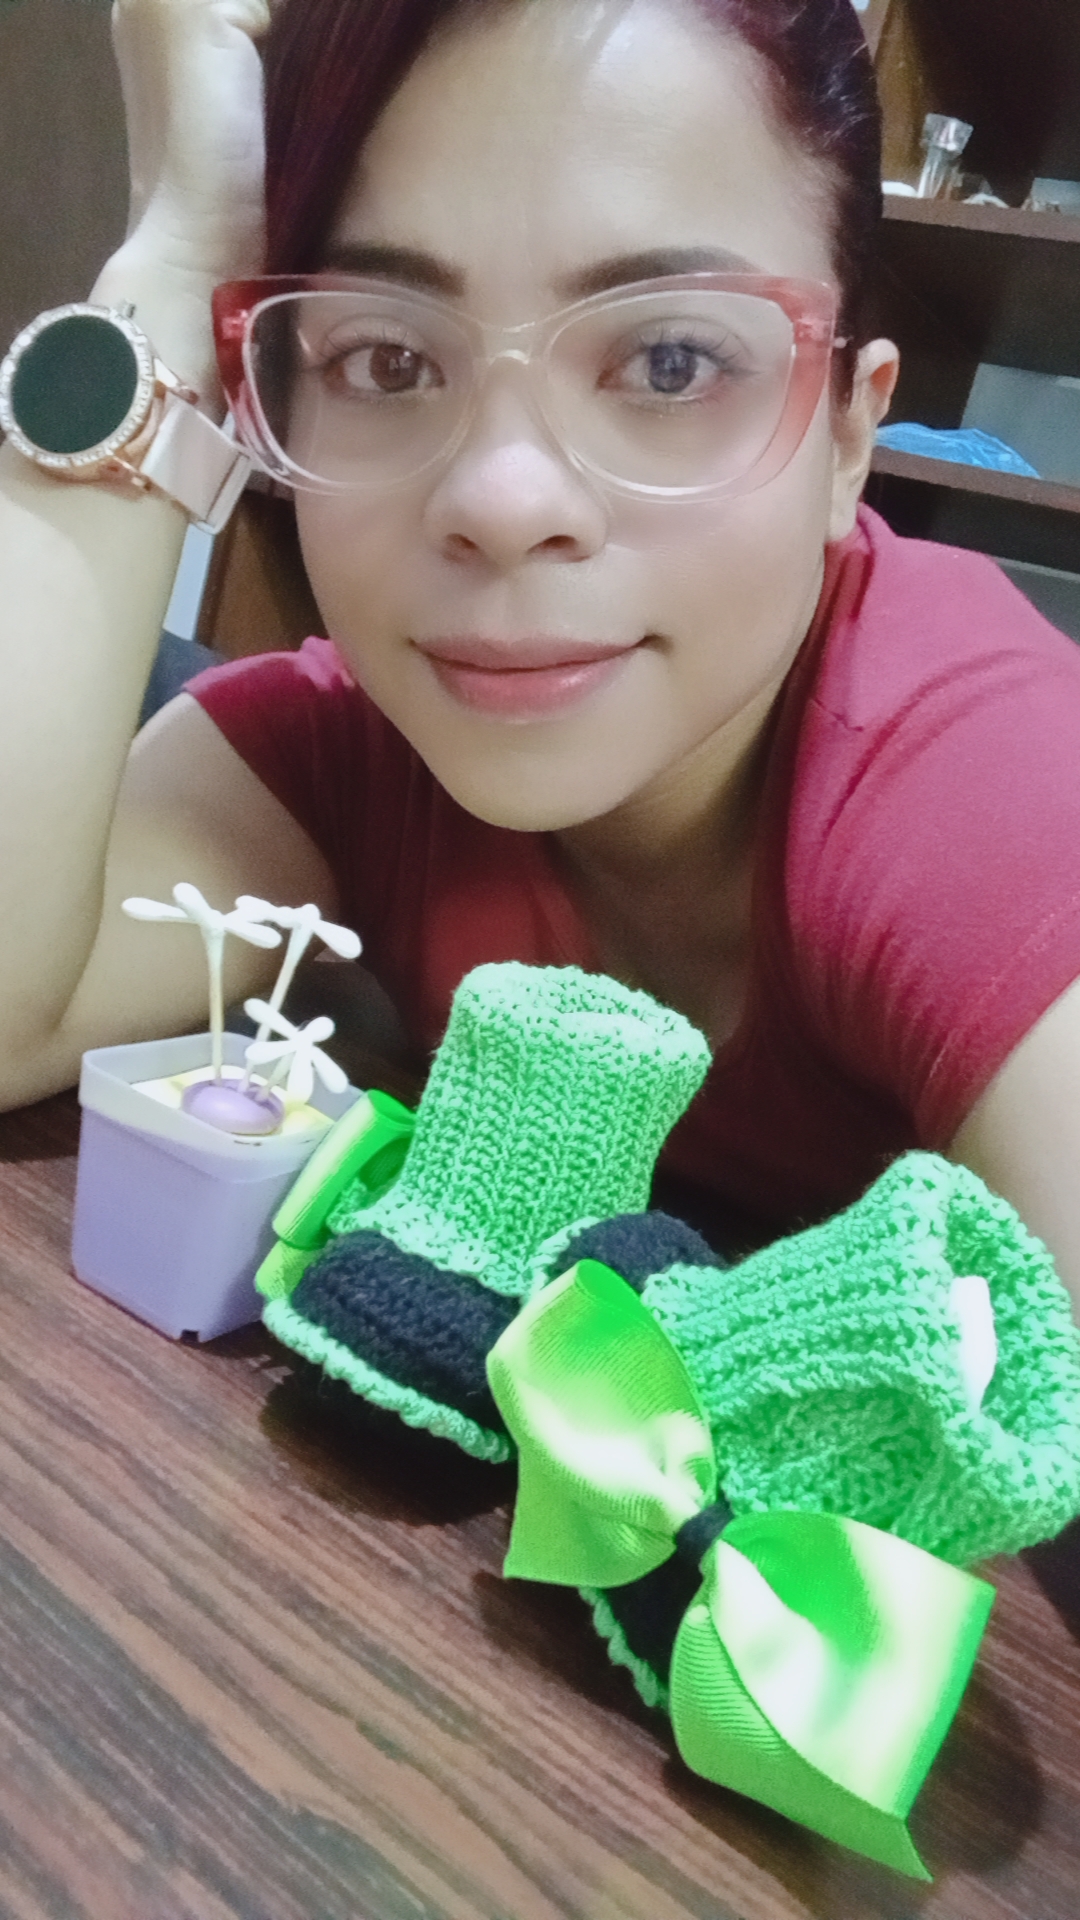
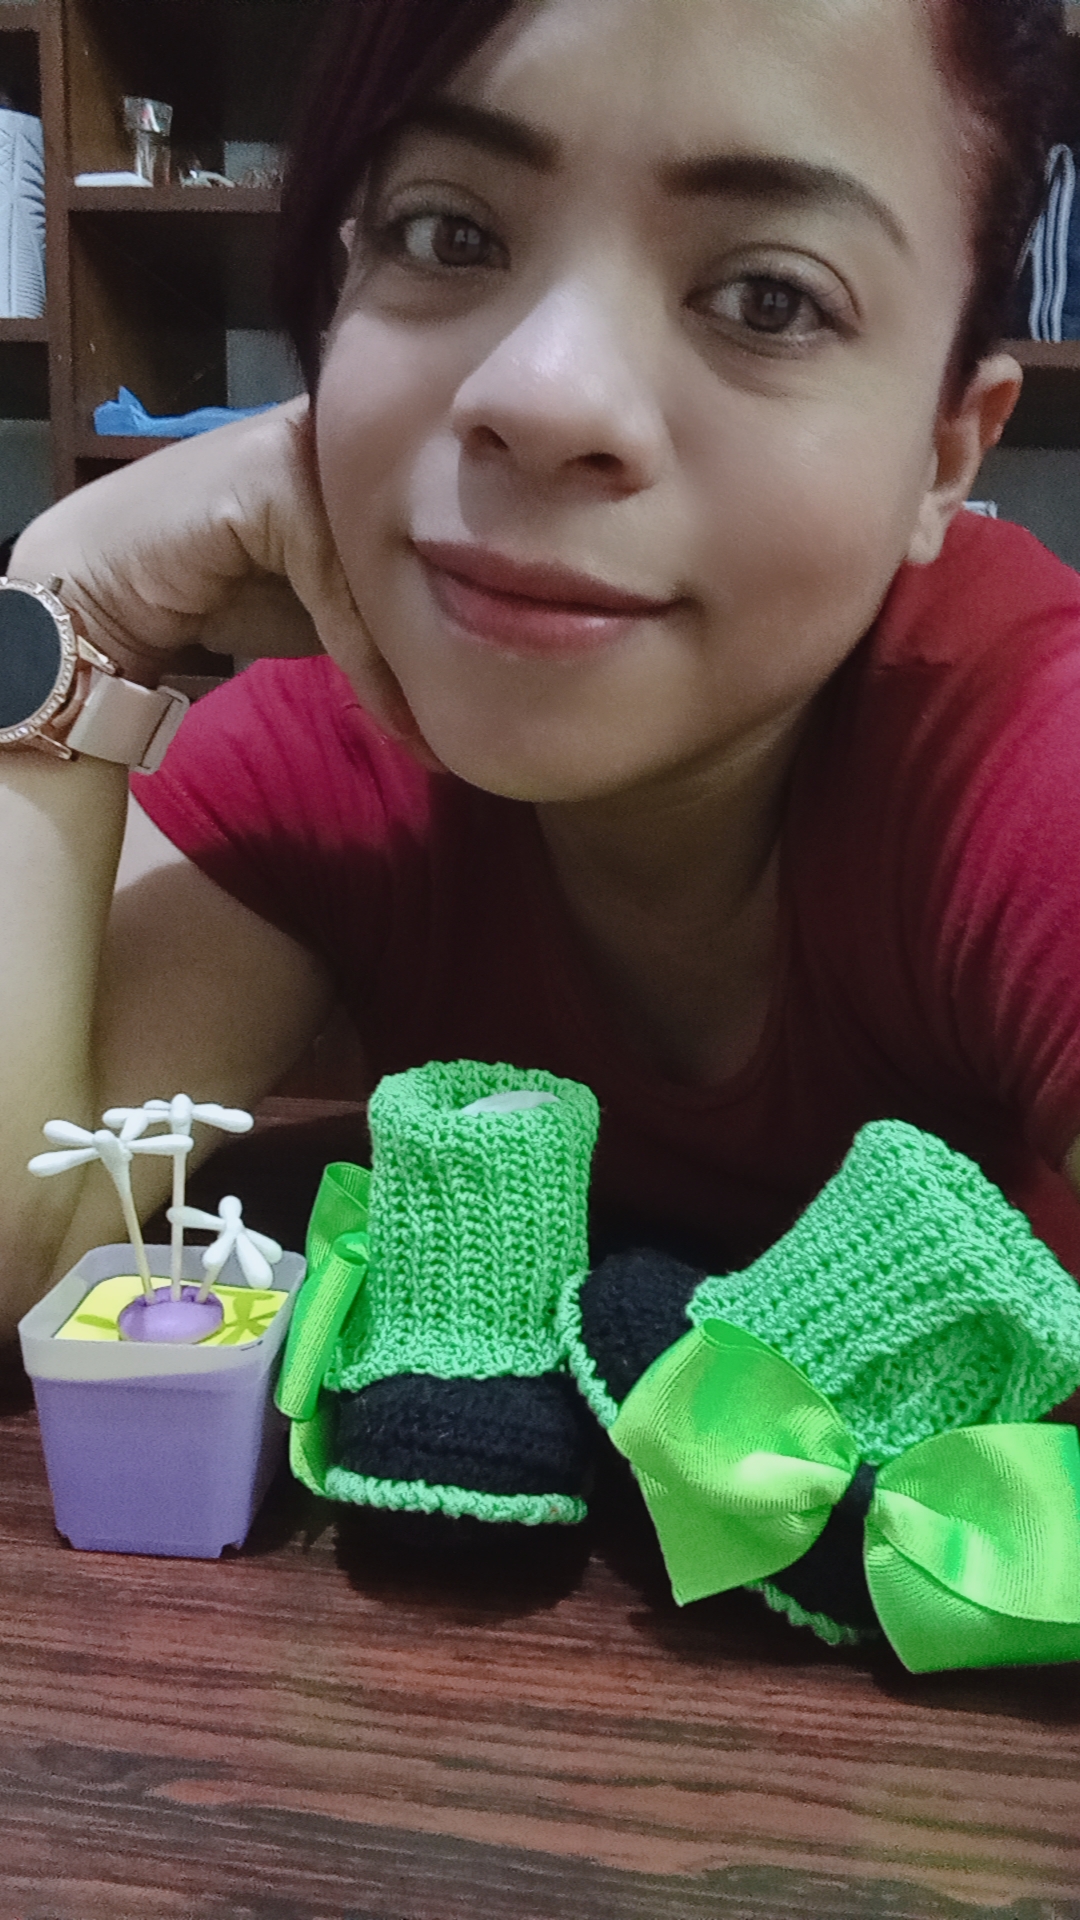
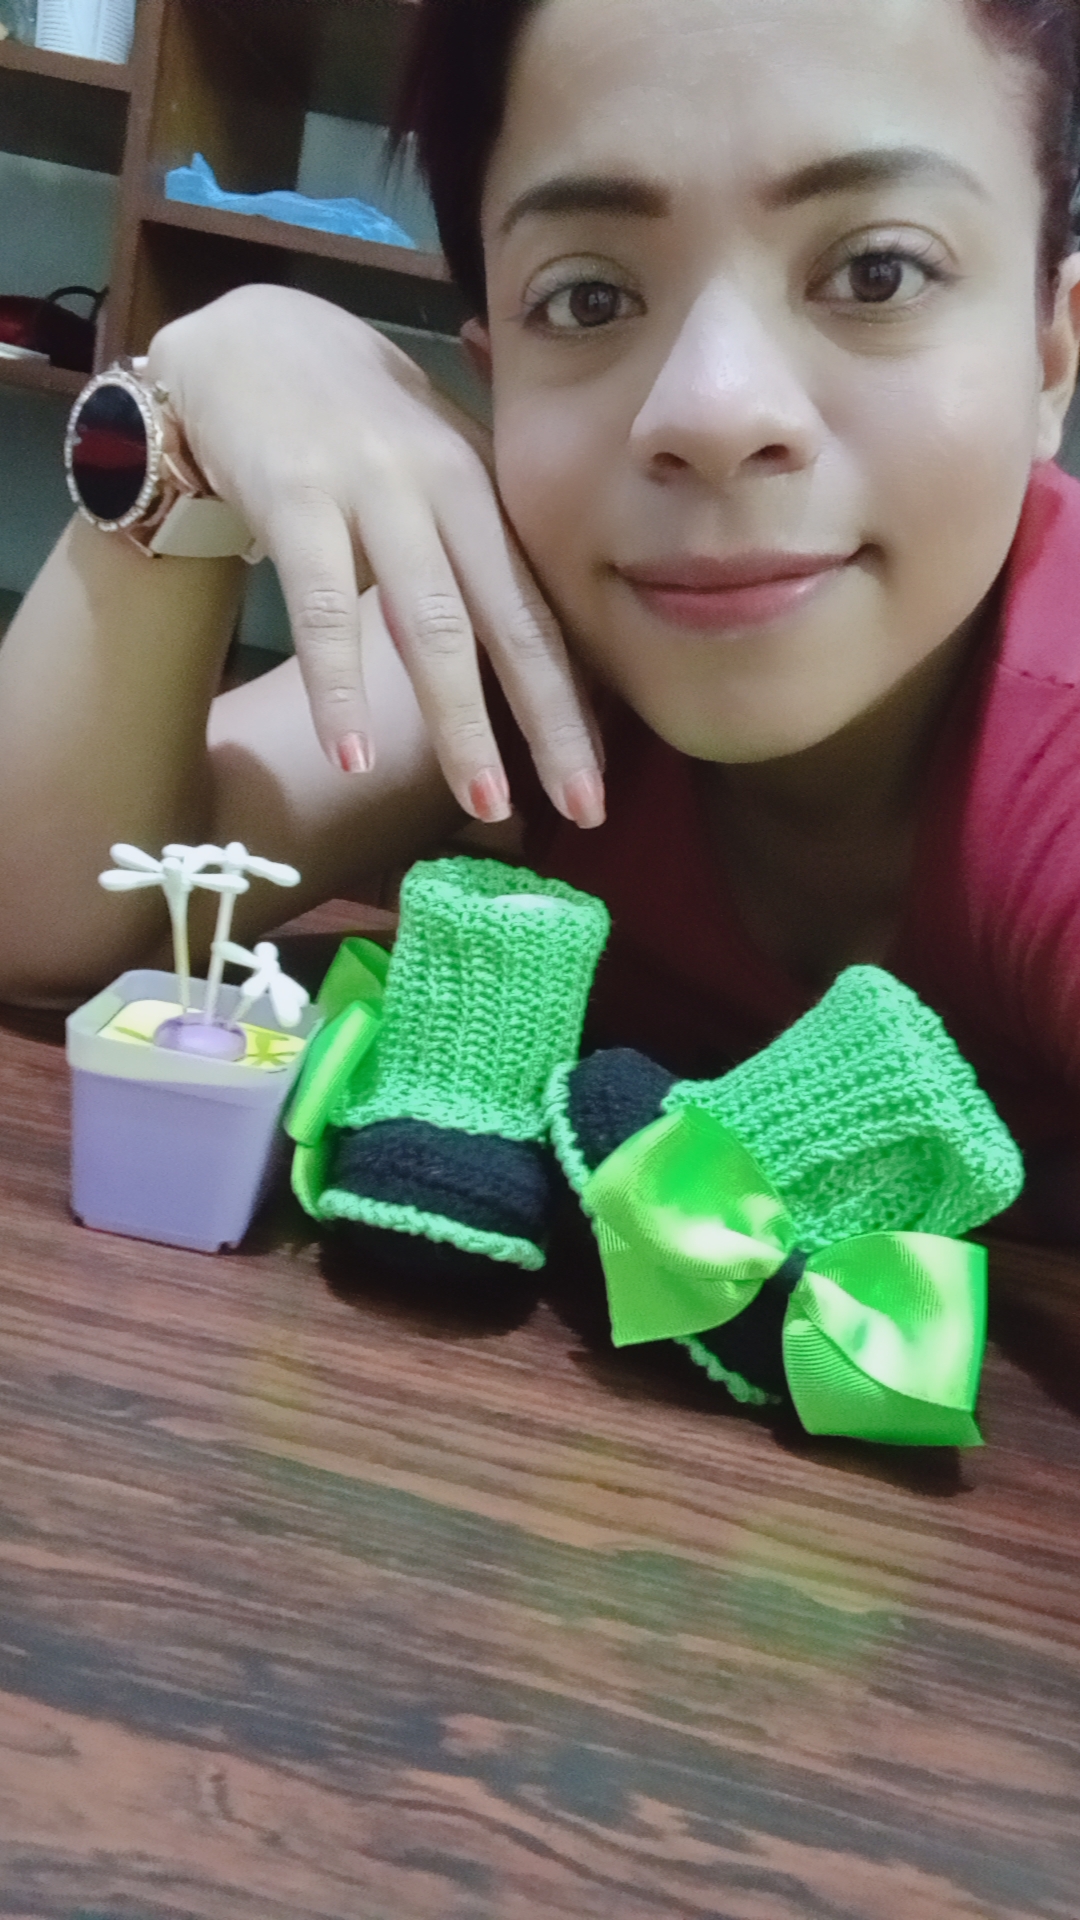
Winter is here, it has been raining too much and also Christmas is coming, so I placed an order for a pair of winter boots, some red and some apple green, the work you will see will be the apple green boots.
Llego el invierno, ha estado lloviendo demasiado y ademas de ello tambien se acerca la navidad, asi que saque un pedido de un par de botas para invierno, unas rojas y otras verde manzana, el trabajo que veran sera las botas verde manzana.

MATERIALS:
-Black and apple green thread
-Sewing needle
-Knitting needle
-Neon green decorative tape
MATERIALES:
-Hilo negro y verde manzana
-Aguja de coser
-Aguja de tejer
-Cinta decorativa verde neon
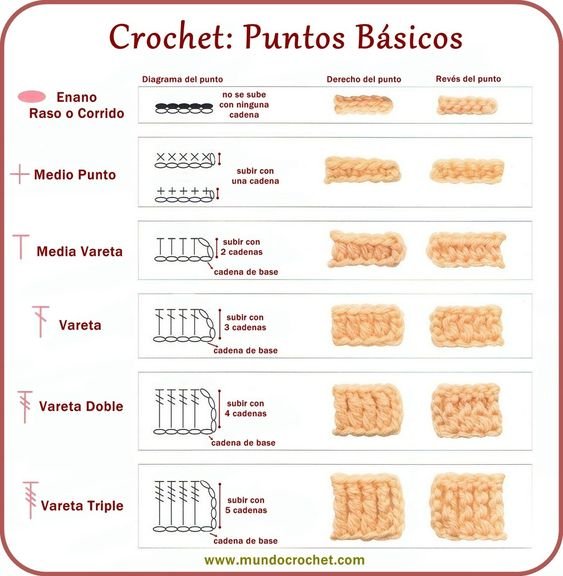
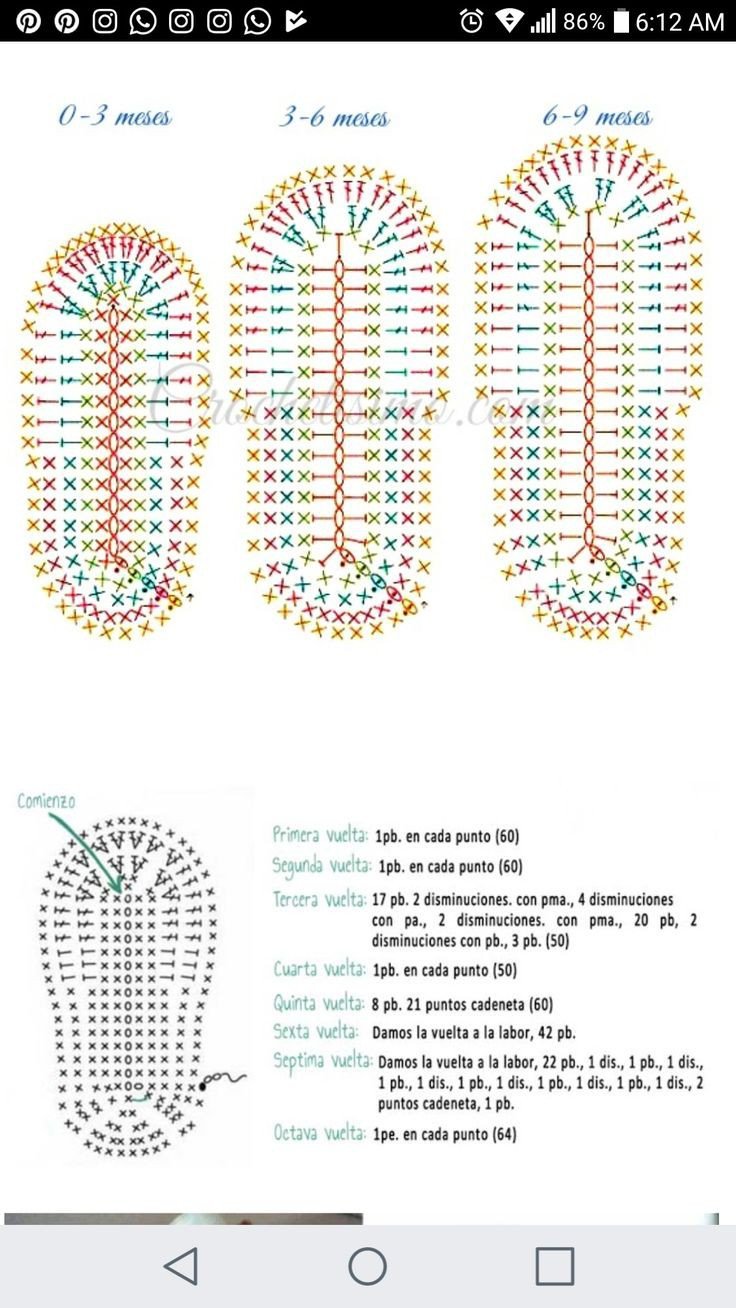
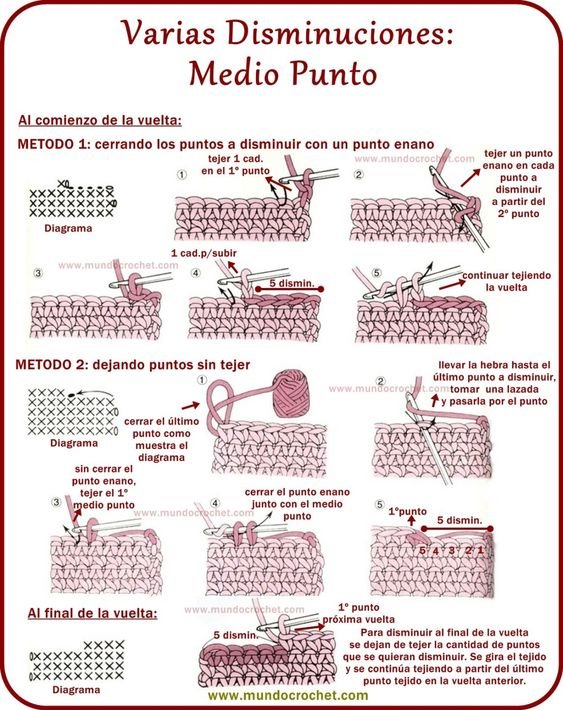
Before starting I want to leave you the pattern that I always use to make the template of any shoe:
Knitted winter boots | Botas tejidas para invierno
Step 1:
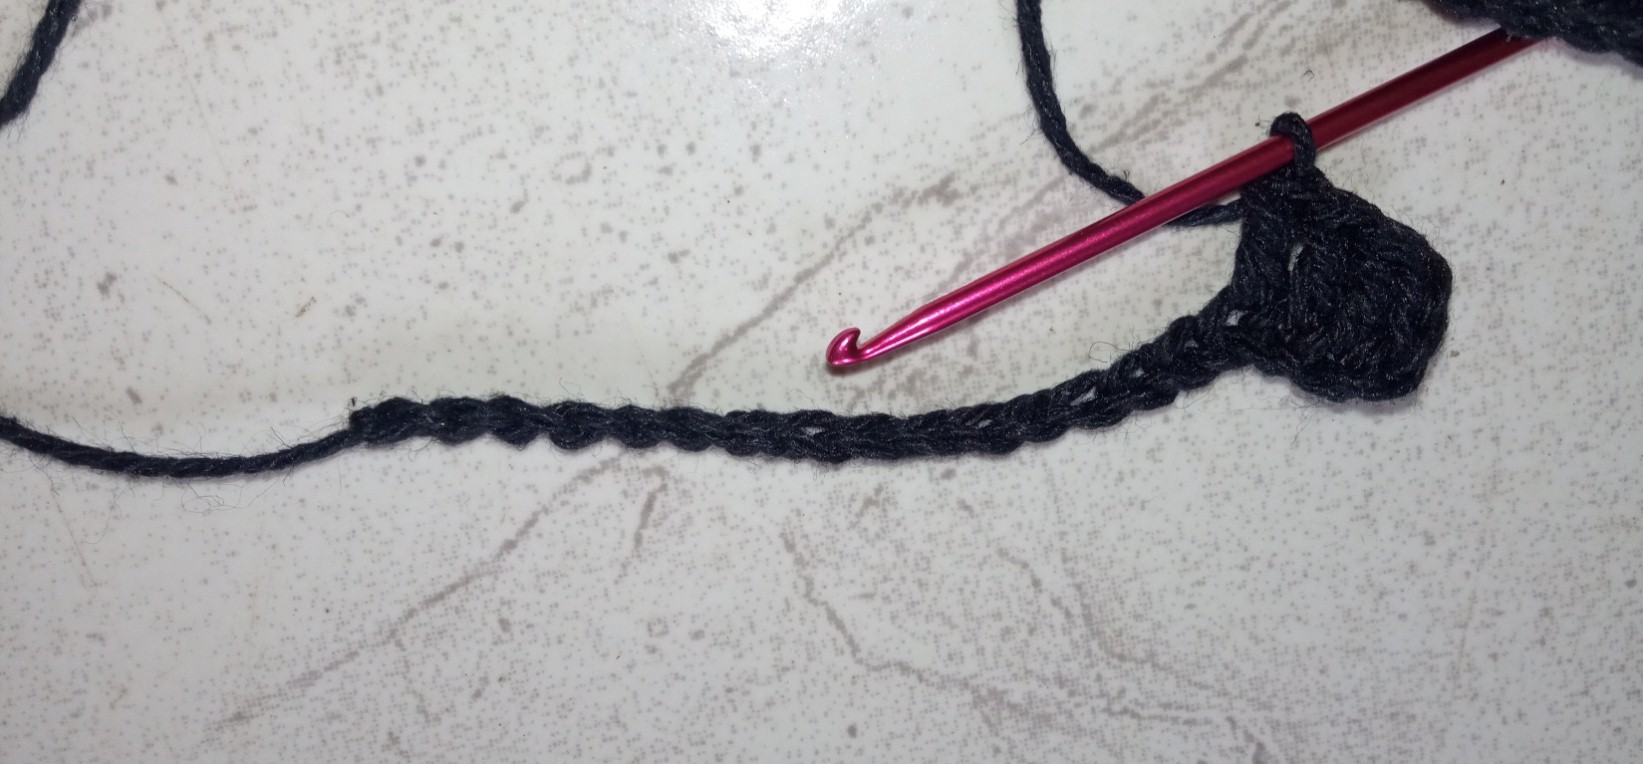
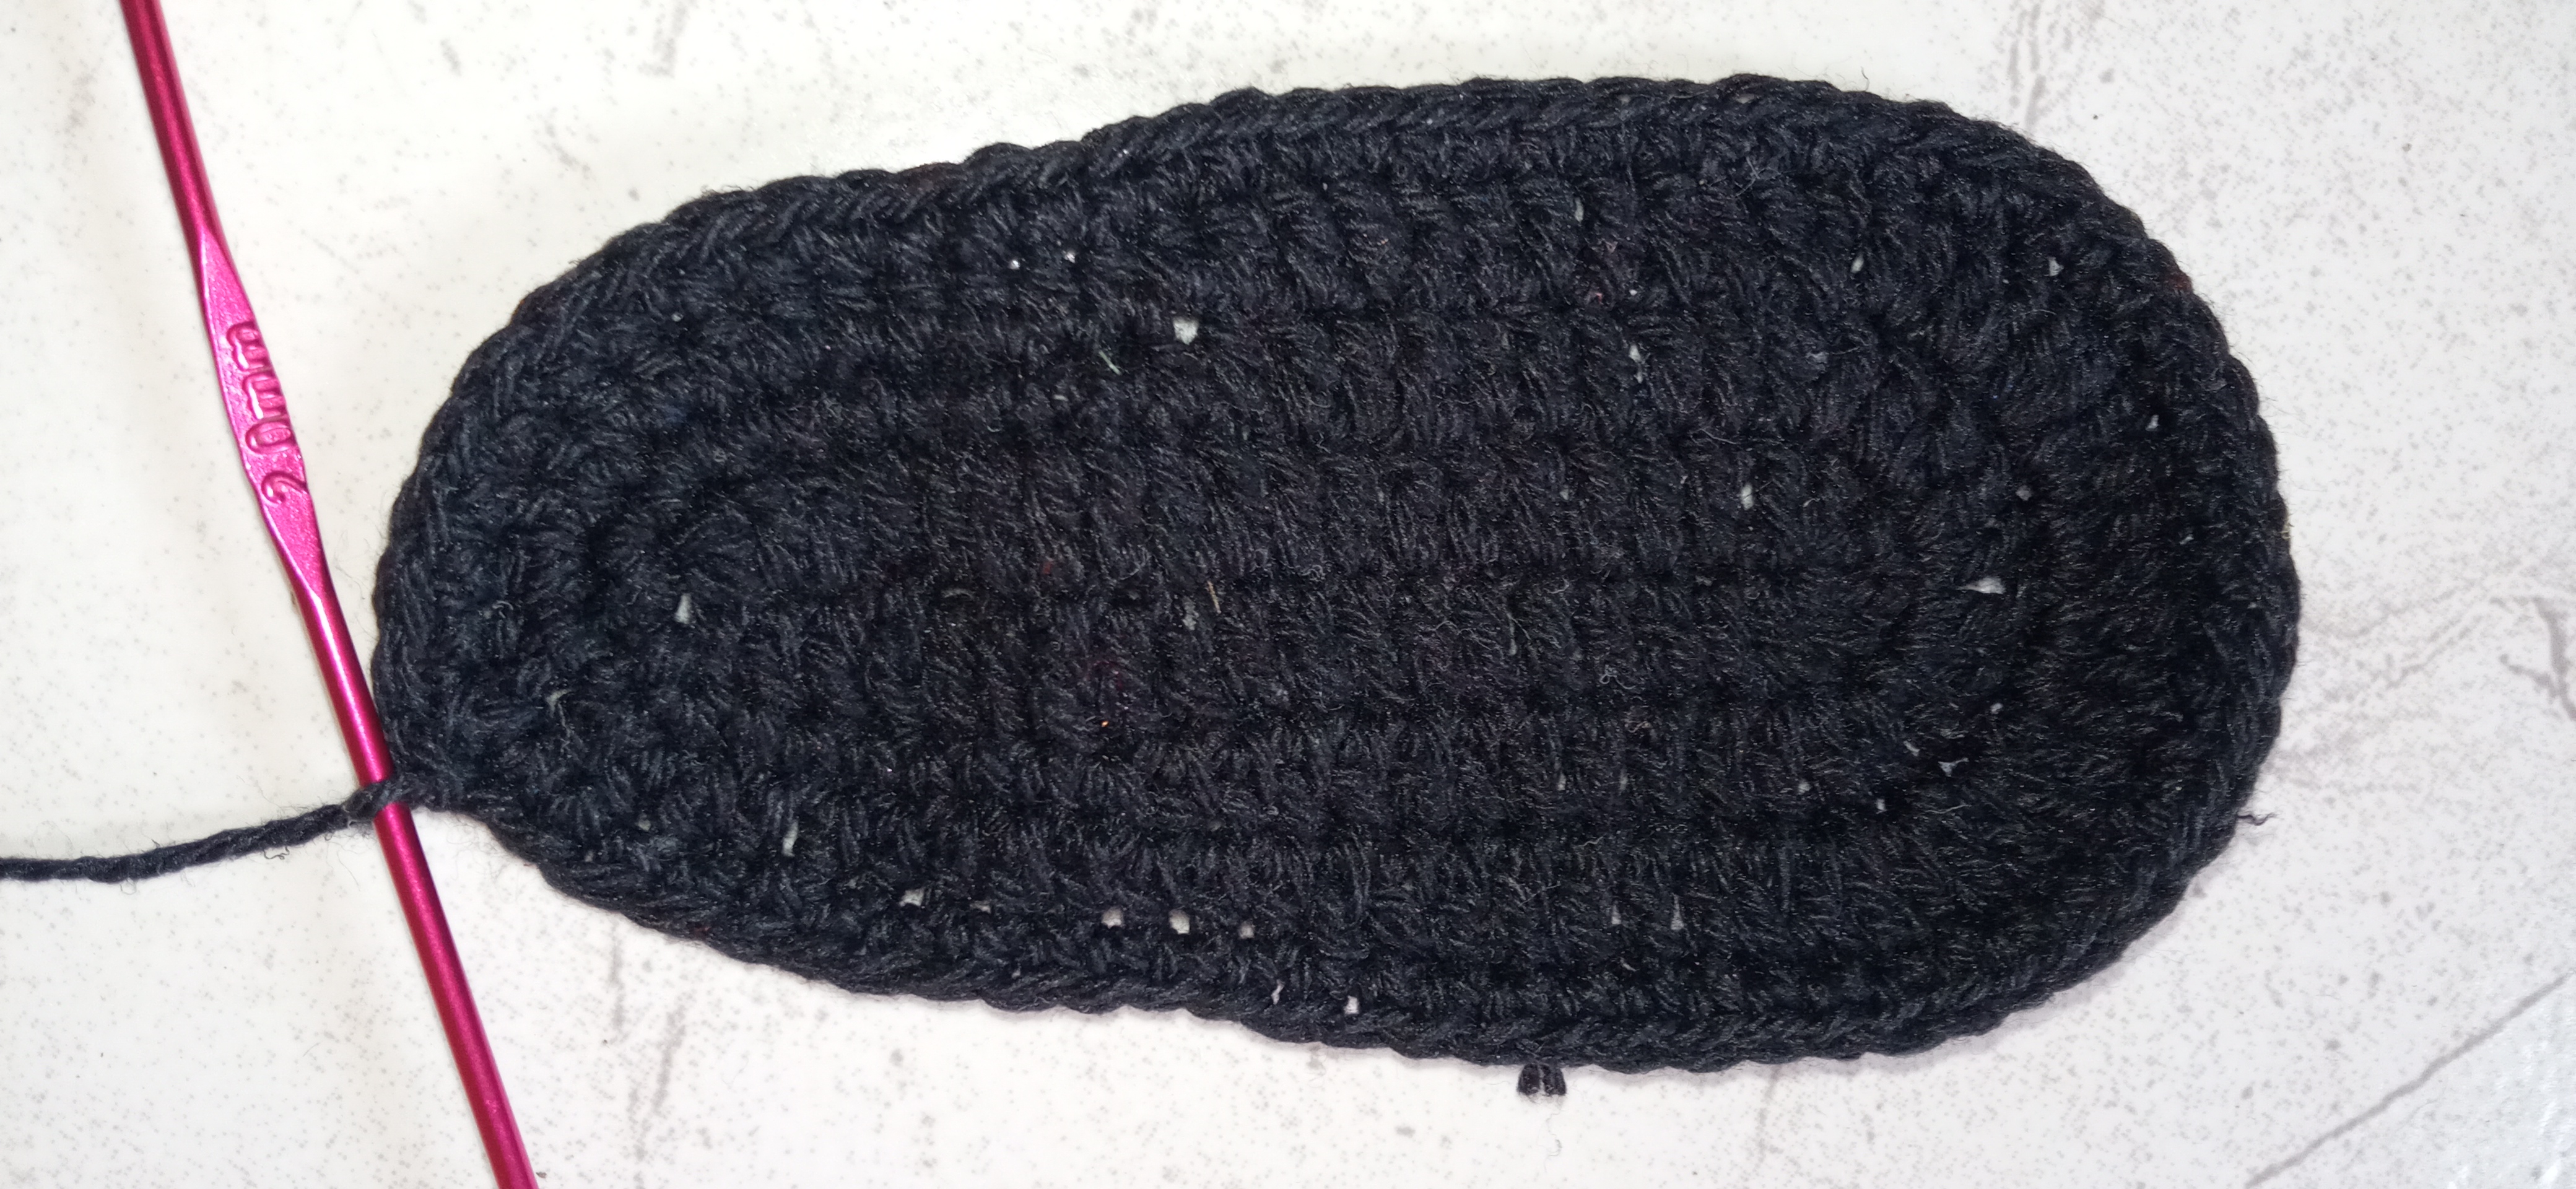
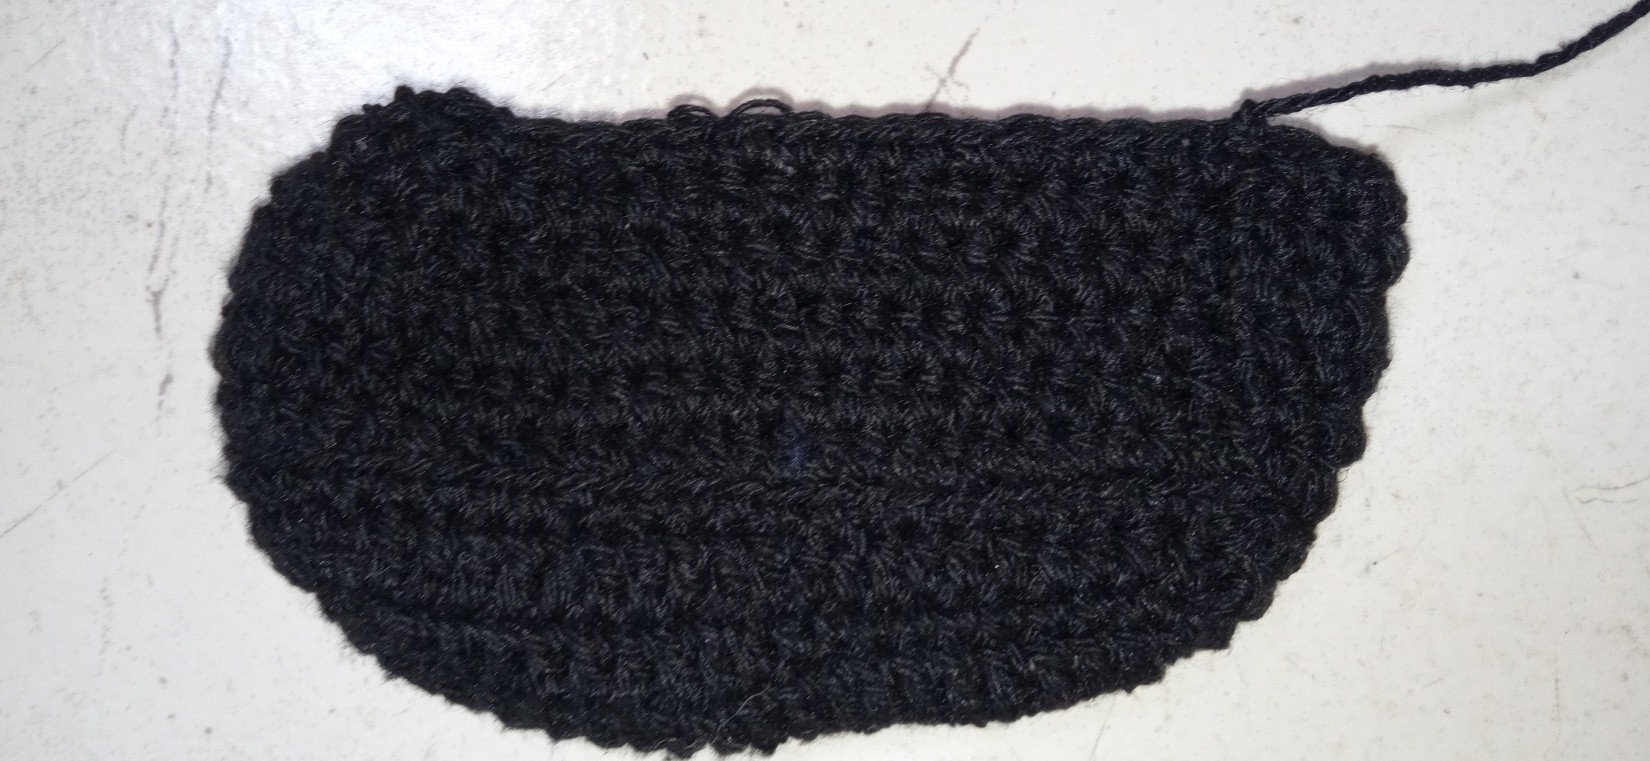
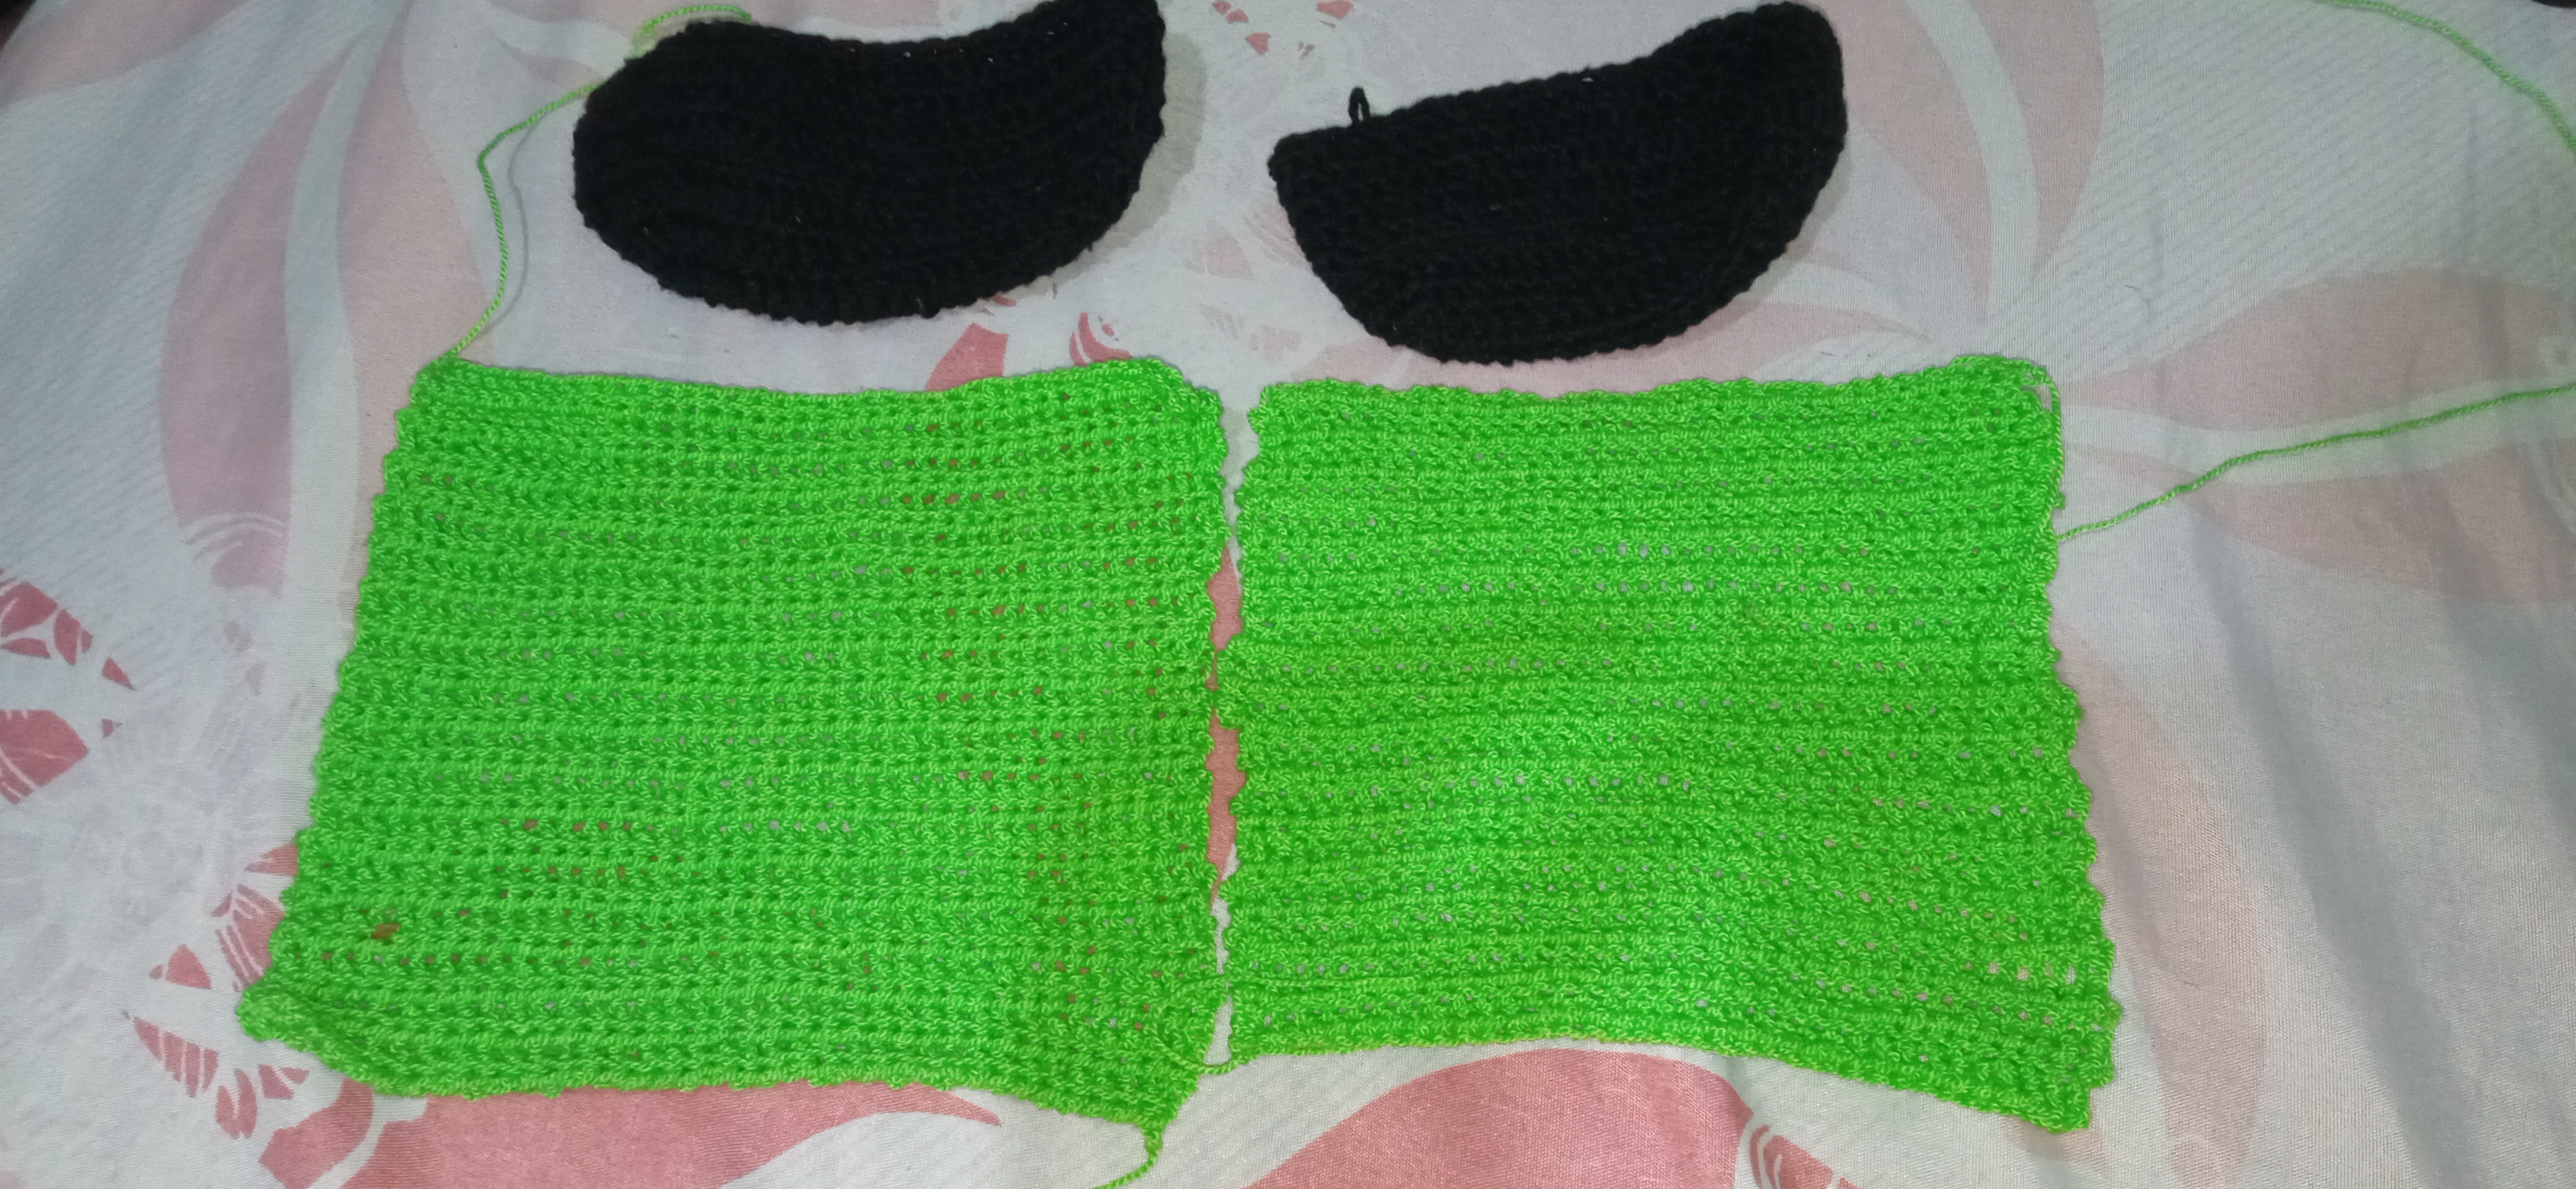
I started knitting 21 chains and at the end she gave me back 4 chains and I started to knit half double crochet until the penultimate chain; in the last chains, 1 increase of half double crochet is made and closed with a slip stitch.
Comence tejiendo 21 cadenas y al finalizr me devolvi 4 cadenas y comence a tejer medios puntos altos hasta la penultima cadena; en la ultima cadenas se hace 1 aumento de medios puntos altos y se cierra con punto deslizado.
Step 2:
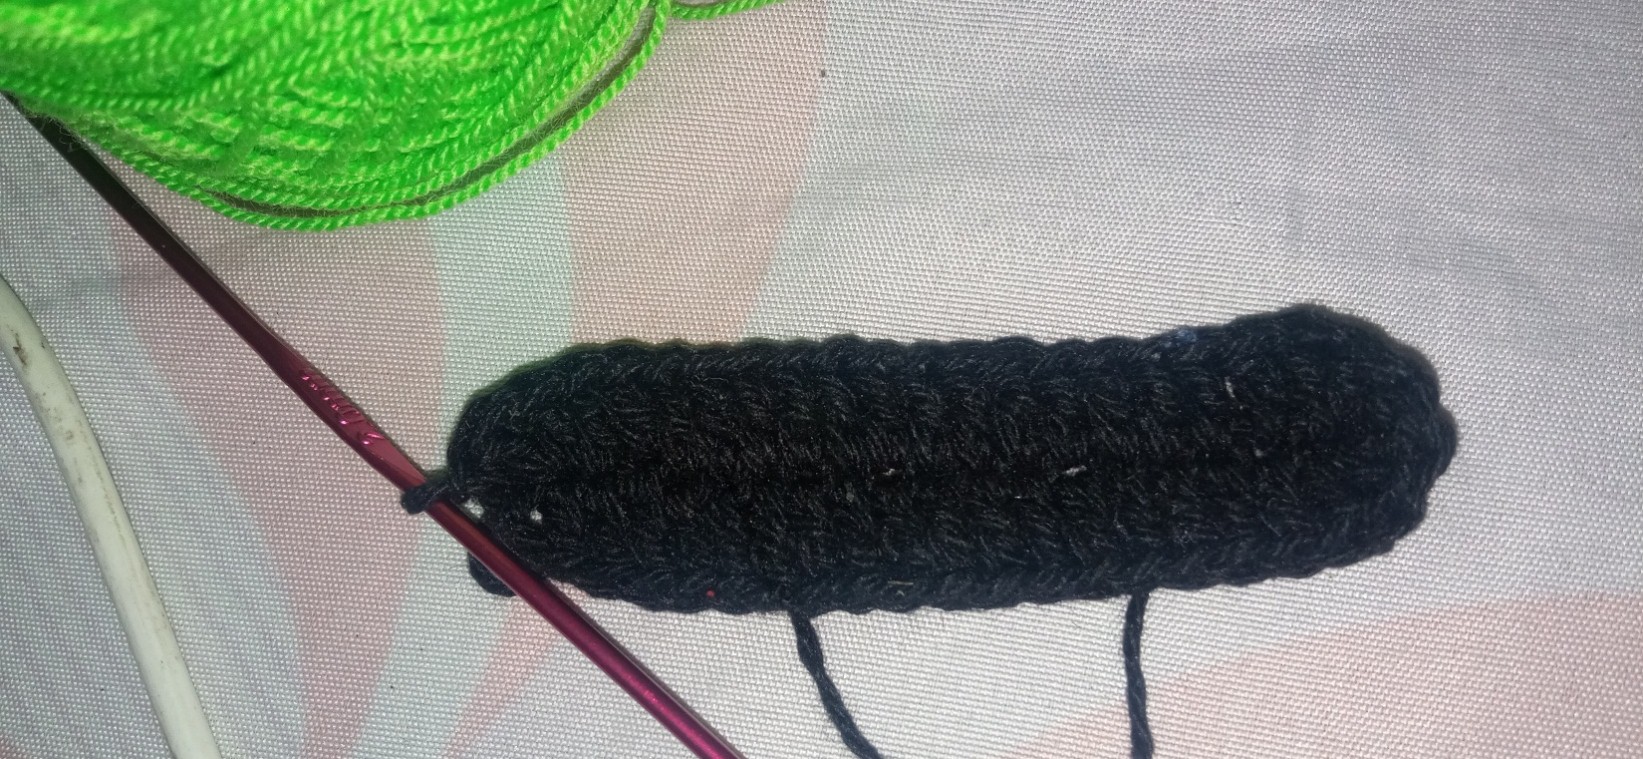
For the next round, 2 single crochet increases are knitted; 7 half points; 2 half double crochet; 7 double crochet and 5 double crochet increases for the curve; then we will do the same to return with 7 double crochet; 2 half double crochet; 7 half points; 2 single crochet increases and close with slip stitch.
Para la siguiente vuelta se tejen 2 aumentos de medios puntos; 7 medios puntos; 2 medios puntos altos; 7 puntos altos y 5 aumentos de puntos altos para la curva; luego haremos lo mismo para regresar con 7 puntos altos; 2 medios puntos altos; 7 medios puntos ; 2 aumentos de medios puntos y se cierra con punto deslizado.

Step 3:
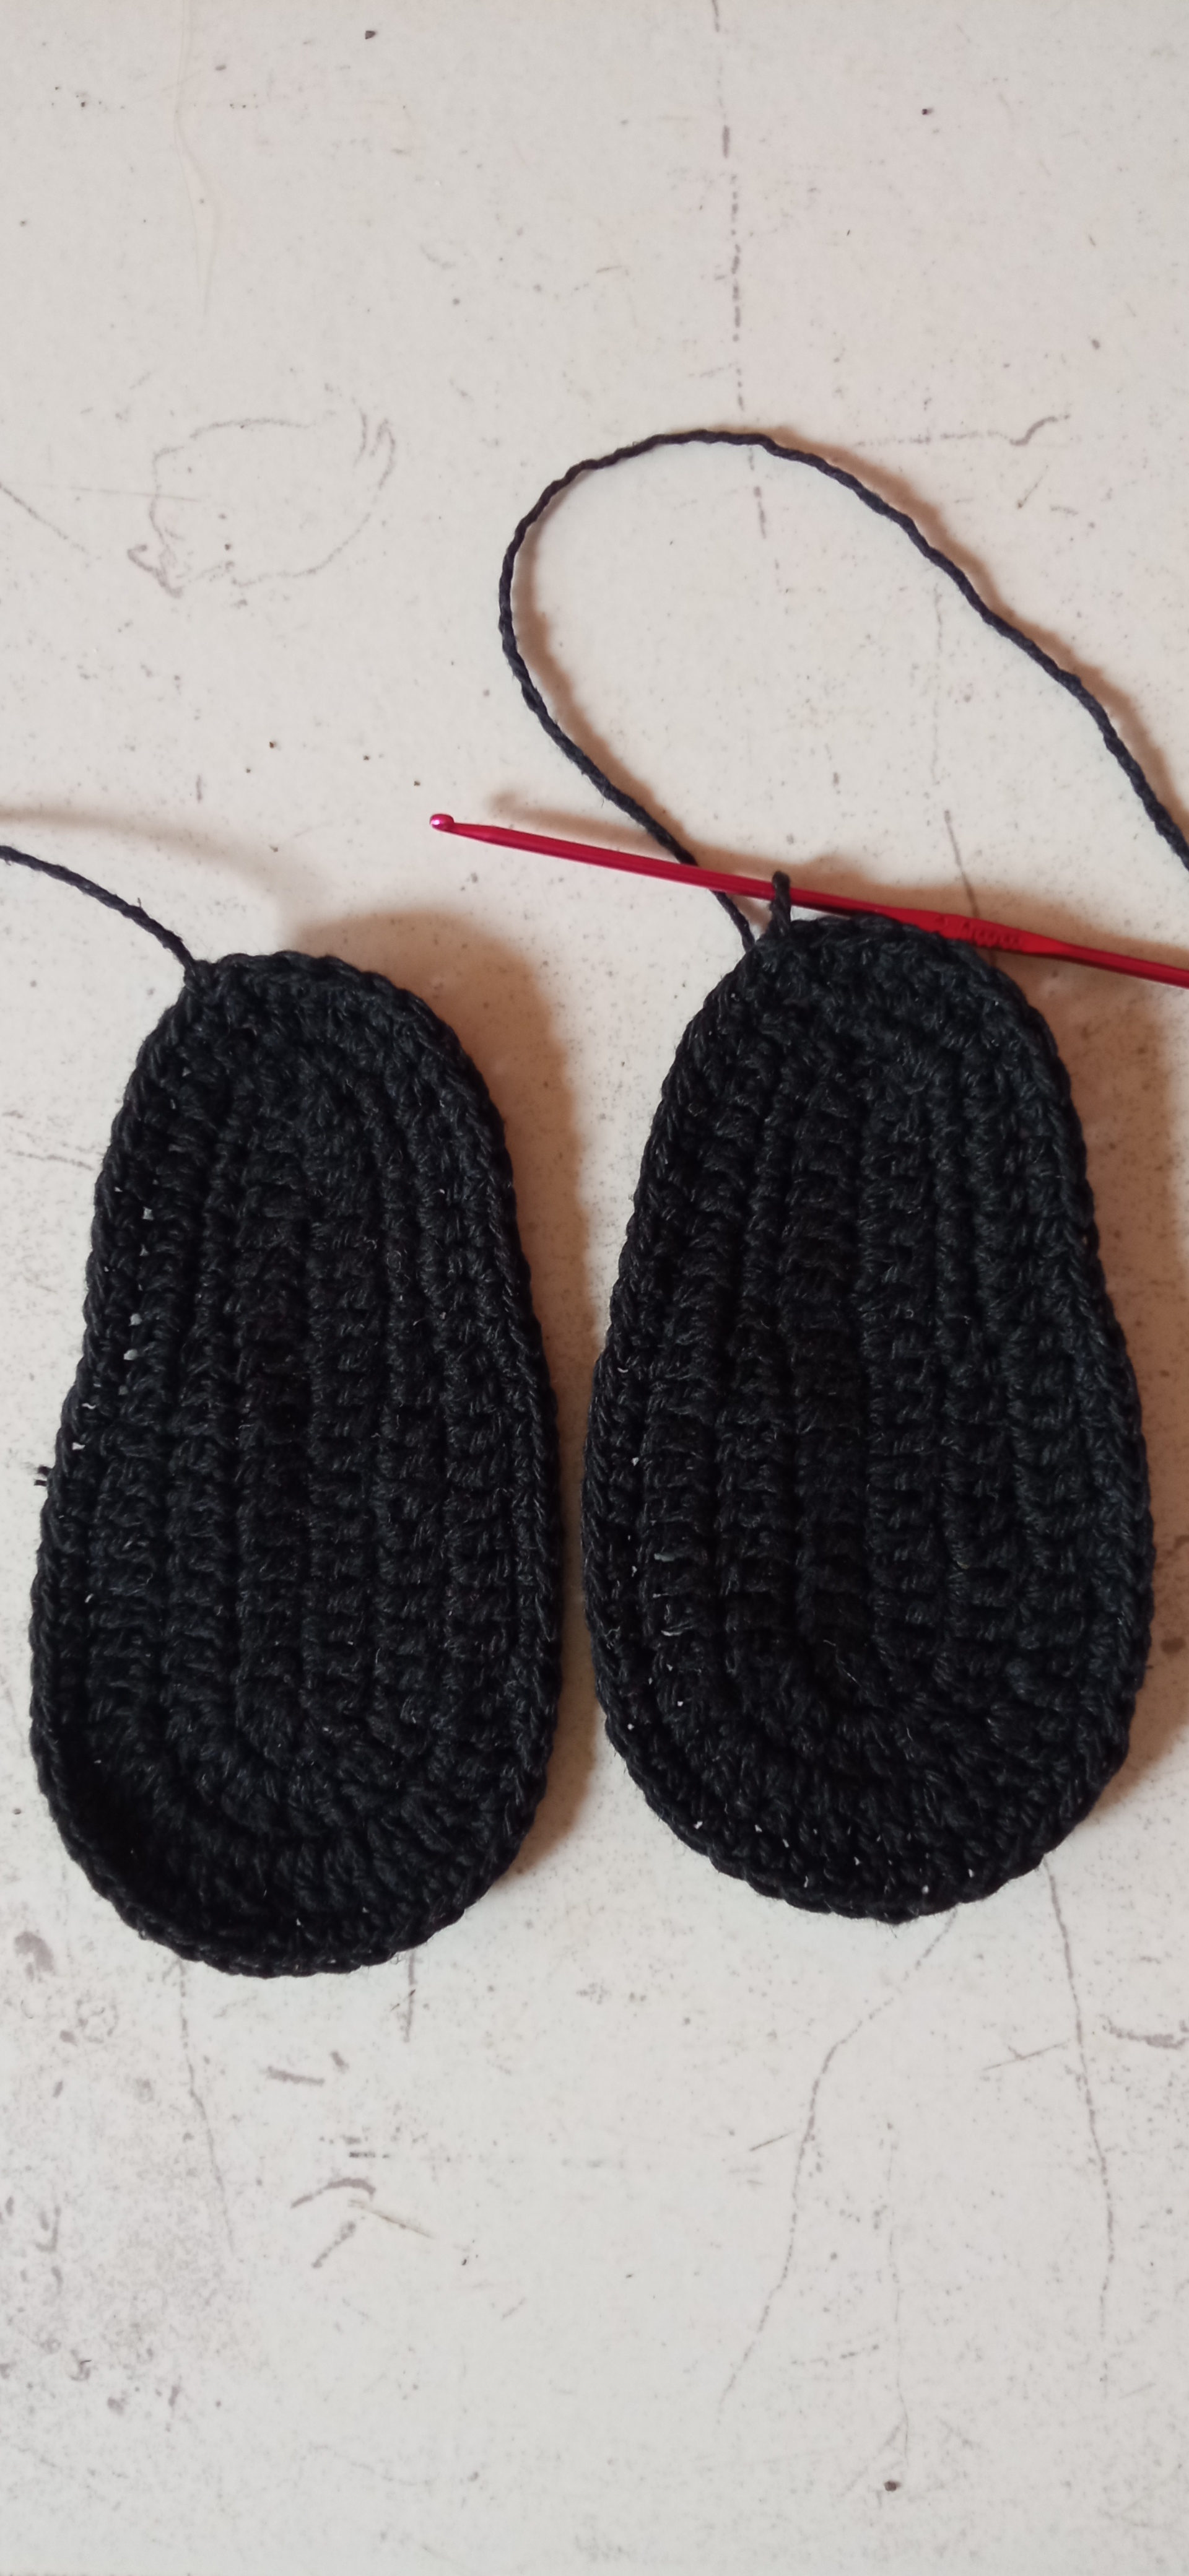
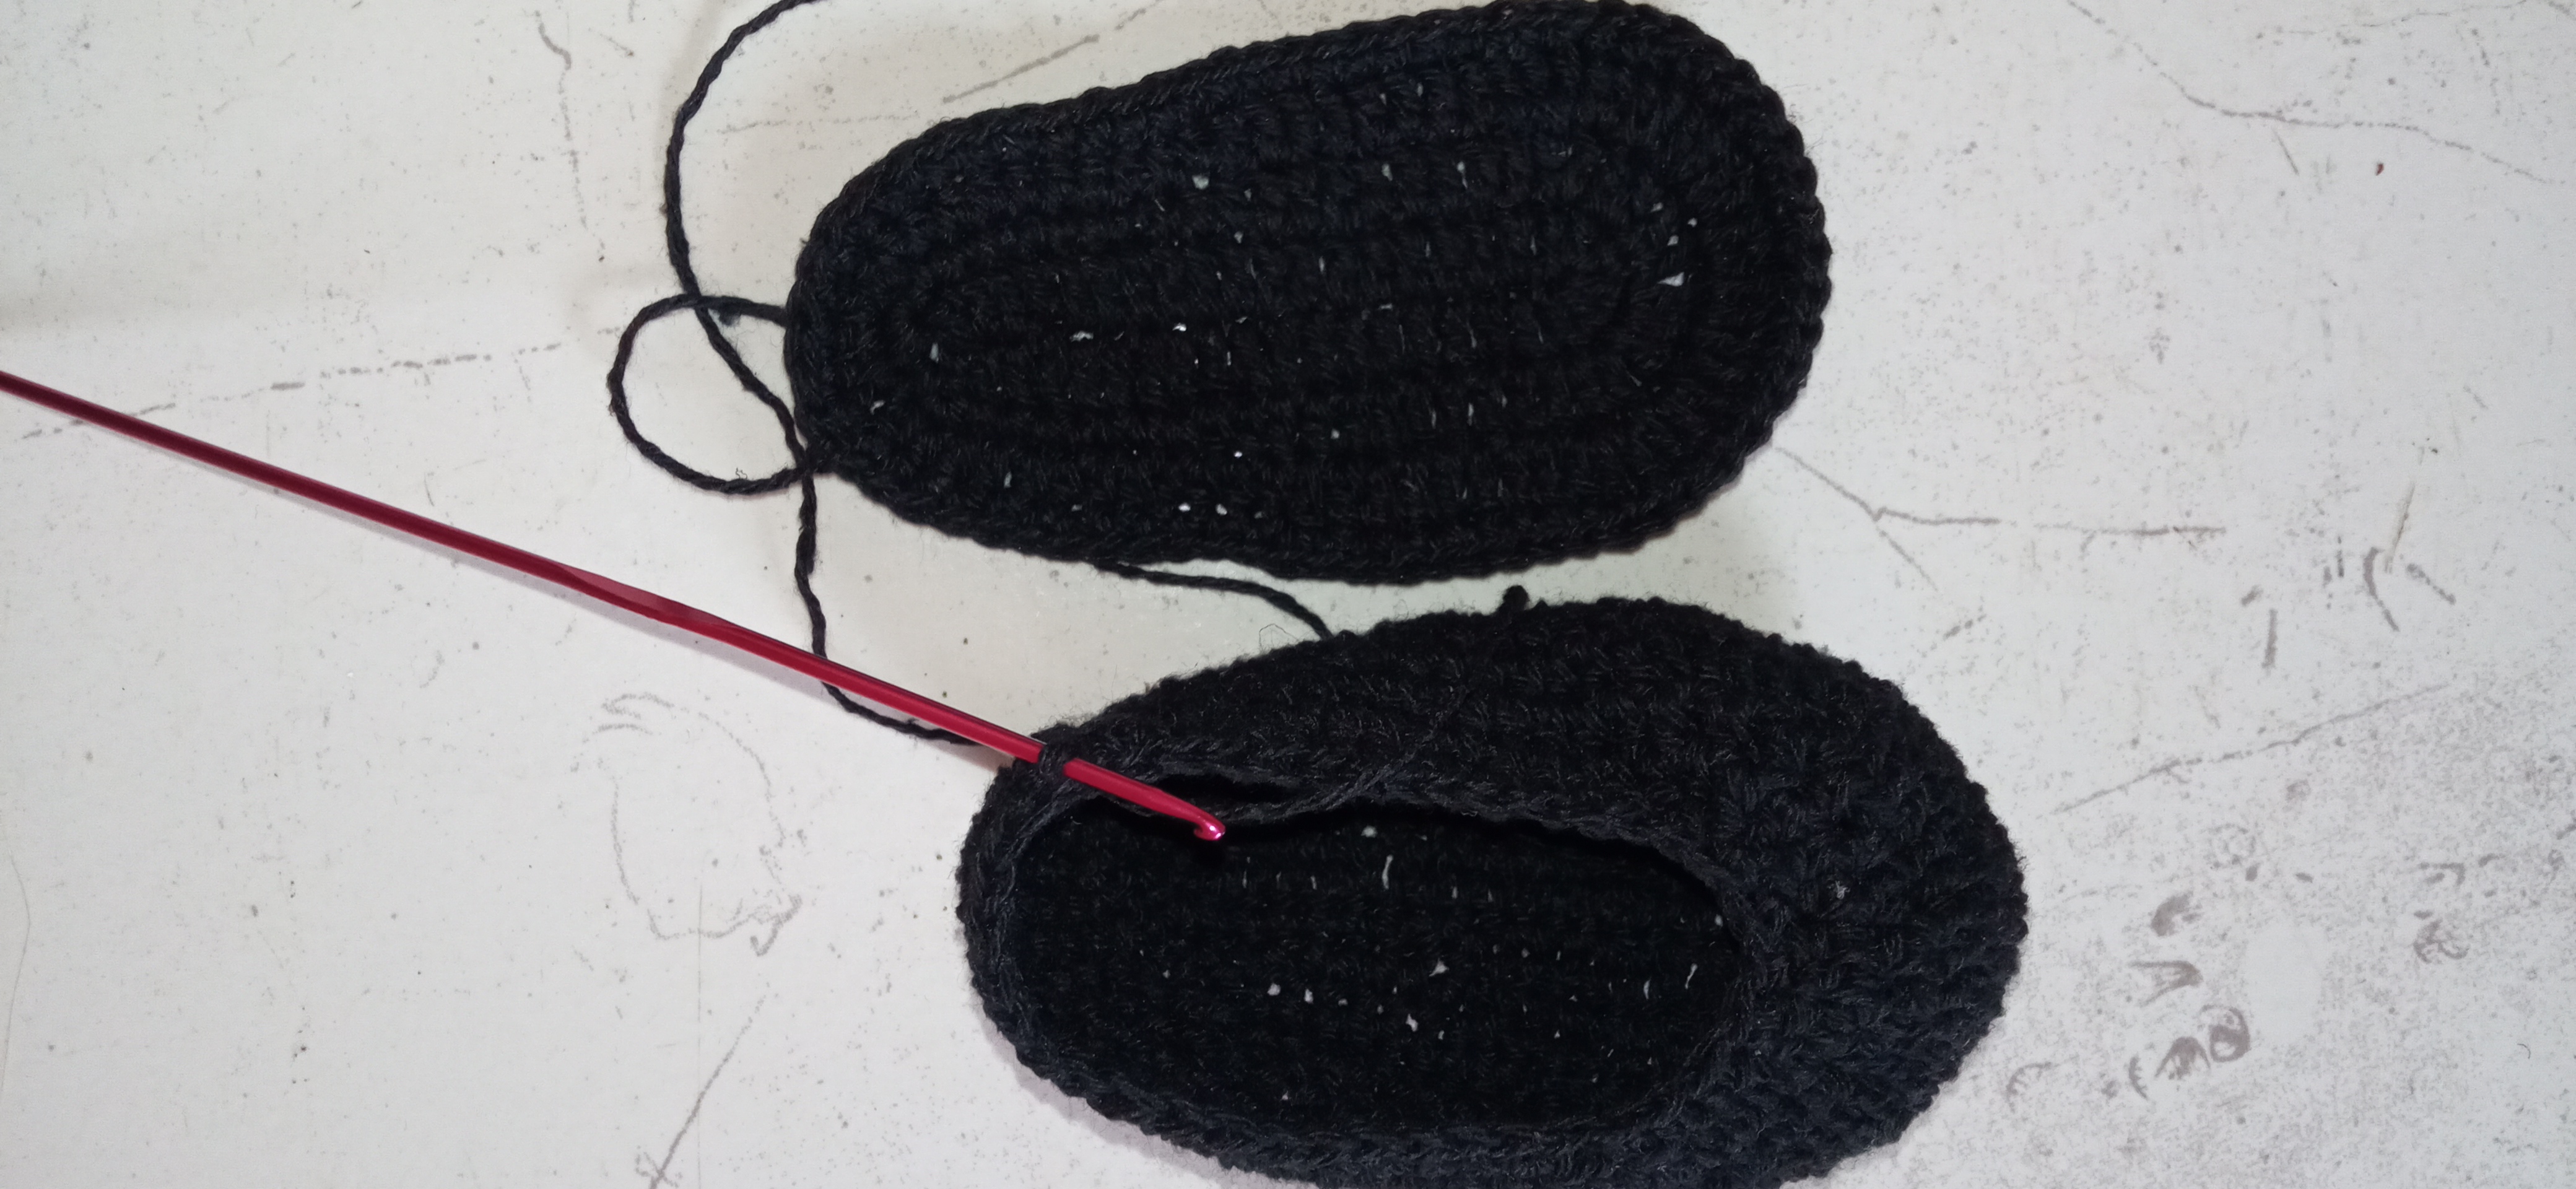
I will begin to raise the shoe with half double crochet around the edge until I finish 2 rows. On the third row we will make half double crochets until point 13 and there we will start double crochets (with a hook we will mark 13 stitches on the other half to know how far we are going to work the double crochets of the front part of the boot.)
Comenzare a subir el zapato con medios puntos altos por todo el bord hasta finalizar 2 vueltas. a la tercera vuenta haremos medios puntos altos hasta el punto 13 y alli comenzaremos puntos altos (con un gancho marcaremos 13 puntos por la otra mitad para saber hasta donde vamos a tejer los puntos altos de la parte fontal de la bota.)
Step 4:
We will repeat the last part of the previous step 1 more round and we will begin to close the shoe with single crochet and when we reach the high points we will decrease leaving a free point until we close the 5 points of the curve and we will continue with single crochet; in the end we will be able to see the curvature of the boot.
la ultima parte del paso anterior la repetiremos 1 vuelta mas y comenzaremos a cerrar el zapato con medios puntos y al llegar a los puntos altos disminuiremos dejando un punto libre hasta cerrar los 5 puntos de la curva y seguiremos con medios puntos; al final lograremos ver la curvatura de la bota.
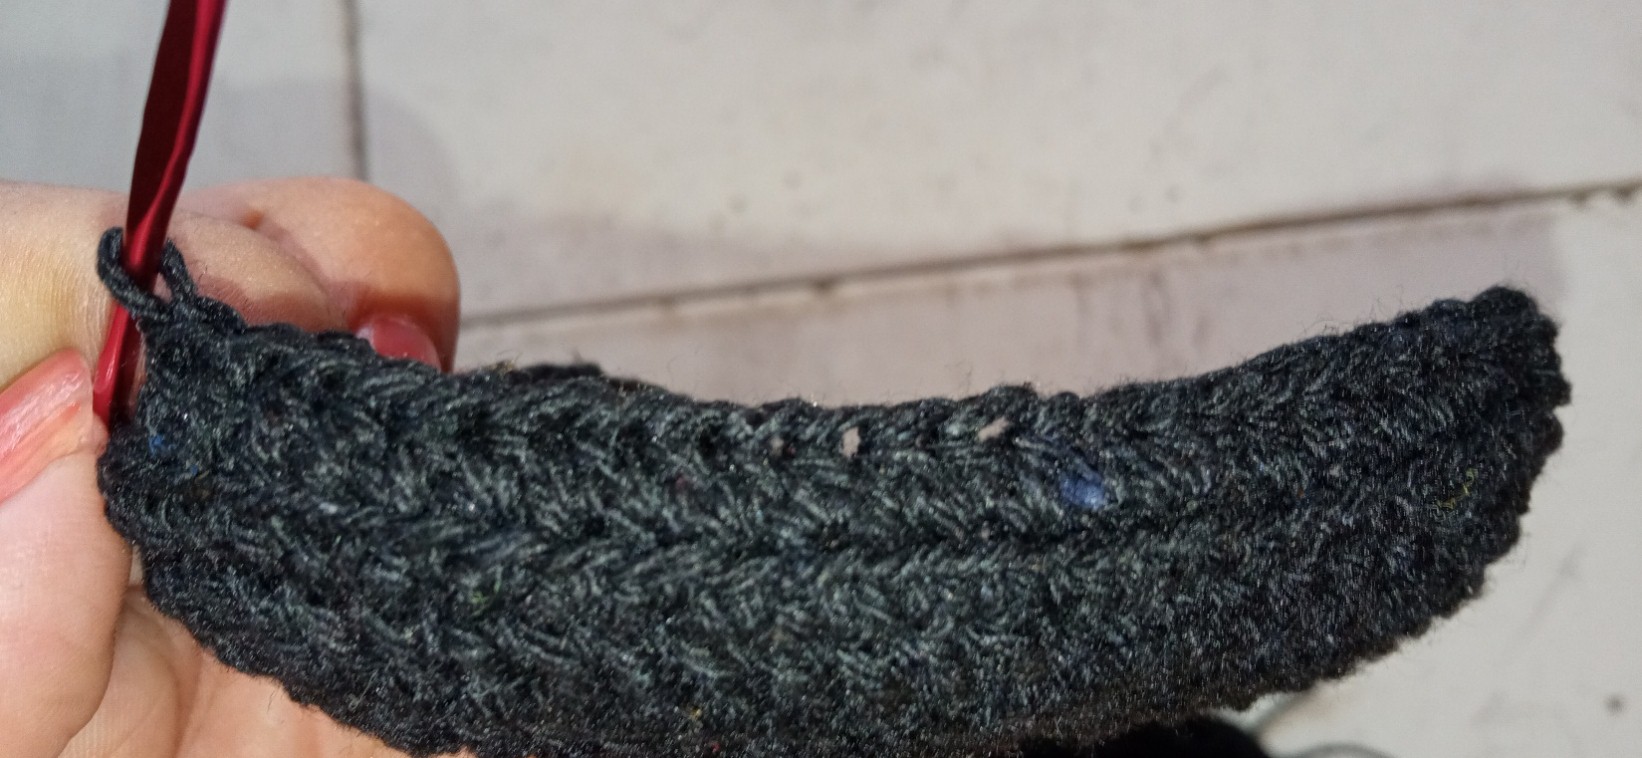
Step 5:
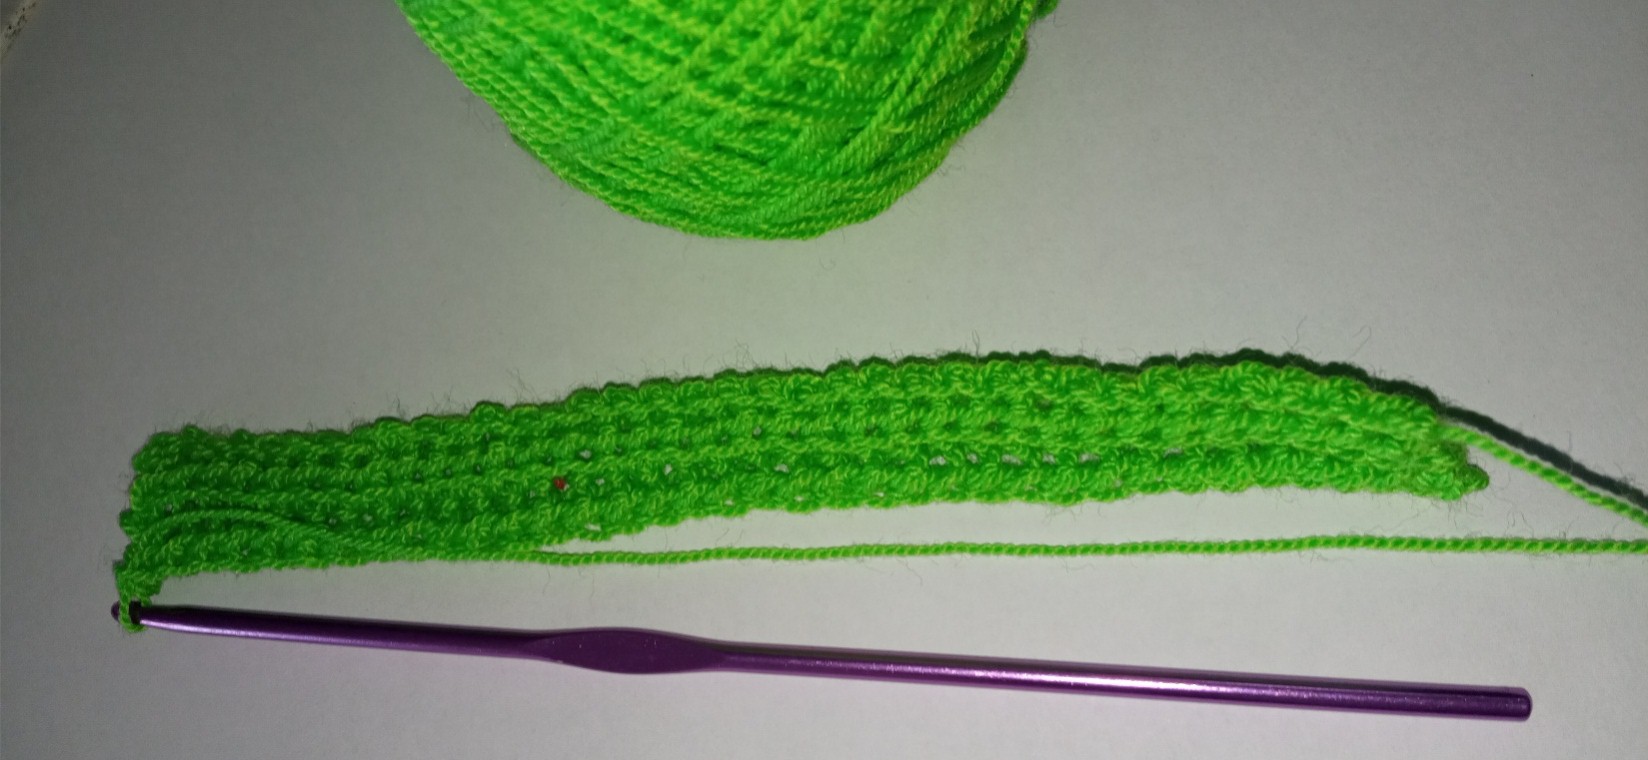
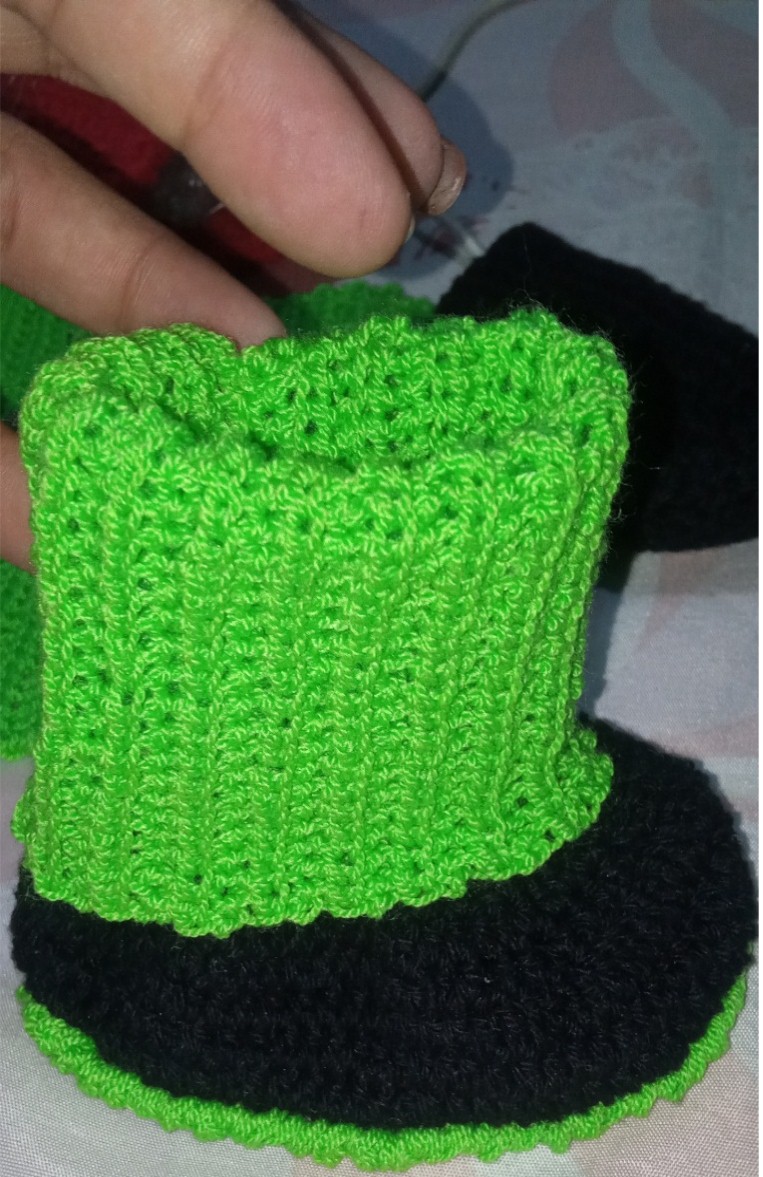
To make the body of the boot we are going to knit a chain of 35 stitches that will be the height and we will knit a total of 15 laps in rib.
Para elaborar el cuerpo de la bota vamos a tejer una cadena de 35 puntos que sera la altura y tejeremos en punto elastico un total de 15 vueltas.
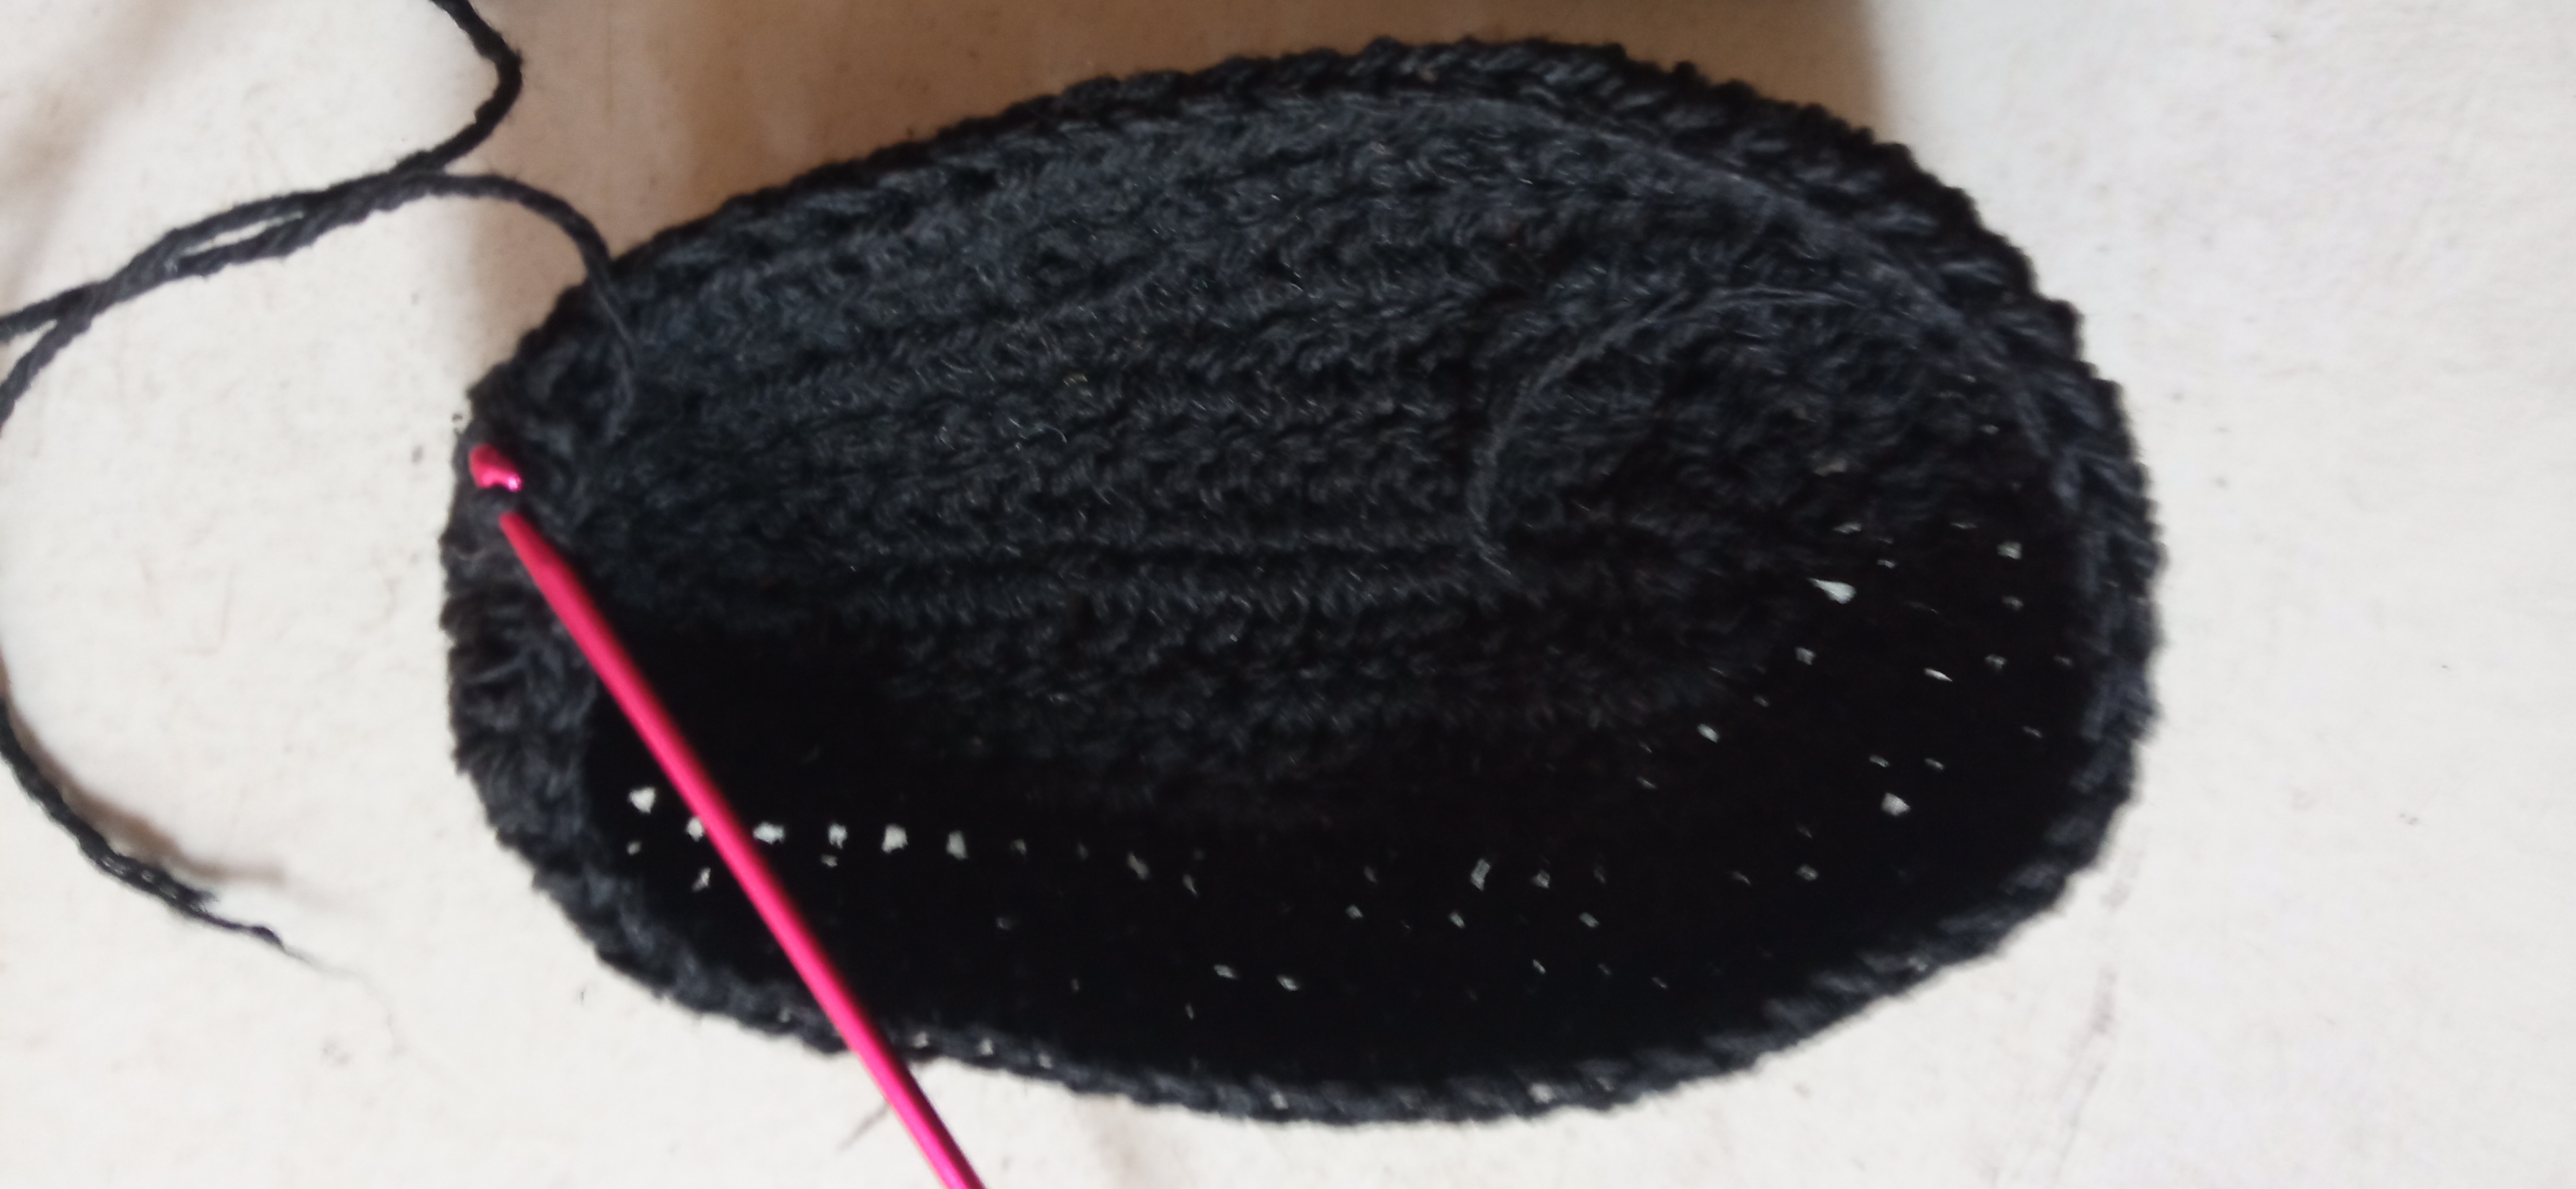
Step 6
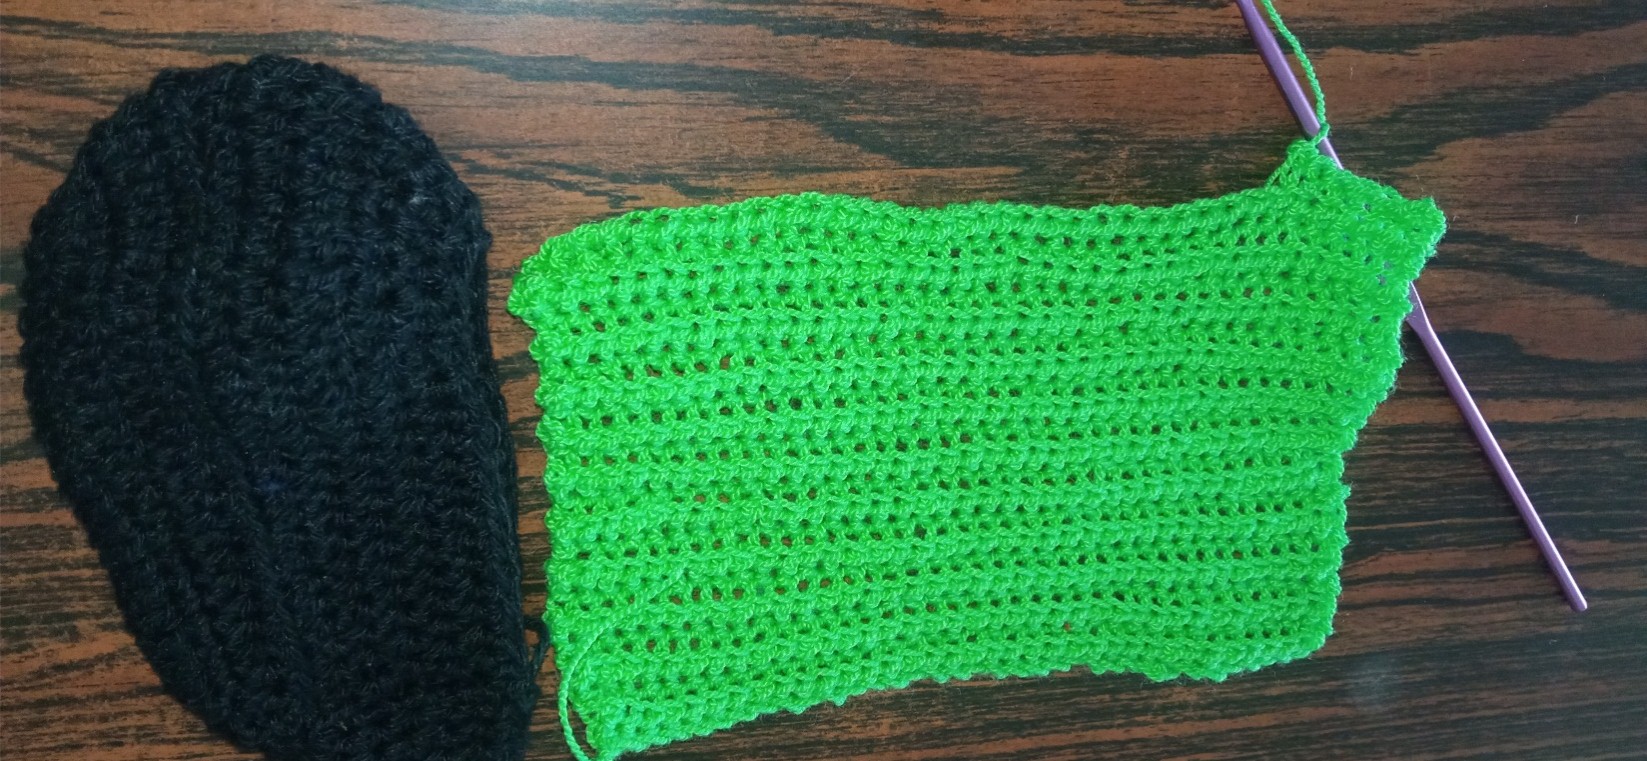
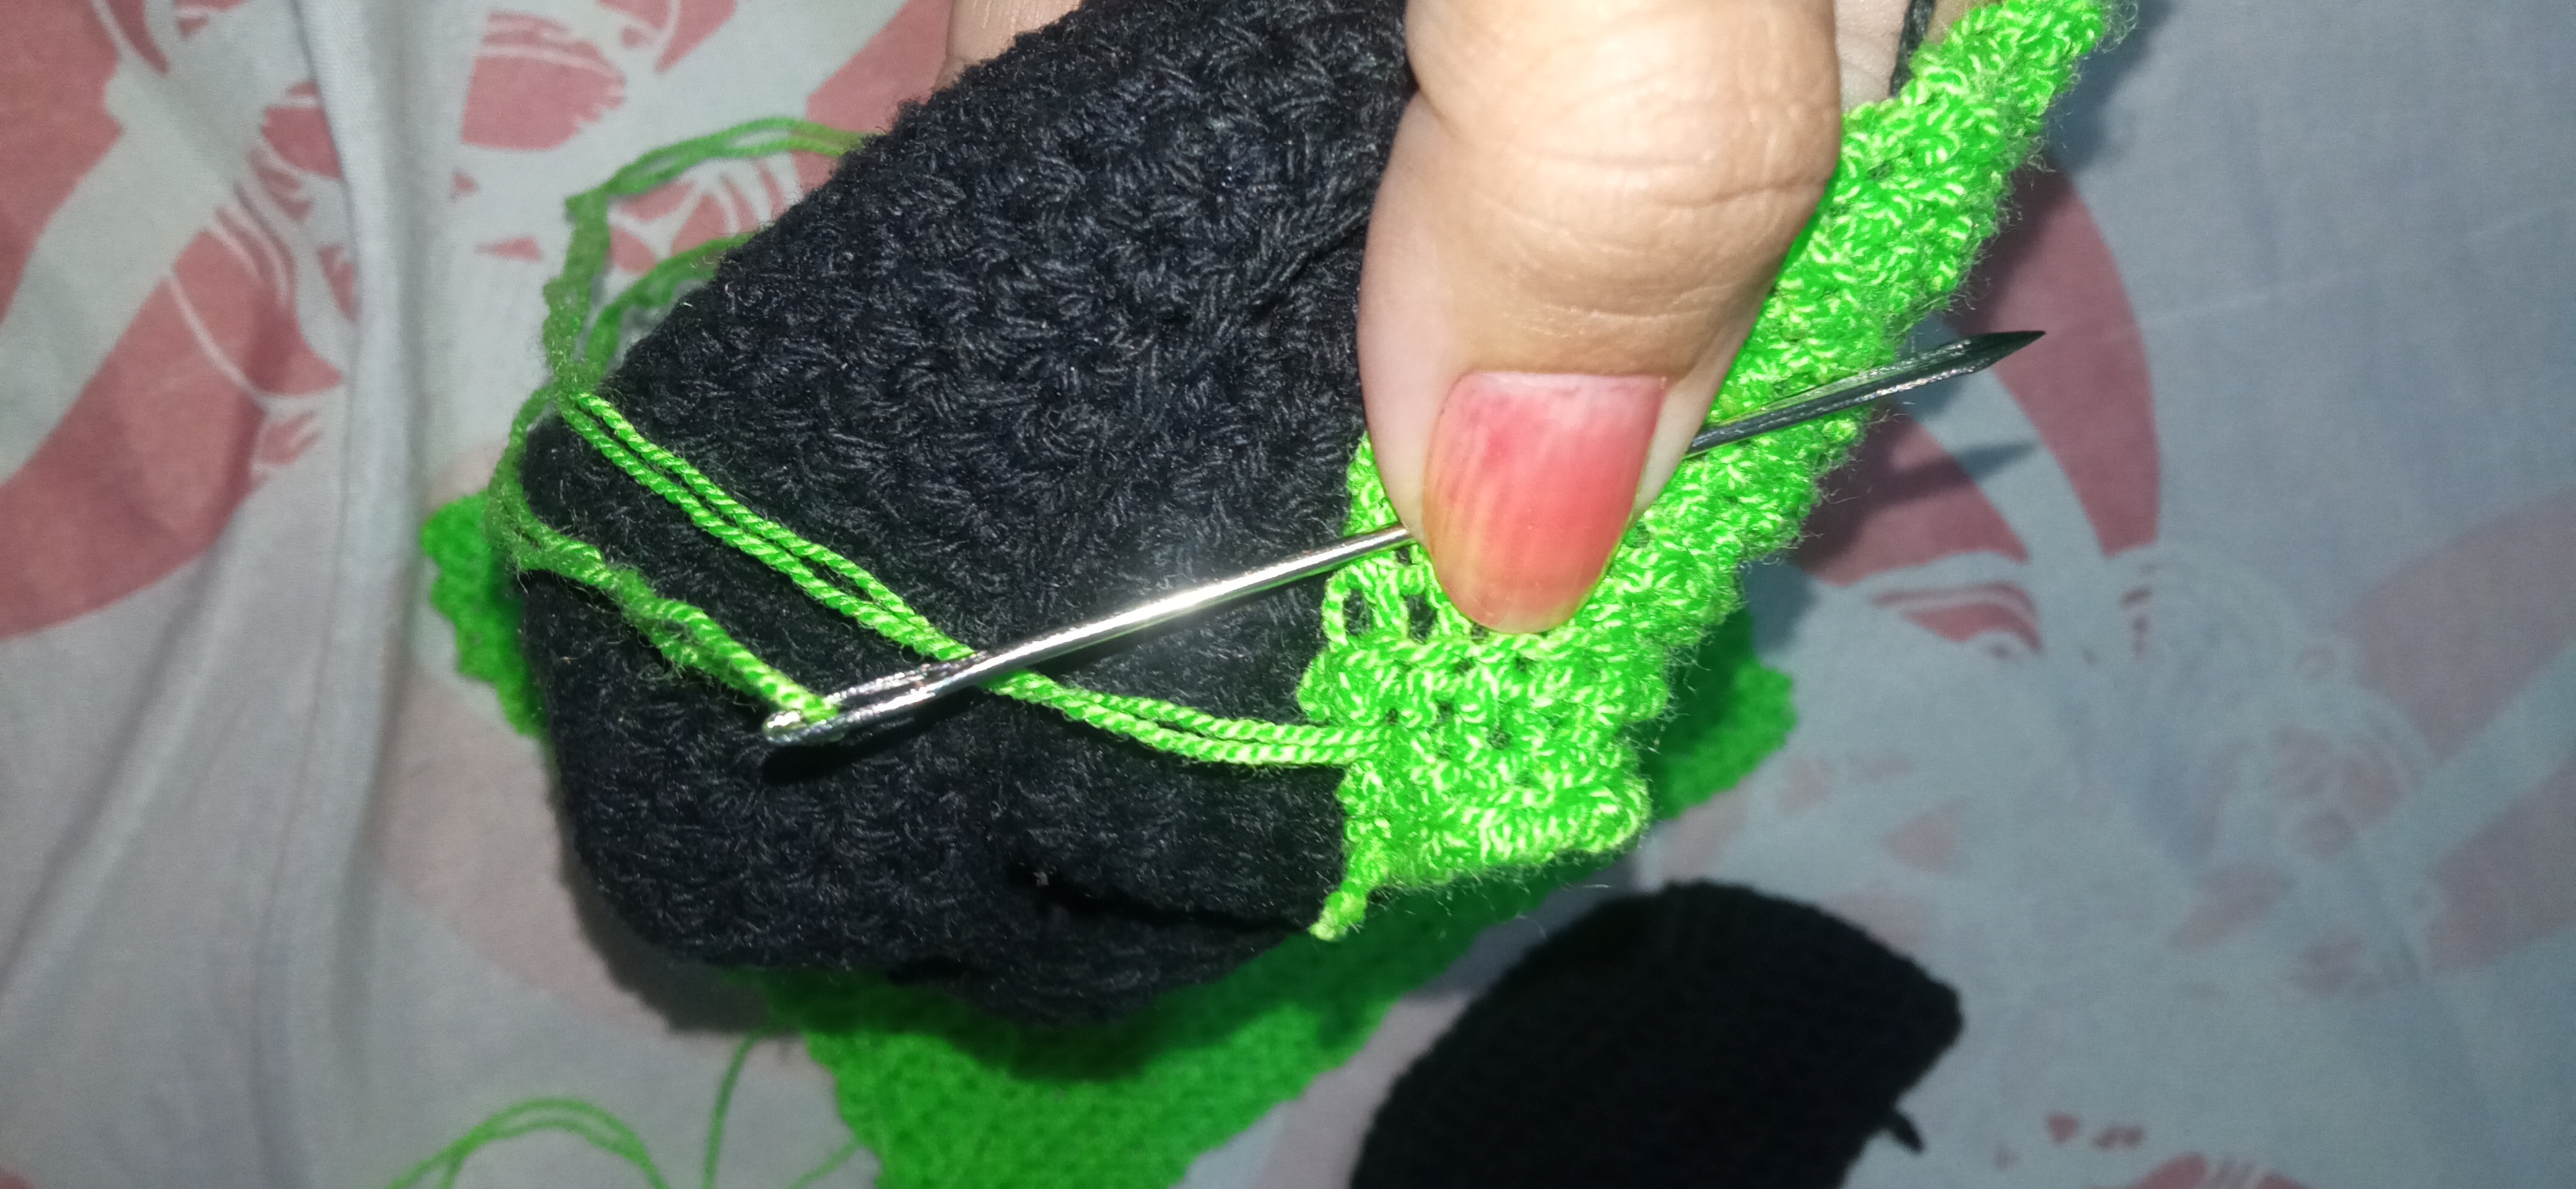
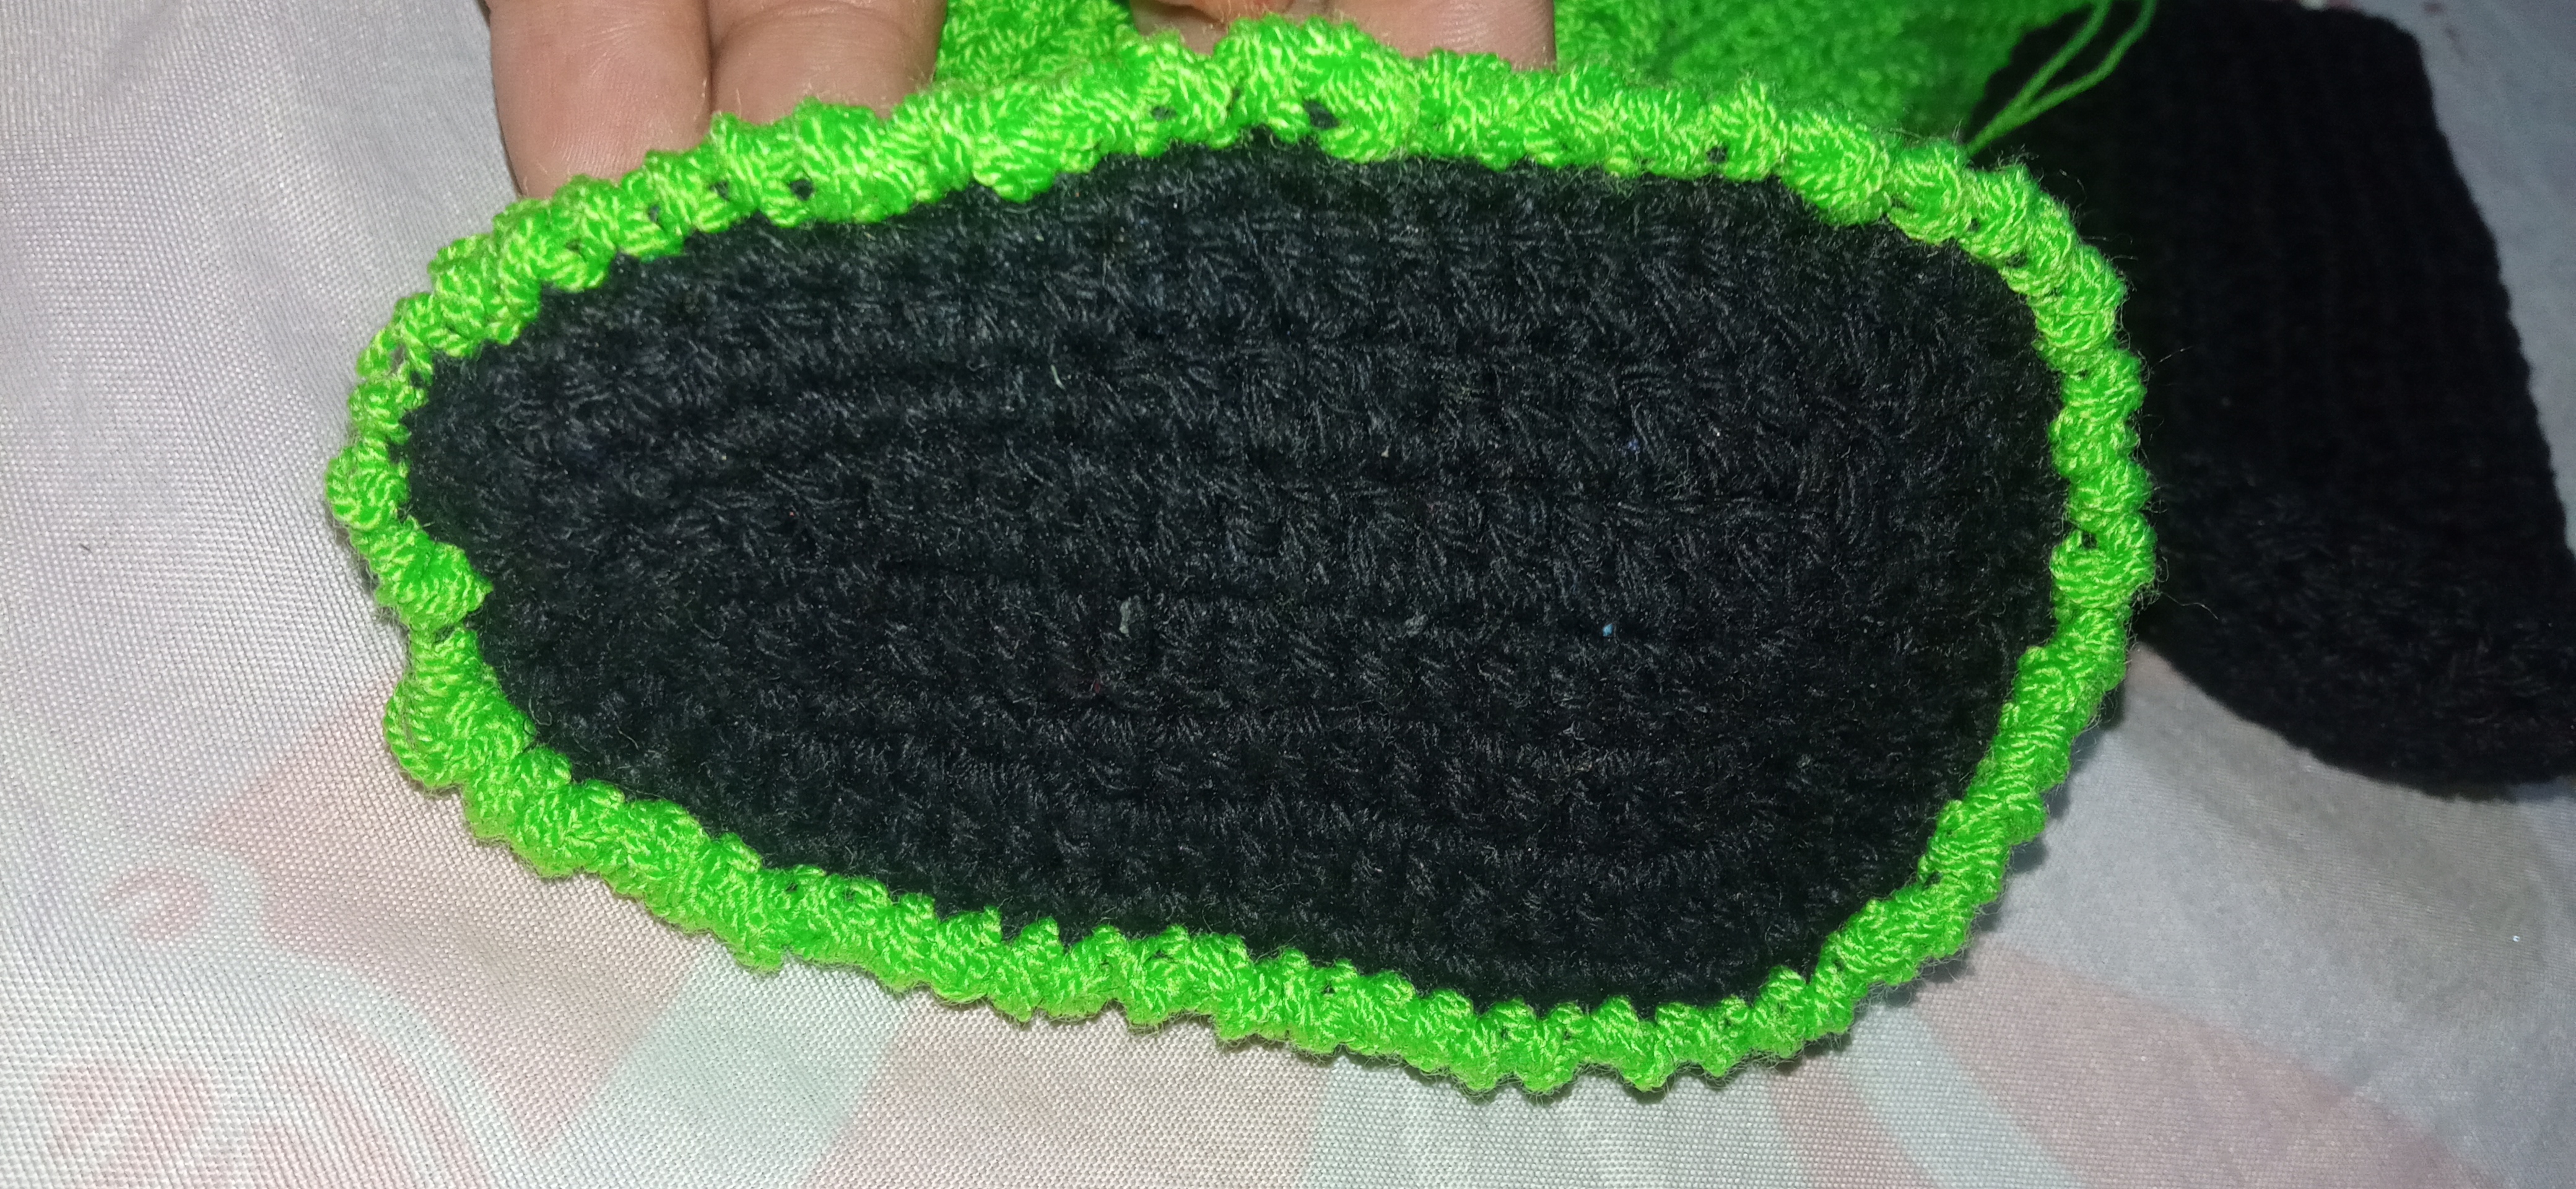
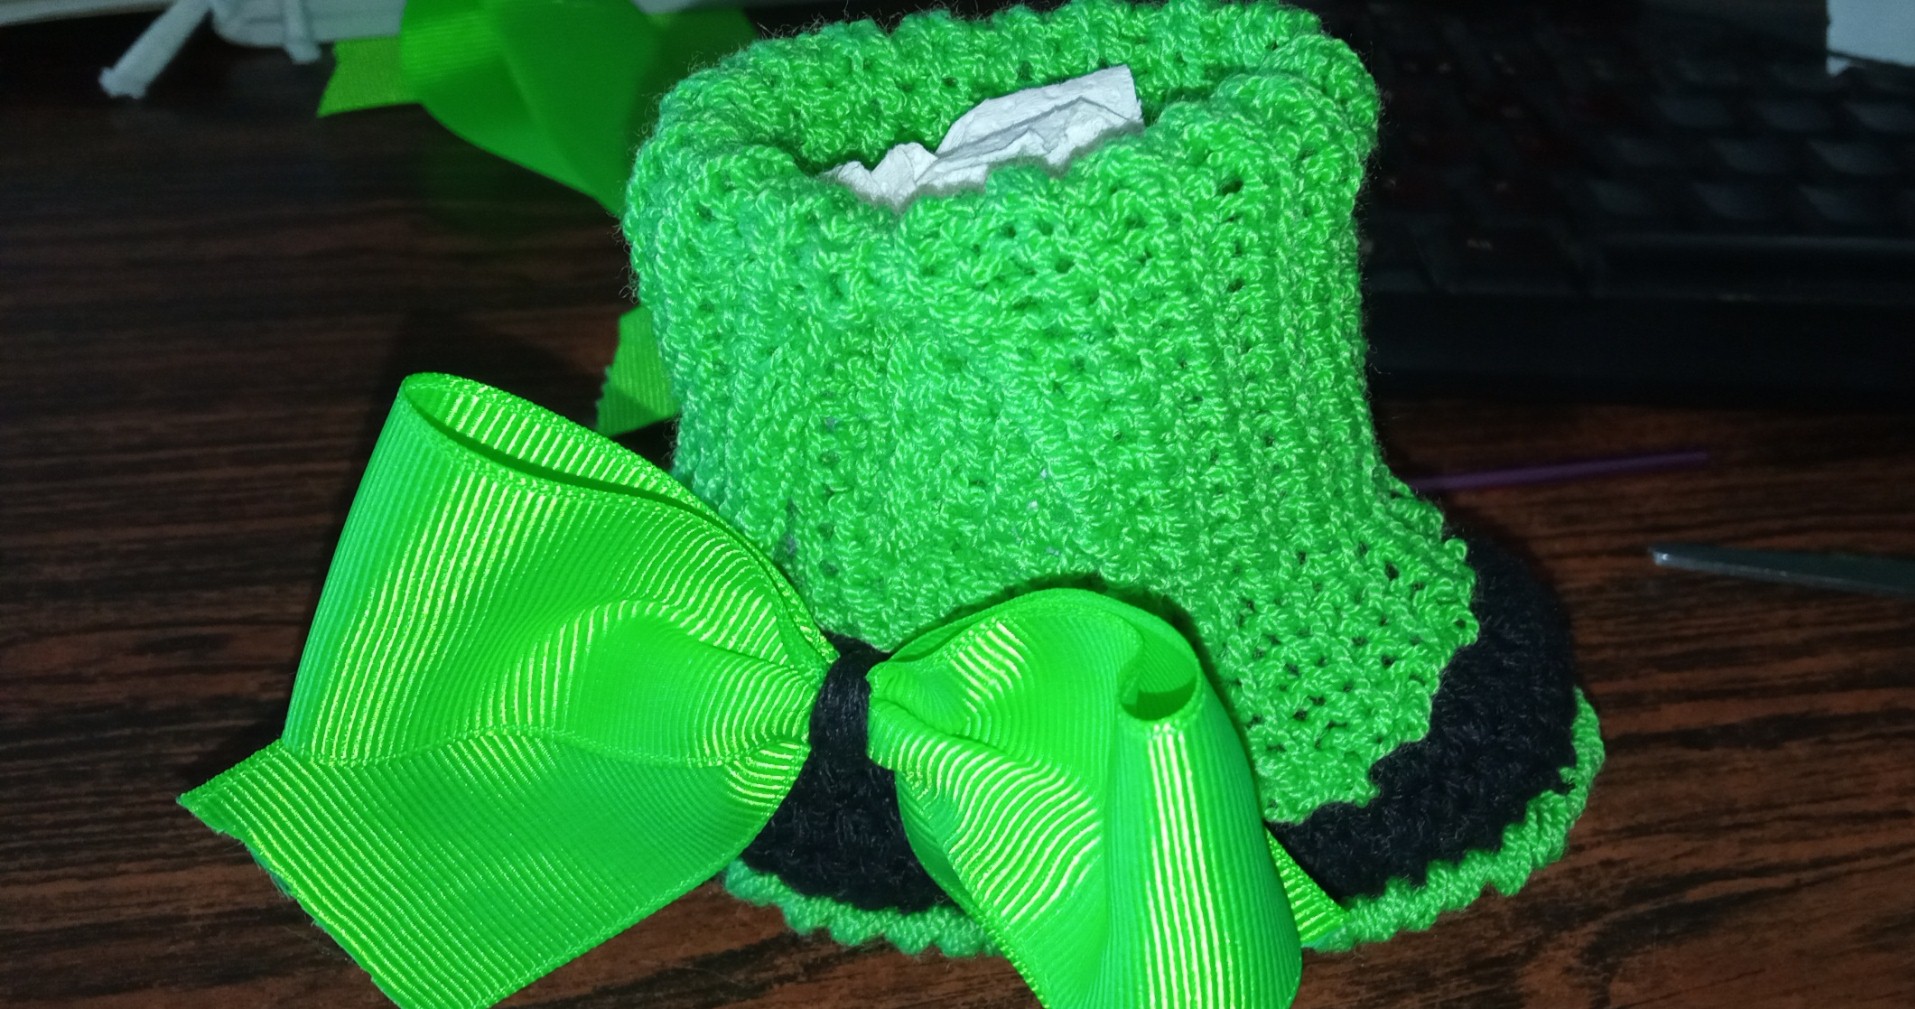
With a wool needle we are going to sew around the edge of the boot and to close we will go up sewing halfway and we will fold the piece.We will knit the sole of the boot in crab stitch with apple green thread
Con una aguja lanera vamos a coser por todo el borde de la bota y para cerrar subiremos cosiendo hasta la mitad y doblaremos la pieza;Tejeremos en punto cangrejo con hilo verde manzana la suela de la bota.
Step 7
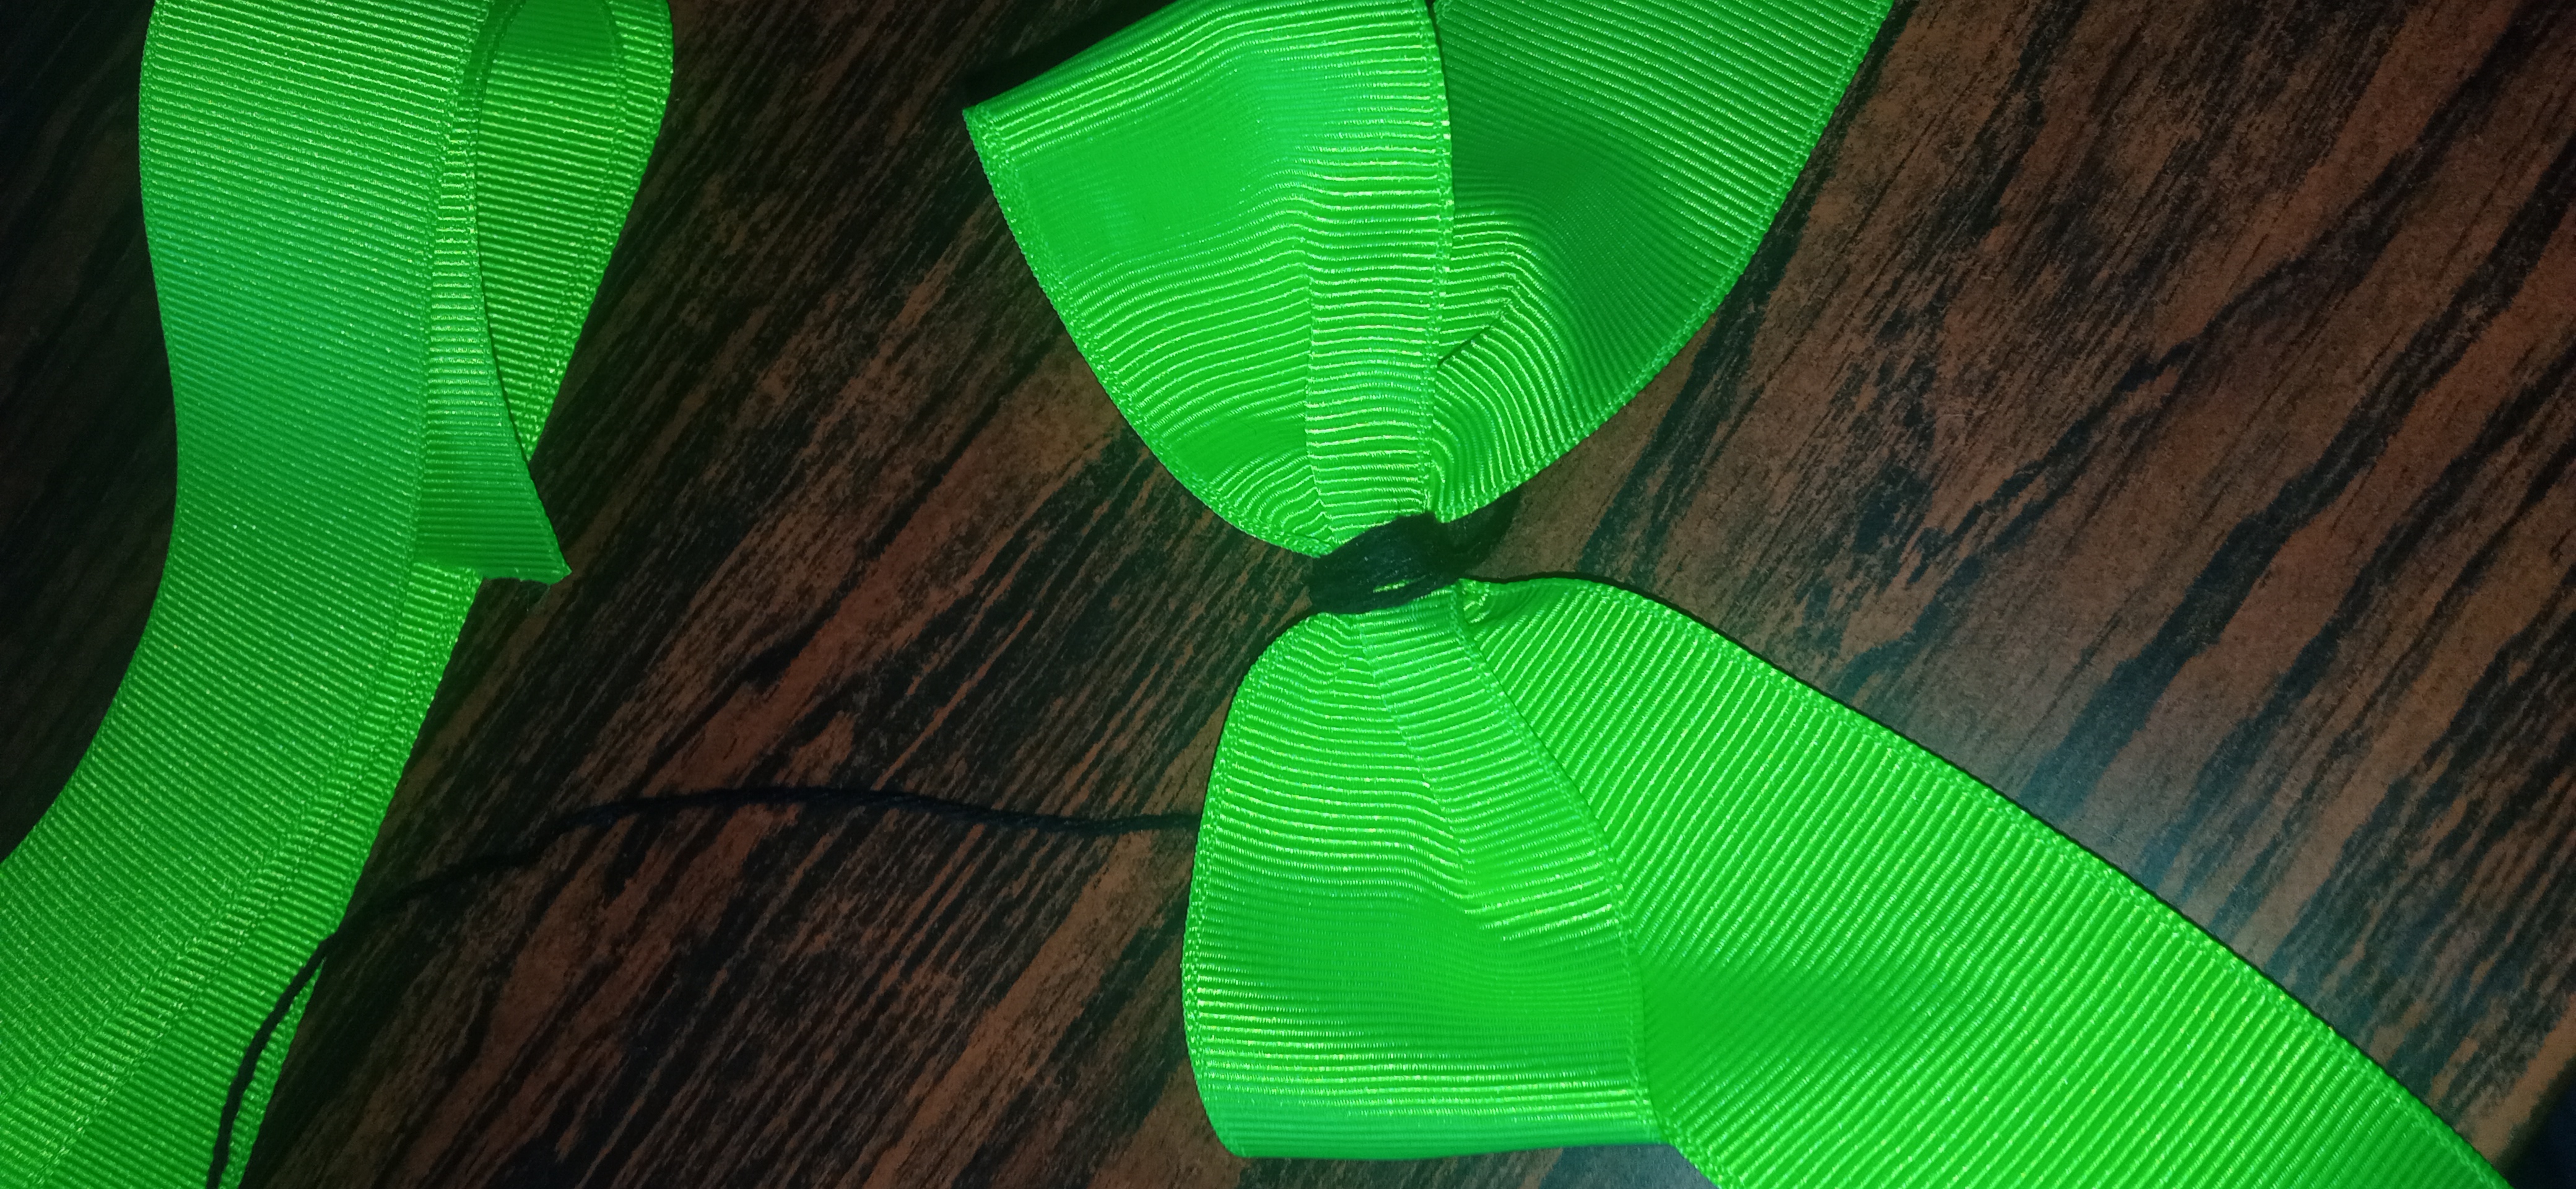
With the neon green decorative ribbon, make a bow which you tie with black thread and leave a long part of the thread to tie it to the body of the boot.
Con la cinta decorativa verde neon elabore un lazo el cual amarre con hilo negro y deje un parte larga del hilo para amarrarlo en el cuerpo de la bota.
DEVELOPMENT OF MY PHOTOGRAPHIC SET
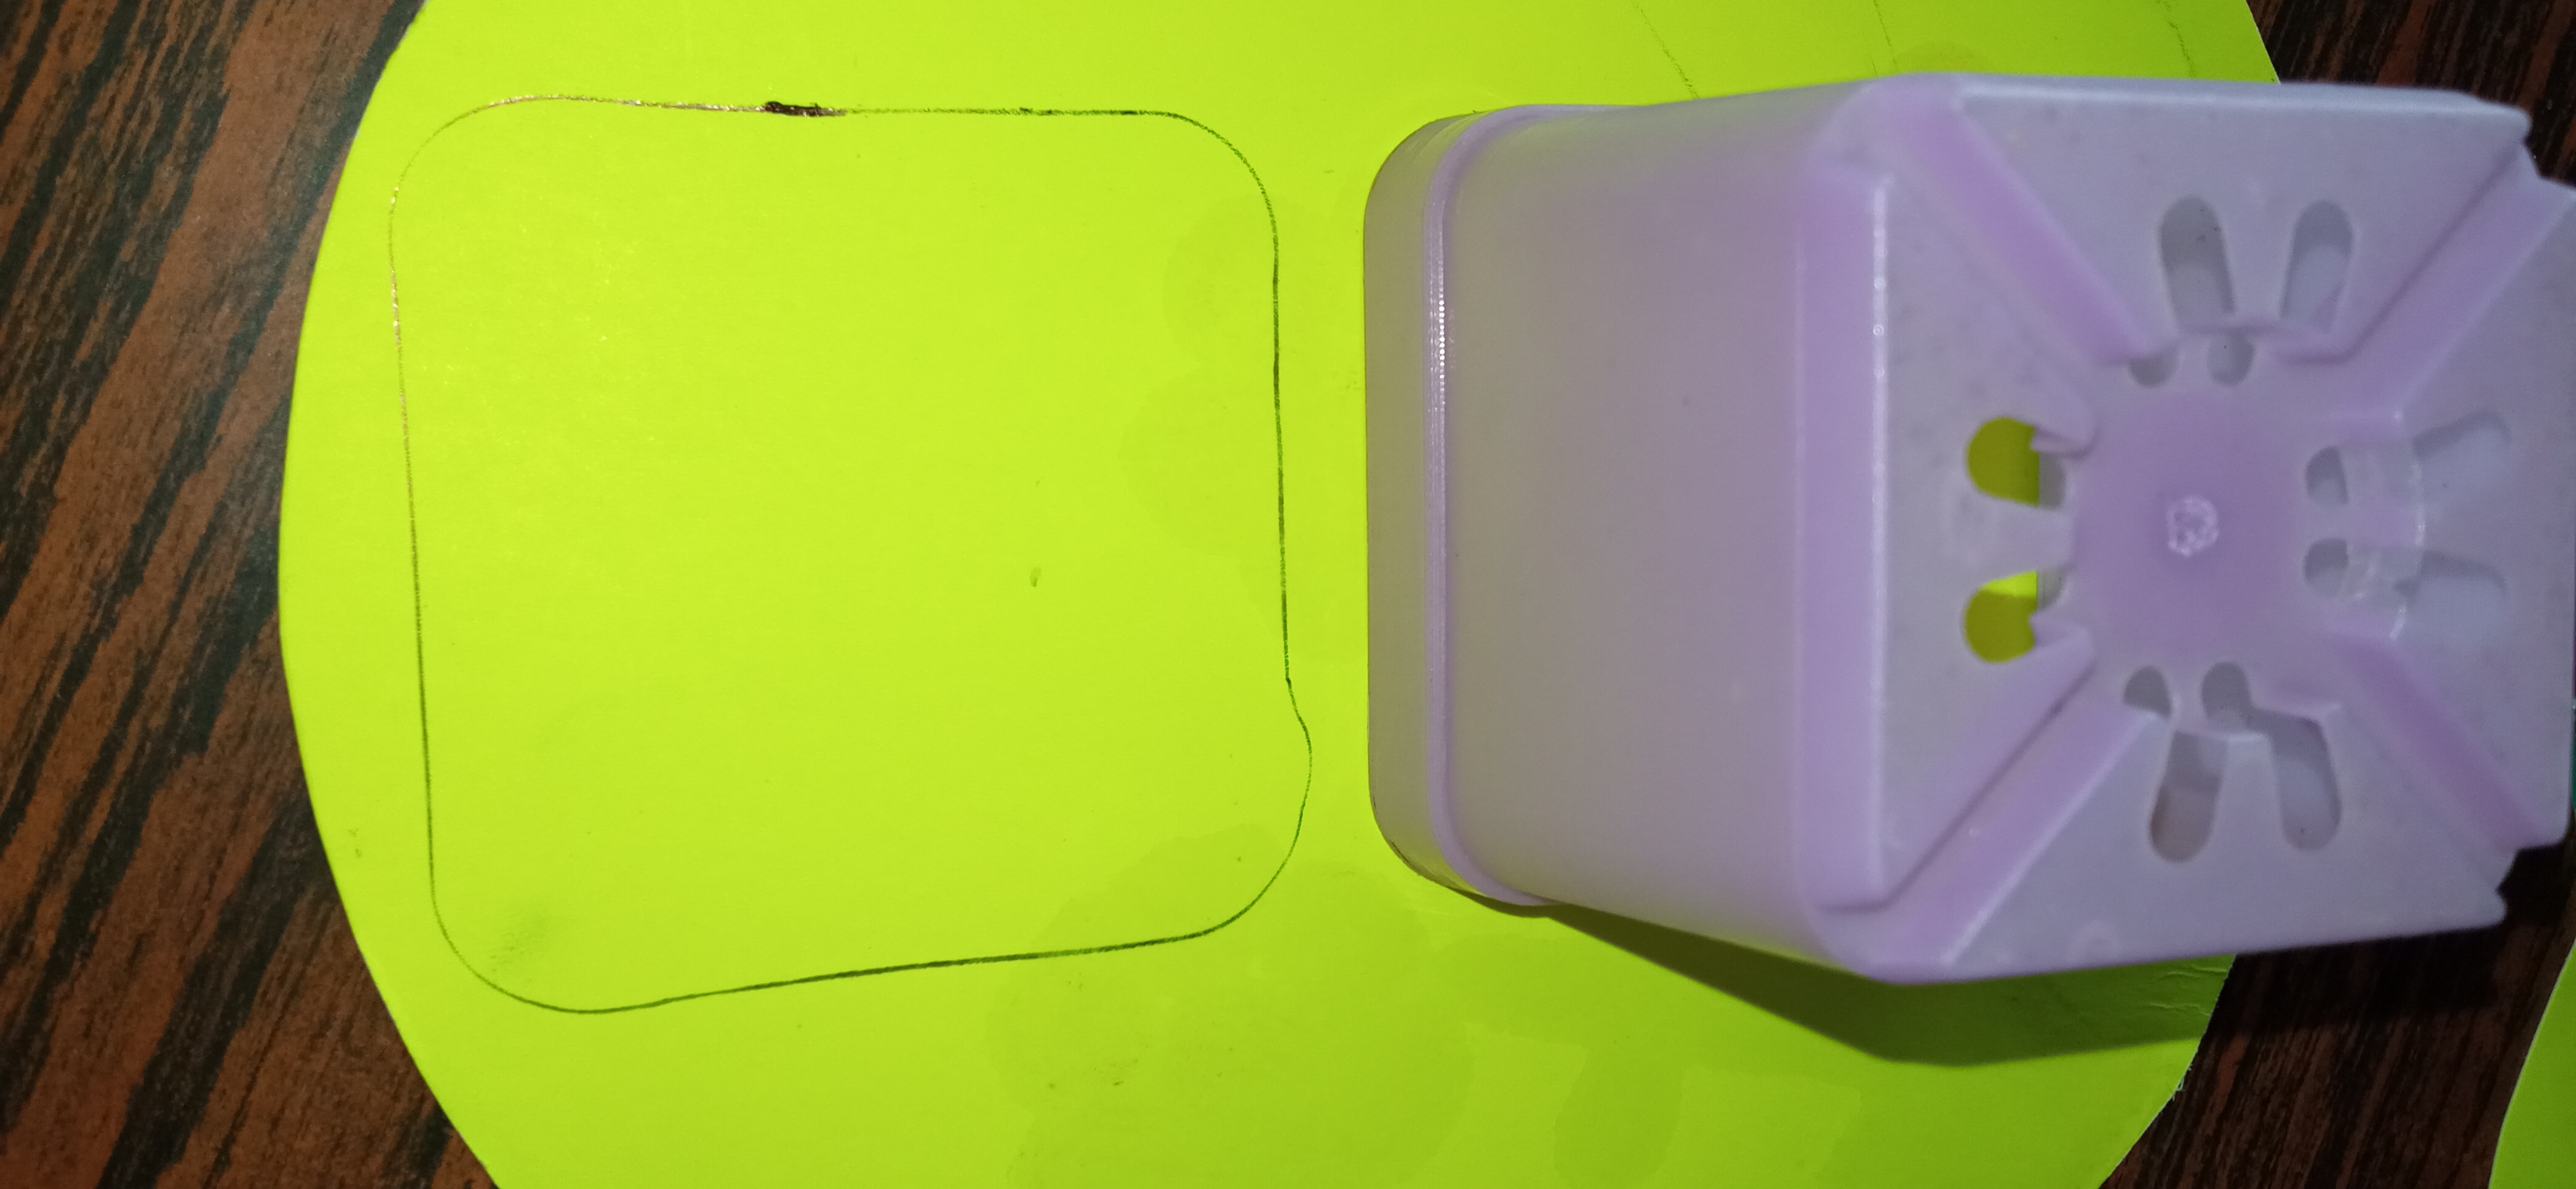
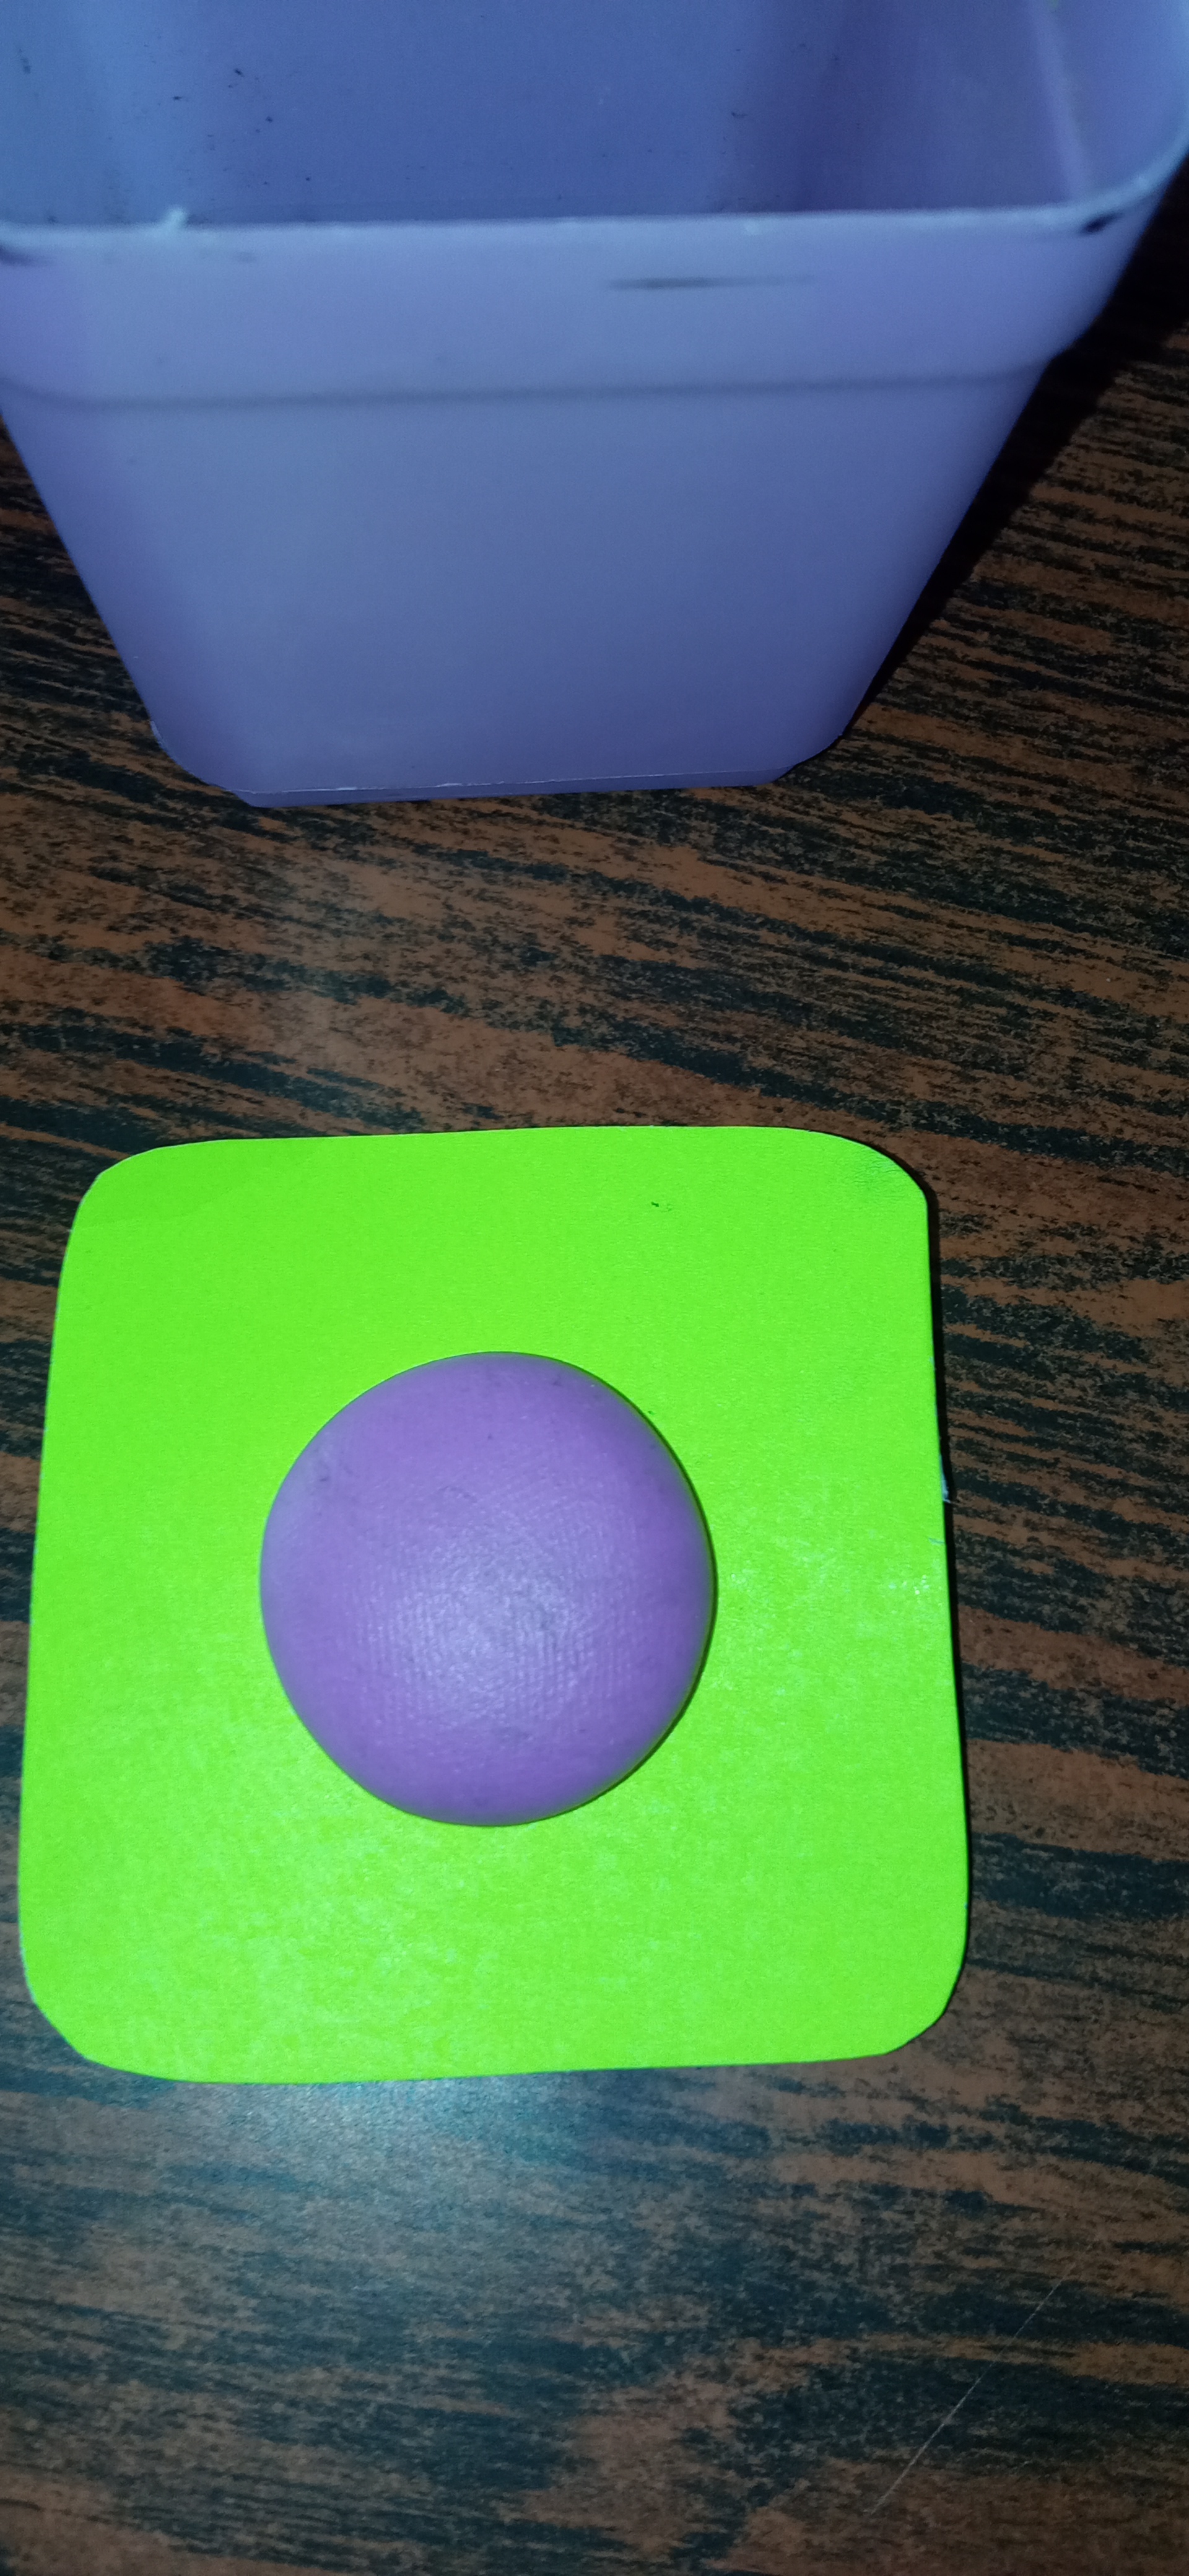
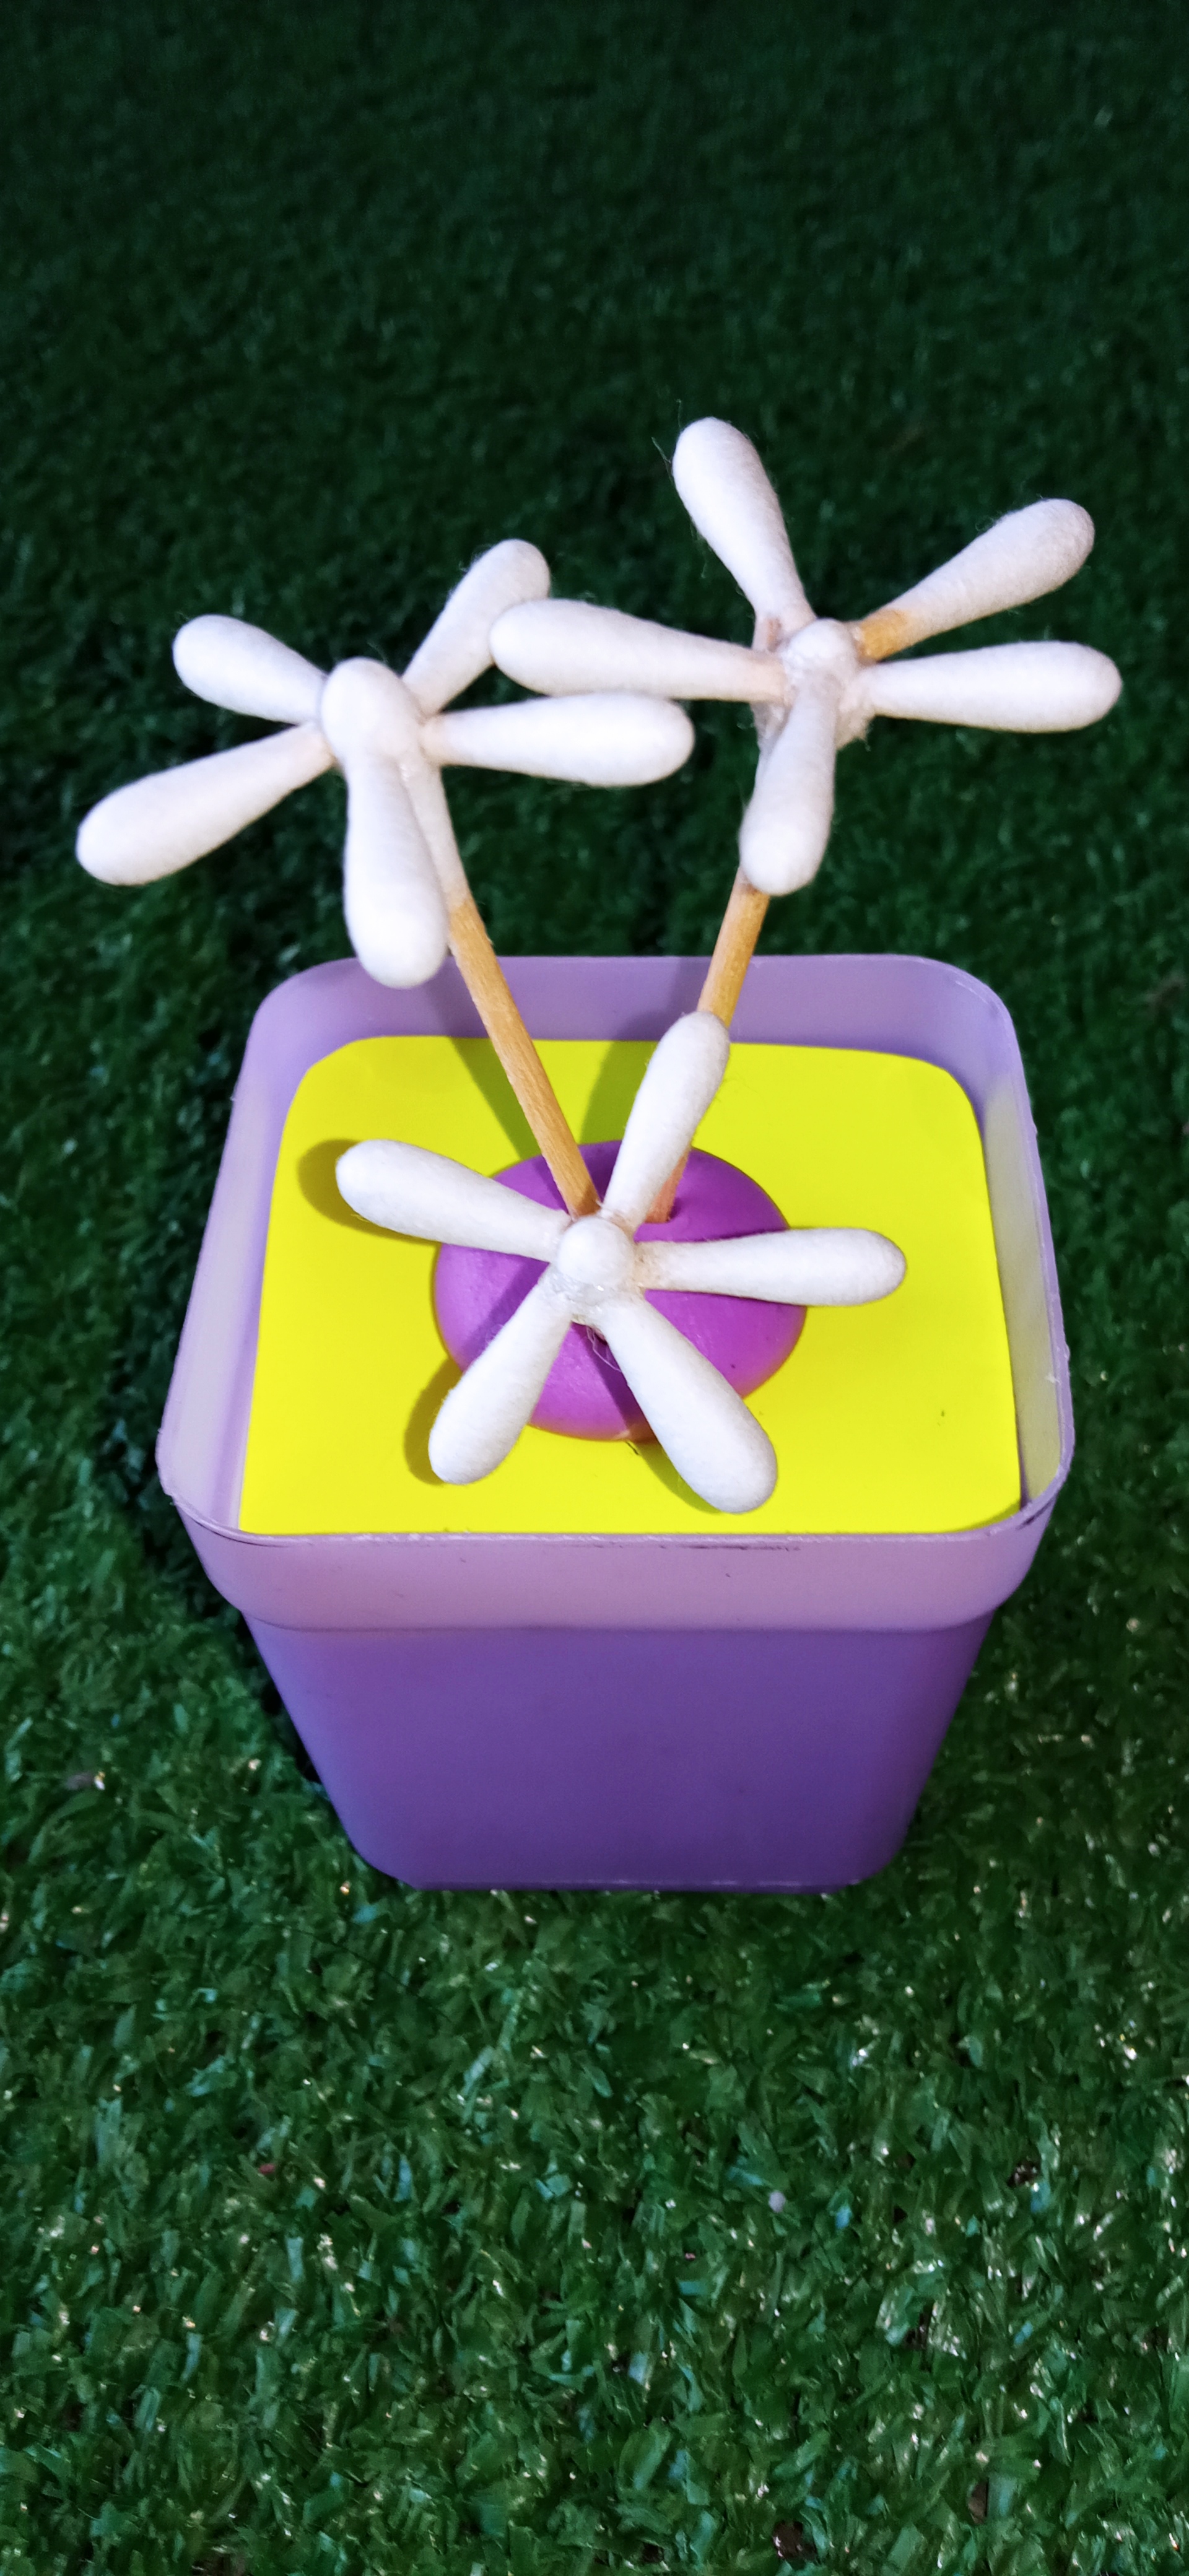
Take a vase of withered old catus and discard the rocks; cut a green cardboard and place a piece of plasticine.
Tome un florero de catus antiguo marchito y deseche las rocas; corte una cartilina verde y coloque un trozo de plastilina.

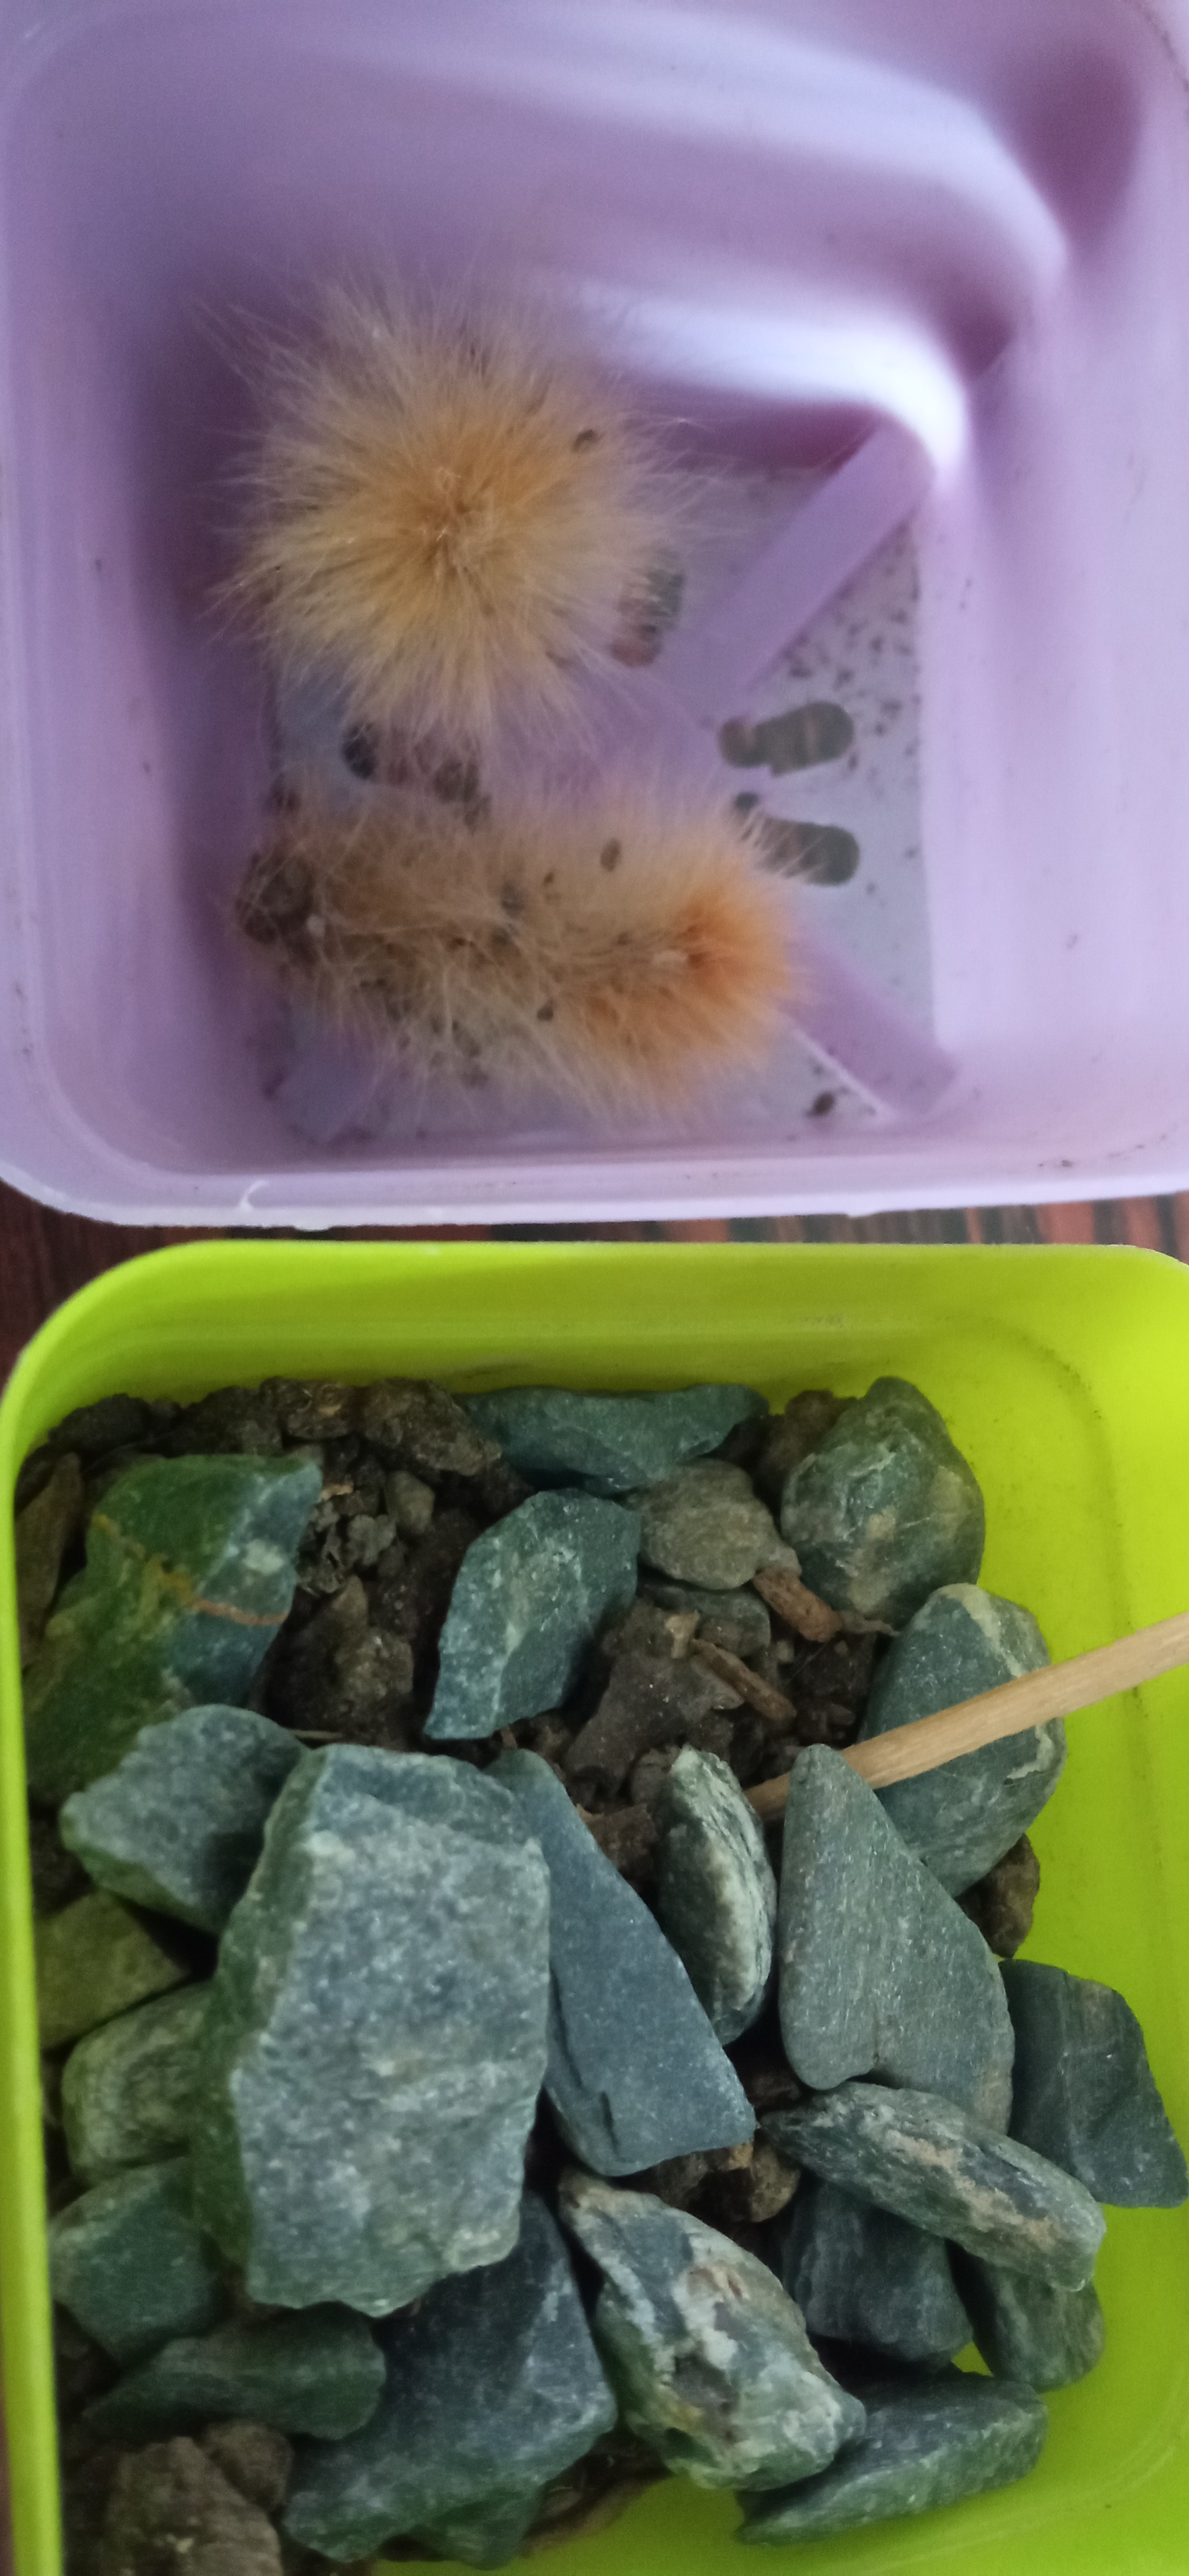

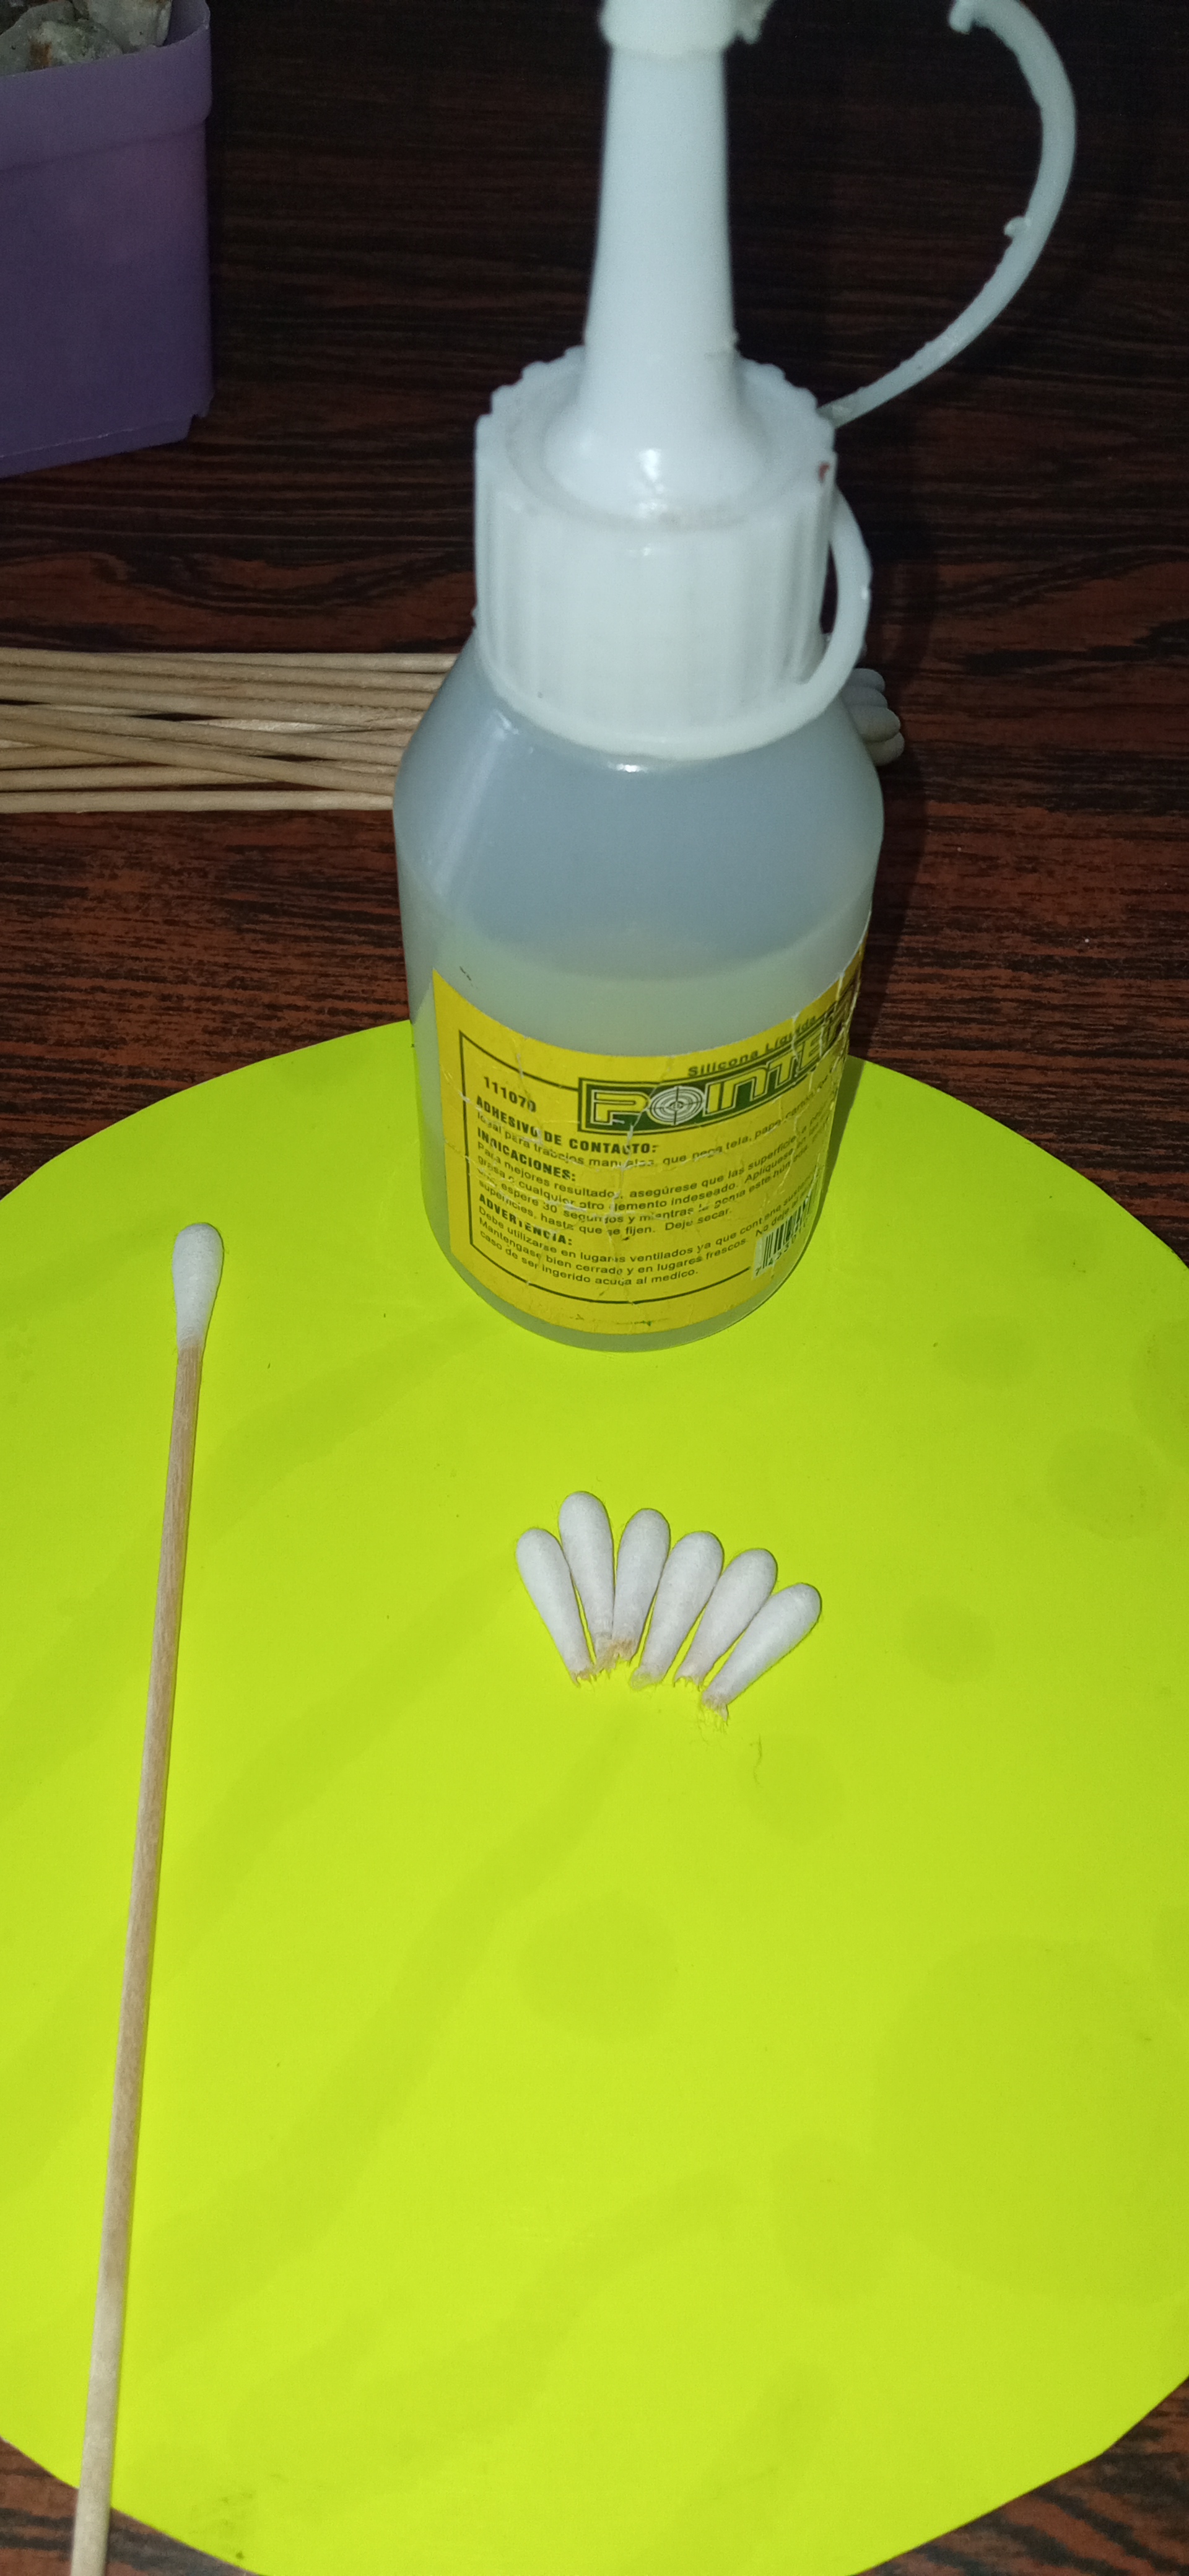
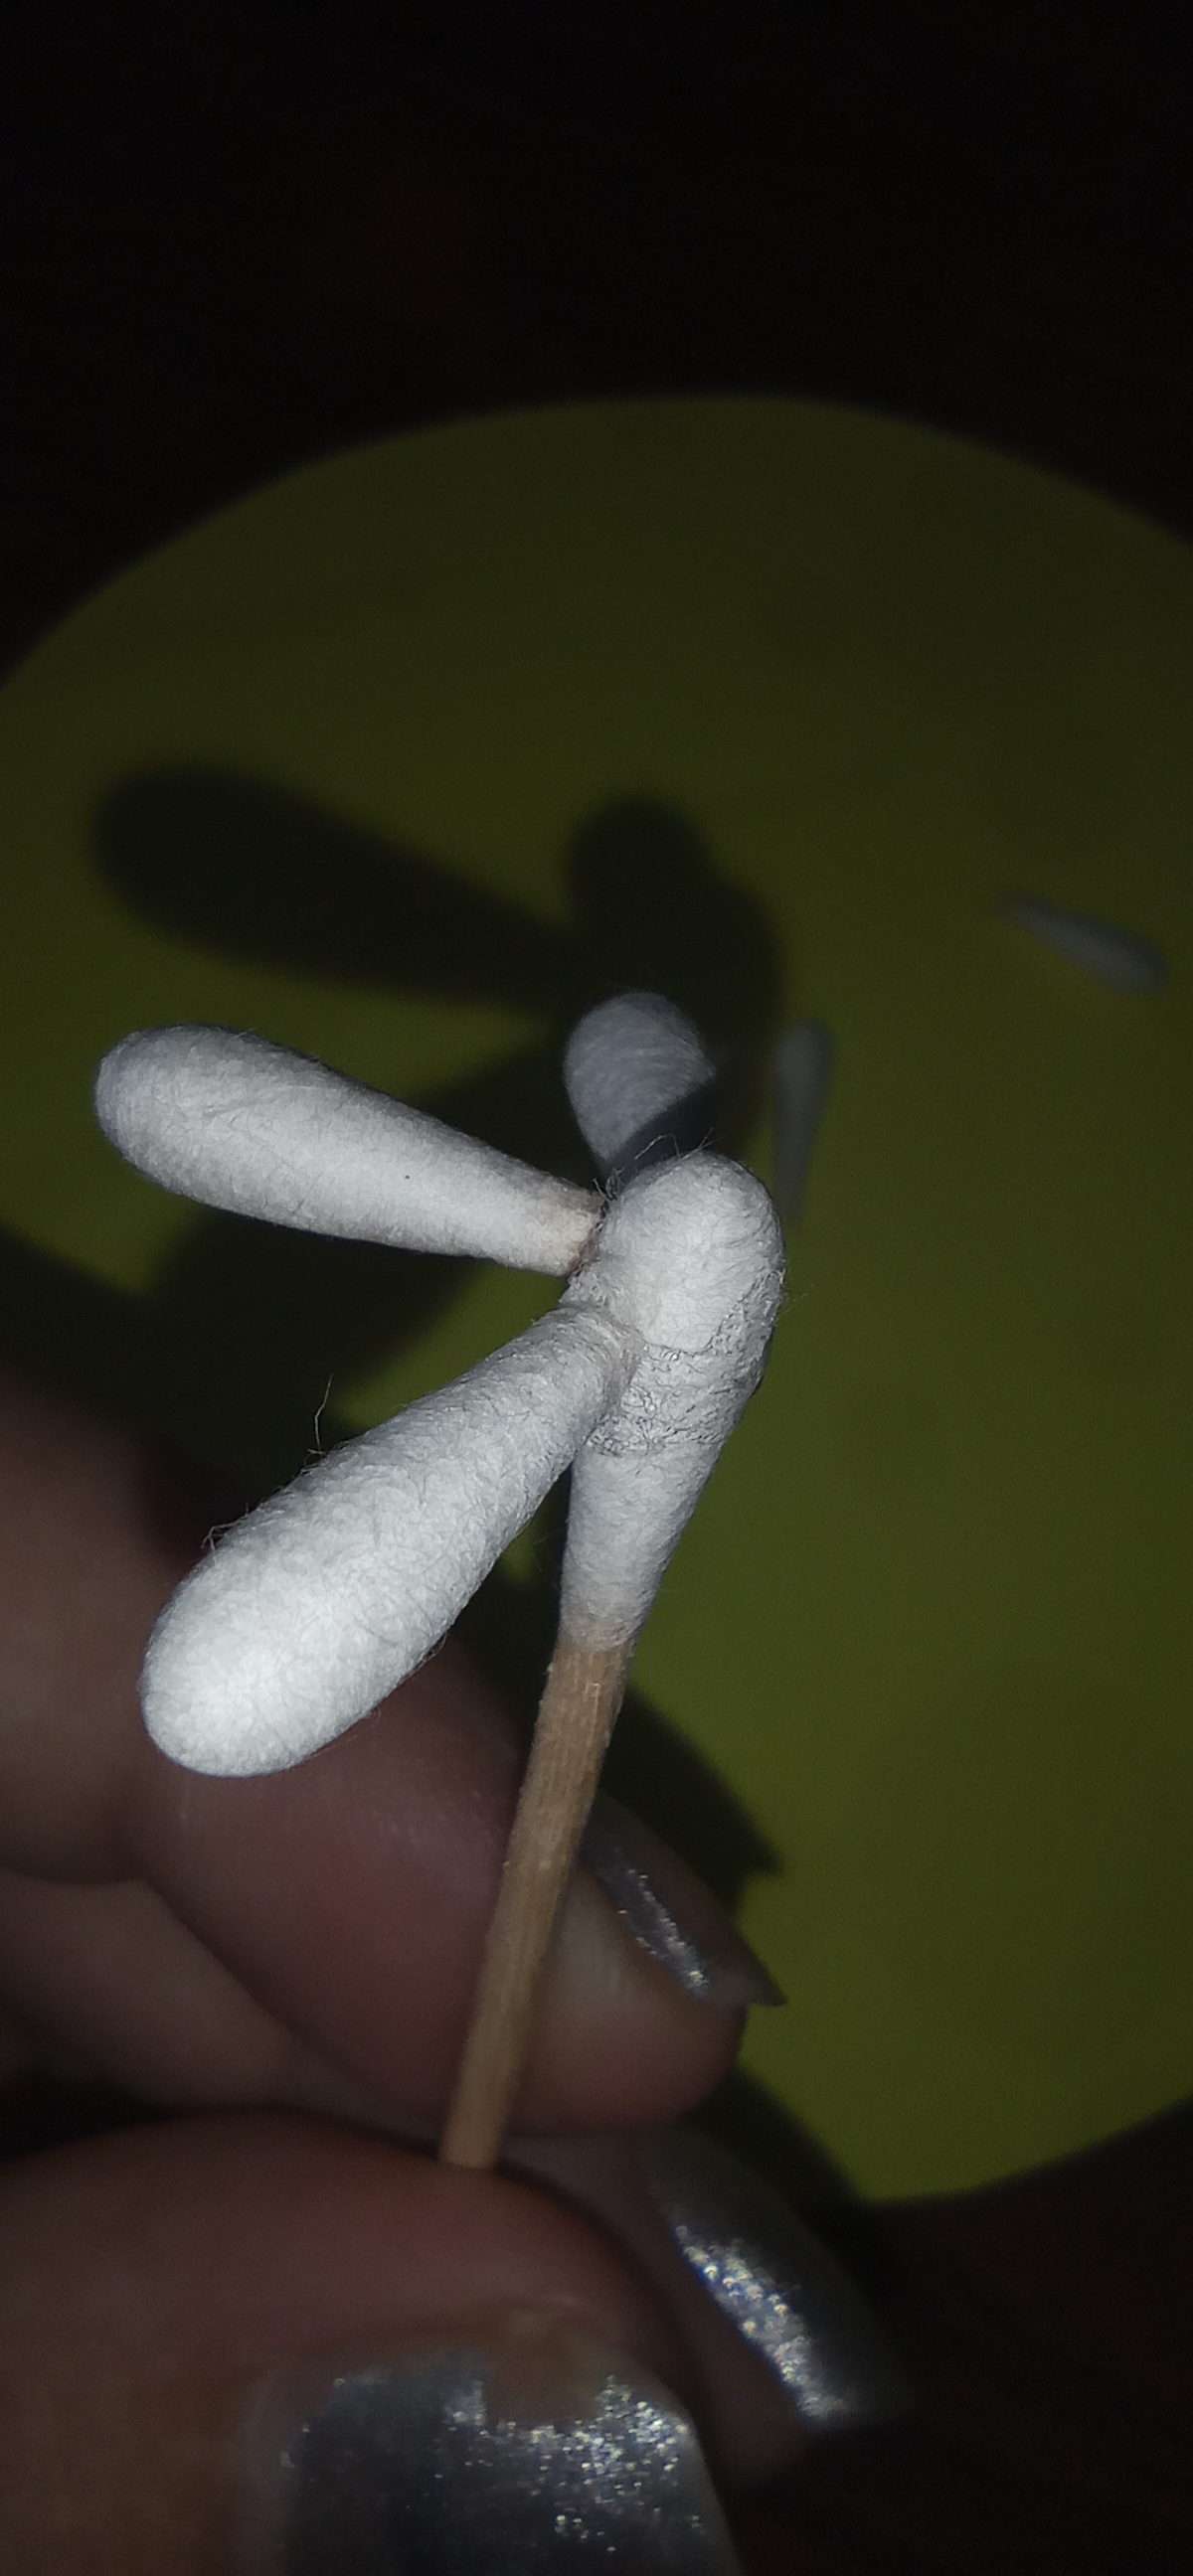
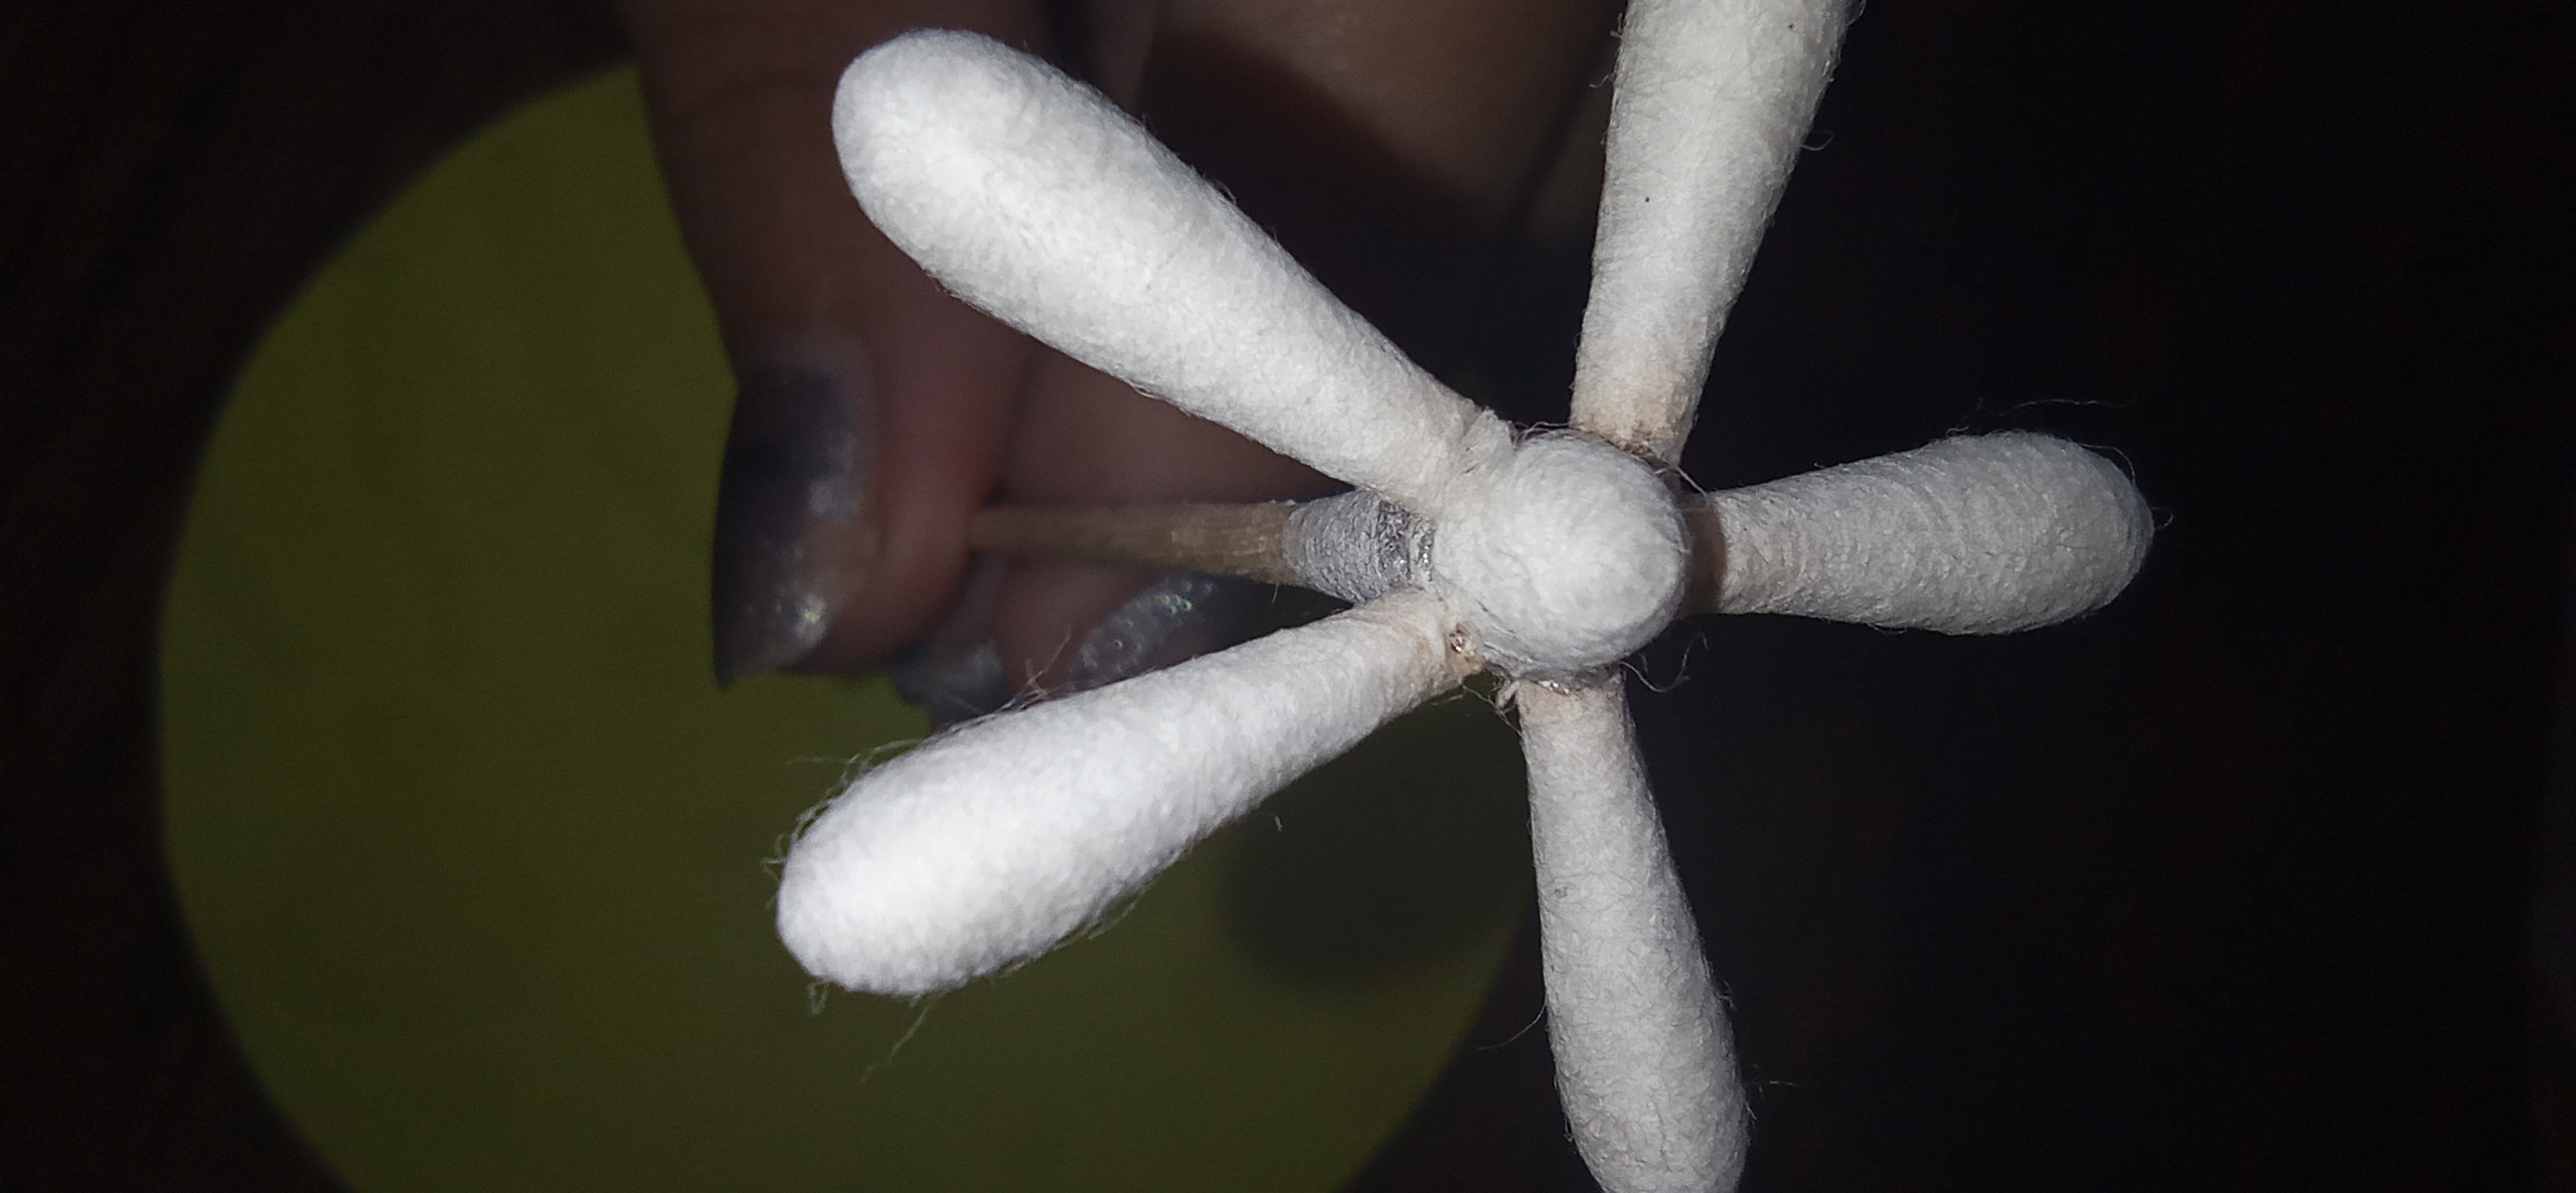
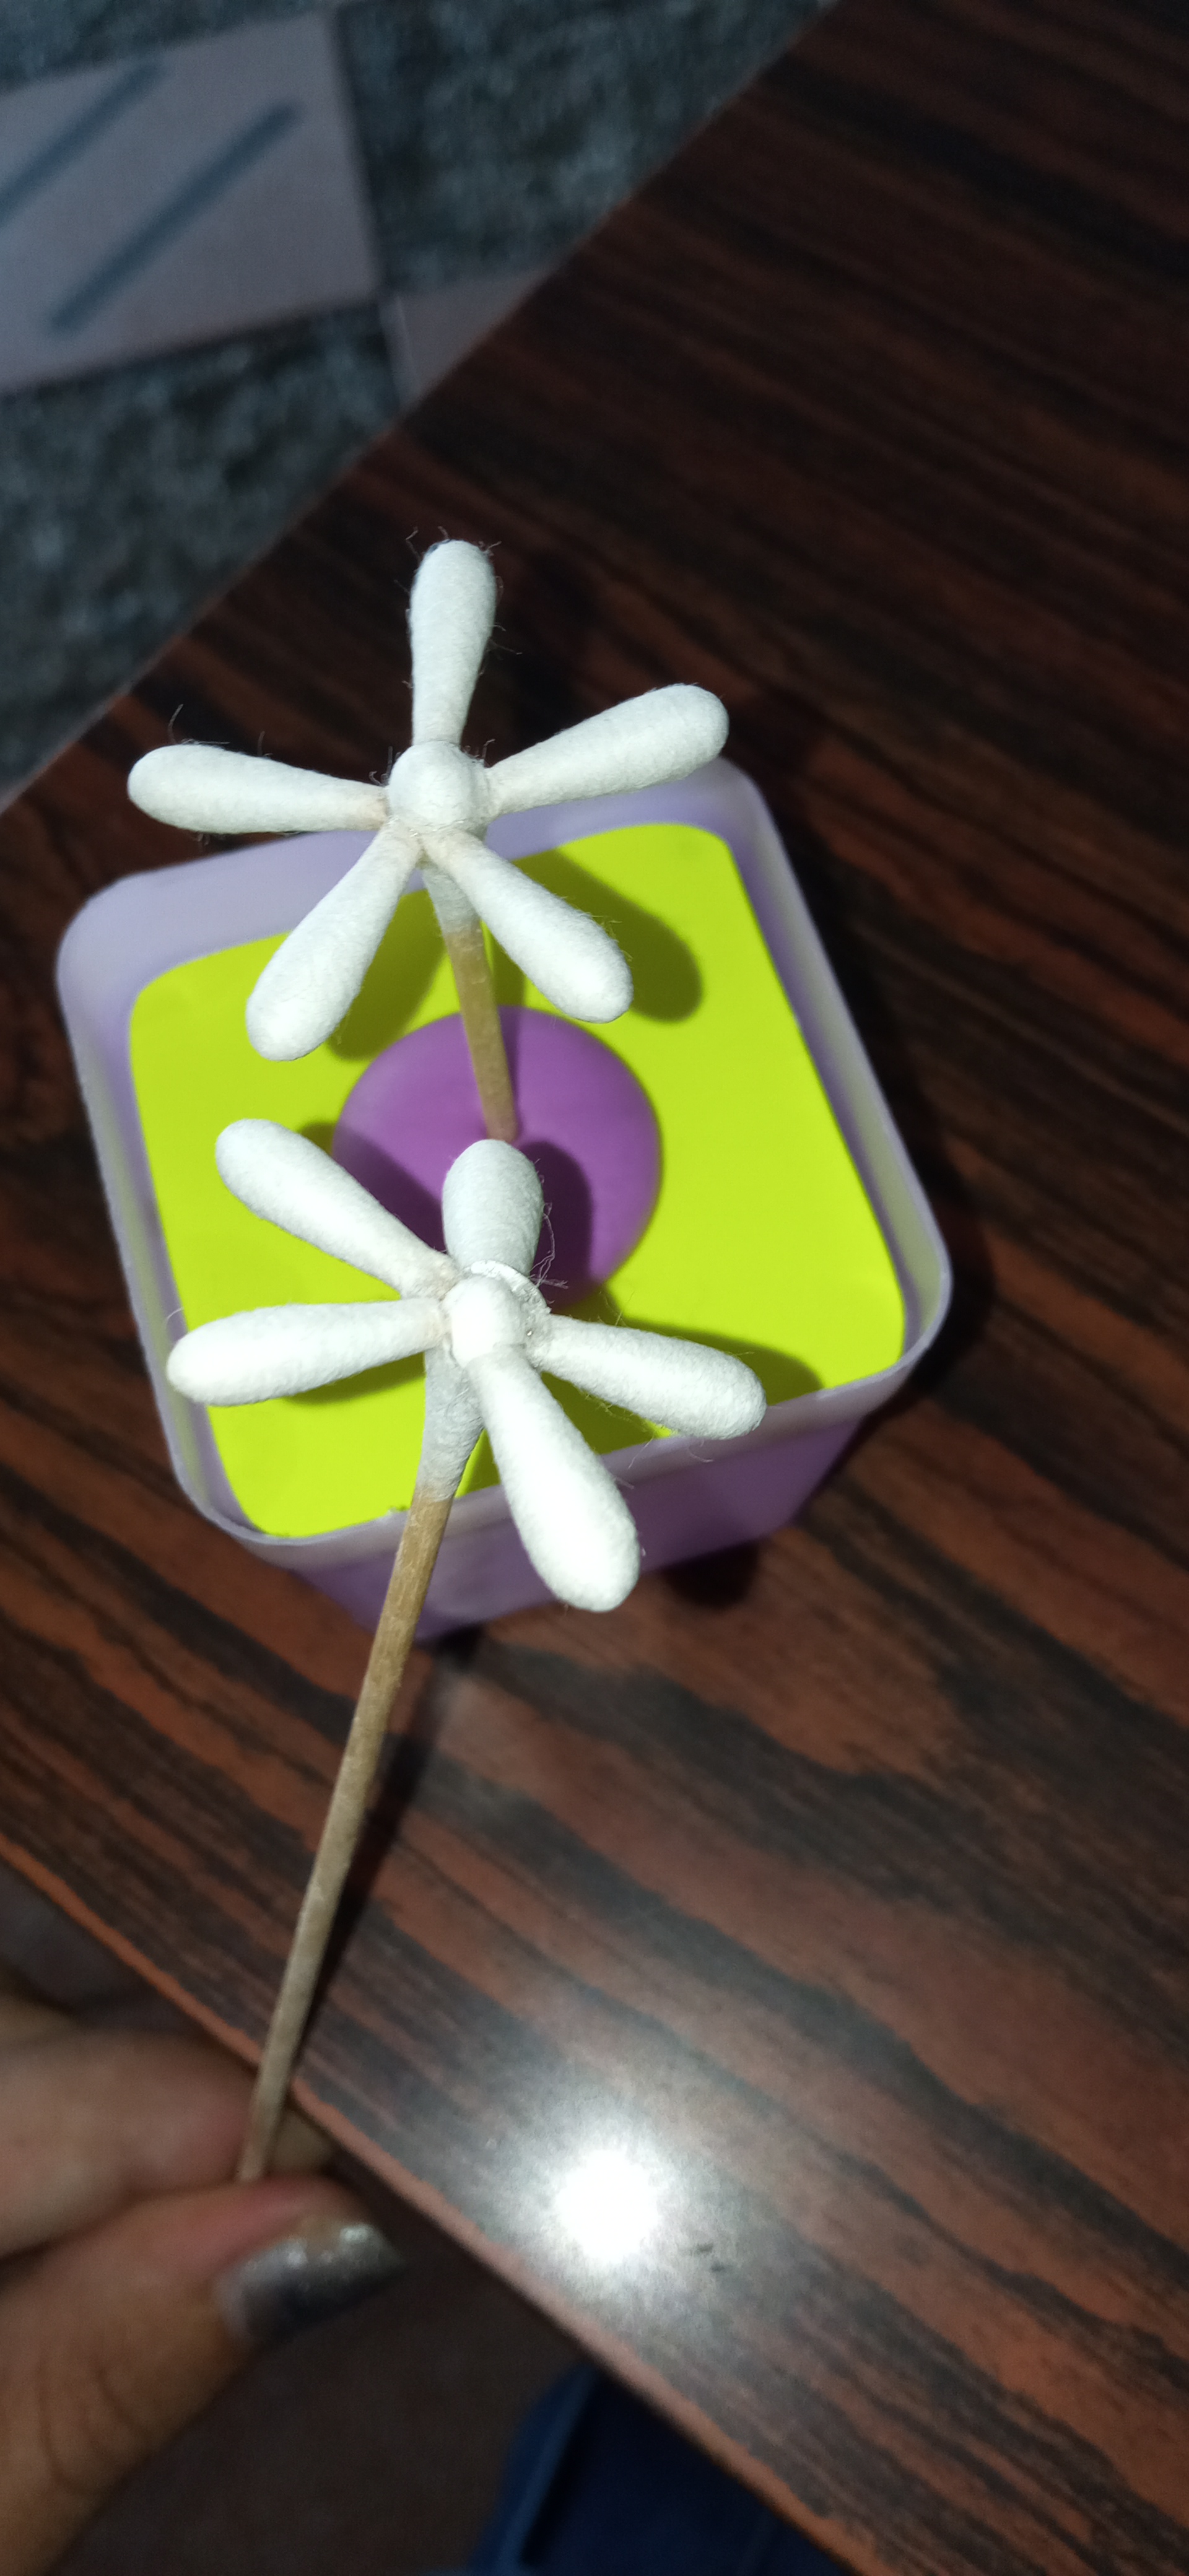
With toothpicks to clean the ears, take the cotton part and split it, then select a complete toothpick and paste 5 pieces of cotton with liquid silicone. In this way, I made 3 flowers, the ciles I gave them different sizes and I placed them as an ornament in my presentation.
Con palillos de limpiar los oidos tome la parte de algodon y lo parti, luego seleccione un palillo completo y pegue 5 piezas de algodon con silicon liquido. de este modo elabore 3 flores las ciles les di diferente tamaño y las coloque como adorno en mi presentacion.

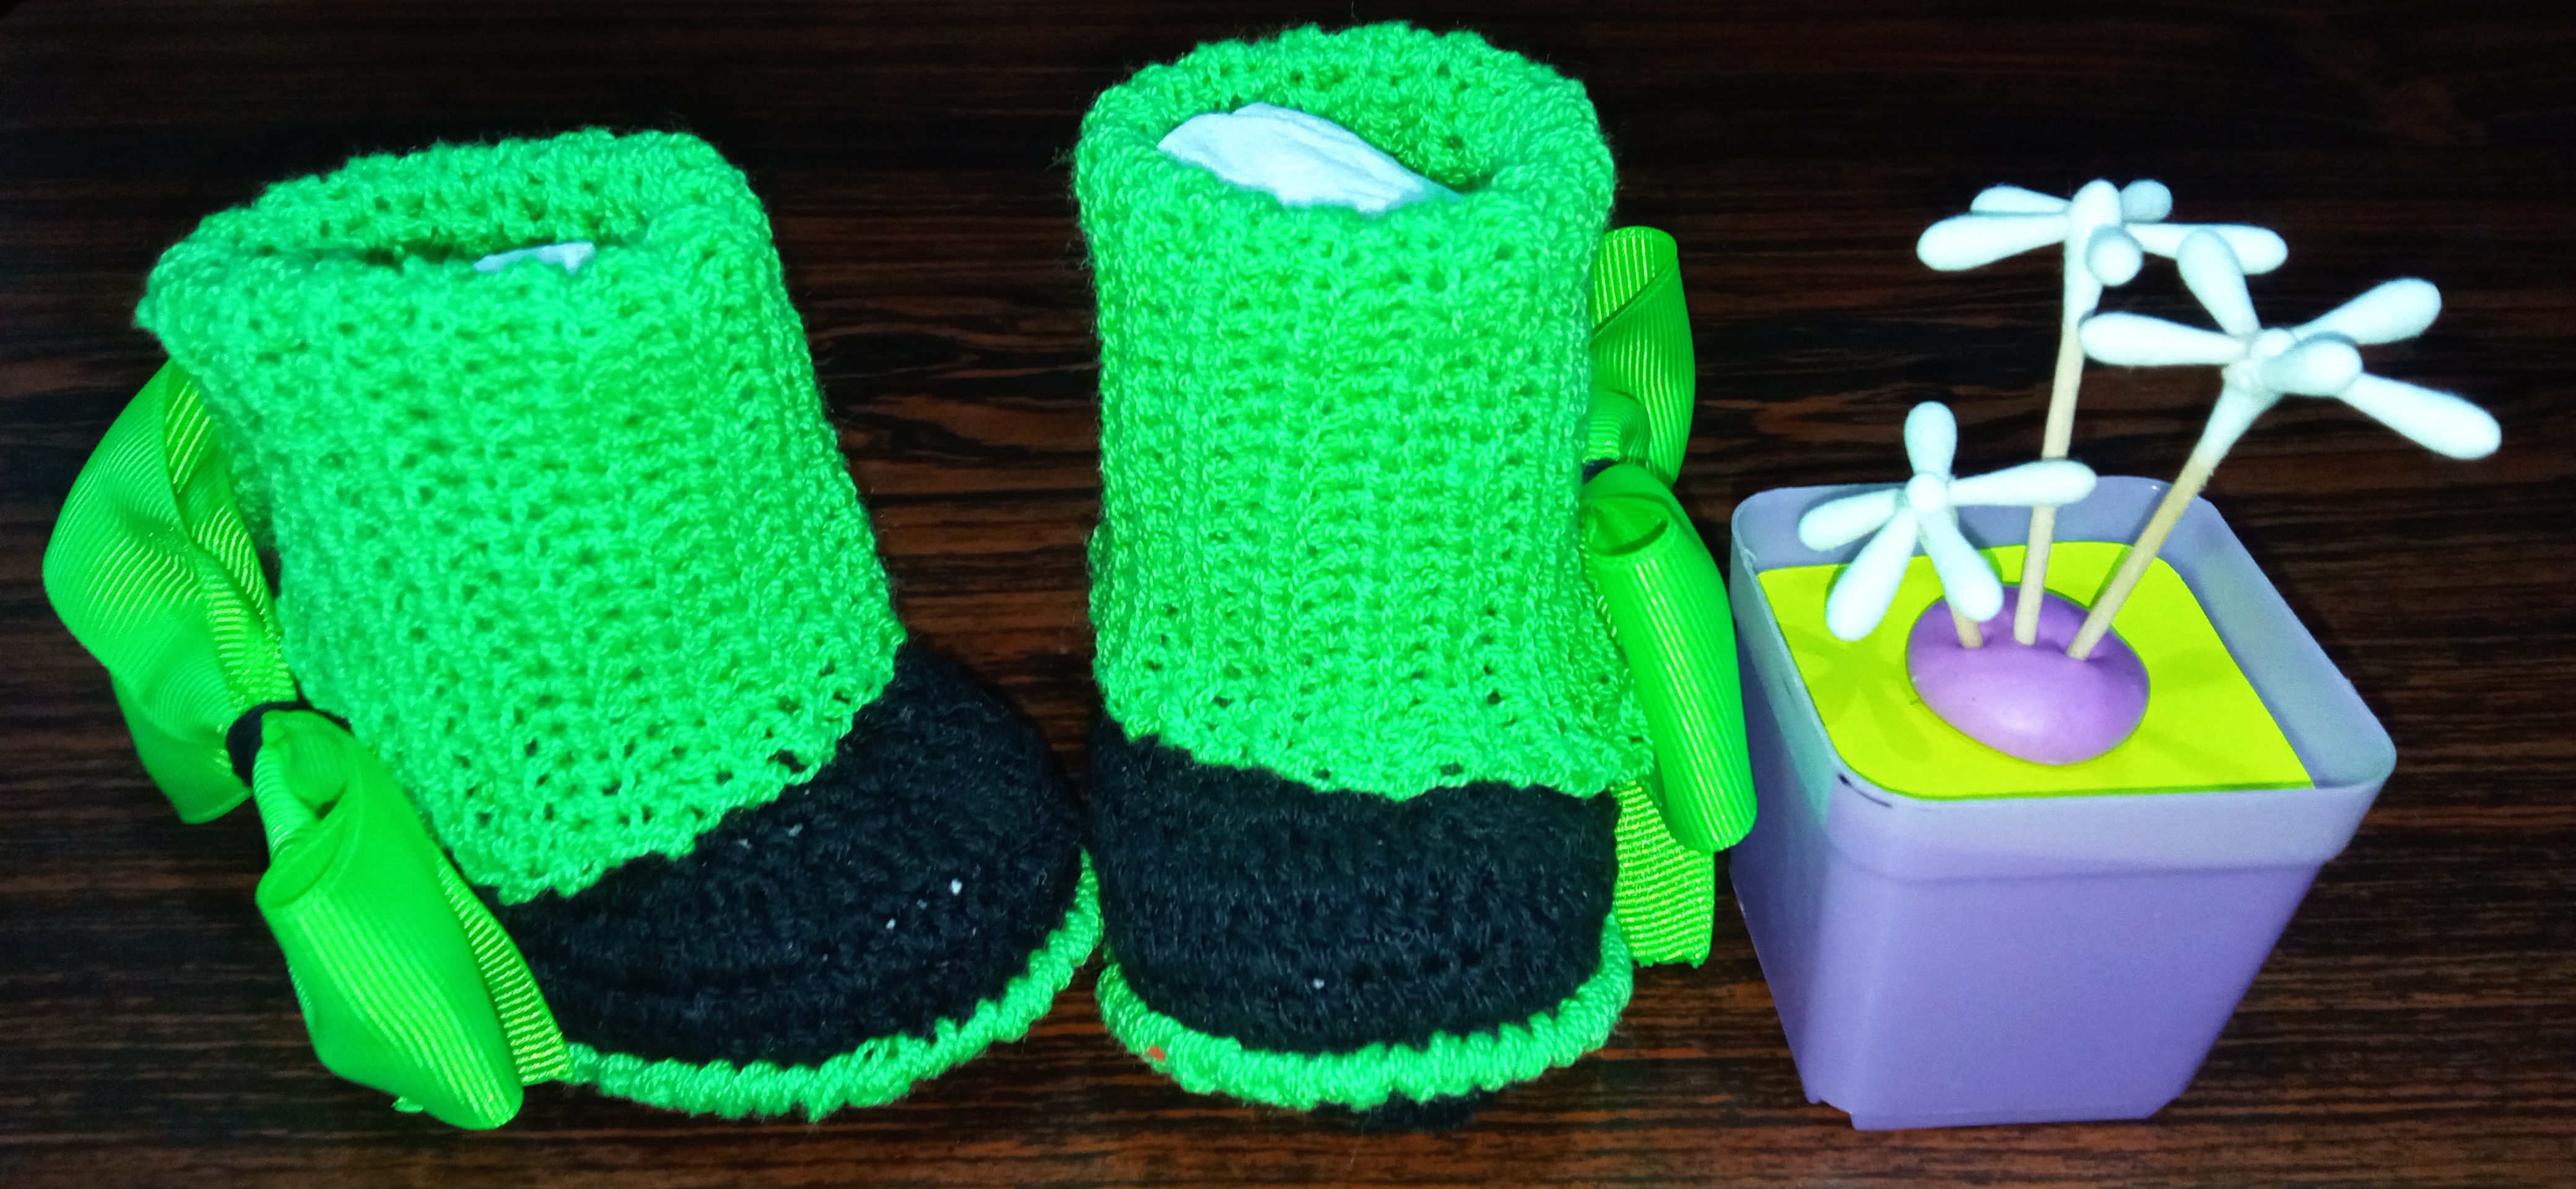
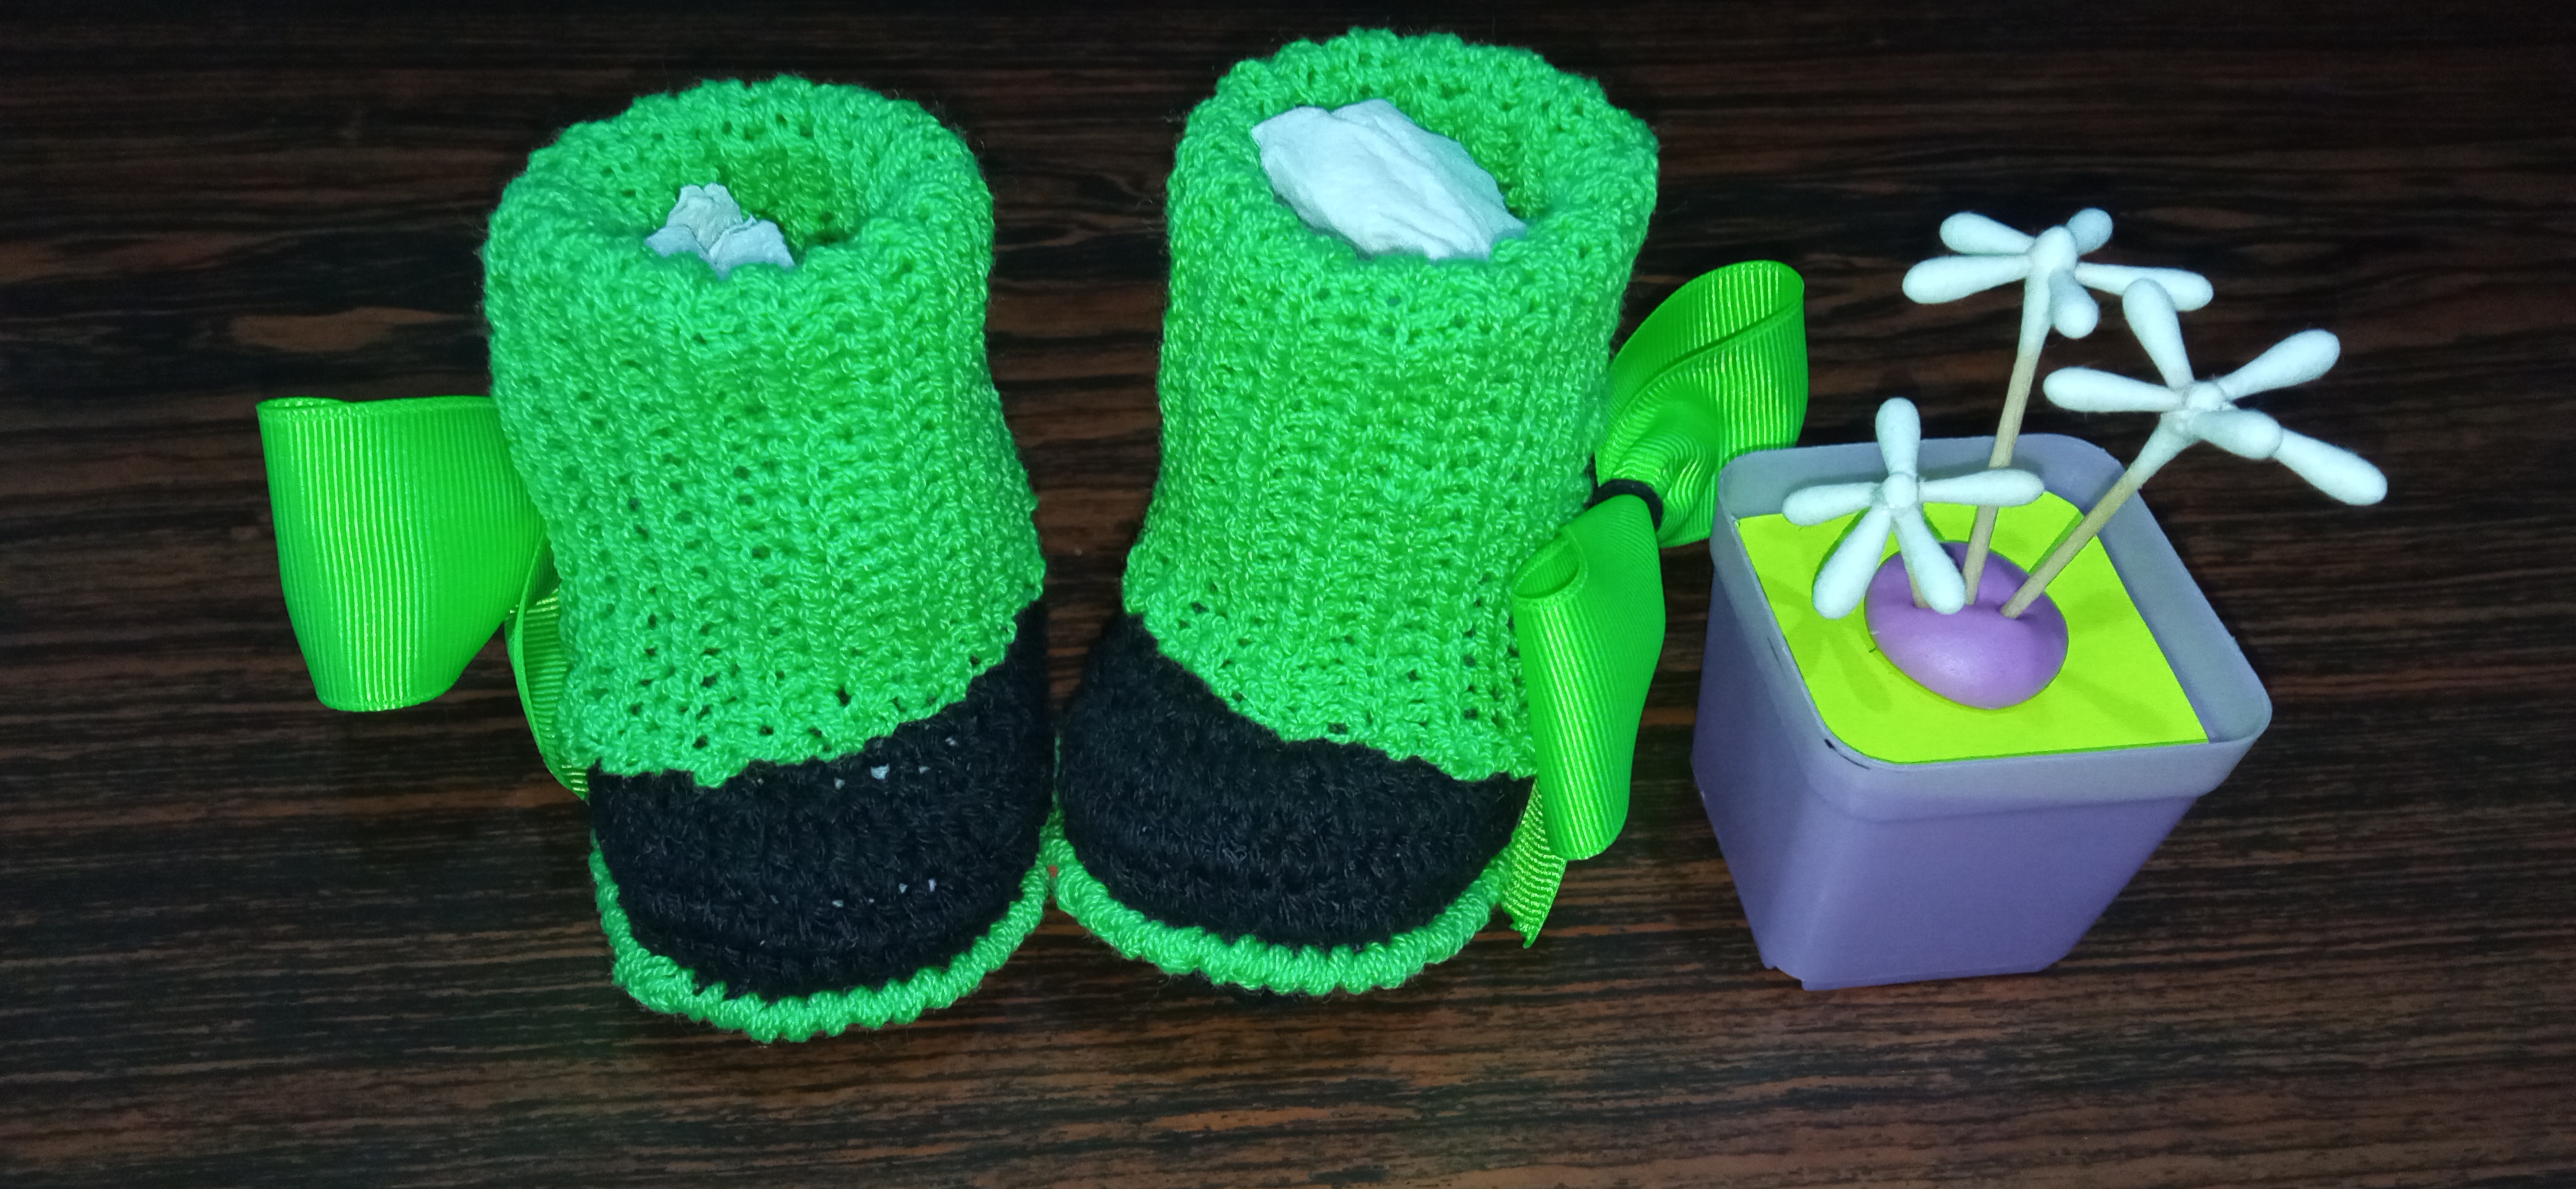
AND THIS WAS THE RESULT OF THE ANKLE BOOTS ❤️🌈 Y ESTE FUE EL RESULTADO DE LOS BOTINES
 |  |  |
Thank you for your visit, see you in another creative opportunity.
Gracias por tu visita, nos vemos en otra oportunidad creativa.
Source: SEPARATORS AND EDITED IN POWER POINT
Fuente: SEPARADORES Y EDITADOS EN POWER POINT
Quedaron hermosos y el color es muy bonito te felicito por tu gran trabajo.
hola, muchas gracias ❤️
Muy buen trabajo, @dloreantdisenos, quedaron hermosas, haré unas a mi nieta siguiendo tus pasos...mucha suerte querida.
que buena idea 💡 me encanta, etiquetarme si lo logras hacer, me encantaría verlos... son laboriosos pero no difícil ❤️
Hola @dloreantdisenos, están muy coquetas las boticas, te felicito.
hola amiga, muchas gracias ❤️
Que bellezas! Se ve que lleva mucho trabajo, por mi parte lo veo muy difícil pero vale la pena al ver tan lindo resultado ♥️
hola cariño, es muy satisfactorio, si tiene trabajo pero con dedicación es que logramos cosas lindas. gracias por visitar mi post. 🤗
Todo lo que se hace tejiendo queda muy lindo y a mi me gusto mucho tu creación ♥️ saludos!
Que hermosas botas, el color es muy bonito y alegre, me gusta la técnica del tejido. Lograste bien la forma de éstas botas, es un buen trabajo. No dejes de compartir.🌹