Creative full color makeup (Eng/Esp)
Good evening my friends and followers of #hive, I hope you are well, it is a pleasure to be sharing a new makeup practice in this community again.
Buenas noches mis amigos y seguidores de #hive, espero estén muy bien, es un gusto estar nuevamente compartiendo una nueva práctica de maquillaje en esta comunidad.
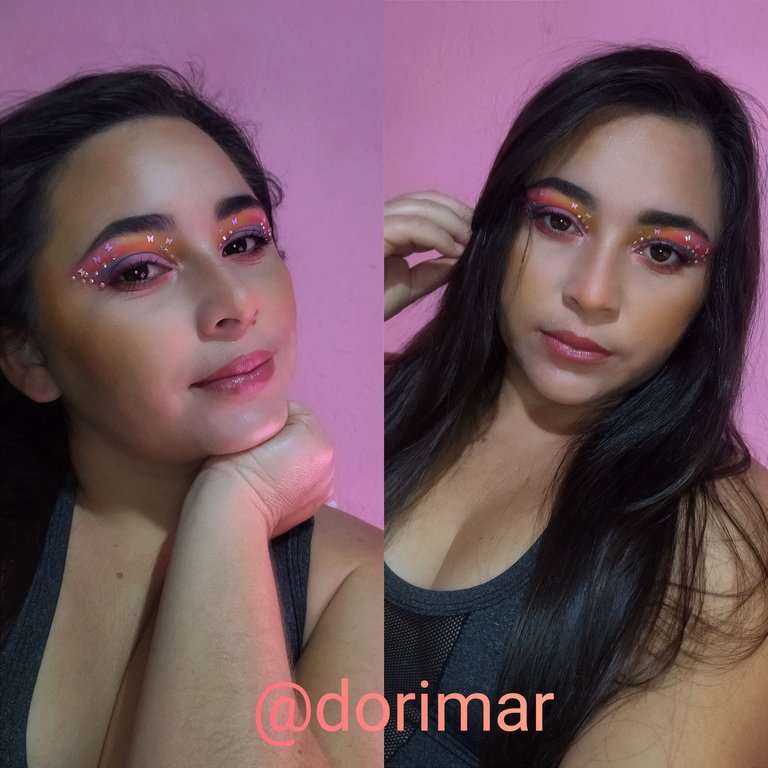
Today I left the routine and took the risk of doing a nice creative makeup with a lot of color to give it a vibrant touch with the new rhinestone trend, I really loved the result, and if you are willing to experiment, here I leave you the step by step of this fabulous makeup.
Hoy salí de la rutina y tomé el riesgo de hacer un lindo maquillaje creativo con mucho color para darle un toque vibrante con la nueva tendencia de pedrería, realmente me encantó el resultado, y si estás dispuesta a experimentar aquí te dejo el paso a paso de este fabuloso maquillaje.
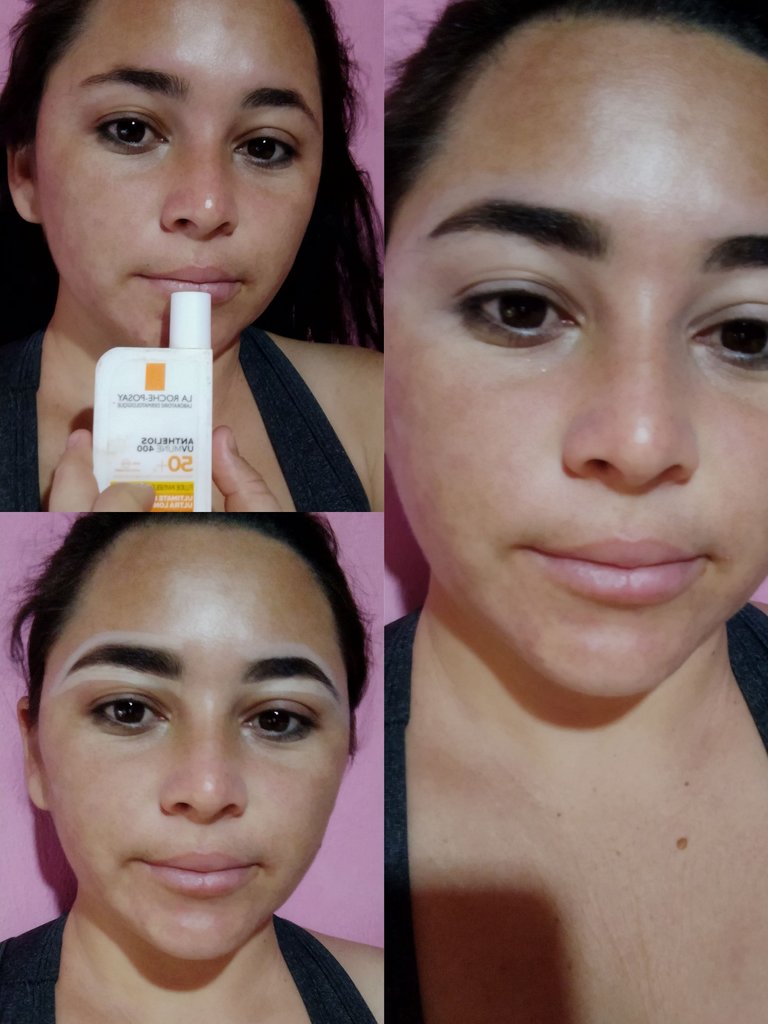
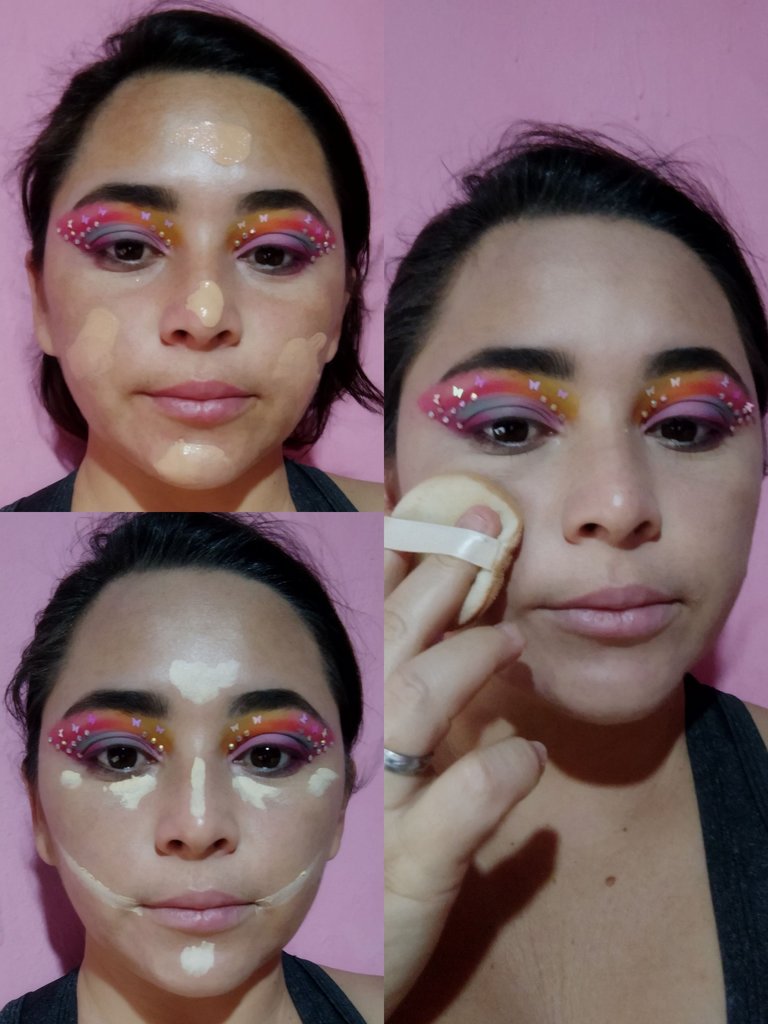
To start with makeup it is necessary to have your face completely clean, I use a neutral soap to wash my face, then I proceed to apply my moisturizer and sunscreen, this helps me keep my skin protected, while the products are absorbed into my skin. I take the opportunity to outline my eyebrows, in this case I use a pomade and an angled brush to fill in the sparse spaces and blur the edges to achieve a natural and uniform finish.
Para comenzar con el maquillaje es necesario tener el rostro completamente limpio, yo uso un jabón neutro para lavar mi cara, luego procedo aplicar mi crema hidratante y protector solar, esto me ayuda a mantener mi piel protegida, mientras los productos se absorben en mi piel aprovecho a perfilar mis cejas, en este caso utilice una pomada y un pincel angular para rellenar los espacios despoblados y difuminar los bordes para lograr un acabado natural y uniforme.
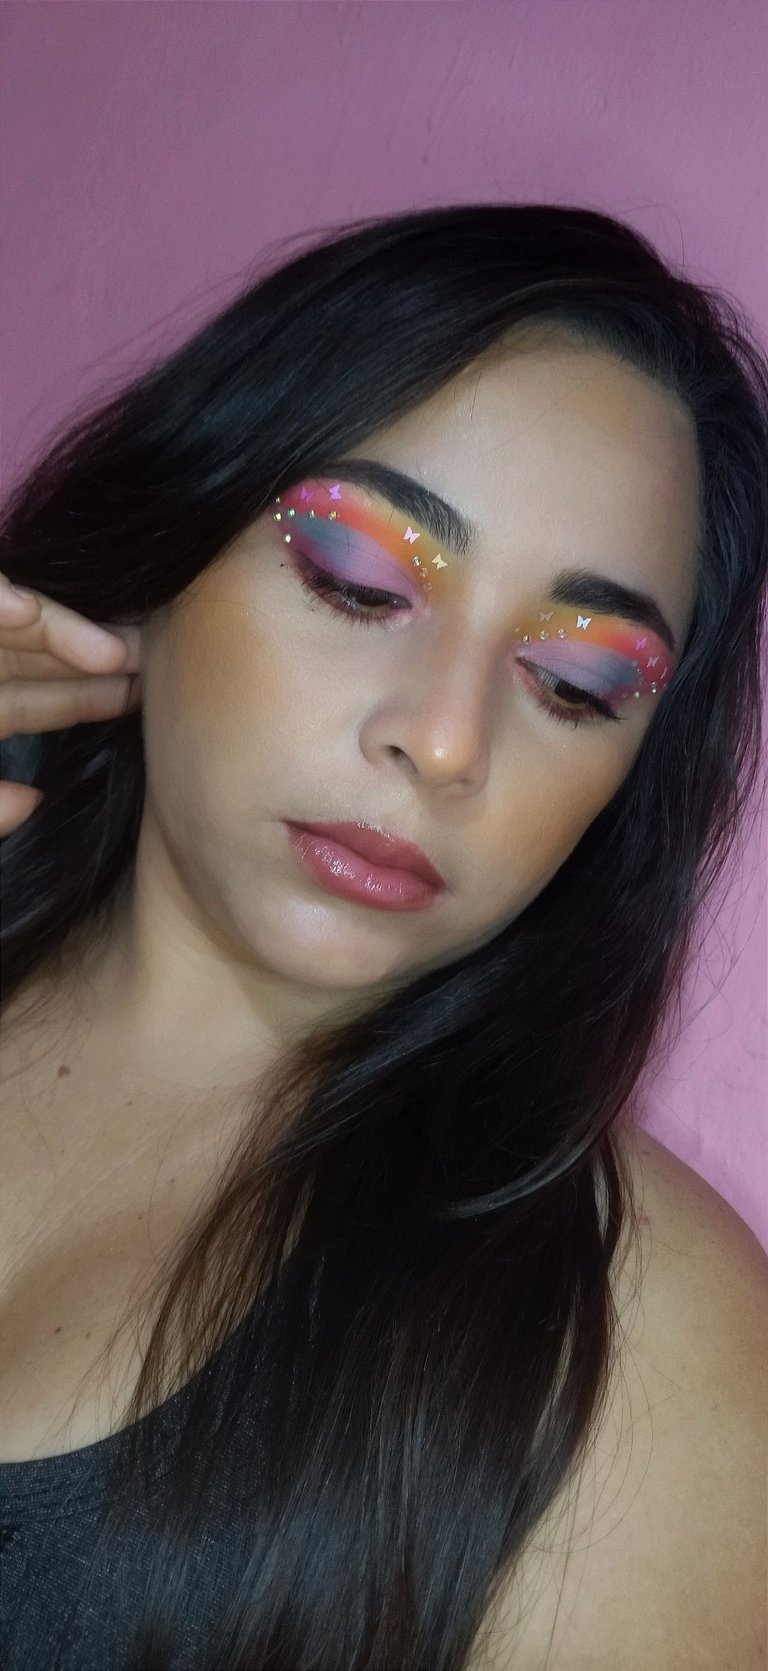
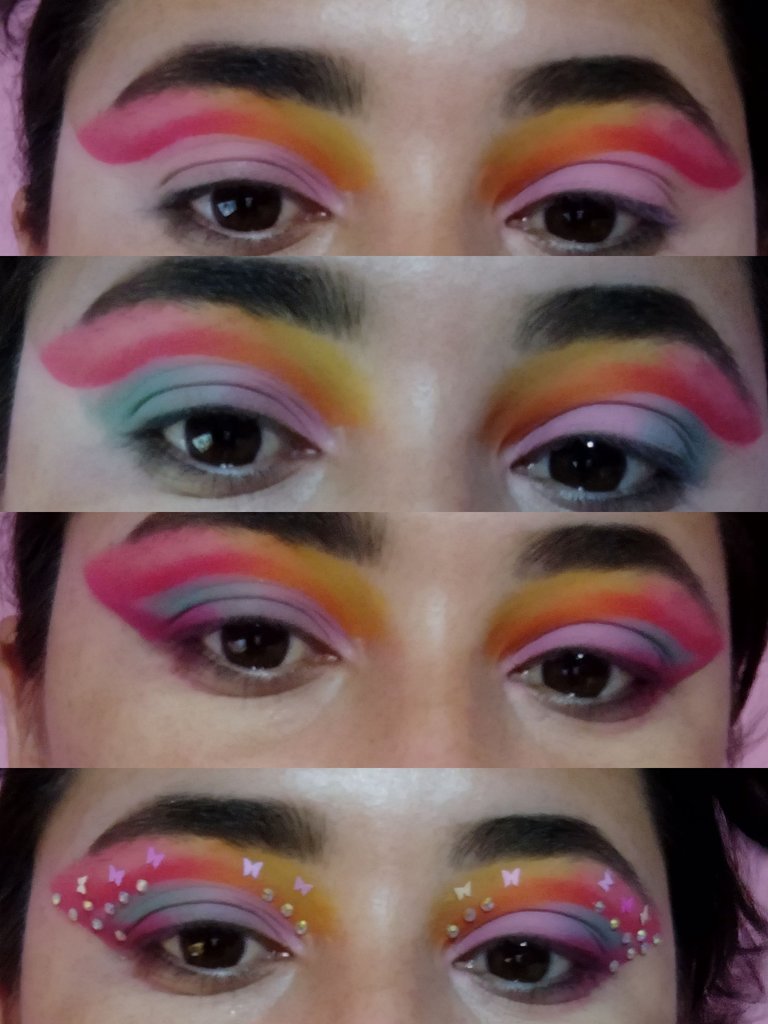
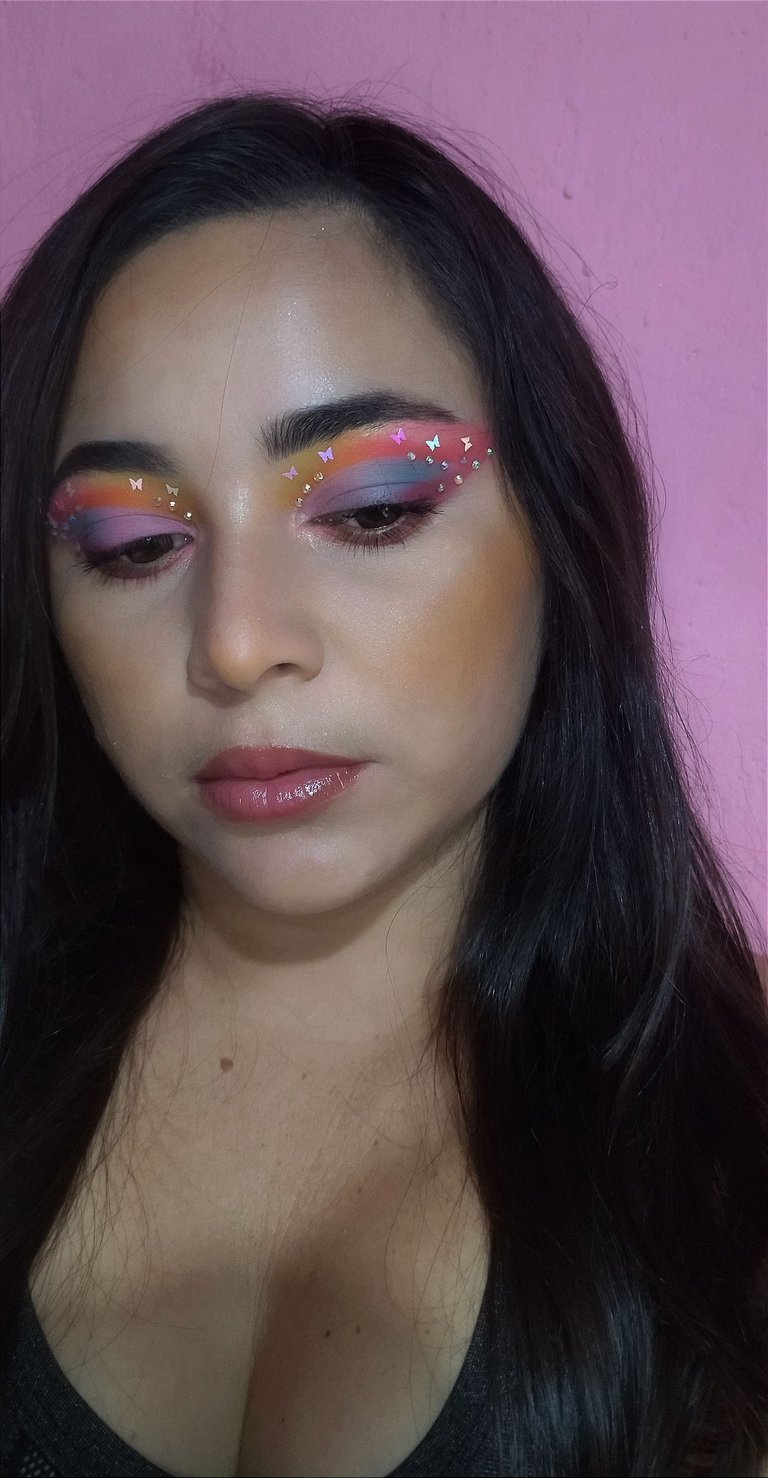
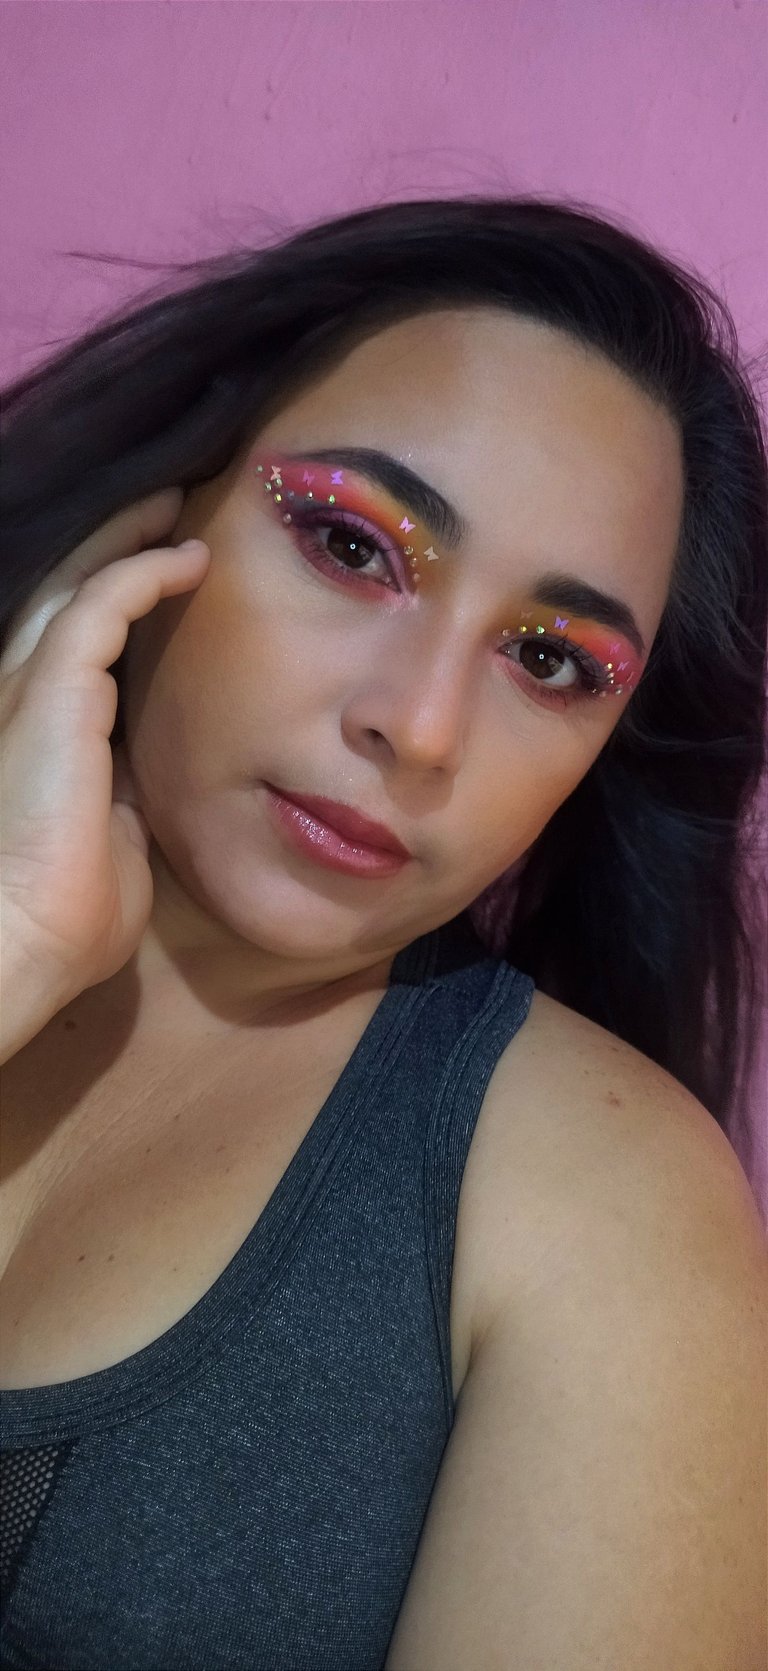
To create this vibrant and colorful eye look, I started by applying a concealer as a primer to ensure longer makeup wear. Then, I combined warm tones like orange and red on the edge of the eye socket, blending with yellow and fuchsia up to the fixed eyelid. To give depth to the look, I made an open crease cut with concealer and sealed it with pink and green tones. Finally, I added a burgundy outline that connected with the red and made a design with rhinestones in the shape of a butterfly to highlight the look.
Para crear este look de ojos vibrante y colorido, comencé aplicando un corrector como prebase para asegurar una mayor duración del maquillaje. Luego, combiné tonos cálidos como naranja y rojo en el borde de la cuenca, difuminando con amarillo y fucsia hasta el párpado fijo. Para darle profundidad a la mirada, realicé un corte de pliegue abierto con corrector y lo sellé con tonos rosado y verde. Finalmente, agregué un delineado vinotinto que conectaba con el rojo y realicé un diseño con pedrería en forma de mariposa para resaltar el look.

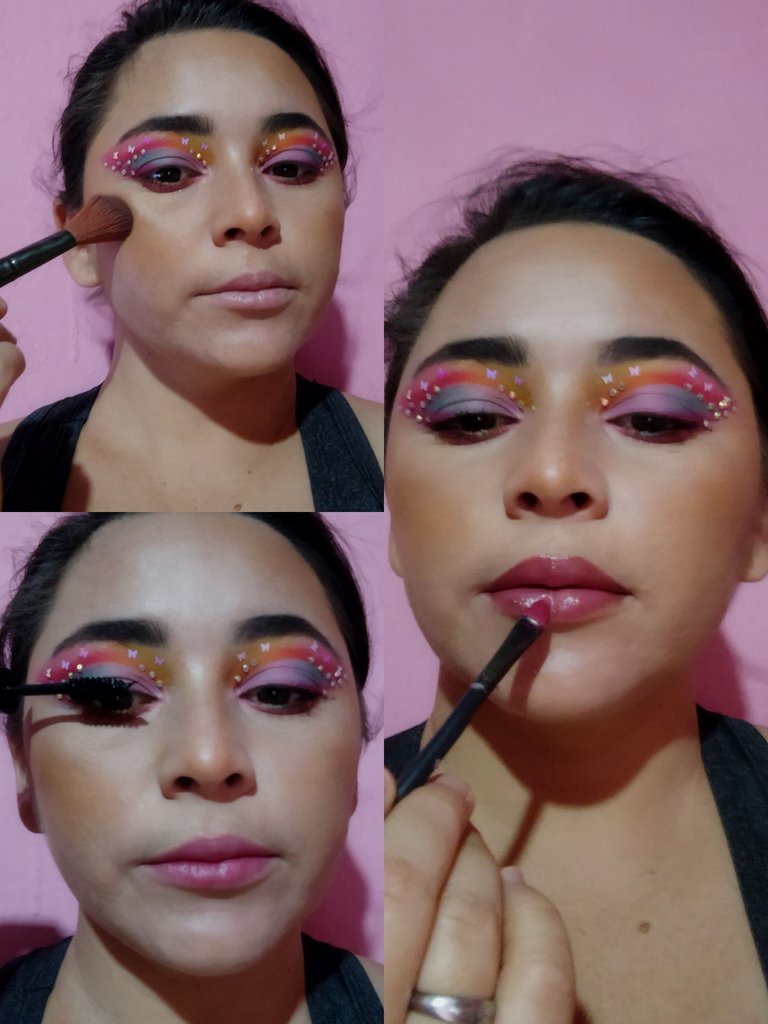
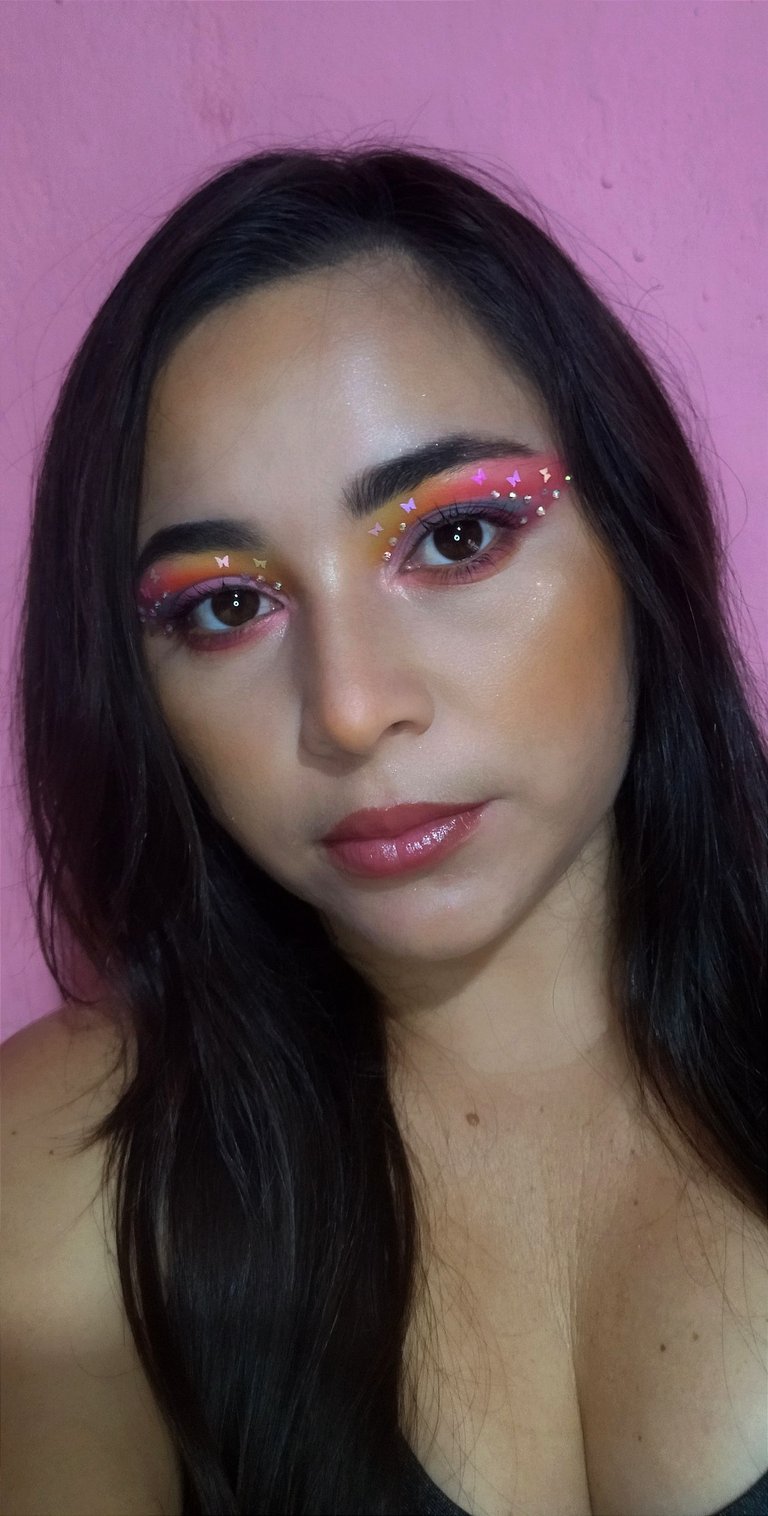
For a flawless finish, I applied the foundation with a soft, damp sponge, using circular motions for even coverage. Then, I used a high-coverage concealer to blur dark circles and imperfections in the "T" zone, then sealing it with a translucent powder to ensure its hold. Next, I did a subtle contour on my cheekbones and jawline to highlight my features. I applied a peach blush to give a touch of color and vitality to my cheeks, and finished with a cream highlighter on strategic points such as the browbone, nasal bone and chin to add luminosity. To complete the look, I applied two coats of mascara on the upper and lower lashes, and a nude lip gloss for a natural and sensual touch.
Para lograr un acabado impecable, apliqué la base de maquillaje con una esponja suave y húmeda, realizando movimientos circulares para una cobertura uniforme. Luego, utilicé un corrector de alta cobertura para difuminar las ojeras e imperfecciones en la zona "T", sellándolo posteriormente con un polvo traslúcido para asegurar su fijación. A continuación, realicé un contorno sutil en pómulos y mandíbula para resaltar mis facciones. Apliqué un rubor en tono melocotón para dar un toque de color y vitalidad a mis mejillas, y finalicé con un iluminador en crema en puntos estratégicos como el arco de la ceja, el hueso nasal y el mentón para aportar luminosidad. Para completar el look, apliqué dos capas de máscara de pestañas en las pestañas superiores e inferiores, y un brillo labial en tono nude para un toque natural y sensual.
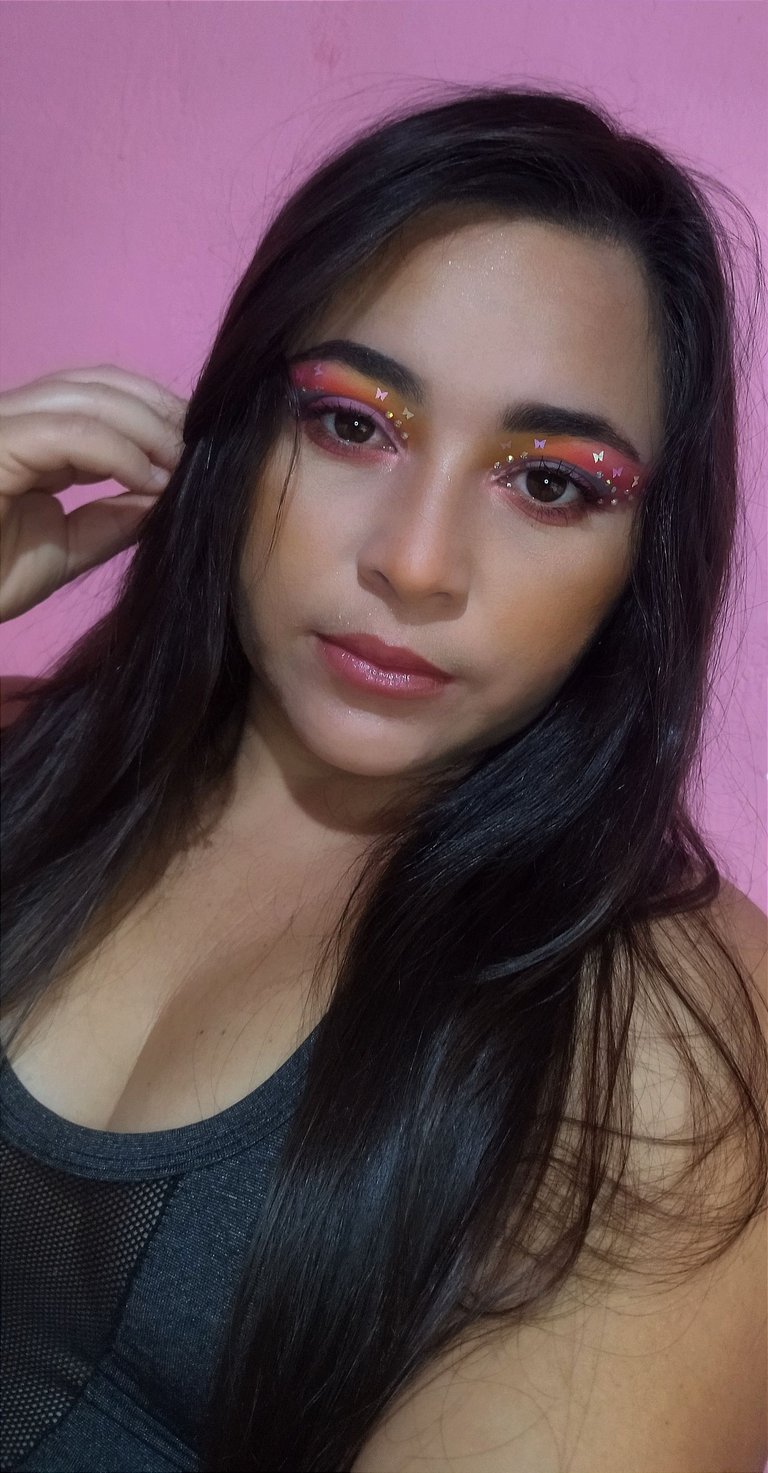
This is the final result of my pretty makeup. I hope you liked it and are encouraged to recreate it. If you have any questions about the steps or products I used, don't hesitate to leave me a comment. Good night everybody!
Este es el resultado final de mi lindo maquillaje. Espero que les haya gustado y se animen a recrearlo. Si tienen alguna duda sobre los pasos o productos que utilicé, no duden en dejarme un comentario. ¡Feliz noche a todos!


!LOL
Posted using Hive Images
lolztoken.com
Because he always has a great fall!
Credit: reddit
@dorimar, I sent you an $LOLZ on behalf of hivephoto
(2/10)
Farm LOLZ tokens when you Delegate Hive or Hive Tokens.
Click to delegate: 10 - 20 - 50 - 100 HP