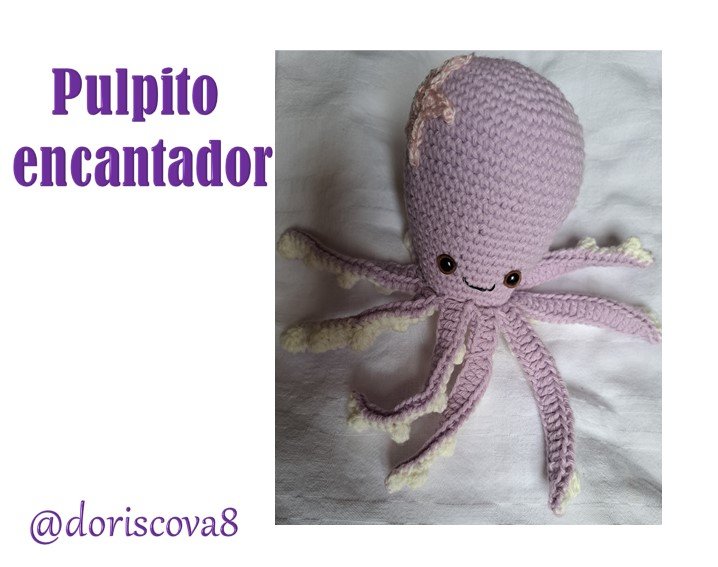
Pulpito encantador//Charmin little octopus[ESP-ENG]
Español
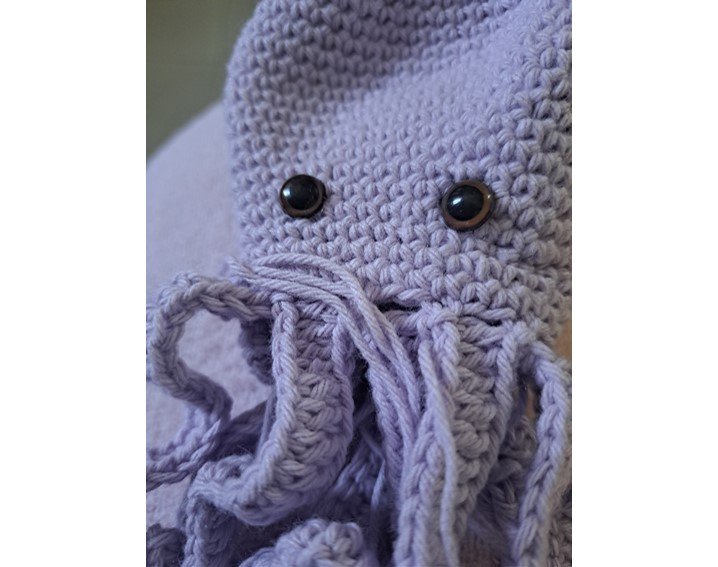
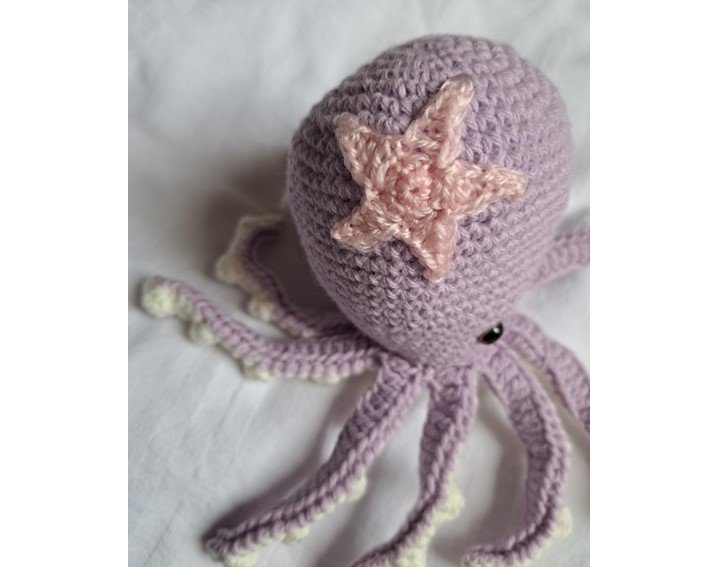
Saludos estimados Hivers de esta hermosa colmena, feliz inicio de semana que les sea muy provechosa esta semana para la ejecución de sus proyectos y que tengan muchos éxitos, por acá, estamos nuevamente presentándoles un hermoso y tierno proyecto que es muy bueno para los bebes ya que los tentáculos se le asemeja a el cordón umbilical.
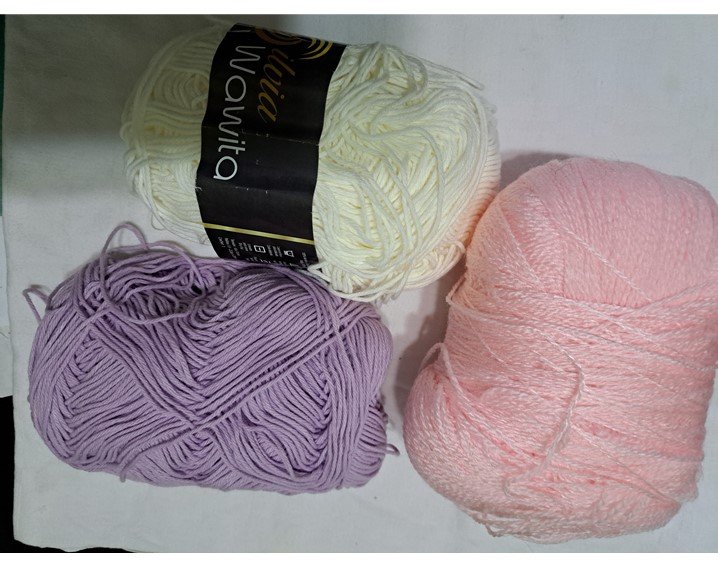
Para este proyecto utilice lana de color lila para la parte superior de la cabeza y para la base y parte inferior de los tentáculos lana de color arena, estos son de la marca wawita poquito de otra lana rosada, todas estas lanas son apropiadas para tejerle prendas a los bebes.
Procedimiento
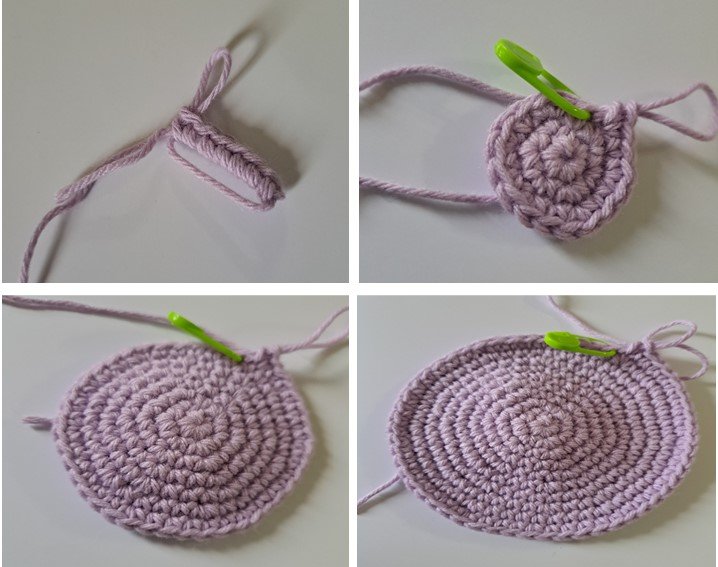
Cabeza
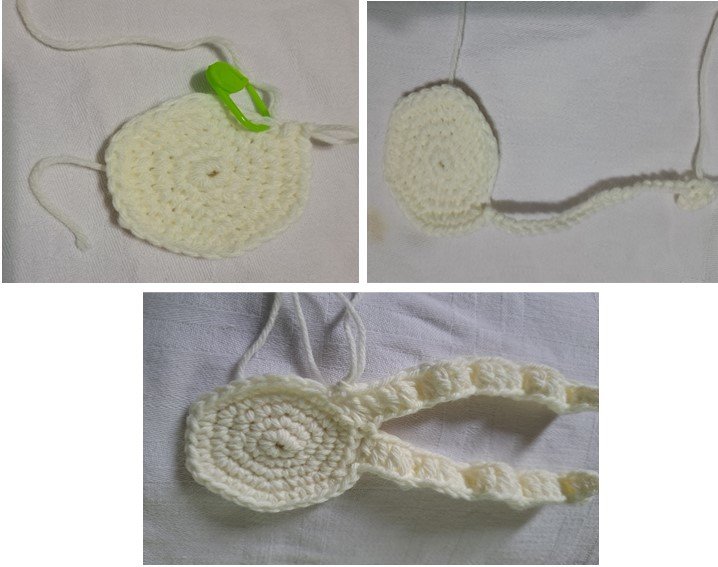
Para la realización de la cabeza iniciamos con 1 anillo mágico de 6 puntos bajos, en la segunda vuelta se realizan 6 aumentos de puntos bajos, en la vuelta 3, se realizan 1 punto bajo y 1 aumento por 6 veces, en la vuelta 4, se realizan 2 puntos bajos y 1 aumento por 6 veces, en la vuelta 5, se realizan 3 puntos bajos y 1 aumento por 6 veces, en la vuelta 6 se realizan 4 puntos bajos y 1 aumento por 6 veces, en la vuelta 7 se realizan 5 puntos bajos y 1 aumento por 6 veces.
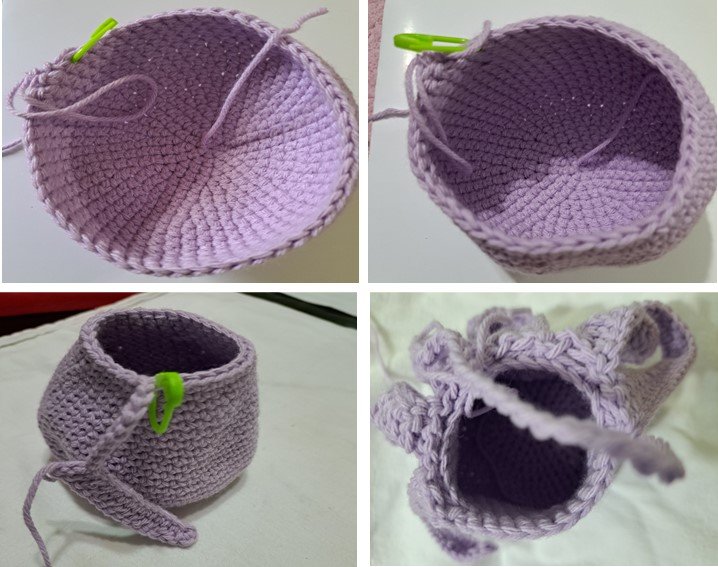
En la vuelta 8 se realizan 6 puntos bajos y 1 aumento por 6 veces, en la vuelta 9 se realizan 7 puntos bajos y 1 aumento por 6 veces; de la vuelta 10 a la vuelta 15 solo se realizan puntos bajos, la vuelta 16 se realizan 7 puntos bajos y 1 disminución por 6 veces, de la vuelta 17 a la 18 solo se realizan puntos bajos, en la vuelta 19 se realizan 6 puntos bajos y 1 disminución, las vueltas 20 y 21 solo se realizan puntos bajos sin aumentos ni disminuciones, en la vuelta 22 se realizan 5 puntos bajos y 1 disminución por 6 veces, las vueltas 23 y 24 solamente puntos bajos; la vuelta 25 se realizan 4 puntos bajos y 1 disminución y las vueltas 26 y 27 solamente se realizan puntos bajos, luego viene la realización de los tentáculos.
Se continua con los tentáculos, y para ello realiza un punto deslizado y 24 cadenas, se retorna en la tercera cadena realizando un medio punto alto, se realiza otro medio punto alto y se continua con 20 puntos altos, todo ellos se van a realizar tomando la hebra interna trasera de la cadena y culminamos con un punto deslizado saltando dos puntos de donde empezamos el tentáculo, de esa manera vamos a realizar 9 tentáculos más.
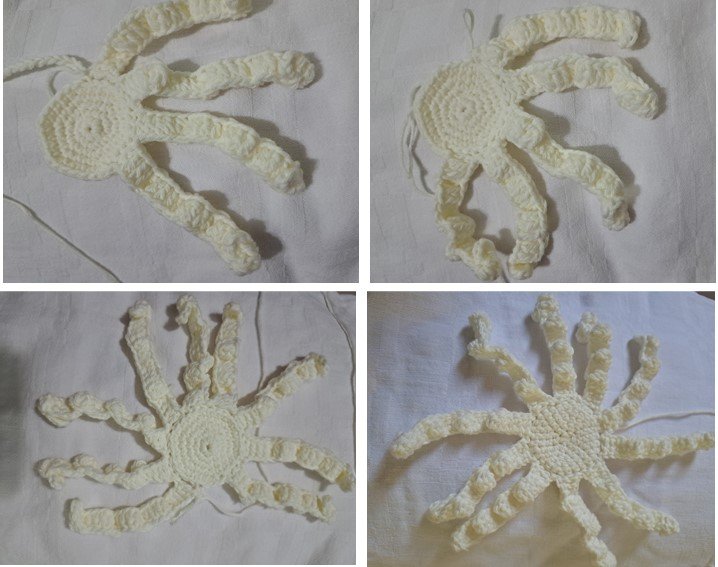
Base
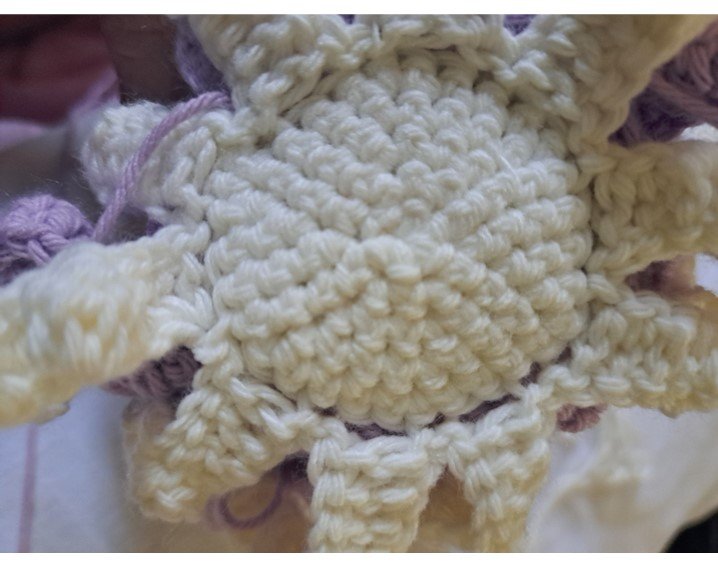
Para la base la realizamos en el color arena, tejemos igual que la cabeza hasta la vuelta 5, y de allí vamos a realizar la parte inferior de los tentáculos; para ello iniciaremos también con un punto deslizado y 24 cadenas, retornamos realizando 1 medio punto alto en la tercera cadena, siempre tomando la hebra trasera, luego hacemos otro medio punto alto, seguidamente realizamos un punto popcorn, que no es más que realizar en el mismo punto 4 puntos altos y solamente se cierra en el ultimo punto, luego realizamos 4 puntos altos y seguidamente otro punto popcorn y así sucesivamente, teniendo en cuenta que se deben realizar a lo largo de la cadena 4 puntos popcorn intercalados de 4 puntos altos; de esa forma vamos a realizar los 10 tentáculos.
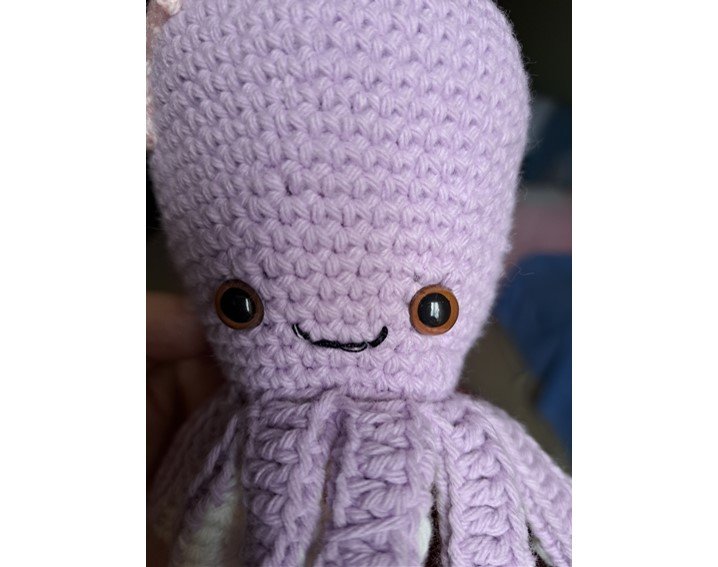
Colocamos los ojitos antes de pegar la base, luego empezamos a pegar la base teniendo cuidado que los tentáculos superiores coincidan con los inferiores, ya que estos deben cuadrar perfectamente porque tienen los mismos puntos, antes de culminar por completo de pagar la base colocamos el relleno, y luego terminamos de pegar la base.
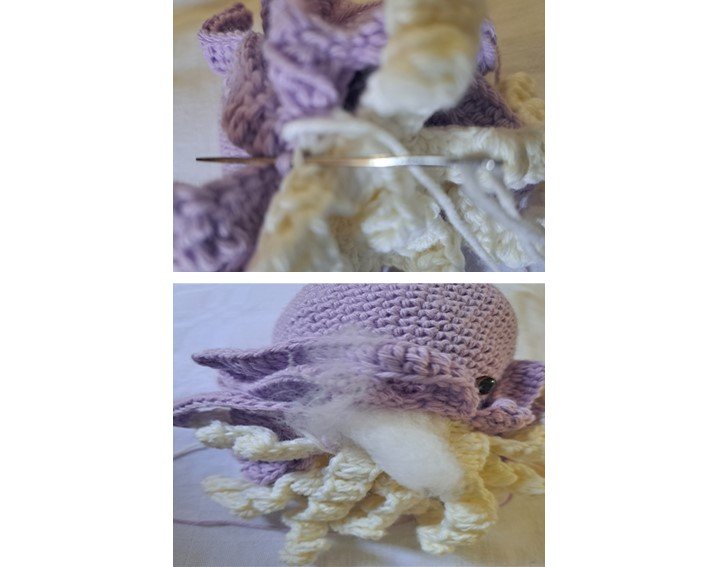
Luego viene la unión de los tentáculos superiores con los inferiores, siempre agarrando la hebra trasera y se realiza con hilo con el que tejimos la cabeza, como dije anteriormente ellos cuadran perfectamente, y se debe unir puntada por puntada.

Estrellita de adorno
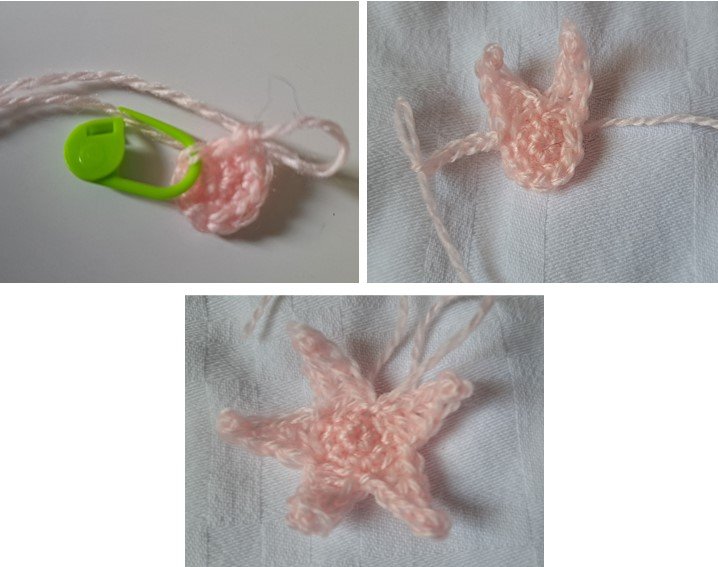
Para ello iniciamos con 1 anillo mágico de 5 puntos bajos, se hace una segunda vuelta realizando un aumento en cada punto, luego hacemos un punto deslizado y 5 cadenas, retornamos en la segunda cadena con un punto deslizado, luego un punto bajo, un medio punto alto y 1 punto alto, saltamos 1 punto y realizamos 1 punto deslizado, y repetimos el procedimiento, al realizar la 5ta punta rematamos y lo colocamos en la cabeza del pulpito.
Con hilo de coser se le borda la boquita.
English
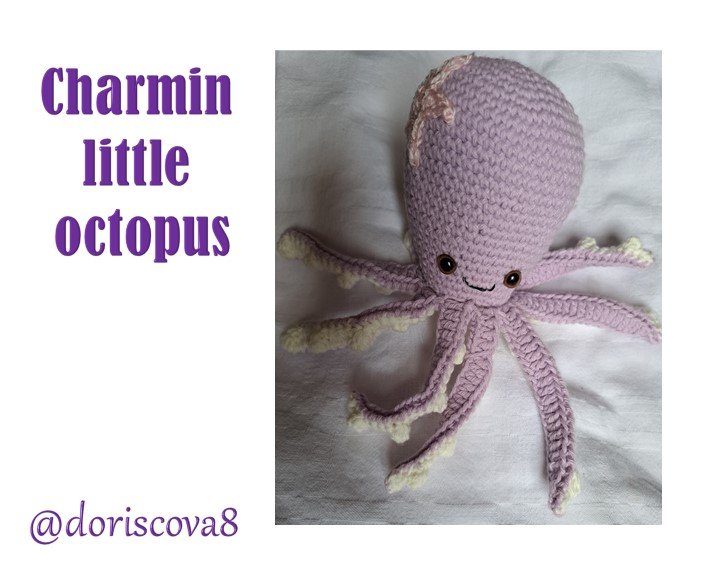
Greetings dear Hivers of this beautiful hive, happy beginning of the week, may this week be very profitable for the execution of your projects and may you have many successes, here we are again presenting you a beautiful and tender project that is very good for babies because the tentacles resembles the umbilical cord.
For this project I used lilac colored yarn for the top of the head and for the base and bottom of the tentacles I used sand colored yarn, these are from the brand wawita little bit of other pink yarn, all these yarns are suitable for knitting garments for babies.
Procedure
Head
To make the head we start with 1 magic ring of 6 single crochet stitches, in the second row we make 6 double crochet increases, in row 3, we make 1 single crochet and 1 increase for 6 times, in row 4, we make 2 double crochet and 1 increase for 6 times, in row 5, we make 3 double crochet and 1 increase for 6 times, in row 6 we make 4 double crochet and 1 increase for 6 times, in row 7 we make 5 double crochet and 1 increase for 6 times.
In row 8, 6 single crochets and 1 increase 6 times, in row 9, 7 single crochets and 1 increase 6 times; from row 10 to row 15 only single crochets, in row 16 7 single crochets and 1 decrease 6 times, from row 17 to 18 only single crochets, in row 19 6 single crochets and 1 decrease, in rows 20 and 21 only single crochets without increases or decreases, in row 22 5 single crochets and 1 decrease 6 times, in rows 23 and 24 only single crochets; in row 25 you knit 4 single crochets and 1 decrease and in rows 26 and 27 you knit only single crochets, then you knit the tentacles.
We continue with the tentacles, and for this we make a slip stitch and 24 chains, we return in the third chain making a half high stitch, we make another half high stitch and we continue with 20 high stitches, all of them are going to be made taking the inside back strand of the chain and we finish with a slip stitch skipping two stitches from where we started the tentacle, in this way we are going to make 9 more tentacles.
Base
For the base we knit it in the color sand, we knit the same as the head up to row 5, and from there we will knit the lower part of the tentacles; for this we will also start with a slipped stitch and 24 chains, we return making 1 half slip stitch in the third chain, always taking the back strand, then we make another half slip stitch, then we make a popcorn stitch, which is nothing more than making 4 high stitches in the same stitch and only closes in the last stitch, then we make 4 high stitches and then another popcorn stitch and so on, taking into account that we must make along the chain 4 popcorn stitches interspersed with 4 high stitches; in this way we will make the 10 tentacles.
We place the little eyes before gluing the base, then we start gluing the base taking care that the upper tentacles coincide with the lower ones, since they must match perfectly because they have the same stitches, before completely paying the base we place the stuffing, and then we finish gluing the base.
Then comes the union of the upper tentacles with the lower ones, always grabbing the back strand and it is done with the thread with which we knit the head, as I said before they match perfectly, and must be joined stitch by stitch.
Little star ornament
To do this we start with 1 magic ring of 5 low stitches, we make a second round making an increase in each stitch, then we make a slipped stitch and 5 chains, we return in the second chain with a slipped stitch, then a low stitch, a half high stitch and 1 high stitch, we skip 1 stitch and make 1 slipped stitch, and repeat the procedure, when we make the 5th point we finish off and place it on the head of the pulpit.
The mouth is embroidered with sewing thread.
Translated with www.DeepL.com/Translator (free version)
Fuente de imágenes: Archivo Personal.


MIS REDES SOCIALES


Querida amiga ese pulpo te quedó bellísimo, me encanta la forma y detalles que le agregas a los tentáculos. Me animaré a tejer uno a ver qué tal me va.
Saludos
Gracias por tus comentarios, pues si animate es rápido de tejer, un poco fastidioso pegar las partes de los tentáculos, pero si se puede, adelante, saludos!
Gracias por la motivación.
Hola @doriscova8, que cuchi se ve el pulpo, está perfecto para decorar la habitación de los bebés, has hecho un lindo trabajo.
Feliz noche!
Si amiga @belkyscabrera para los niños me pareció perfecto, también para decorar la habitación como sugieres, saludos!
¡Bello! Se ve tierno y delicado. Te felicito. Gracias por compartir este proyecto tan bonito. Saludos.
Gracias por tus comentarios @aurodivys, siempre a la orden, saludos!
Un trabajo bellísimo, me gustó mucho.
!discovery 35
Gracias por tus comentarios @gaboamc2393, saludos!
This post was shared and voted inside the discord by the curators team of discovery-it
Join our Community and follow our Curation Trail
Discovery-it is also a Witness, vote for us here
Delegate to us for passive income. Check our 80% fee-back Program
Thank you for your support
Thank you for using the #diy tag.
As long as you keep growing your BUIDL POWER you will receive my support.
Upvoted.
Check out this post for more information about BUIDL tokens.
Congratulations @doriscova8! You have completed the following achievement on the Hive blockchain And have been rewarded with New badge(s)
Your next target is to reach 800 comments.
You can view your badges on your board and compare yourself to others in the Ranking
If you no longer want to receive notifications, reply to this comment with the word
STOPTo support your work, I also upvoted your post!
Check out our last posts:
Hola Doris. Que adorable que te quedó este proyecto de pulpito, me gusta el color de la lana, fue perfecto para este trabajo. Que bueno que pudiste terminarlo, quedó genial.
Te felicito y te deseo un buen martes. Saludos ❤️-.
Gracias @lauramica por tus comentarios, si me encanta esa lana es divina para tejer y para las cosas de los niños ideal, saludos!