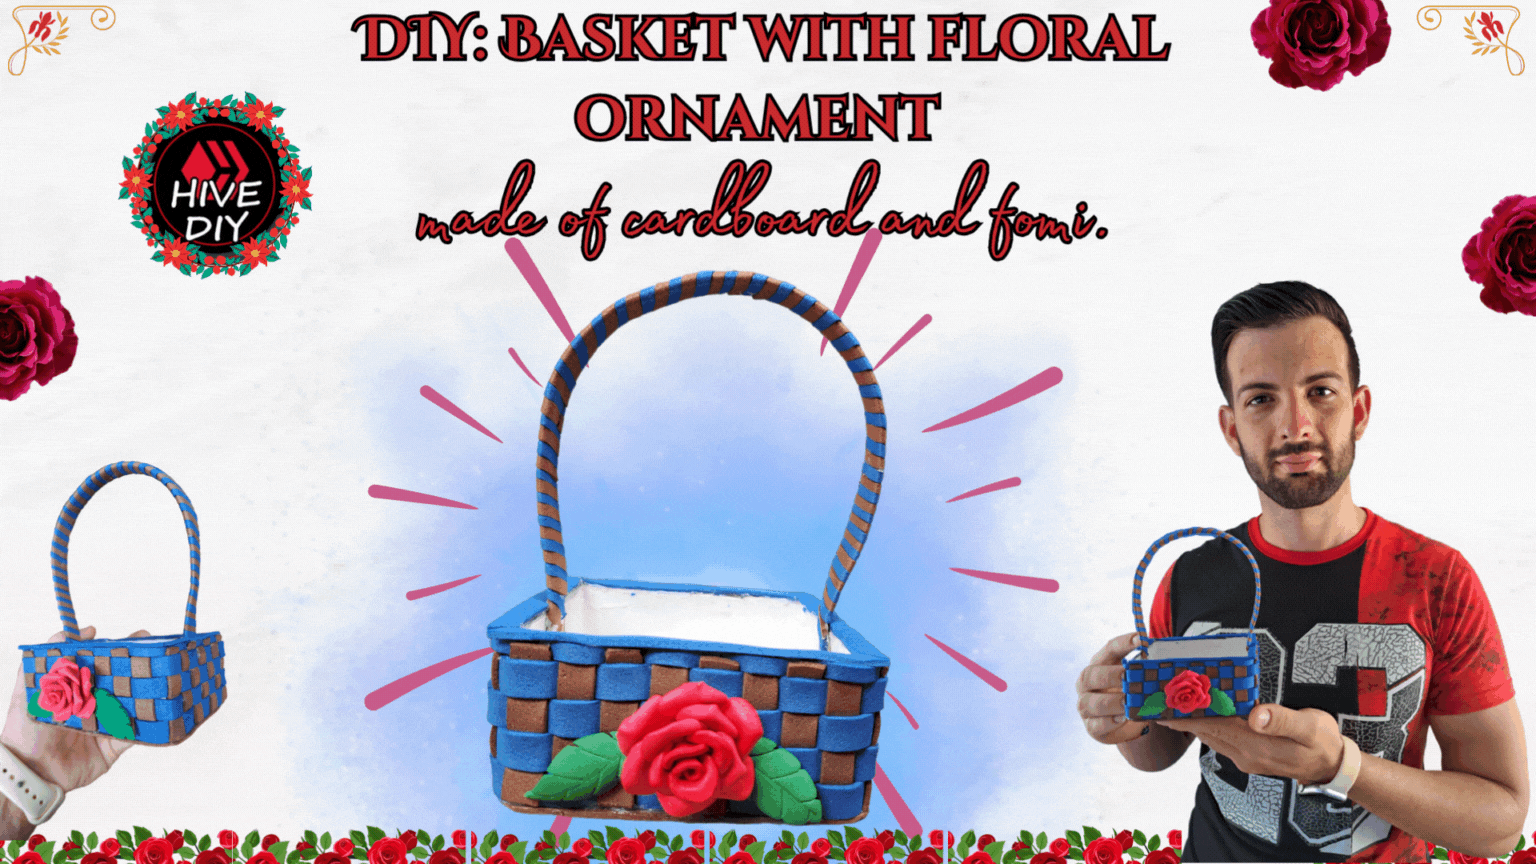
♻️ DIY: Basket with floral ornament made of cardboard and fomi. // ♻️ DIY: Cesta con adorno floral de cartón y fomi. [ESP+ENG]
Greetings to all my dear creators! I am very happy to be back here to share with you one of my crafts. Today I bring you a tutorial on how to make a small cardboard and foam basket that can be used as a gift container. In this basket, you can give sweets, accessories, or some handmade detail. It can even be used as an organizer or jewelry box.
When creating this basket, my intention was to use it as a gift for the past March 8th, but due to personal matters, I couldn't do the tutorial on that date. That's why I bring you the tutorial today.
! [English Version Here]
¡Saludos a todos mis queridos amigos creadores! Me alegra mucho estar de vuelta aquí para compartir con ustedes una de mis manualidades. Hoy les traigo un tutorial sobre cómo hacer una pequeña cesta de cartón y fomi que puede ser utilizada como recipiente para un regalo. En esta cesta se pueden regalar golosinas, accesorios o algún detalle hecho a mano. Incluso puede ser utilizada como organizador o joyero.Al crear esta cesta, mi intención era utilizarla como regalo para el pasado 8 de marzo, pero debido a asuntos personales no pude realizar el tutorial en esa fecha. Por eso, hoy les traigo el tutorial.
✂️ Materiales // Materials ✂️
| ✔️ Láminas de fomi liso café, azul, rojo y verde | ✔️ Sheets of plain brown, blue, red, and green foam |
| ✔️ Caja de cartón pequeña | ✔️ Small cardboard box |
| ✔️ Silicona caliente | ✔️ Hot glue gun |
| ✔️ Tijera | ✔️ Scissors |
| ✔️ Marcador | ✔️ Marker |
| ✔️ Cútter recto y redondo | ✔️ Straight and round cutter |
| ✔️ Regla | ✔️ Rule |

📋 Paso a paso // Step by step 📋
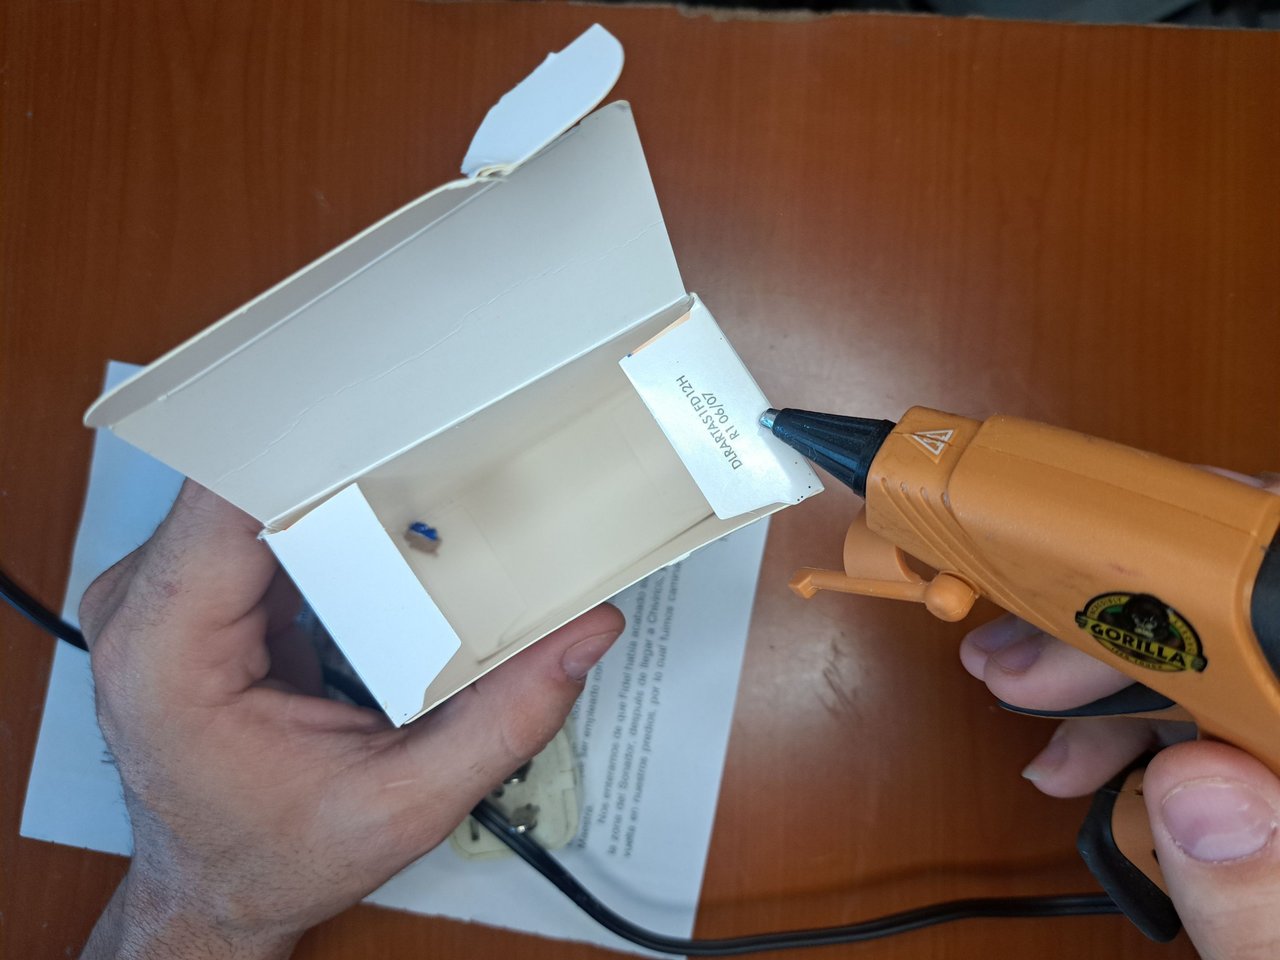
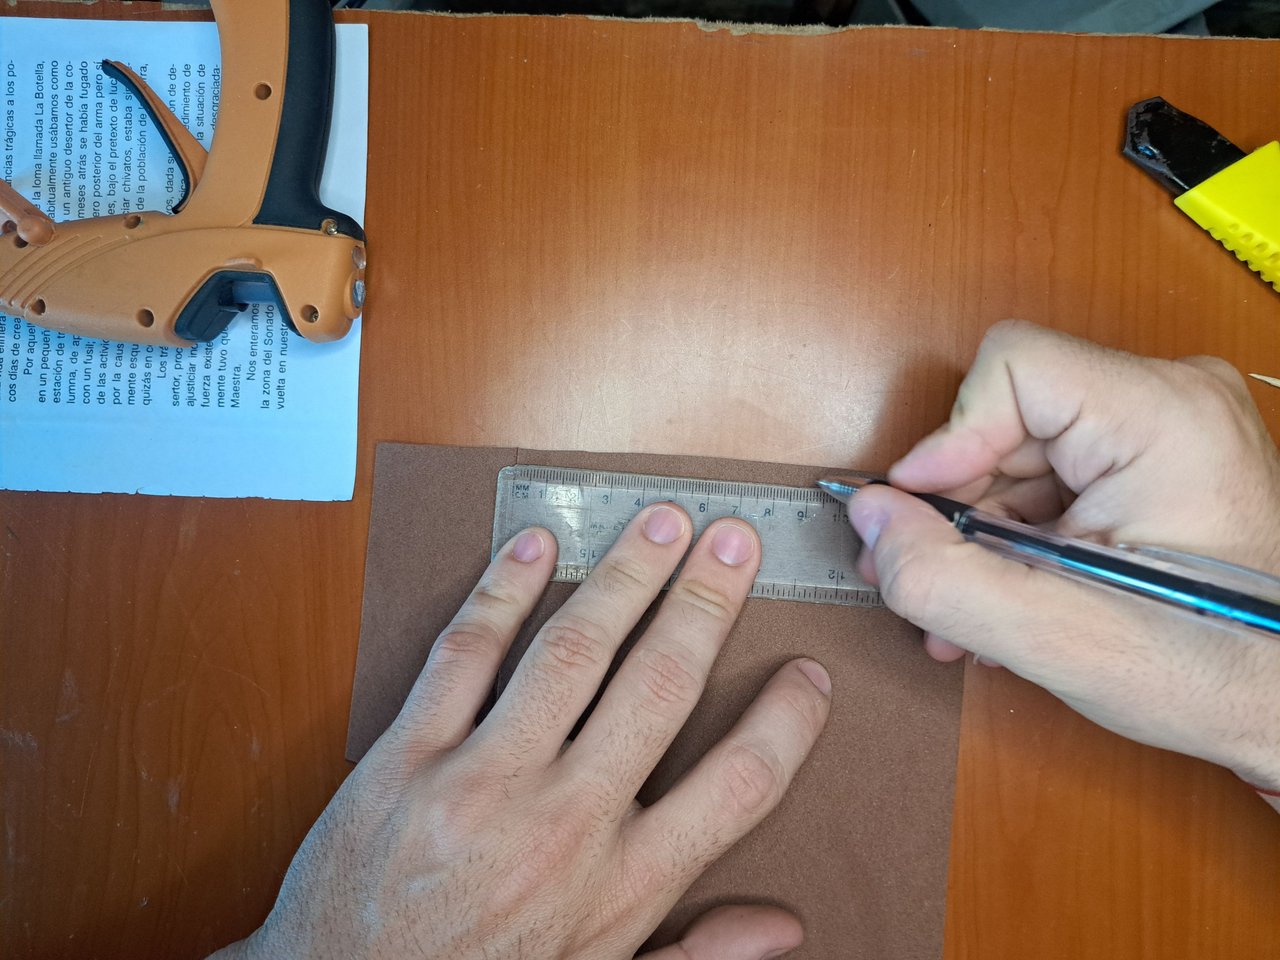
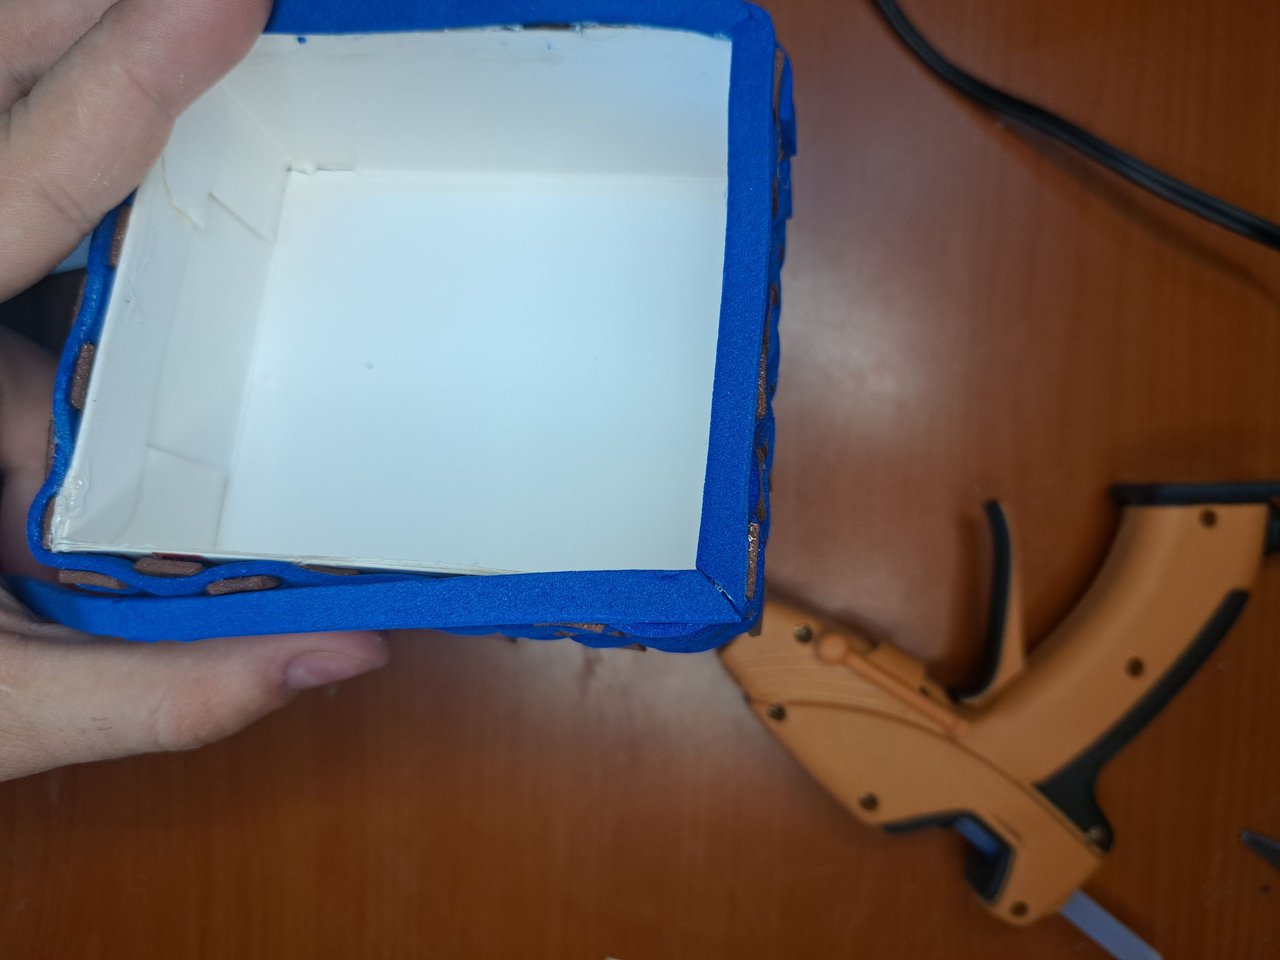
1️⃣ Para empezar, acondicionamos la caja que será nuestra pieza principal. Para ello pegamos las tapas y reforzamos una de sus caras hasta formar un recipiente de cartón.
! [English Version Here]
1️⃣ To begin, we prepare the box that will be our main piece. To do this, we glue the lids and reinforce one of its sides to form a cardboard container.
 |  |
 |  |
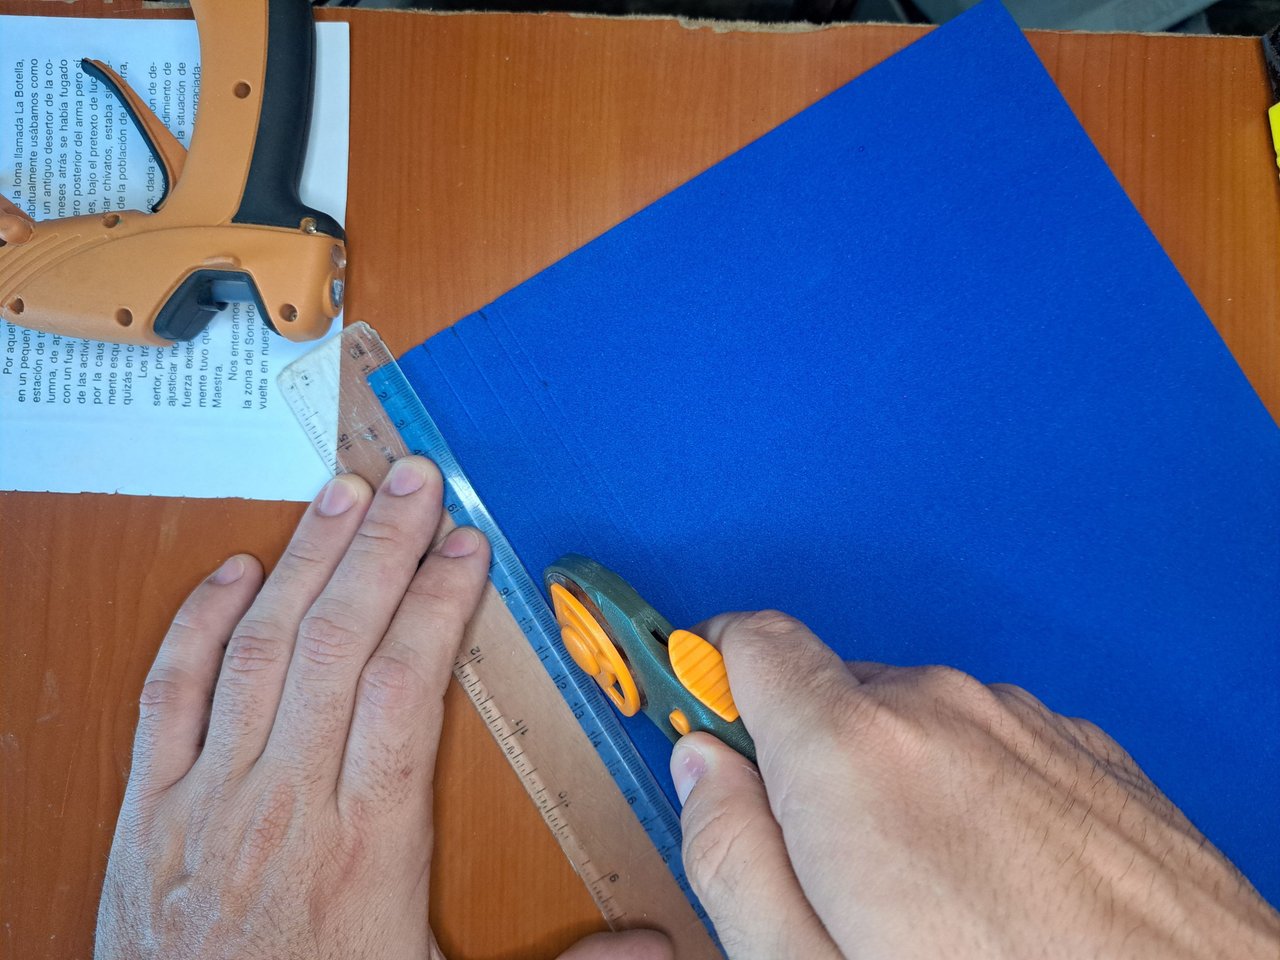
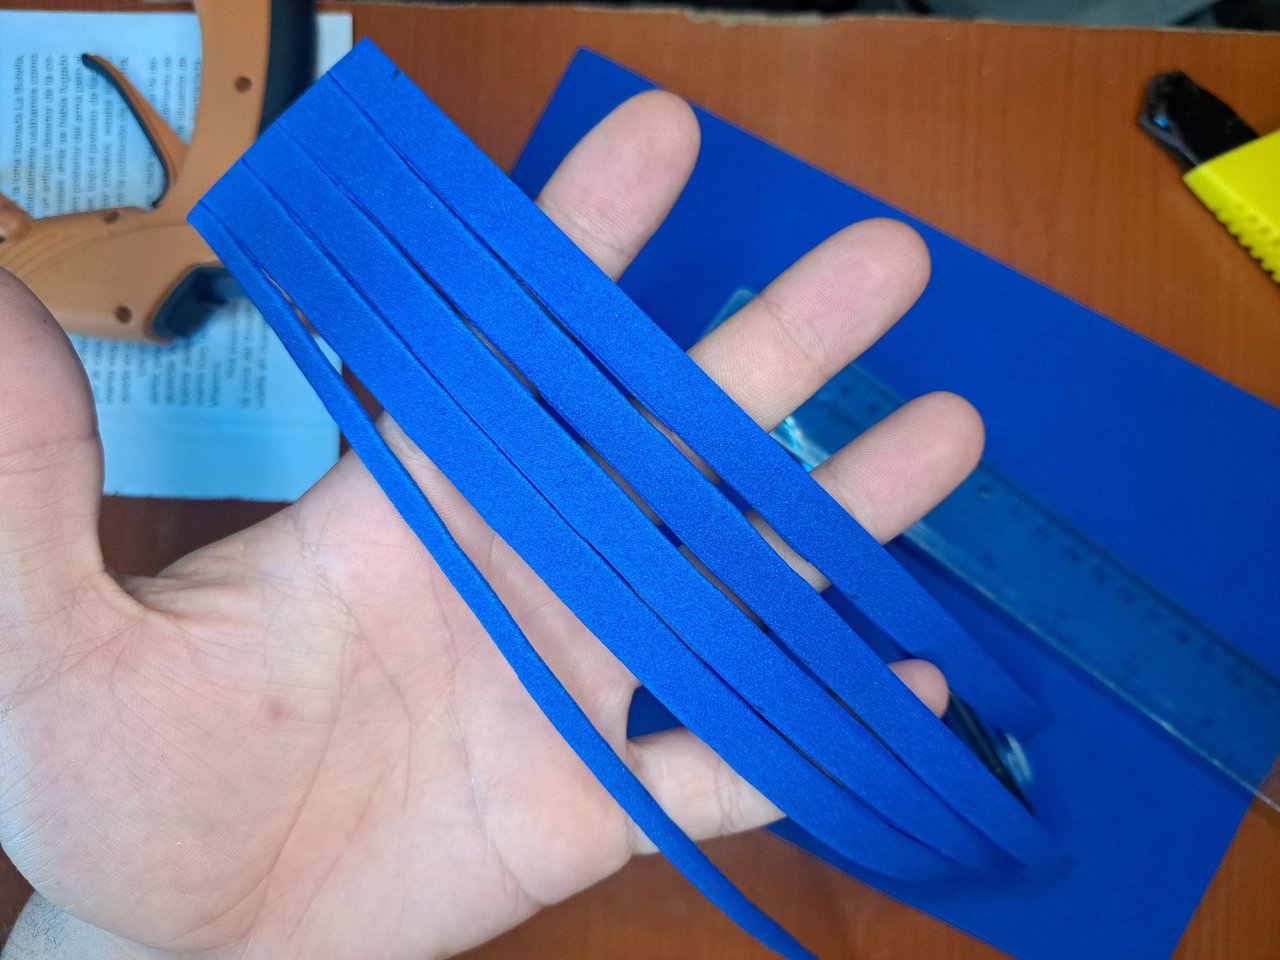
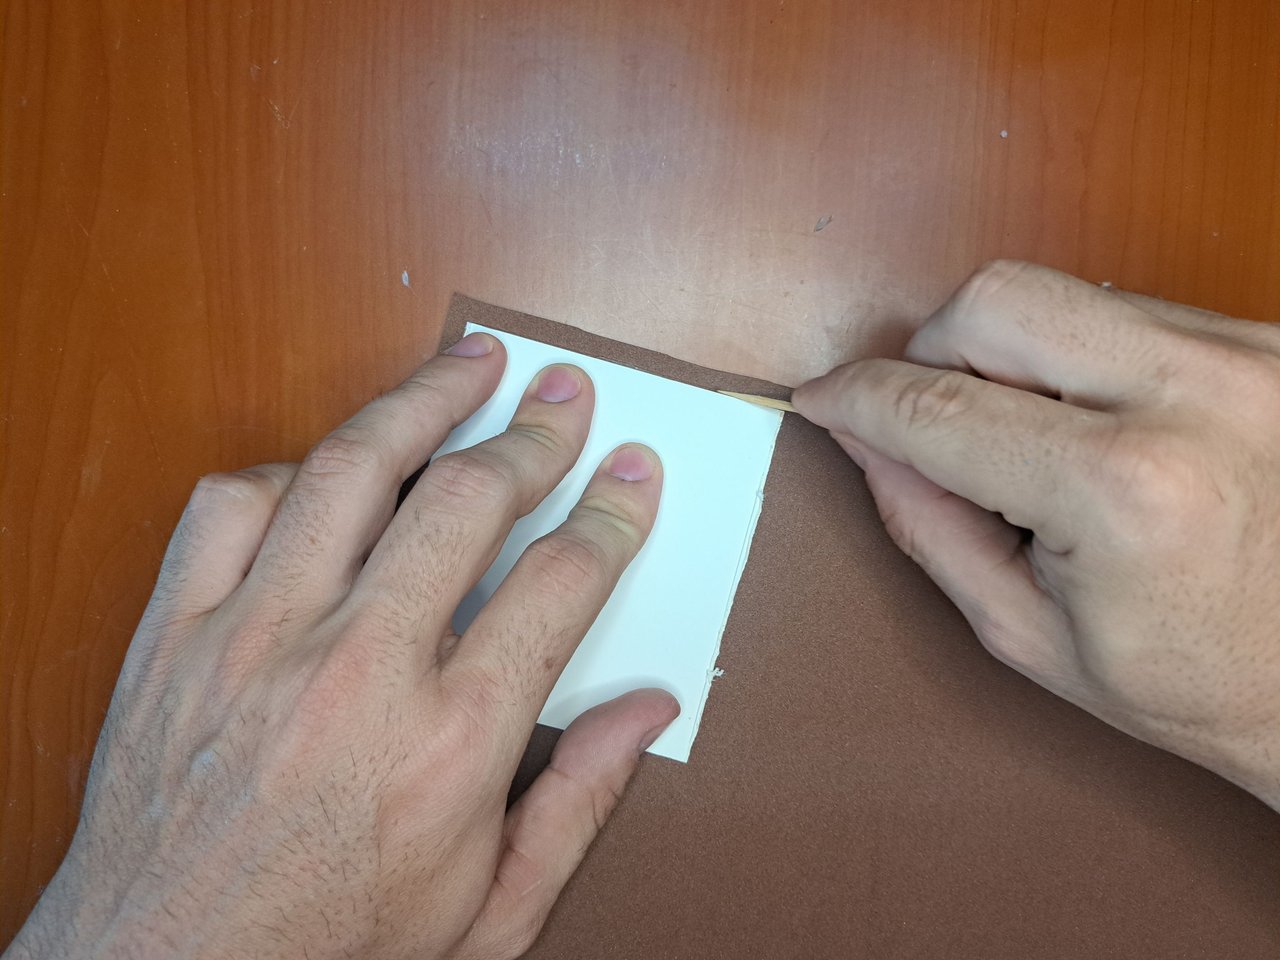
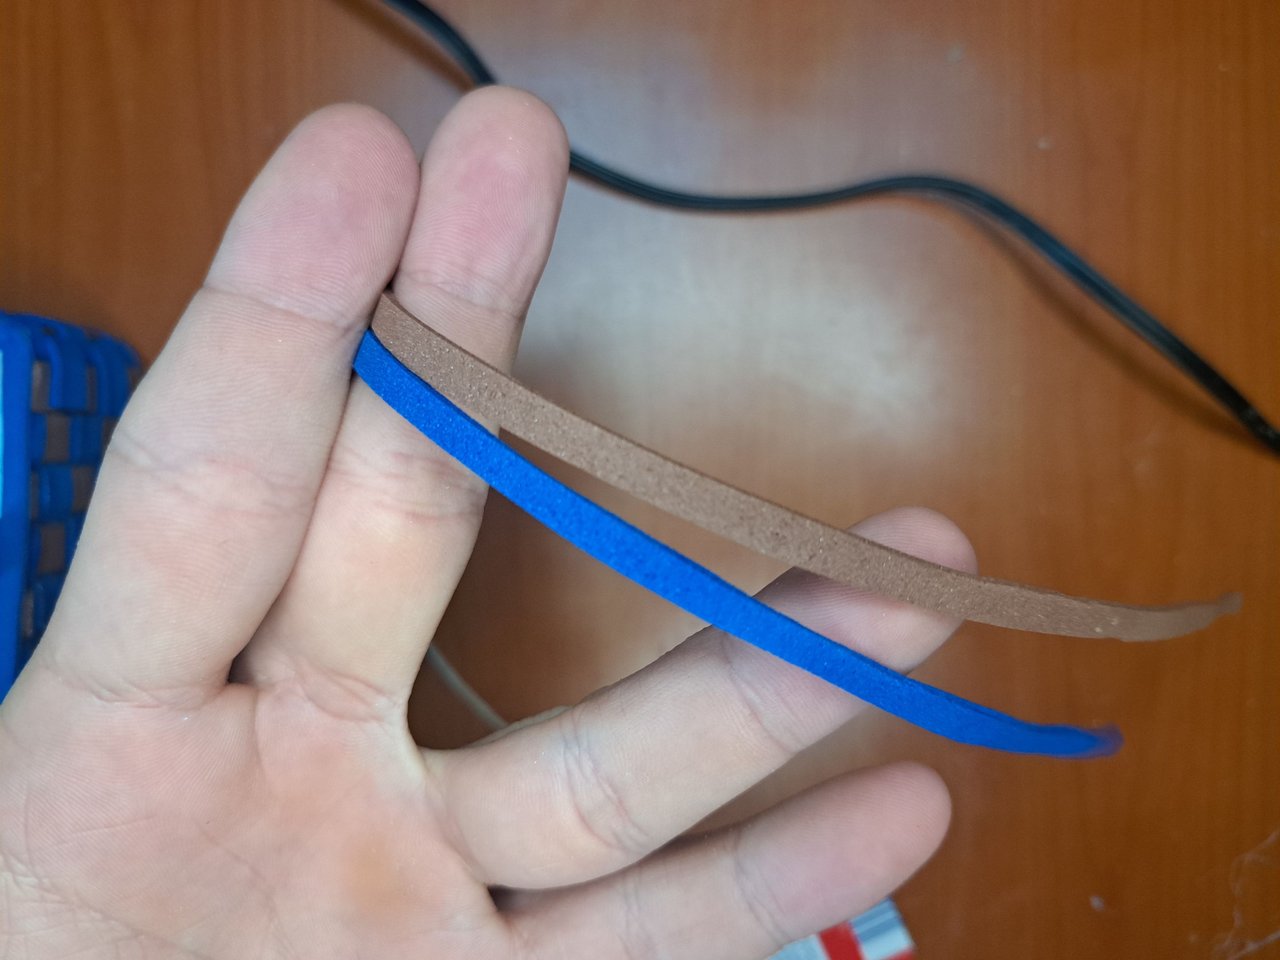
2️⃣ A continuación, cortamos el fomi azul en 5 piezas, cada una de ellas con 1 cm de ancho y con todo el largo posible. Con el fomi café haremos lo mismo, pero el largo no debe ser mayor que la altura de la base de cartón.
! [English Version Here]
2️⃣ Next, we cut the blue foam into 5 pieces, each with a width of 1 cm and with the full possible length. Do the same with the brown foam, but the length should not be greater than the height of the cardboard base.
 |  |  |
 |  |  |
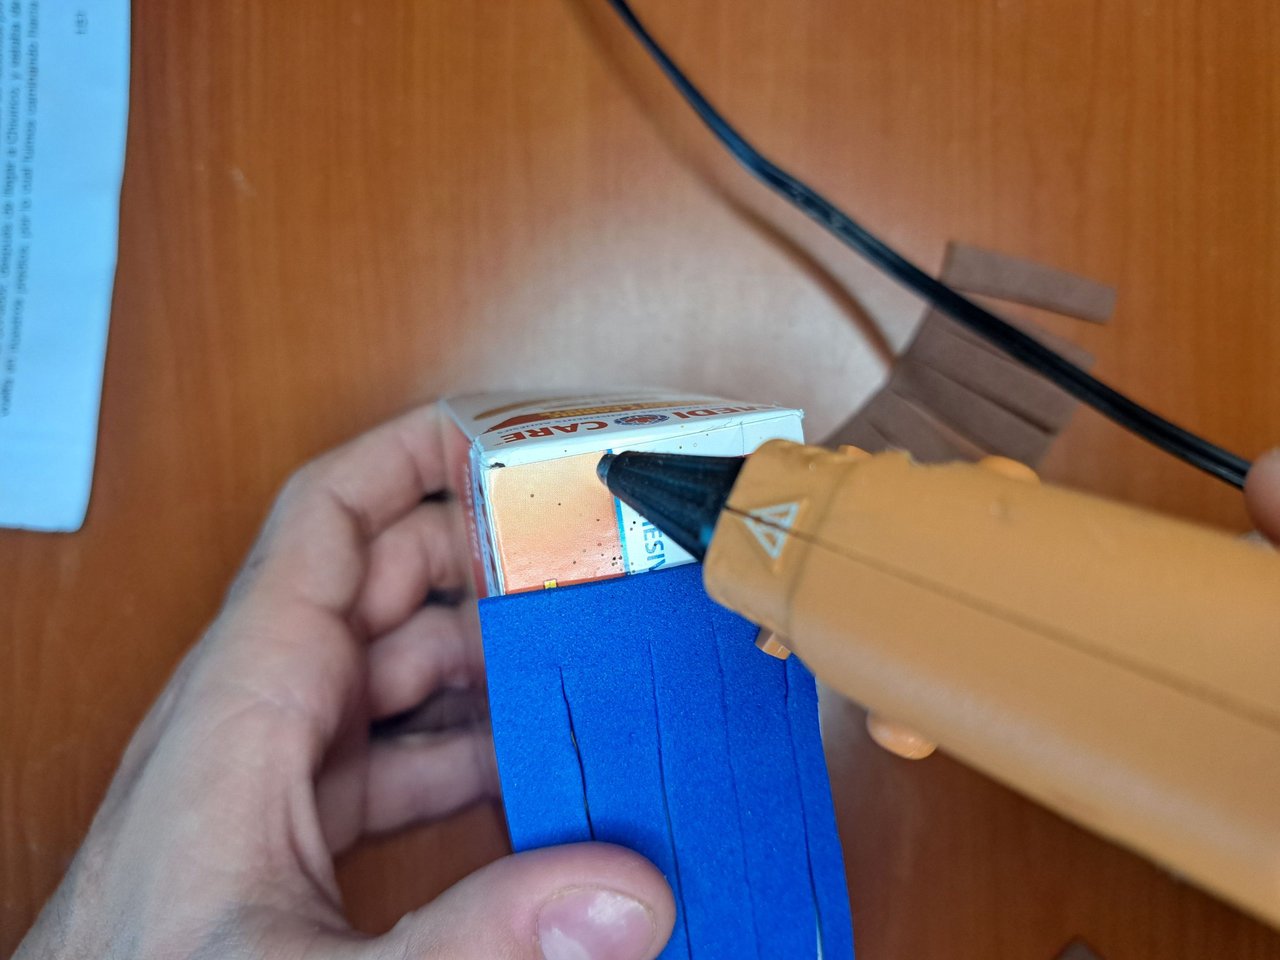
3️⃣ Con las tiras de fomi recortadas, empezamos a entretejerlas a la vez que las vamos pegando a la superficie del cartón. Es importante tener en cuenta que para la técnica de tejido simple se deben intercambiar las posiciones de las tiras de color azul cada vez que se coloque una tira de color café.
! [English Version Here]
3️⃣ With the cut foam strips, we start weaving them while gluing them to the surface of the cardboard. It is important to note that for the simple weaving technique, the positions of the blue strips must be exchanged each time a brown strip is placed.
 |  |
 |  |
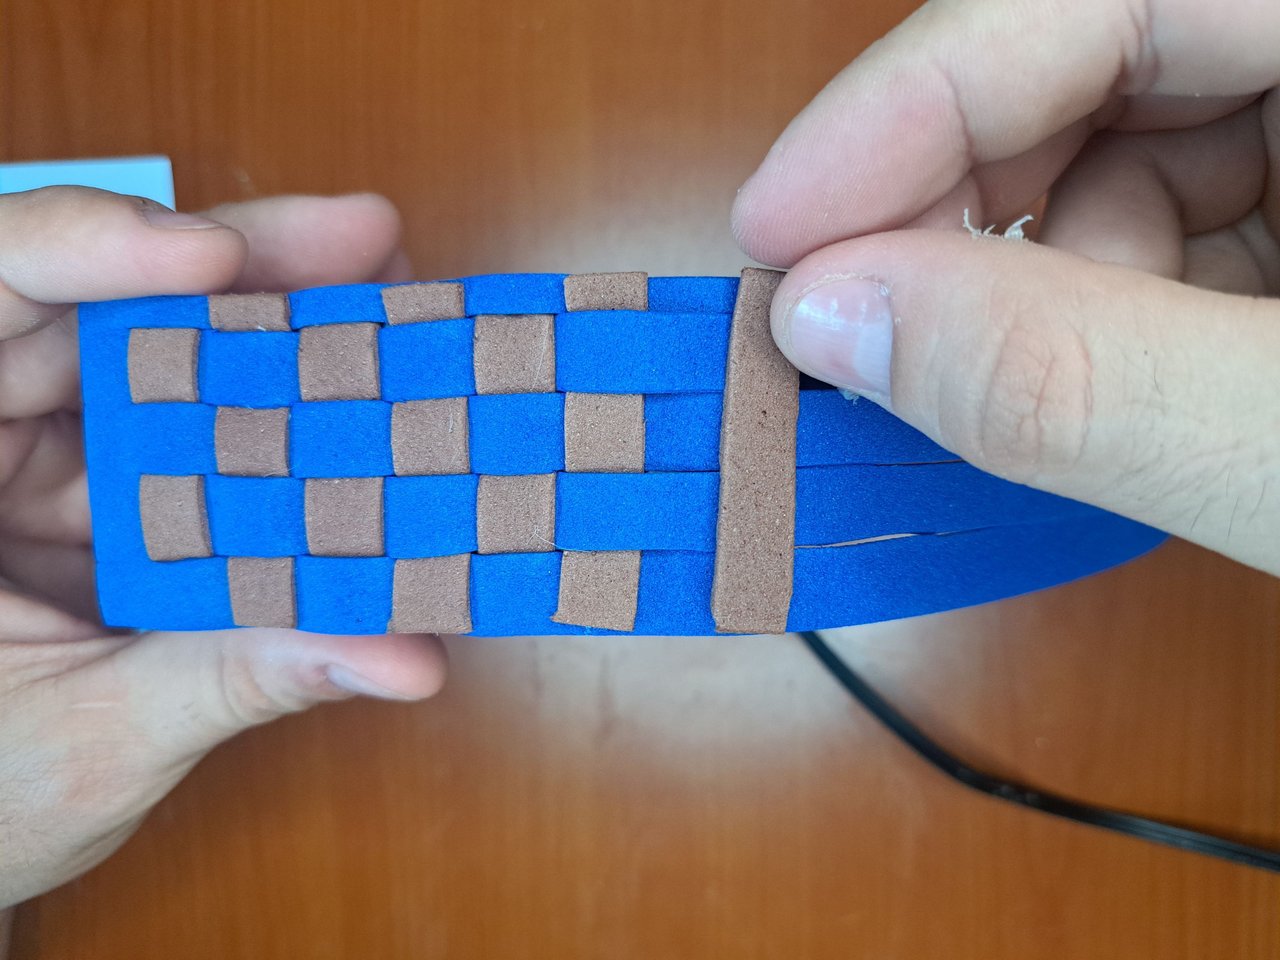
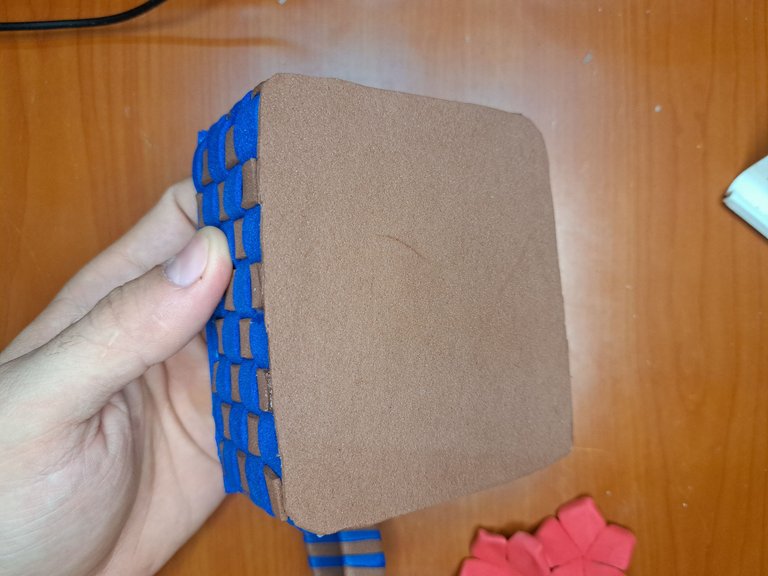
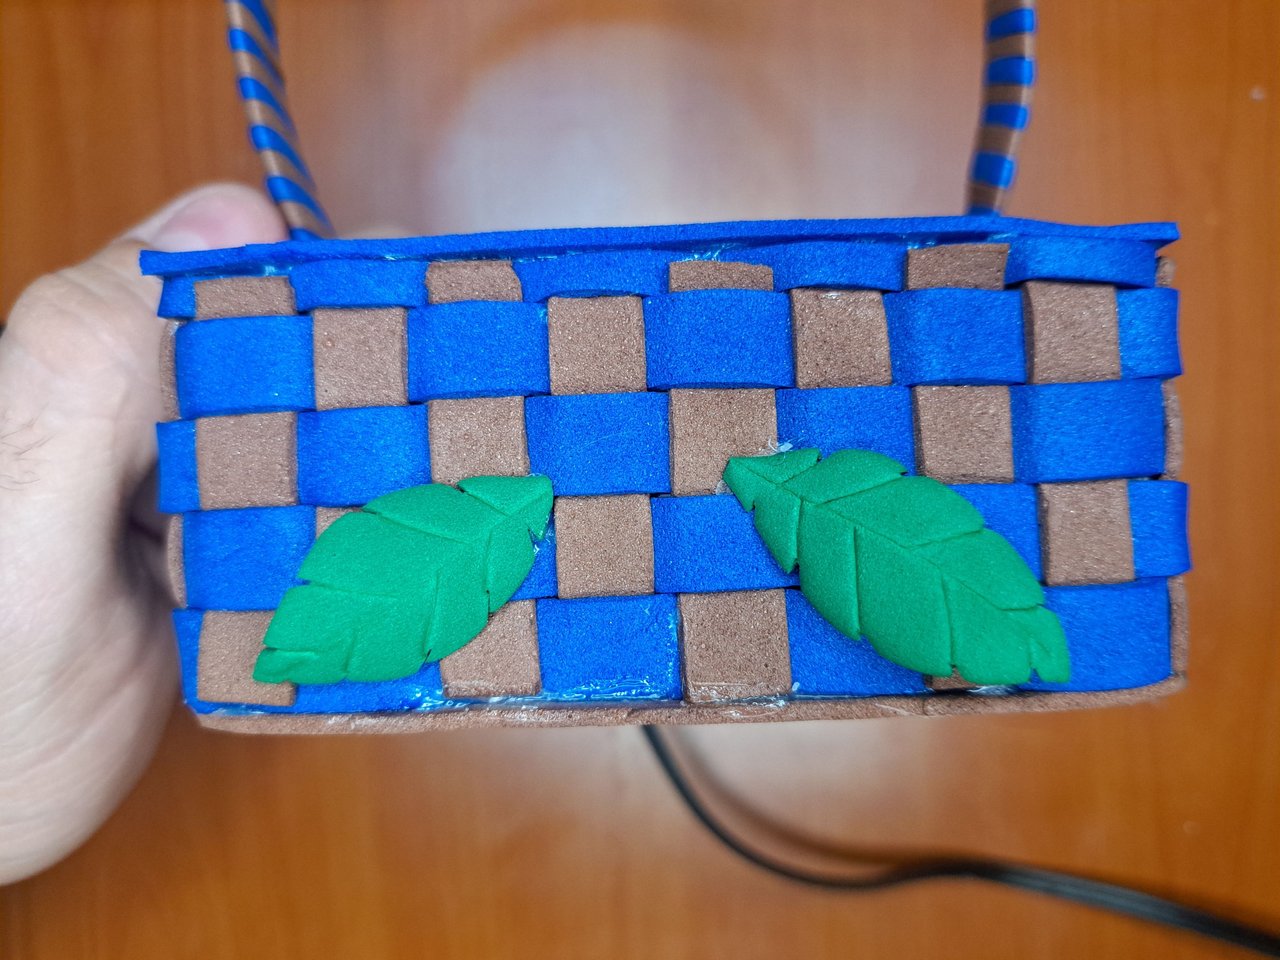
4️⃣ Cuando la superficie lateral de la base de cartón esté cubierta con fomi tejido, entonces recortaremos una tira de fomi azul y la pegaremos en todo el borde superior de la base. Luego marcamos, recortamos y pegamos una pieza de fomi café en la parte inferior de la base.
! [English Version Here]
4️⃣ When the side surface of the cardboard base is covered with woven foam, then we will cut out a strip of blue foam and glue it around the entire top edge of the base. Next, we mark, cut out, and glue a piece of brown foam on the bottom of the base.
 |
 |
 |

|
|
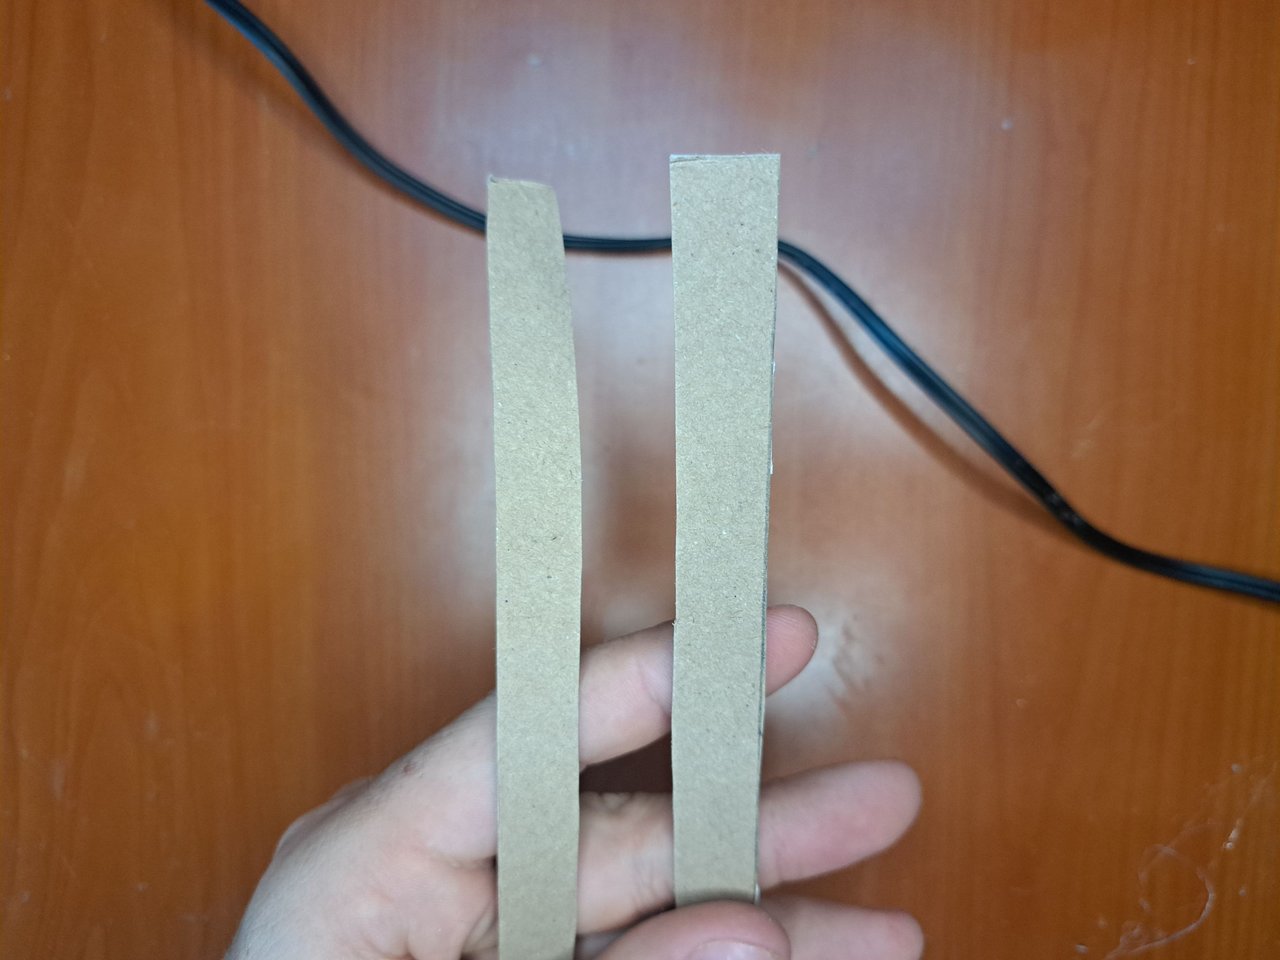
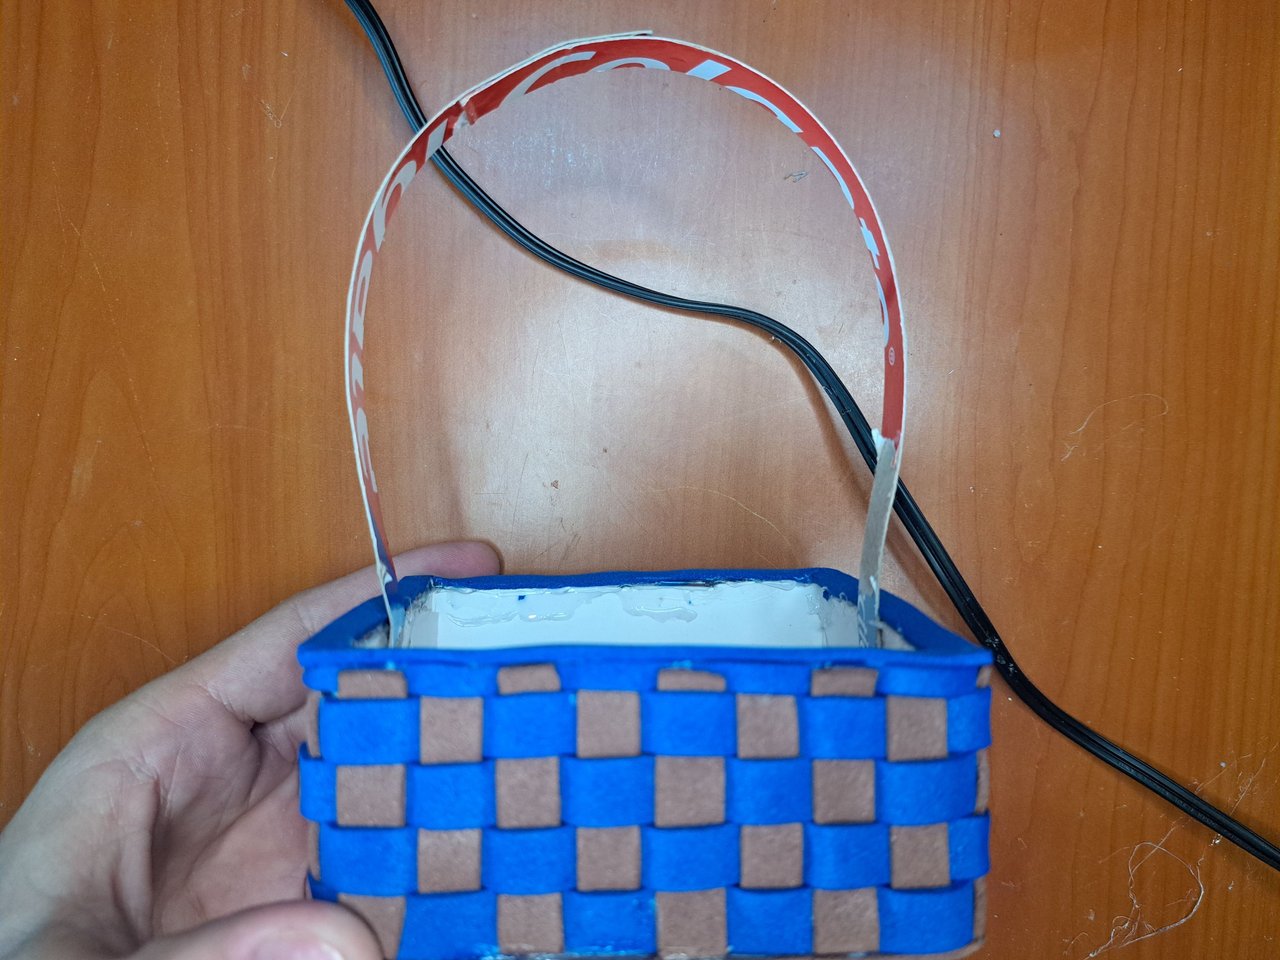
5️⃣ A continuación, recortamos dos tiras de cartulina que pegaremos por sus extremos y luego la pegaremos en el borde interior de la base para formar el asa. Después, recortamos dos tiras finas de fomi azul y café, las envolveremos y pegaremos alrededor del asa de la cesta.
! [English Version Here]
5️⃣ Next, cut two strips of cardboard that we will glue at their ends and then glue them on the inner edge of the base to form the handle. Then, cut two thin strips of blue and brown foam, wrap them, and glue them around the handle of the basket.
 |  |  |
 |  |  |
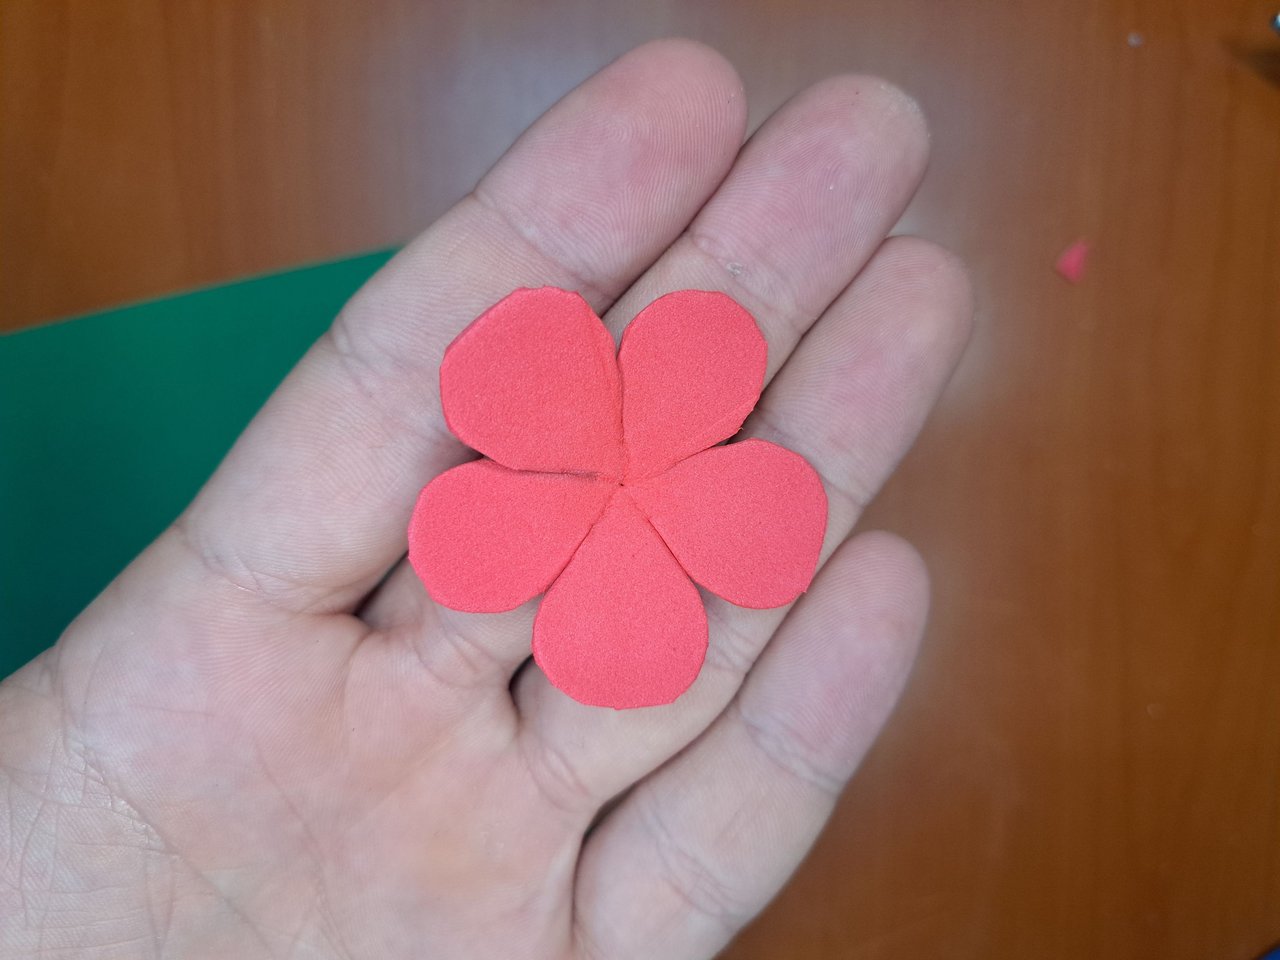
6️⃣ Con la cesta lista pasaremos a la decoración. Para ello primeramente recortaremos tres círculos de fomi rojo a los cuales les haremos cinco cortes que dividirán sus extremos en partes iguales. A cada uno de estos extremos los redondearemos hasta formar cinco pétalos. Luego, utilizando alguna fuente de calor, doblaremos hacia abajo el borde de cada uno de los pétalos utilizando técnicas de termoformado.
! [English Version Here]
6️⃣ With the basket ready, we will move on to decoration. To do this, first we will cut out three red foam circles that we will make five cuts in, dividing their ends into equal parts. We will round each of these ends to form five petals. Then, using a heat source, we will fold down the edge of each of the petals using thermoforming techniques.
 |  |  |
 |  |  |
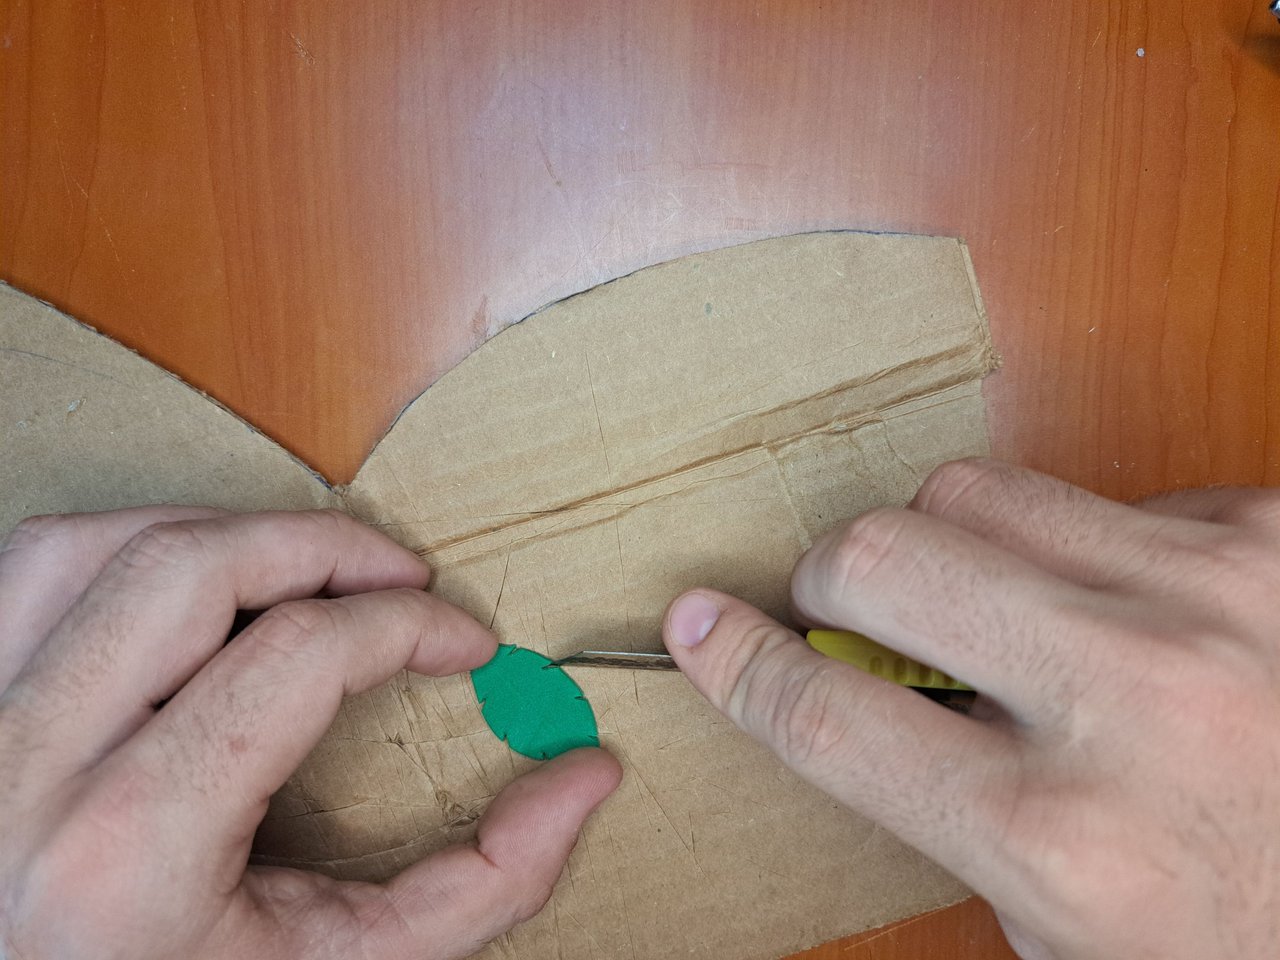
7️⃣ A continuación, vamos a dibujar y recortar la forma de las hojas en una lámina de fomi verde, luego las termoformaremos para que tengan volumen. Después, con un palillo de dientes o algún objeto fino, haremos las marcas características en las hojas.
! [English Version Here]
7️⃣ Next, we are going to draw and cut out the shape of the leaves on a green foam sheet, then we will thermoform them to give them volume. Then, with a toothpick or some thin object, we will make the characteristic marks on the leaves.
 |  |
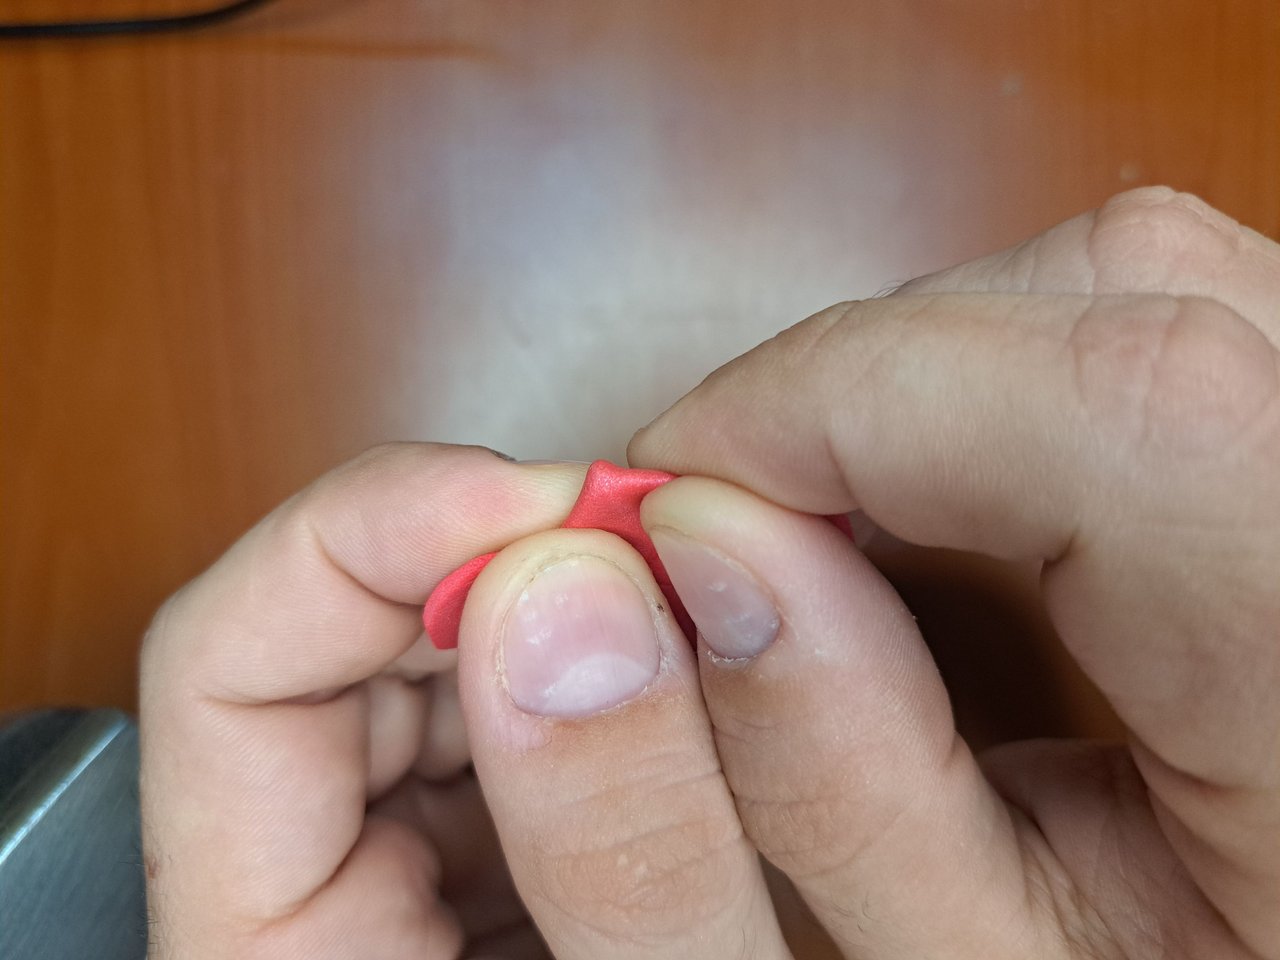
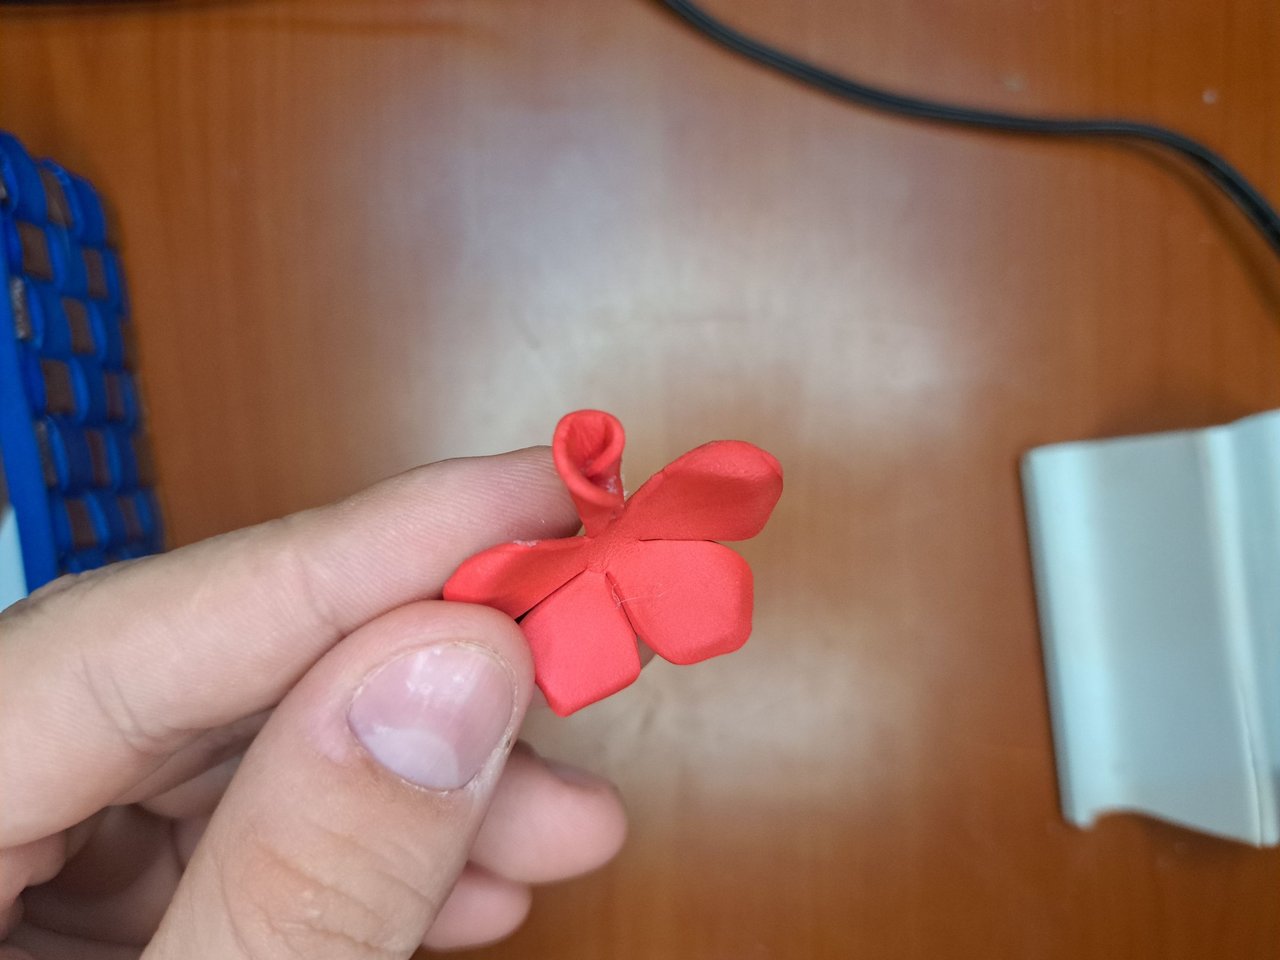
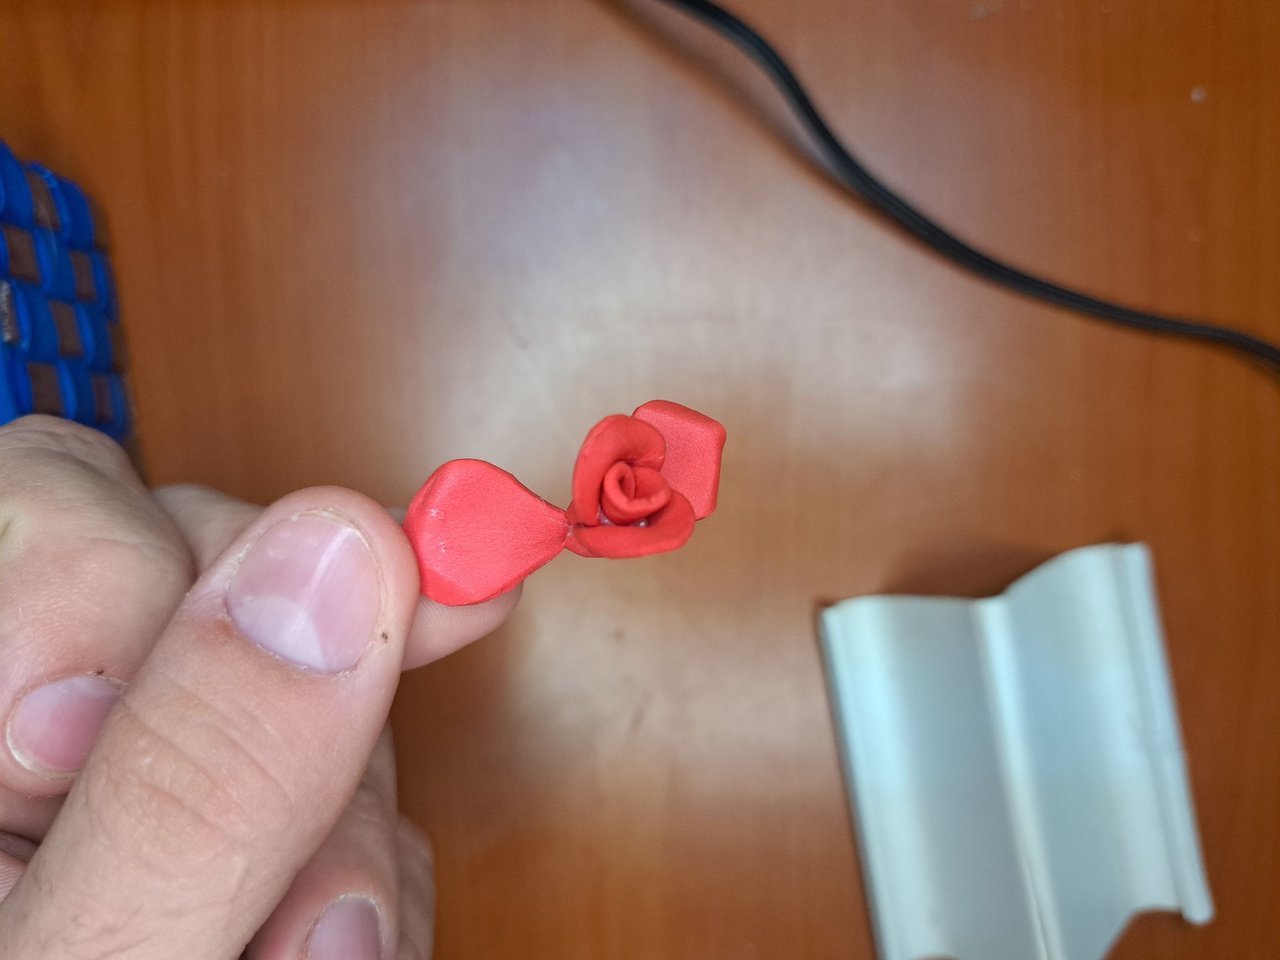
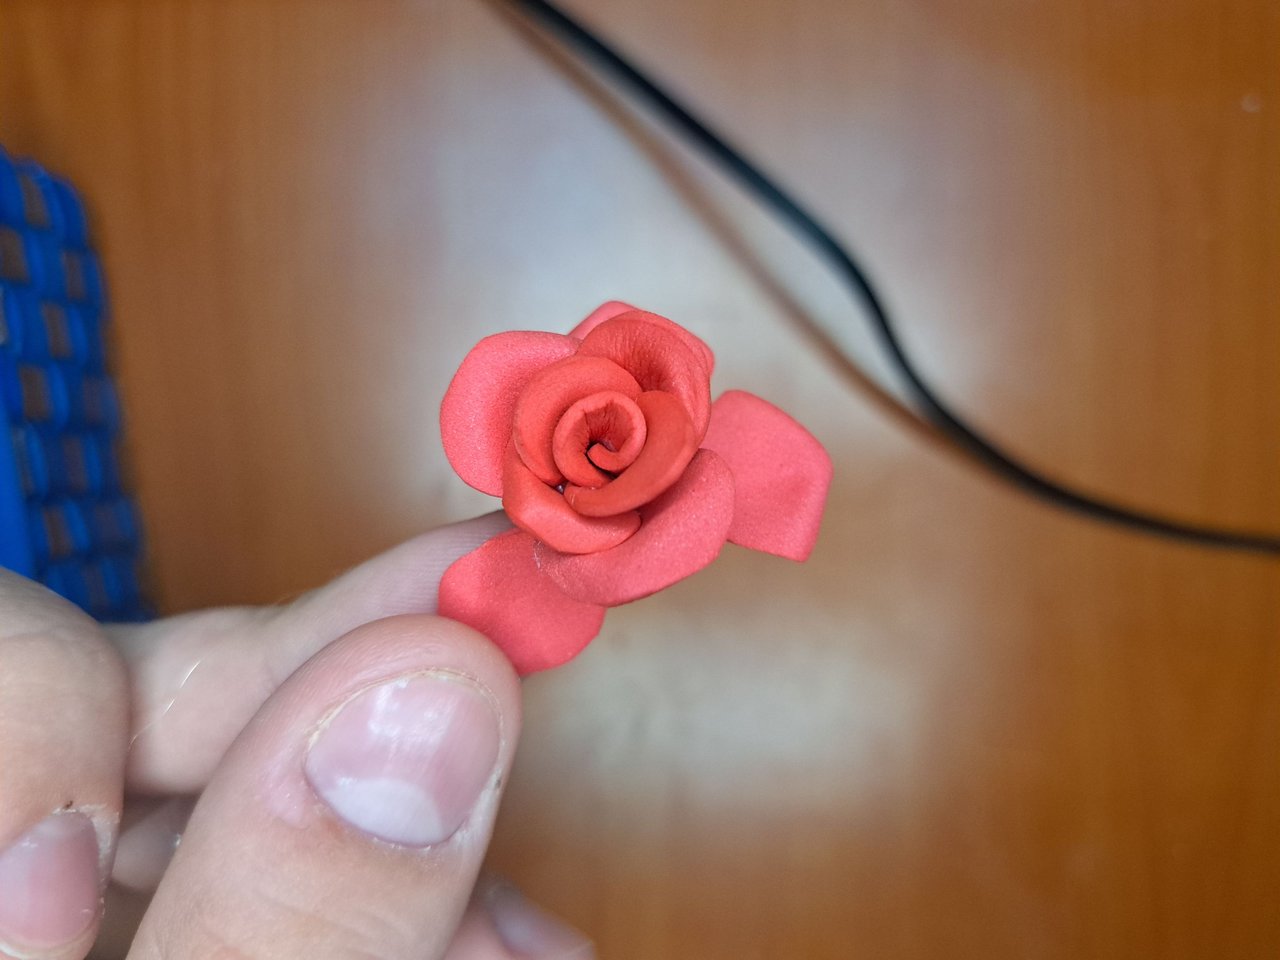
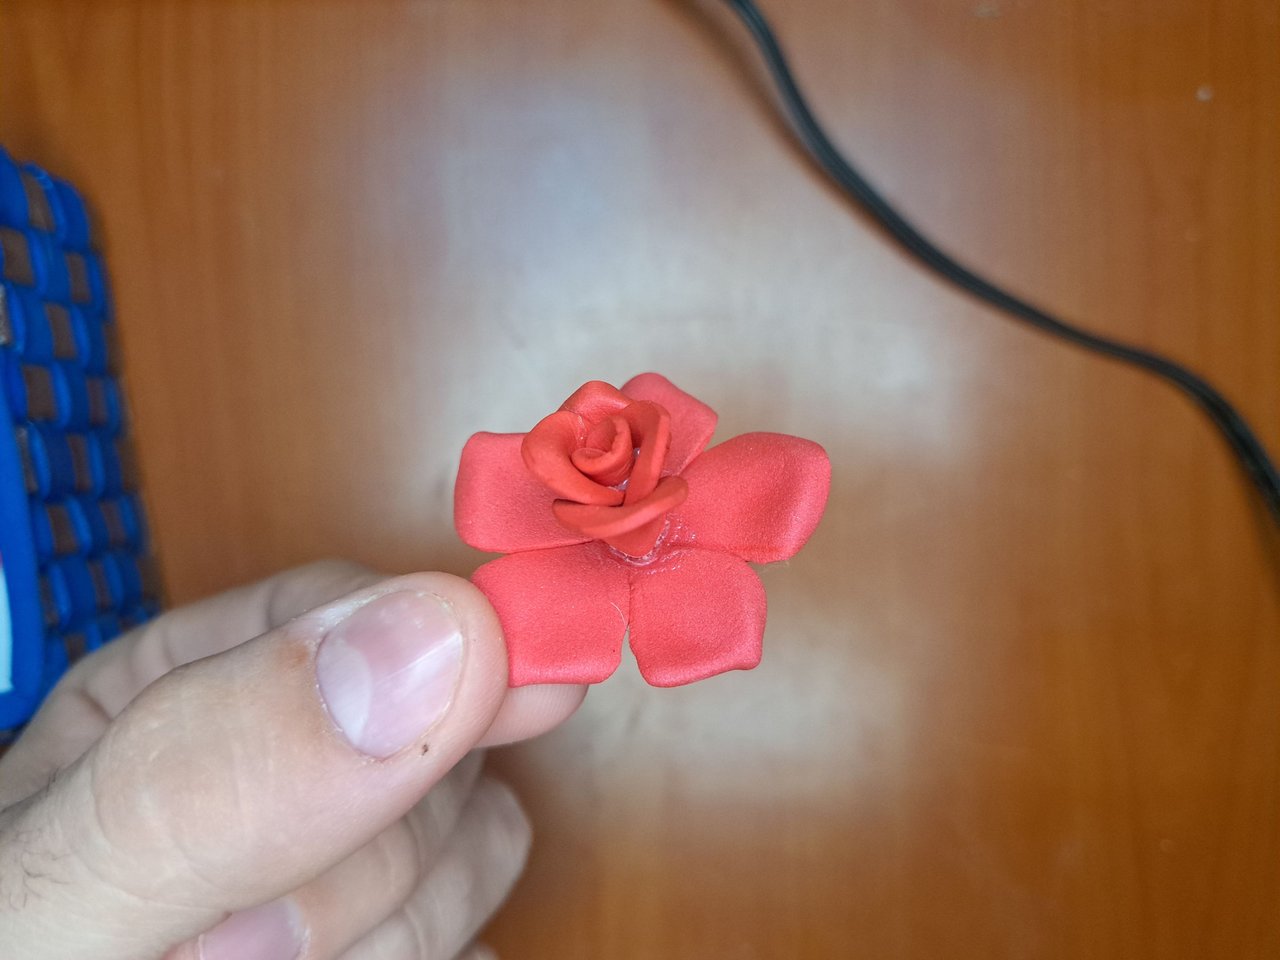
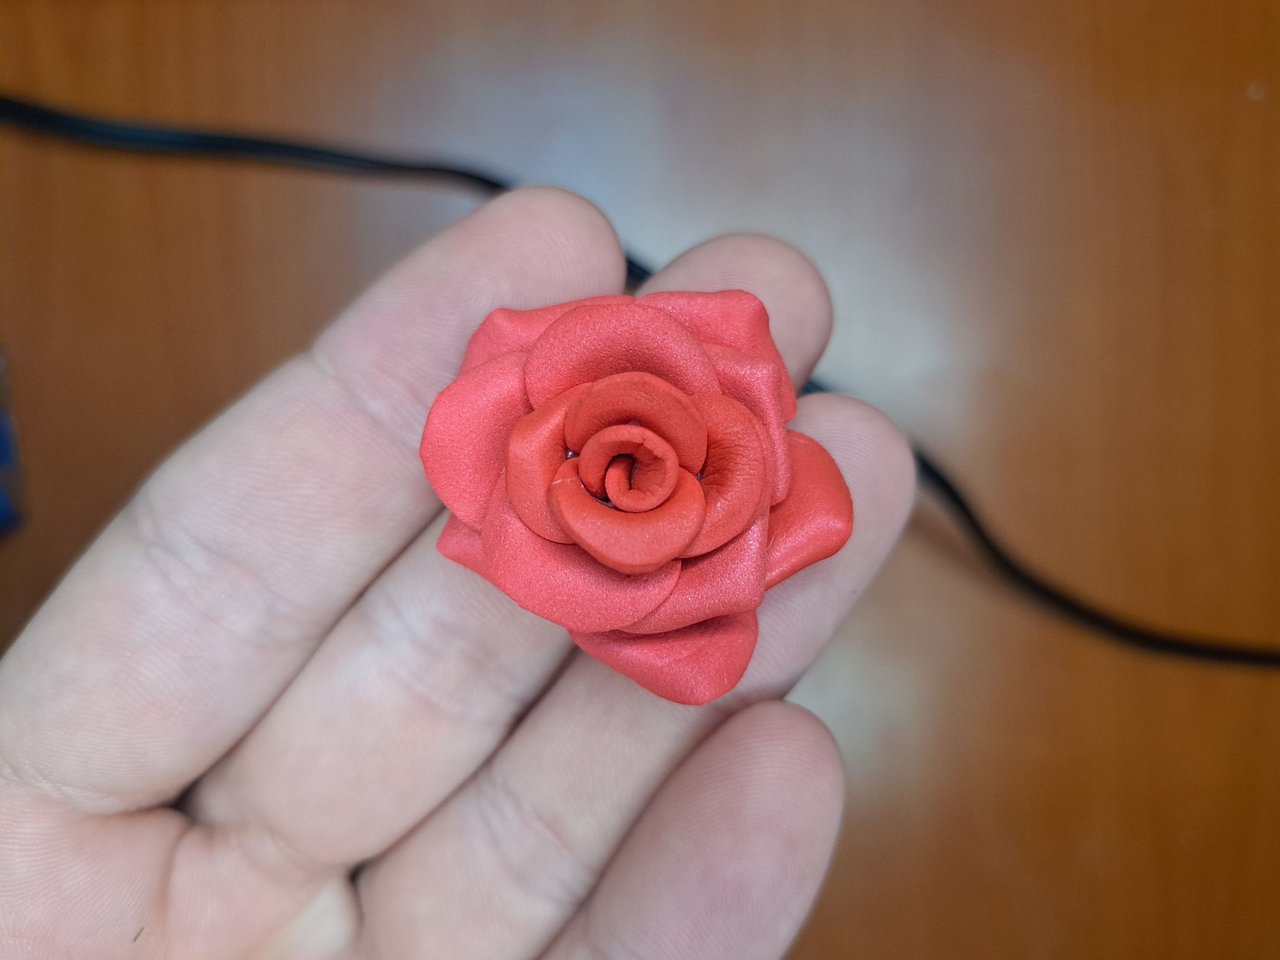
8️⃣ Con todas las partes listas comenzamos a crear el adorno floral de la cesta. Para empezar enrollamos un pétalo sobre sí mismo y le iremos pegando los demás pétalos de forma intercalada. Añadiremos la segunda capa de pétalos y repetiremos el proceso anterior en esta y en la tercera. Es importante controlar la posición de cada pétalo para balancear el volumen de estos y garantizar una uniformidad en la flor.
! [English Version Here]
8️⃣ With all the parts ready, we start creating the floral ornament of the basket. To begin, roll a petal around itself and start gluing the other petals alternatingly. We will add the second layer of petals and repeat the previous process on this one and the third one. It is important to control the position of each petal to balance their volume and ensure uniformity in the flower.
 |
 |  |
 |  |
|  |  |
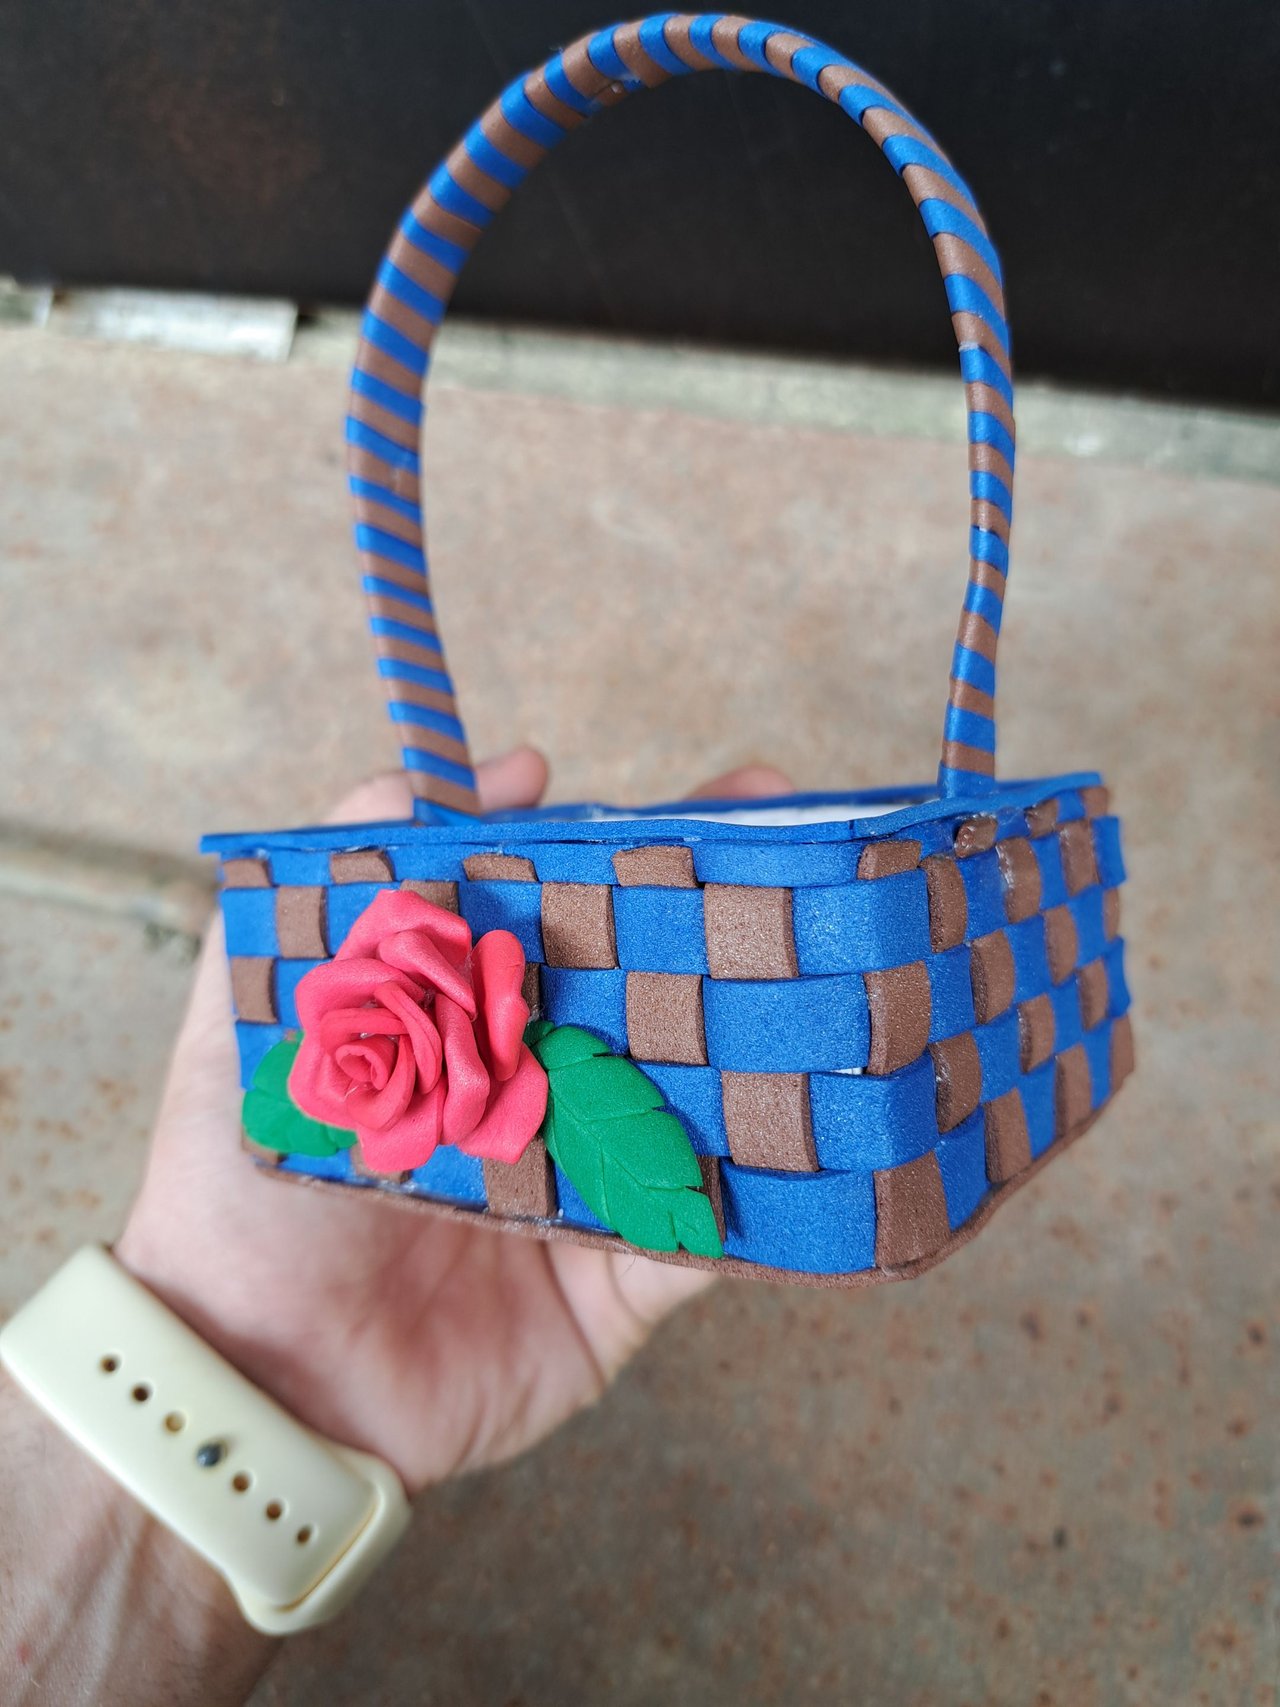
9️⃣ Y así estaría todo listo para unirlos y finalizar. Comenzaremos por añadir el adorno floral a la cesta. Para ello, empezamos pegando las dos hojas y luego la rosa. Al pegar las hojas, es importante tener en cuenta que no deben estar muy juntas, ya que la rosa cubrirá gran parte de ellas.
! [English Version Here]
9️⃣ And that would be it to join them and finish. We will start by adding the floral decoration to the basket. To do this, we start by gluing the two leaves and then the rose. When gluing the leaves, it is important to note that they should not be very close together, as the rose will cover a large part of them.
 |  |
Espero que, como siempre, hayas disfrutado tanto del tutorial como del resultado final. Deseo que si decides replicar este regalo hecho a mano, lleve alegría y cariño a la persona especial que lo reciba.
! [English Version Here]
I hope that, as always, you have enjoyed both the tutorial and the final result. I wish that if you decide to replicate this handmade gift, it brings joy and affection to the special person who receives it.
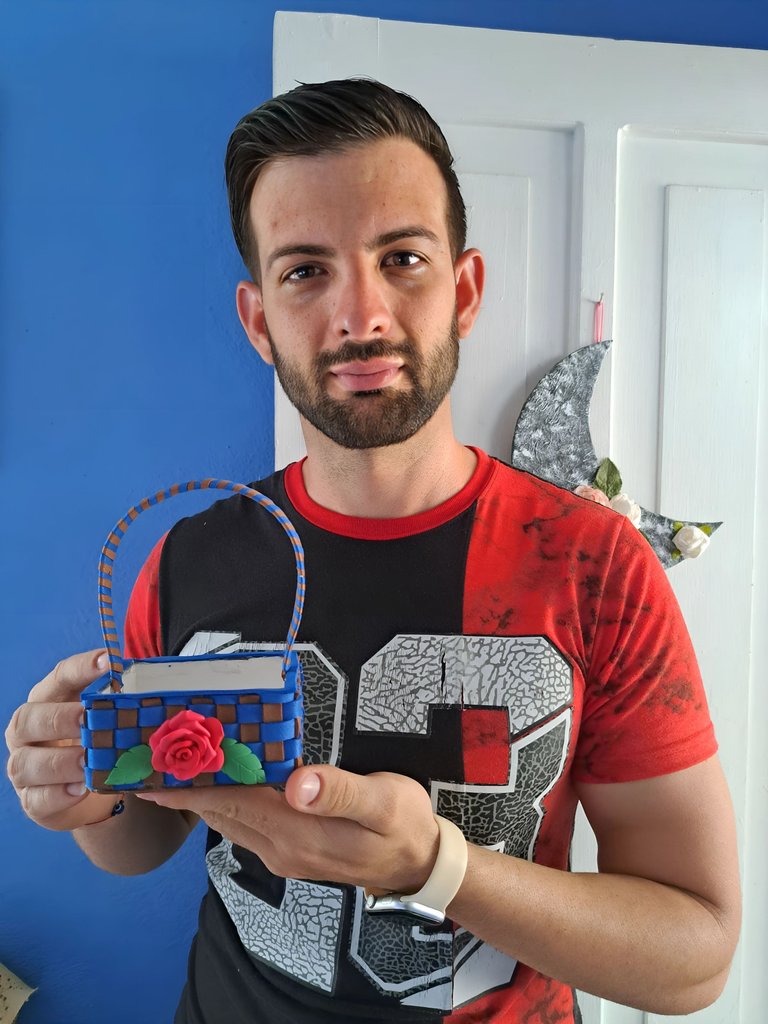
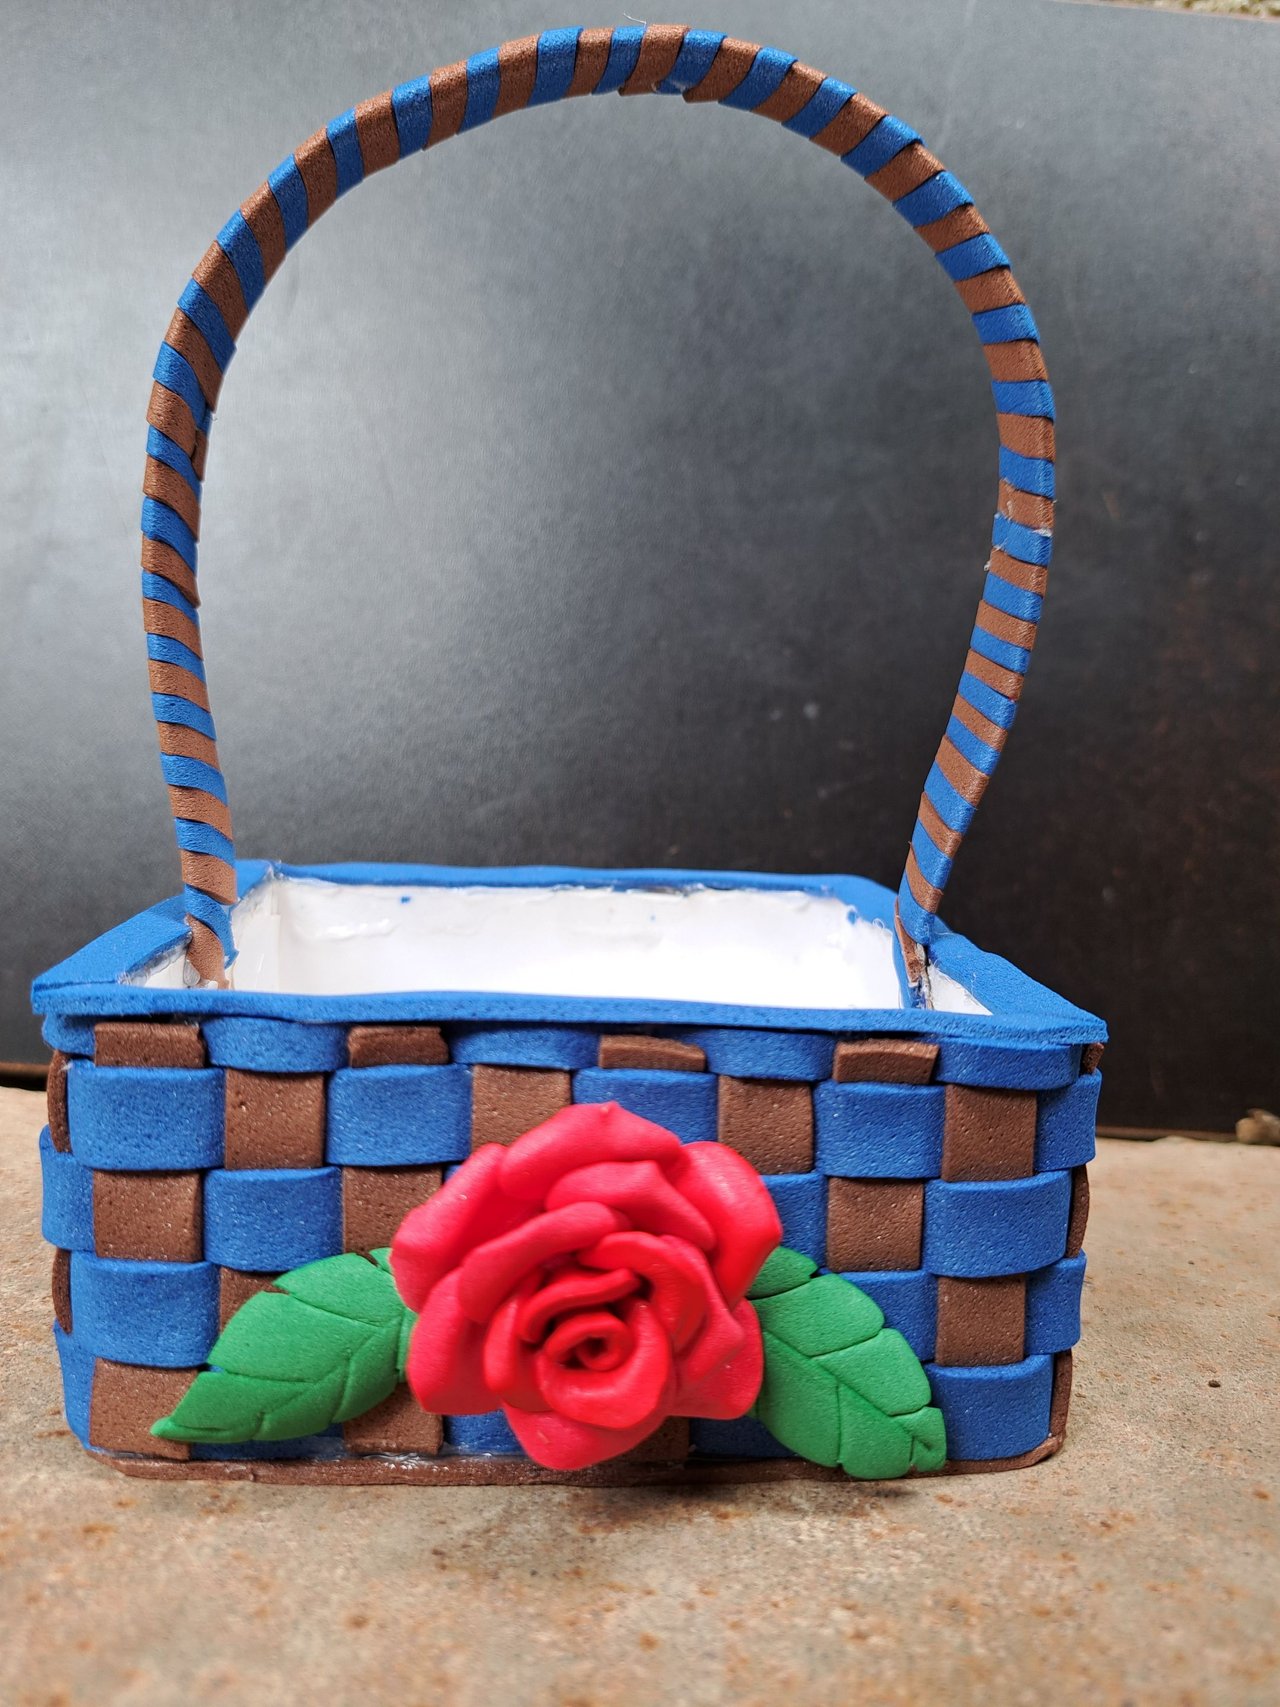
⚜️ Resultado Final // Final Result ⚜️
 |

|
 |
 |

Thank you very much for reading my post. If you liked it, please leave a comment and consider following me so you don't miss my next posts. I'd love to know your opinion and your thoughts about the topic I discussed in this post, see you in the next one!
Muchas gracias por leer mi post. Si te gustó, por favor deja un comentario y considera seguirme para no perderte mis próximas publicaciones. Me encantaría saber tu opinión y tus ideas sobre el tema que traté en este post. ¡Nos vemos en el próximo!
Cover page created in Canva Pro
Translated by DeepL


Quedó muy bonita, buen trabajo ☺️
Gracias 🫂
This is pure creativity @edeyglezsosa. You've got an amazing talent, is sad I am just so bad with crafting...
Thank you very much for your words, I appreciate them very much. Truly, with a little practice anyone can create a craft. We all have talent inside.
Te quedo muy bonita y elegante, linda para guardar algunas cositas o decorar el hogar (o para llevar a Buhito a pasear) jajaja
Felicitaciones, un excelente trabajo 🦉
Nunca se me hubiera ocurrido lo de pasear al Buhito ahí, pero ahora que lo pienso 🤔 no sería mala idea 😆
Very pretty idea!
Thanks 🤗
That's a small and cute basket. Looks like it could hold a couple of things. Good job.
Thank you for your words and thanks for all the support.
Esa cesta está preciosa, me encanta ese tejido con foami pero lo que mas me encantó fue esa rosa y la forma que le diste a los pétalos, ¡que belleza! 😍
Muchas gracias, me alegra saber que te gustó.
Buen trabajo, felicidades 👏
Gracias 🫂
Me gustó la idea de la cesta, con pocos materiales. Bendiciones @edeyglezsosa.
Muchas gracias y bendiciones para usted también.
Te felicito, quedó muy linda.
Muchas gracias por compartir tan bonito trabajo.
Muchas gracias a ti por tus palabras de apoyo.