DIY: Cesta de flores para una muy buena amiga. // Flower basket for a very good friend. [ESP+ENG]
Un saludo, tengan todos mis amigos creativos y amantes de las manualidades. El día de hoy quiero compartirles una manualidad que hice en conmemoración con la venidera fecha del 14 de febrero. La manualidad en realidad no está centrada en el amor, sino que es más bien un regalo para una amiga. Dicha amiga es una persona mayor que disfruta mucho de coleccionar adornos pequeños y cosas bonitas. Espero que sea de su agrado y comencemos con el tutorial.
Greetings to all my creative friends and craft lovers. Today I want to share with you a craft I made to commemorate the upcoming February 14th. The craft is not really centered on love, but is rather a gift for a friend. Said friend is an older person who really enjoys collecting small ornaments and pretty things. I hope you like it and let's get started with the tutorial.
 |
 |
🔹 Materiales // Matertials 🔹
✅Vaso desechable plástico
✅Láminas de fomi amarillo, azul claro y oscuro
✅Fragmento de poliespán
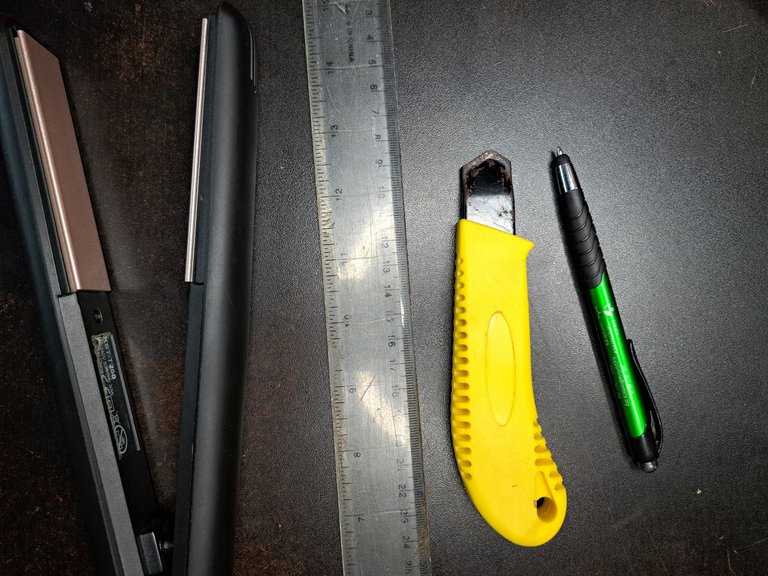
✅Tijeras, cúter circular y cúter recto
✅Tape floral
✅Piedrecitas de color naranja
✅Marcadores de colores y marcador negro de punta fina
✅Regla o cinta métrica
✅Plancha de pelo o de ropa
✅ Disposable plastic cups
✅ Yellow, light blue and dark blue fomi sheets.
✅Poliespan fragment
✅Scissors, circular cutter and straight cutter.
✅Floral tape
✅Orange colored pebbles
✅Color markers and black fine tip marker.
✅Ruler or measuring tape
✅Hair iron or clothes iron

|
|
🔹 Paso a paso // Step by step 🔹
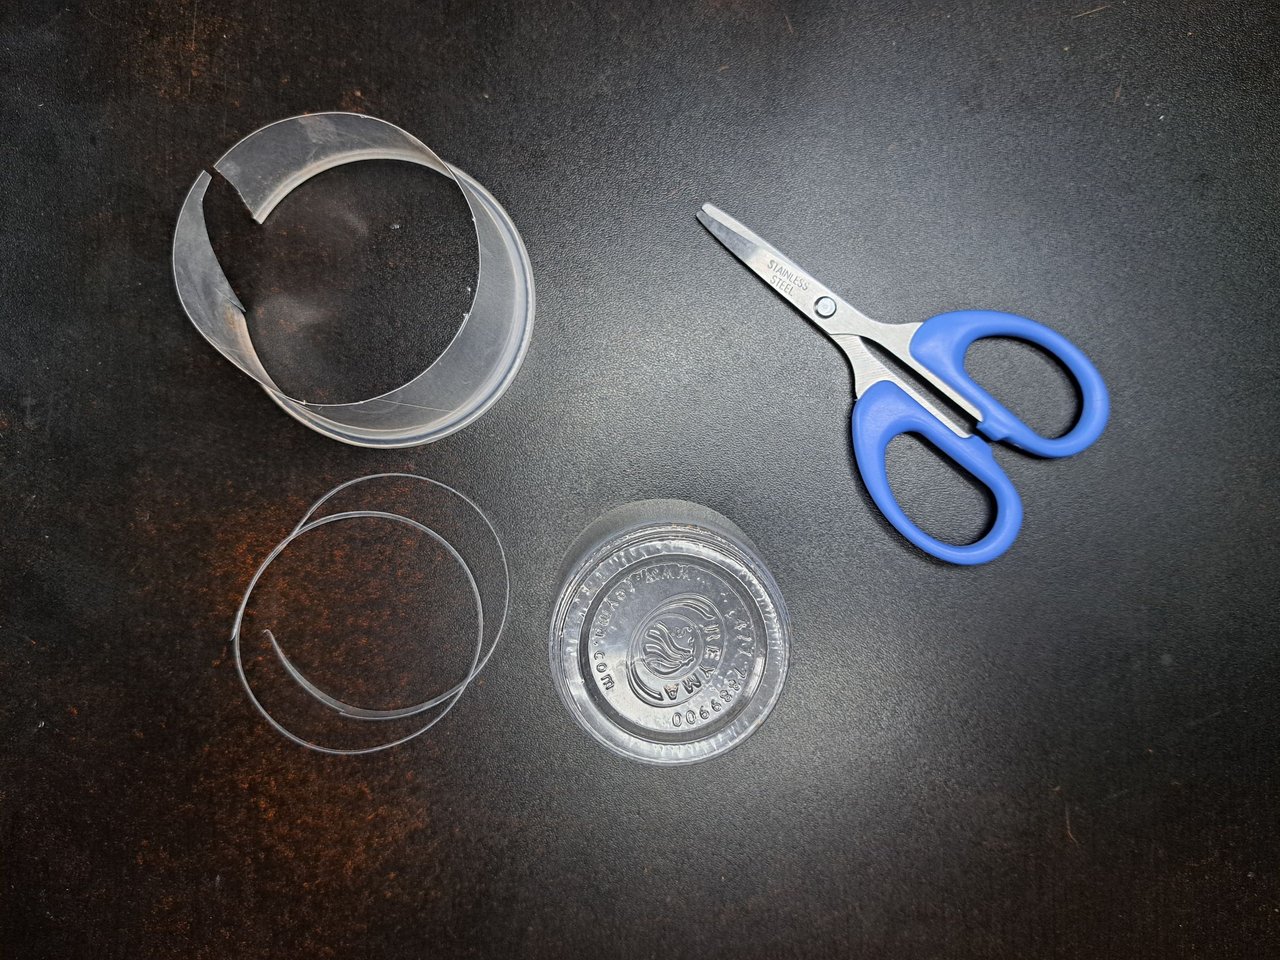
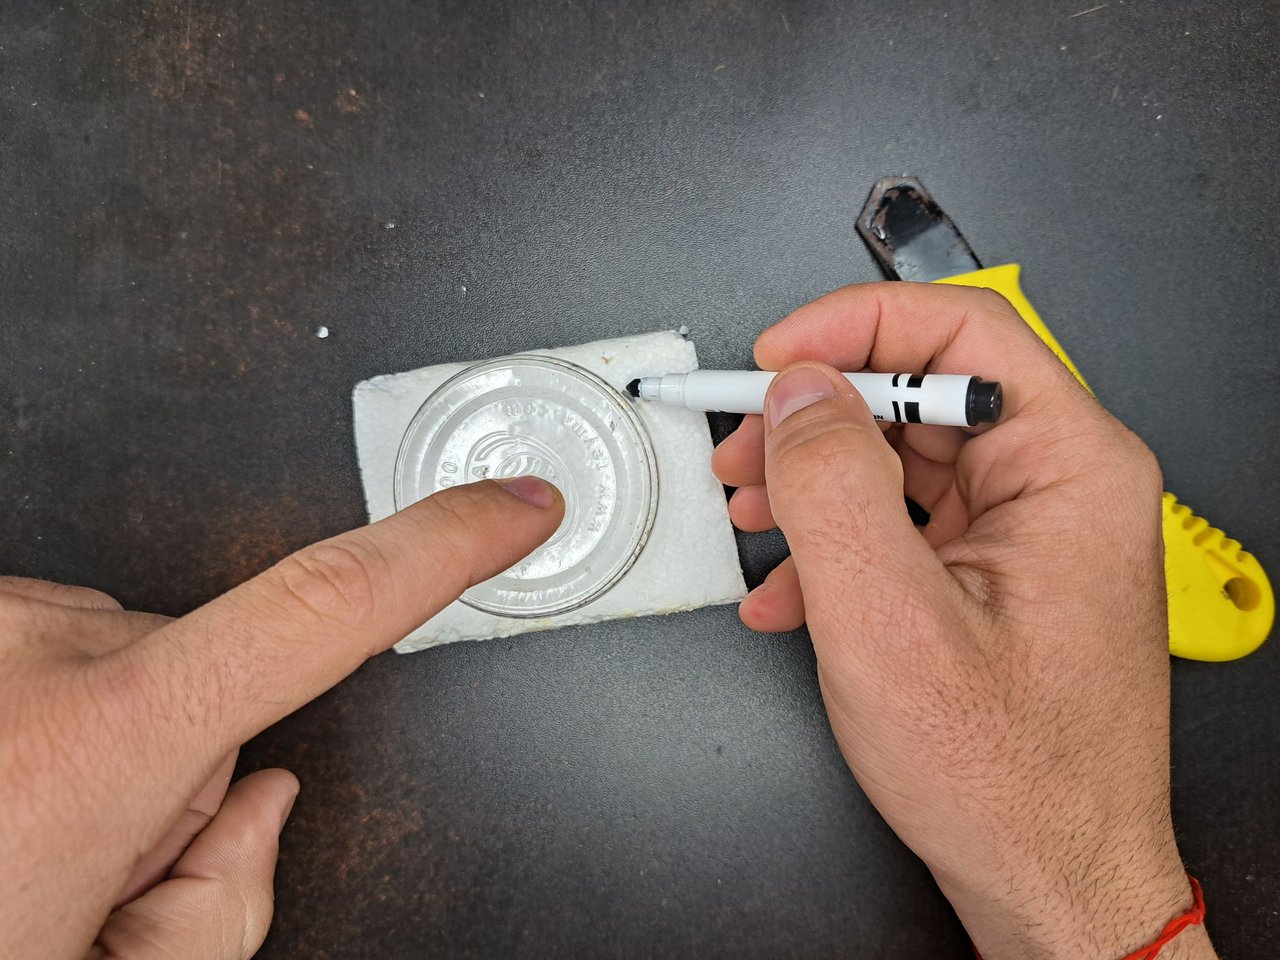
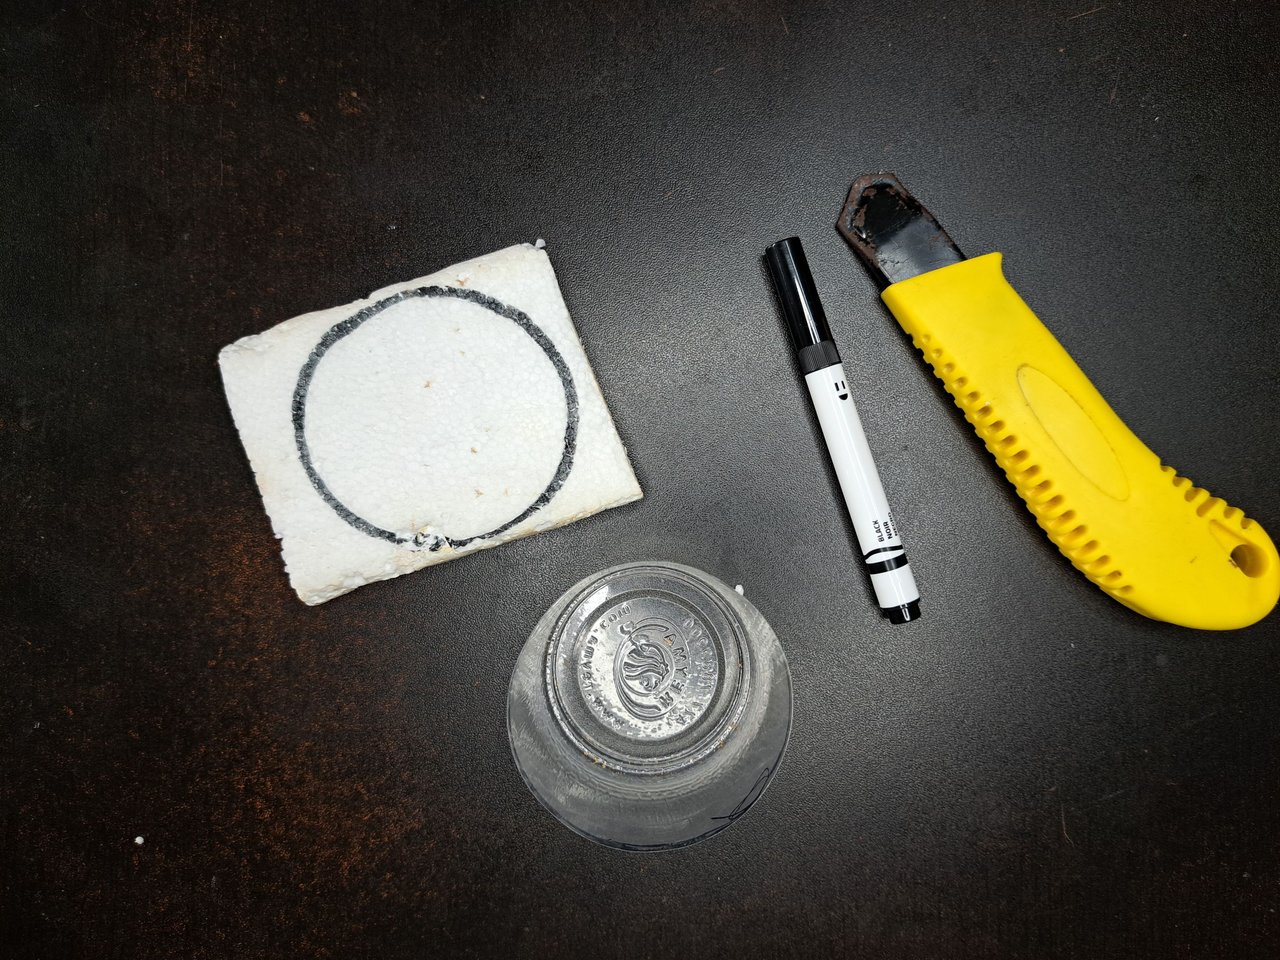
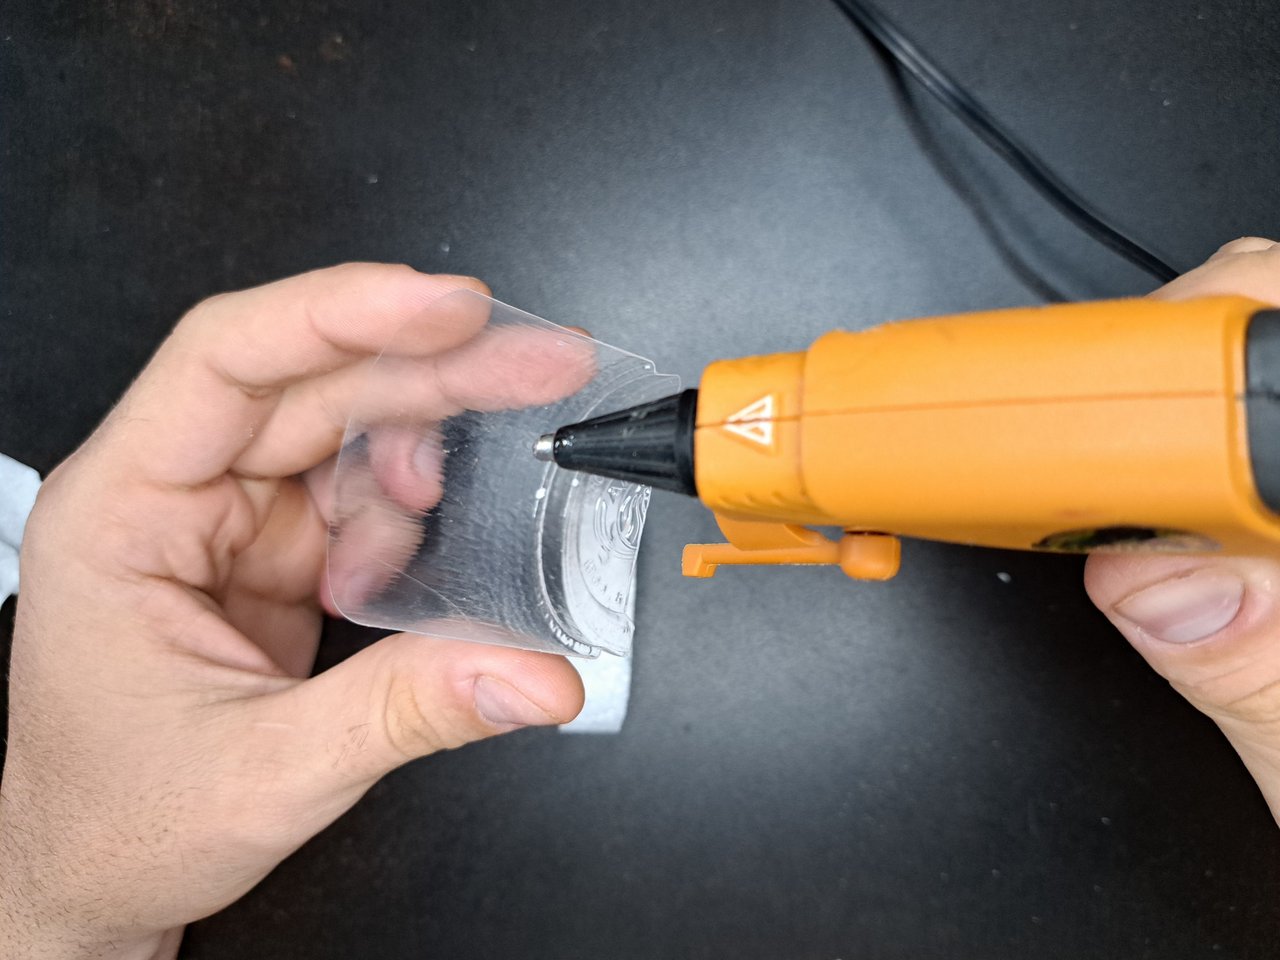
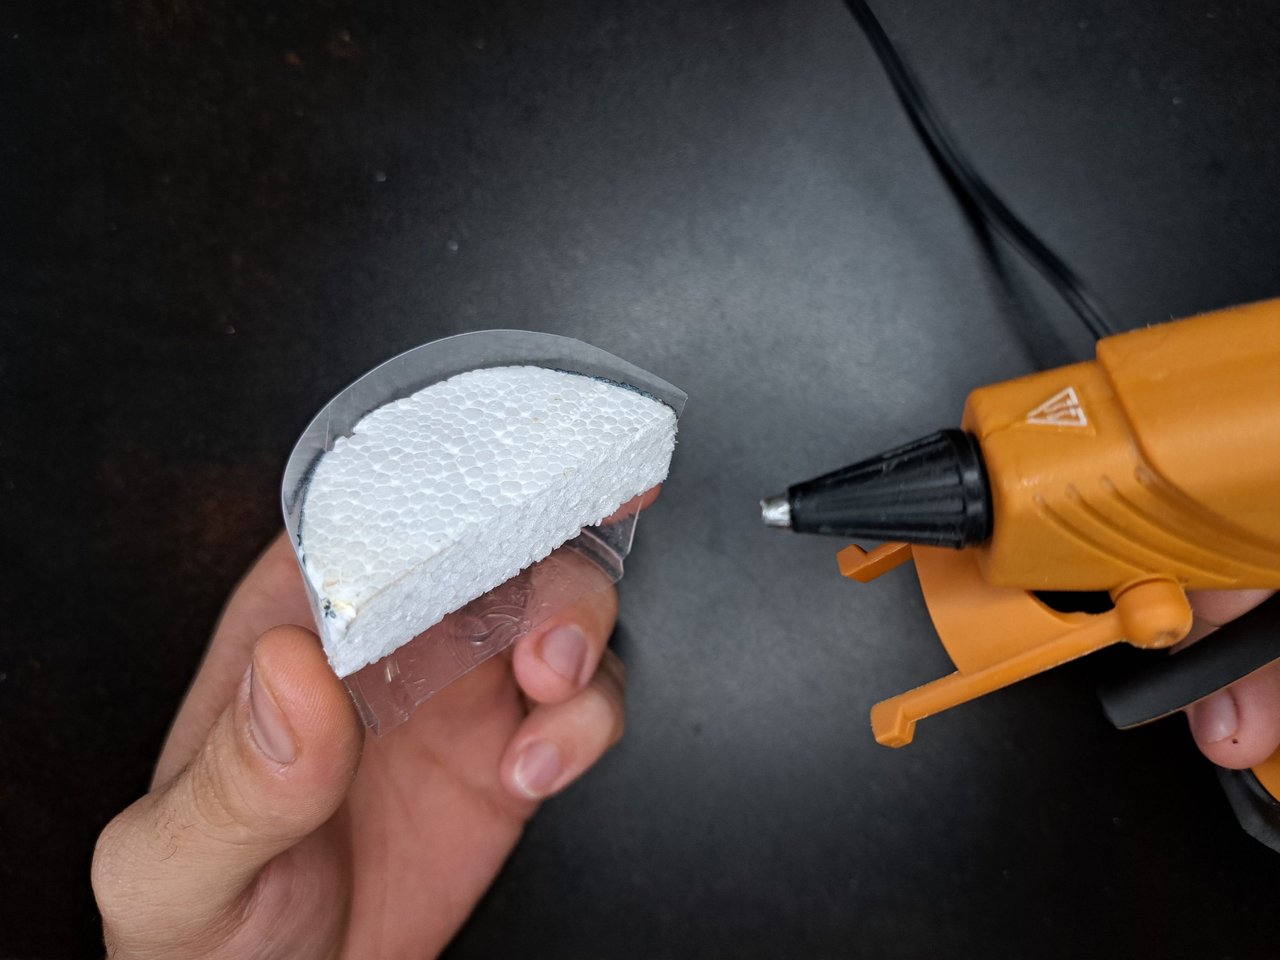
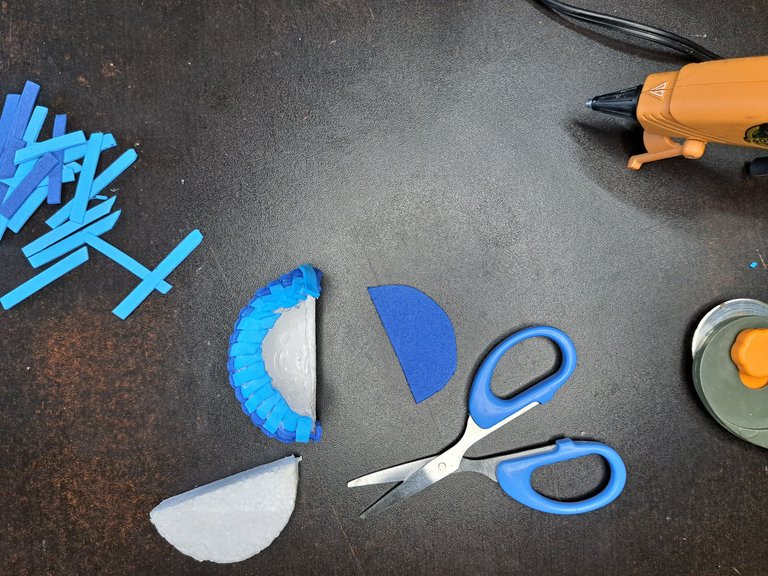
1️⃣ Para empezar recortamos el recipiente plástico a la mitad. Marcamos la parte superior en una fragmento de poliespán. Introducimos el círculo dentro del recipiente, lo pegamos y cortamos a la mitad todo.
To begin with, cut the plastic container in half. Mark the upper part on a piece of polystyrene. Insert the circle inside the container, glue it and cut the whole thing in half.
 |  |
 |
 |
 |
 |  |
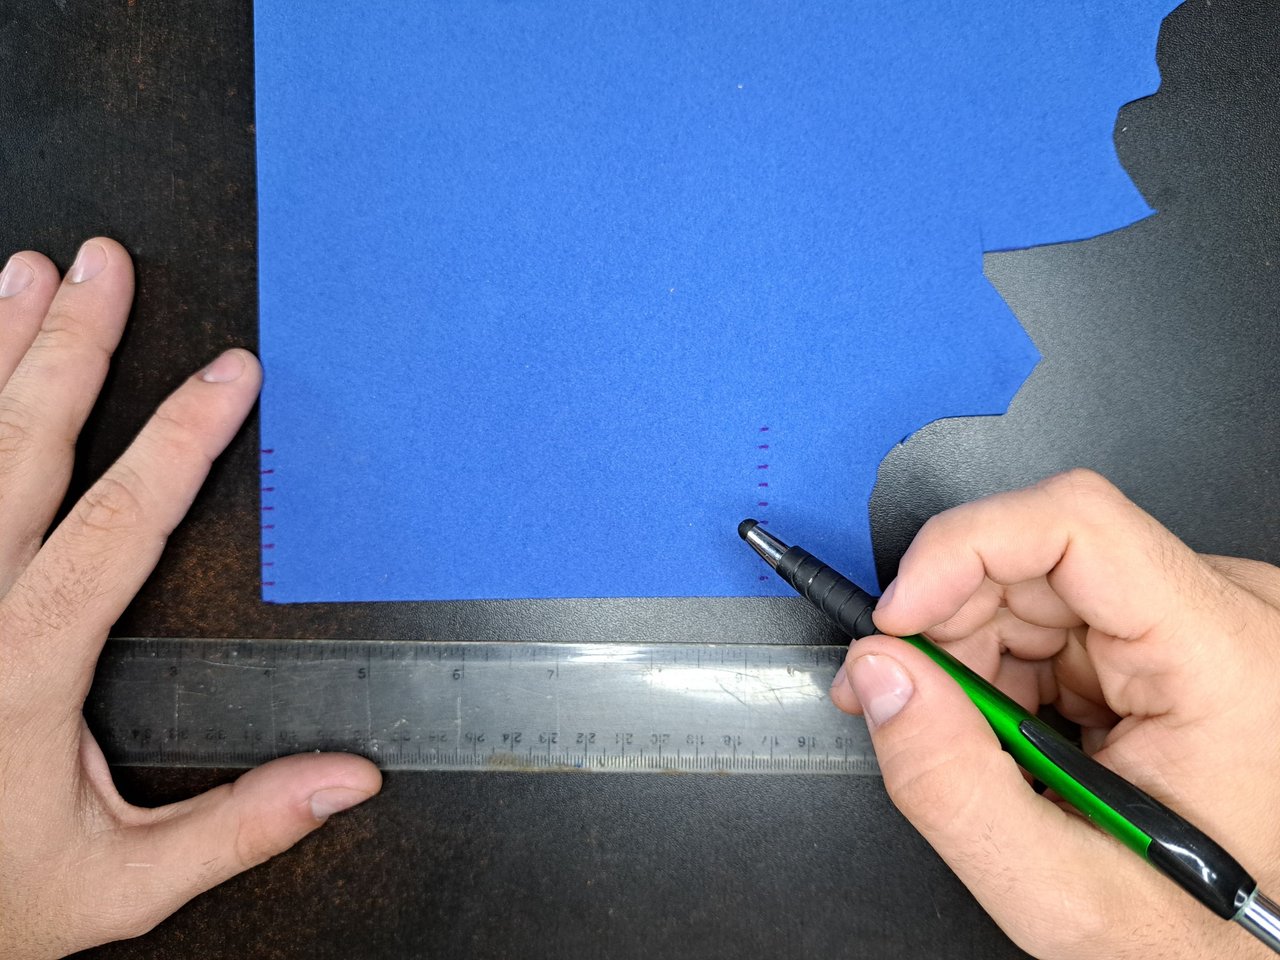
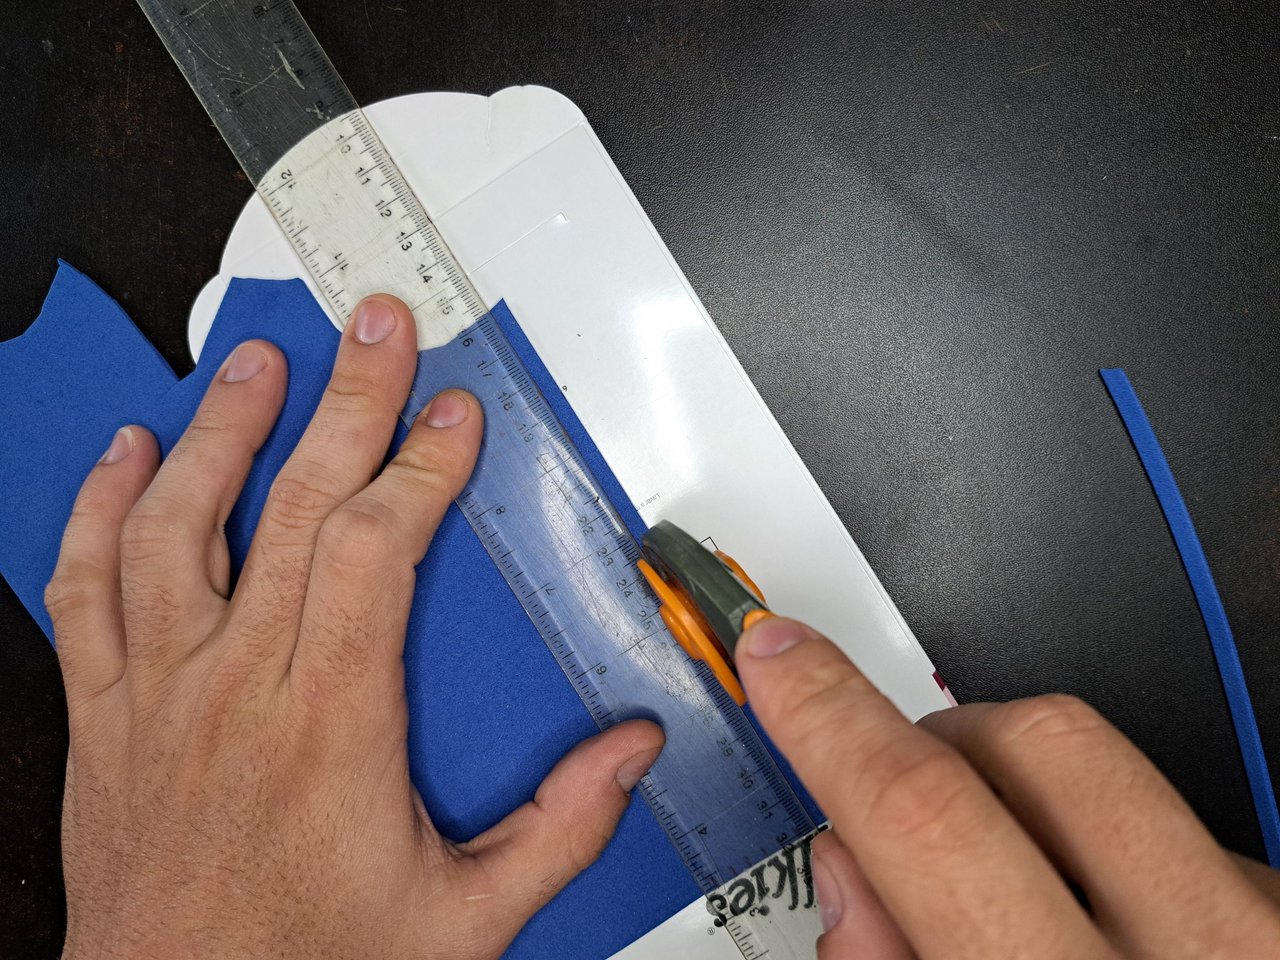
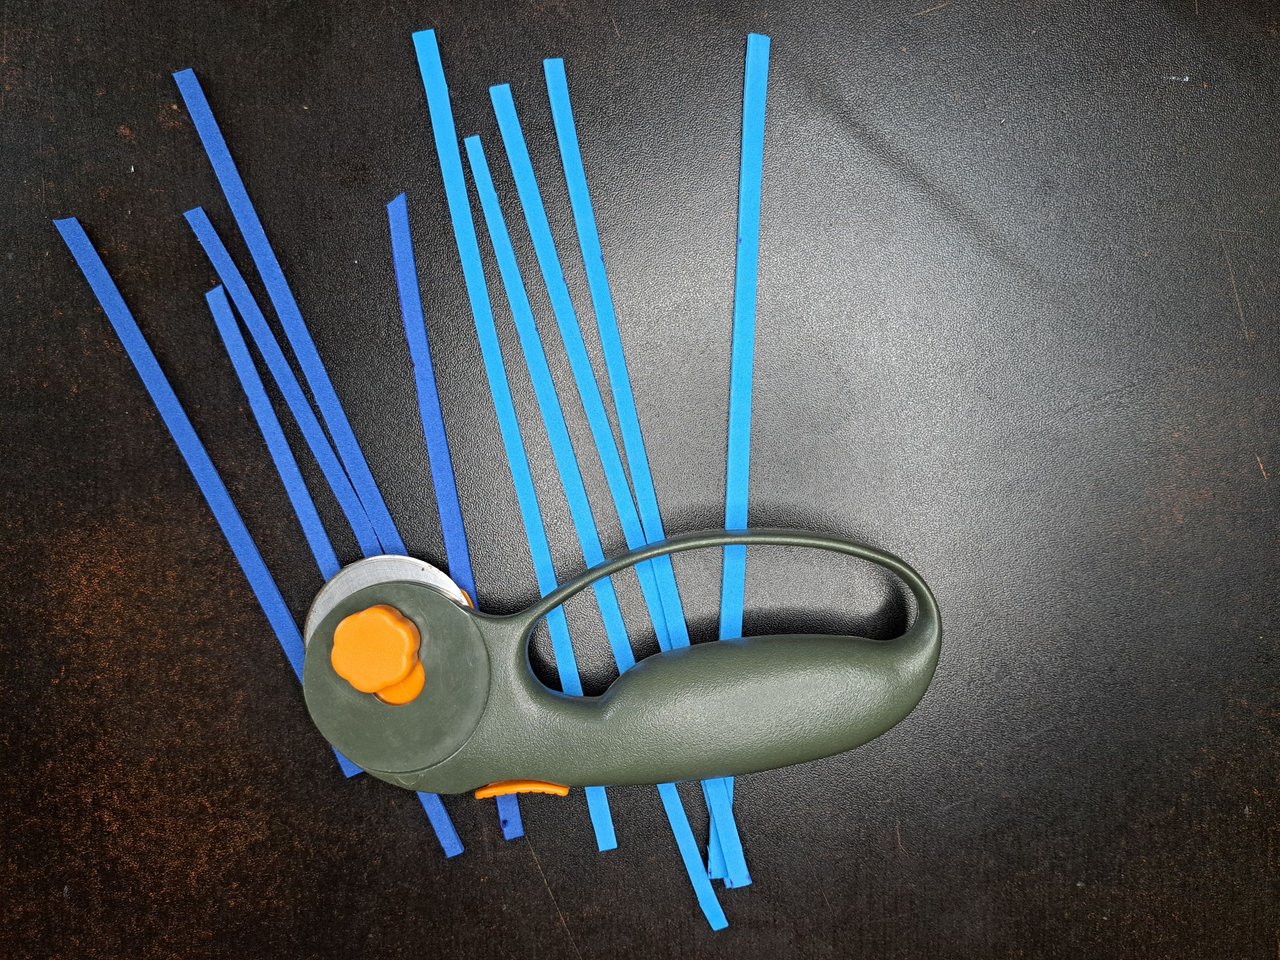
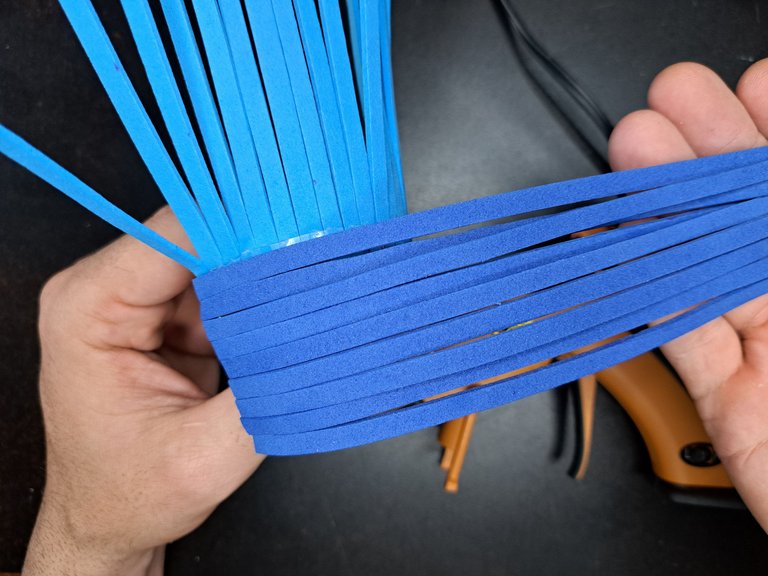
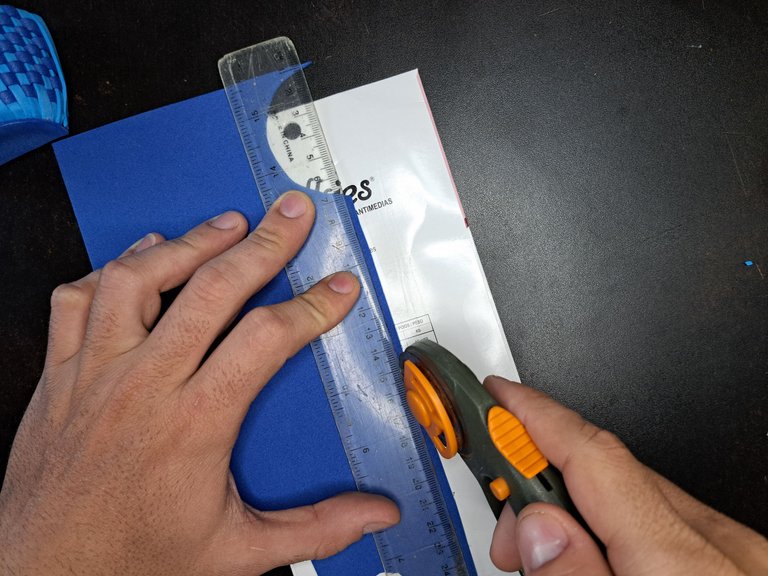
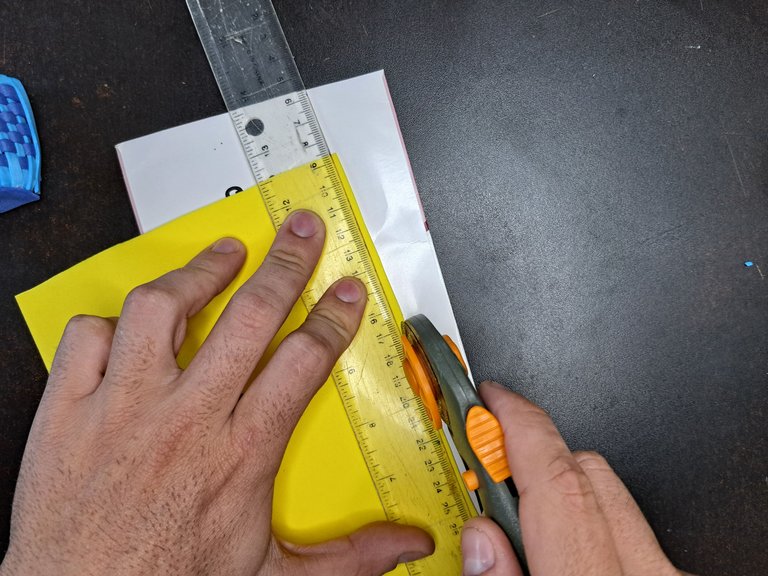
2️⃣ En las láminas de fomi azul oscuro y claro marcamos y recortamos 9 y 18 finas tiras respectivamente, de 0.5 cm de ancho.
On the dark and light blue fomi sheets we mark and cut out 9 and 18 thin strips respectively, 0.5 cm wide.
 |  |
 |  |
 |
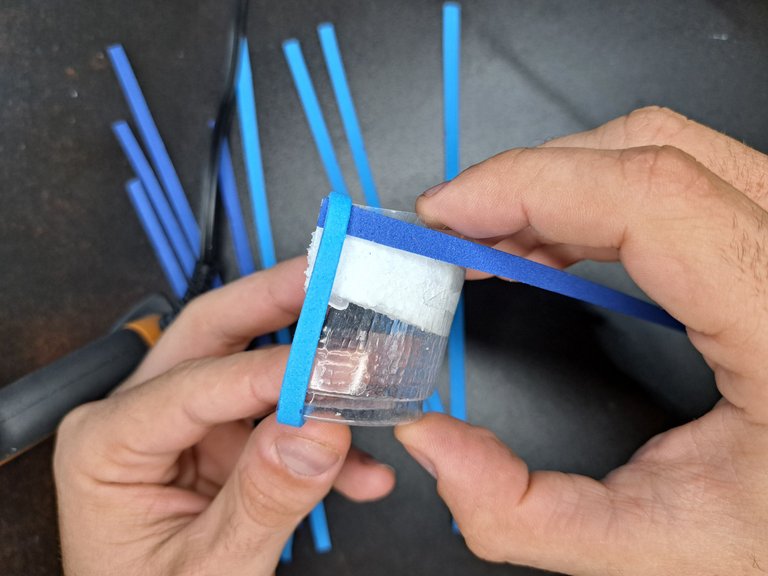
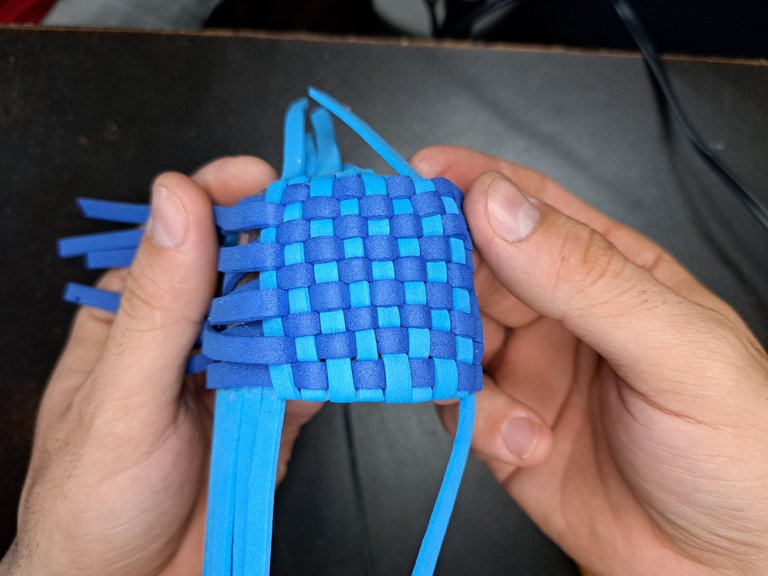
3️⃣ En la mitad de la base que cortamos anteriormente pegamos las tiras de fomi por un costado y por la parte superior. Luego, haciendo uso de la técnica de tejido básico, crearemos las estructura de una cesta alrededor de la base y recortaremos los tramos de fomi sobrantes.
On the half of the base that we previously cut we glue the strips of fomi on one side and on the top. Then, using the basic weaving technique, we will create the structure of a basket around the base and we will cut out the remaining strips of fomi.
|

|
|

|

|
|

|
4️⃣ Con el semicírculo de poliespán sobrante marcaremos su contorno en fomi azul oscuro y lo pegaremos en la parte inferior de la cesta.
With the leftover polystyrene semicircle we will mark its outline in dark blue fomi and glue it to the bottom of the basket.

|
|

|
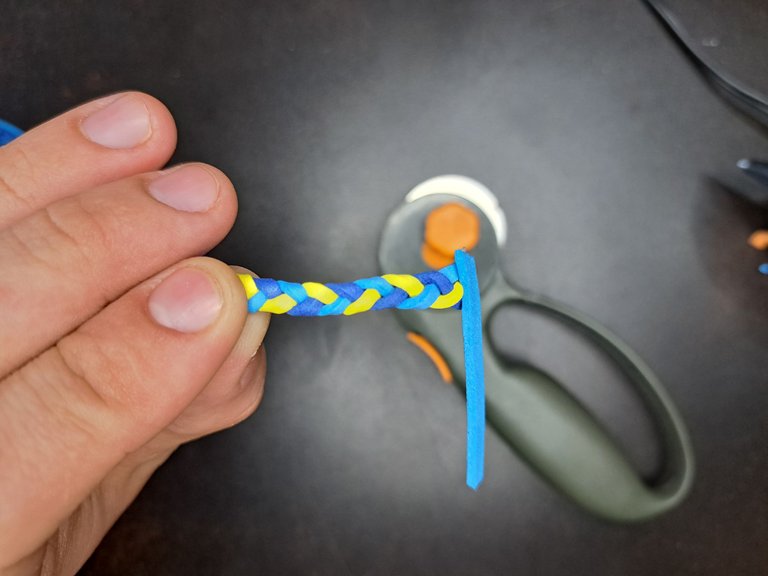
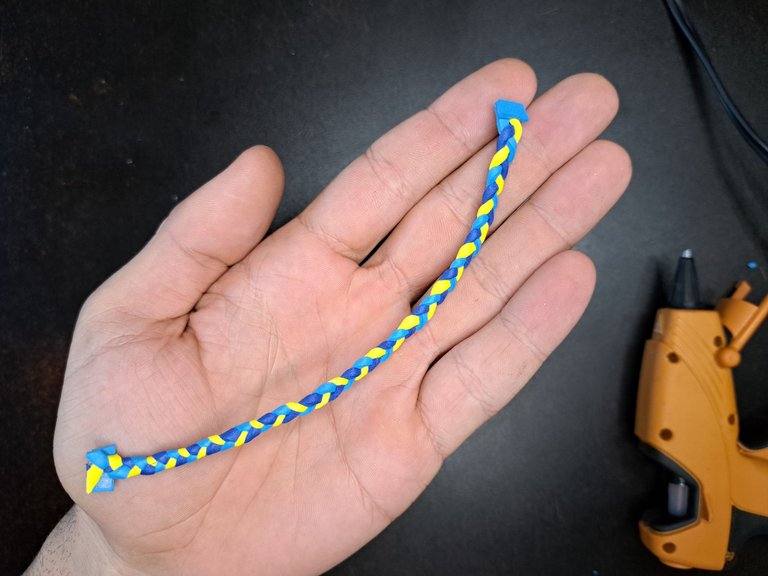
5️⃣ Seguidamente, recortaremos 3 tiras finas de fomi de color amarillo, azul oscuro y claro. Estas tiras las pegaremos en las puntas y haremos una trenza. Con la trenza lista pegaremos sus extremos en el borde interior superior de la cesta y así haríamos el asa del canasto.
Next, we will cut out 3 thin strips of yellow, dark blue and light blue fomi. These strips will be glued at the ends and we will make a braid. With the braid ready, we will glue its ends to the inside upper edge of the basket and thus we will make the handle of the basket.
|
|

|

|
|
|

|
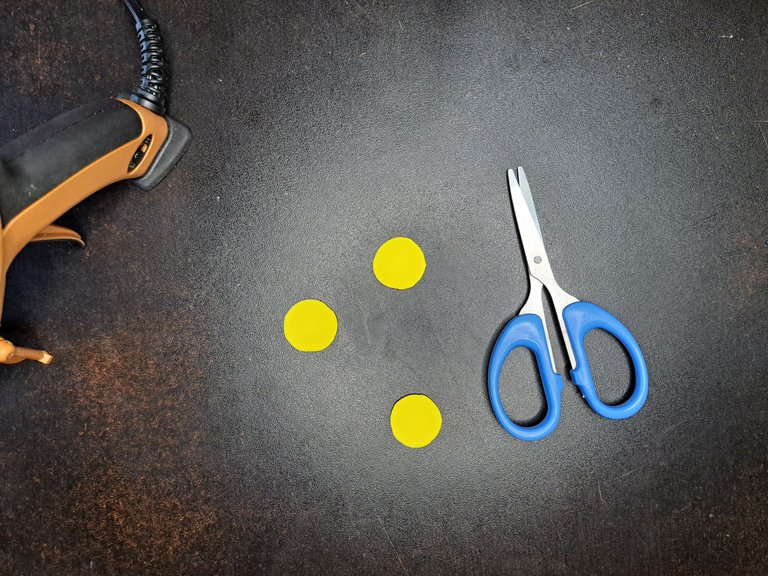
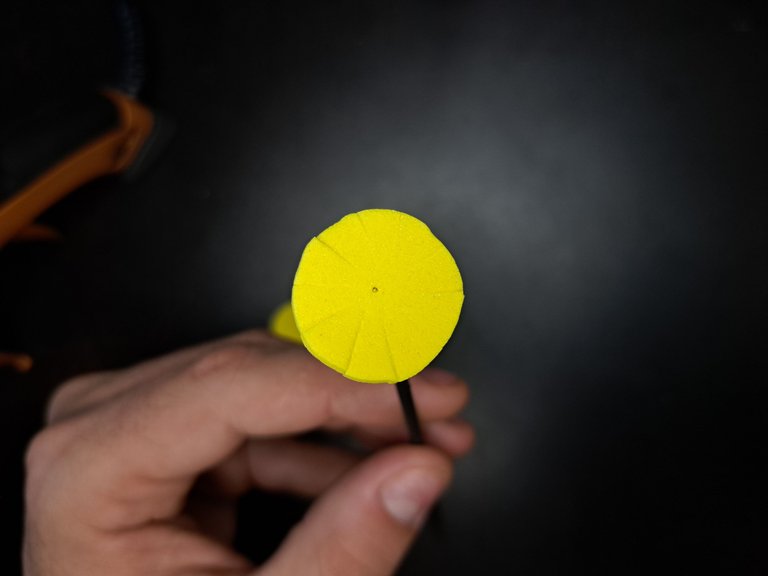
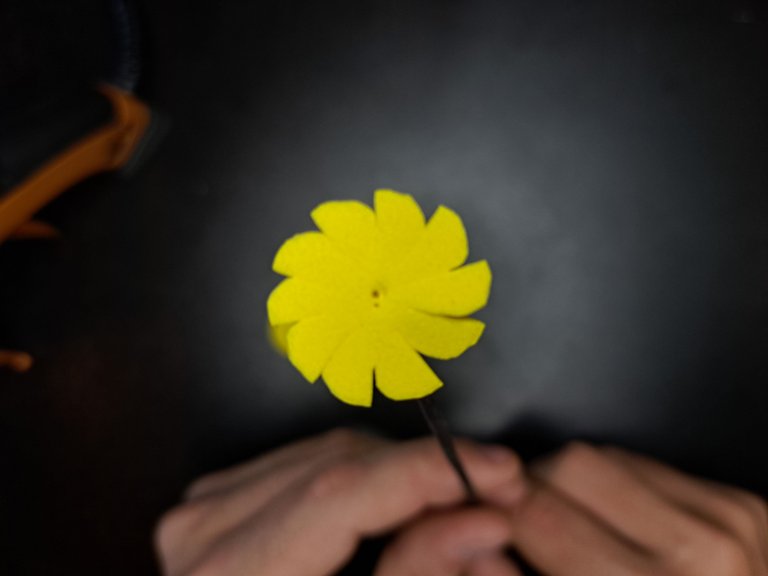
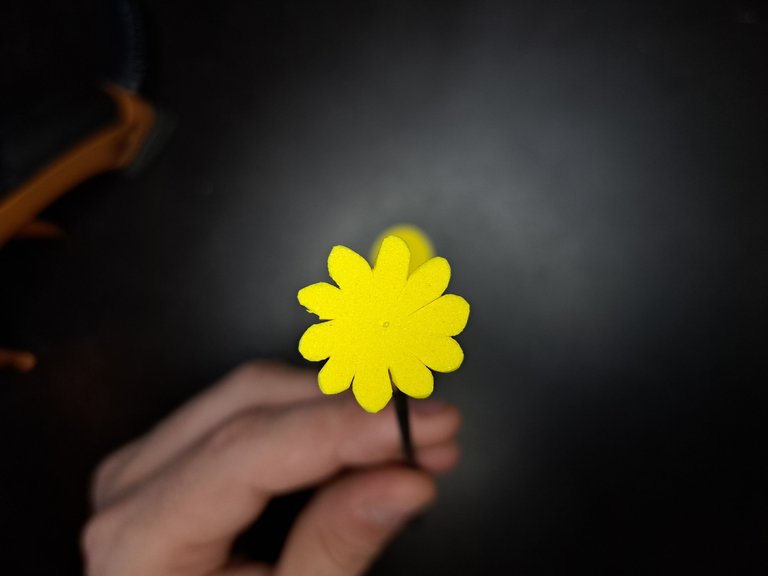
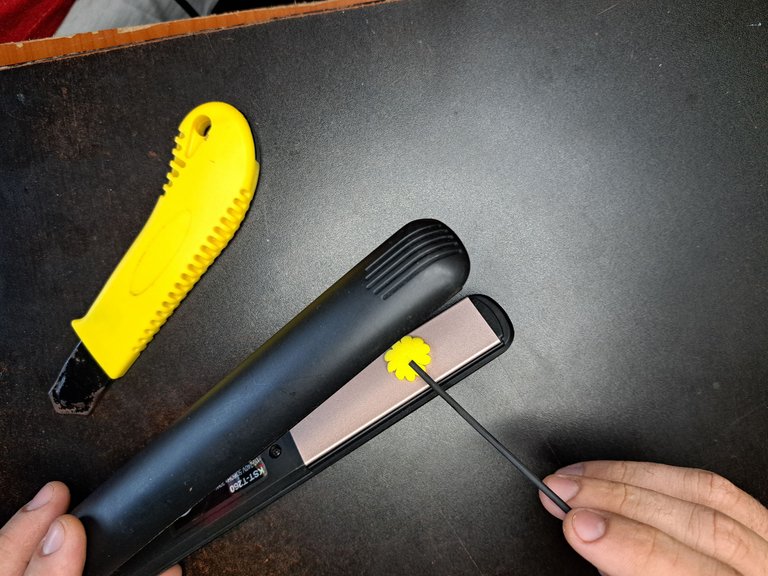
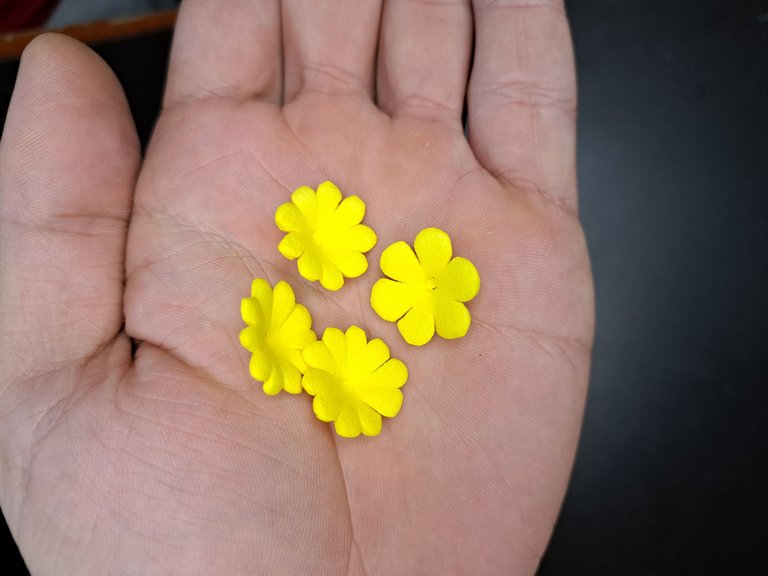
6️⃣ A continuación empezaremos con las flores. Primeramente, confeccionaremos las flores amarillas y para esto recortaremos varios círculos de fomi amarillo y le haremos cortes consecutivos alrededor. Guiándonos por estos cortes, iremos dando forma a los pétalos. Con los pétalos definidos aplicaremos un proceso de termoformado a cada flor para que obtengan su forma característica.
Next we will start with the flowers. First, we will make the yellow flowers and for this we will cut out several circles of yellow fomi and make consecutive cuts around them. Guided by these cuts, we will shape the petals. Once the petals are defined, we will apply a thermoforming process to each flower to obtain its characteristic shape.
|
|
|
|
|

|
|
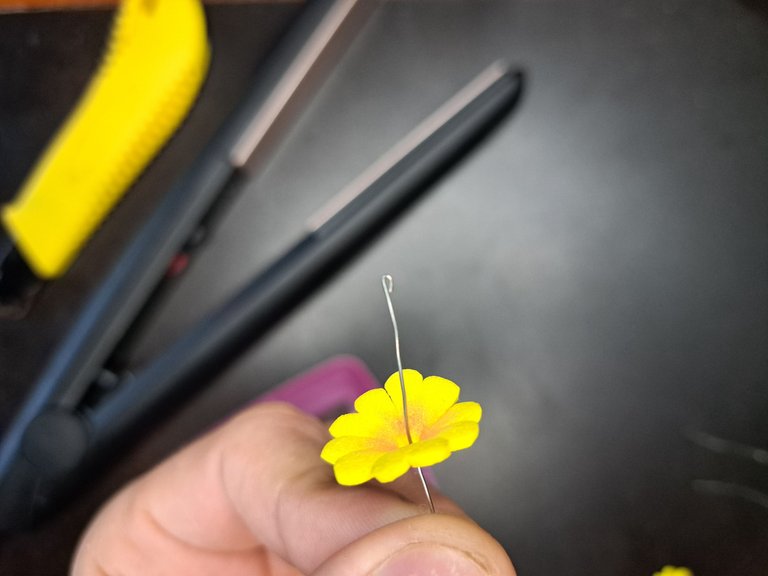
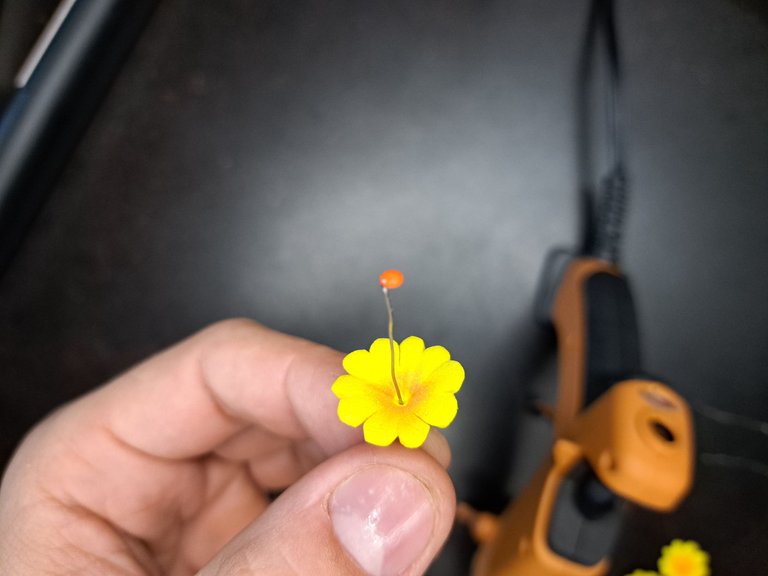
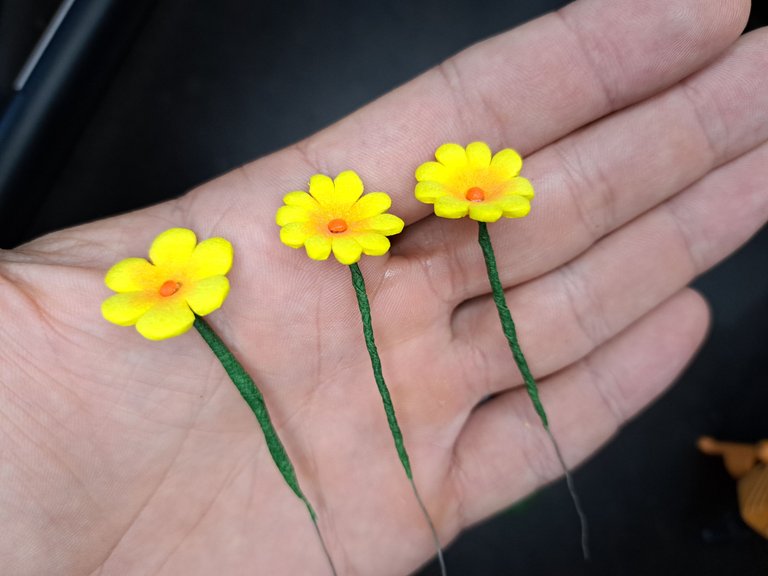
7️⃣ Una vez los pétalos estén listos los atravesamos con alambre fino. En la parte superior pegaremos una piedrecita naranja y unimos todo a los pétalos. La parte posterior del alambre la enrollaremos con tape floral y ya estarían listas las flores amarillas.
Once the petals are ready, we cross them with fine wire. At the top we glue an orange pebble and attach it to the petals. The back of the wire is rolled with floral tape and the yellow flowers are ready.
|
|

|

|
|
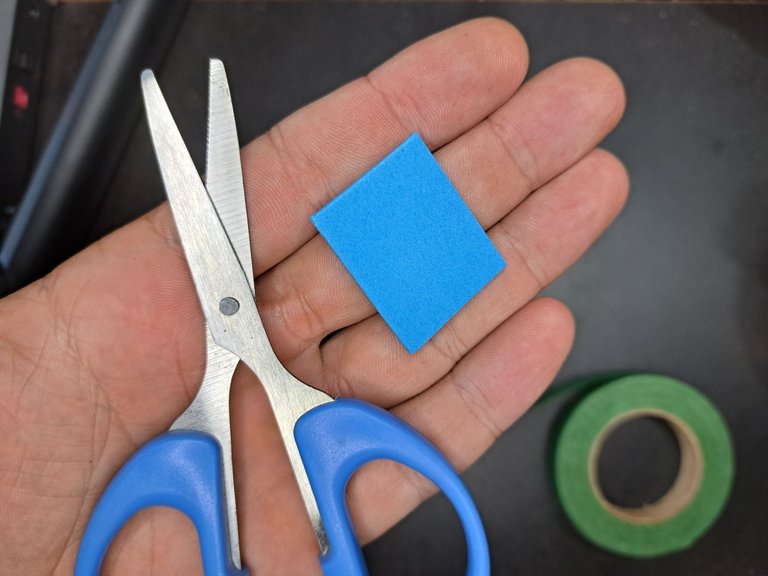
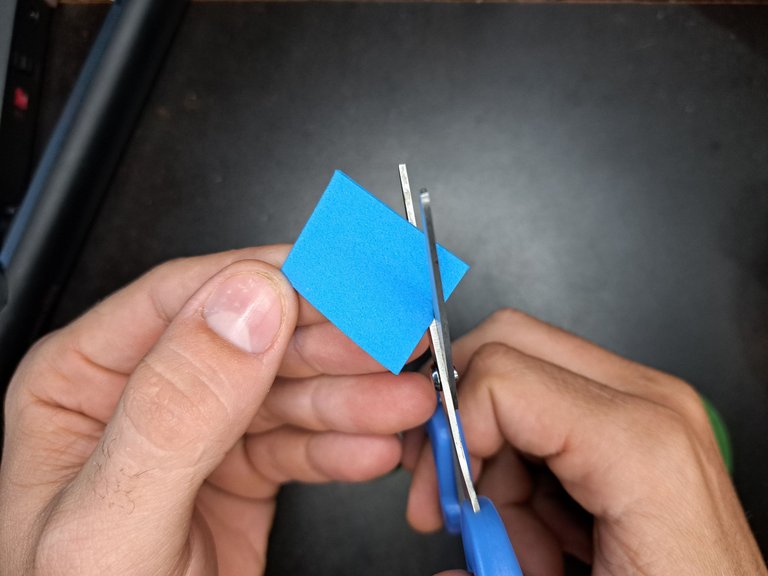
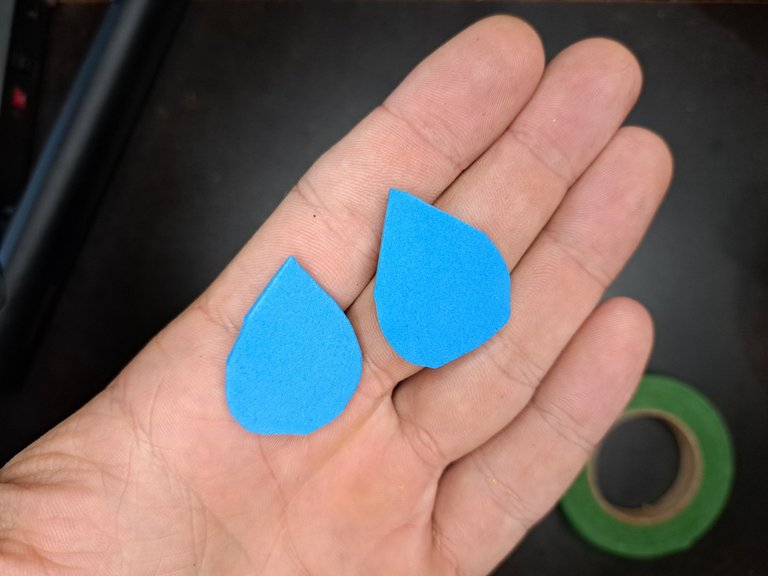
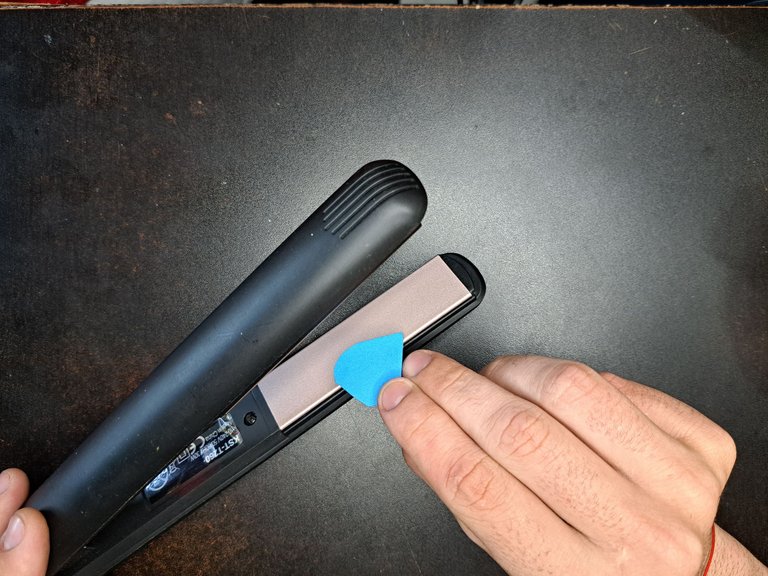
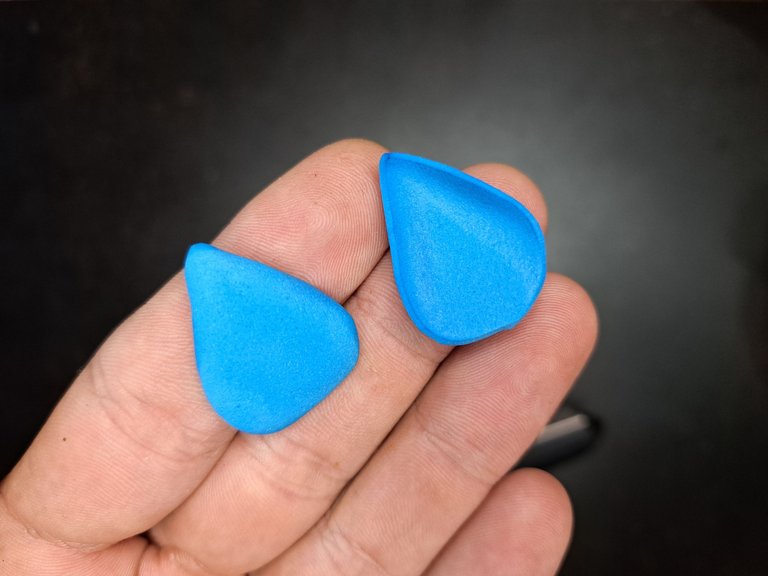
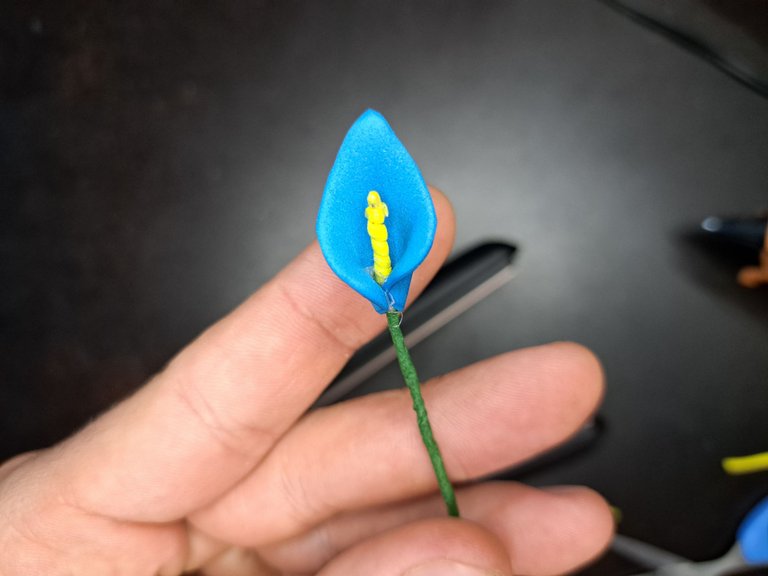
8️⃣ Para las flores azules recortaremos cuadrados azules a los cuales les daremos forma de lágrima. Luego haciendo uso de la plancha doblaremos los bordes de las lágrimas utilizando el termoformado.
For the blue flowers we will cut out blue squares and shape them into teardrops. Then using the iron we will fold the edges of the teardrops using the thermoforming.
|
|
|
|
|
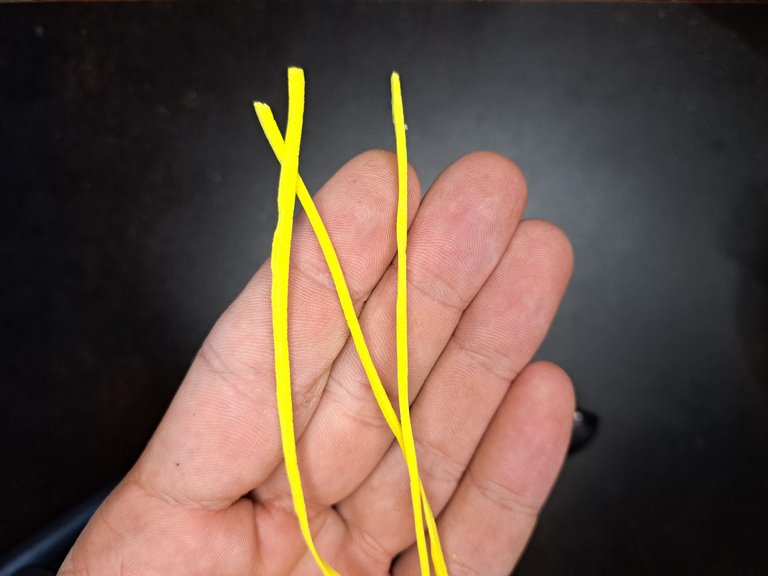
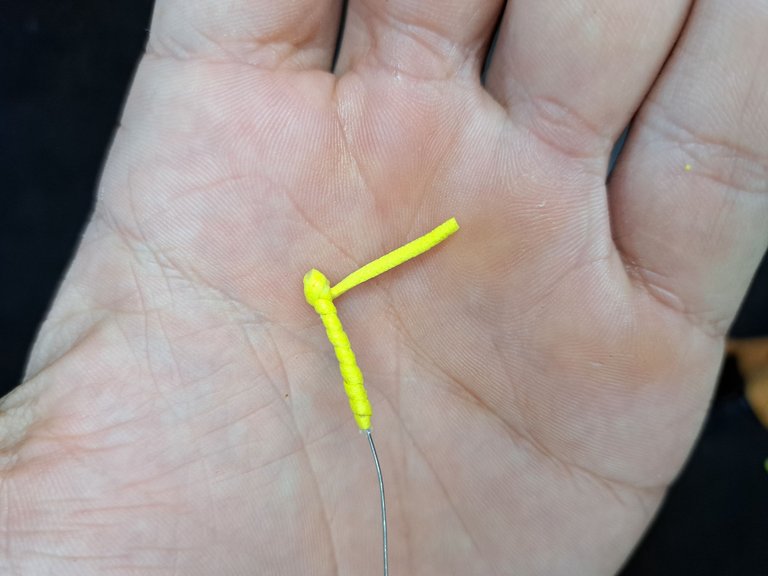
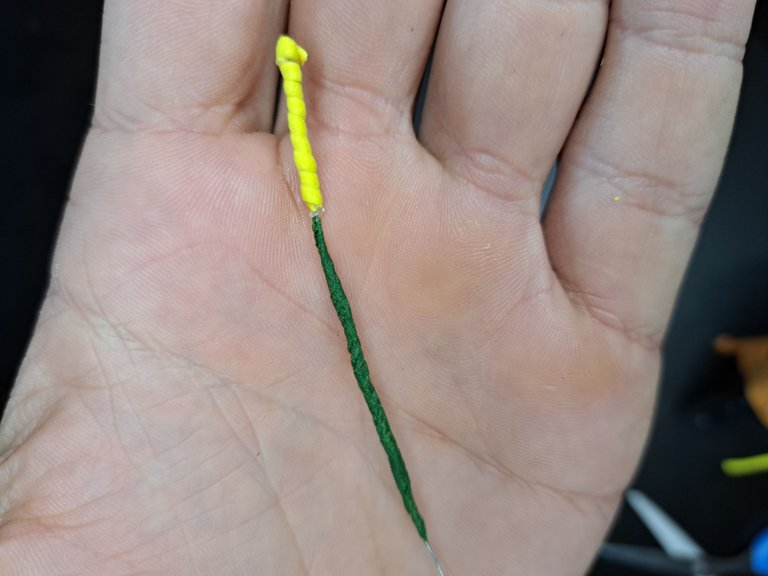
9️⃣ Seguidamente, haciendo uso de alambre, los restos de las tiras de fomi amarillo y del tape floral crearemos los centros de las flores azules, los cuales pegaremos en el centro de las lágrimas azules que creamos en el paso anterior.
Next, using wire, the remnants of the strips of yellow fomi and the floral tape, we will create the centers of the blue flowers, which we will glue in the center of the blue teardrops we created in the previous step.
|
|
|

|
|
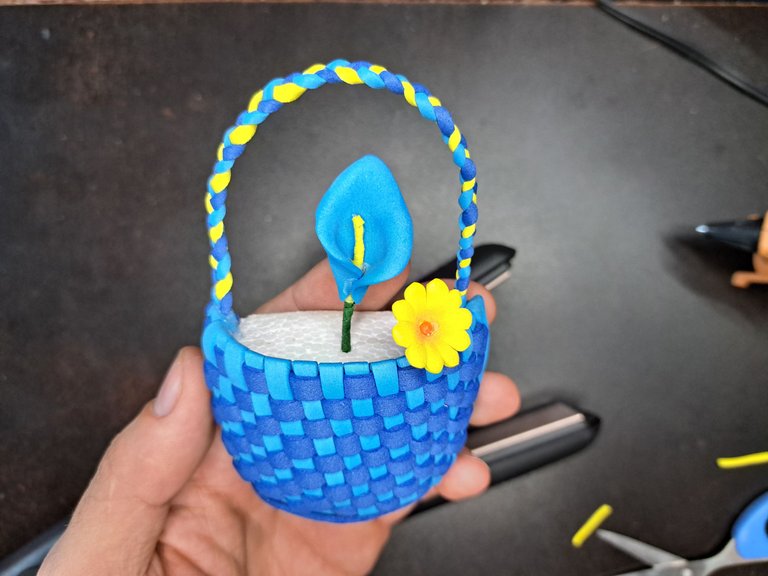
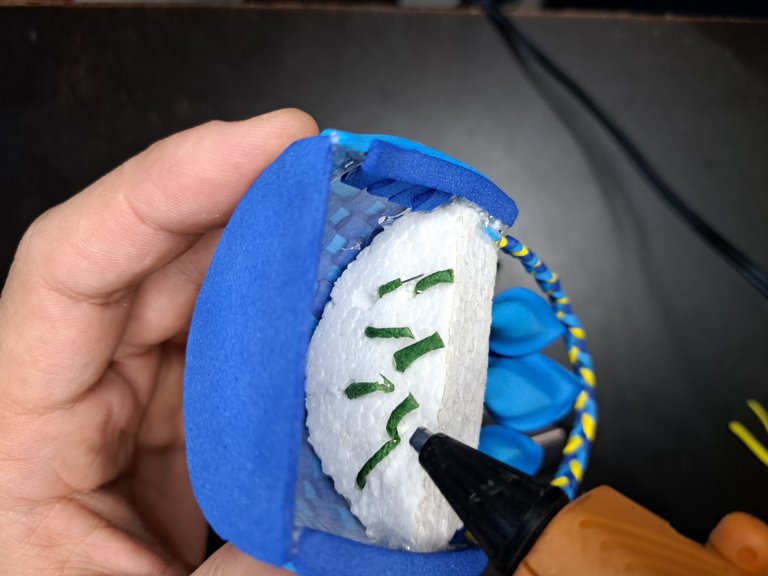
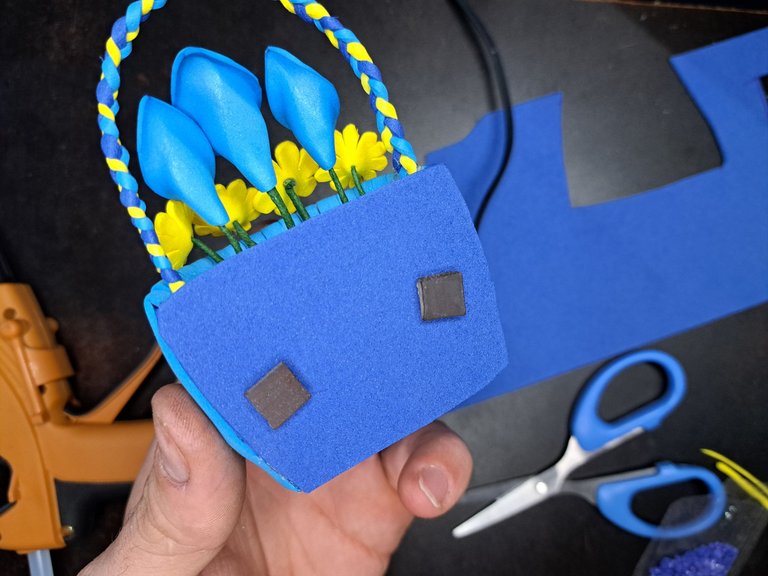
🔟 Con todo los elementos listos es hora de ensamblar el adorno. Primeramente, iremos insertando las flores azules y amarillas de forma intercalada. Una vez que estén la posición deseada, doblaremos, recortaremos y pegaremos los tallos para que no se muevan o caigan. Por último marcaremos, recortaremos y pegaremos la silueta trasera del adorno, al cual le agregaremos también dos imanes para que se sujeten en superficies metálicas.
With all the elements ready, it is time to assemble the ornament. First, we will insert the blue and yellow flowers in an intercalary way. Once they are in the desired position, we will bend, cut and glue the stems so that they do not move or fall. Finally, we will mark, cut out and glue the back silhouette of the ornament, to which we will also add two magnets so that they can be attached to metal surfaces.
|
|
|

|

|

|
|
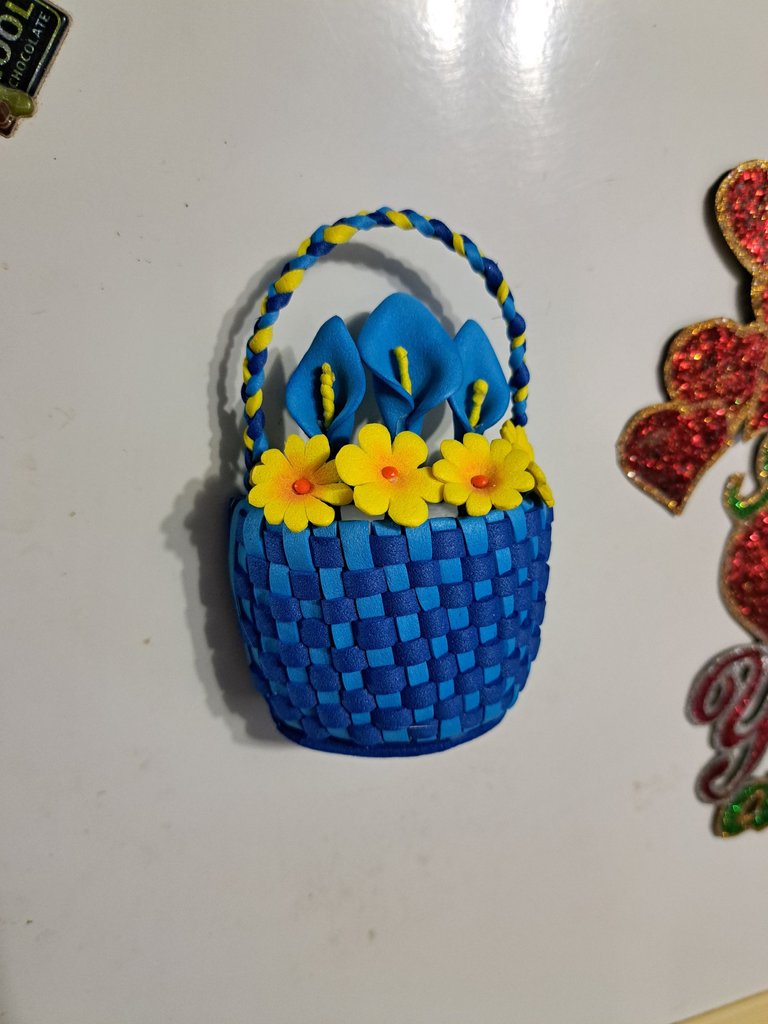
Y pues esto sería todo amigos. Espero que haya sido de su agrado y antes de mostrarles el resultado final los invito a que me dejen su opinión en los comentarios sobre si les gusto o no. Yo, como siempre, estaré encantado de leerlos y responderles. Bye.
And this would be all friends. I hope you liked it and before I show you the final result I invite you to leave me your opinion in the comments on whether you like it or not. I, as always, will be happy to read them and answer you. Bye.
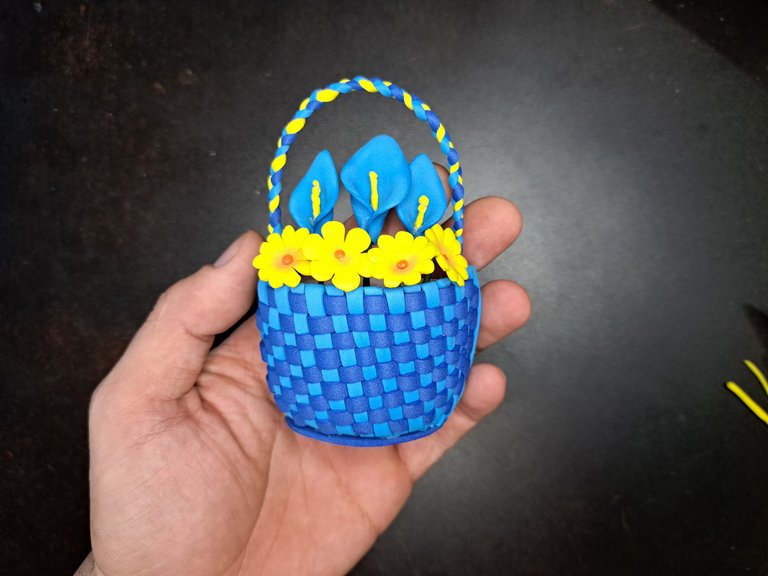
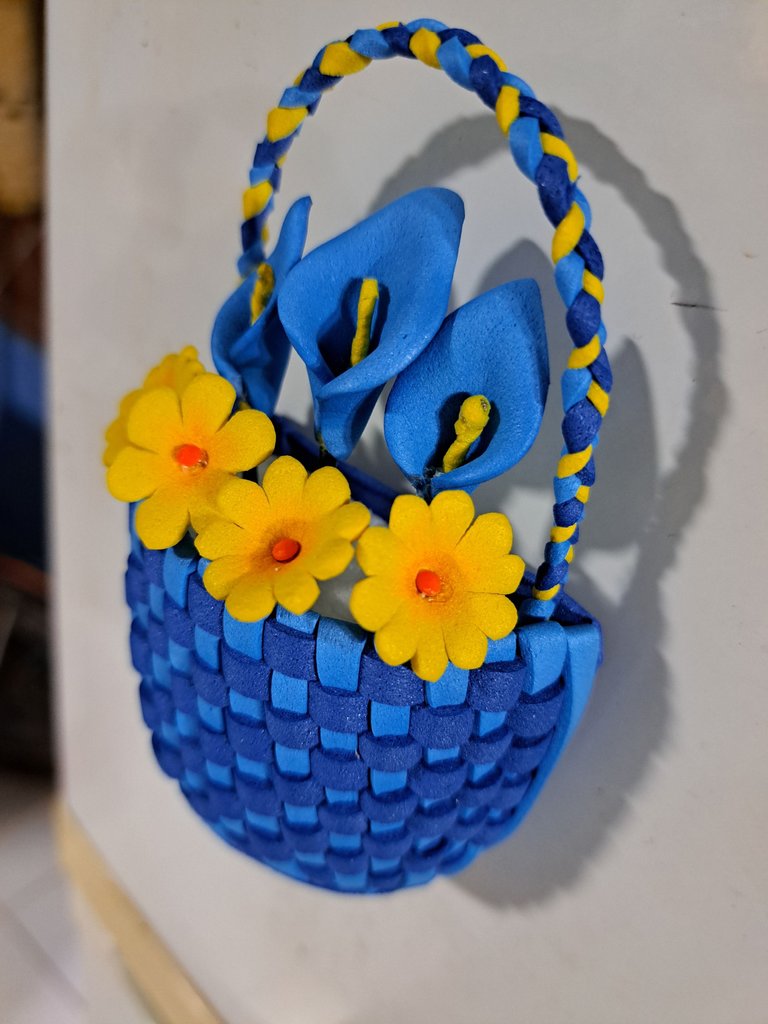
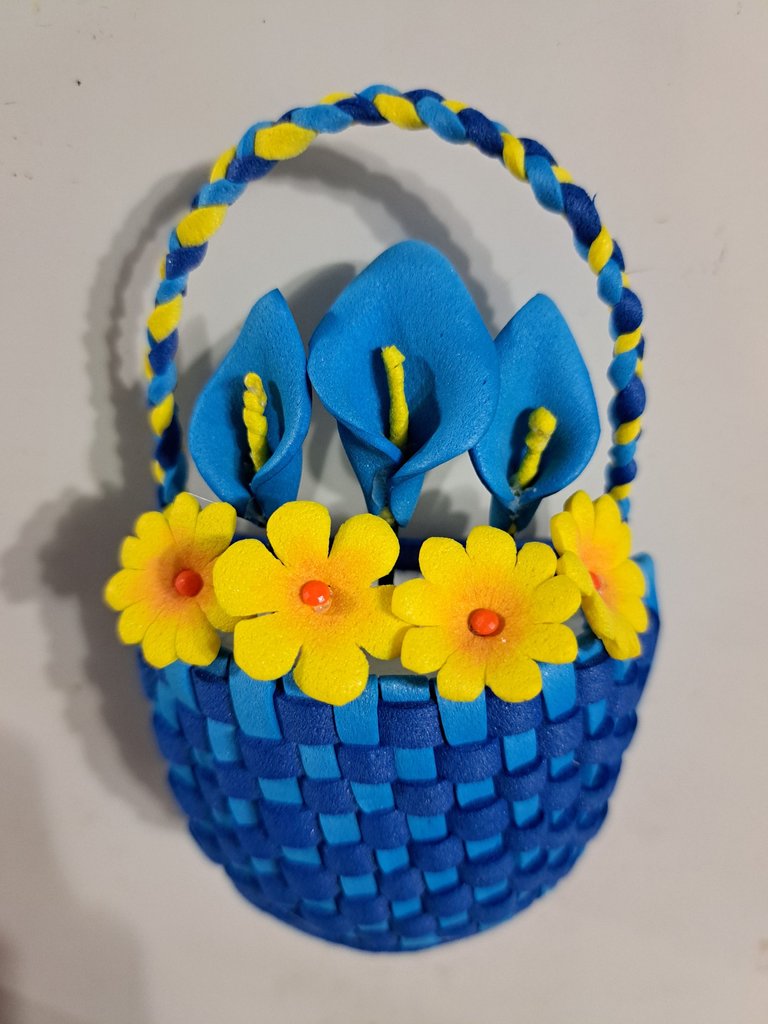
🔹 Resultado Final // Final Result 🔹
|
|
|
|

|

Muchas gracias por leer mi post. Si te gustó, por favor deja un comentario y considera seguirme para no perderte mis próximas publicaciones. Me encantaría saber tu opinión y tus ideas sobre el tema que traté en este post. ¡Nos vemos en el próximo!
Thank you very much for reading my post. If you liked it, please leave a comment and consider following me so you don't miss my next posts. I'd love to know your opinion and your thoughts about the topic I discussed in this post, see you in the next one!
Cover page created in Canva
Translated by DeepL


!giphy wow
@sagarkothari88 vote 15%
!PIZZA
Via Tenor
| Hive Curators Community | Join Discord | Support Witness | Follow Curation Trail |
Keep Up the good work on Hive ♦️
Thank you for all the support you provide
wow amazing. Art work thanks a lot for sharing ❤️🤗🔥🙏
Thank you for your support
$PIZZA slices delivered:
@bhattg(7/10) tipped @edeyglezsosa
Yay! 🤗
Your content has been boosted with Ecency Points, by @edeyglezsosa.
Use Ecency daily to boost your growth on platform!
Thank you for accepting the Boost
Edey esas cosas de puntos q es ?
A medida que vas generando interacción desde la dapp de ecency, vas ganando puntos. Estos puntos los puedes usar para boostear una publicación o para promocionarla.
A ya ok ok
Es una belleza, tu amiga la va a adorar y la conservara por siempre 😍 me encantaron los detalles que le hiciste y esa combinacion de colores esta muy prolija ❤️ es muy tierna tambien jeje
Buhito es tu fan jaja 😂
Espero que así sea y le guste el regalo. Buhito tiene buenos gustos 😁
Buen trabajo Edey 👏… muy original 😉
Muchísimas gracias 🫂
Muy bonito trabajo
Gracias 🫂
Que bonito ideal para un regalo o decoración, creo que lo intentaré en algún momento.
Pues hazlo y comparte el resultado con nosotros.
Lovely colors!!!
Congratulations @edeyglezsosa! You have completed the following achievement on the Hive blockchain And have been rewarded with New badge(s)
Your next target is to reach 1000 replies.
You can view your badges on your board and compare yourself to others in the Ranking
If you no longer want to receive notifications, reply to this comment with the word
STOPhttps://twitter.com/hivediy47901/status/1756172178767172026
Vota por HIVEDIY como Witness en el siguiente Link:
https://vote.hive.uno/@hivediy
Bnas noches, paso por aquí para comentarte que me encantó tu trabajo.
Saludos y gracias por compartirlo.