DIY: Floral ornament with square cardboard base.. // DIY:Adorno floral con base cuadrada de cartón. [ENG+ESP]
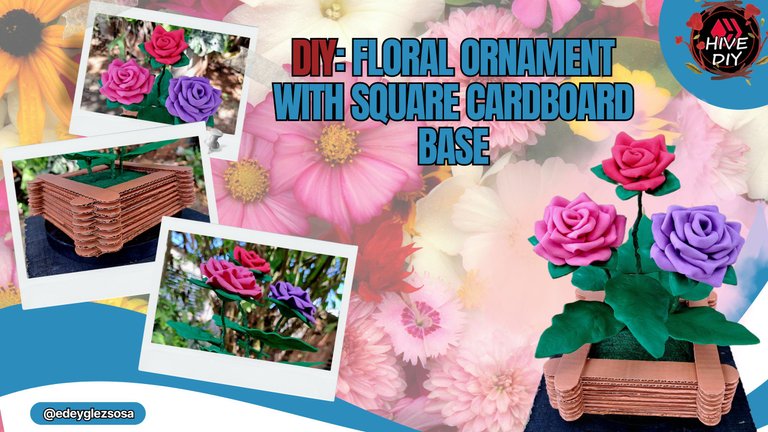
April 2nd is the birthday of a very special person for me. On that day my beloved grandmother celebrates her birthday, and this time she will be 80 years old. In honor of such an important date, the whole family has agreed to celebrate in style. The thing is that I am getting into the habit of including in the gifts some detail made by me. And since it is my grandmother, it could not be an exception.
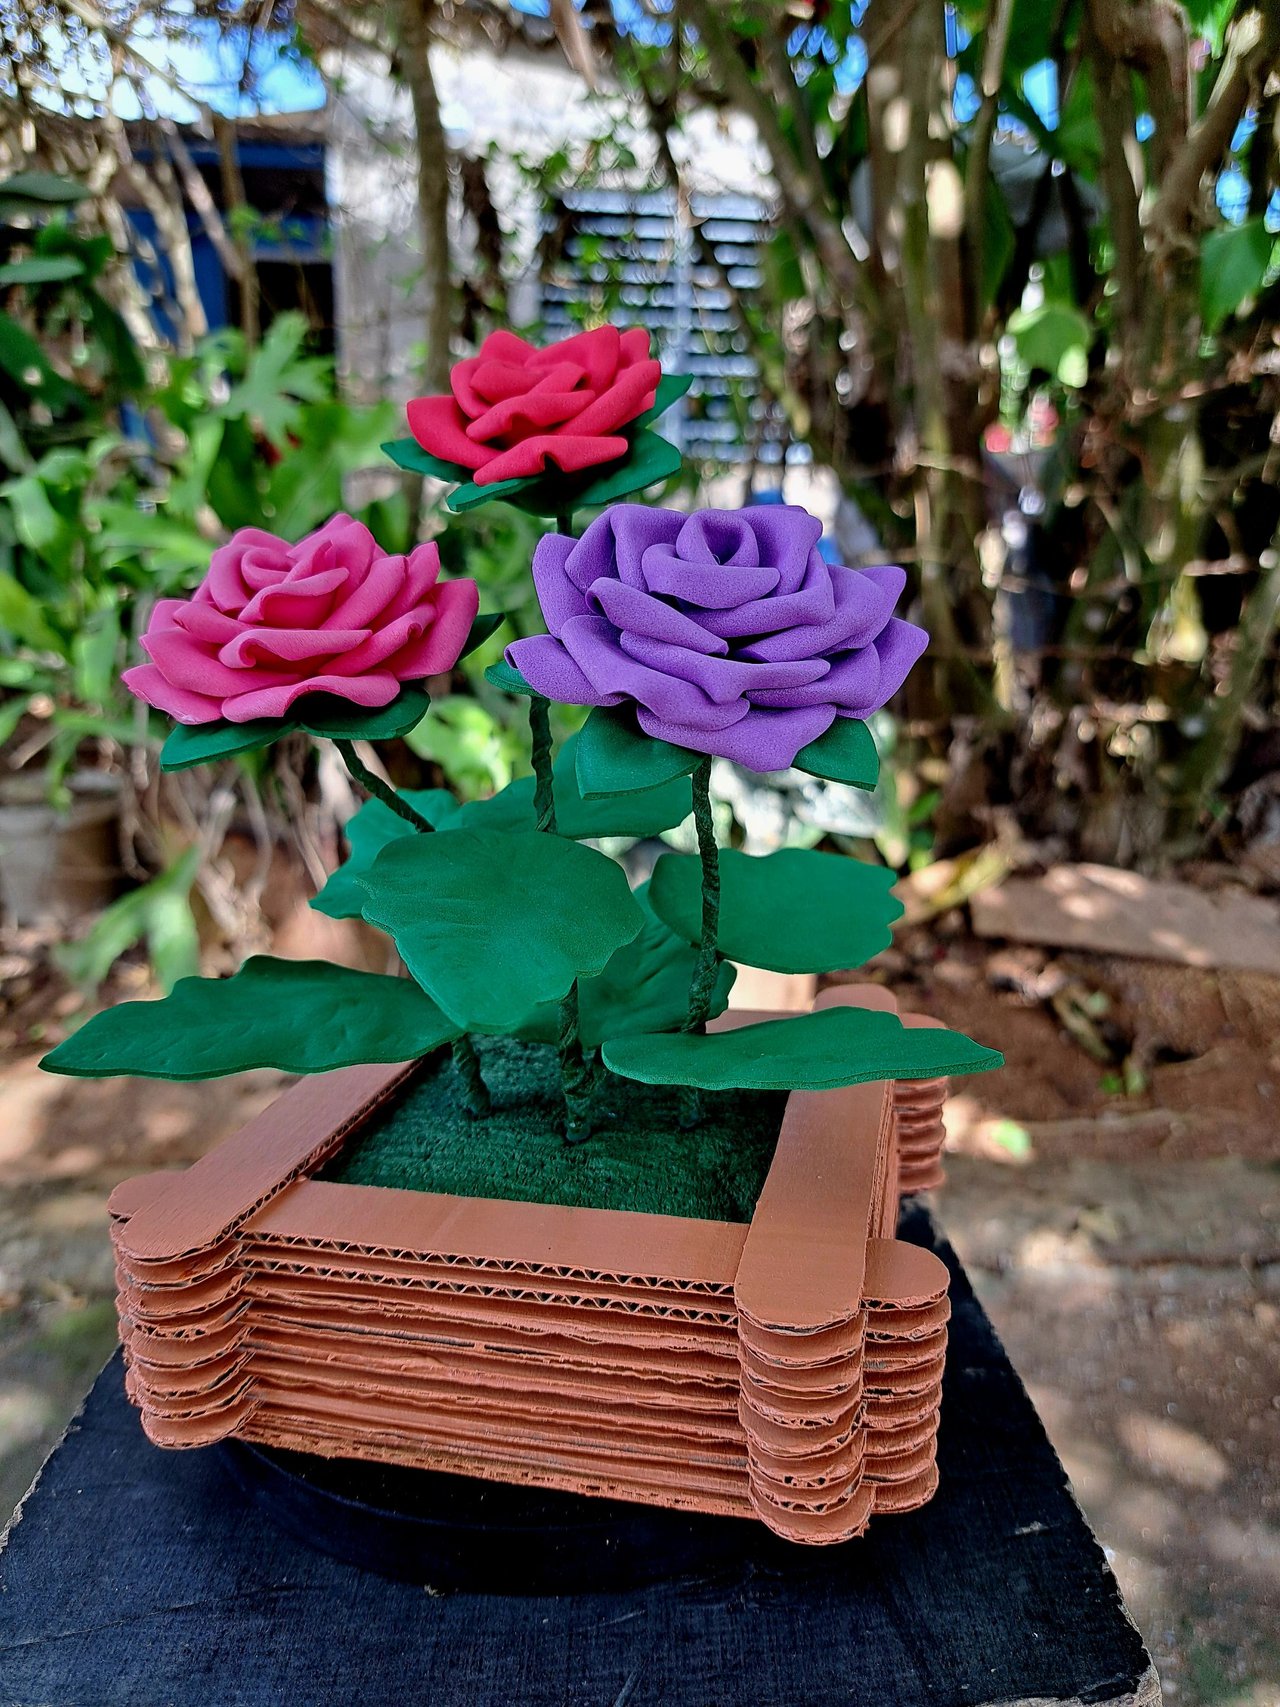
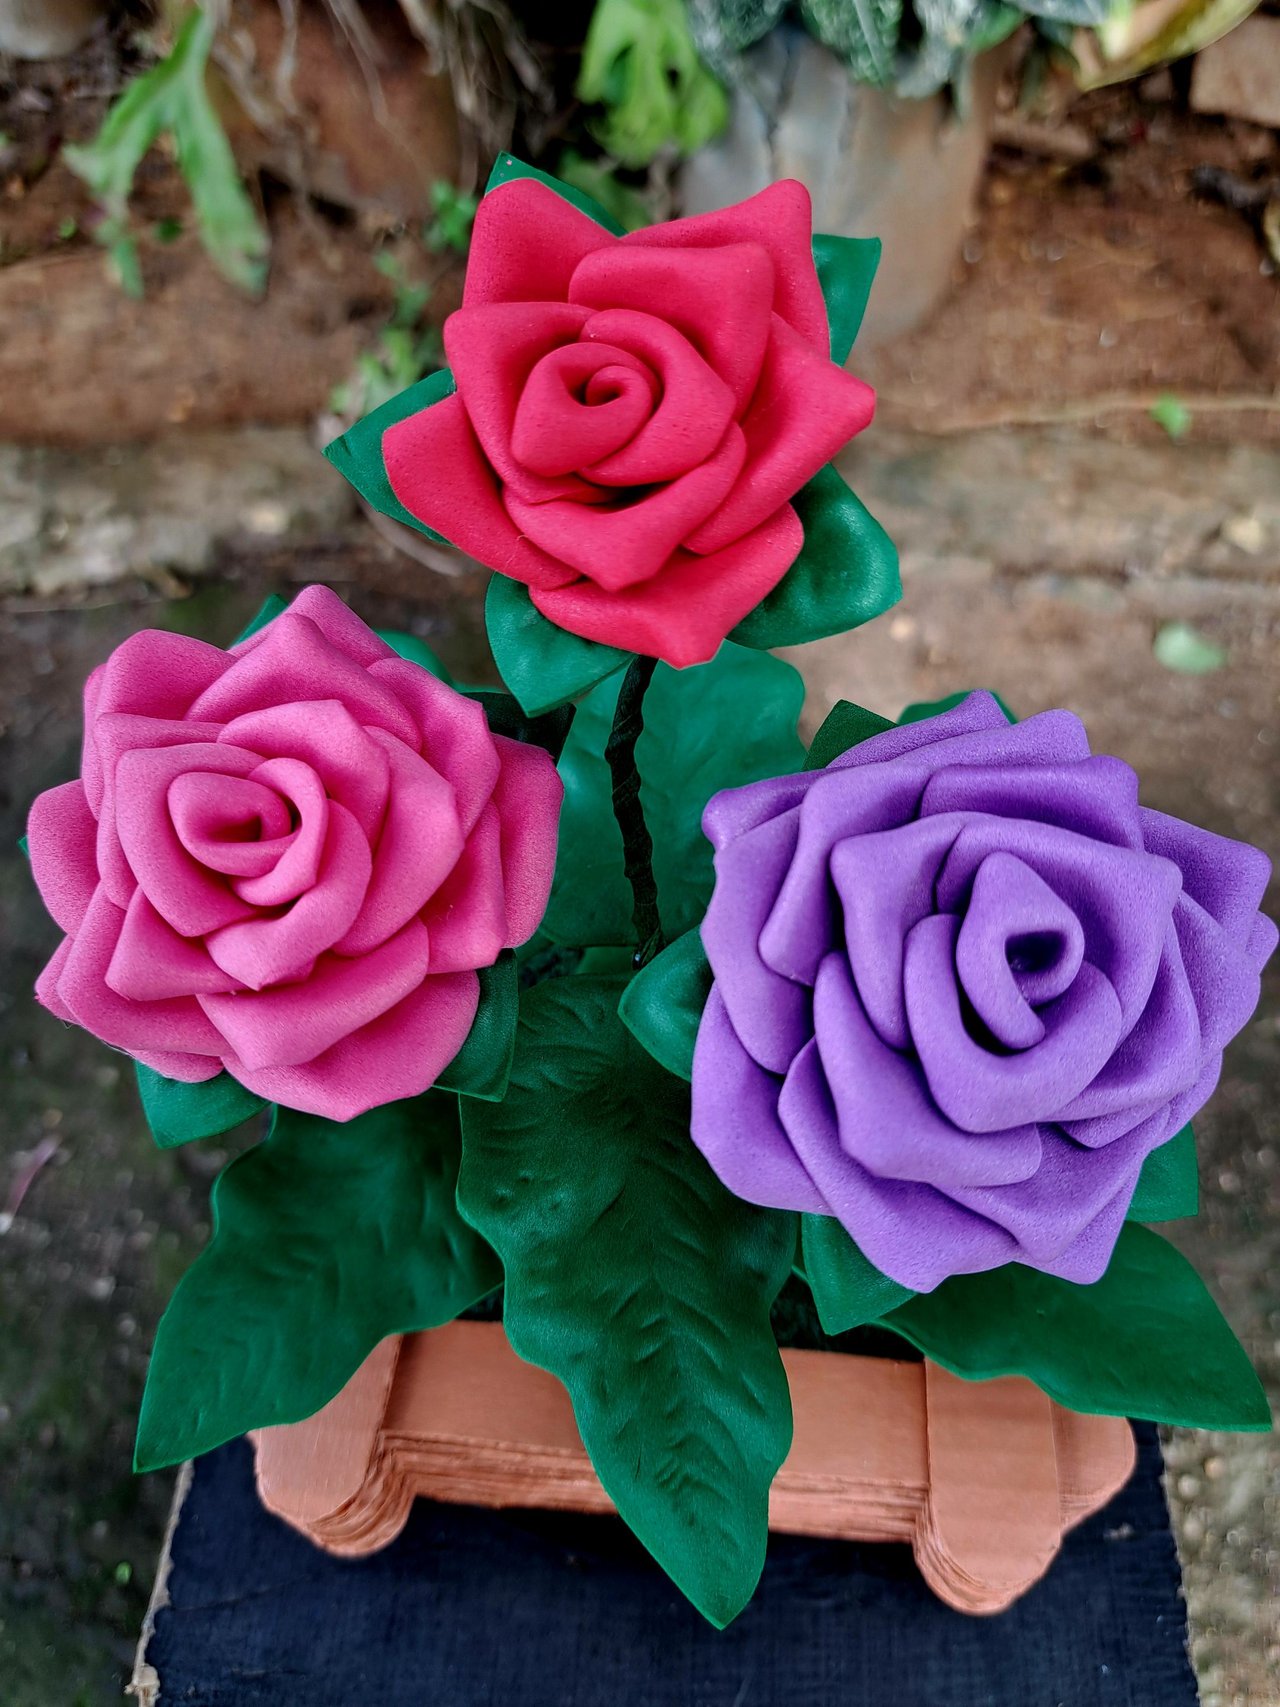
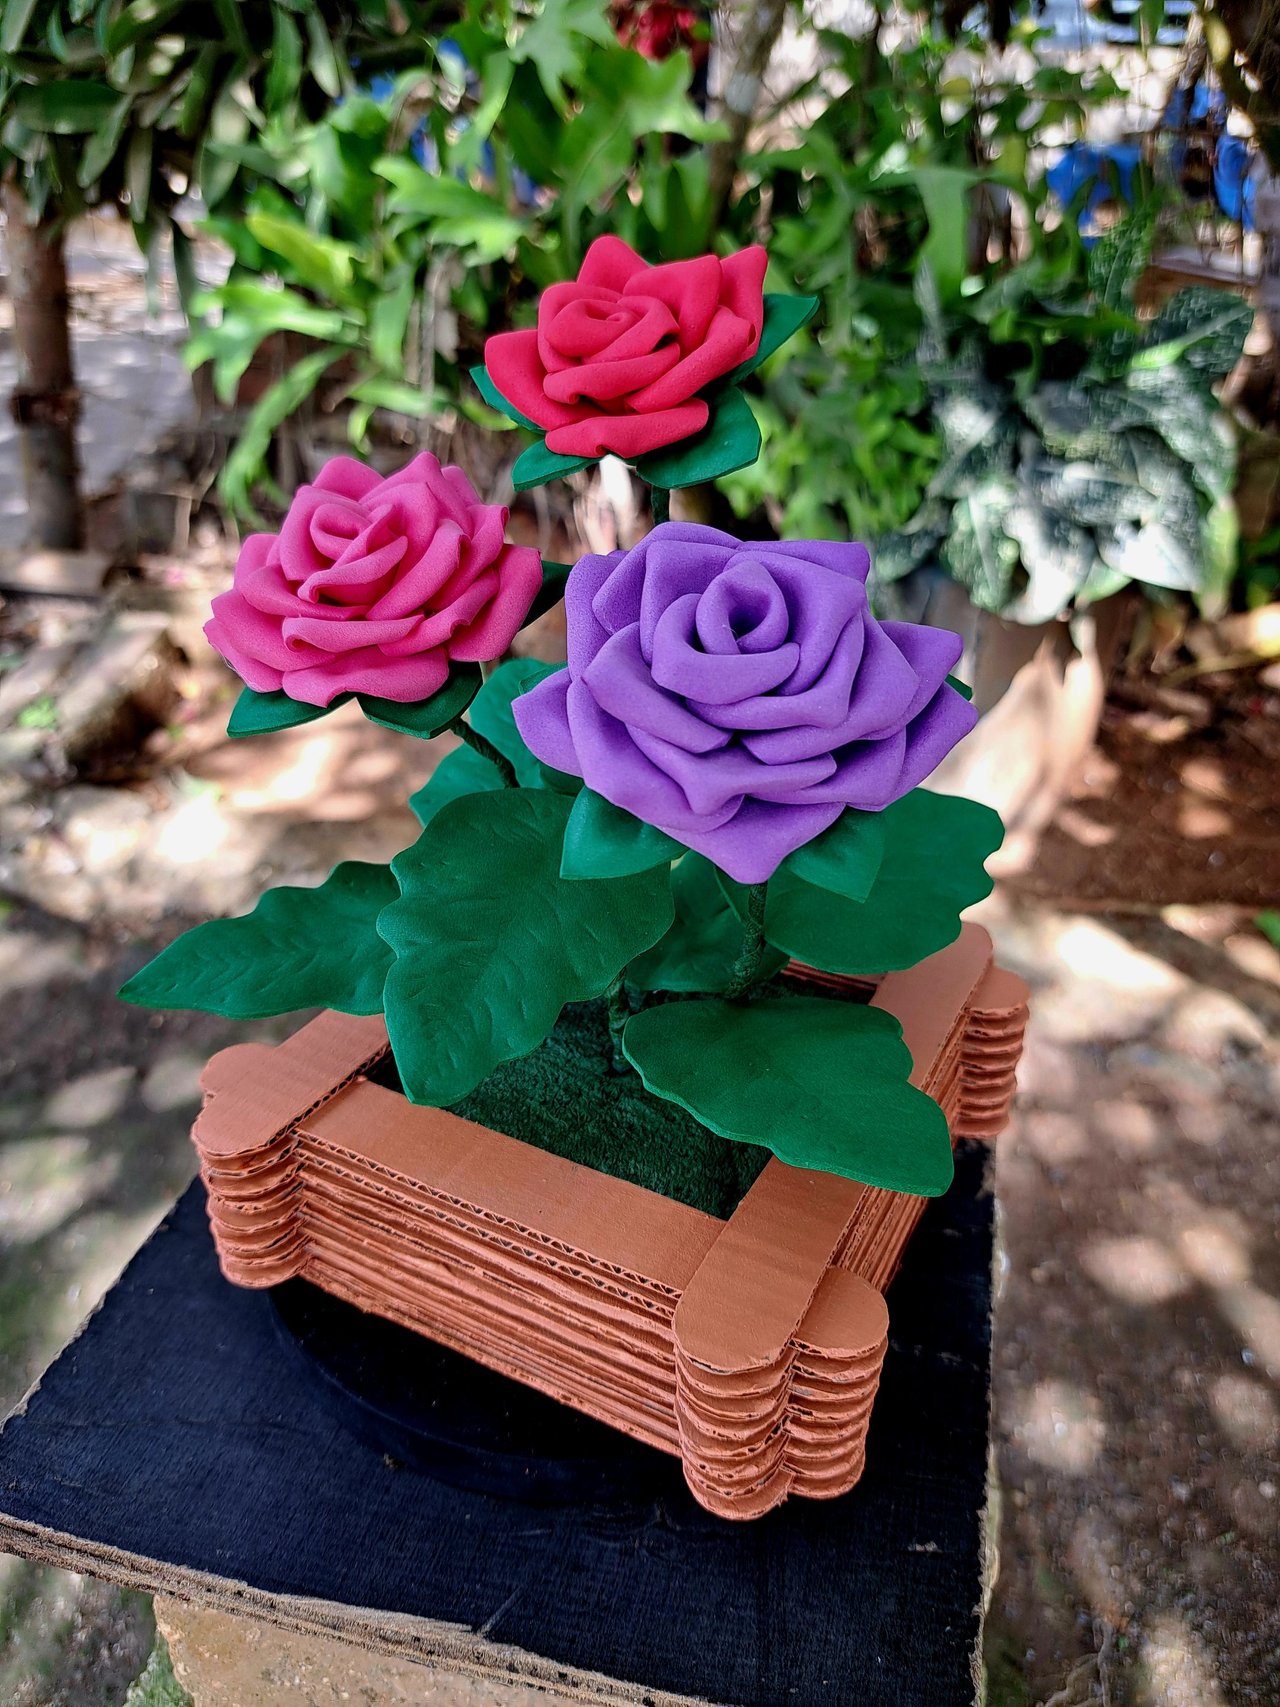
I decided to create a floral ornament with a geometrical base, using fomi and cardboard as the main materials. The idea to make this ornament comes from a belief of my grandmother, in which she says that flowers look more beautiful attached to their stems. That is to say, my grandmother is one of those people who don't like flowers to be plucked unless there is a strong reason for it. Knowing this, I chose to create an ornament composed of three almost realistic-looking fomi flowers, which will never wilt.
! [Spanish Version Here]
El 2 de abril cumple años, una persona muy especial para mí. Ese día celebra su aniversario mi queridísima abuela y en esta ocasión estará cumpliendo sus 80 años. En honor a tan importante fecha, toda la familia se ha puesto de acuerdo para hacer una celebración por todo lo alto. El caso es que se me está haciendo costumbre incluir en los regalos algún detalle echo por mí. Y tratándose de mi abuela, no podía ser la excepción.Decidí crear un adorno floral con base geométrica, utilizando fomi y cartón como materiales principales. La idea para hacer este adorno surge a partir de una creencia de mi abuela, en la cual ella asegura que las flores se ven más bonitas unidas a su tallo. Es decir, que mi abuela es de esas personas a las que no les gusta que arranquen las flores si no hay un motivo de fuerza por medio. Sabiendo esto, opté por crear un adorno compuesto por tres flores de fomi con aspecto casi realista, las cuales nunca se marchitarán.
 |
 |
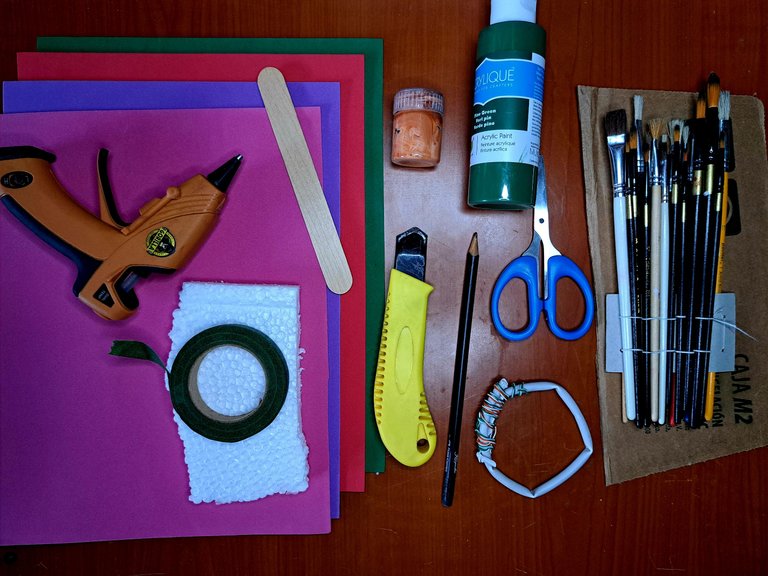
Materials // Materiales
| ✔️ Fomi green, red, lilac, pink | ✔️ Fomi verde, rojo, lila, rosa |
| ✔️ Cardboard | ✔️ Cartón |
| ✔️ Scissors, cutter and tweezers | ✔️ Tijeras, cútter y pinza |
| ✔️ Floral tape | ✔️ Cinta floral |
| ✔️ Thin wire | ✔️ Alambre fino |
| ✔️ Wooden tongue depressor | ✔️ Depresor lingual de madera |
| ✔️ Hot silicone | ✔️ Silicona caliente |
| ✔️ Green and light brown paint | ✔️ Pintura verde y carmelita claro |
| ✔️ Set of brushes | ✔️ Set de pinceles |
| ✔️ Polystyrene | ✔️ Poliespán |
Step by step // Paso a paso
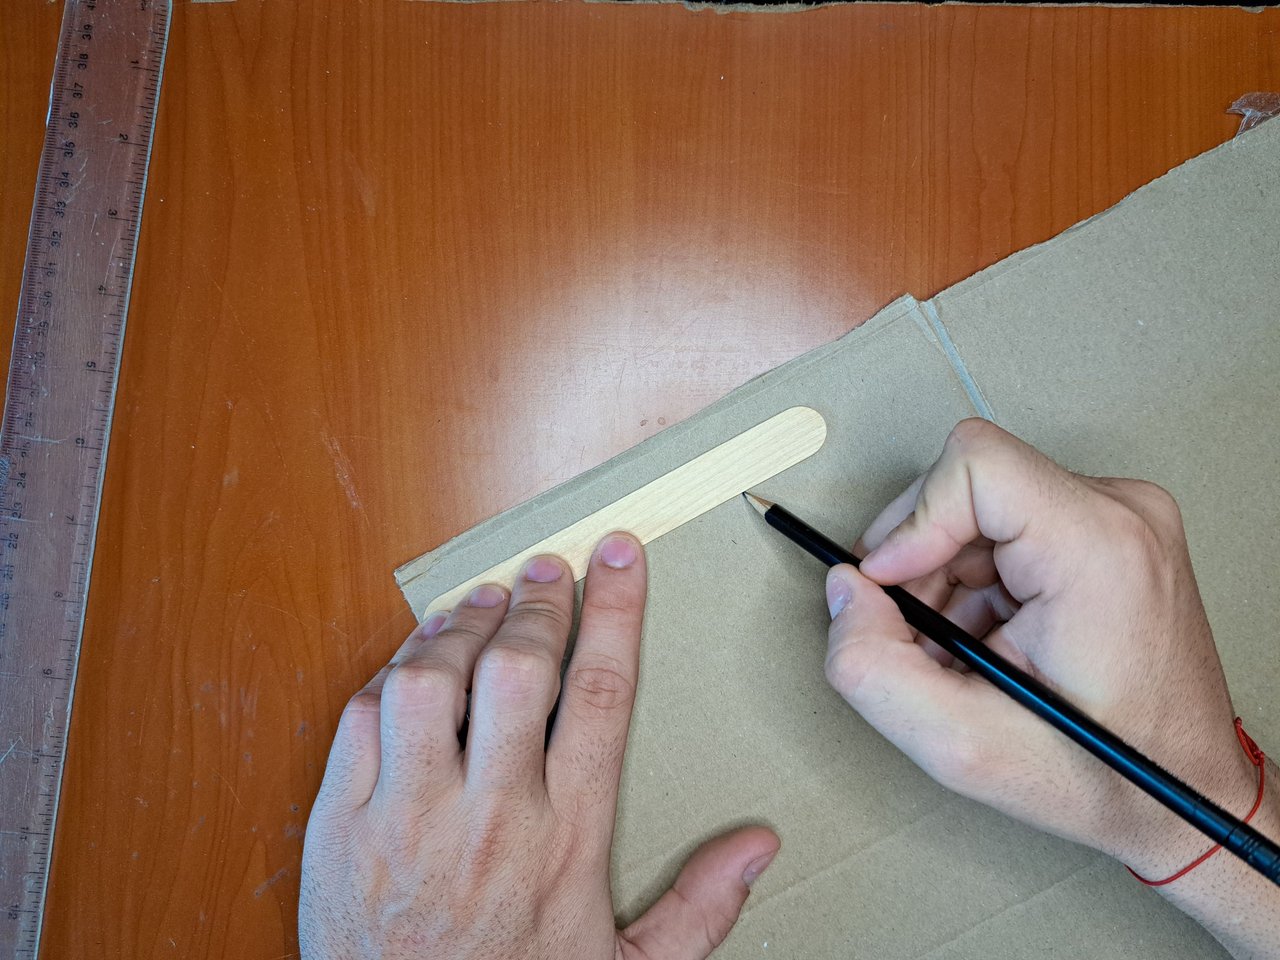
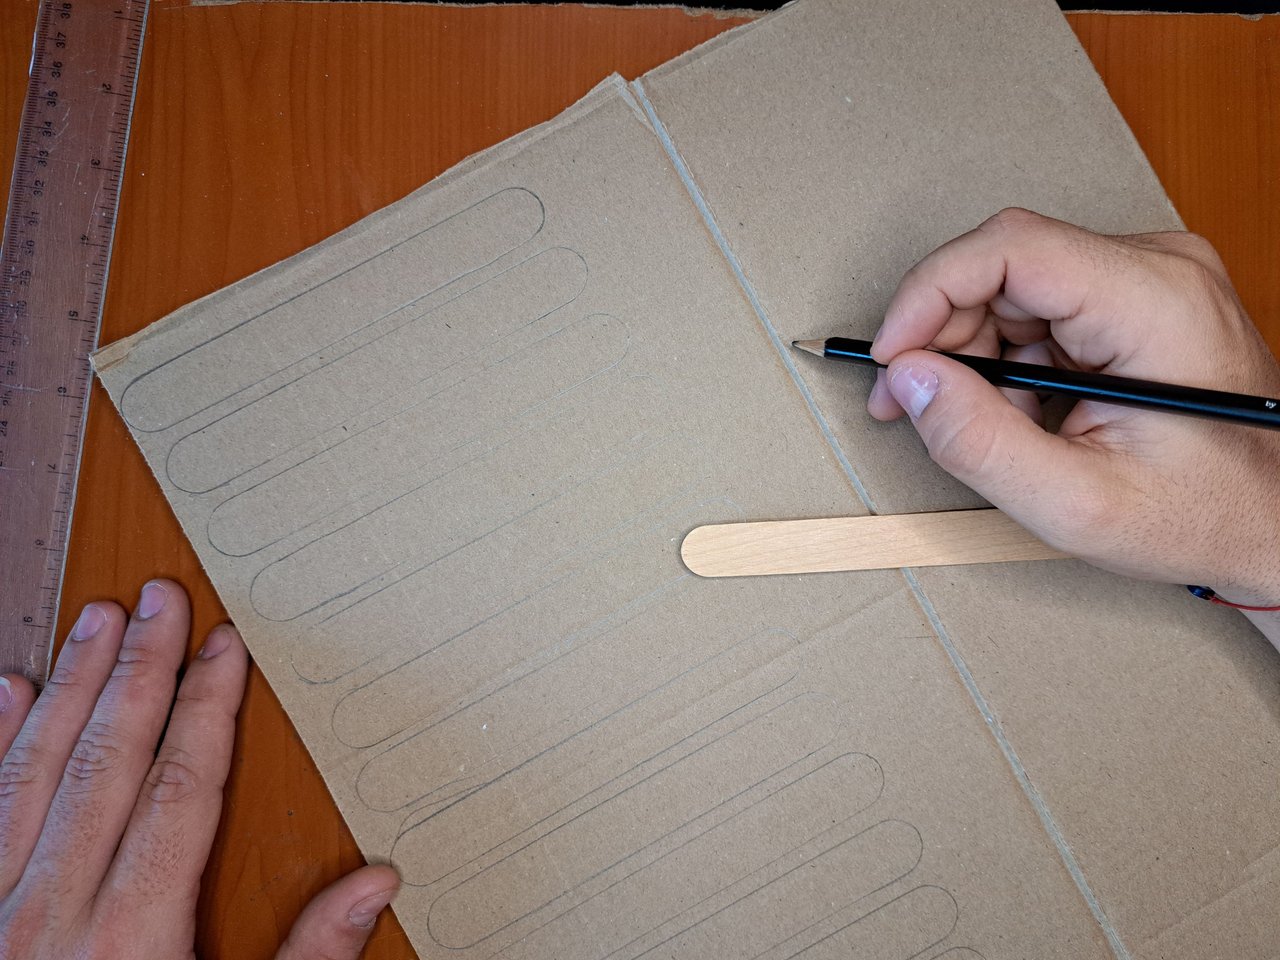
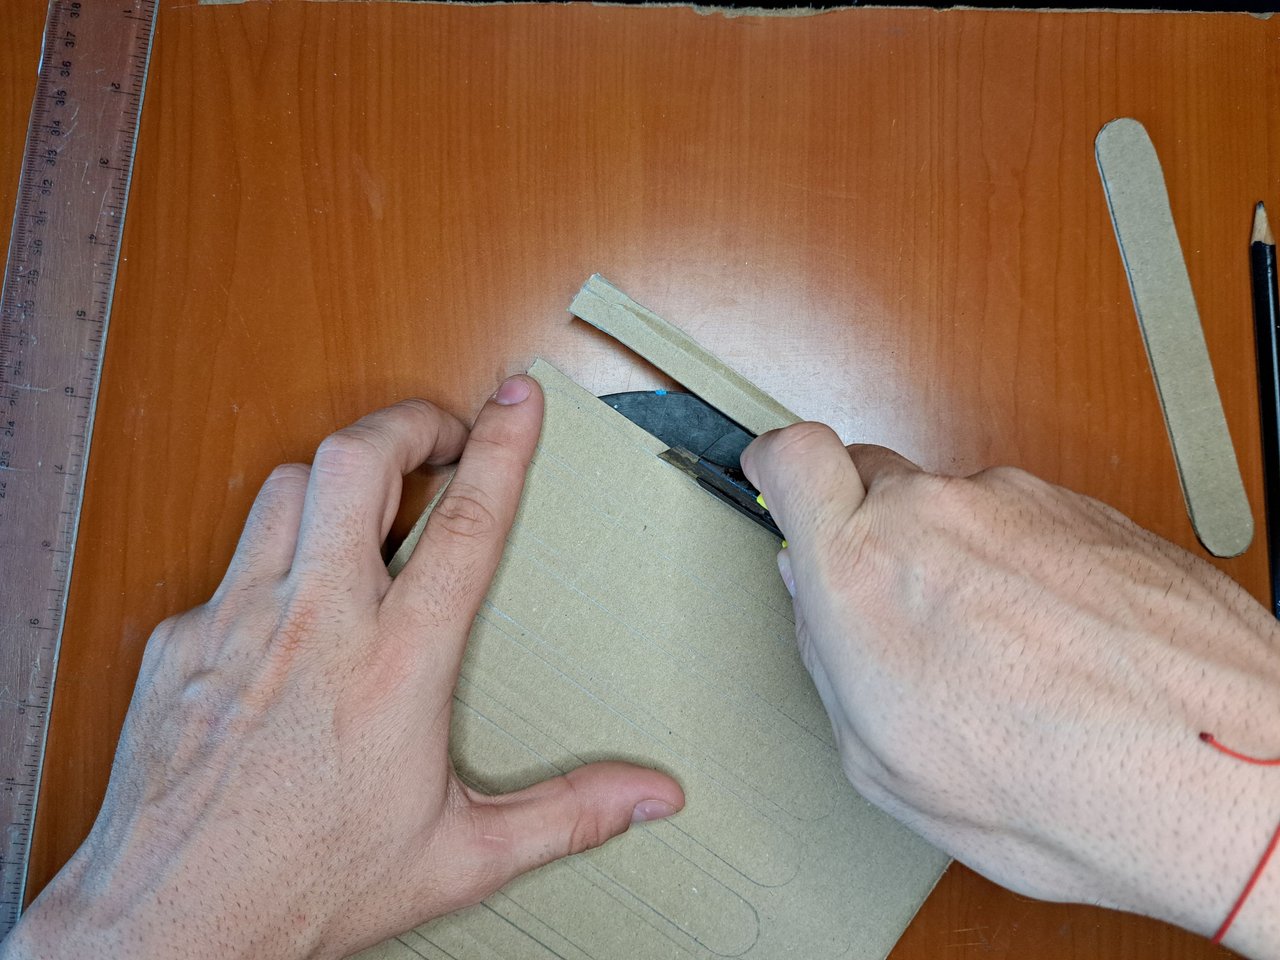
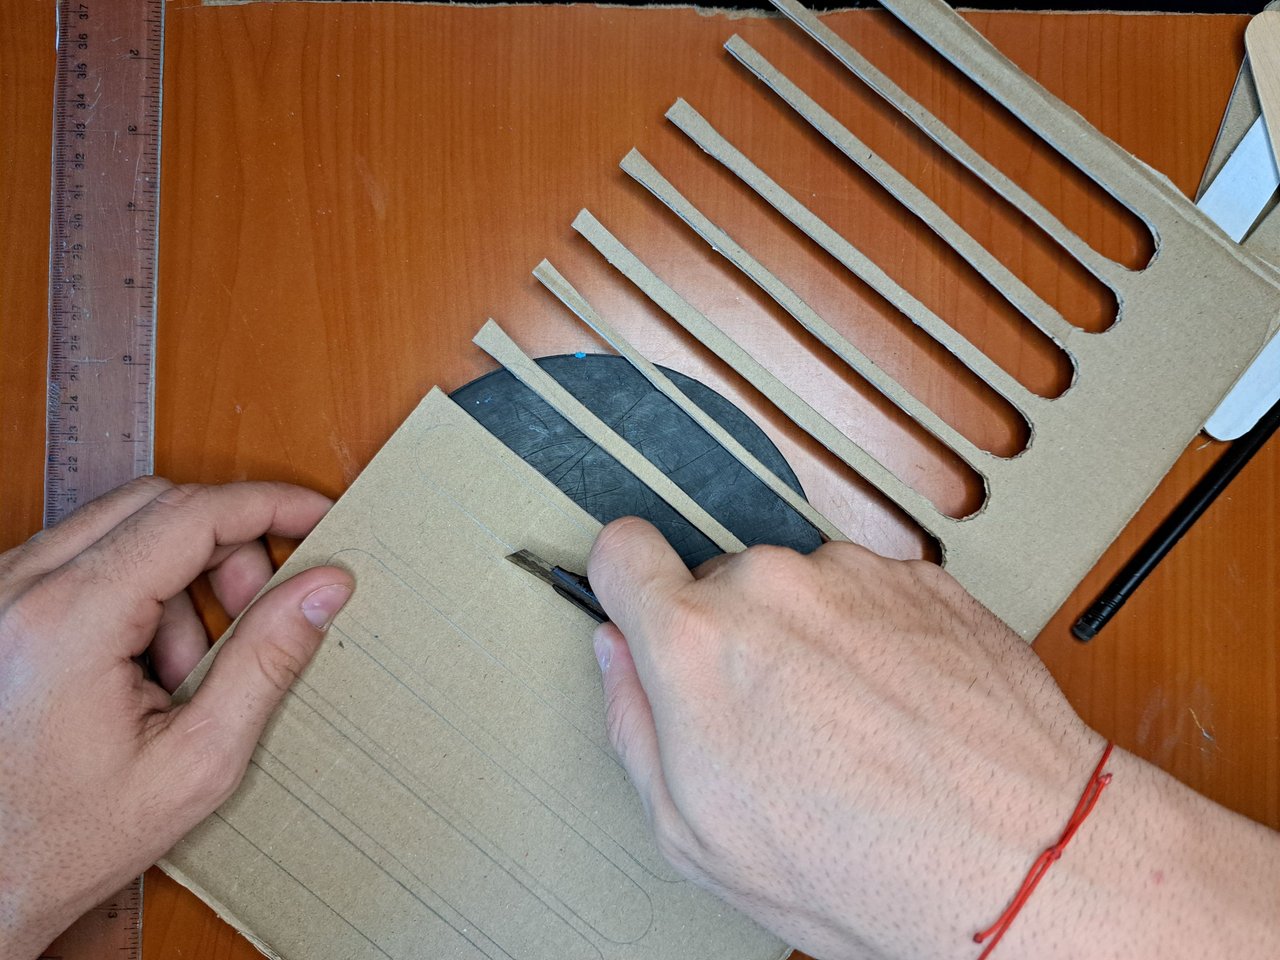
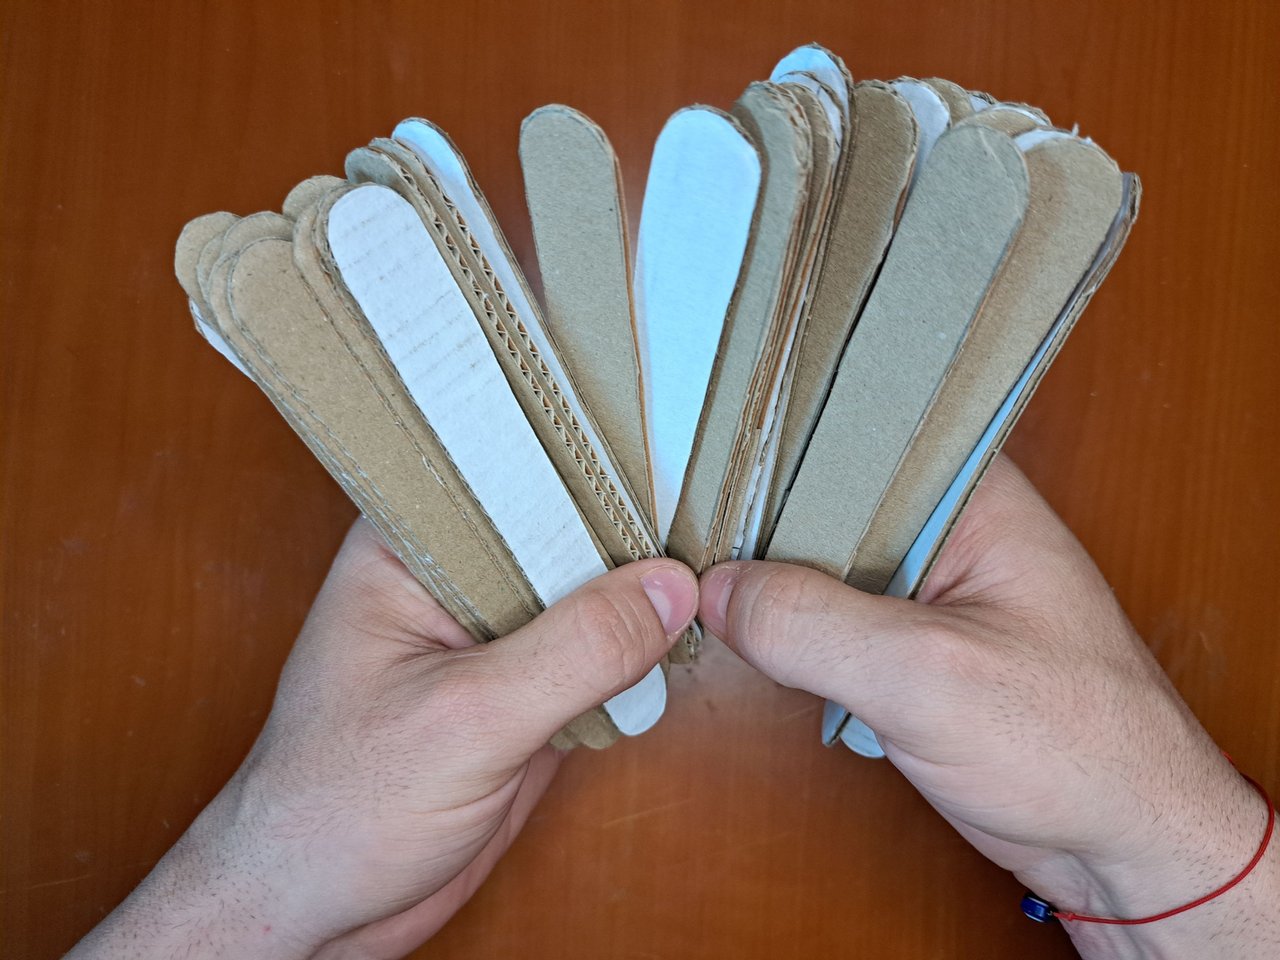
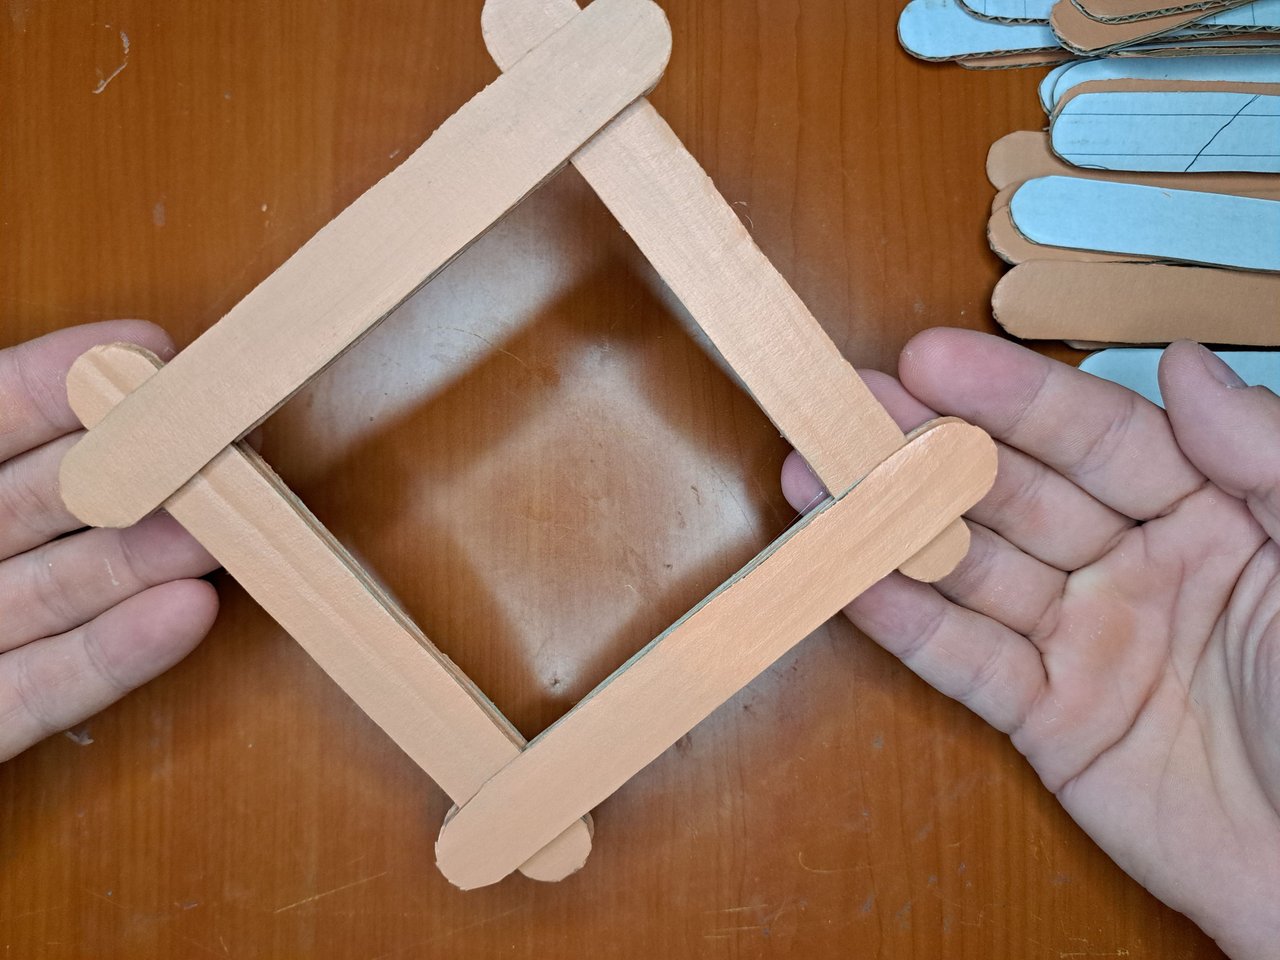
1️⃣ To start we mark and cut out 32 pieces of cardboard using the shape of a tongue depressor (tongue depressor). Then we painted each piece of cardboard on both sides with clear carmelite paint.
! [Spanish Version Here]
1️⃣ Para empezar marcamos y recortamos 32 piezas de cartón usando la forma de un depresor lingual (saca lenguas). Luego con pintura carmelita claro pintamos cada pieza de cartón por ambos lados.
 |
 |
 |
 |
 |
 |
 |
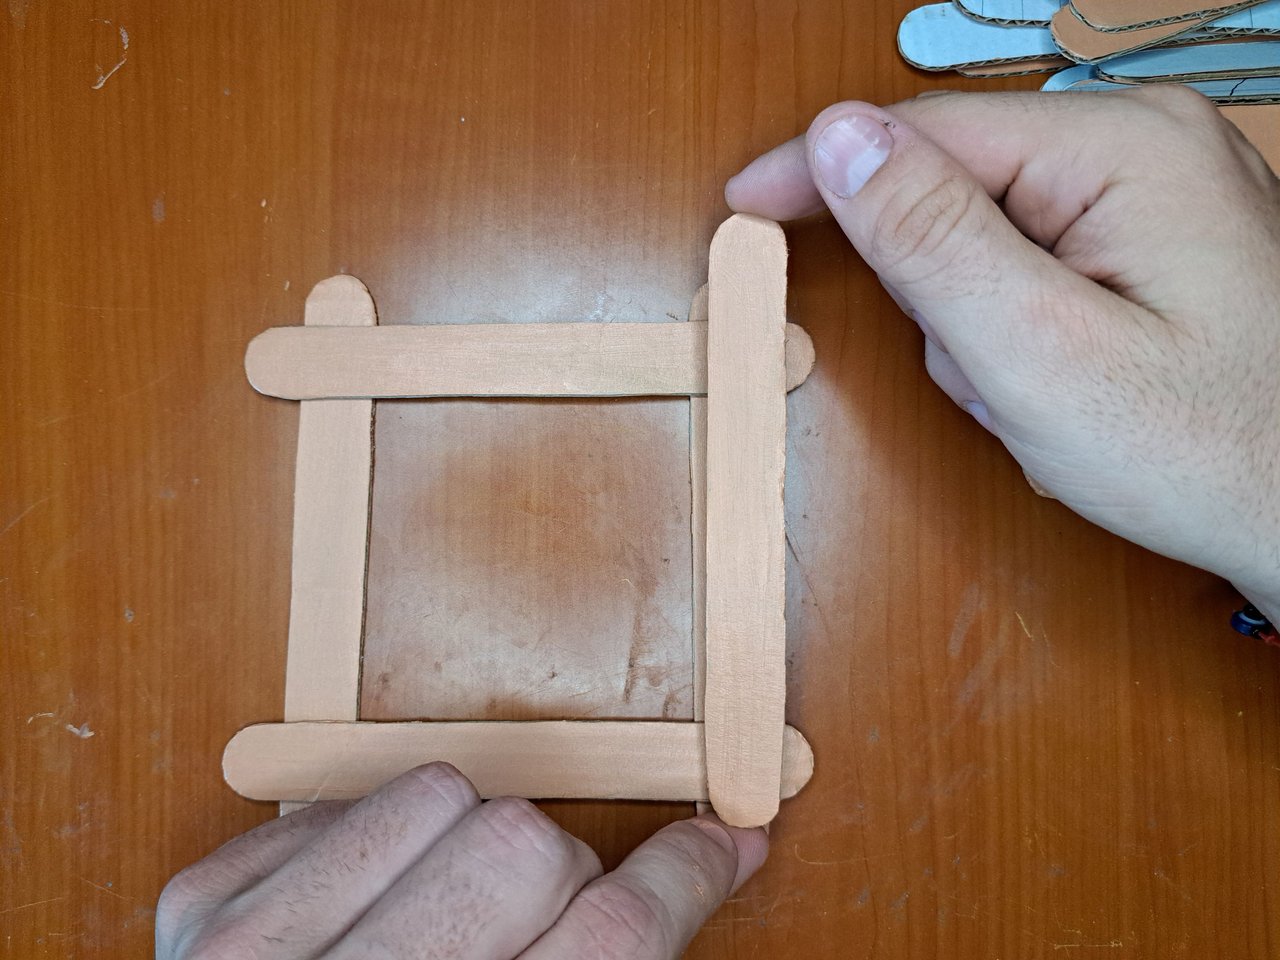
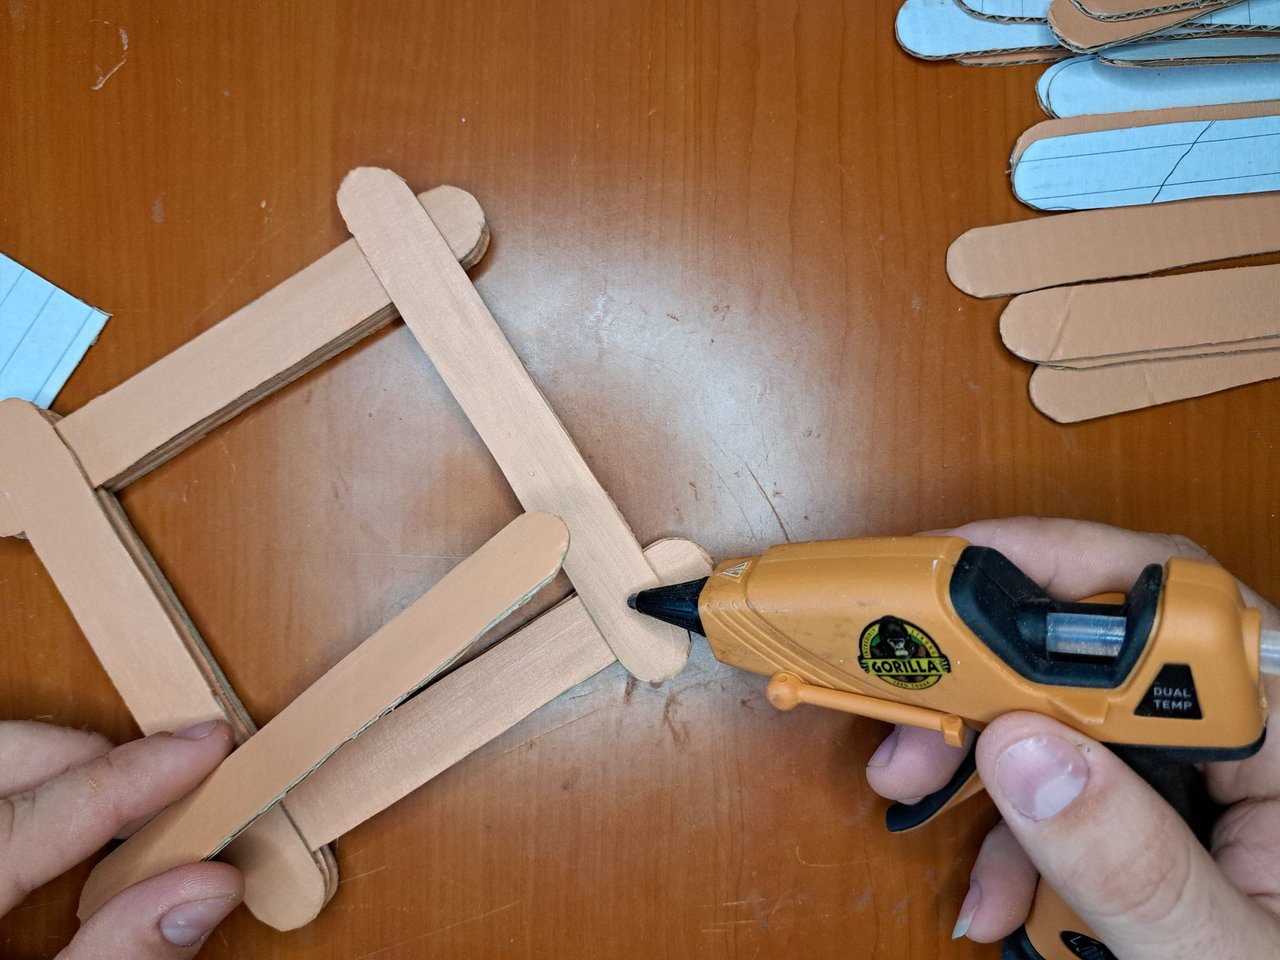
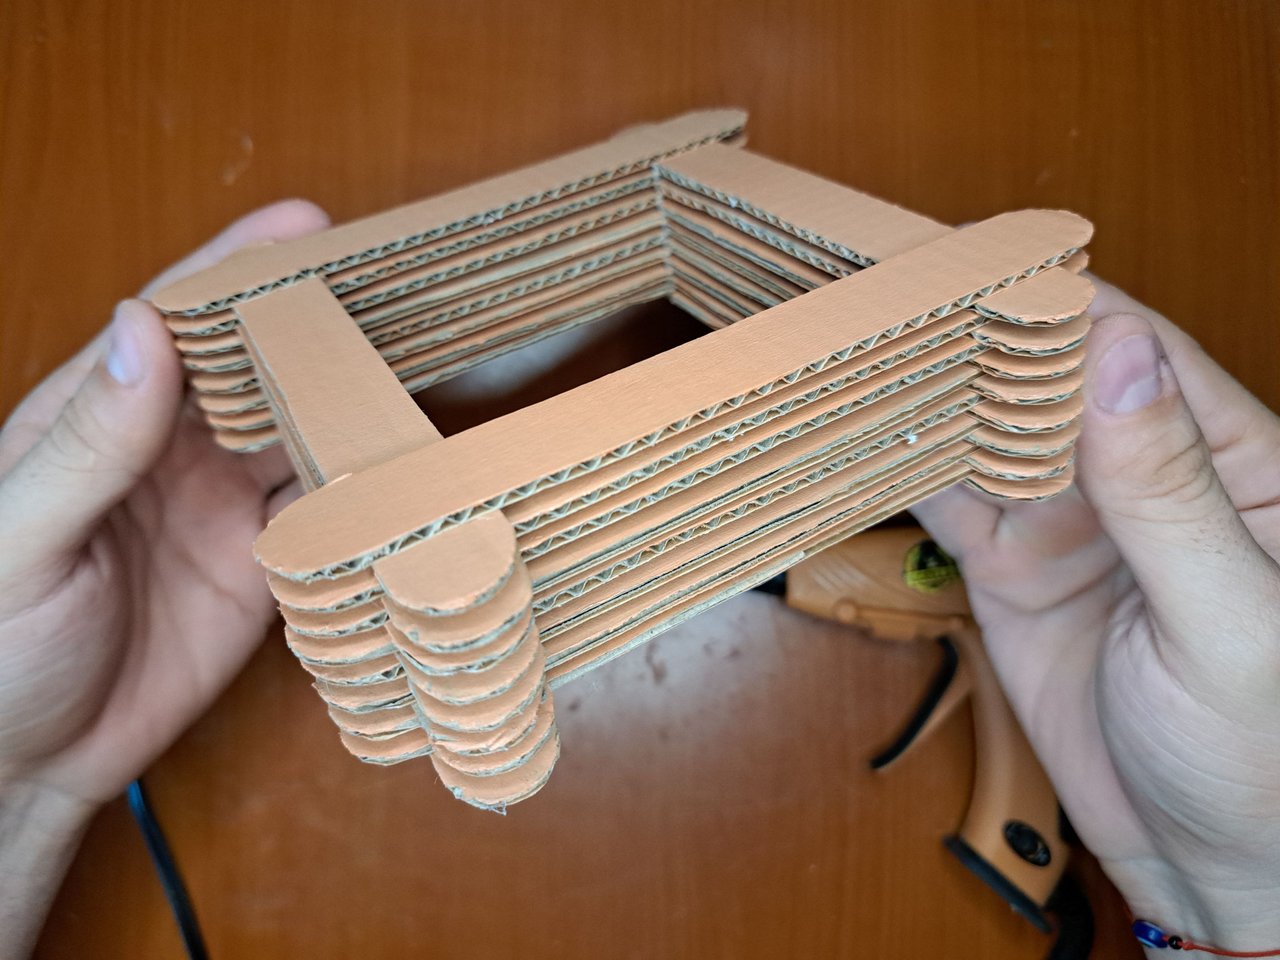
2️⃣ Once the paint is dry, we glue each of the pieces forming a square pyre. Then we mark and cut in polystyrene the inner shape of the pyre.
! [Spanish Version Here]
2️⃣ Una vez seque la pintura, pegamos cada una de las piezas formando una pira de cuadrada. Luego marcamos y recortamos en poliespán la forma interior de la pira.
 |
 |
 |
|
 |
 |
 |
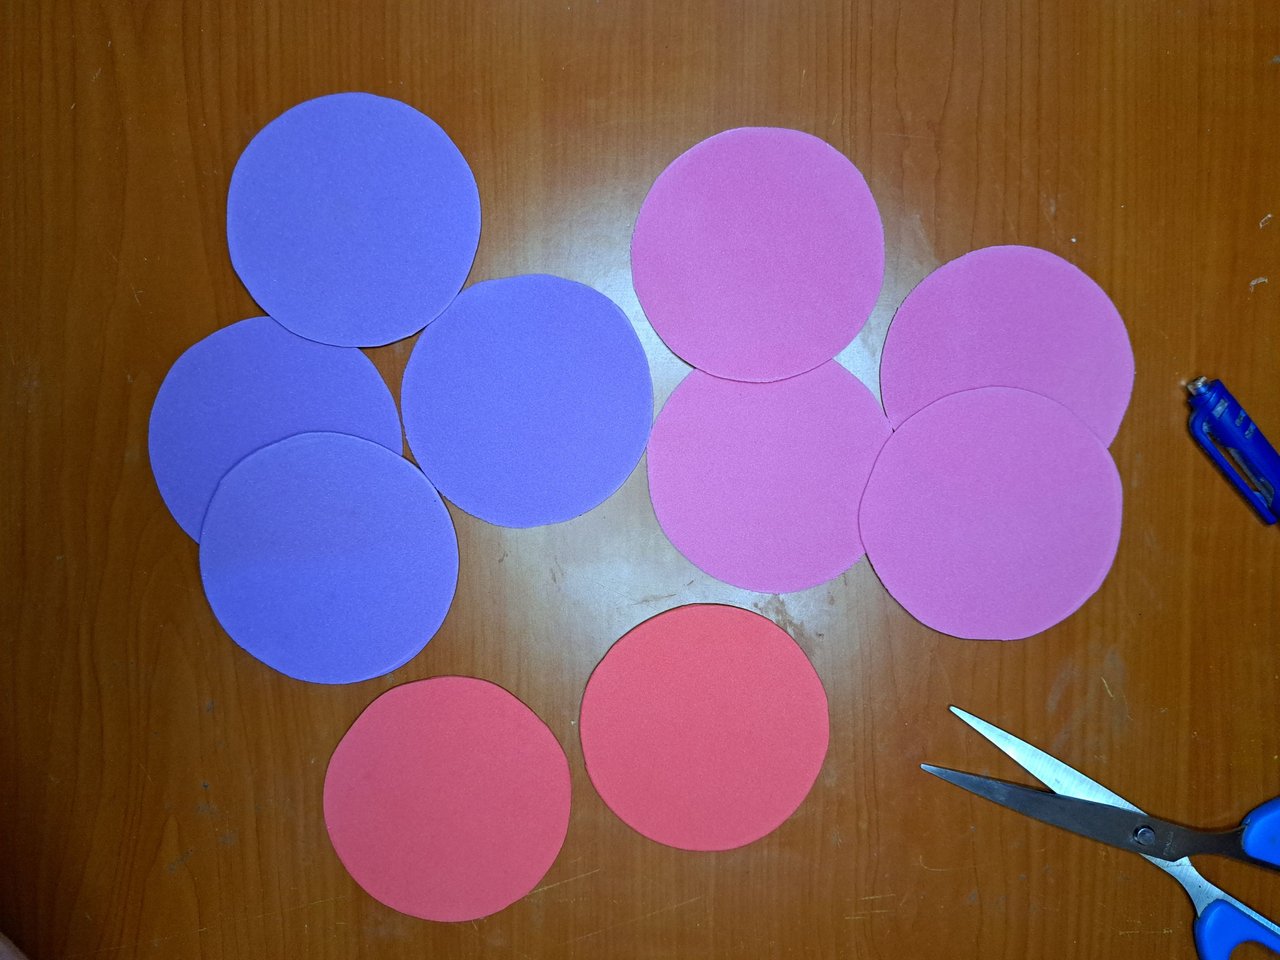
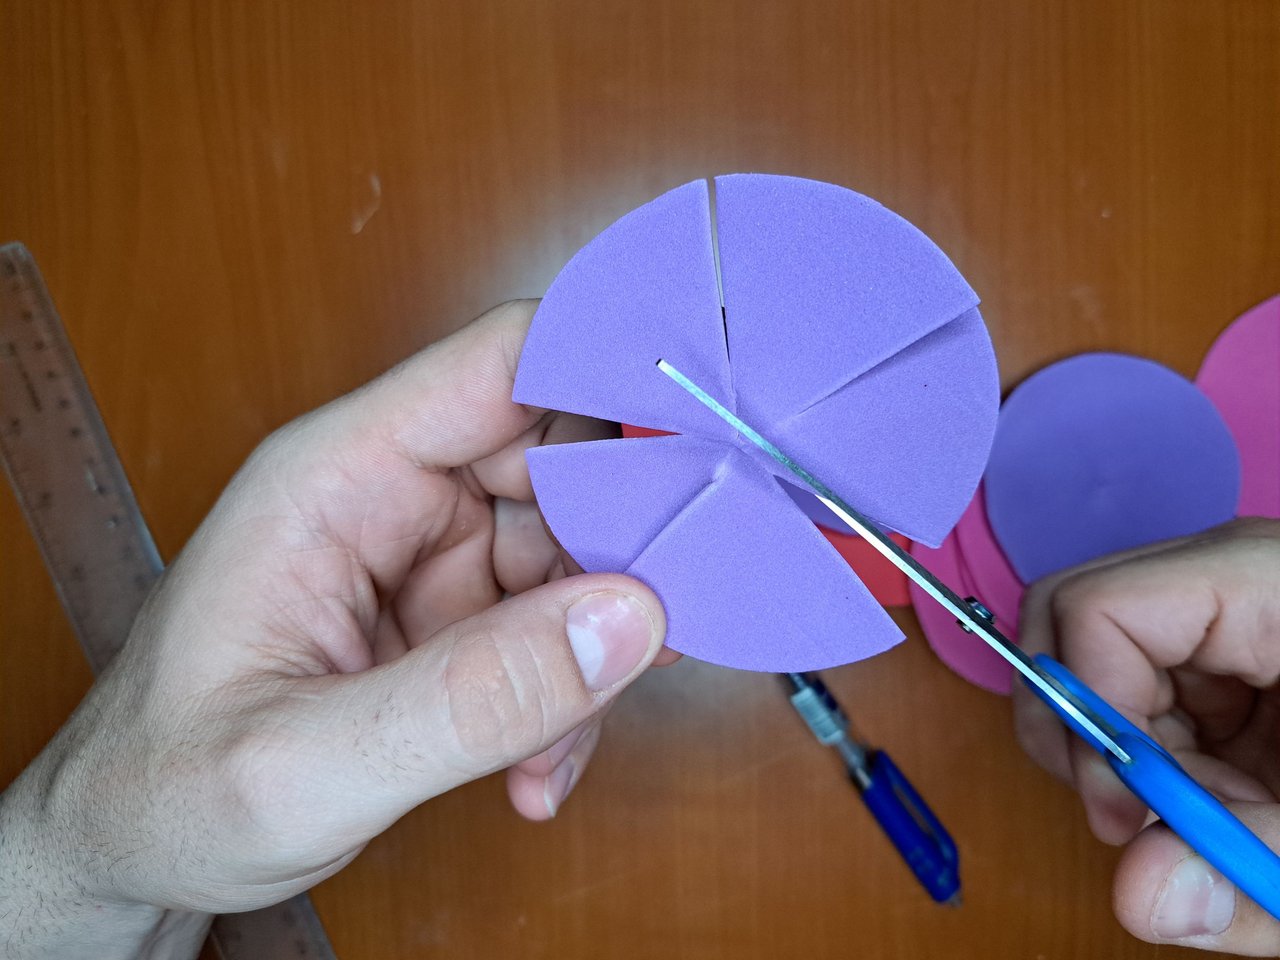
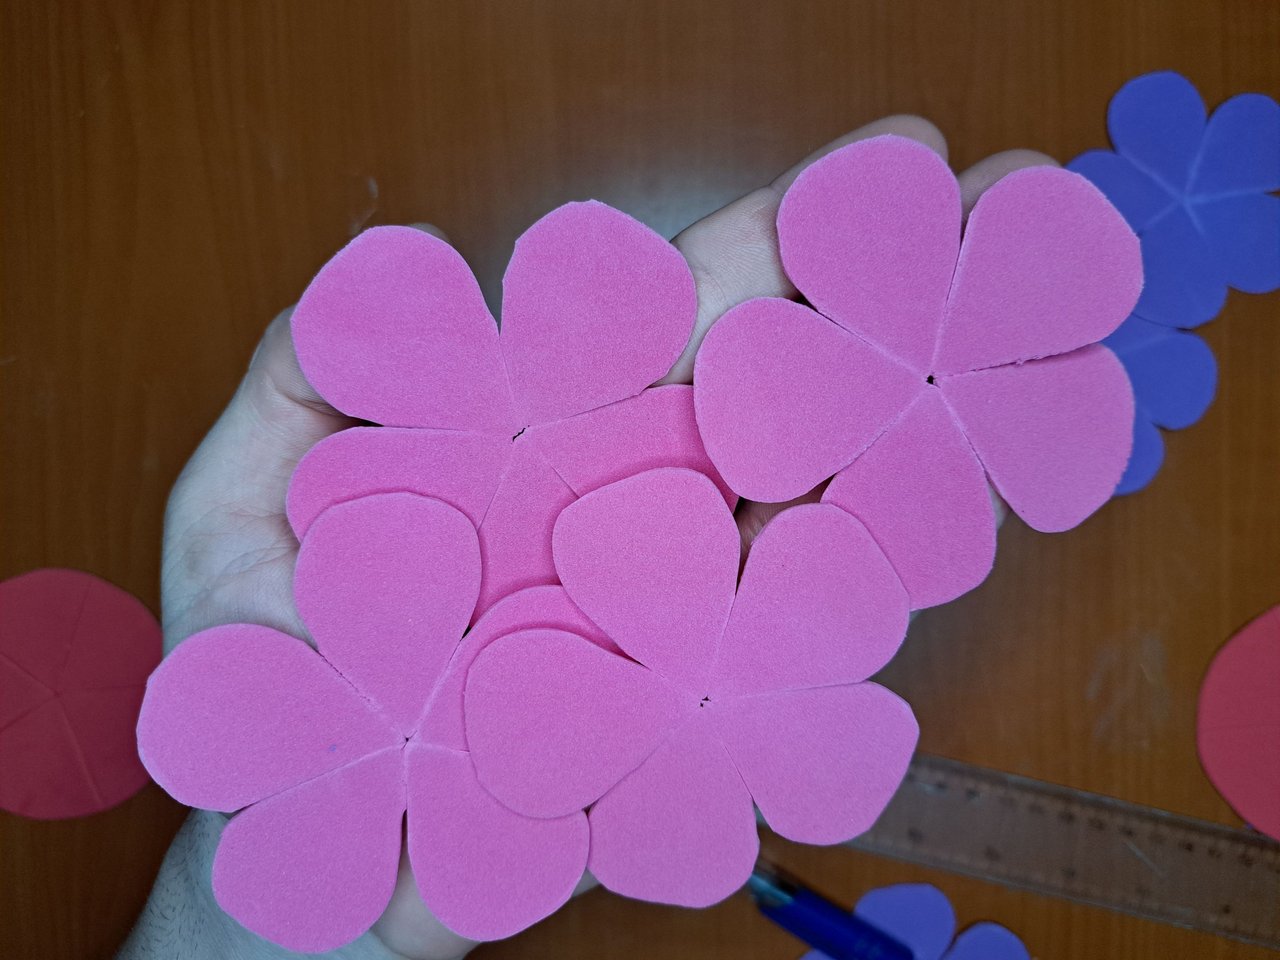
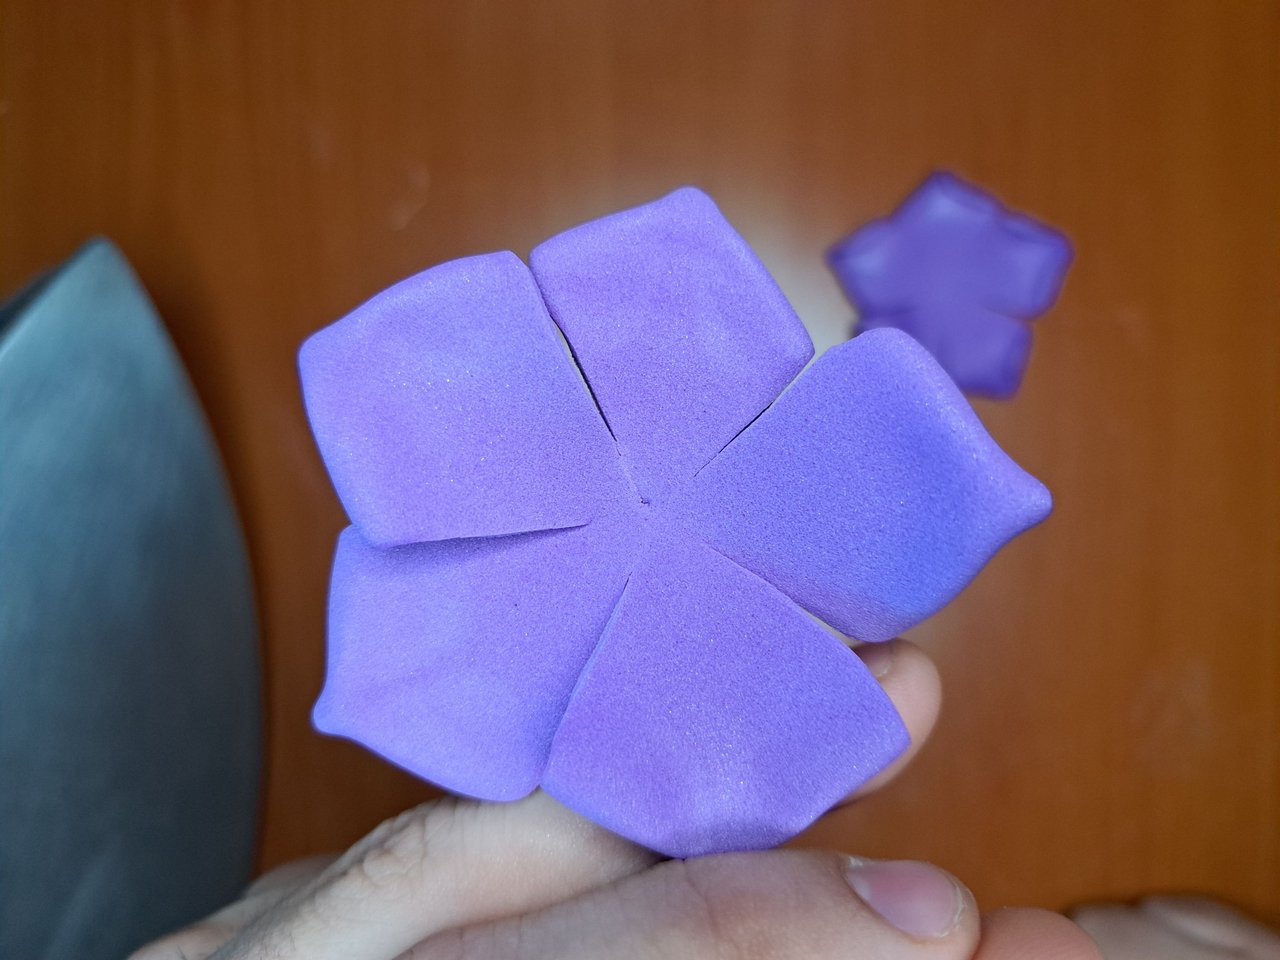
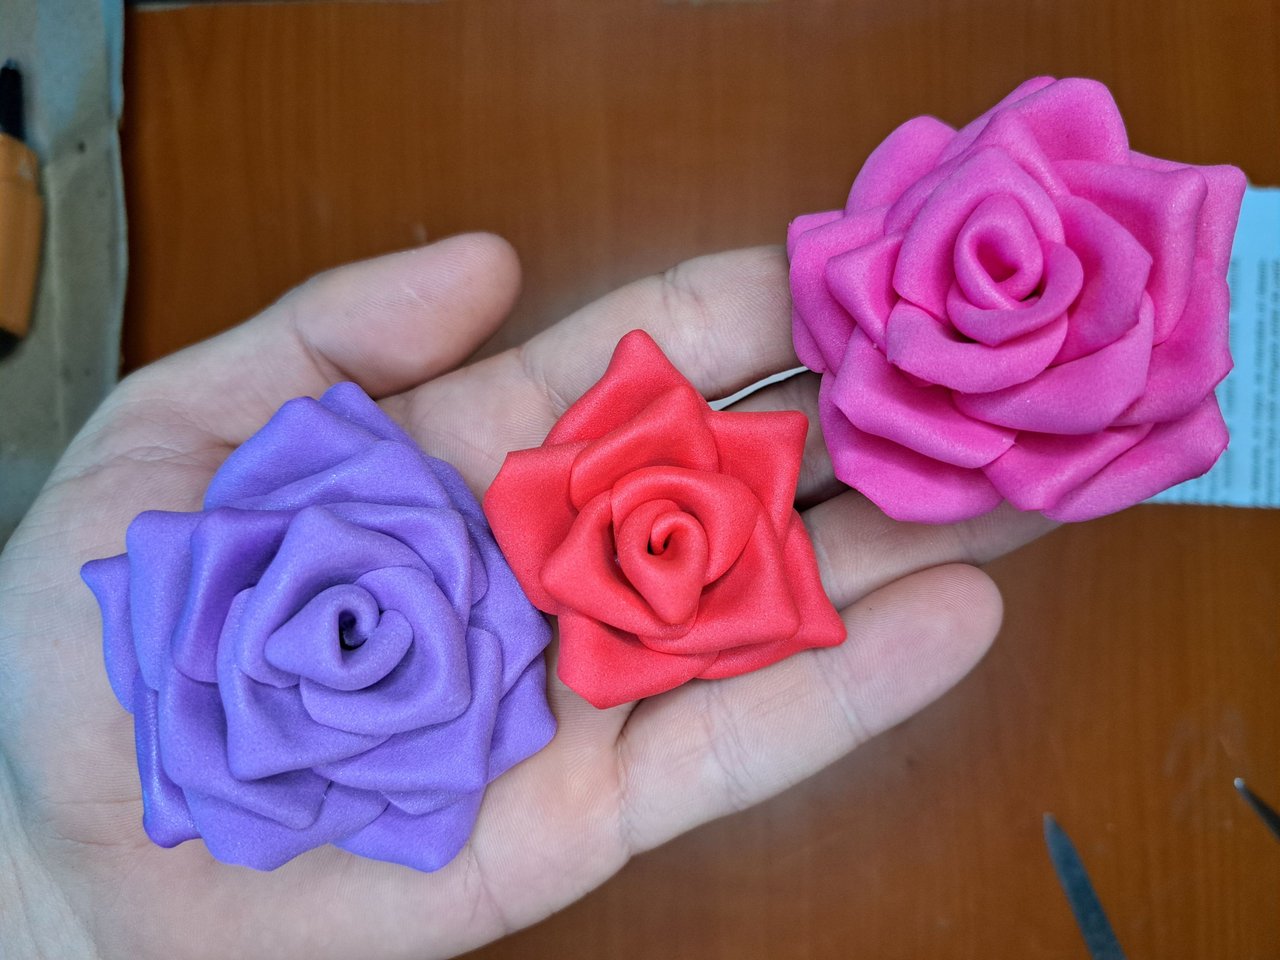
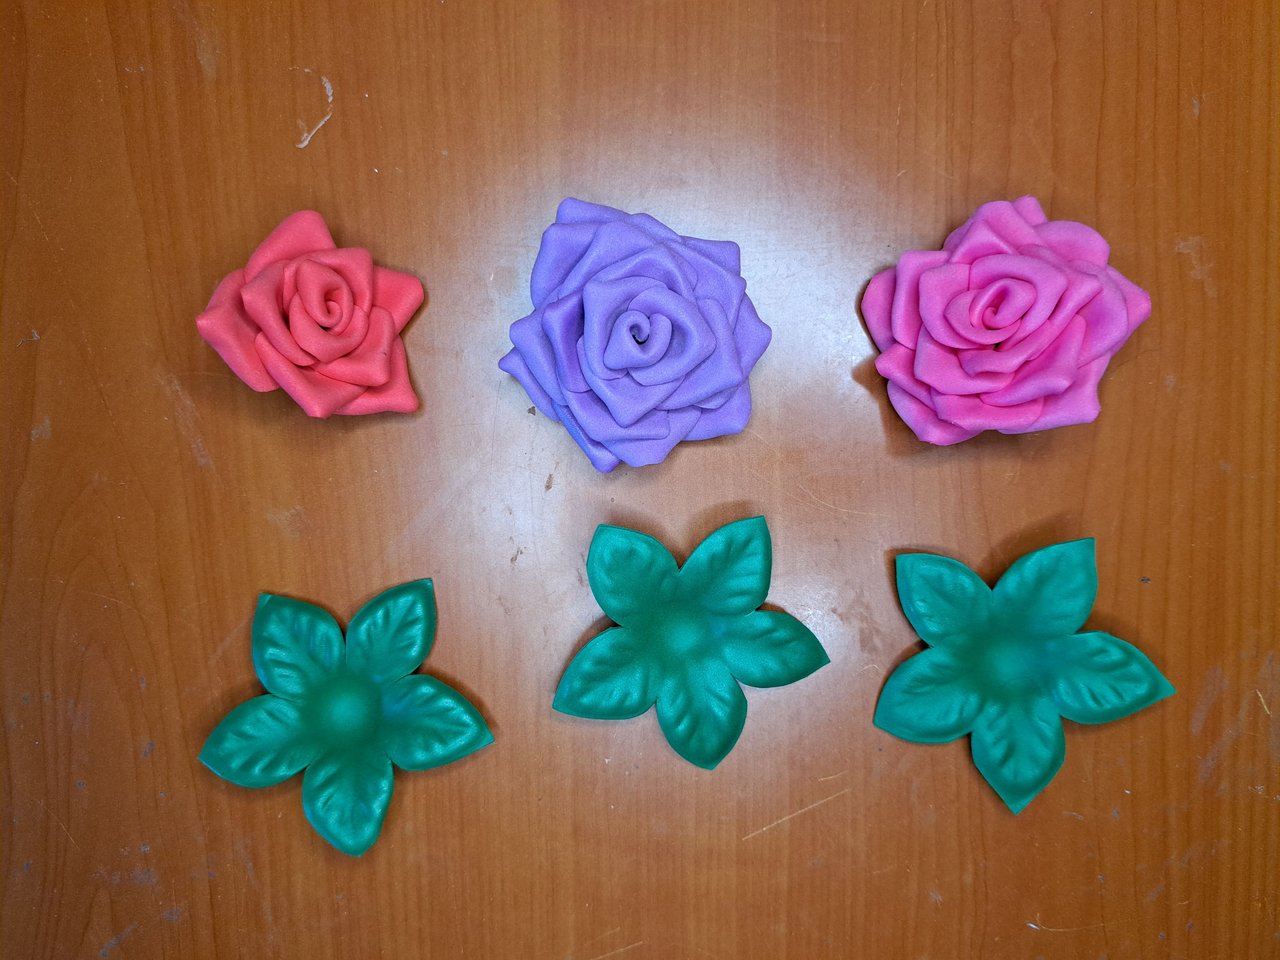
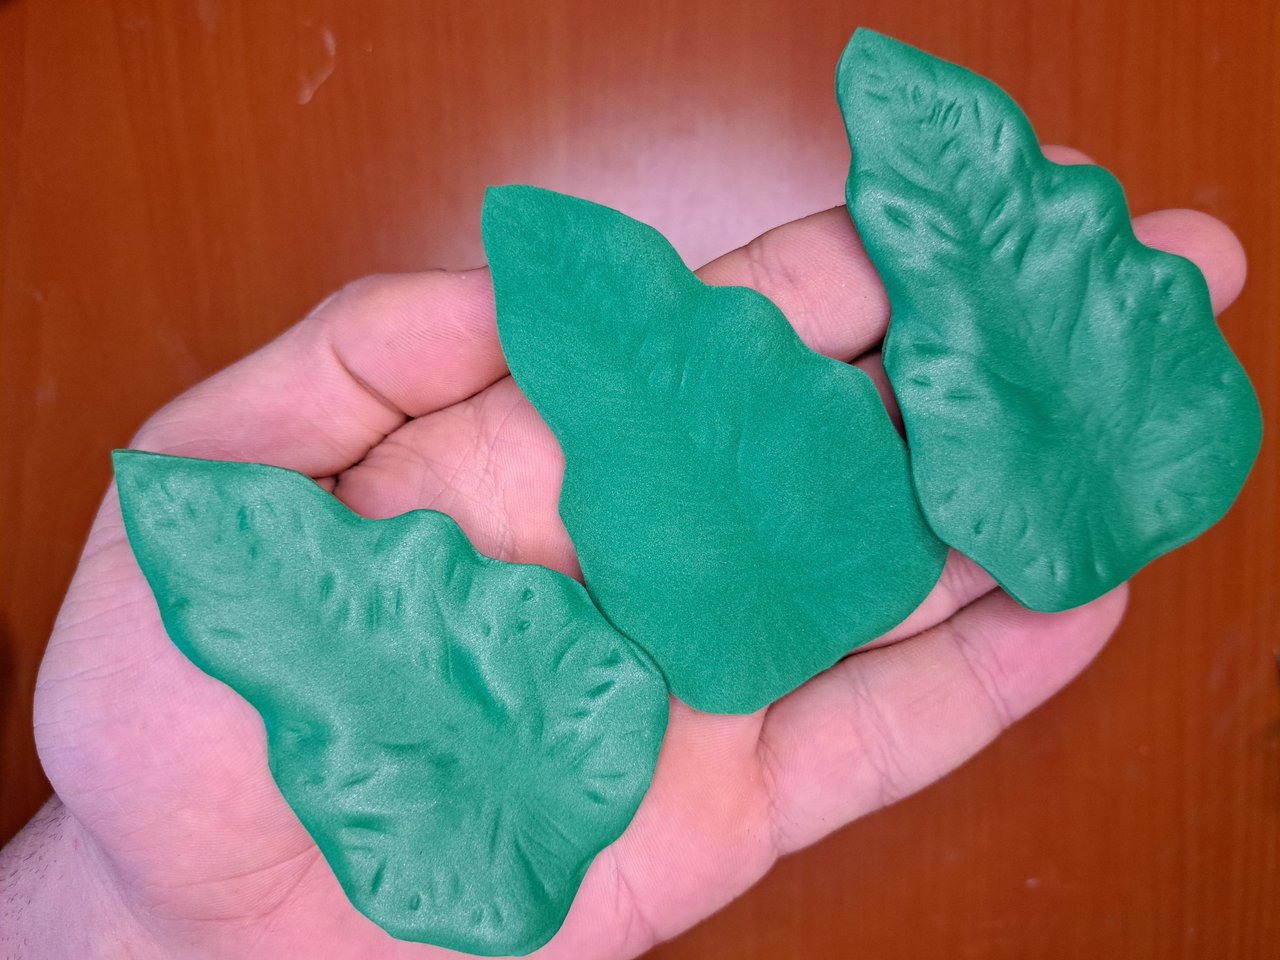
3️⃣ With the base ready we move on to the flowers. The flowers will be roses and to make them we mark and cut out 4 circles of fomi of two colors and 2 circles of fomi of a third color. Each circle will be divided into five parts and the tabs will be cut along the marks. Each tab will be rounded at the end to form the petals.
! [Spanish Version Here]
3️⃣ Con la base lista pasamos a las flores. Las flores serán rosas y para hacerlas marcamos y recortamos 4 círculos de fomi de dos colores y 2 círculos de fomi de un tercer color. Cada círculo se dividirá en cinco partes y por las marcas se cortarán las lengüetas. Cada lengüeta se le redondeará su extremo para forma los pétalos.
 |
 |
 |
 |
 |
 |
 |
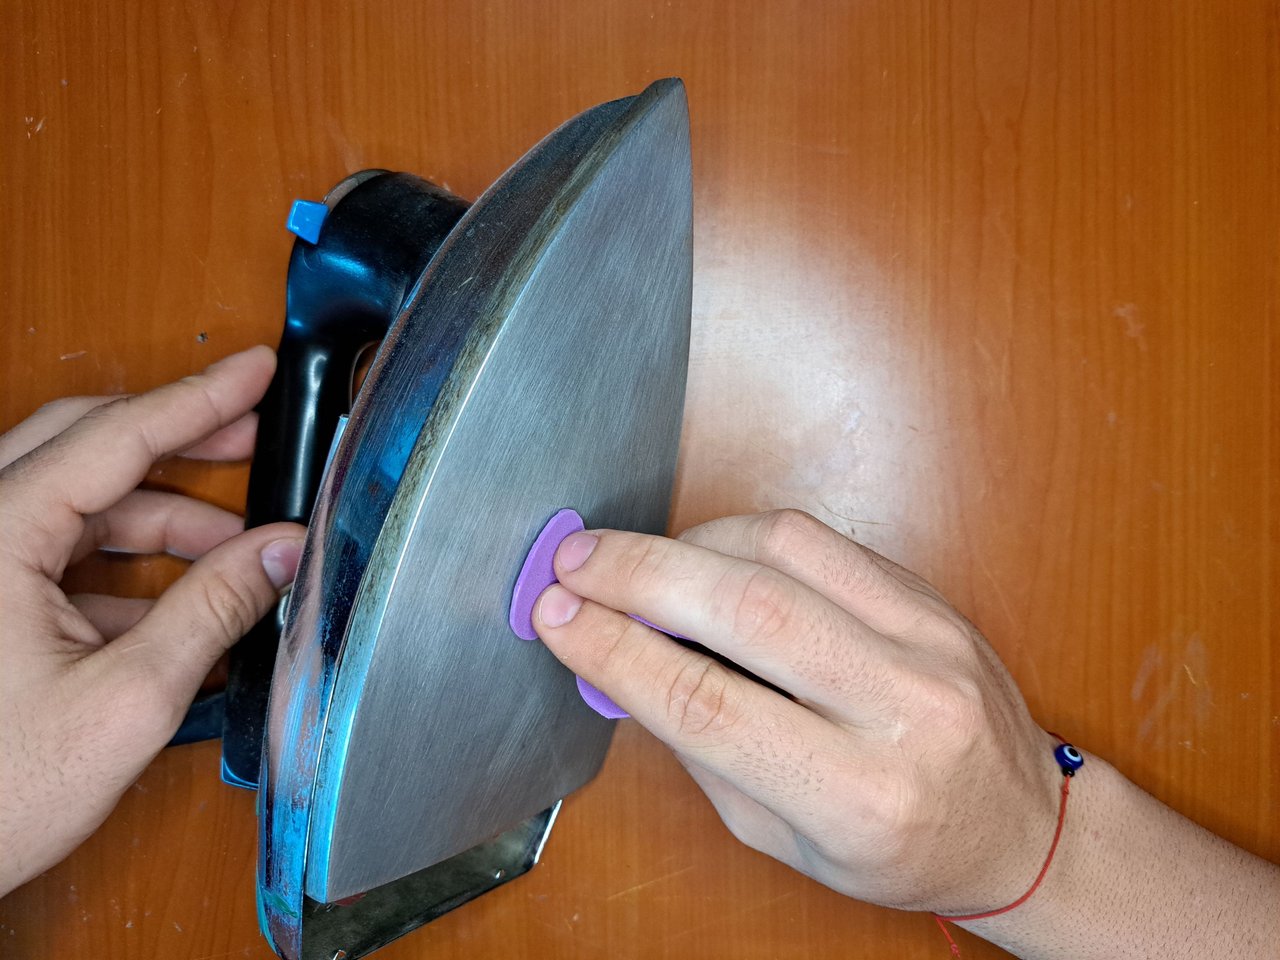
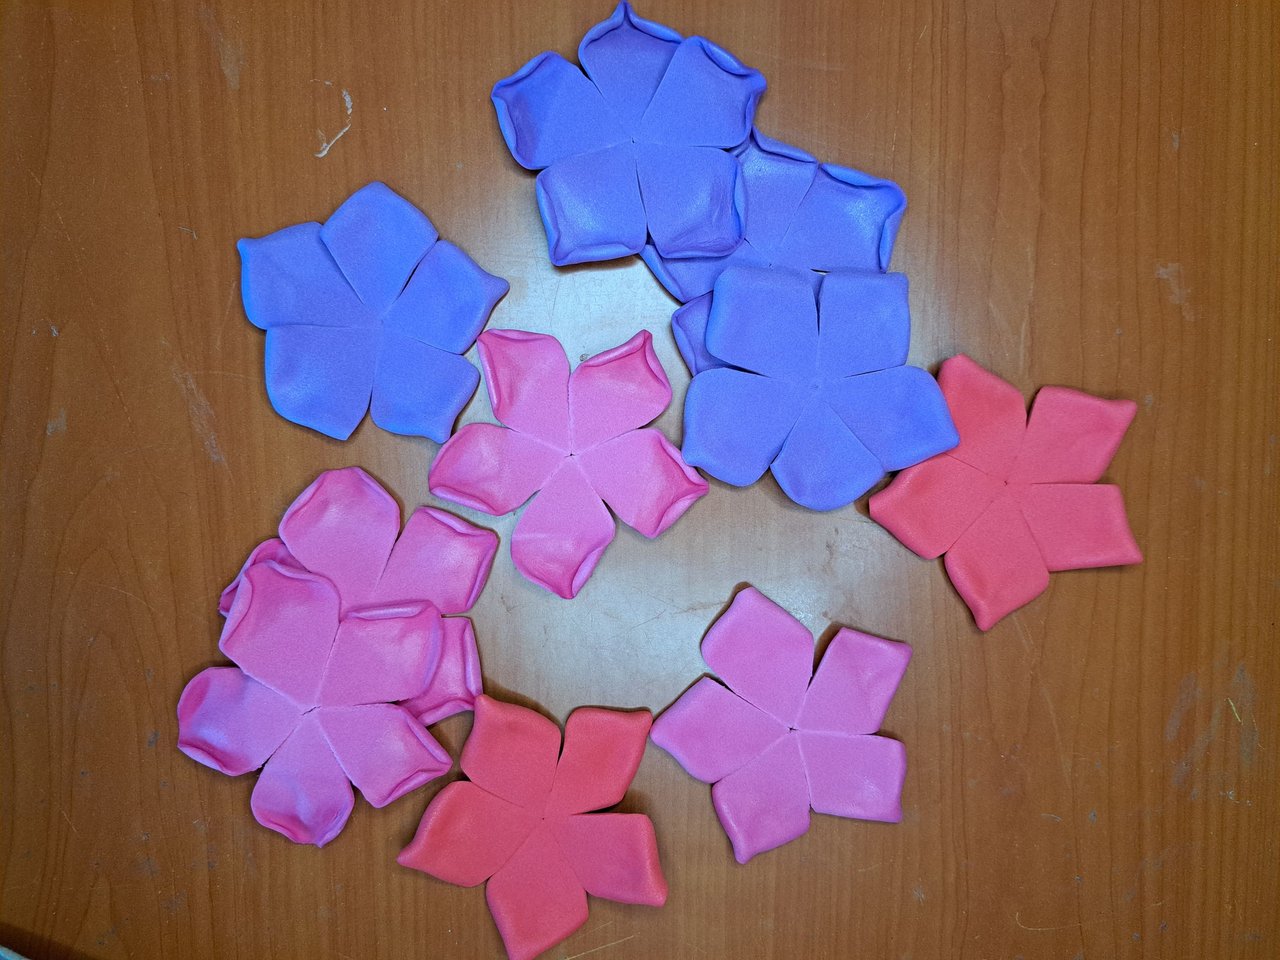
4️⃣ Using some external heat source (clothes iron) we will apply a thermoforming technique to the edges of the petals so that they look like this.
! [Spanish Version Here]
4️⃣ Haciendo uso de alguna fuente de calor externa (plancha para ropa) aplicaremos una técnica de termoformado a los bordes de los pétalos para que queden de la siguiente forma.
 |
 |
 |
 |
 |
 |
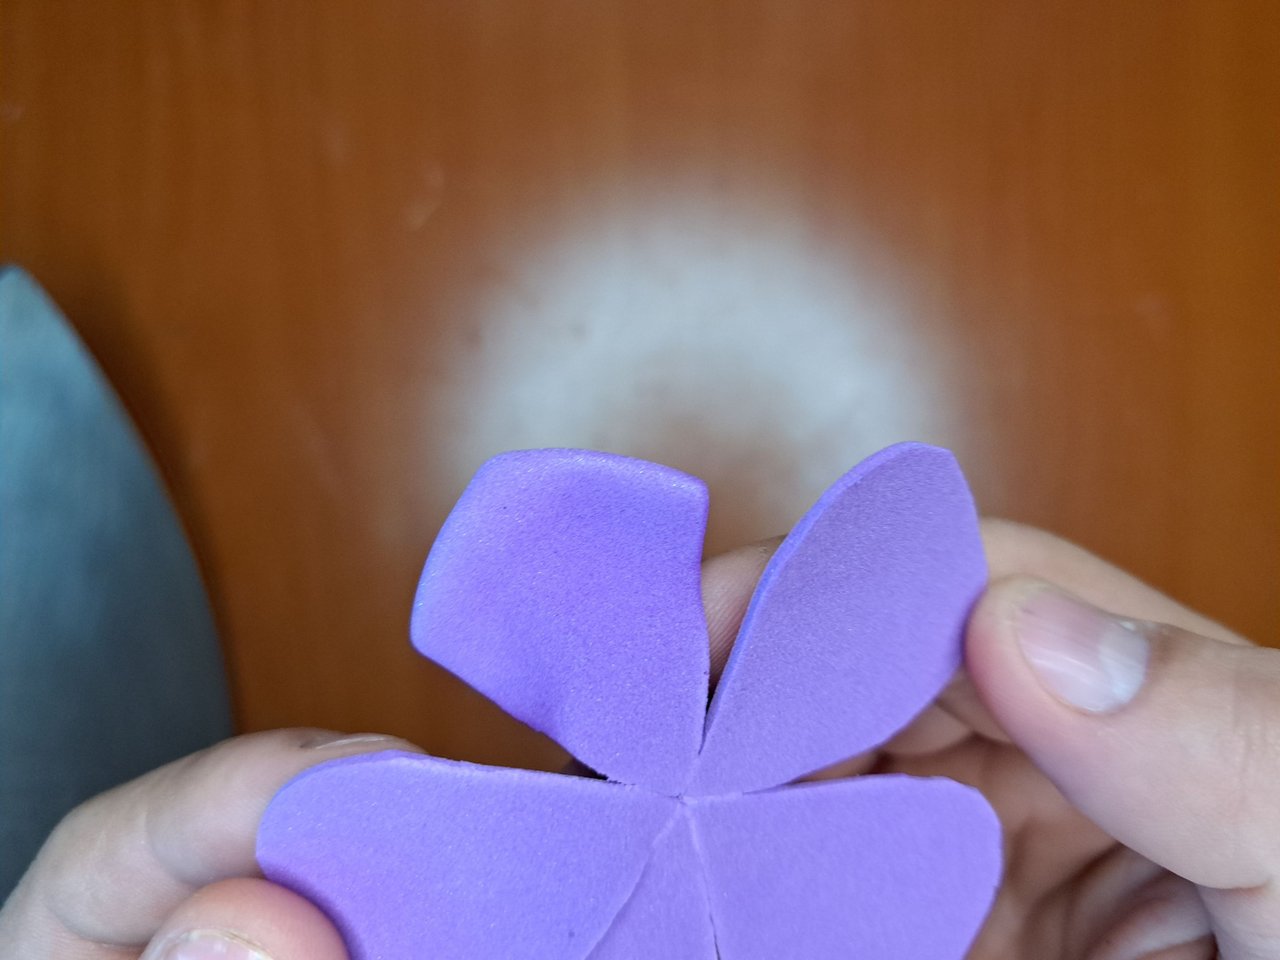
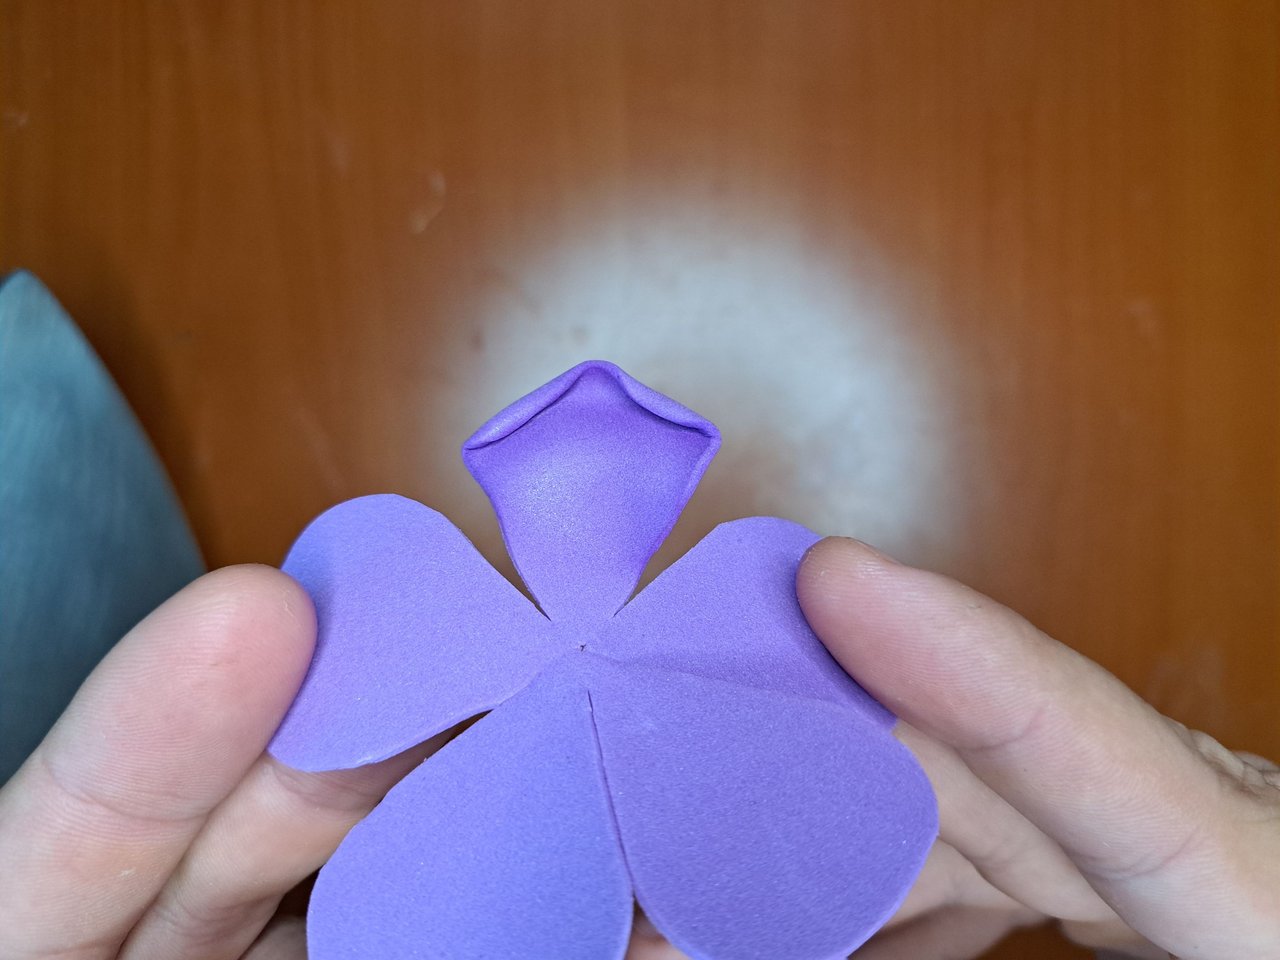
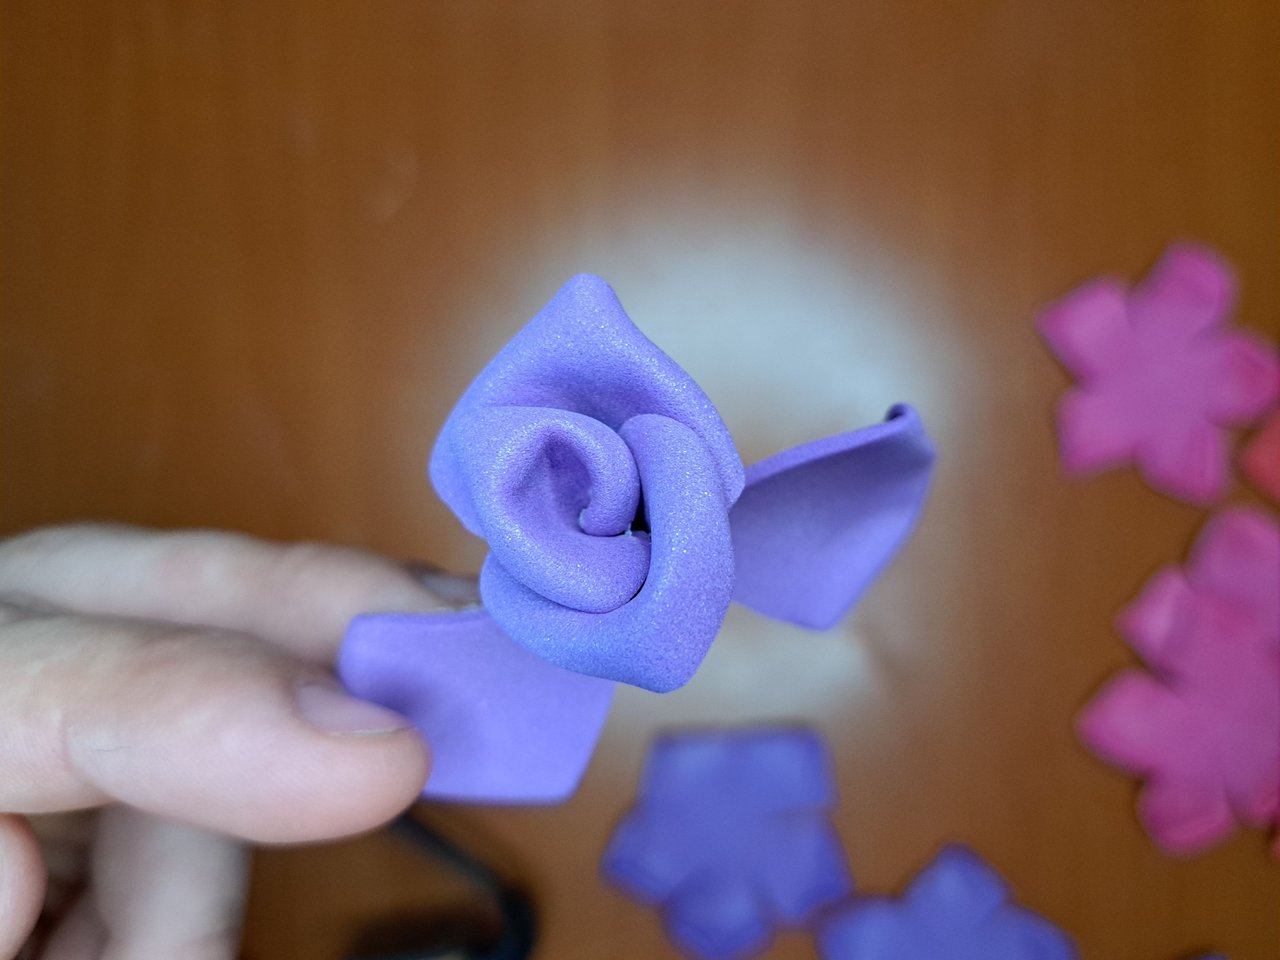
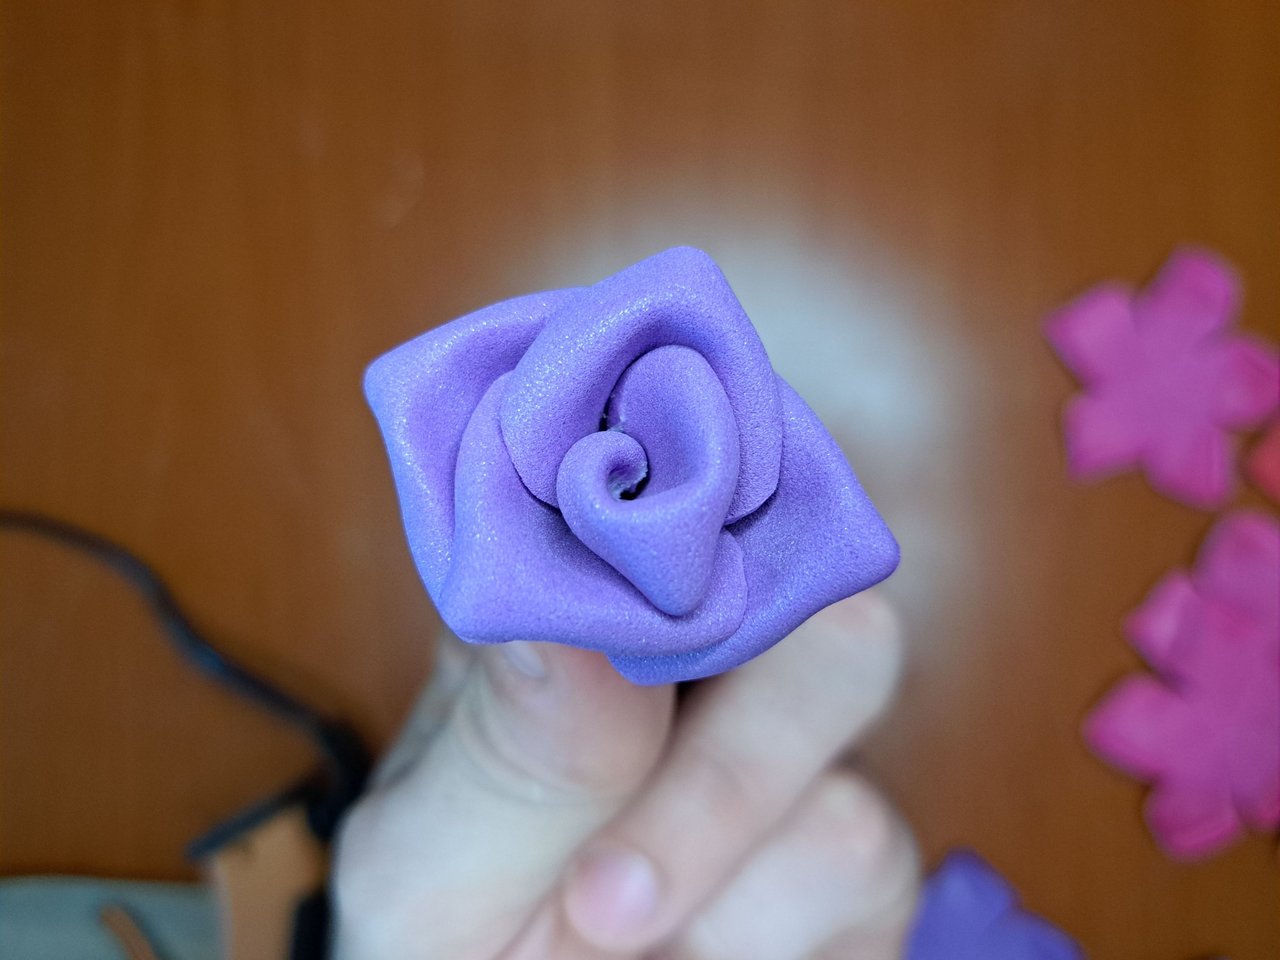
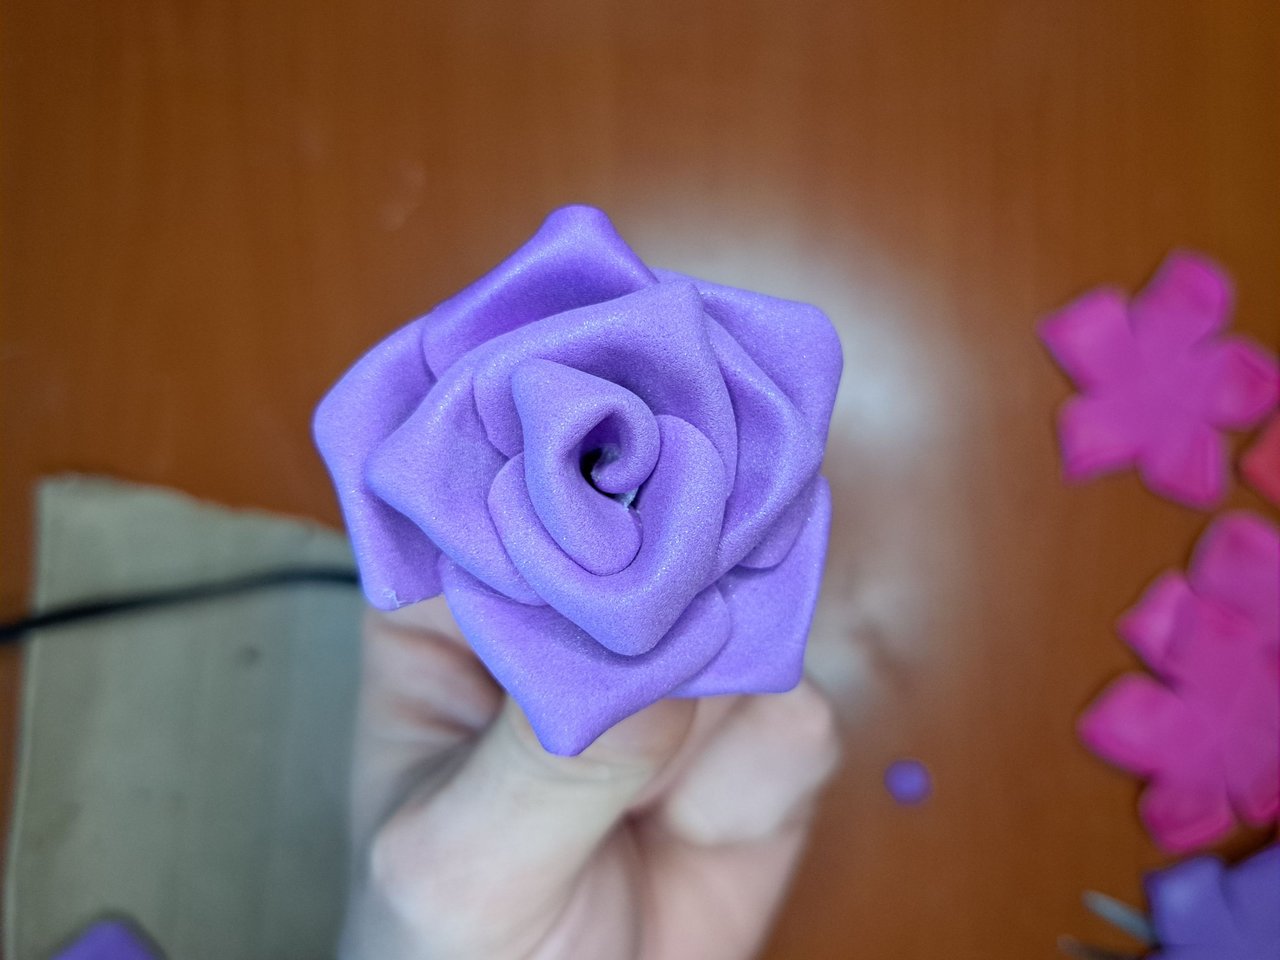
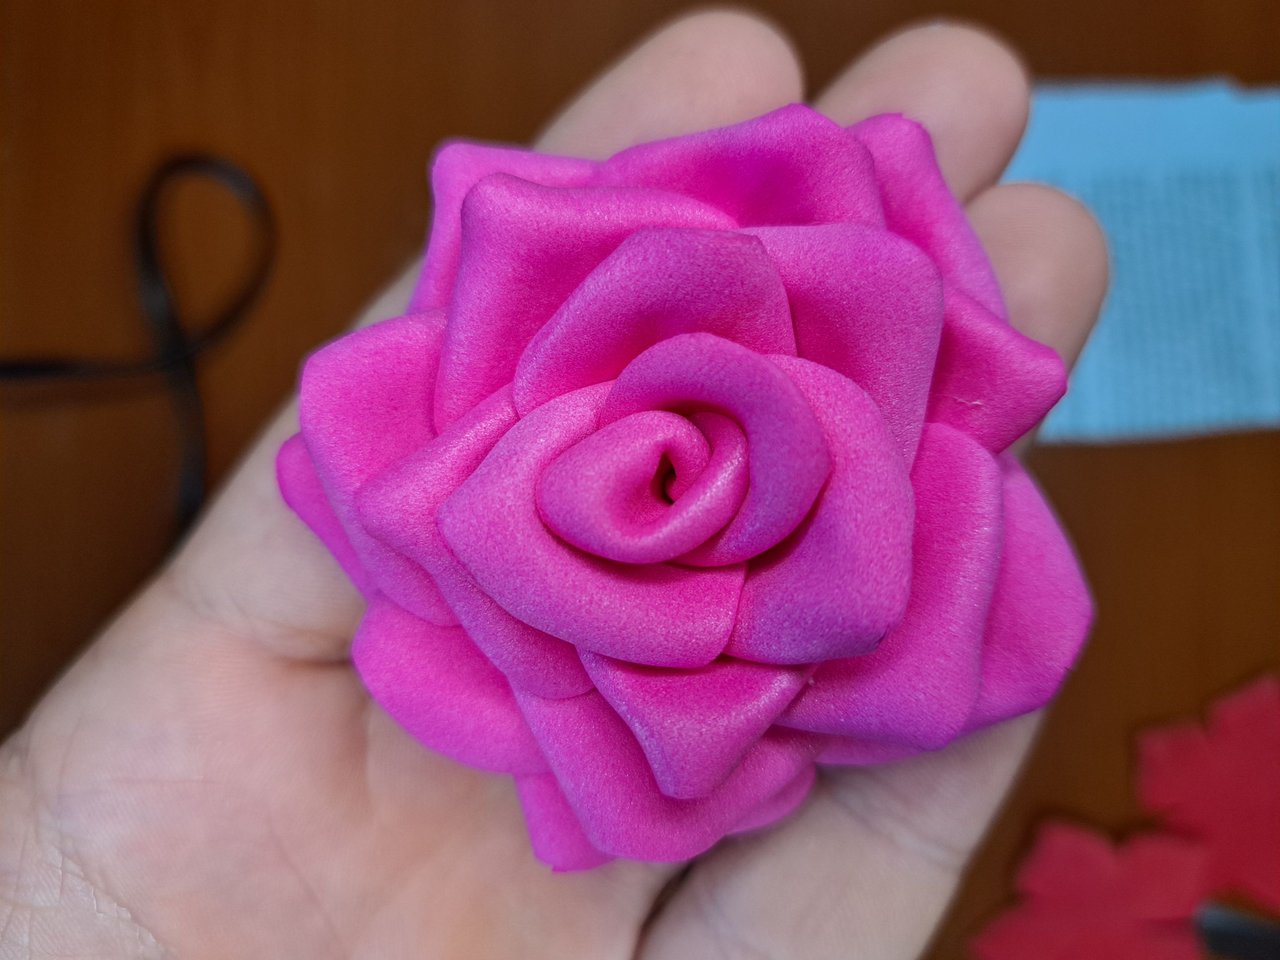
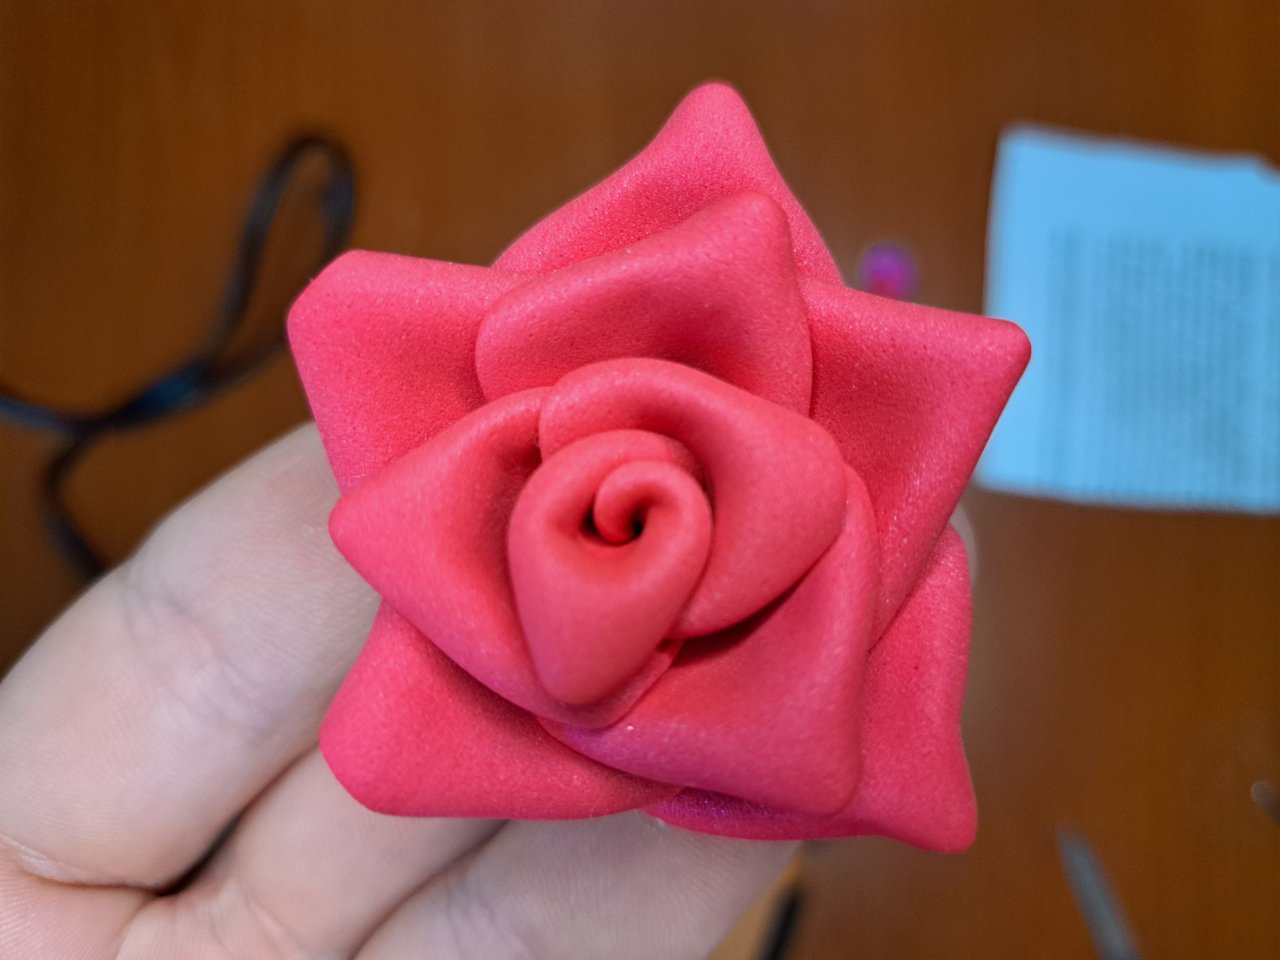
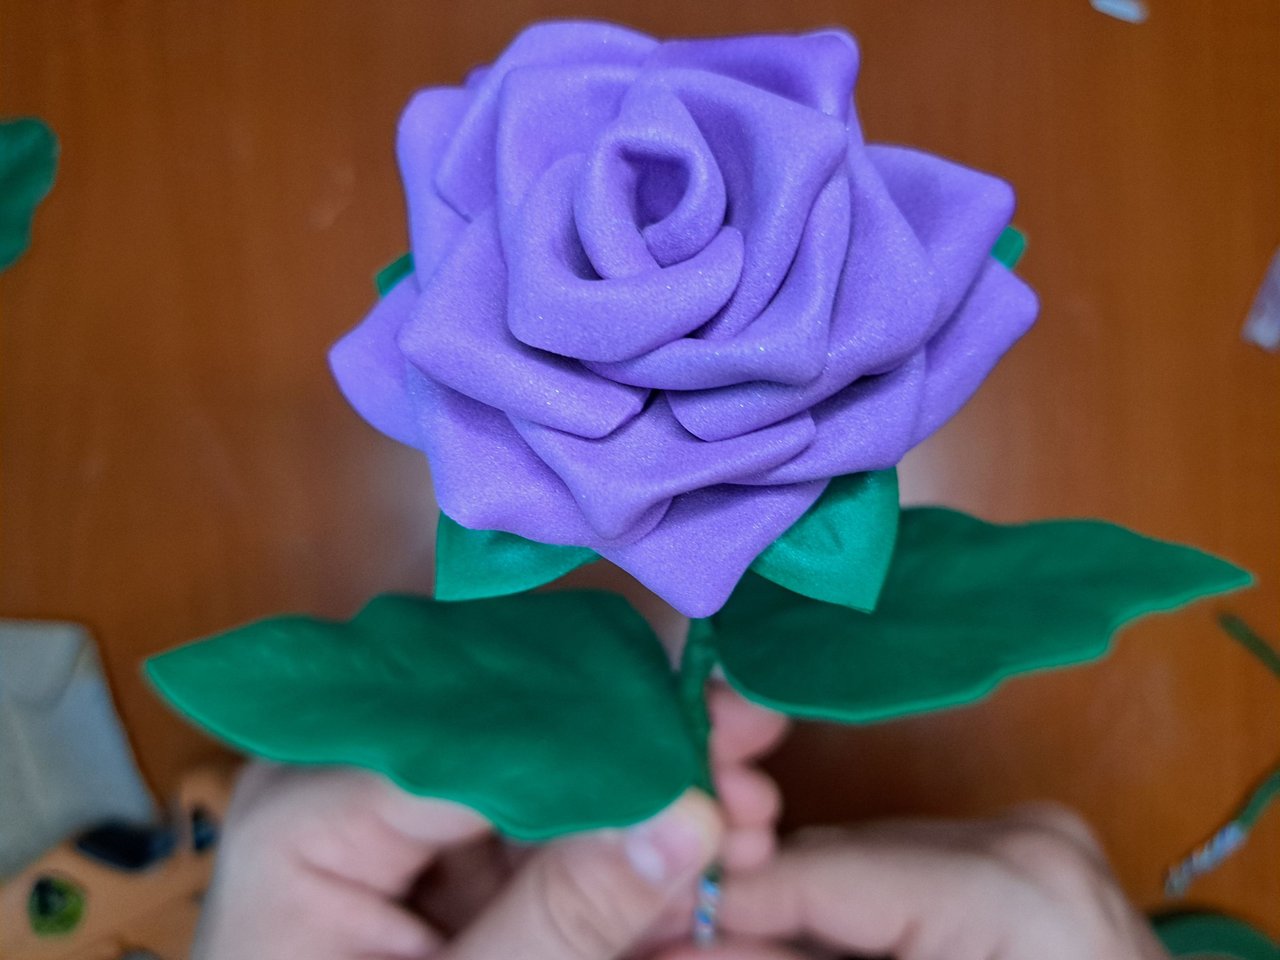
5️⃣ To form the roses we must select one of the petals and glue it twisted in a spiral. Then we glue to one side the petal on the opposite side and repeat the process with each of the layers. The 4-layer flowers would be the big roses and the 2-layer flower would be the small one.
! [Spanish Version Here]
5️⃣ Para conformar las rosas debemos seleccionar uno de los pétalos y pegarlo enroscado ene espiral. Luego pegamos a un lado el pétalo del lado opuesto y repetimos el proceso con cada una de las capas. Las flores de 4 capas serían las rosas grandes y la flor de 2 capas sería la pequeña.
 |
 |
 |
 |
 |
 |
 |
 |
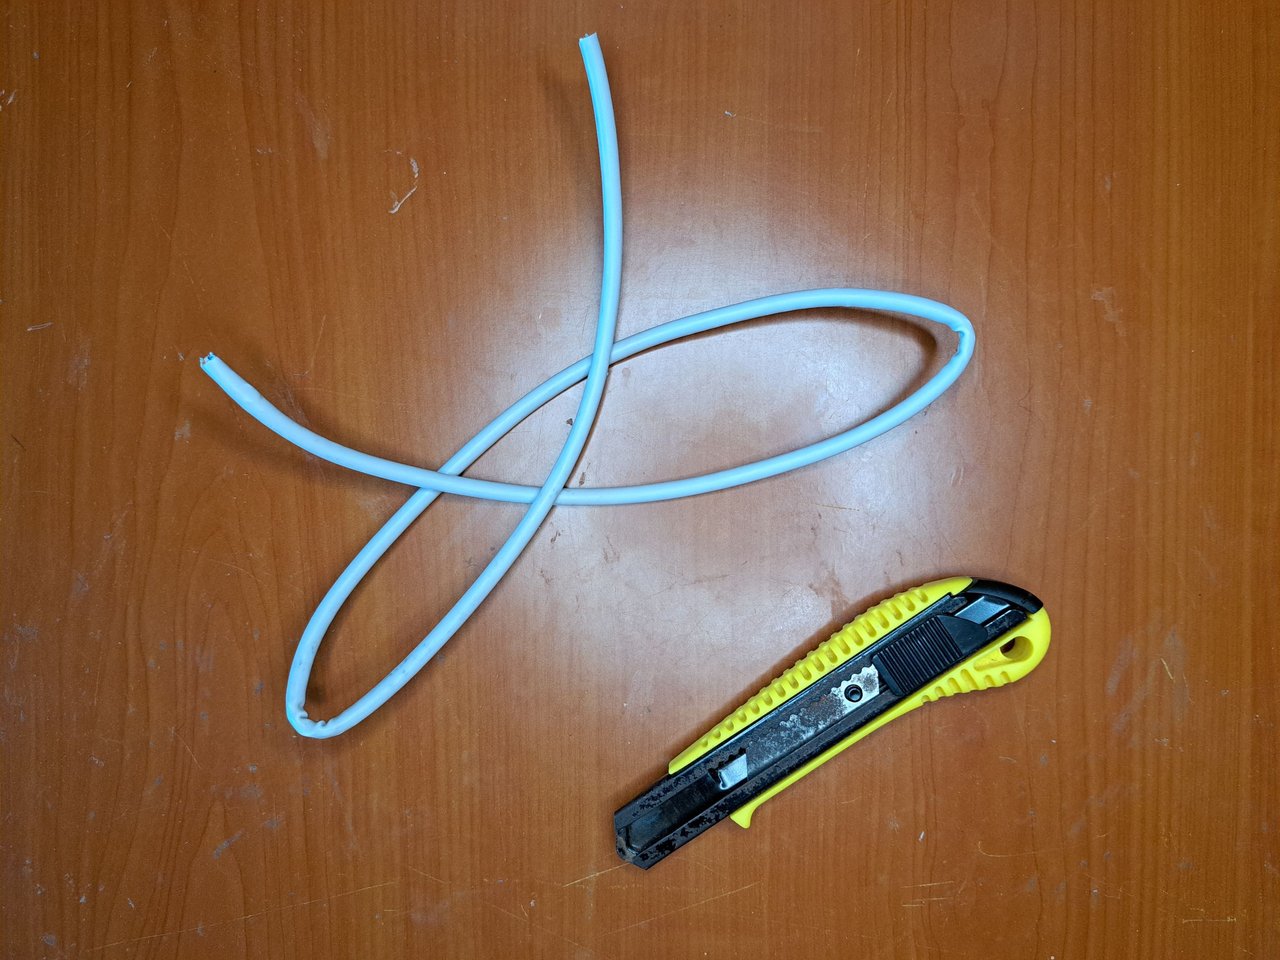
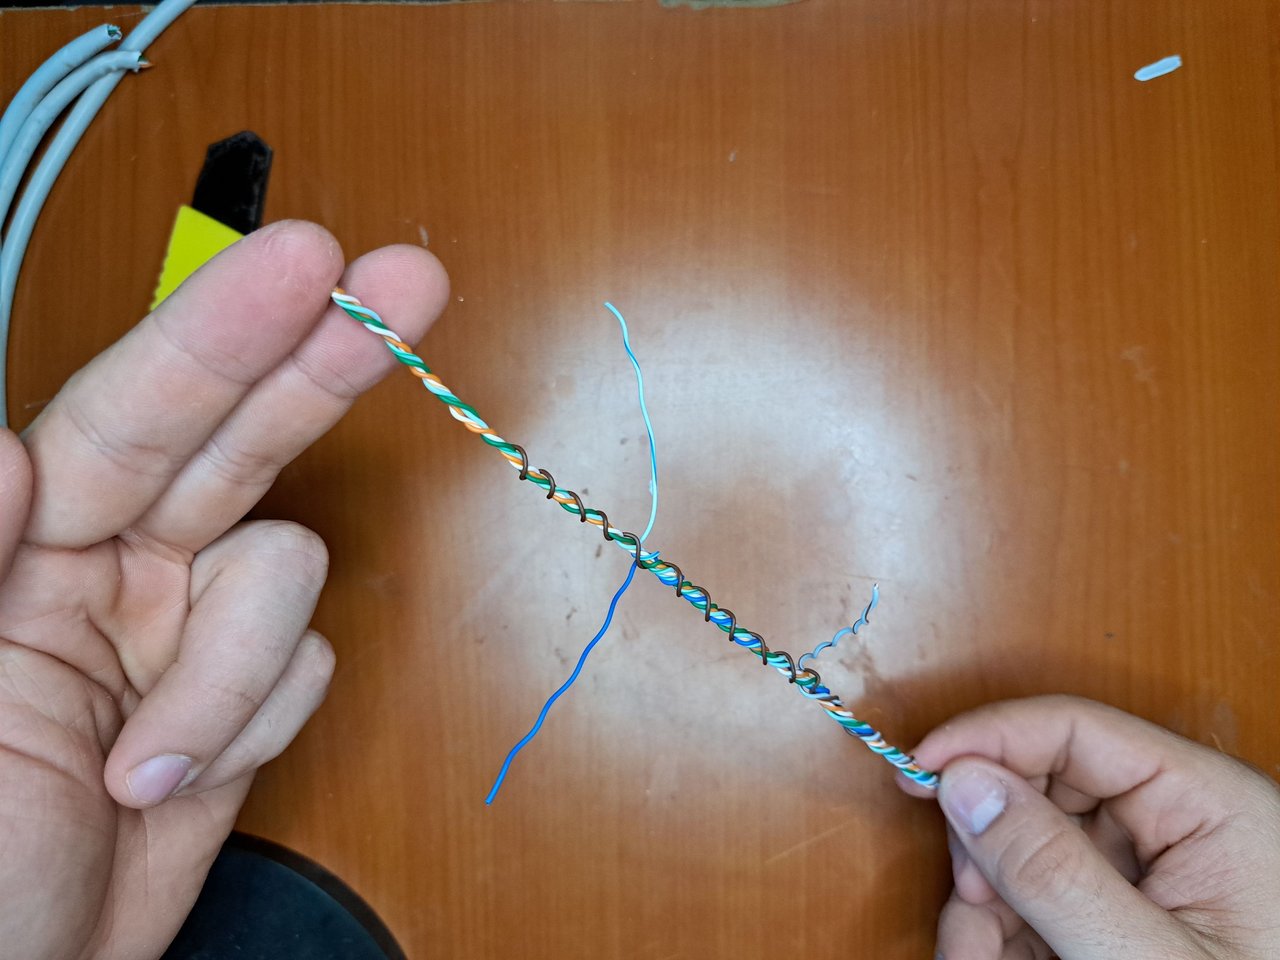
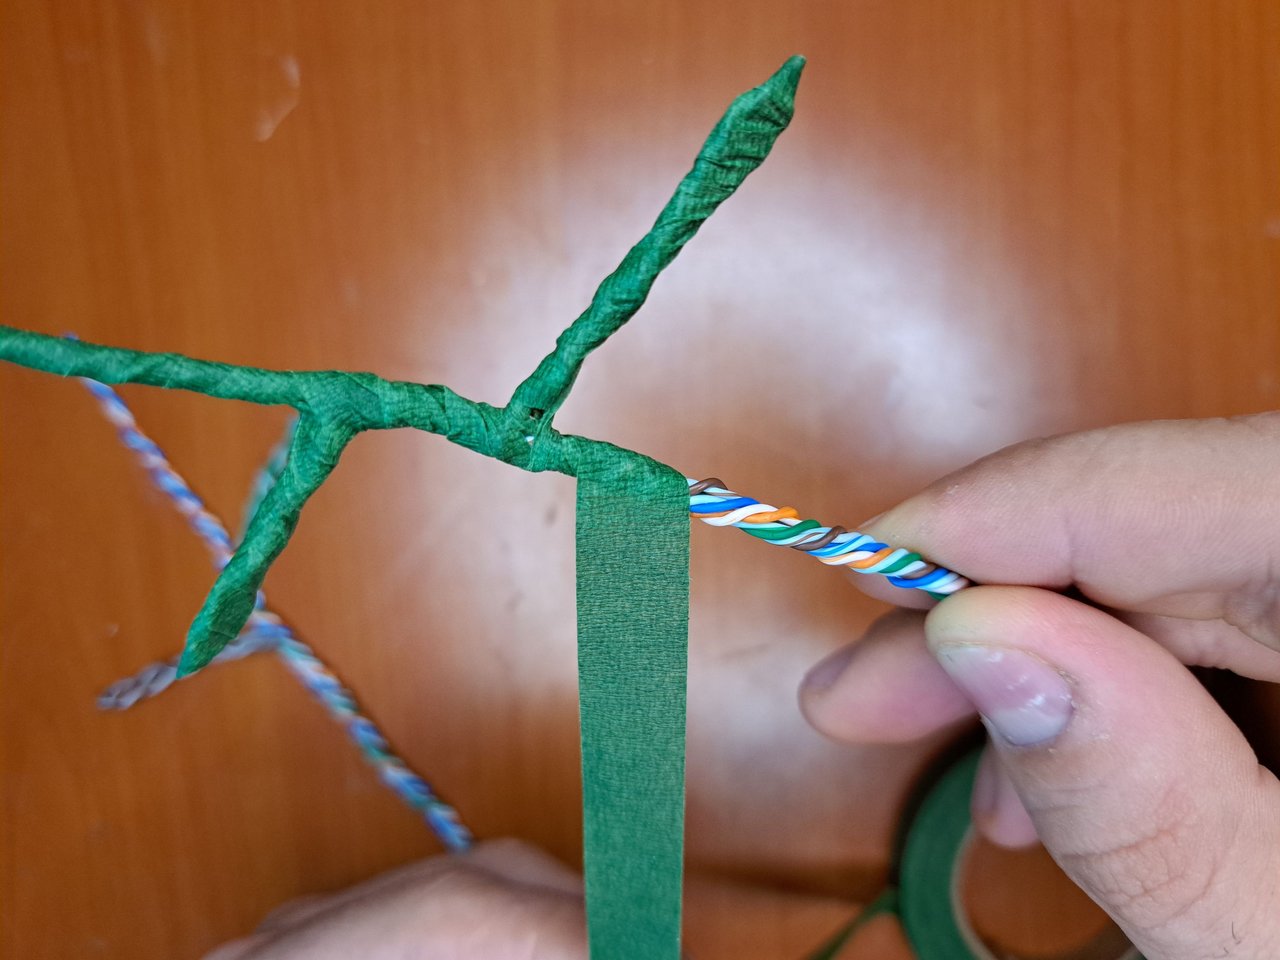
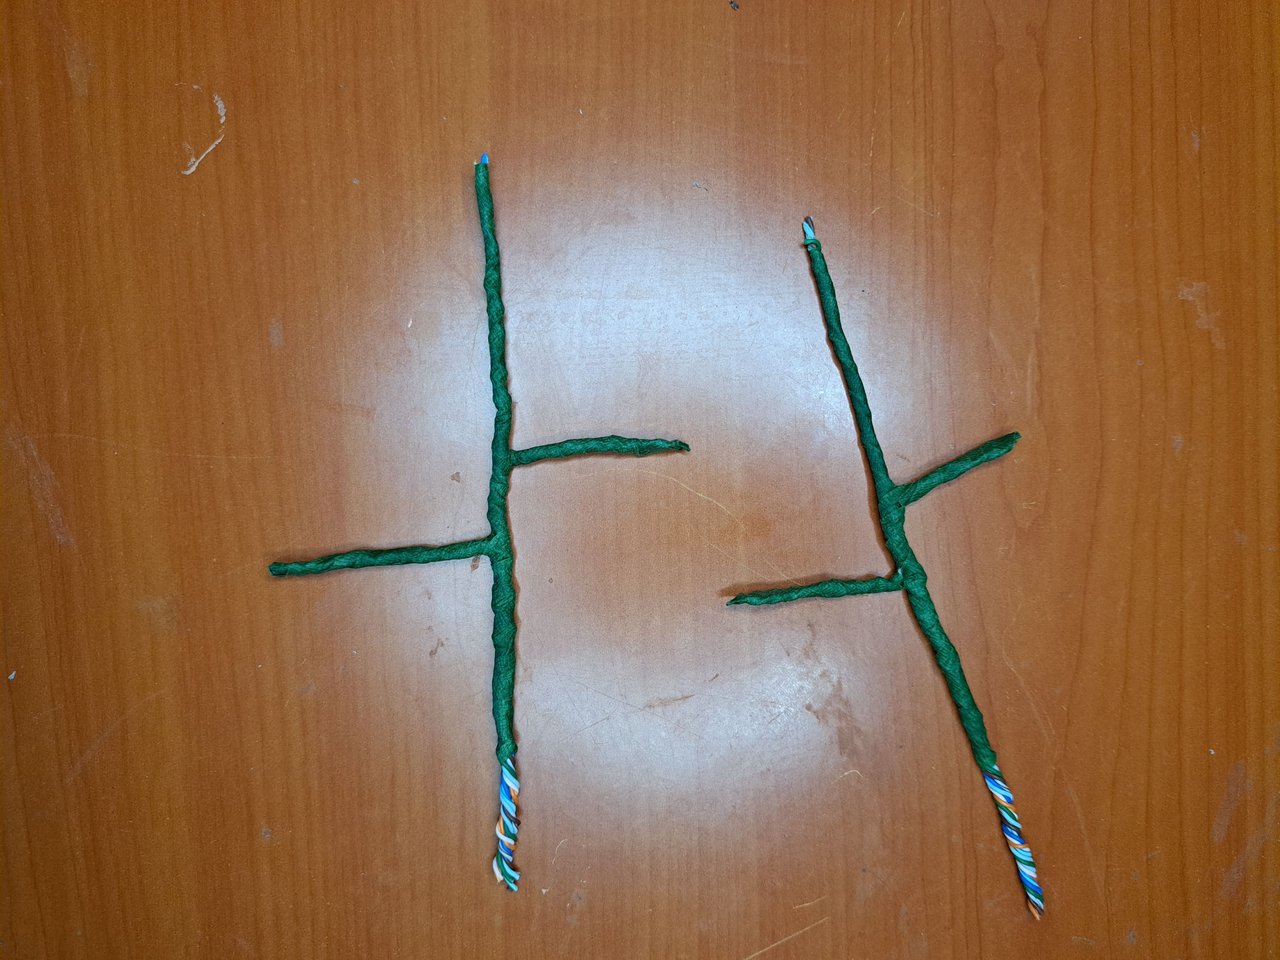
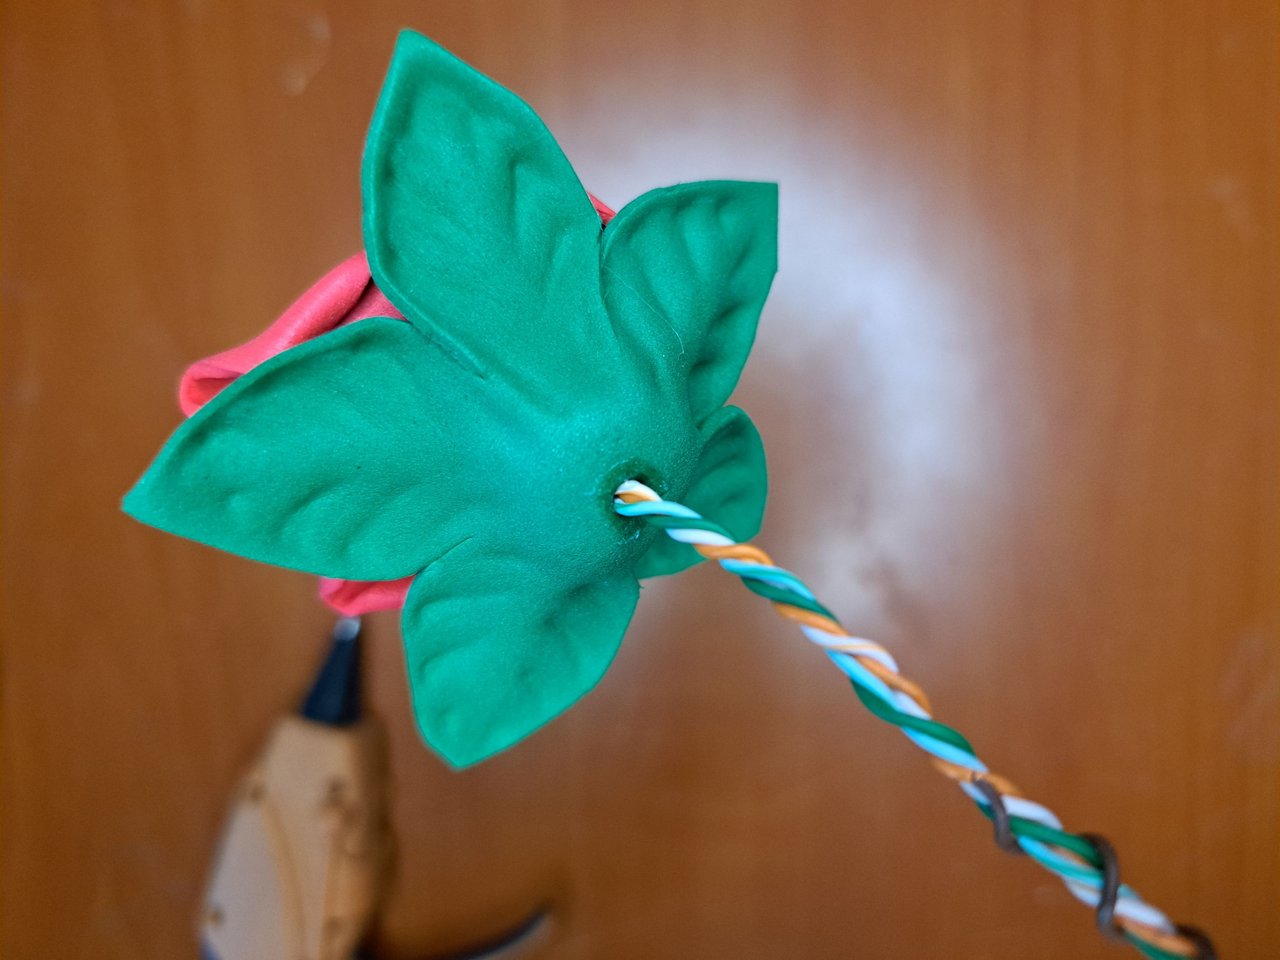
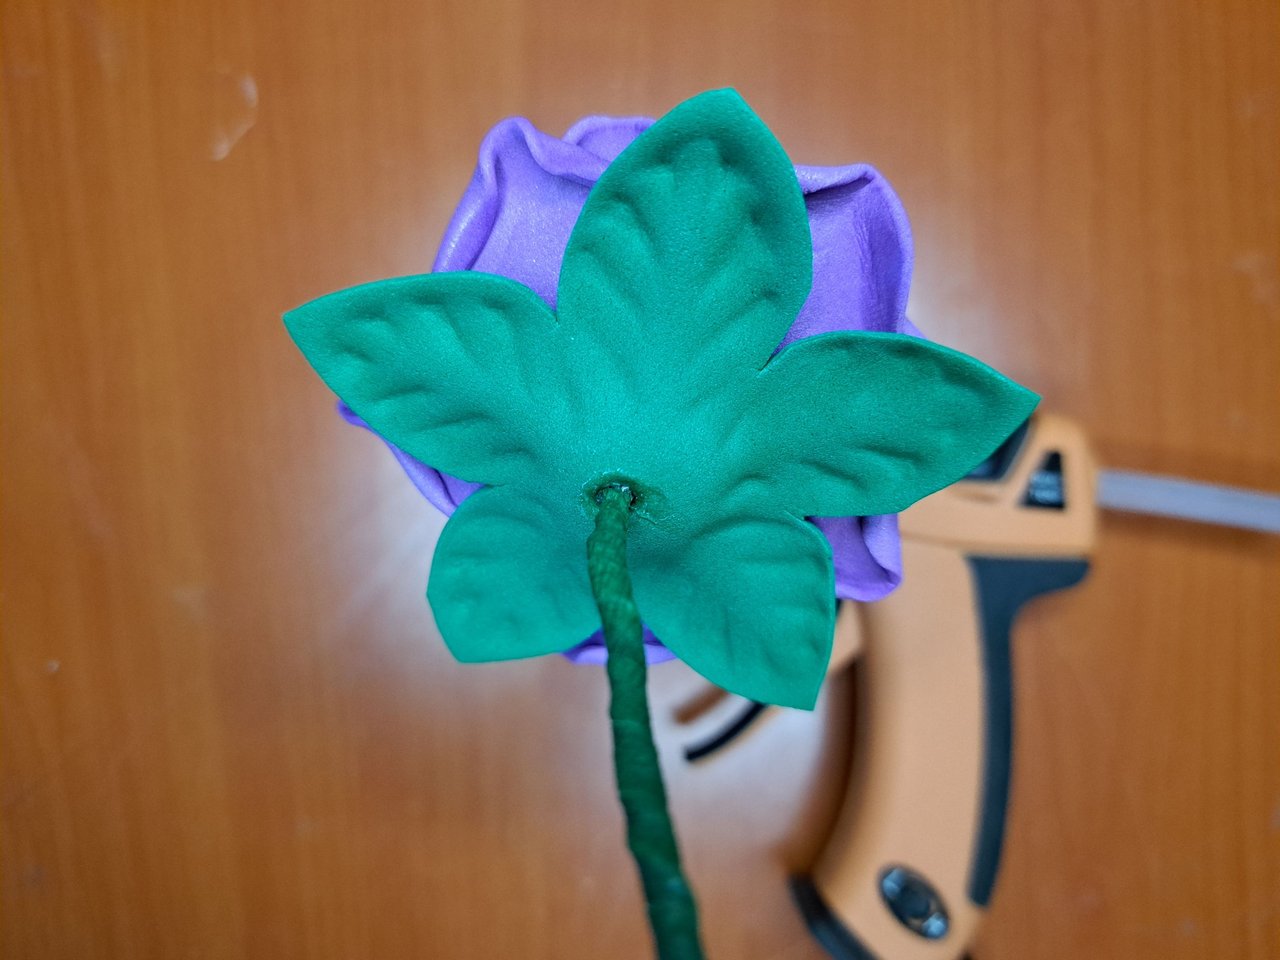
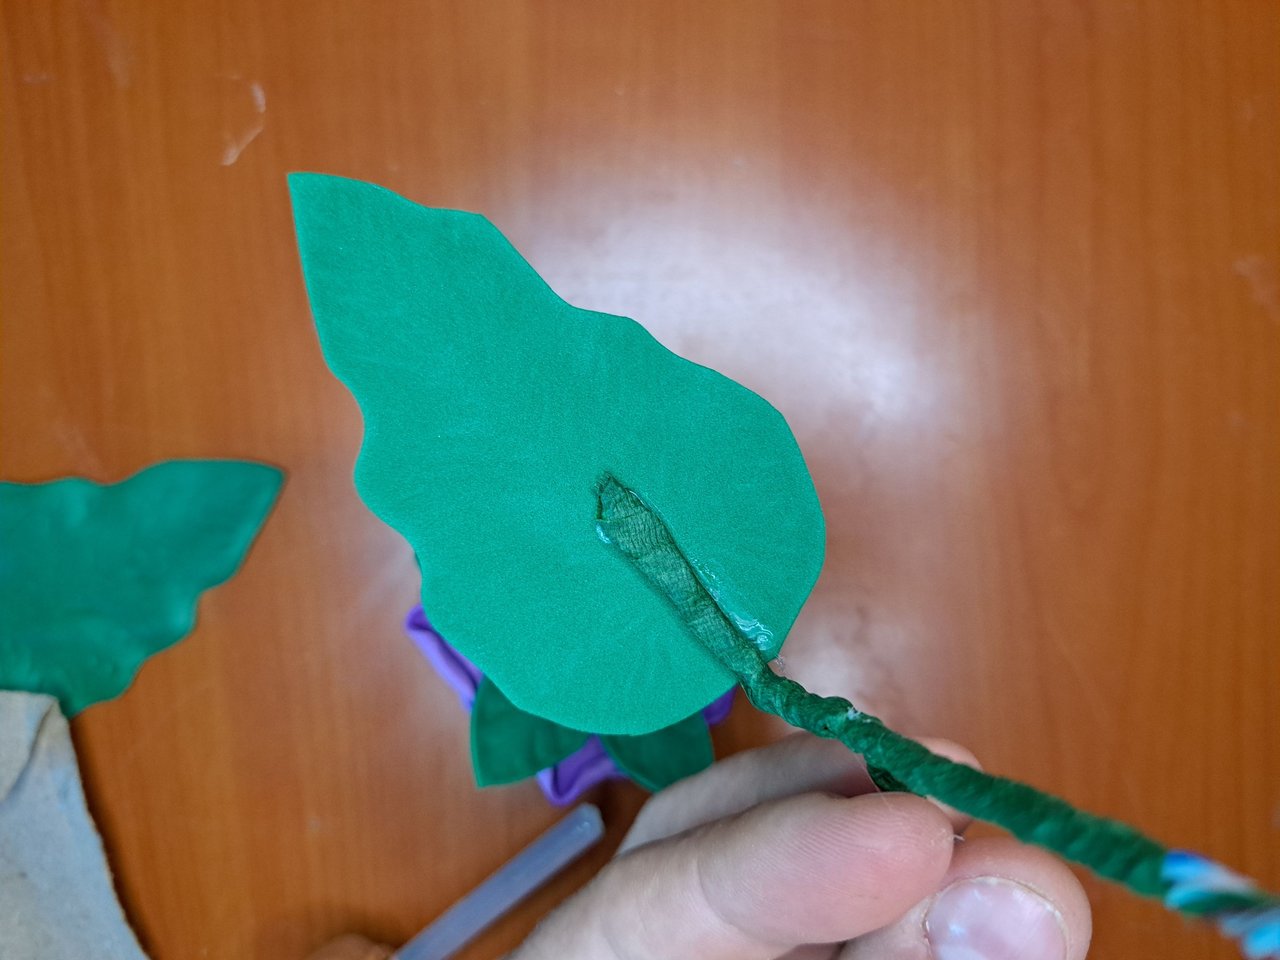
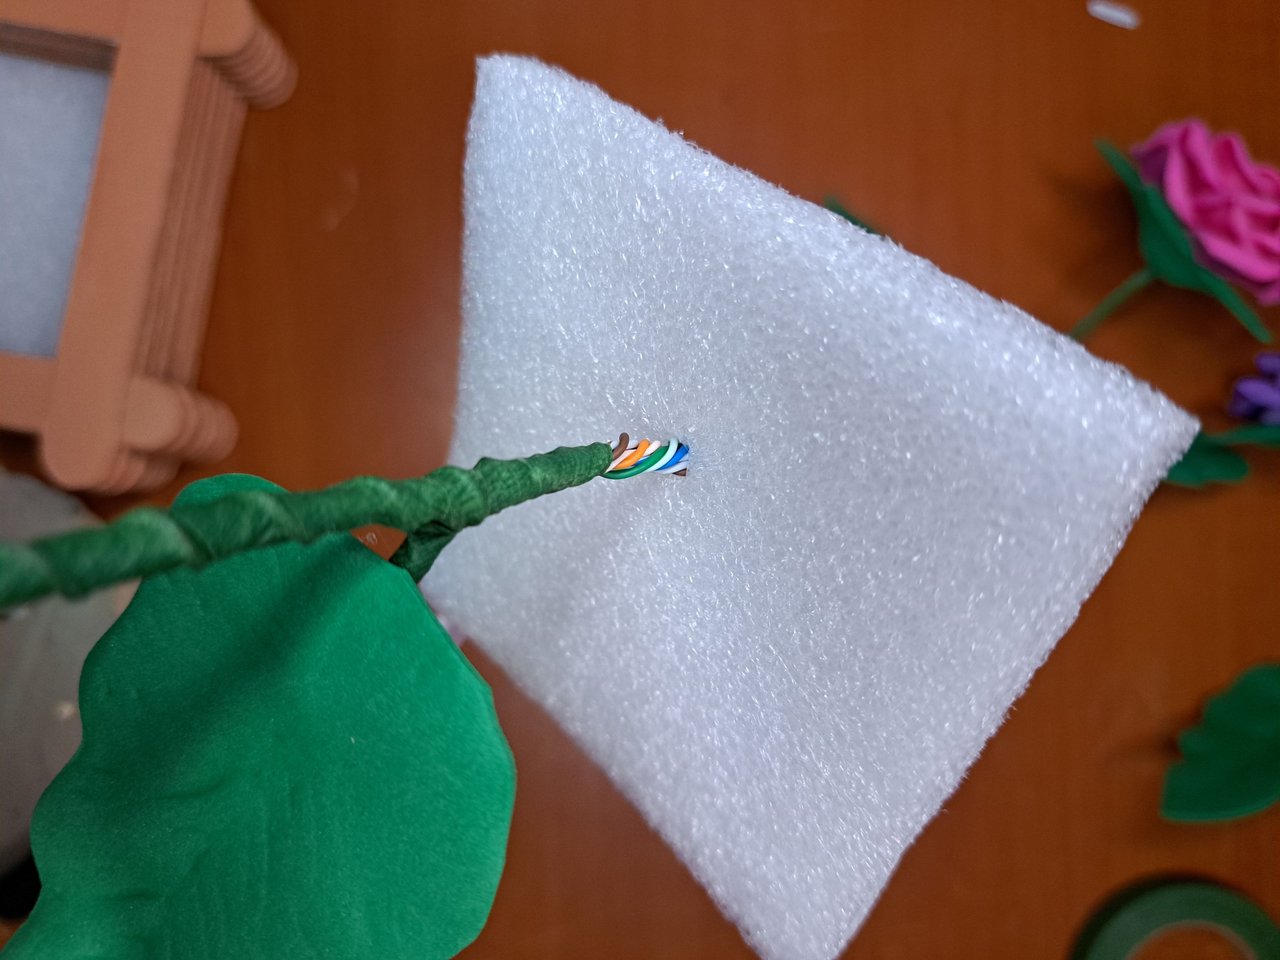
6️⃣ We peel a copper wire (rj45 cable in my case) and twist it to form a wider wire. Then we separate some tips that will be the support of the leaves and we roll the whole structure in floral tape to form the stems.
! [Spanish Version Here]
6️⃣ Pelamos un alambre de cobre (cable rj45 en mi caso) y lo torcemos hasta formar un cable más ancho. Luego separamos algunas puntas que serán el sostén de las hojas y enrollamos toda la estructura en cinta floral para formar los tallos.
 |
 |
 |
 |
 |
 |
 |
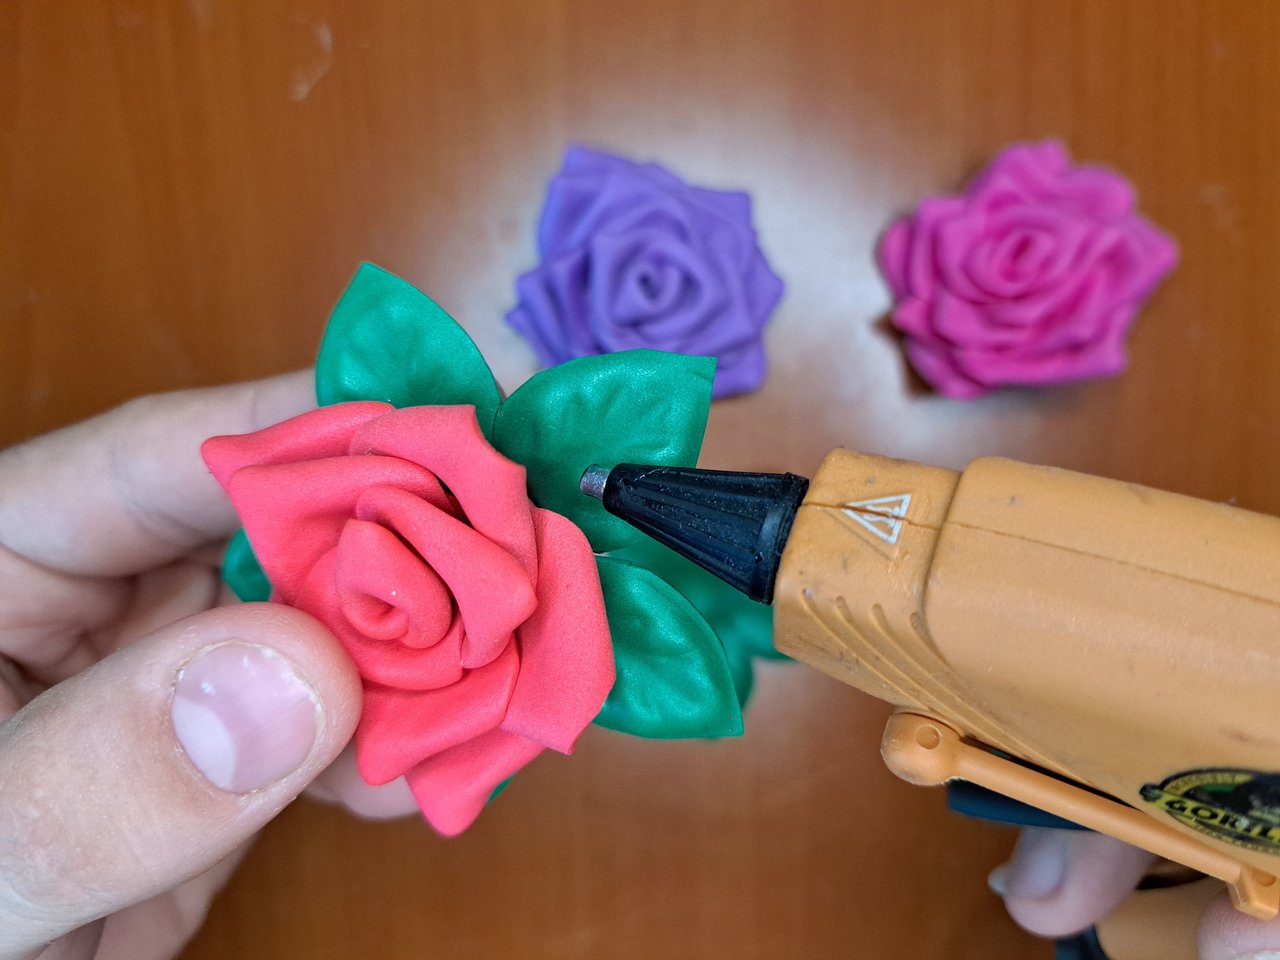
7️⃣ Continuing with the flowers, this time we will add to each rose its sepal, which like the leaves are pieces of leftover fomi from this craft. Once the sepals are glued, we insert the stems into the bottom of each rose.
! [Spanish Version Here]
7️⃣ Continuando con la las flores, esta vez le añadiremos a cada rosa su sépalo, el cual al igual que las hojas son piezas de fomi sobrante de esta manualidad. Una vez pegados los sépalos, introducimos los tallos en la parte inferior de cada rosa.
 |
 |
 |
 |
 |
 |
 |
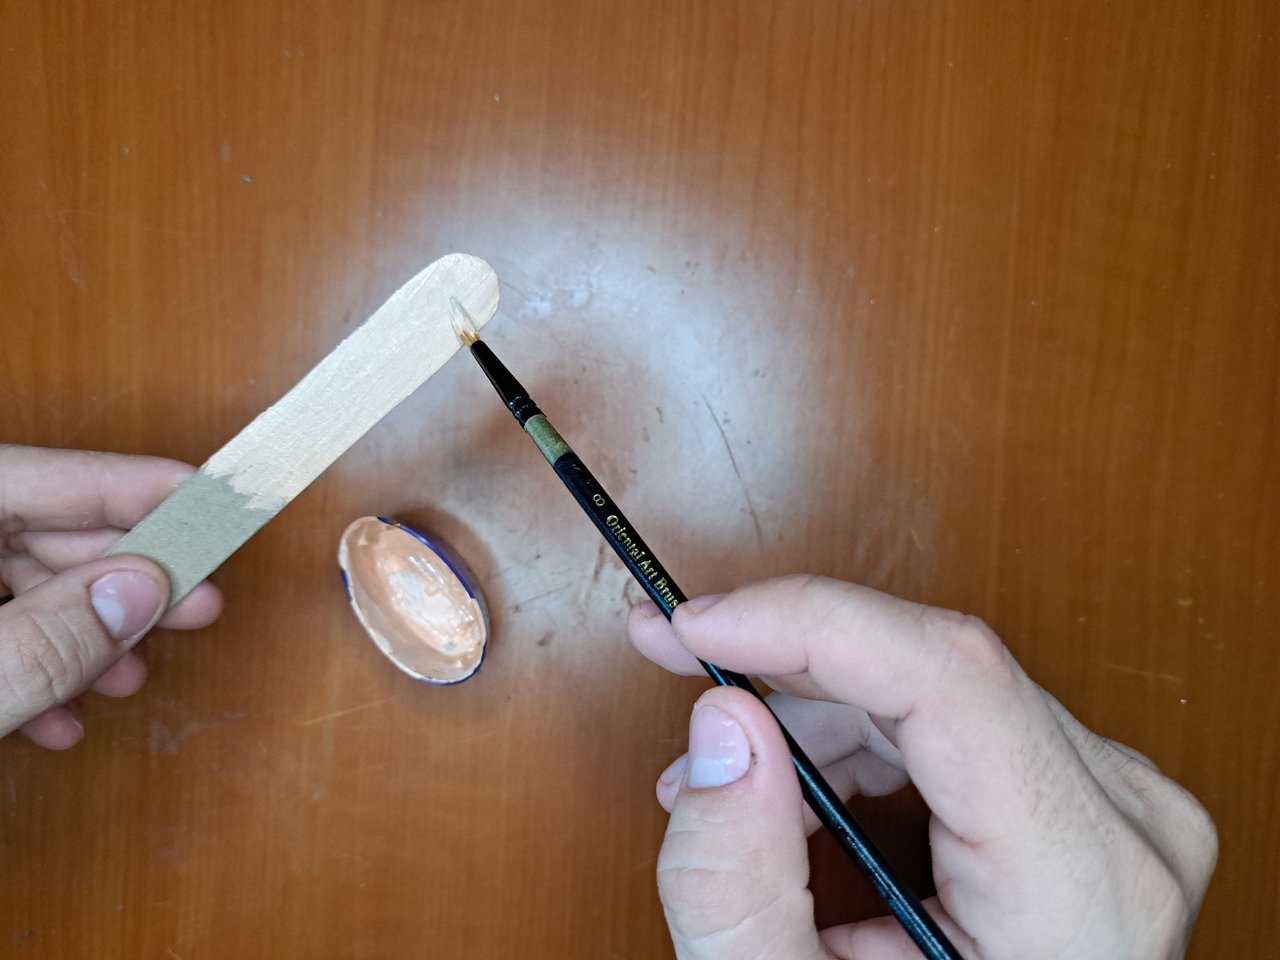
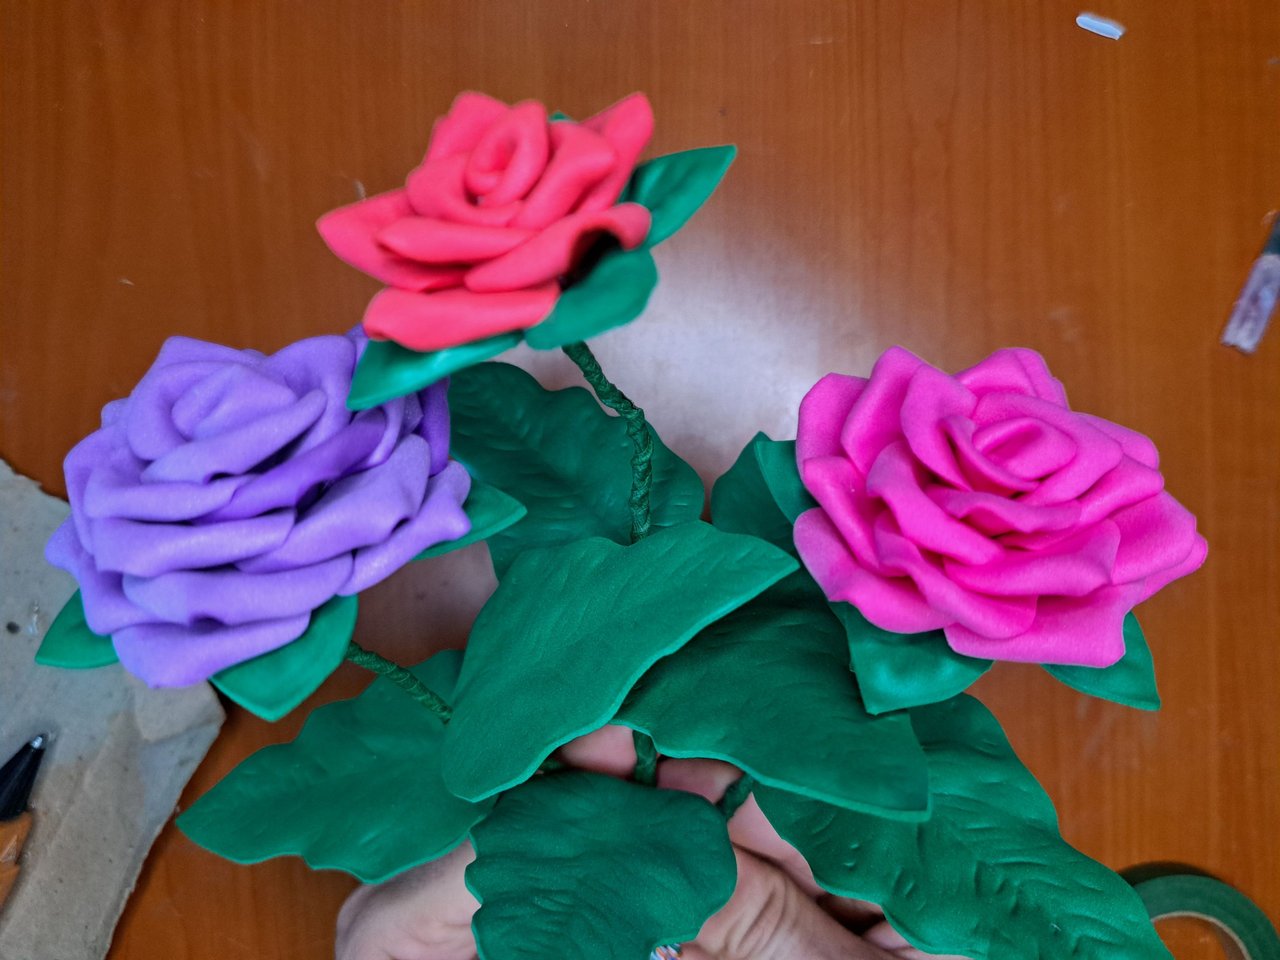
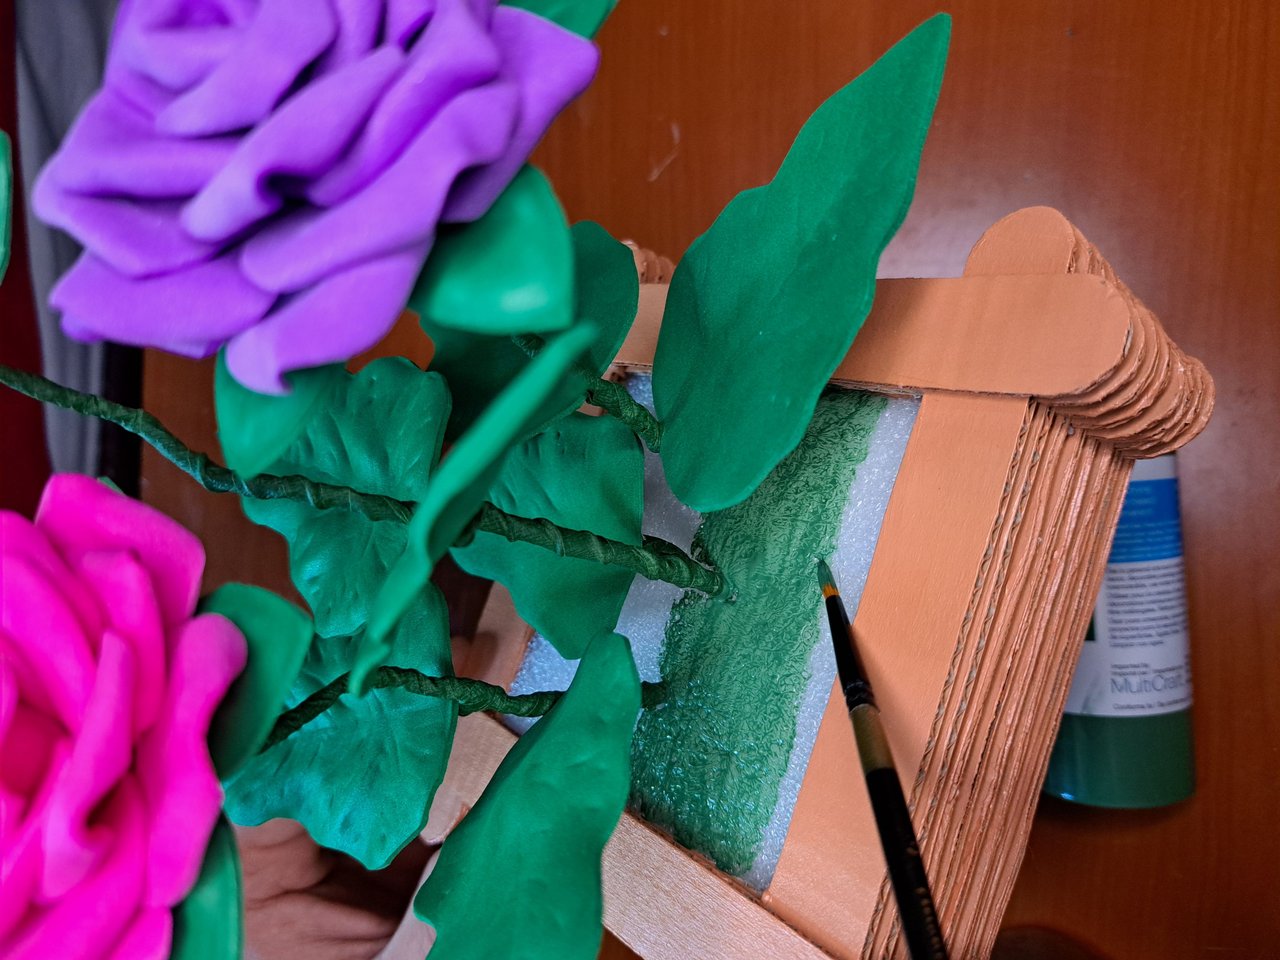
8️⃣ Then add the leaves to each stem and glue them to the piece of polystyrene to insert it into the cardboard base. Once the whole base is glued we paint the part of the base that makes contact with the stems of the flowers with dark green.
! [Spanish Version Here]
8️⃣ Seguidamente añadimos las hojas a cada tallo y los pegamos a la pieza de poliespán para introducirla en la base de cartón. Una vez pegada toda la base pintamos de verde oscuro la parte de la base que hace contacto con los tallos de las flores.
 |
 |
 |
 |
 |
 |
 |
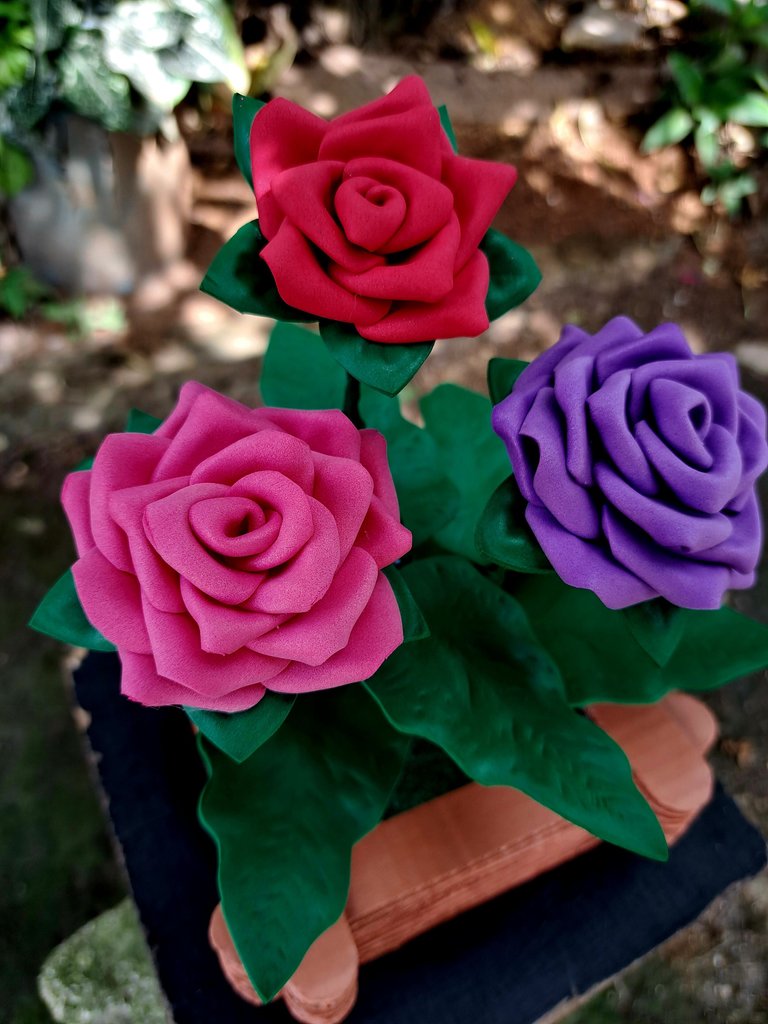
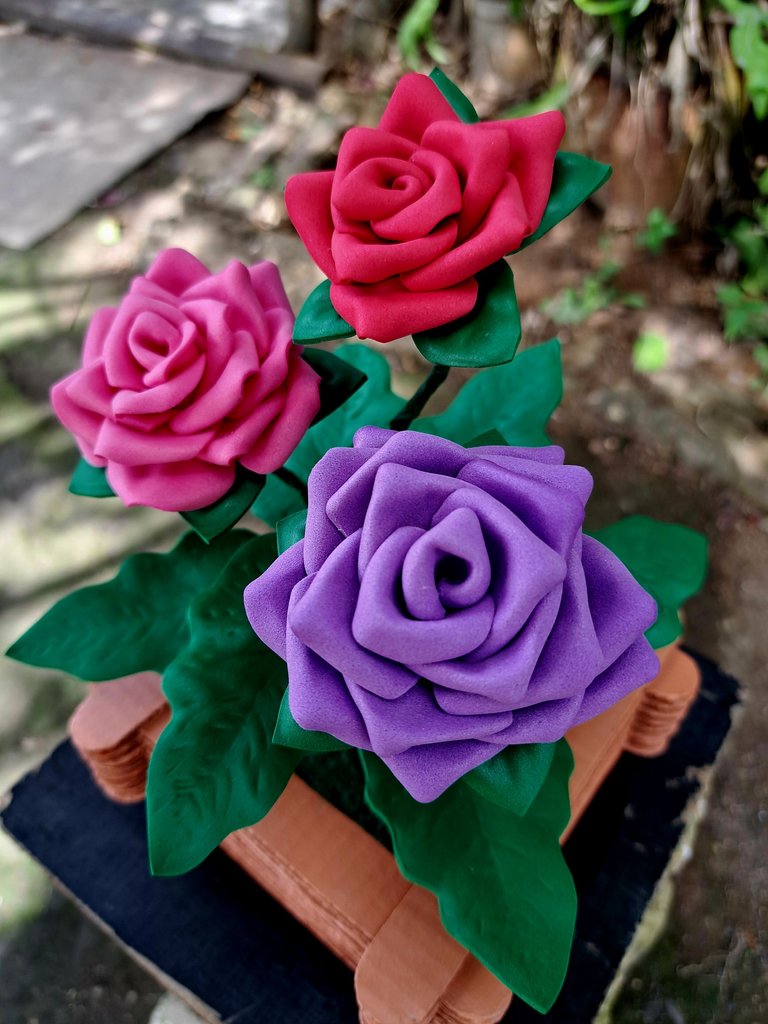
And that concludes it. I hope this tutorial has been useful and that you are encouraged to create your own floral ornament. For my part, I'll say goodbye until the next post, where I will bring you another little piece of my creative world.
! [Spanish Version Here]
Y con eso concluimos. Espero que este tutorial les haya sido útil y que se animen a crear su propio adorno floral. Por mi parte, me despido hasta la próxima publicación, donde les traeré otro pedacito de mi mundo creativo.
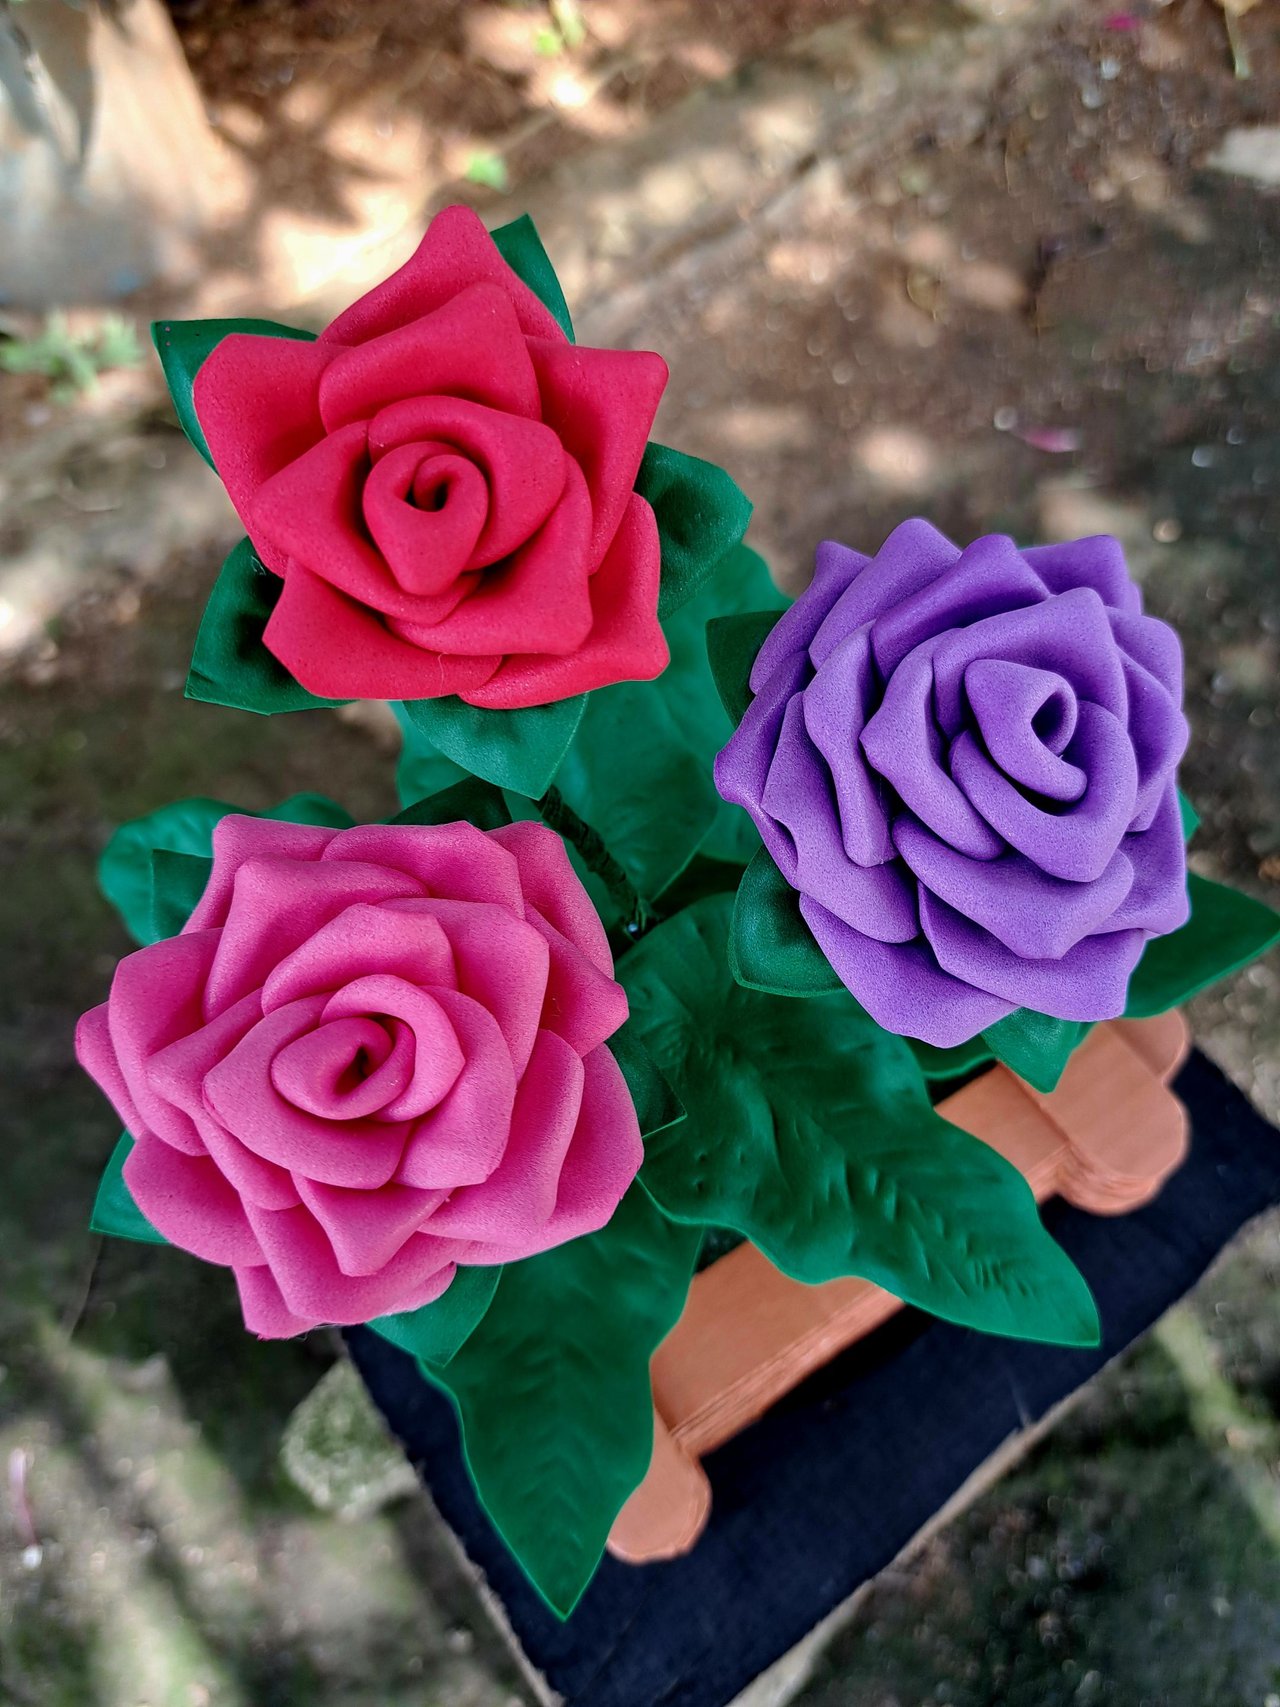
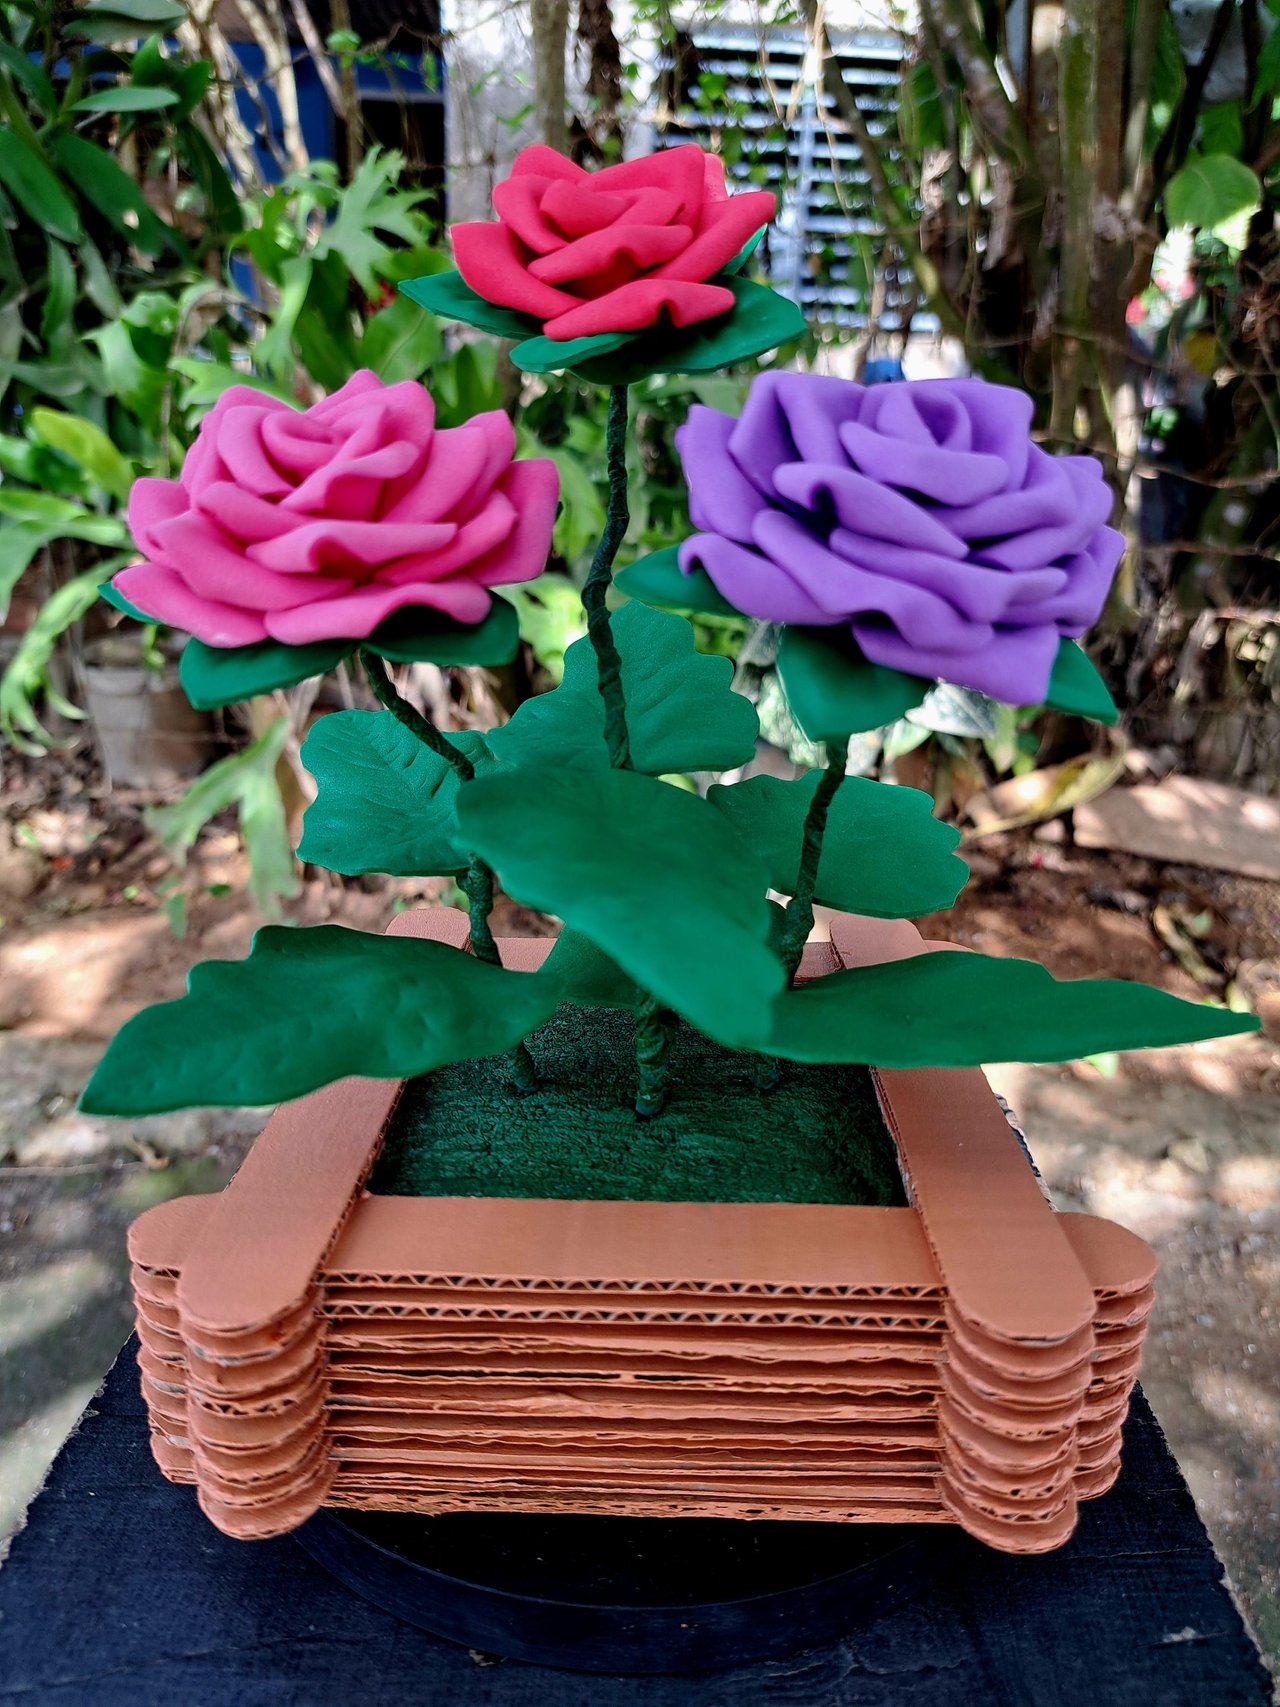
Final Result // Resultado Final
 |
 |
 |
 |
 |
 |
 |

Thank you very much for reading my post. If you liked it, please leave a comment and consider following me so you don't miss my next posts. I'd love to know your opinion and your thoughts about the topic I discussed in this post, see you in the next one!
Muchas gracias por leer mi post. Si te gustó, por favor deja un comentario y considera seguirme para no perderte mis próximas publicaciones. Me encantaría saber tu opinión y tus ideas sobre el tema que traté en este post. ¡Nos vemos en el próximo!
Cover page created in Canva Pro
Translated by DeepL


Que hermosas quedaron esas flores, no había visto una técnica donde se hiciera una flores tan hermosas con foami, seguro que las intento hacer y serían un desastre, te quedaron espectaculares.
Con un poco de práctica y paciencia podrías lograrlo.
wow that looks so amazing. you are so creative keep up the good work. have a great week ahead.
Thanks for the support 🤗
https://twitter.com/hivediy47901/status/1775034463736504467
Quedó precioso, me encantó. 😍😍
Gracias 🤗
You sure have a lot of patience. At first glance I thought you're using wooden spatulas, which are available in every hobby shop, then I saw it's cardboard. Anyway, the end result is nice, congratulations.
I actually use the wooden pallet as a template to cut out the cardboard. I wanted to do it this way to give an ecological plus to the craft.
Que hermoso adorno y muy bonito detalle para tu abuela, estas flores nunca se marchitaran y yo tambien pienso que las flores se ven mas bonitas en sus tallos, asi que las flores de adorno son una excelente opcion para regalar ❤️
Feliz cumple para tu abue ✨🦉
Gracias por tus palabras. Mi abuela todavía no ha visto el regalo, pero pronto se lo llevaré. Voy a tratar de subir su reacción en una publicación de Liketu 😉
¡ Que hermosas flores ! te quedo genial, me encanto como lo hiciste, voy a ver si puedo hacer unas para mi, a simple vista se ven complicadas de hacer pero viendo tu técnica es fácil de hacer. Saludos, feliz día.
El procedimiento no está tan difícil una vez que lo empiezas a hacer. Anímate.
Las rosas están hermosas parecen que las hubiera hecho con un troquel me encanta todo el arreglo floral
Muchas gracias 🤗, están echas a mano y con mucho amor.