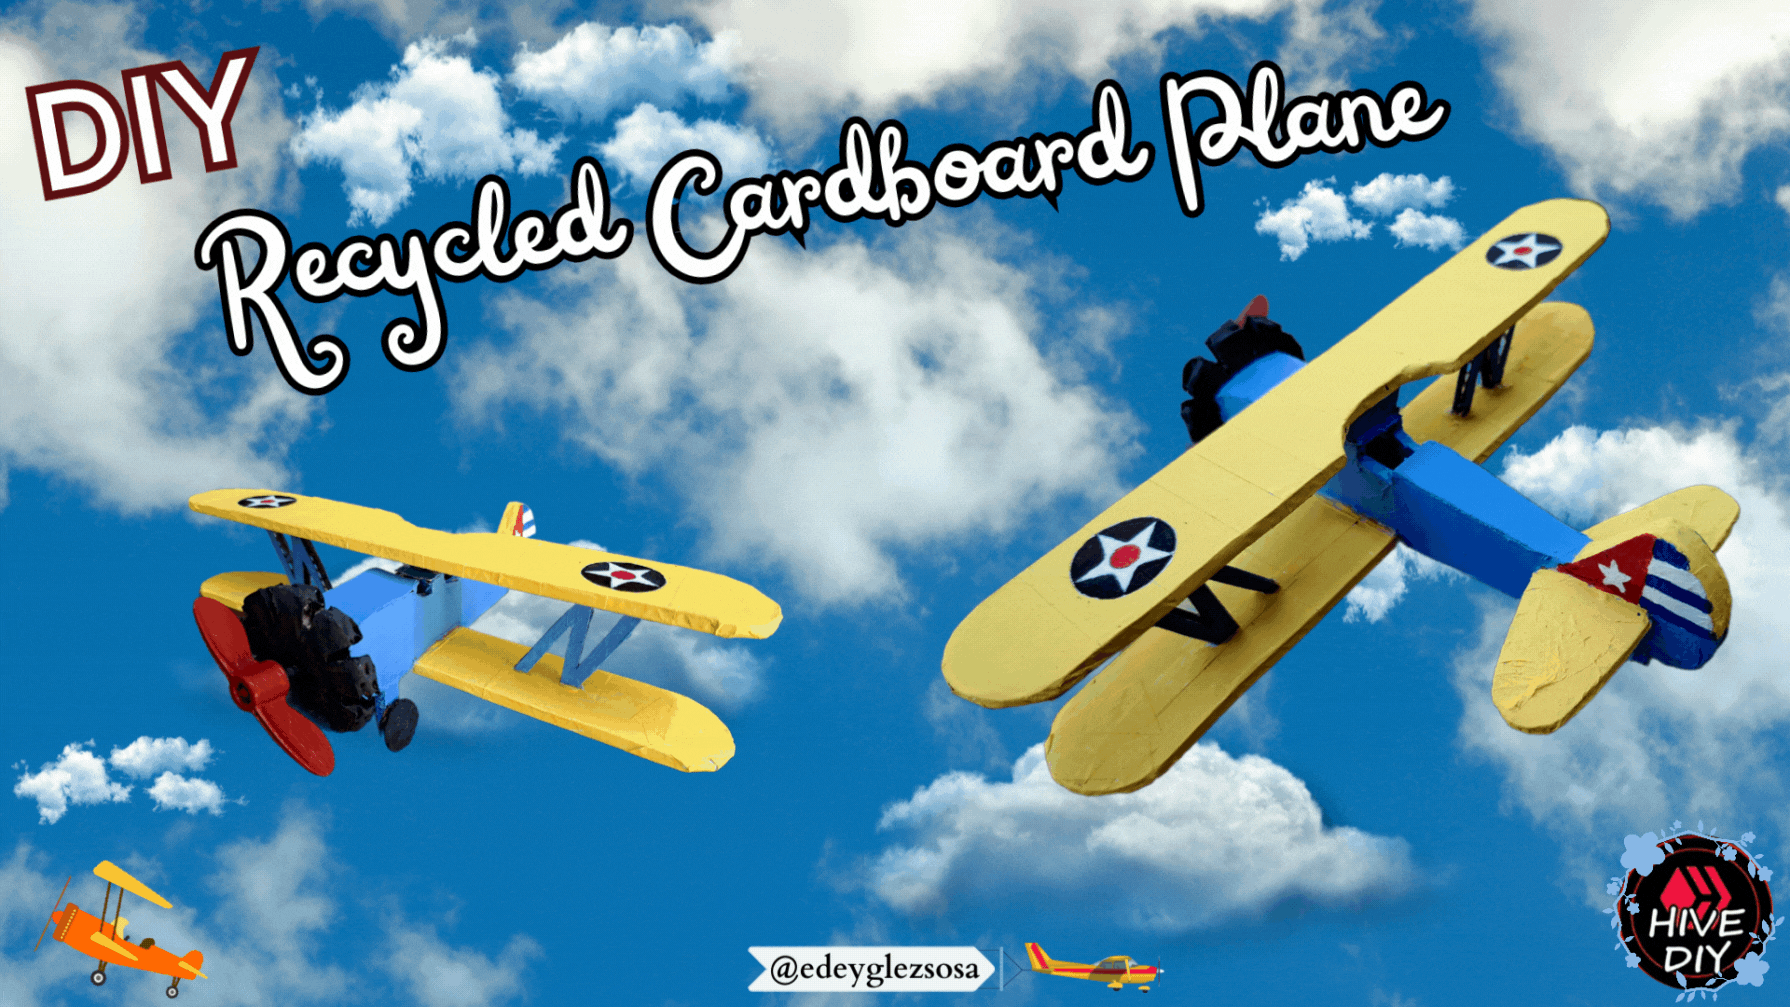
DIY: Recycled Cardboard Plane // DIY: Avión de Cartón Reciclado [ENG+ESP]
Greetings fellow creators. I wanted to step out of my comfort zone a bit and decided to make a slightly different craft. Although the materials are not new, I have tried to create an airplane that can be used both to decorate a display case and to be used as a toy. The part of being an ornament I have it covered, but the toy part becomes a bit tricky, as depending on the age of the person holding it, the plane can be completely destroyed.
With this in mind, I decided to use a thicker than normal cardboard to provide a little more rigidity to the plane and hope that it will not be destroyed too quickly. That said, let's get started with the tutorial for making a recycled cardboard airplane.
! [Spanish Version Here]
Saludos amigos creadores. He querido salir un poco de la zona de confort y he decidido hacer una manualidad un tanto distinta. Aunque los materiales no son nuevos, he intentado crear una avioneta que sirva tanto para adornar una vitrina como para ser utilizada como un juguete. La parte de ser un adorno la tengo cubierta, pero el tema de ser un juguete se torna un poco complicado, ya que dependiendo de la edad de quien lo tenga en la mano, el avión puede ser completamente destruido.Teniendo esto en cuenta, decidí utilizar un cartón más grueso de lo normal para brindarle un poco más de rigidez a la avioneta y esperar que no sea destruida muy rápido. Dicho esto, comencemos con el tutorial para hacer una avioneta de cartón reciclado.
 |  |
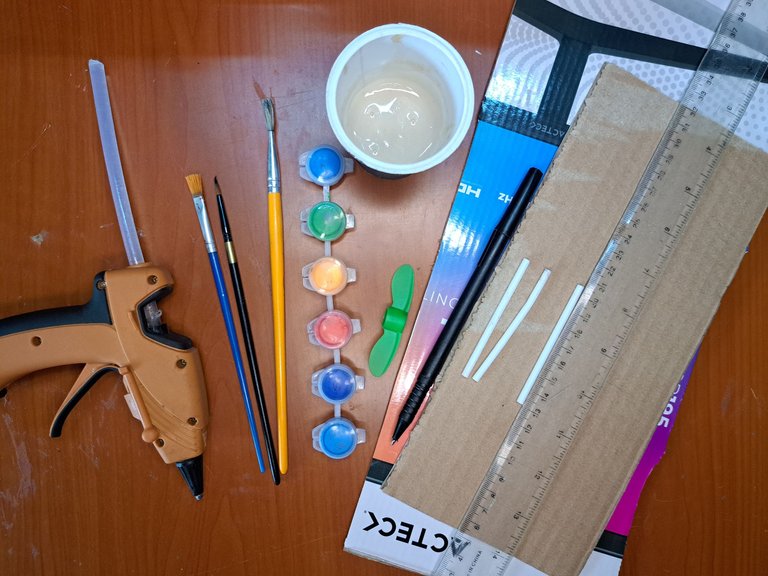
Materials // Materiales
| ✔️ Recycled cardboard | ✔️ Cartón reciclado |
| ✔️ Silicone gun | ✔️ Pistola de silicona |
| ✔️ Liquid glue | ✔️ Pegamento líquido |
| ✔️ Ruler and marker | ✔️ Regla y marcador |
| ✔️ Paintbrushes | ✔️ Pinceles |
| ✔️ Yellow, blue, black, black and red paint. | ✔️ Pintura amarilla, azul, negra y roja |
| ✔️ Lollipop sticks | ✔️ Palitos de chupa-chus |
| ✔️ Juice container lid (helix) | ✔️ Tapa de envase de jugo (hélice) |
| ✔️ Straight blade and scissors | ✔️ Cuchilla recta y tijeras |
Step by step // Paso a paso
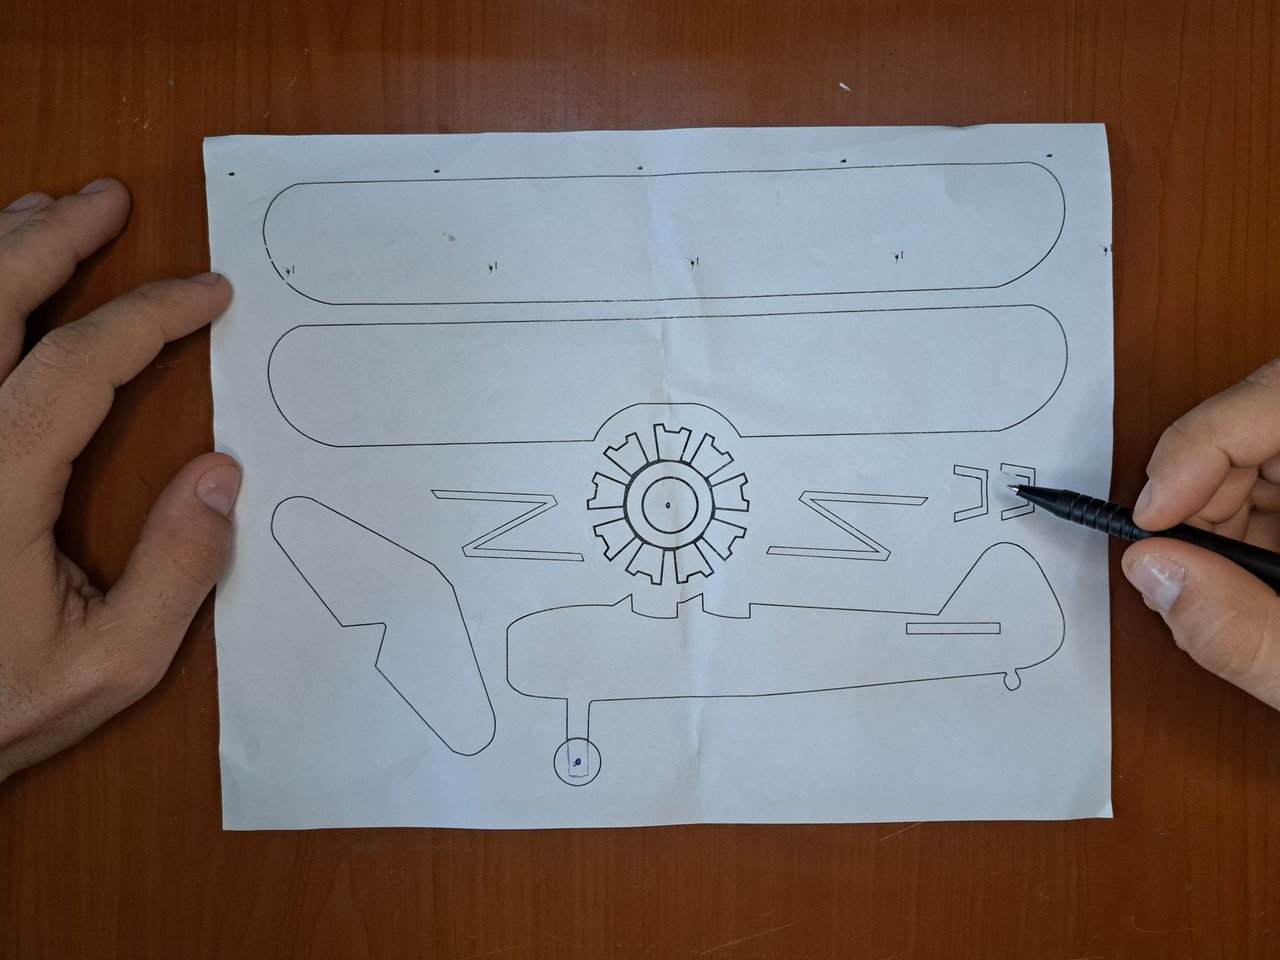
1️⃣ We start by marking and cutting out the molds on a sheet of paper to be used as a template. The first thing to cut out will be the wings which are the same size only the upper one has an indentation on one of its sides.
! [Spanish Version Here]
1️⃣ Empezamos marcando y recortando los moldes en una hoja de papel para luego utilizarlo como plantilla. Lo primero que recortaremos serán las alas las cuales son de la misma medida solo que la superior tiene una hendidura en uno de sus lados.
 |
 |
 |
 |
 |
 |
 |
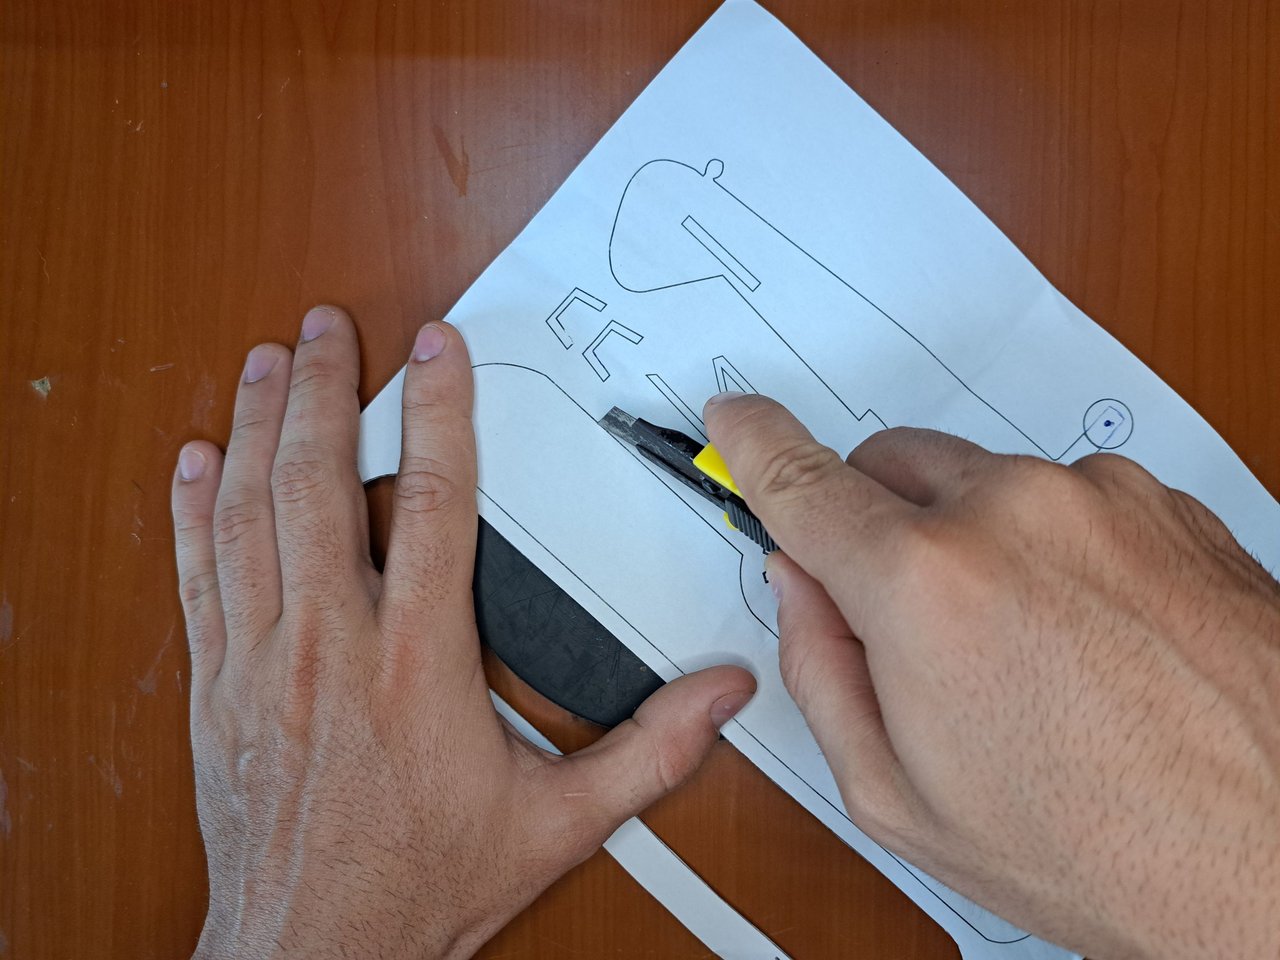
2️⃣ After marking and trimming the other parts of the fuselage and the tail, it is advisable to use a thin blade to cut the two halves of the fuselage, as the cardboard is very thick, making it difficult to make precise cuts.
! [Spanish Version Here]
2️⃣ Luego de marcar y recortar las otras partes del fuselaje y la cola, es aconsejable utilizar una cuchilla fina para cortar las dos mitades del fuselaje, ya que al ser muy grueso el cartón se dificulta hacer cortes precisos.
 |
 |
 |
 |
 |
 |
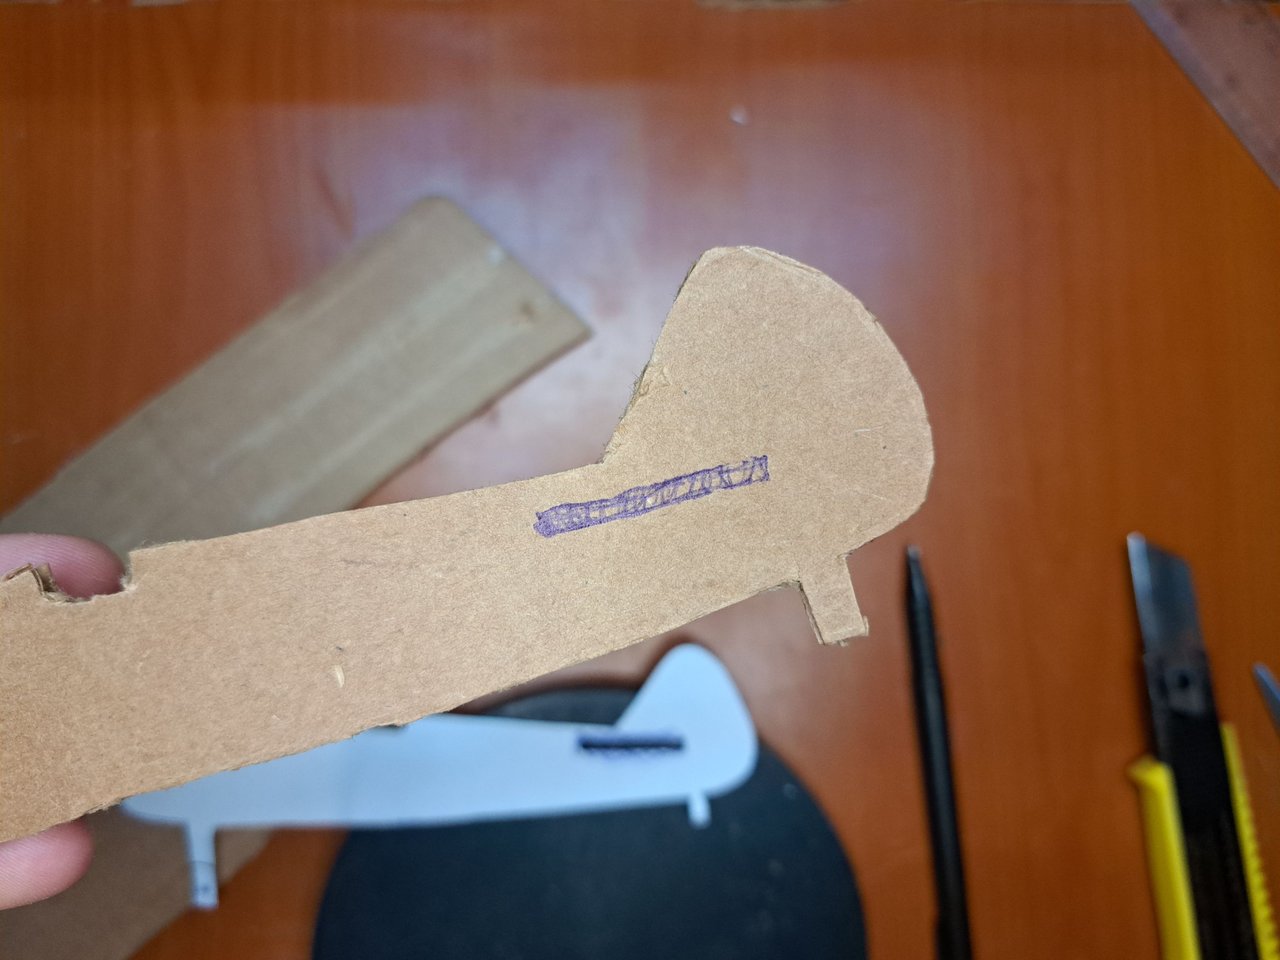
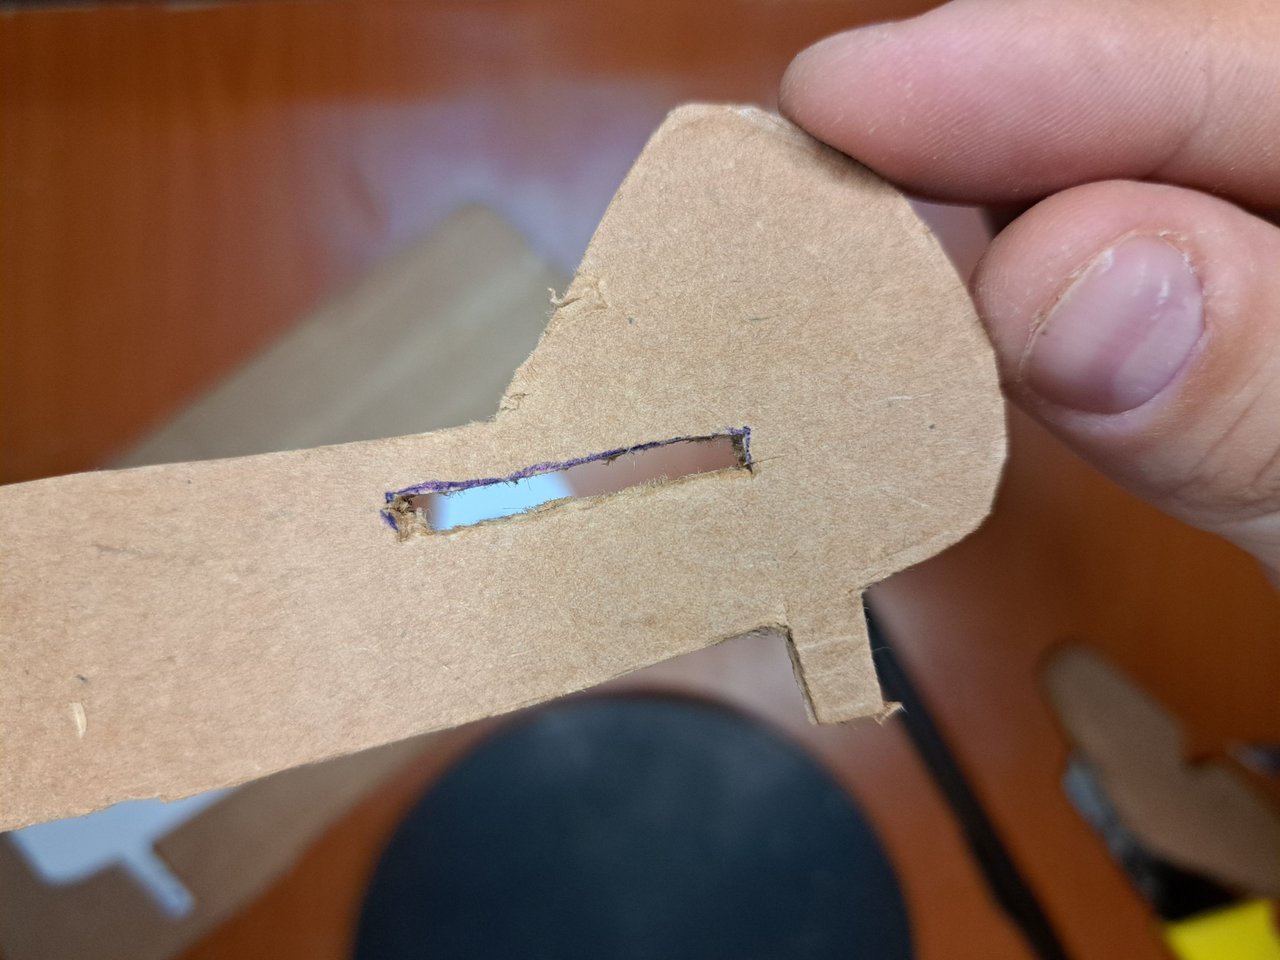
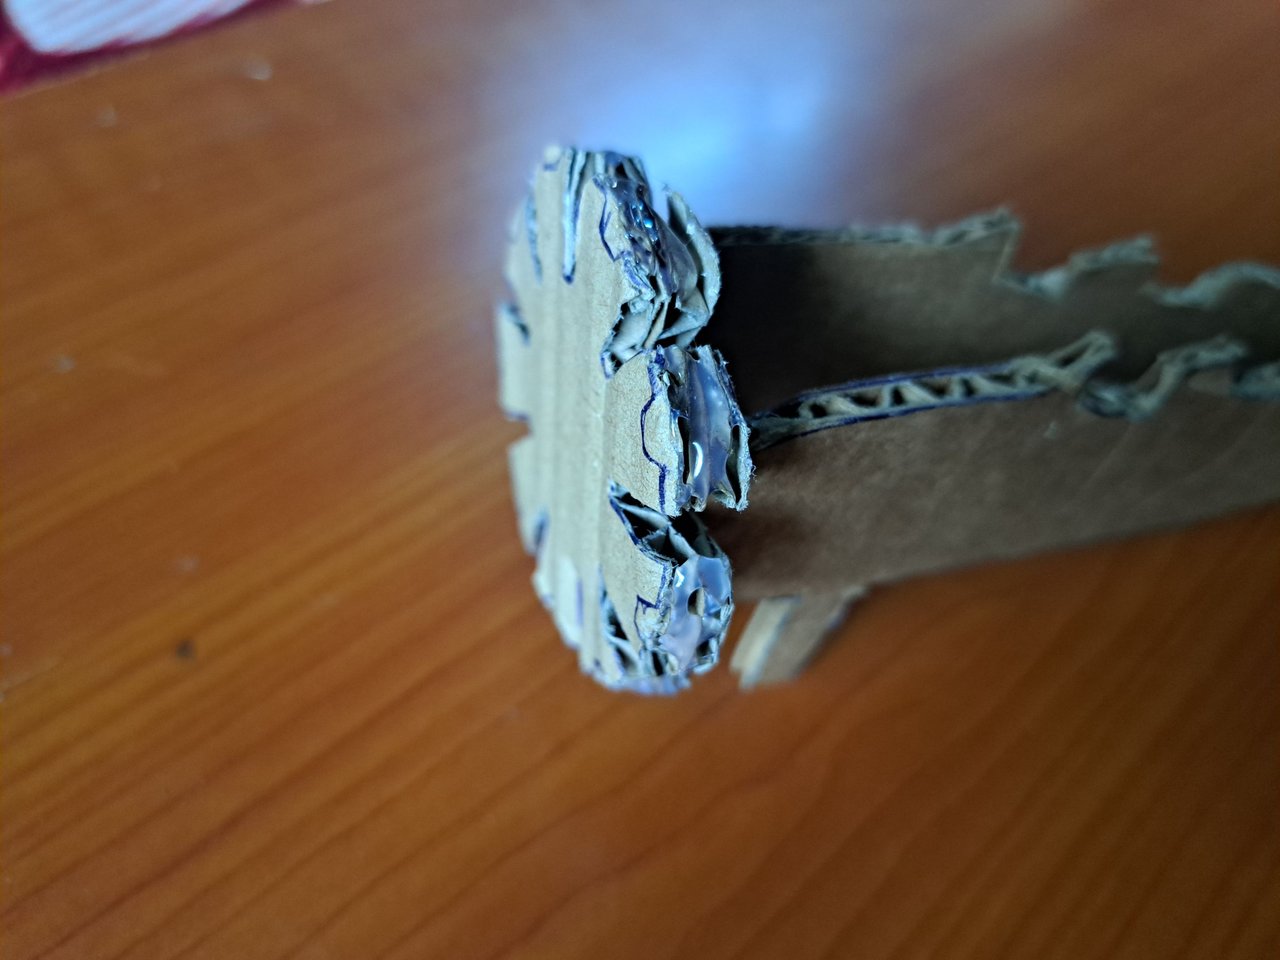
3️⃣ When the fuselage parts are cut, we will make a slit in the back using the paper mold. Through this slit, we will introduce the glue.
! [Spanish Version Here]
3️⃣ Cuando las partes del fuselaje estén cortadas, les haremos una hendidura en la parte trasera haciendo uso del molde de papel. A través de dicha hendidura, introduciremos la cola.
 |
 |
 |
 |
 |
 |
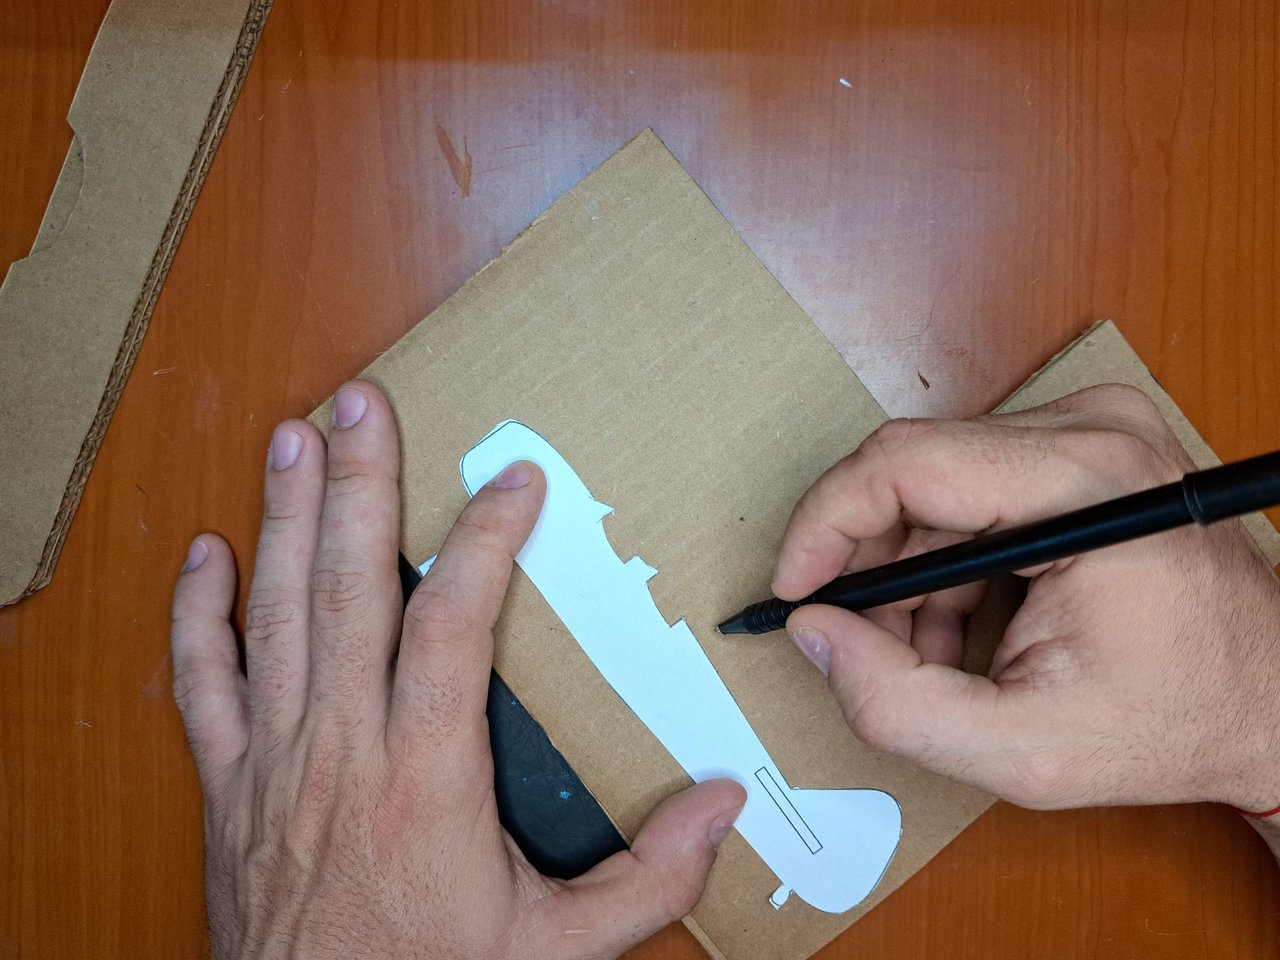
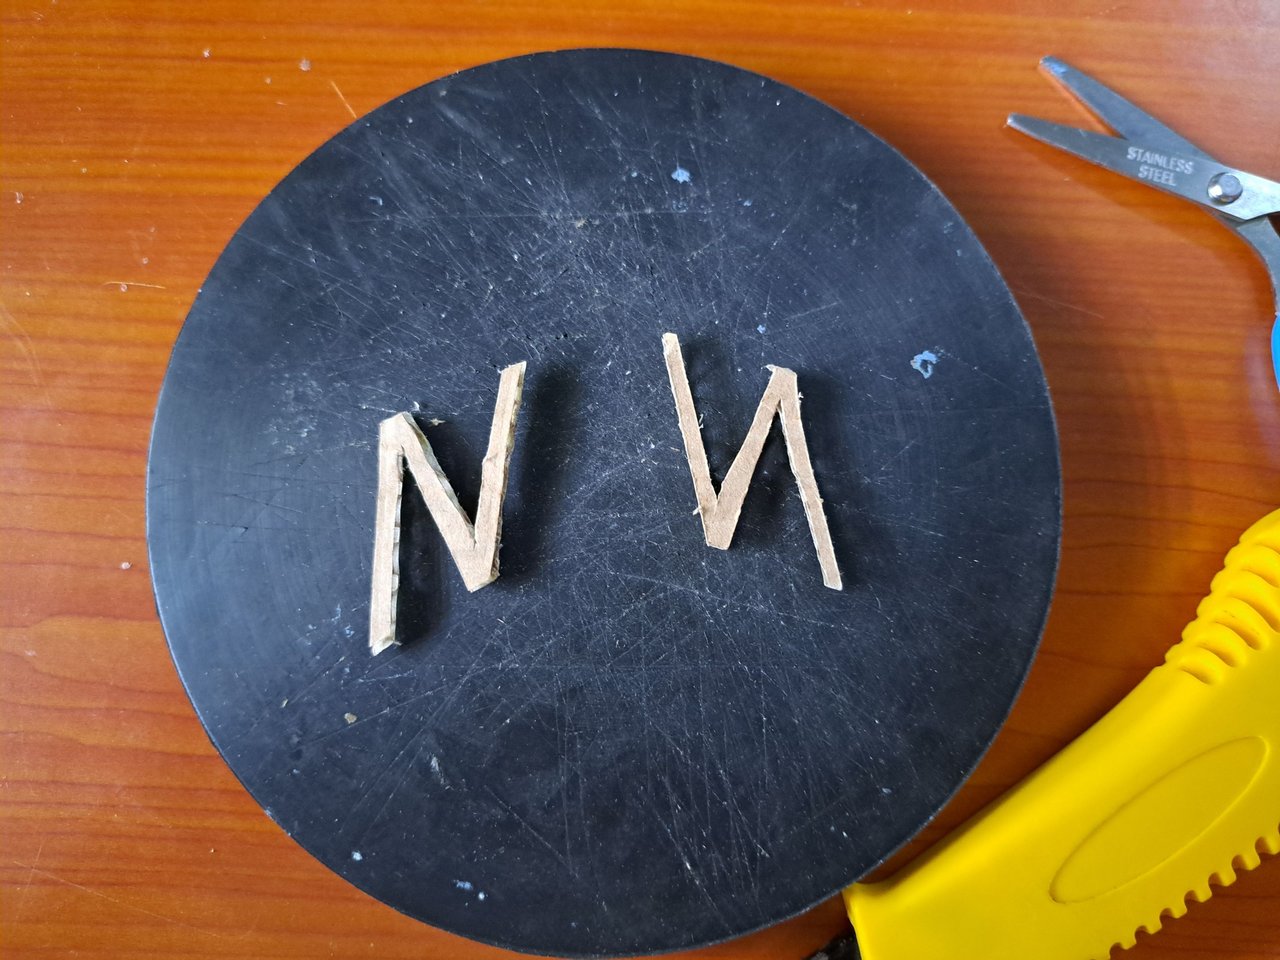
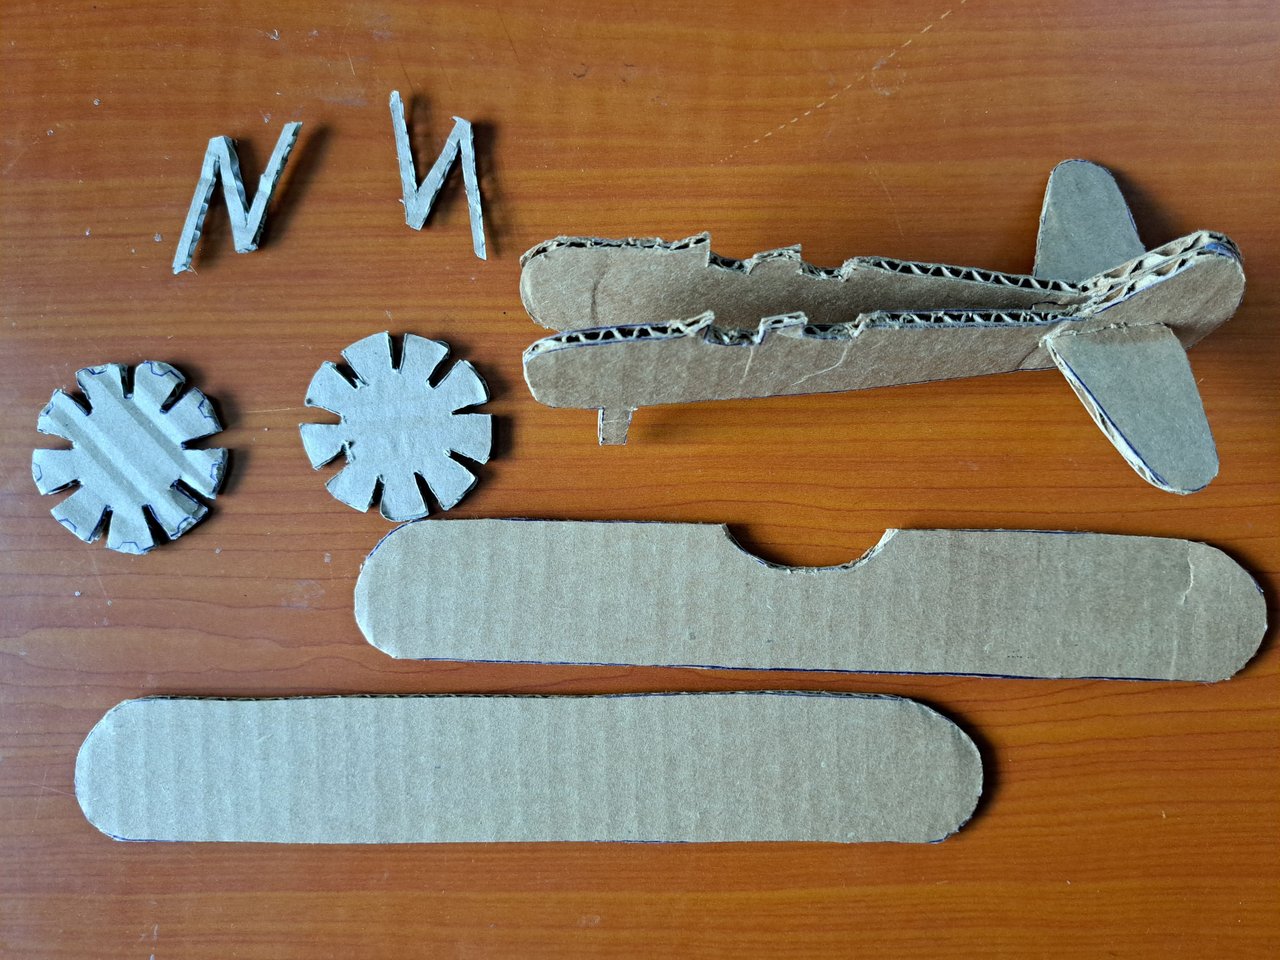
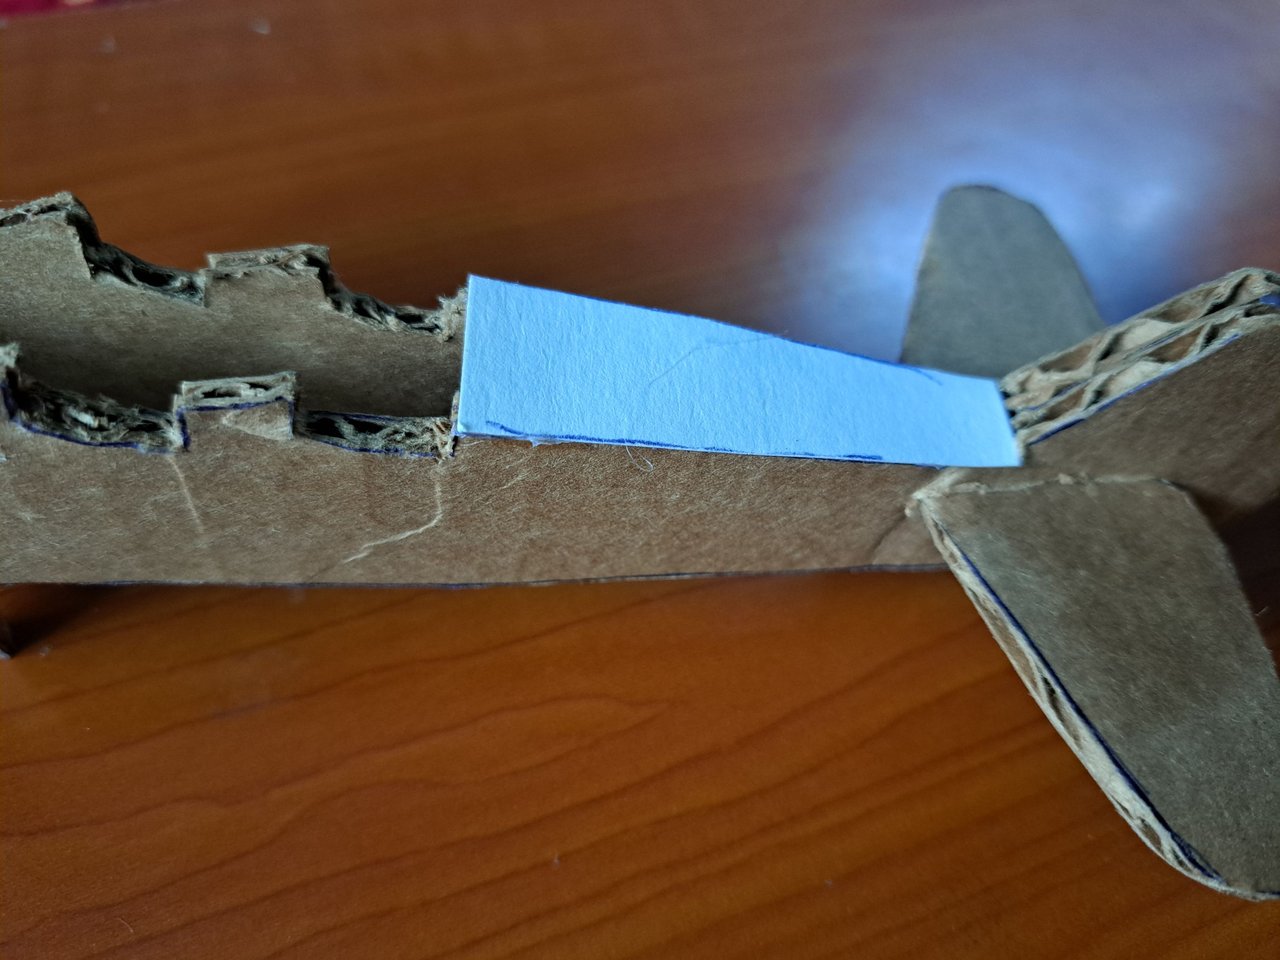
4️⃣ Additionally we cut out the front part of the plane as well as the wing supports. With all the pieces cut out we start to assemble little by little.
! [Spanish Version Here]
4️⃣ Adicionalmente recortamos la parte frontal del avión al igual que los soportes de las alas. Ya con todas las piezas recortadas comenzamos a ensamblar poco a poco.
 |
 |
 |
 |
 |
 |
 |
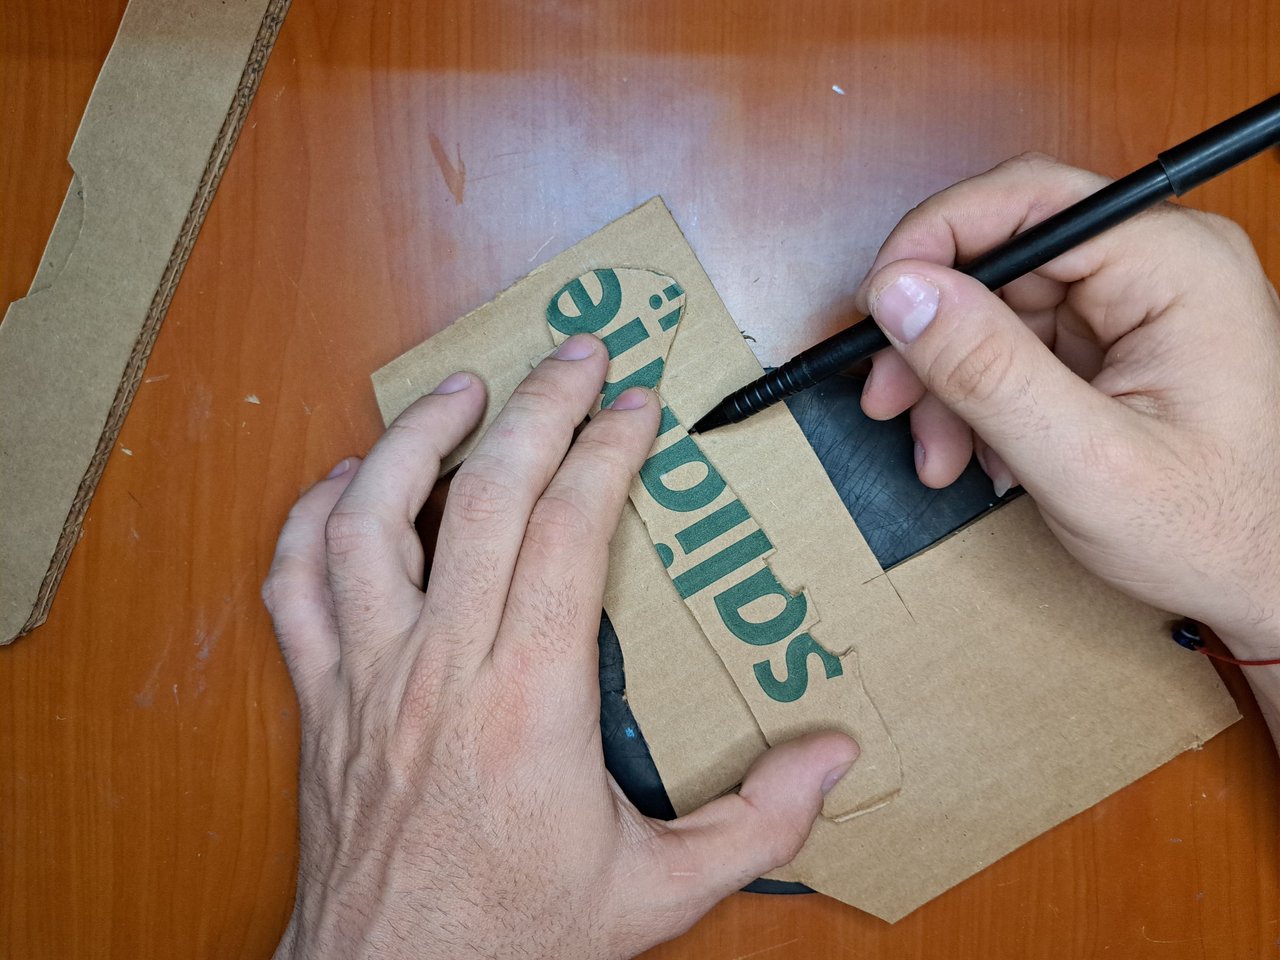
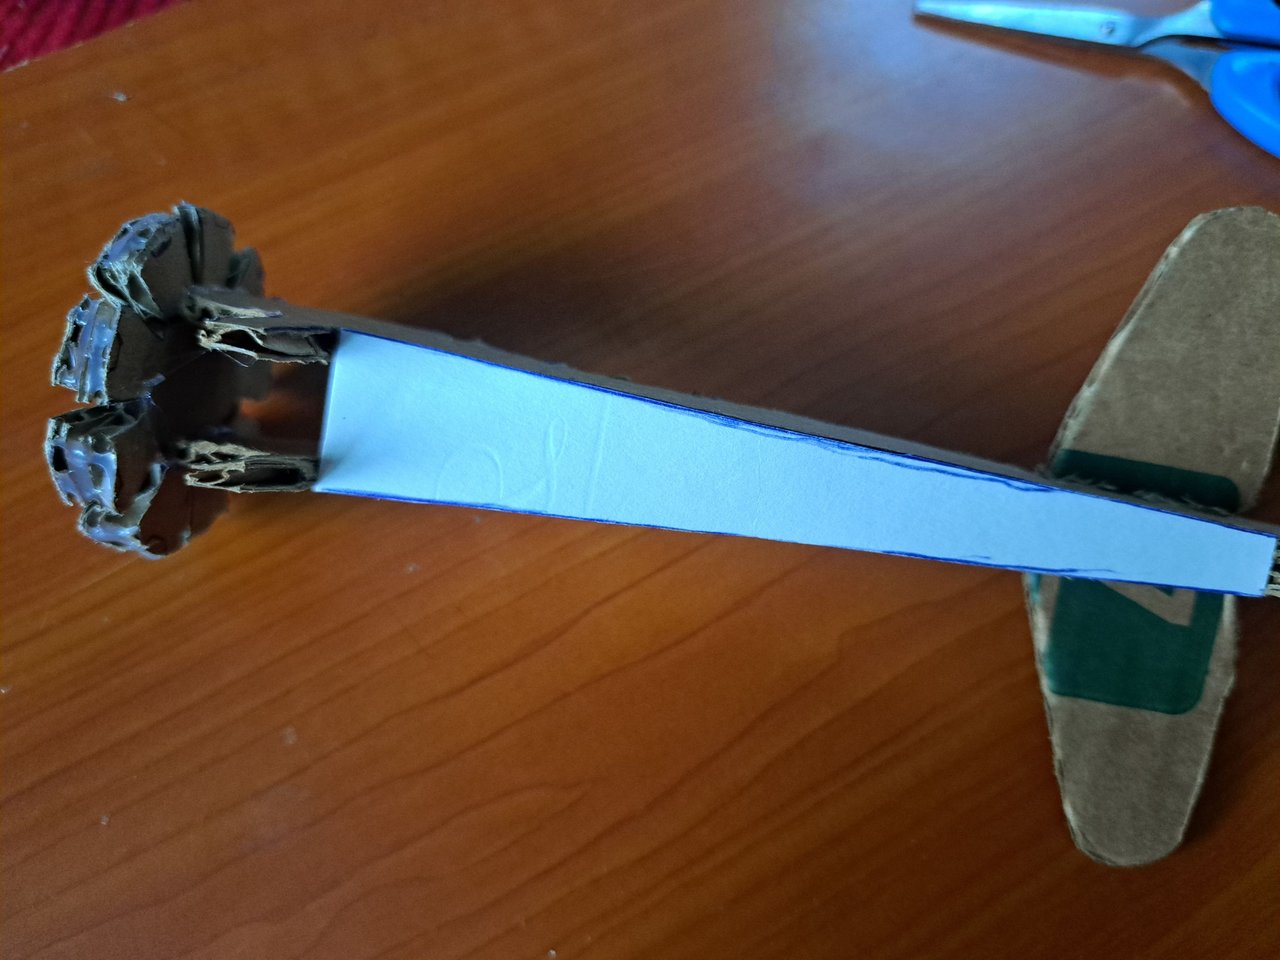
5️⃣ We start by gluing the front part where the propeller will be placed and then we move on to the top and bottom of the fuselage. To do this we will use a thinner cardboard and mark the necessary pieces and then glue them.
! [Spanish Version Here]
5️⃣ Comenzamos pegando la parte frontal donde irá colocada la hélice y luego pasamos a la parte superior e inferior del fuselaje. Para ello utilizaremos un cartón más fino y marcaremos las piezas necesarias para luego pegarlas.
 |
 |
 |
 |
 |
 |
 |
6️⃣ Then we will cut thin, square strips of white paper, which we will glue around all the edges of the cardboard pieces of the airplane. The paper glued with liquid glue not only adds rigidity, but also adds texture and covers up the holed edges of the cardboard pieces.
! [Spanish Version Here]
6️⃣ Luego recortaremos tiras finas y cuadradas de papel blanco, las cuales iremos pegando alrededor de todos los bordes de las piezas de cartón de la avioneta. El papel pegado con pegamento líquido no solo aporta rigidez, sino que también agrega textura y tapa los bordes agujereados de las piezas de cartón.
 |
 |
 |
 |
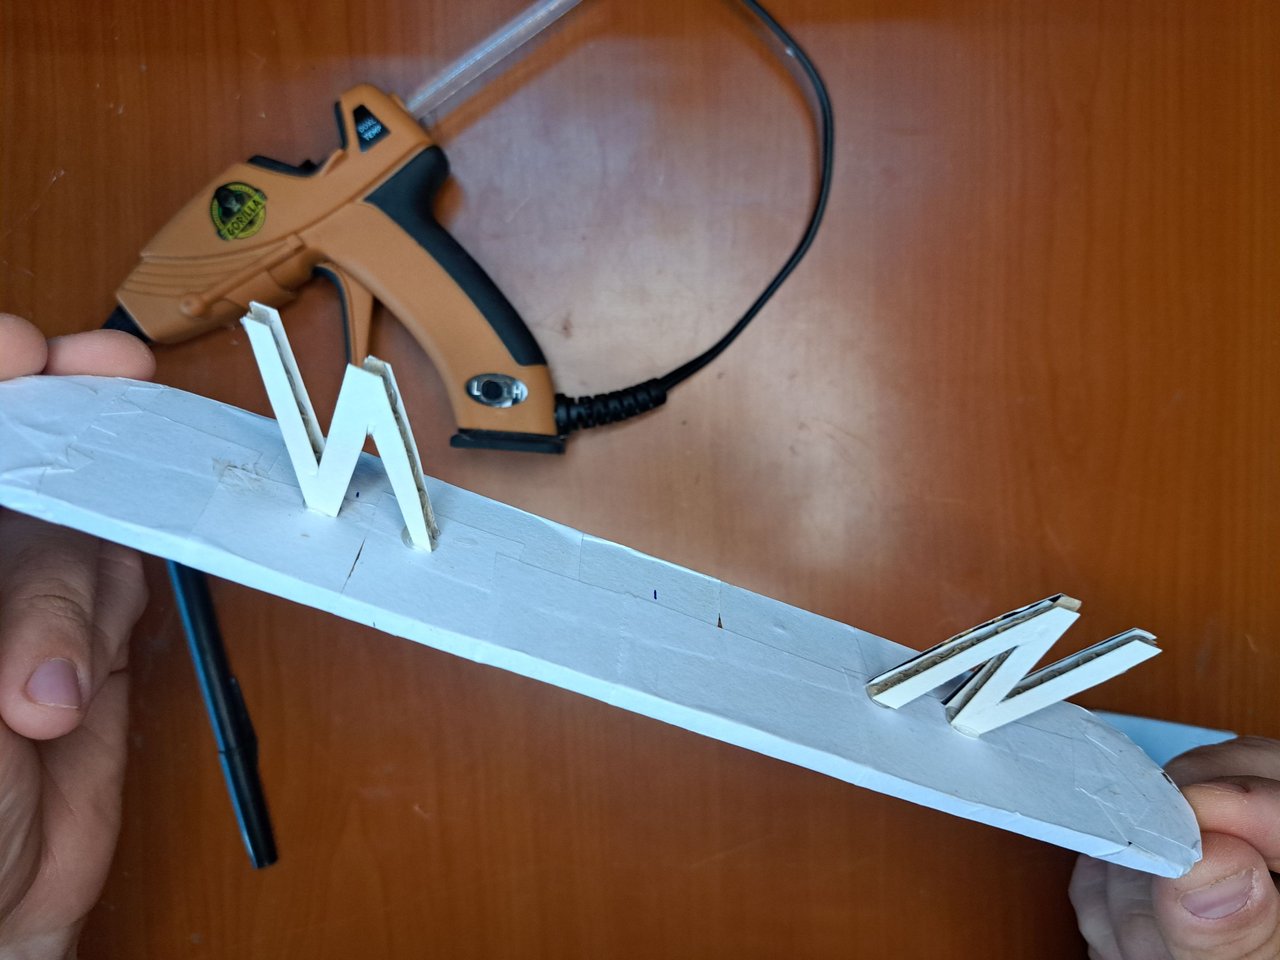
7️⃣ When everything is dry, we start gluing the parts of the plane. The first thing will be to glue the wings, and for this we must place the supports. Then we will make a cut in the lower part of the fuselage and there we will place the lower wing.
! [Spanish Version Here]
7️⃣ Cuando todo esté seco, comenzamos a pegar las partes del avión. Lo primero será pegar las alas, y para ello debemos colocarles los soportes. Luego haremos un corte en la parte inferior del fuselaje y ahí colocaremos el ala inferior.
 |
 |
 |
 |
 |
 |
 |
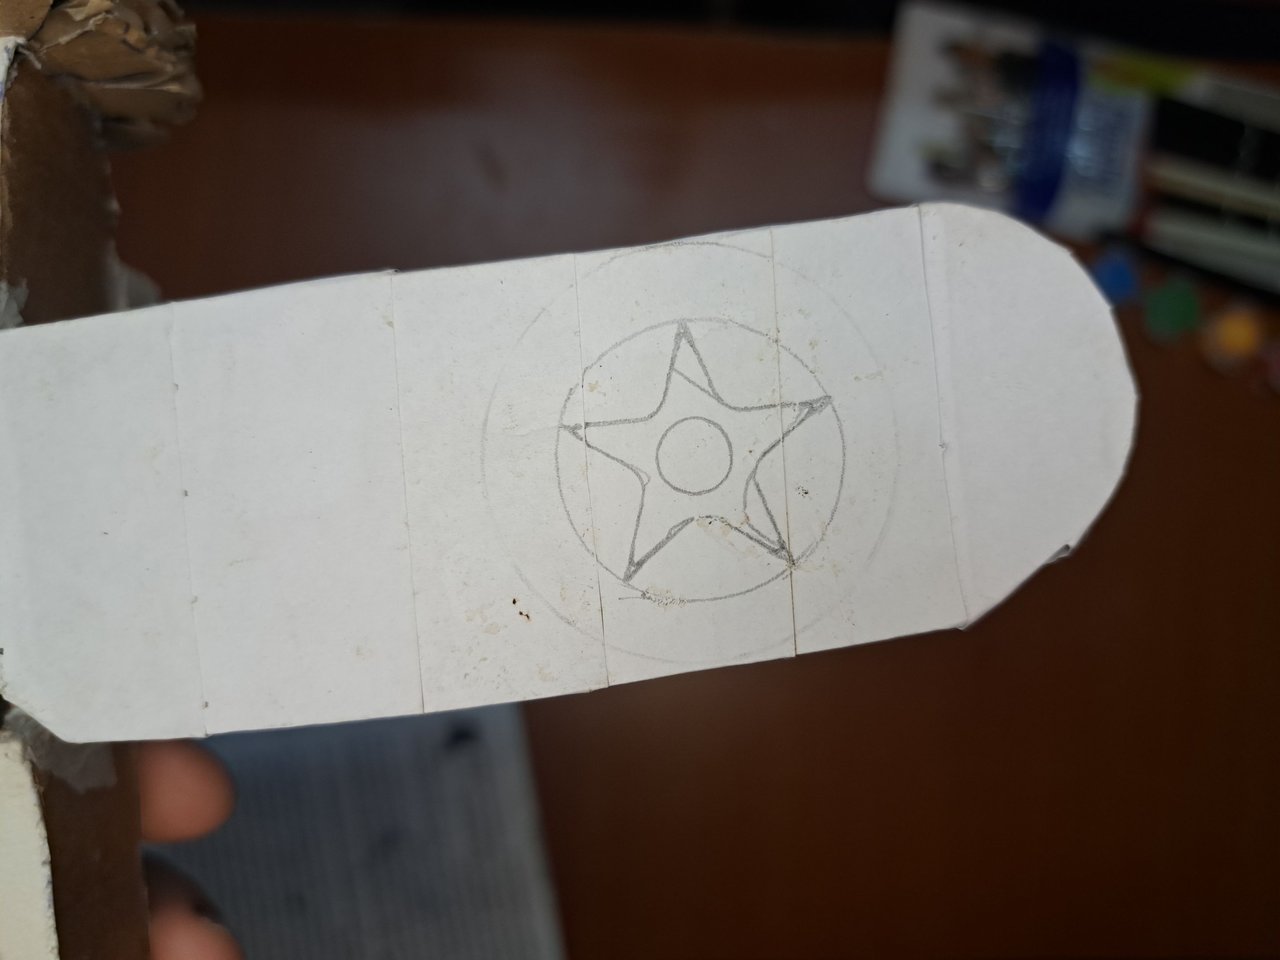
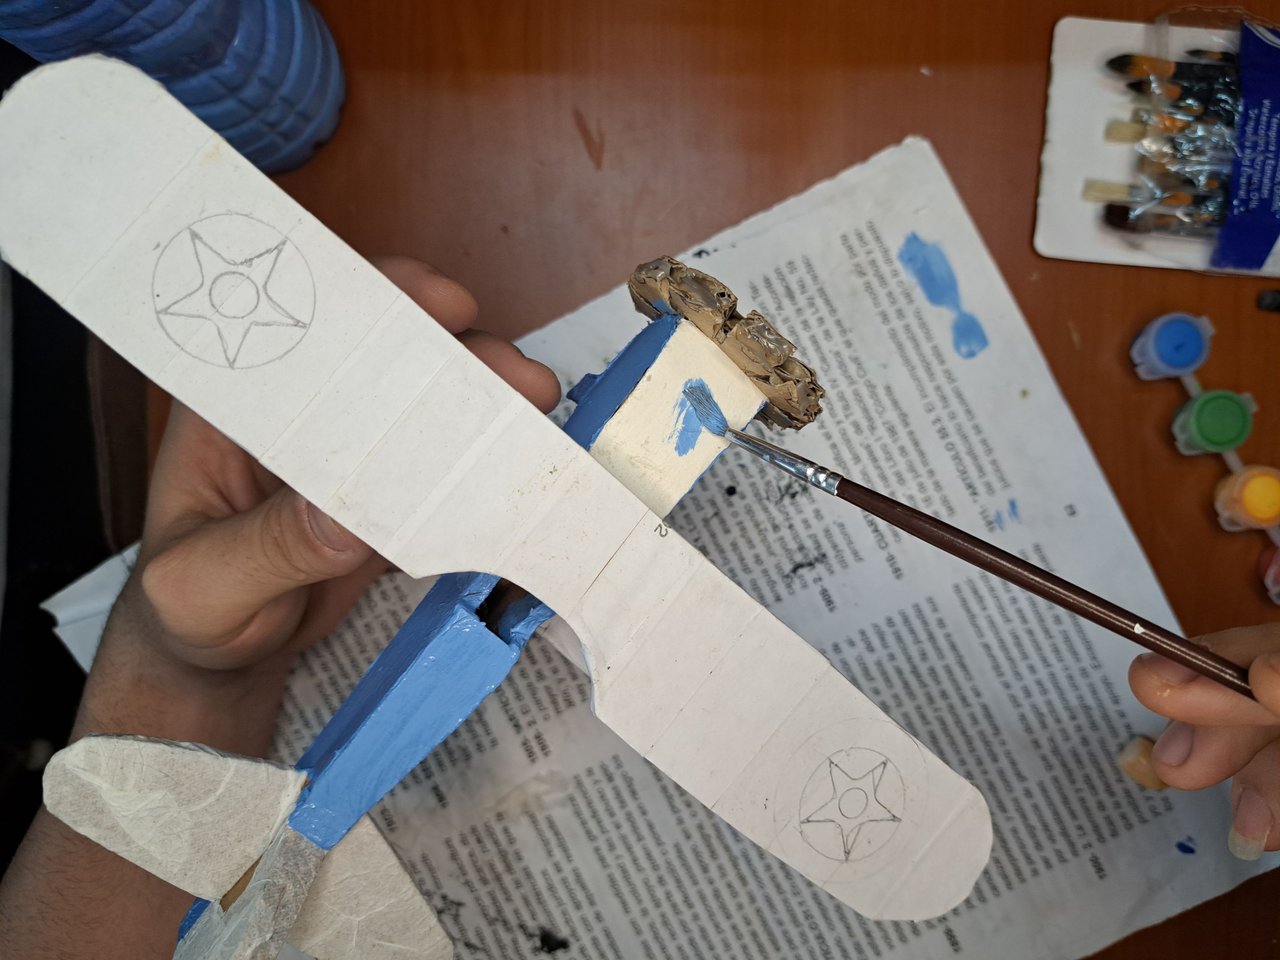
8️⃣ The plane is now ready and we are going to color it, but first we will draw a circle with a star inside at each end of the wings. We will paint the wings and the tail in yellow, and we will paint the fuselage in blue.
! [Spanish Version Here]
8️⃣ Ya estaría listo el avión y pasaremos a darle color, pero antes en cada extremo de las alas dibujaremos un círculo con una estrella dentro. Pintaremos de amarillo las alas y la cola, y de azul pintaremos todo el fuselaje.
 |
 |
 |
 |
 |
 |
 |
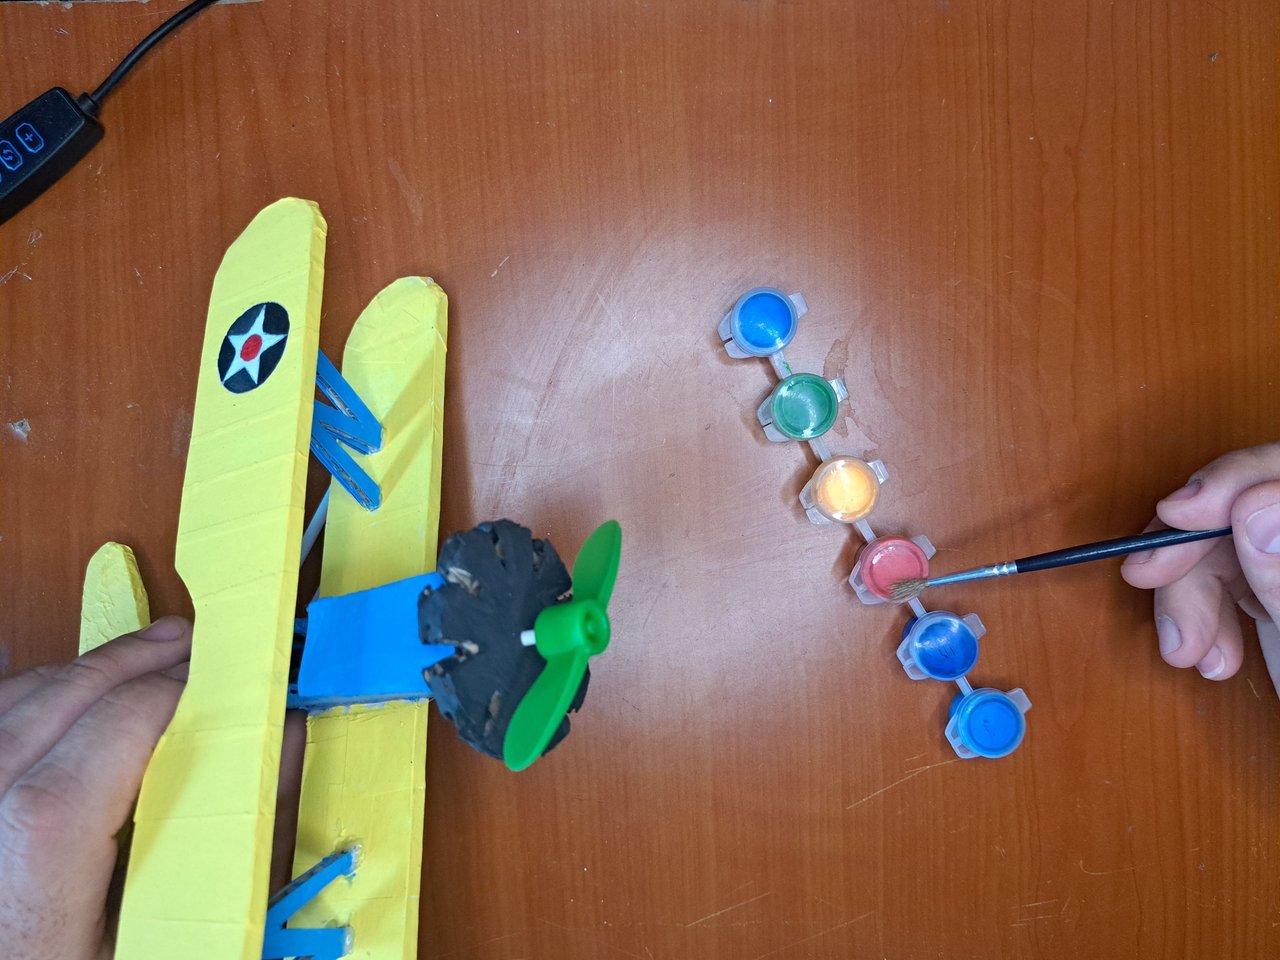
9️⃣ Continuing with the painting, we will draw on the tail the Cuban flag with its characteristic colors. In addition, we will paint the front of the plane in black and the propeller in red.
! [Spanish Version Here]
9️⃣ Continuando con la pintura, dibujaremos en la cola la bandera cubana con sus colores característicos. Además, pintaremos de negro el frontal del avión y de rojo la hélice.
 |
 |
 |
 |
 |
 |
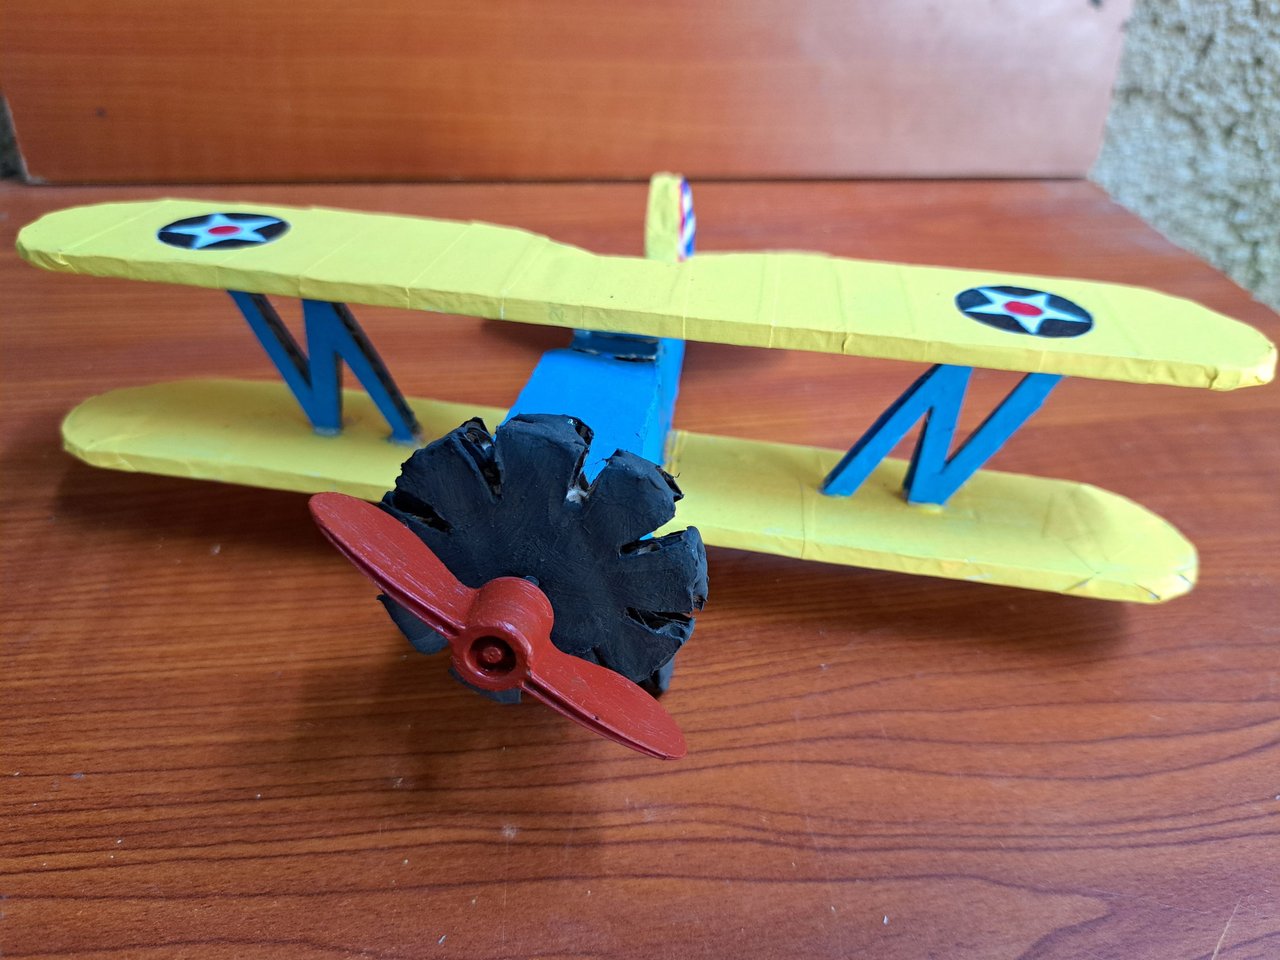
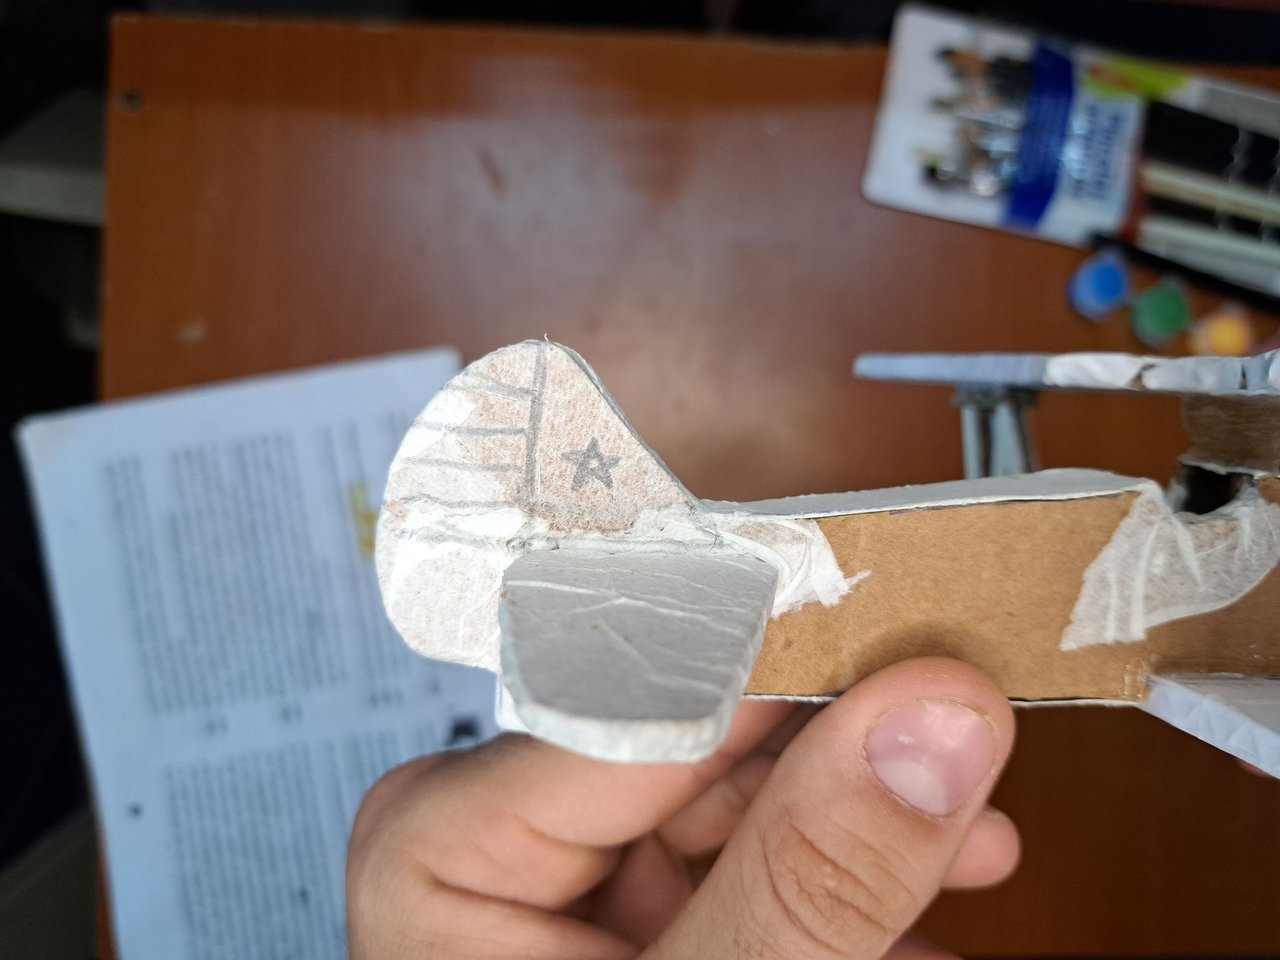
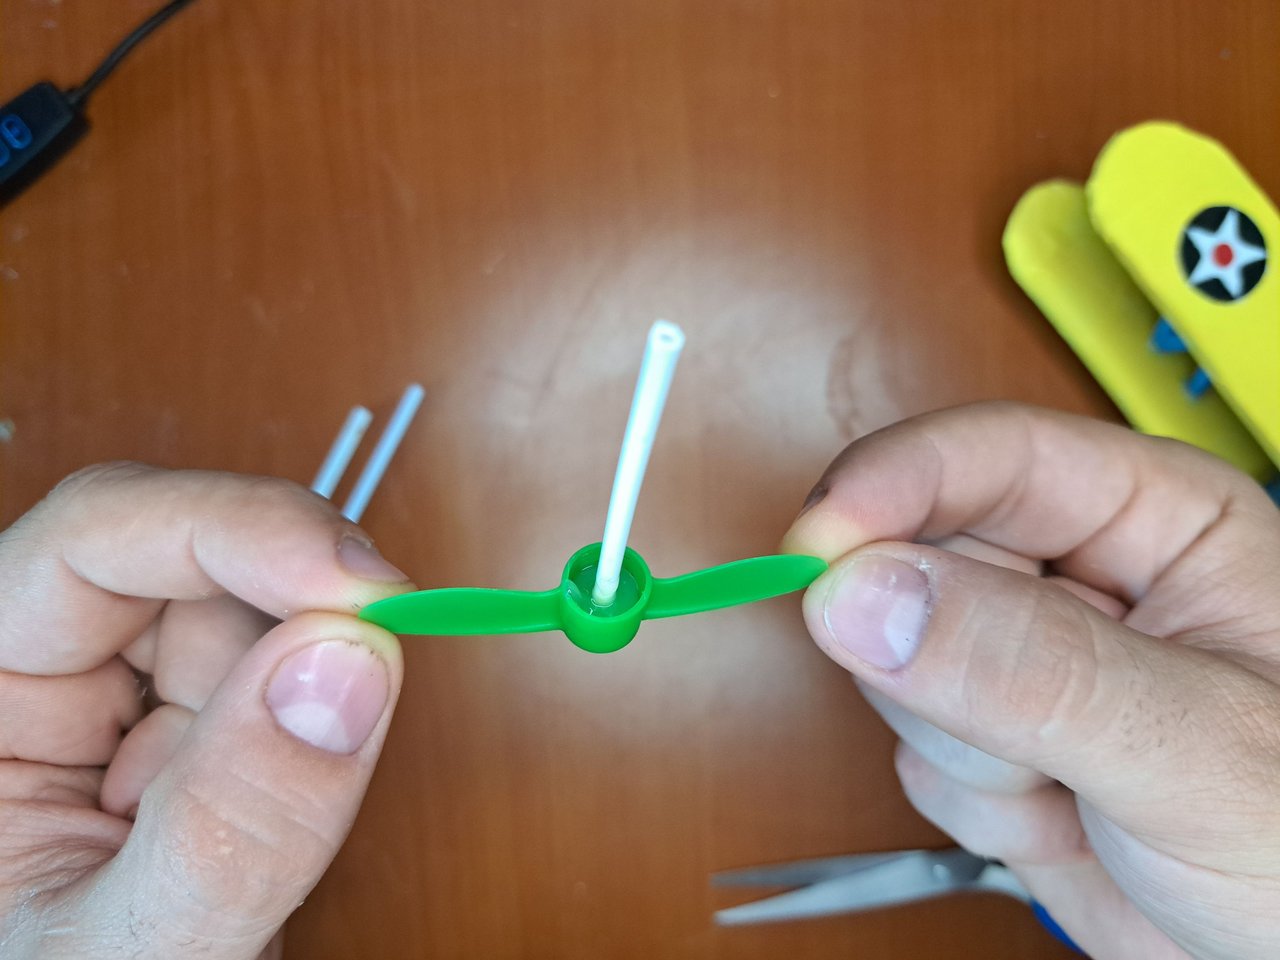
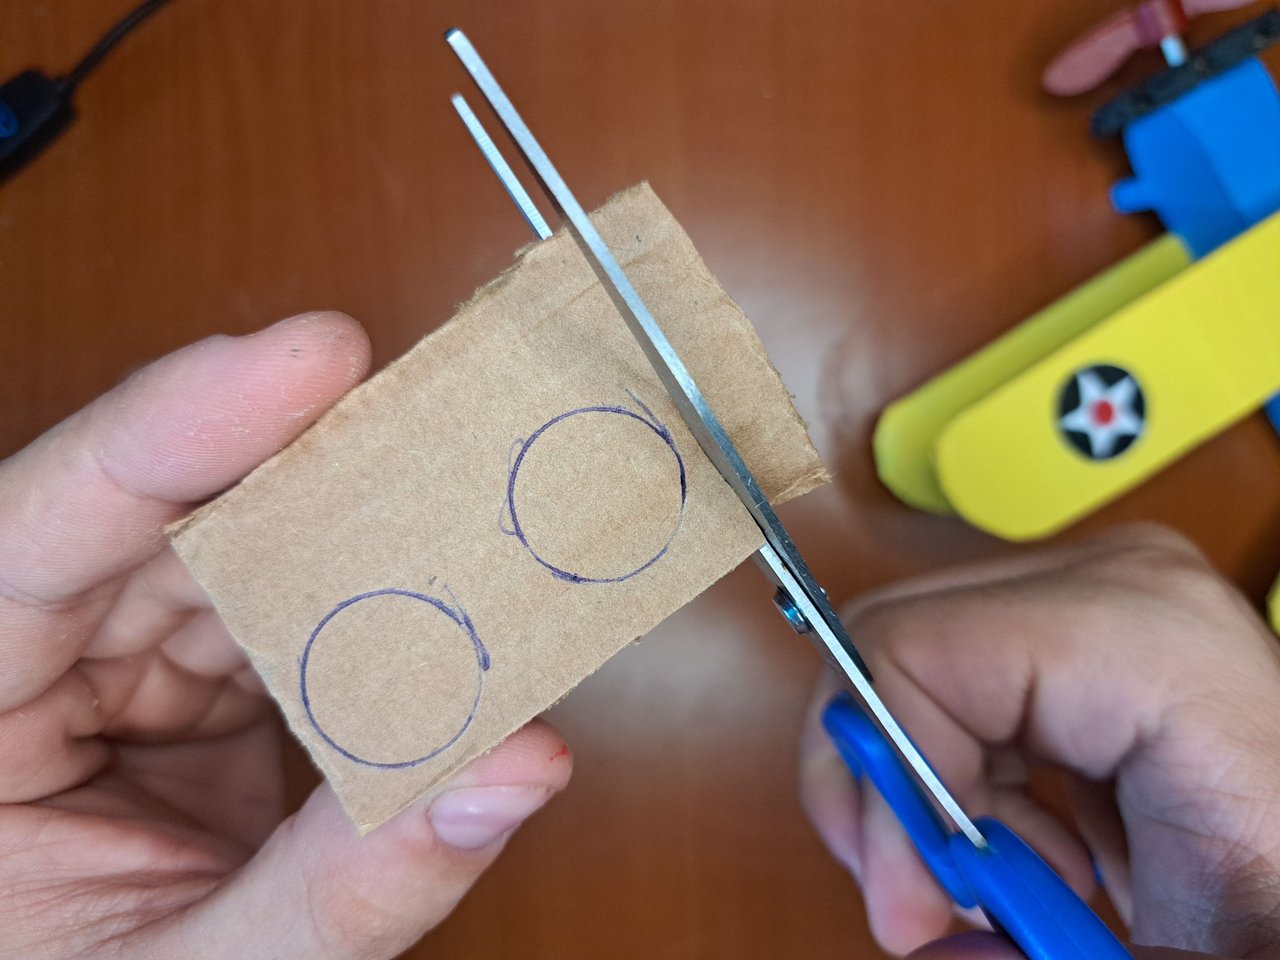
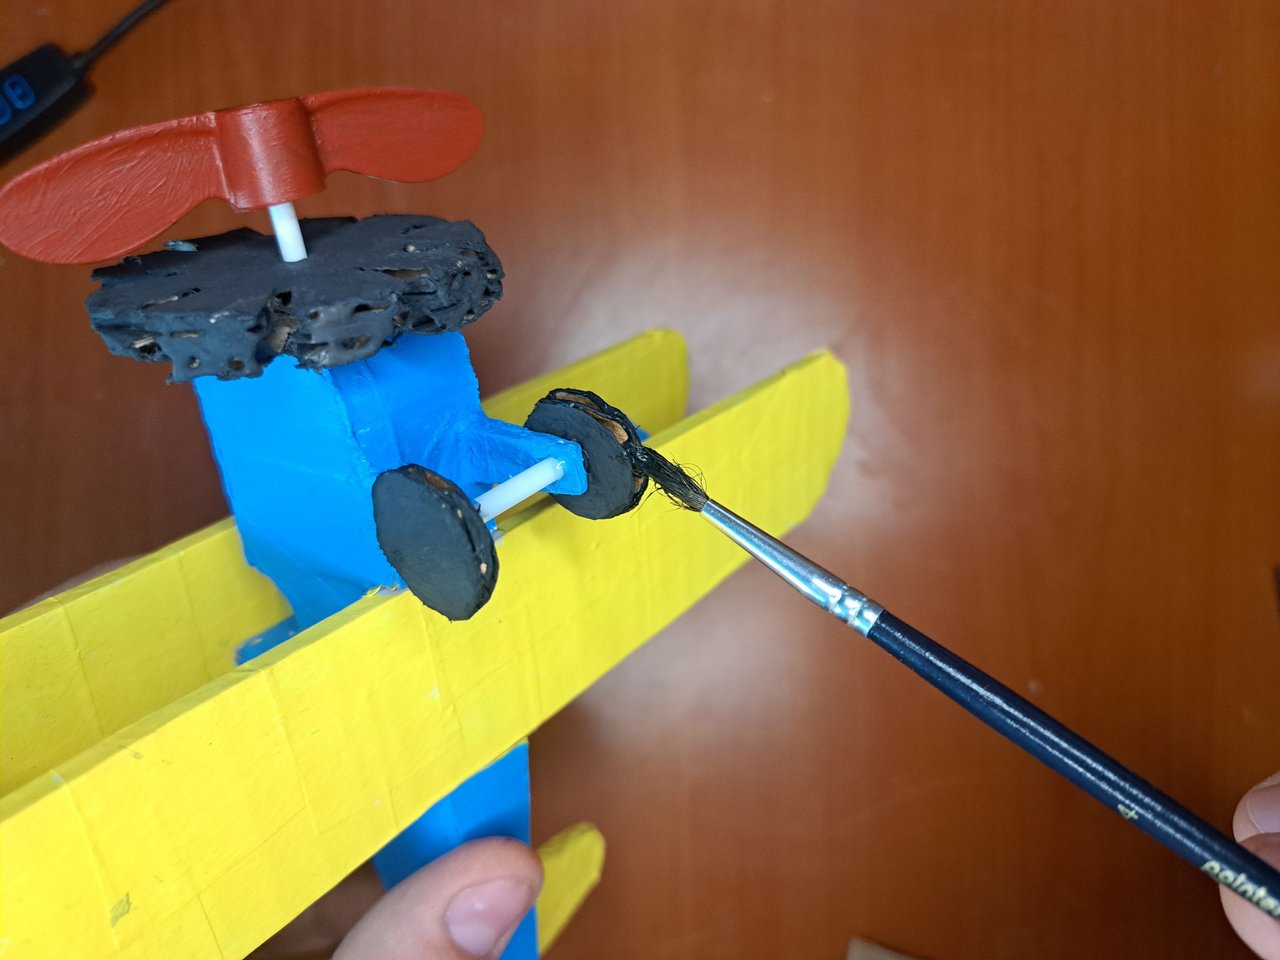
🔟 To make the propeller you can use a piece of cardboard, but luckily I had a piece of plastic from a juice knob, which had a shape very similar to a propeller. After painting the propeller, we will cut out two cardboard circles, which we will glue on each end of the front legs to make the landing gear. Finally, we will paint the landing gear black, as well as the propeller shaft.
! [Spanish Version Here]
🔟 Para hacer la hélice se puede utilizar una pieza de cartón, pero por suerte tenía una pieza de plástico proveniente de un pomo de jugo, la cual tenía una forma muy parecida a una hélice. Luego de pintar la hélice, recortaremos dos círculos de cartón, los cuales pegaremos en cada extremo de las patas delanteras para hacer el tren de aterrizaje. Para finalizar, pintaremos el tren de aterrizaje de negro, al igual que el eje de la hélice.
 |
 |
 |
 |
 |
 |
 |
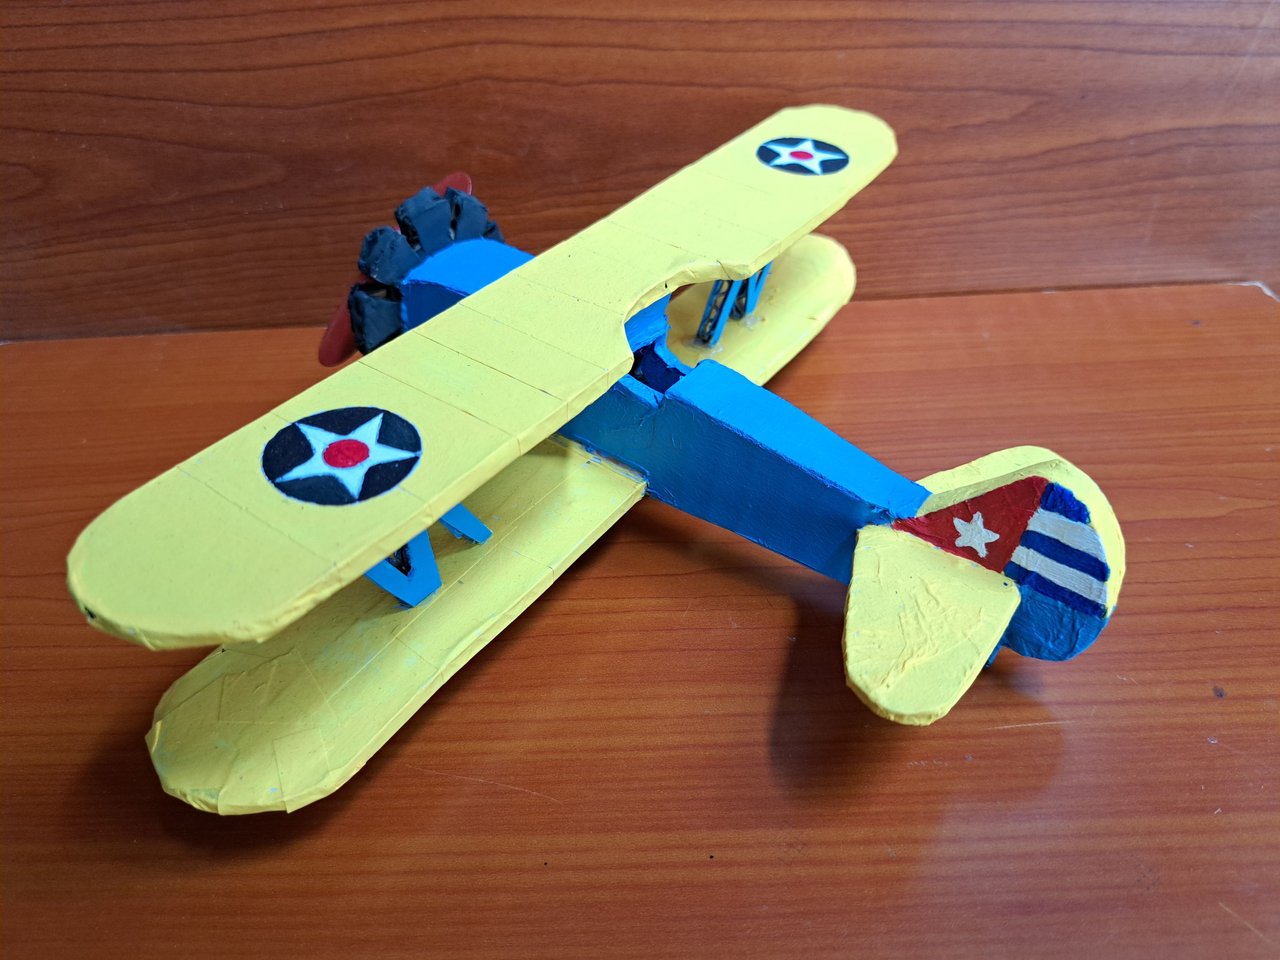
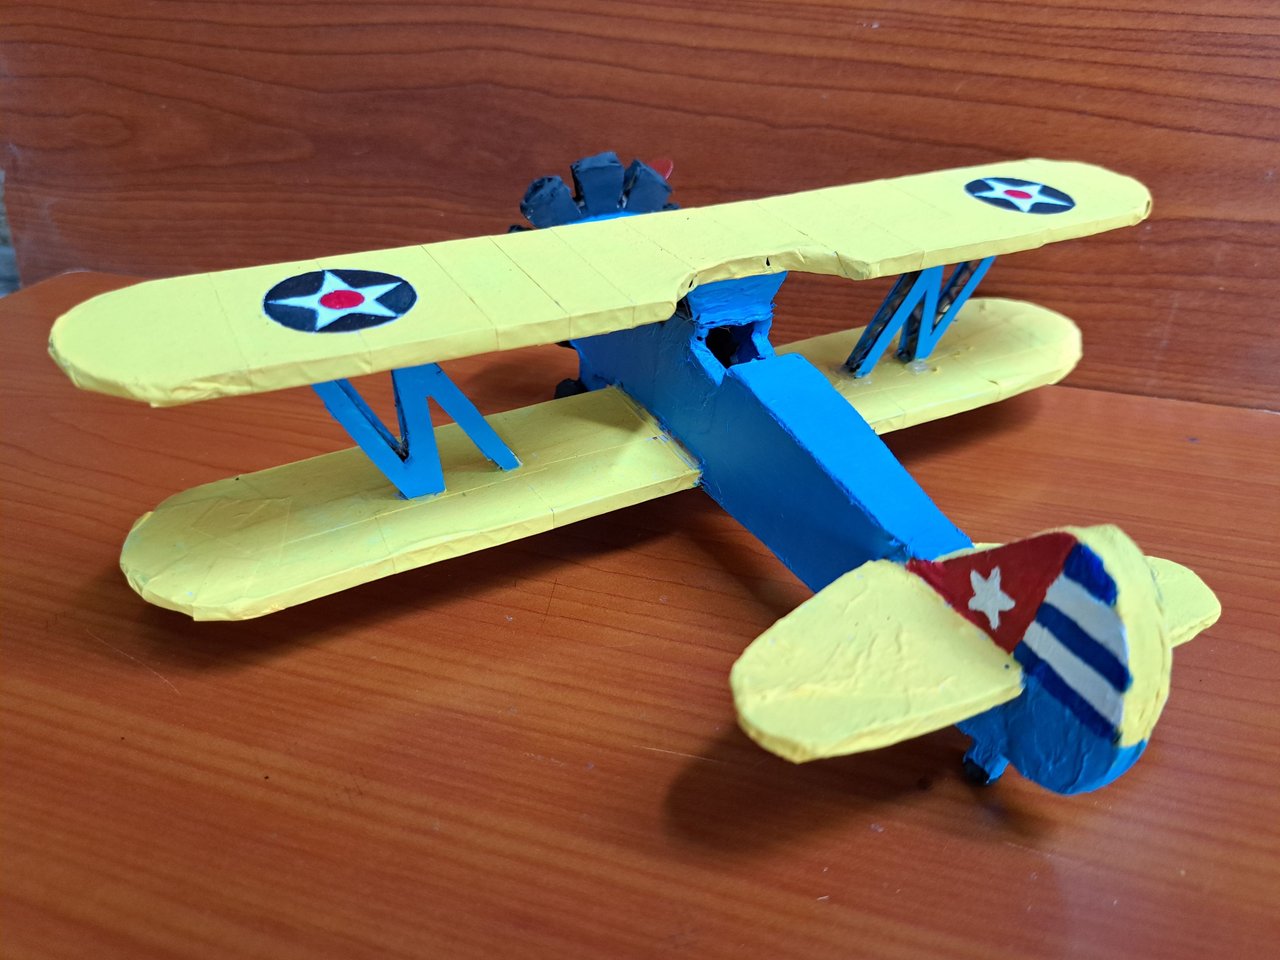
And now the recycled cardboard plane is ready, painted with beautiful colors and carrying the flag of my country on its tail. I hope this plane can become something more than just an ornament, and I also hope you liked the tutorial. See you in a future publication.
! [Spanish Version Here]
Y ya estaría lista la avioneta de cartón reciclado, pintada con hermosos colores y que porta en la cola la bandera de mi patria. Espero que esta avioneta pueda llegar a ser algo más que un simple adorno, al igual que espero que el tutorial haya sido de su agrado. Nos vemos en una próxima publicación.
Final Result // Resultado Final
 |
 |
 |
 |

Thank you very much for reading my post. If you liked it, please leave a comment and consider following me so you don't miss my next posts. I'd love to know your opinion and your thoughts about the topic I discussed in this post, see you in the next one!
Muchas gracias por leer mi post. Si te gustó, por favor deja un comentario y considera seguirme para no perderte mis próximas publicaciones. Me encantaría saber tu opinión y tus ideas sobre el tema que traté en este post. ¡Nos vemos en el próximo!
Cover page created in Canva Pro
Translated by DeepL


Que bonito Edey 👏😉
Gracias Bro, 🫂🫂🫂
Hola. Feliz día. Me encantó ver este proceso creativo 😃 el avión se ve precioso. Hiciste un trabajo excelente, los colores se ven muy lindos. Gracias por compartir tu creación 🫂
Muchísimas gracias, le apliqué unos colores bien llamativos para que resalte bastante.
¡Felicidades! Esta publicación obtuvo upvote y fue compartido por @la-colmena, un proyecto de Curación Manual para la comunidad hispana de Hive que cuenta con el respaldo de @curie.
Si te gusta el trabajo que hacemos, te invitamos a darle tu voto a este comentario y a votar como testigo por La Colmena.
Si quieres saber más sobre nuestro proyecto, te invitamos a acompañarnos en nuestro servidor de Discord.
Muchísimas gracias por todo el apoyo 🤗
Hola! Un grandioso trabajo se ve demasiado perfecto, gracias por compartir✨
Muchísimas gracias 🤗
Wow, amazing work!
Thanks 🤗
ya que dependiendo de la edad de quien lo tenga en la mano, el avión puede ser completamente destruido.
Seguramente si Buhito quiere pilotearla, no terminara nada bien jaja
Esplendido trabajo, todos los detalles estan muy bien manejados y creo que como adorno es ideal ❤️
Yo creo que Buhito lo cuidaría bastante no importa si lo usa como adorno o juguetes.