🌹 DIY Rosa de foami: Un regalo para para una persona especial. // 🌹 DIY foami rose: A gift for a special person.. [ESP-ENG]
¡Bienvenidos una vez más a mi blog! El día de hoy les compartiré un tutorial donde les mostraré cómo creé un adorno floral único y especial para mi esposa @yale95reyra. Los adornos florales no solo son hermosos, sino que también son una forma encantadora de expresar amor y aprecio hacia alguien especial. Y como soy de los que piensan que todos los días pueden ser 14 de febrero decidí hacerle un pequeño obsequio.
Para la creación de cualquier arreglo floral lo principal es encontrar la inspiración adecuada y seleccionar las flores adecuadas. Para mi adorno, me inspiré en los colores favoritos de mi novia y en su tipo de flor preferida.
En este tutorial, te guiaré a través de los pasos que seguí para crear un arreglo floral que espero inspire y ayude a otros a crear algo hermoso para sus seres queridos.
! [English Version Here]
Welcome once again to my blog! Today I will share a tutorial where I will show you how I created a unique and special floral ornament for my wife @yale95reyra. Floral ornaments are not only beautiful, but they are also a lovely way to express love and appreciation towards someone special. And since I believe that every day can be February 14th, I decided to give her a small gift.For the creation of any floral arrangement, the main thing is to find the right inspiration and select the right flowers. For my ornament, I was inspired by my girlfriend's favorite colors and her preferred type of flower.
In this tutorial, I will guide you through the steps I followed to create a floral arrangement that I hope will inspire and help others to create something beautiful for their loved ones.
 |
 |
 |
 |
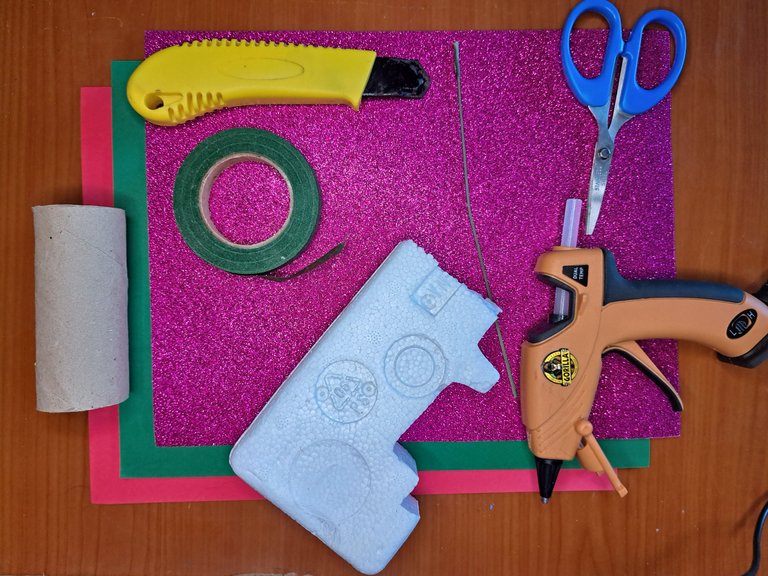
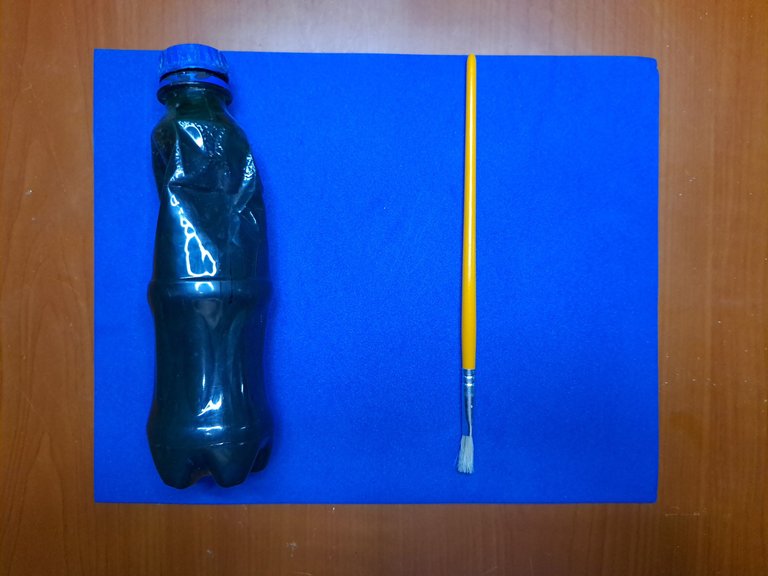
✂️ Materiales // Materials ✂️
| ✔️ Fomi liso azul, rojo y verde | ✔️ Plain blue, red and green fomi |
| ✔️ Fomi escarchado rosa | ✔️ Pink frosted fomi |
| ✔️ Tijeras y cúter | ✔️ Scissors and box cutter |
| ✔️ Cinta floral | ✔️ Floral tape |
| ✔️ Tubo de cartón | ✔️ Cardboard tube |
| ✔️ Poliespán | ✔️ Polystyrene |
| ✔️ Silicona caliente | ✔️ Hot silicone |
| ✔️ Alambre o palillo de brochetas | ✔️ Wire or skewer stick |
| ✔️ Pinceles y pintura negra | ✔️ Brush and black paint |
 |
 |
📋 Paso a paso // Step by step 📋
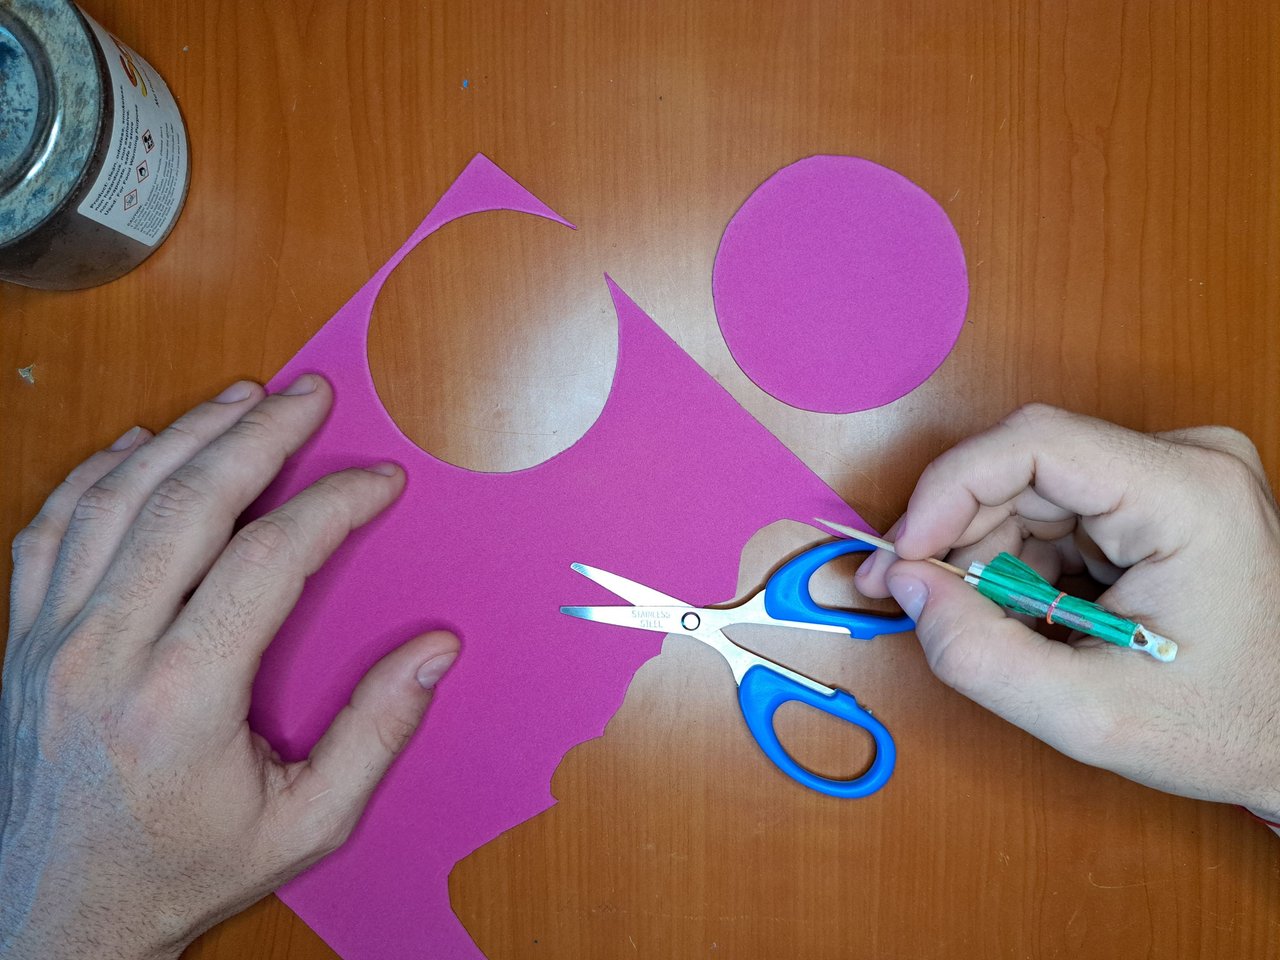
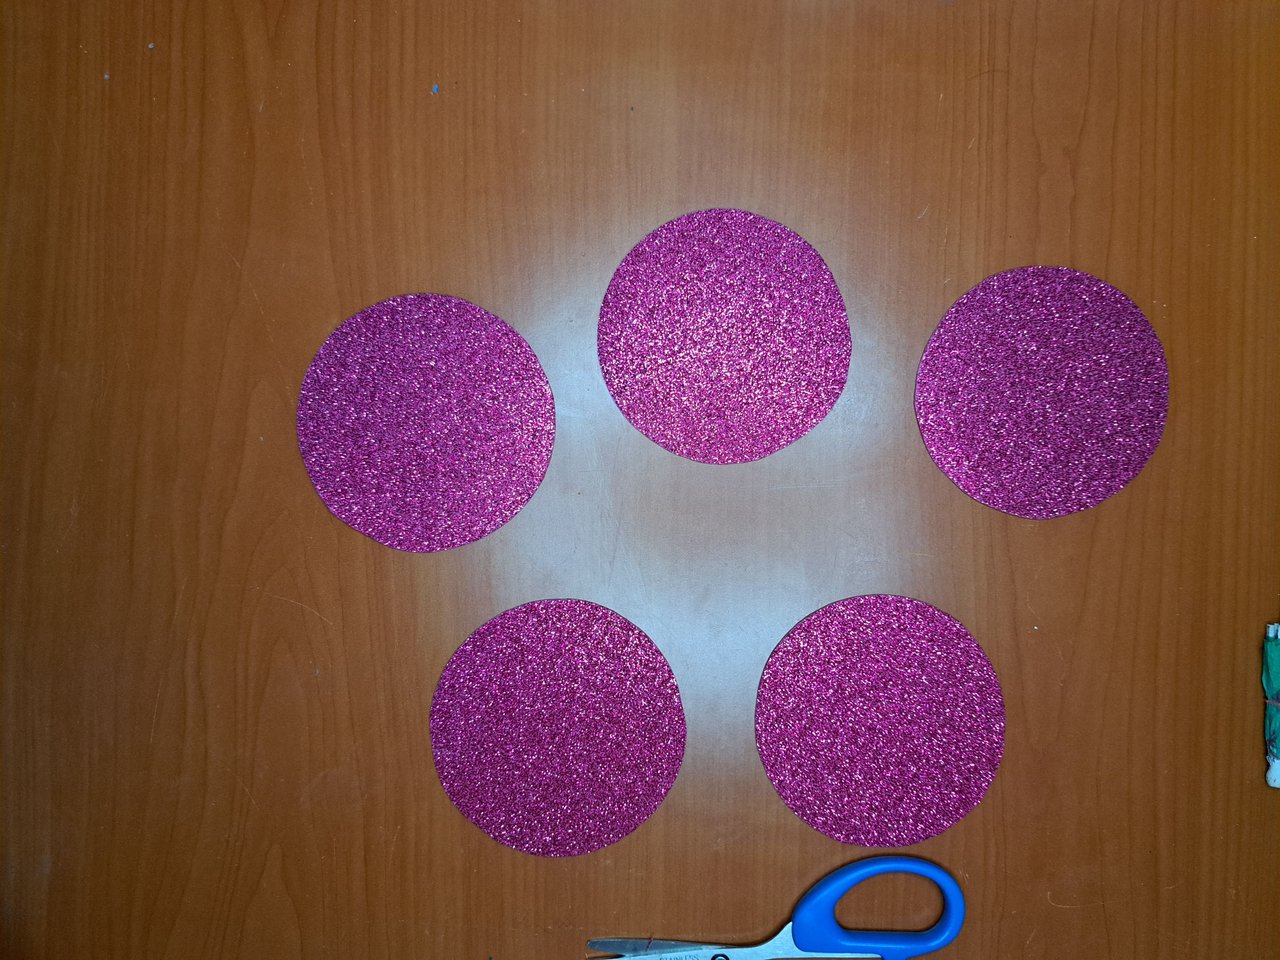
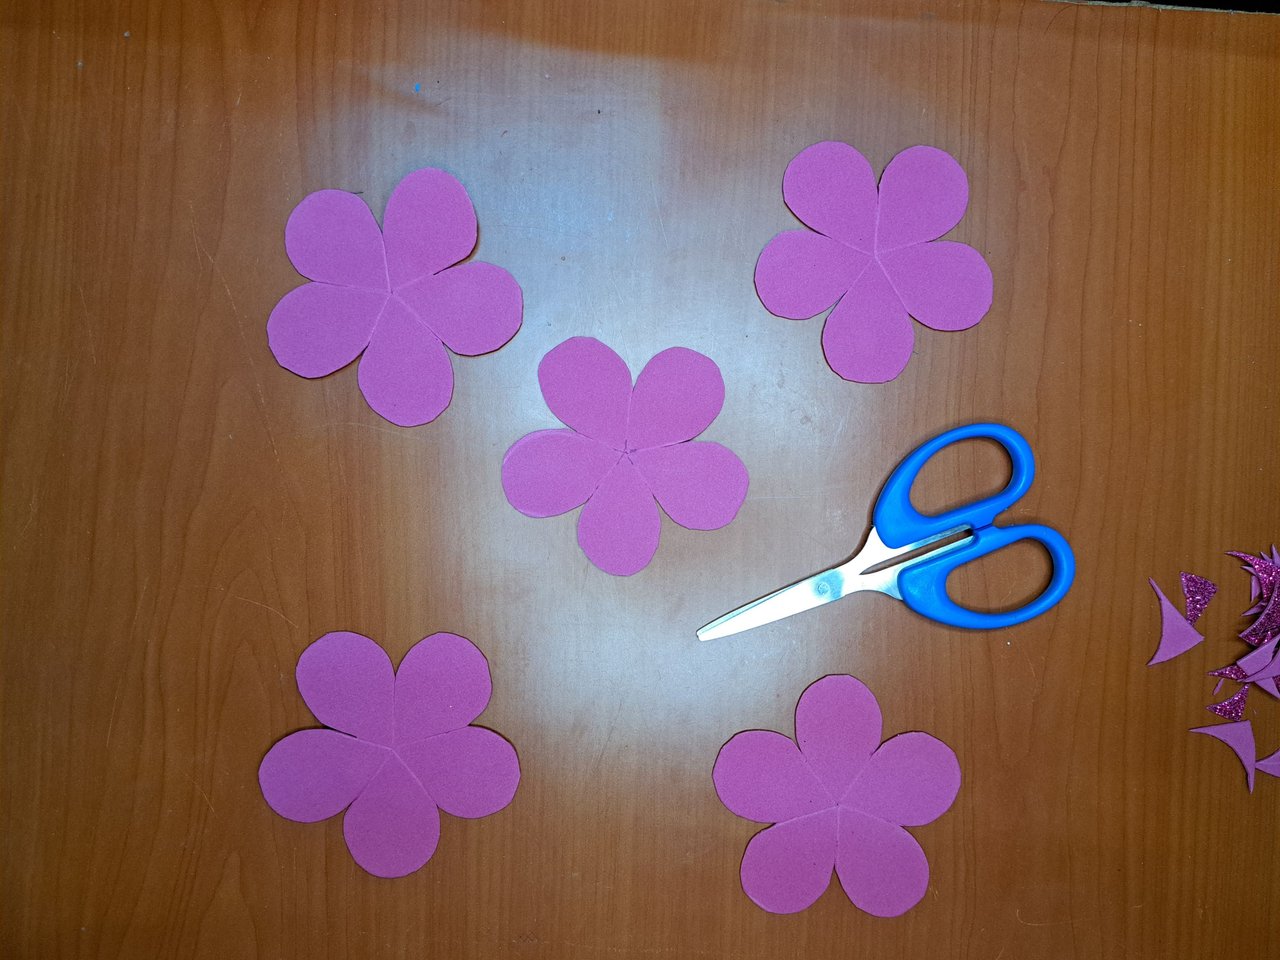
1️⃣ Para empezar marcamos y recortamos cinco círculos de 8 cm de diámetro en la hoja de fomi escarchado. Adicionalmente, dividiremos cada círculo en cinco y haremos cortes medianos en las marcas para luego dar forma a cada uno de los pétalos.
! [English Version Here]
1️⃣ To begin, we mark and cut out five circles of 8 cm in diameter on the frosted fomi sheet. Additionally, we will divide each circle in five and make medium sized cuts in the marks to shape each of the petals.
 |  |
 |  |
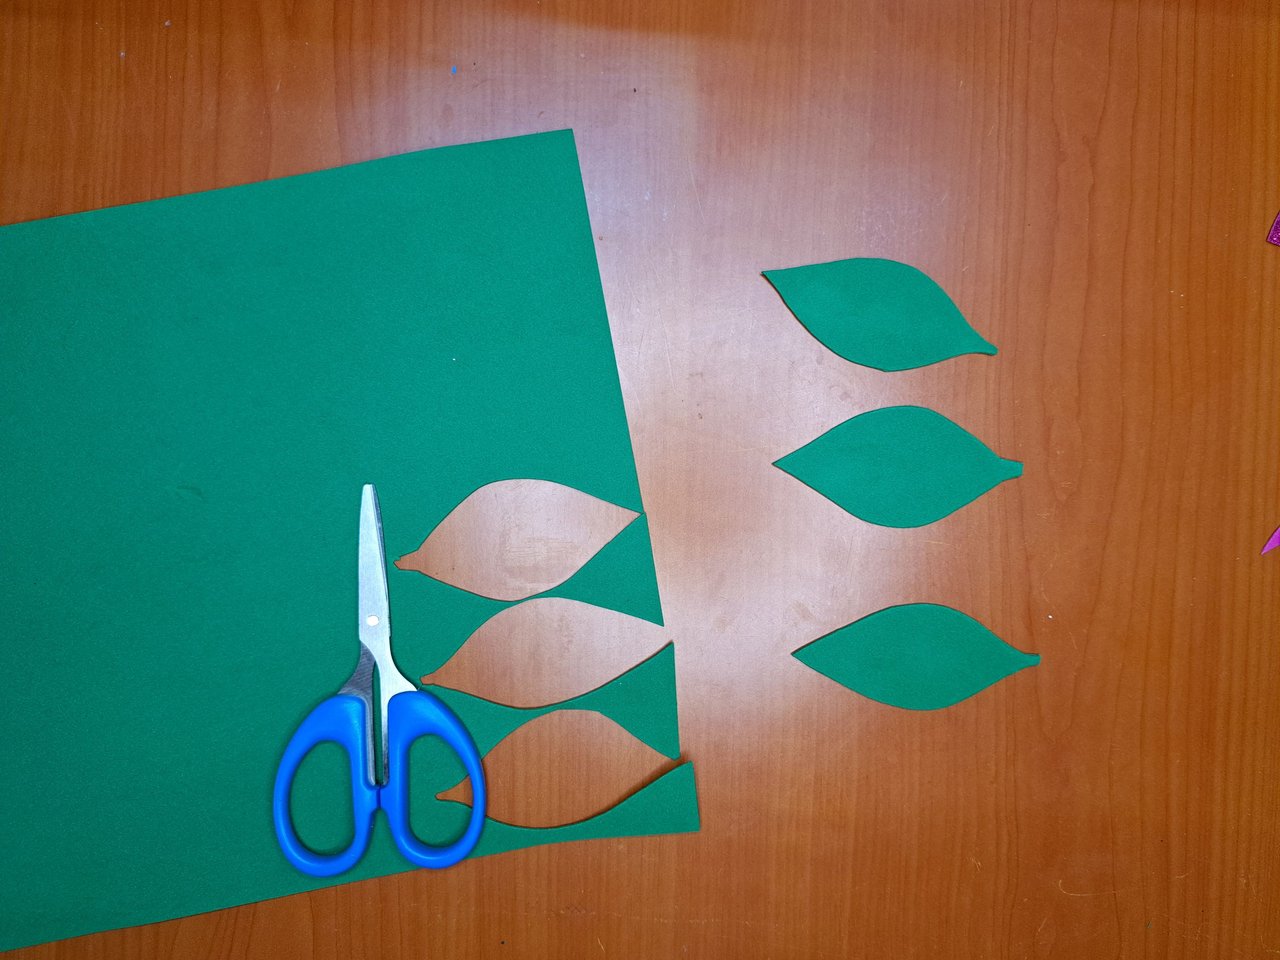
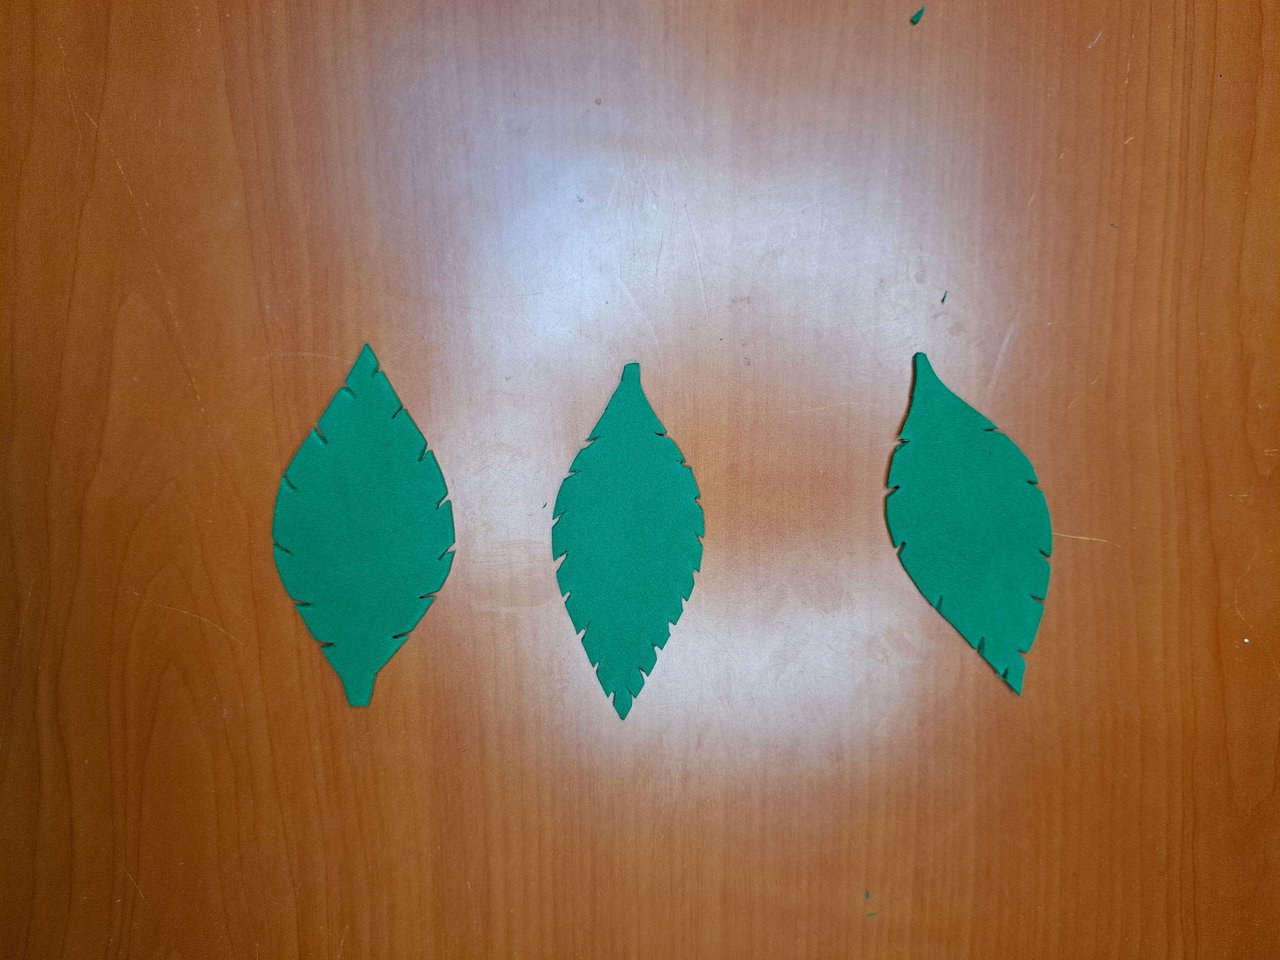
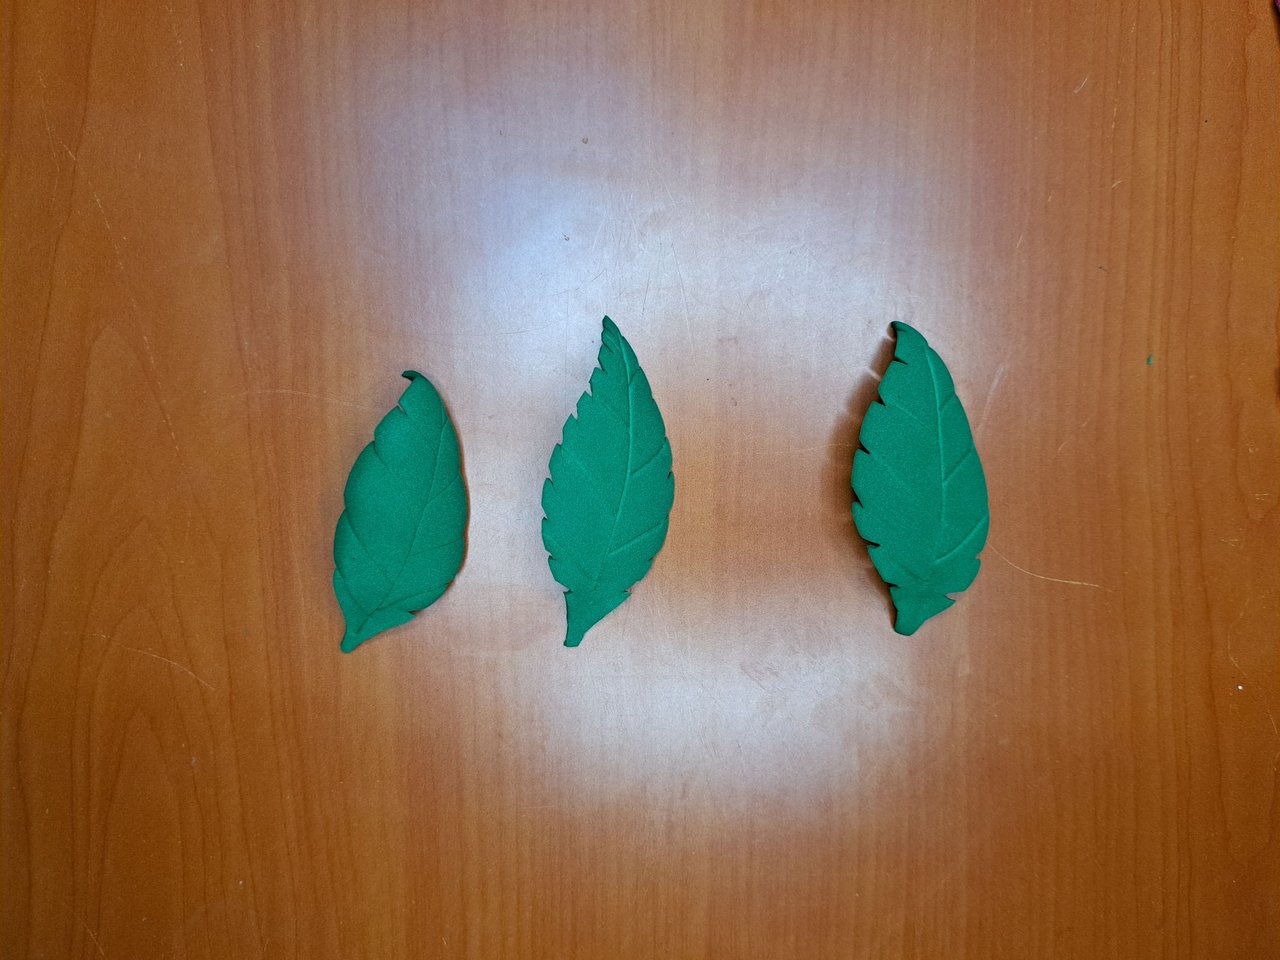
2️⃣ En una hoja de fomi verde marcamos y recortamos las siluetas de las hojas. Las forma de la hoja puede ser variada y de preferencia que tengan los bordes puntiagudos e irregulares como es el caso de las rosas.
! [English Version Here]
2️⃣ On a green fomi sheet we mark and cut out the silhouettes of the leaves. The shape of the leaves can be varied, preferably with pointed and irregular edges, as in the case of the roses.
 |  |
3️⃣ A continuación, haciendo uso de una fuente de calor (una plancha) modificaremos la forma de las piezas de fomi a través de técnicas de termoformado sin moldes. En el caso de los pétalos los doblaremos un poco en las puntas y a las hojas las arquearemos.
! [English Version Here]
3️⃣ Next, using a heat source (an iron) we will modify the shape of the fomi pieces through thermoforming techniques without molds. In the case of the petals we will bend them a little at the tips and the leaves will be arched.
 |  |
 |  |
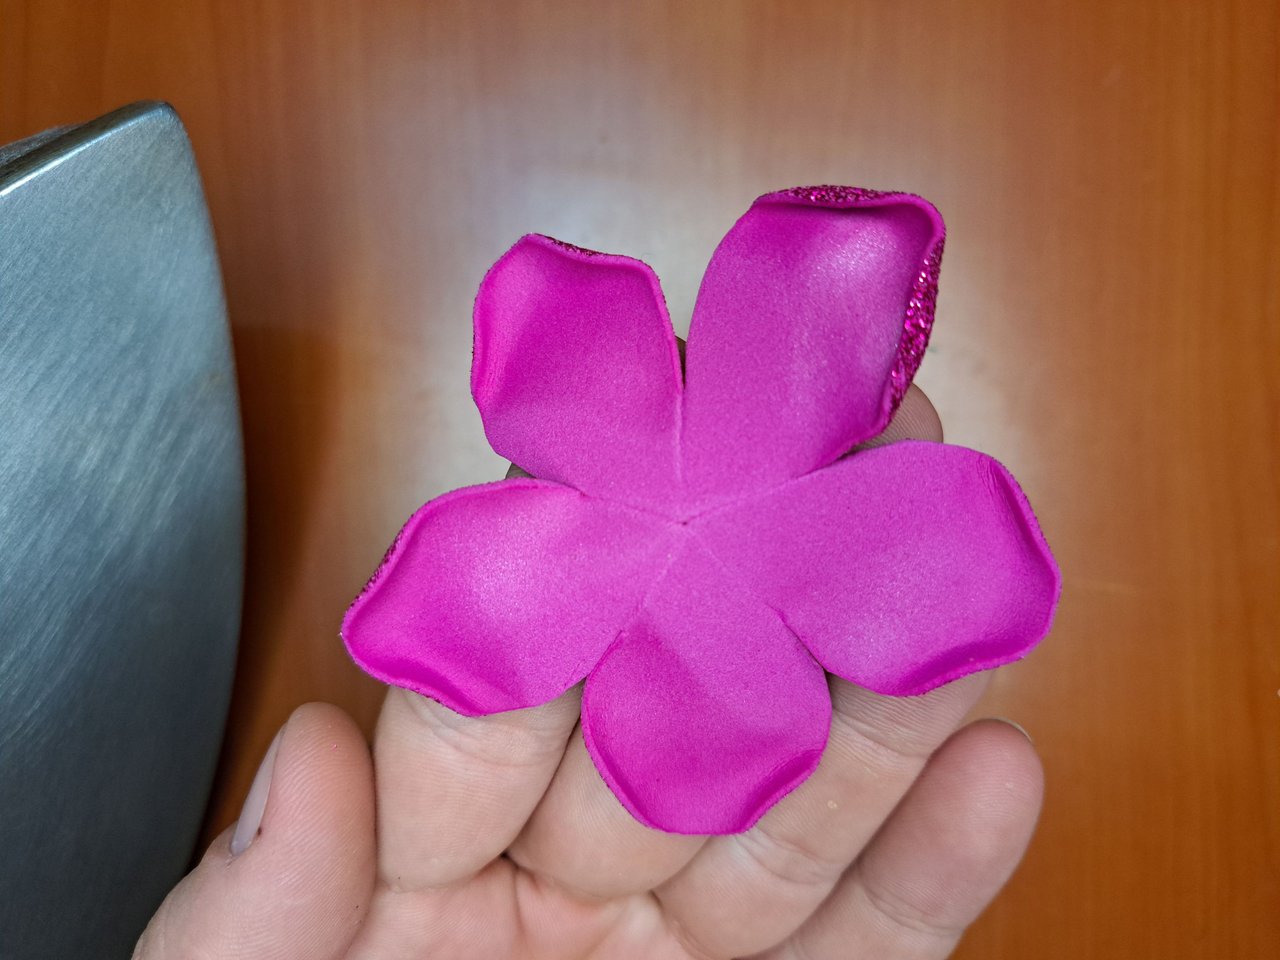
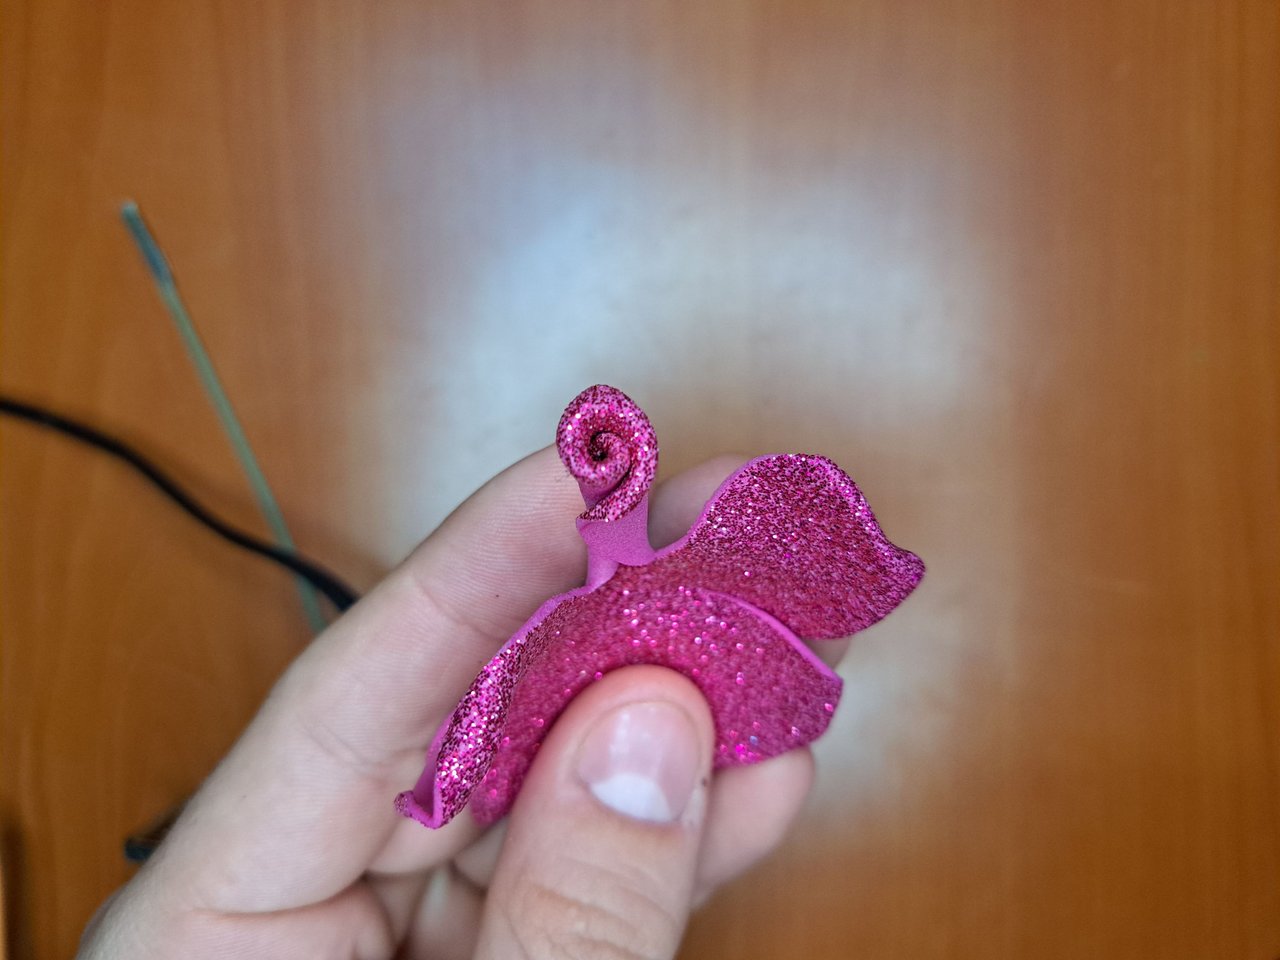
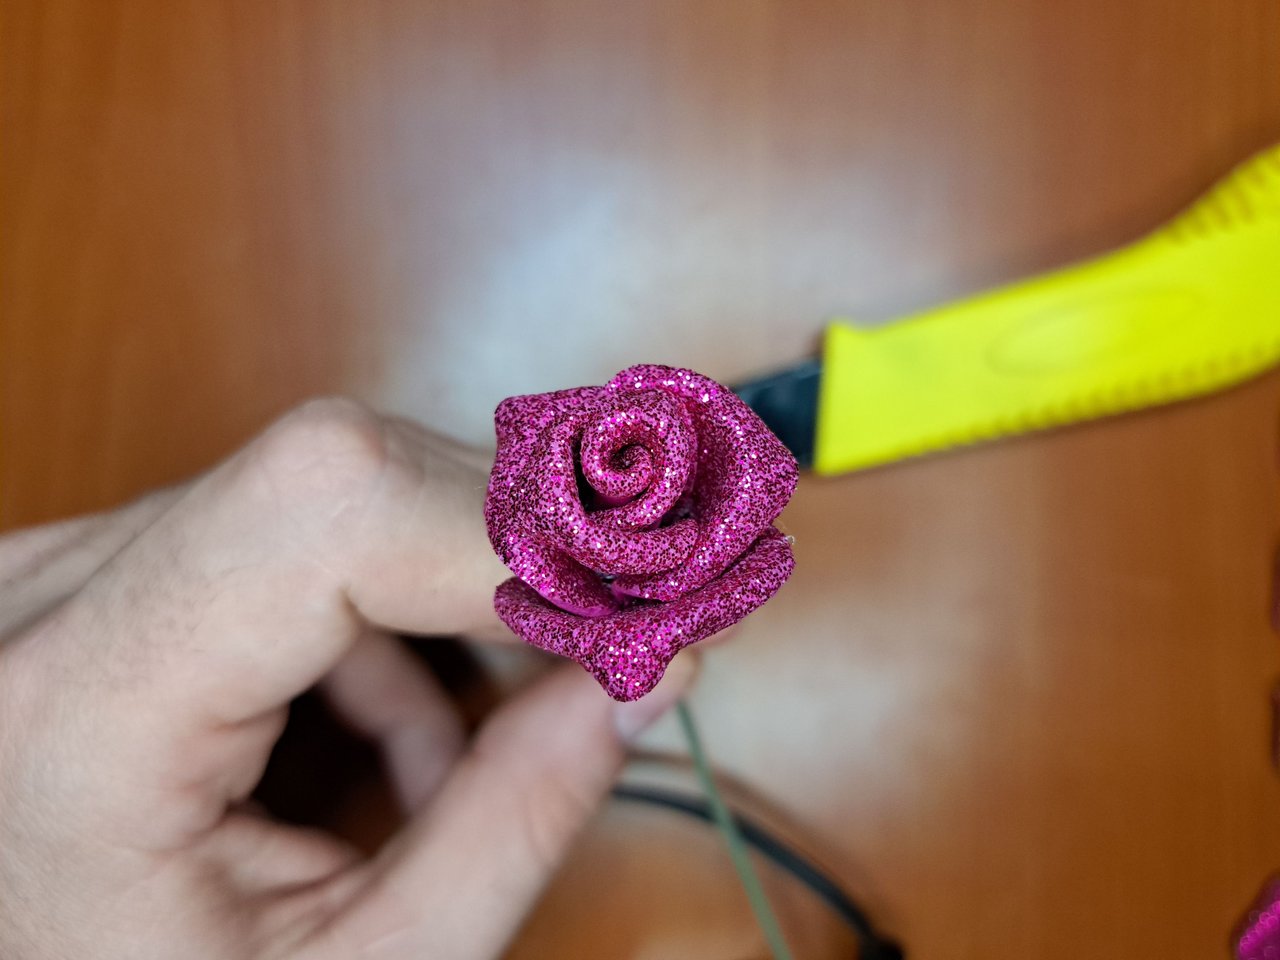
4️⃣ Con los pétalos y las hojas termoformados pasamos entonces a confeccionar la flor. Para ello primero insertamos y fijamos el alambre en el medio de una de las capas de cinco pétalos. Seguidamente, enrollamos uno de los pétalos de esa capa y le iremos pegando alrededor los demás pétalos.
Repetiremos este proceso con cada una de las cuatro capas de pétalos restantes hasta que quede lista la flor.
! [English Version Here]
4️⃣ With the petals and leaves thermoformed we then move on to making the flower. To do this we first insert and fix the wire in the middle of one of the layers of five petals. Next, we roll up one of the petals of that layer and glue the other petals around it.Repeat this process with each of the remaining four layers of petals until the flower is ready.
 |  |  |
 |  |  |
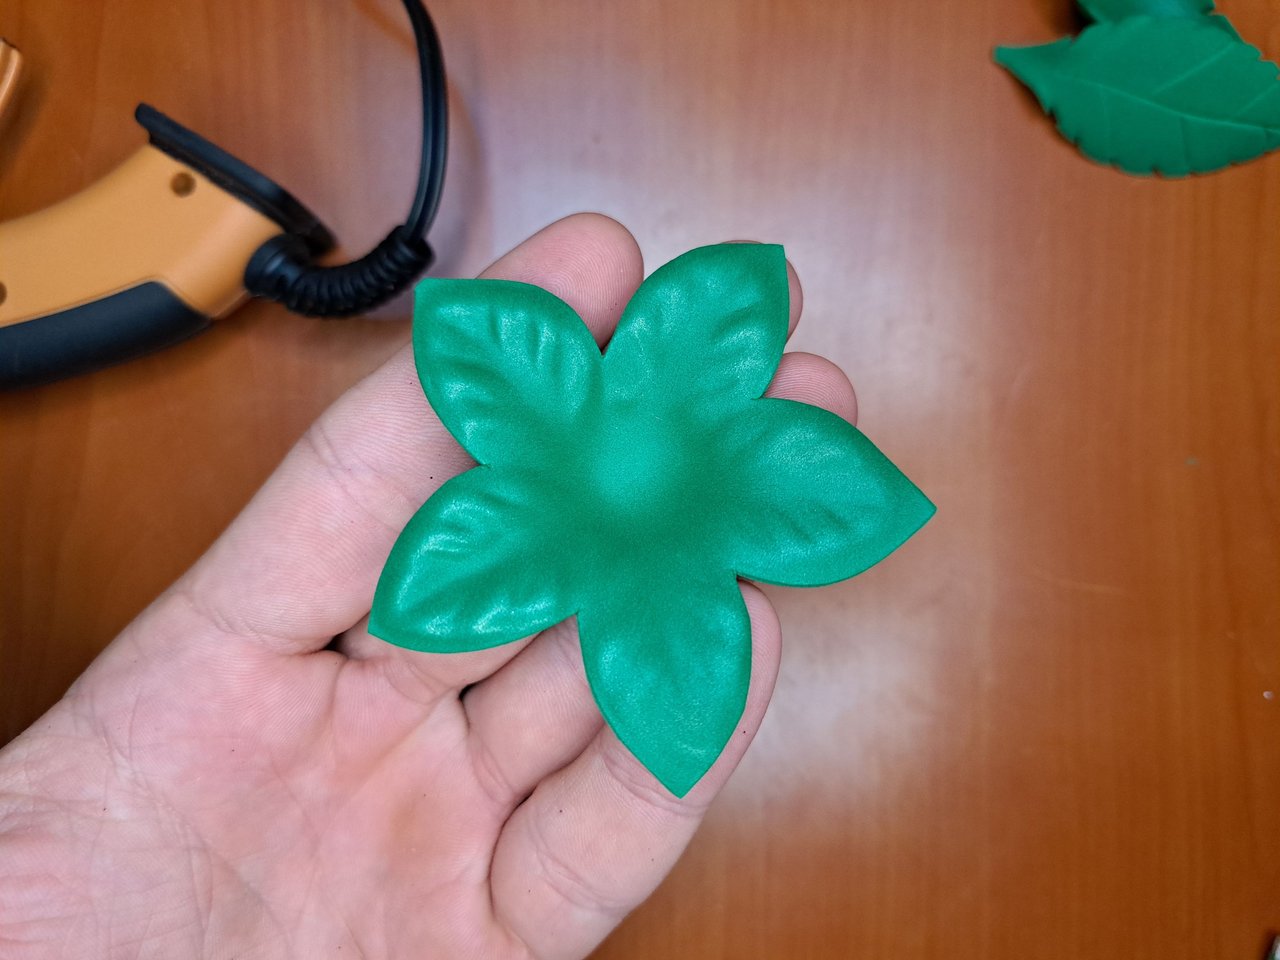
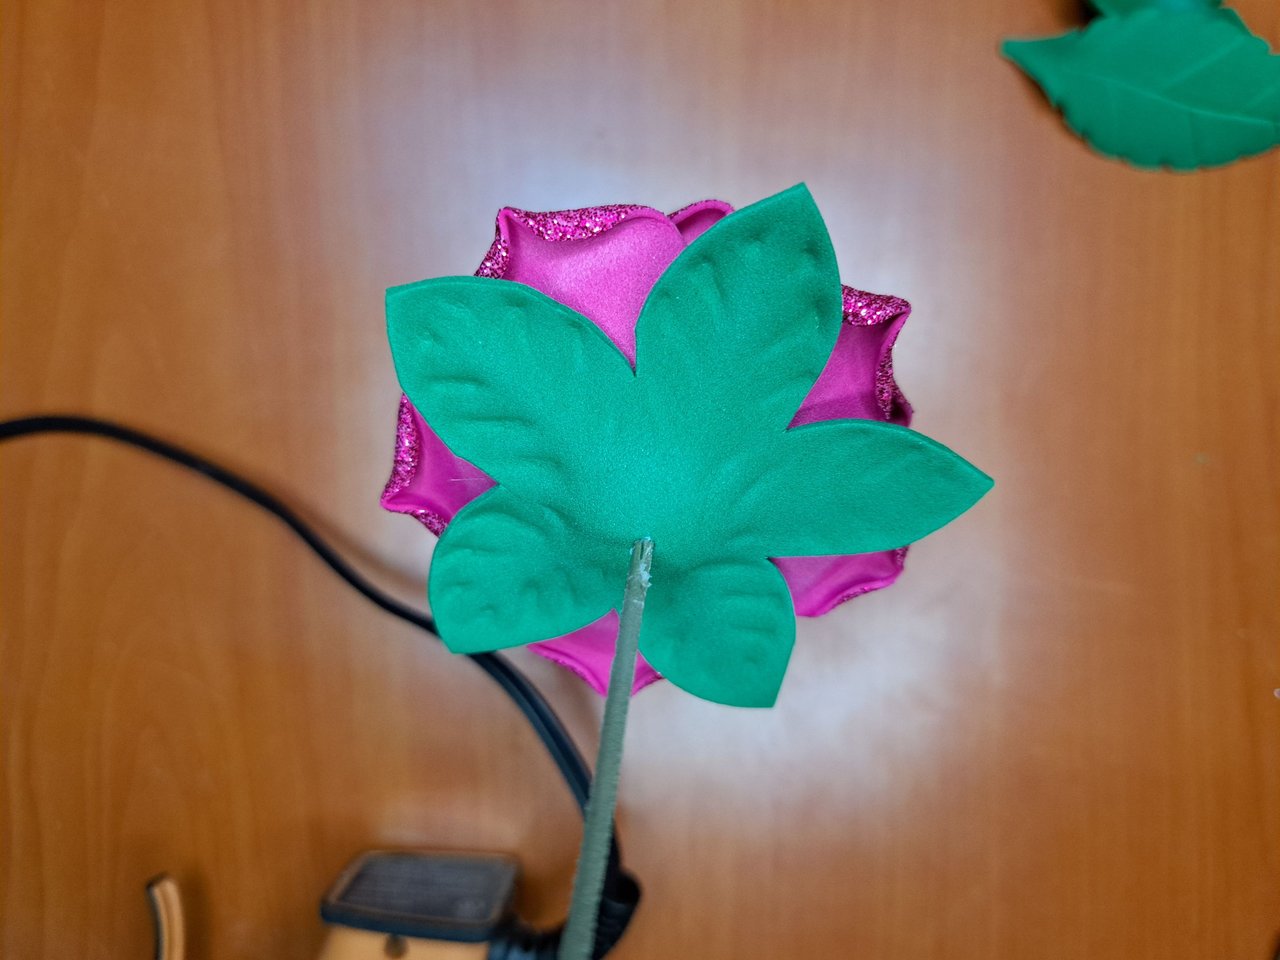
5️⃣ Para el cáliz de la flor usaremos fomi verde y un molde. Calentamos una pieza de fomi en la plancha y la introducimos dentro del molde, presionamos fuerte y recortamos el excedente. Cuando esté listo el cáliz, le introducimos el tallo de la flor y lo pegamos en la base de los pétalos.
! [English Version Here]
5️⃣ For the calyx of the flower we will use green fomi and a mold. Heat a piece of fomi on the iron and insert it into the mold, press hard and cut off the excess. When the calyx is ready, we introduce the stem of the flower and glue it at the base of the petals.
 |
 |
 |  |
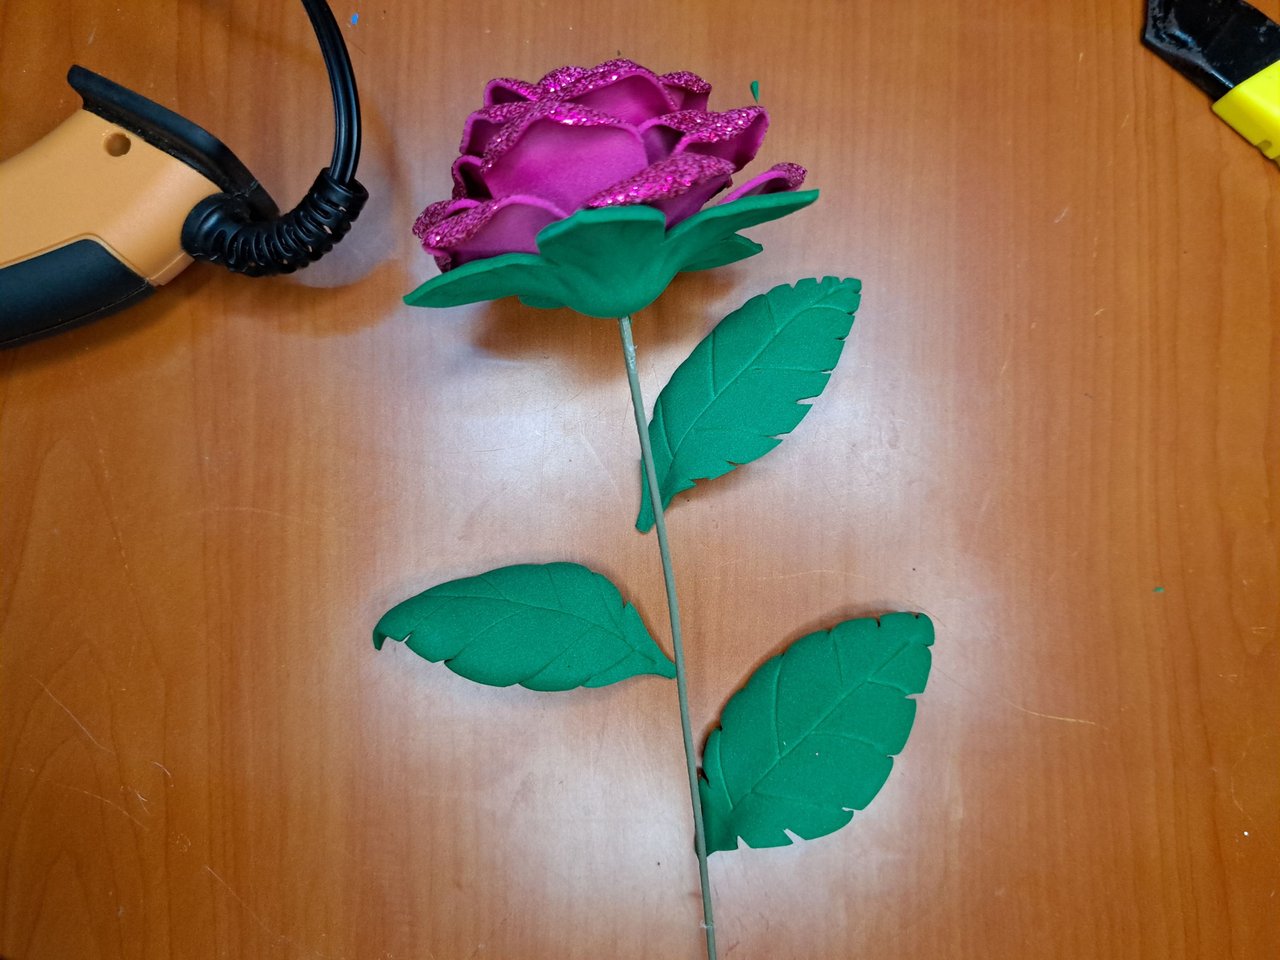
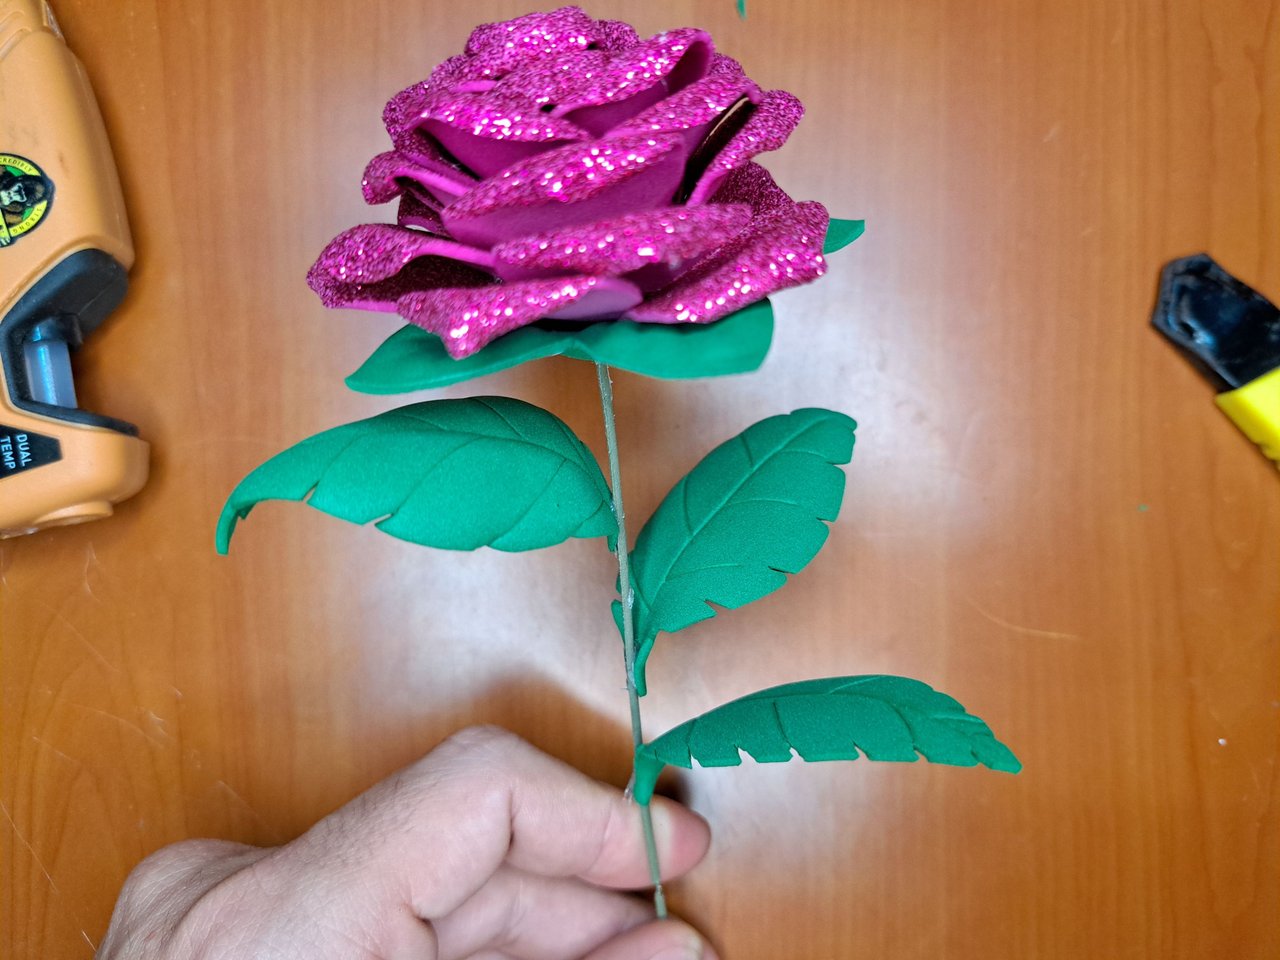
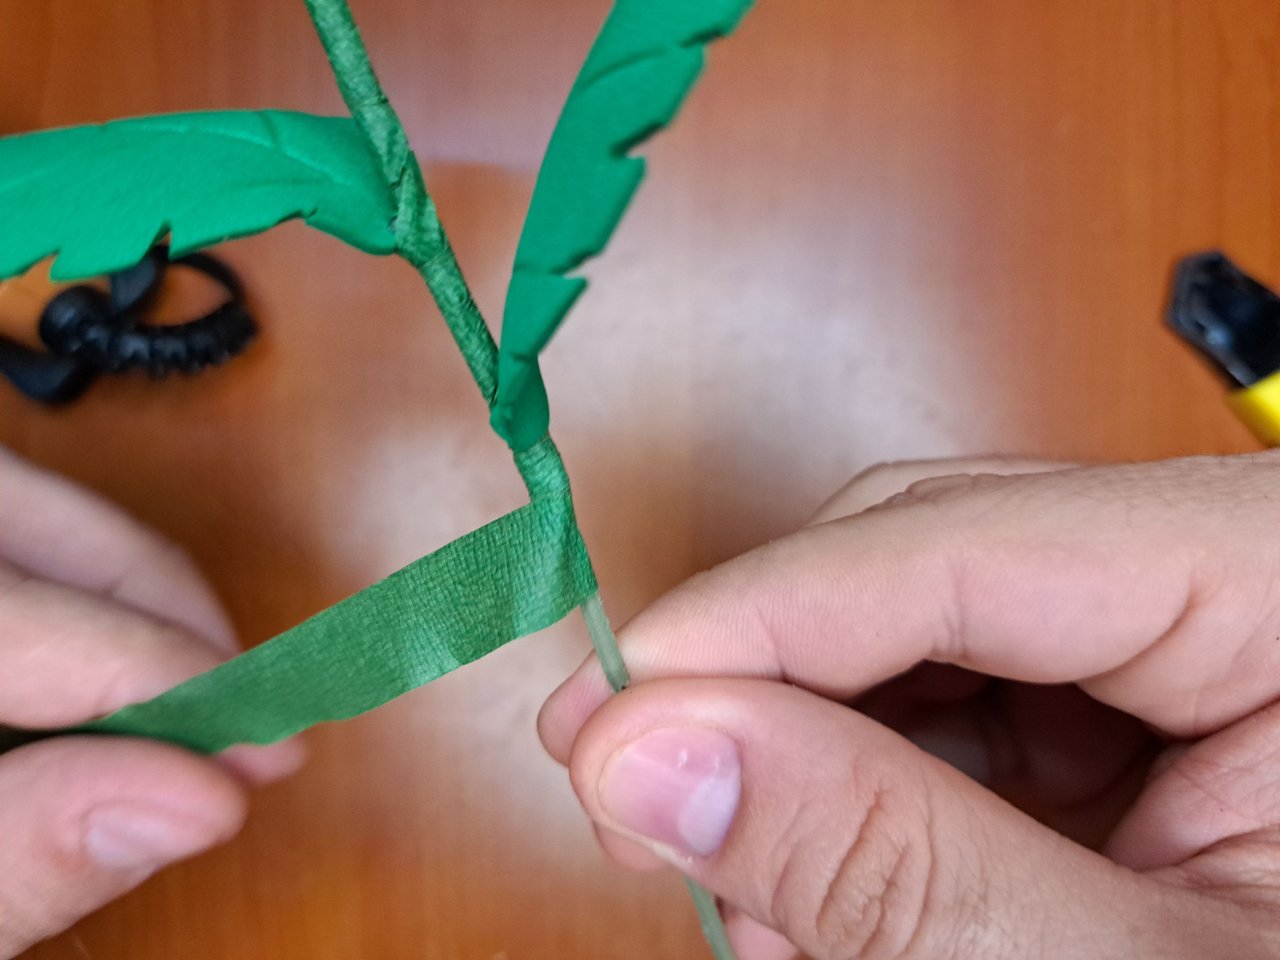
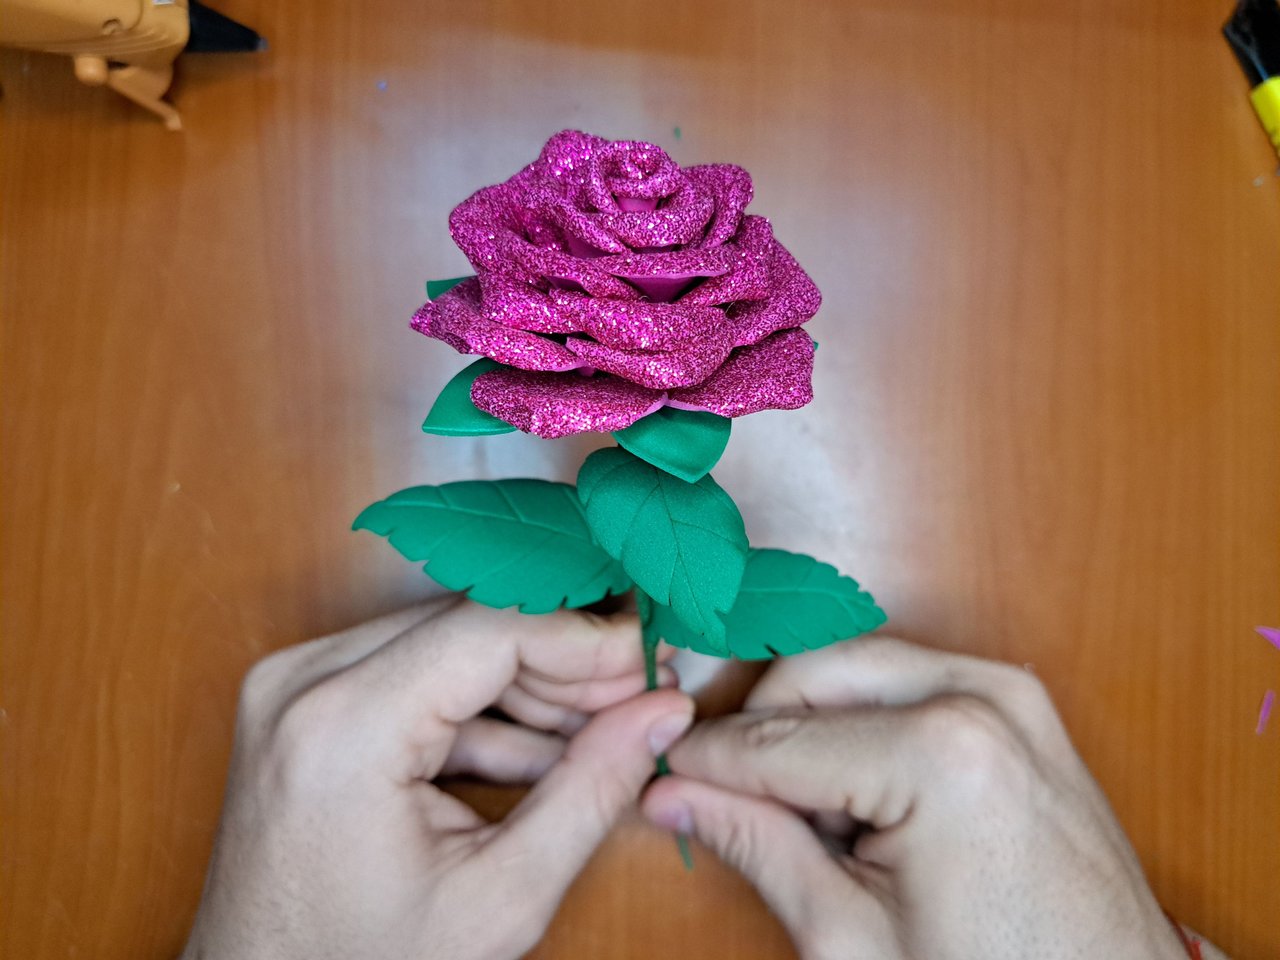
6️⃣ A continuación, pegamos las tres hojas a lo largo del tallo, dándole así más volumen a la flor y un toque más natural y vivo. Seguidamente, envolvemos todo el tallo con cinta floral, el cual aporta textura al tallo y otorga un factor extra de sucesión a las hojas.
! [English Version Here]
6️⃣ Next, we glue the three leaves along the stem, giving the flower more volume and a more natural and lively touch. Next, we wrap the entire stem with floral tape, which adds texture to the stem and gives the leaves an extra factor of succession.
 |  |  |
 |  |  |
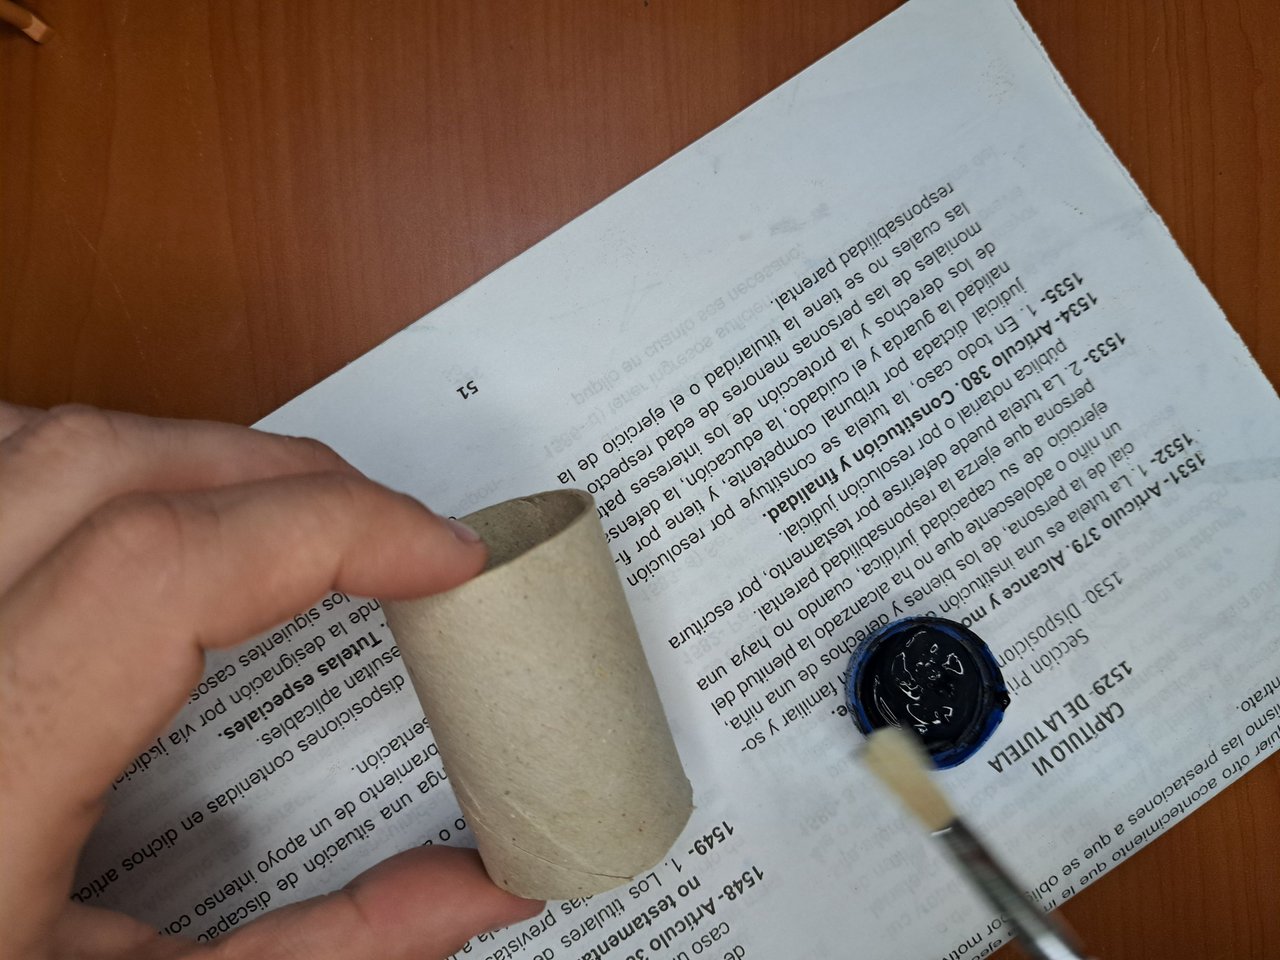
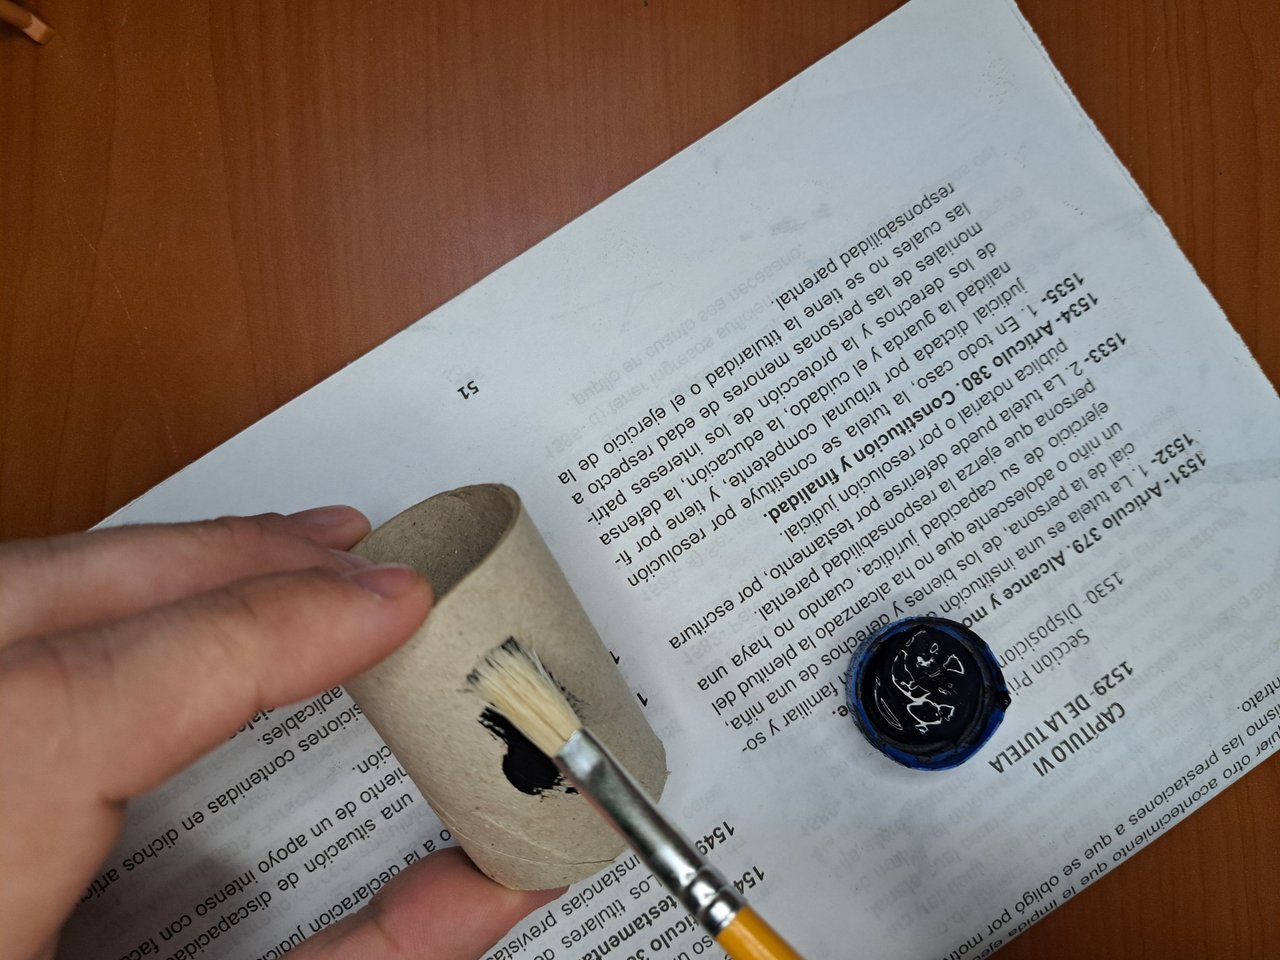
7️⃣ Una vez la flor está lista, empezamos a trabajar en la base. Para ello primeramente recortamos un extremo de un tubo de cartón de papel sanitario y lo pintamos de negro. La altura del trozo del tubo puede variar en dependencia de la propia, altura del tubo y del tamaño del tallo de la flor.
Escogí pintar de negro la base porque resaltará los colores de los adornos de esta.
! [English Version Here]
7️⃣ Once the flower is ready, we start working on the base. To do this we first cut off one end of a cardboard tube of toilet paper and paint it black. The height of the piece of the tube can vary depending on the height of the tube itself and the size of the stem of the flower.I chose to paint the base black because it will highlight the colors of the ornaments on it.
 |  |
 |  |
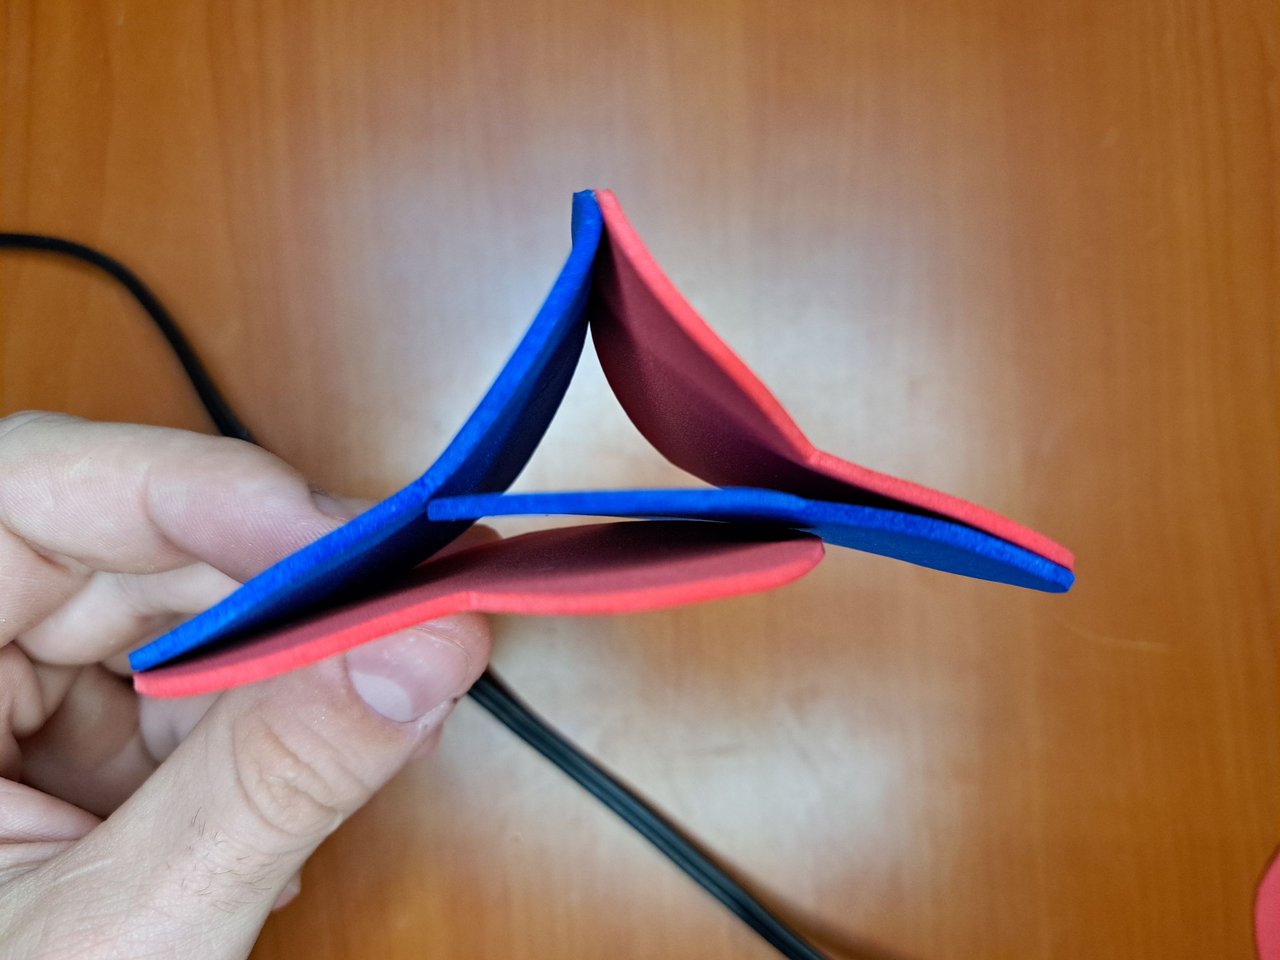
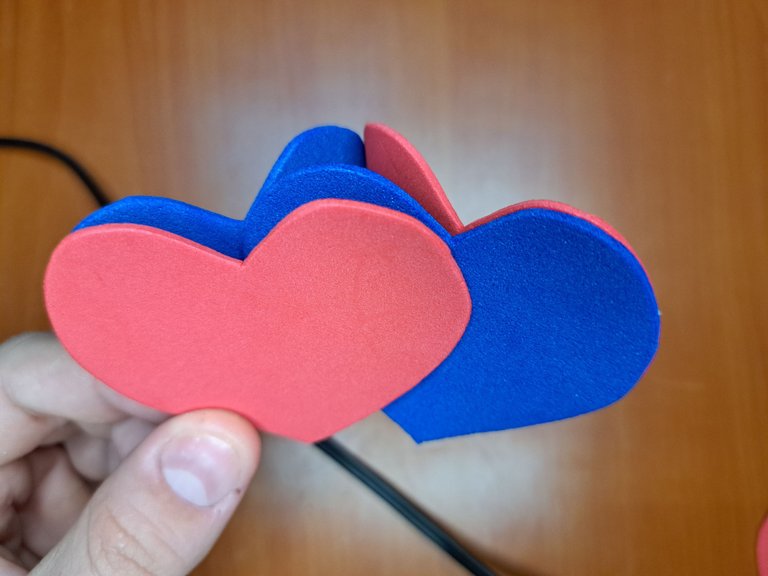
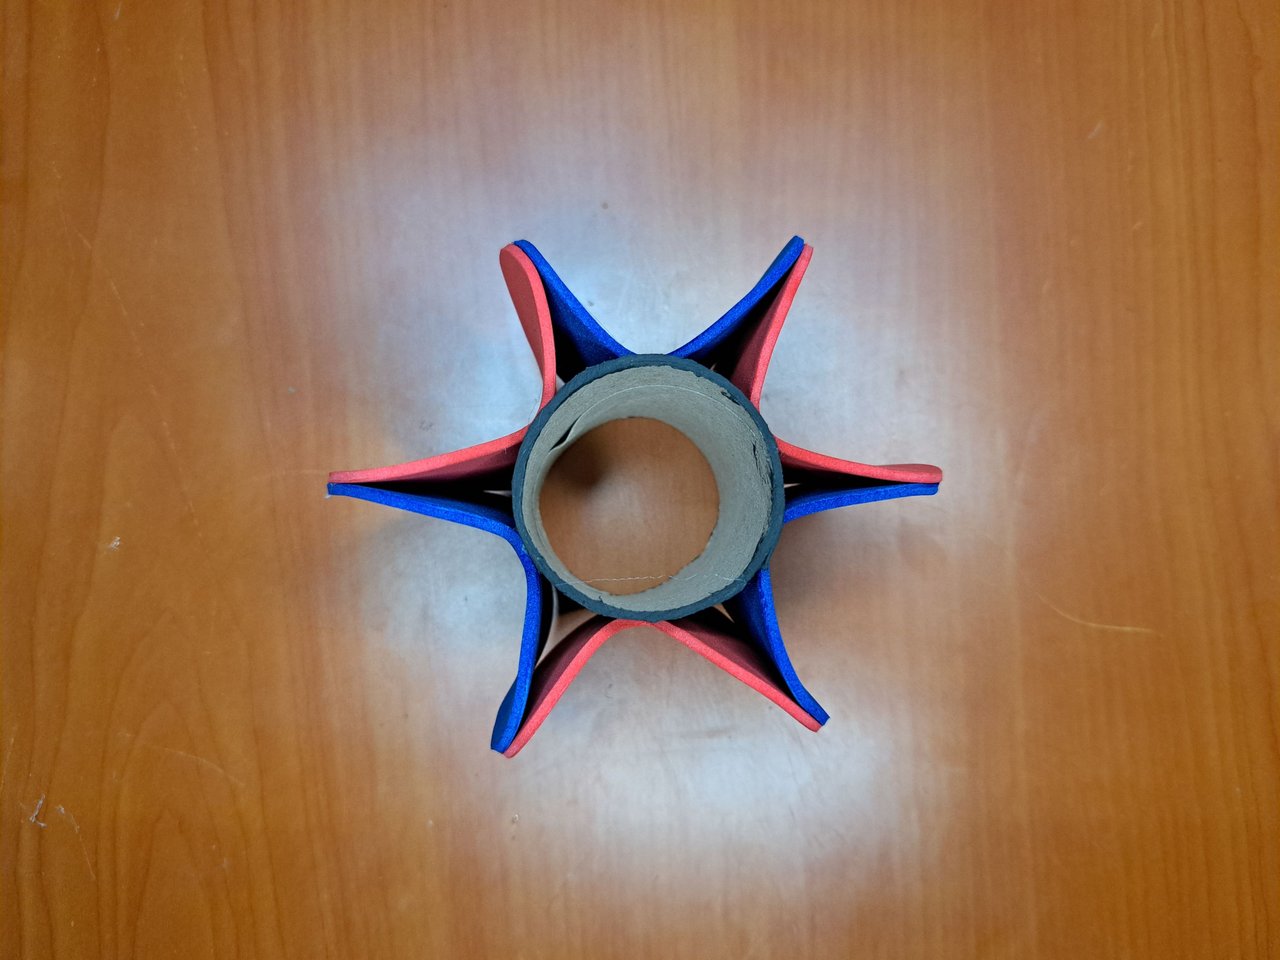
8️⃣ En las hojas de fomi rojo y azul recortaremos 3 corazones de cada color. Luego pegaremos los corazones por los bordes superiores, introduciremos el tubo de cartón en el centro de la figura formada y pegáramos cada corazón al tubo en la posición en la que se encuentran.
La altura de los corazones debe ser mínimamente más baja que la del tubo de la base para que no opaque la parte en la que se une la base con el tallo de la flor.
! [English Version Here]
8️⃣ Cut out 3 hearts of each color from the red and blue fomi sheets. Then glue the hearts along the top edges, insert the cardboard tube in the center of the formed figure and glue each heart to the tube in the position where they are.The height of the hearts should be slightly lower than that of the base tube so as not to obscure the part where the base meets the stem of the flower.
 |  |
|  |

|
 |  |
9️⃣ Con el extremo sobrante del tubo de cartón marcamos y recortamos dos círculos de poliespán los cuales introduciremos en los extremos de la base, no sin antes rellenar con arena o piedrecitas.
Seguidamente, recortamos un círculo de fomi verde y lo pegaremos en la parte superior de la base para luego introducir por el medio el tallo de la flor.
! [English Version Here]
9️⃣ With the remaining end of the cardboard tube we mark and cut out two polystyrene circles which we will insert in the ends of the base, but not before filling them with sand or pebbles.Next, cut out a circle of green fomi and glue it to the top of the base and then insert the stem of the flower in the middle.
 |  |  |
 |  |
Espero que hayan disfrutado tanto como yo al hacer este regalo especial para mi esposa. Recuerden que la creatividad no tiene límites, ¡así que anímense a hacer sus propias creaciones y sorprender a sus seres queridos con regalos hechos a mano llenos de amor y dedicación!
! [English Version Here]
I hope you enjoyed as much as I did making this special gift for my wife. Remember that creativity has no limits, so be encouraged to make your own creations and surprise your loved ones with handmade gifts full of love and dedication!
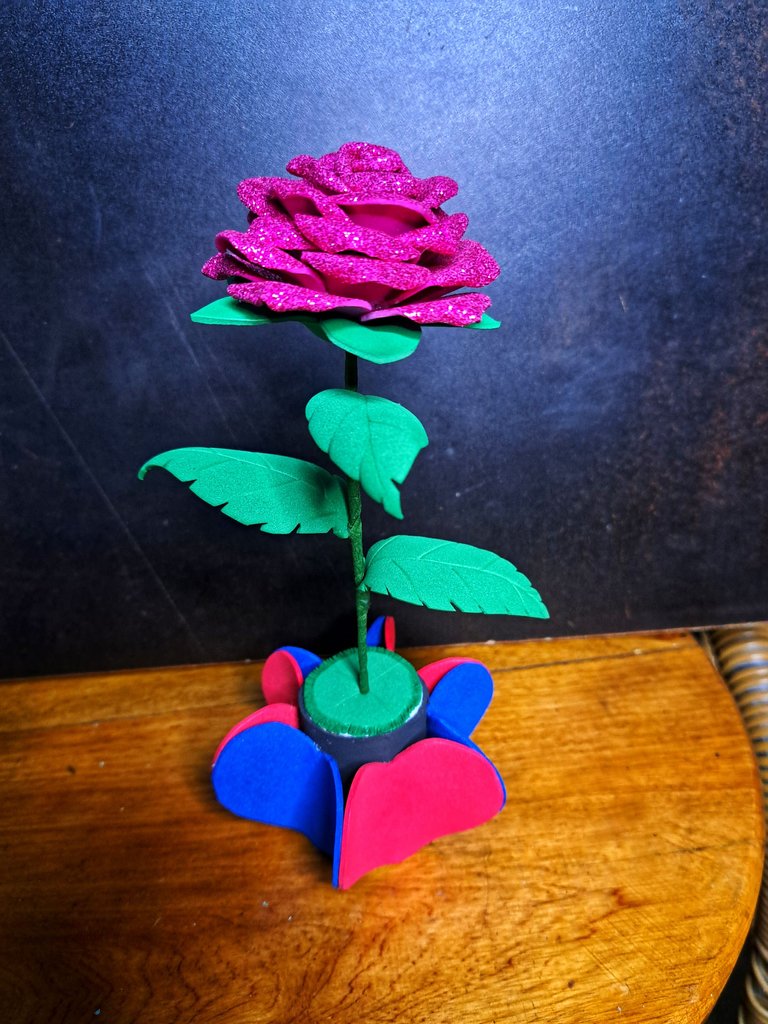
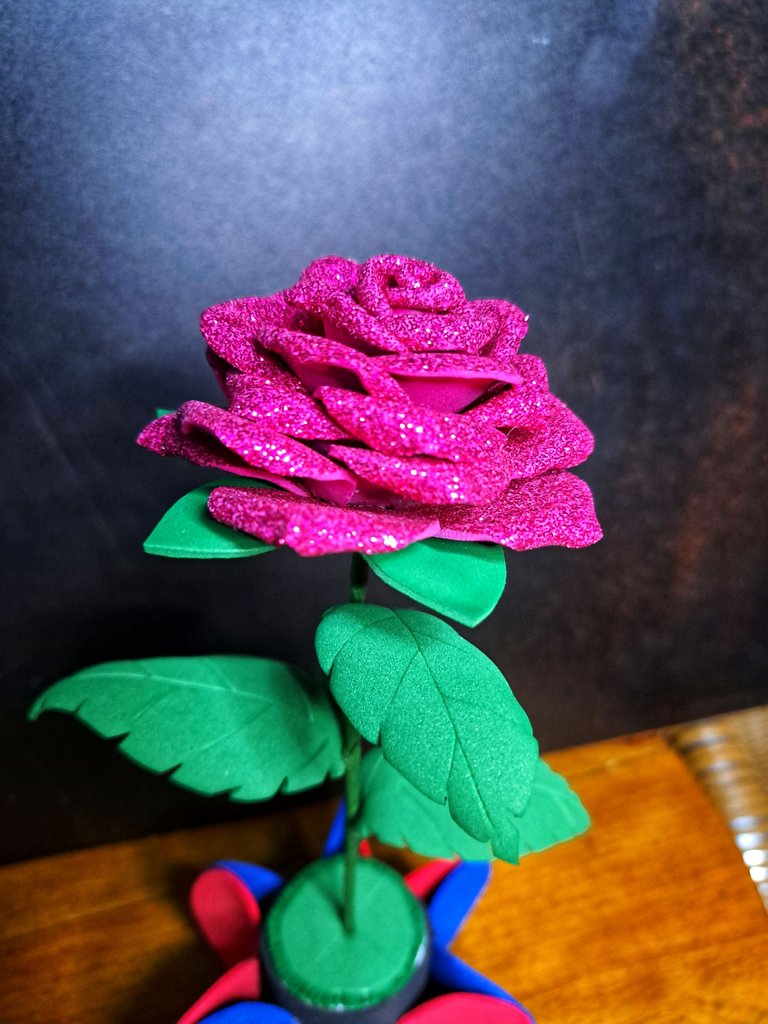
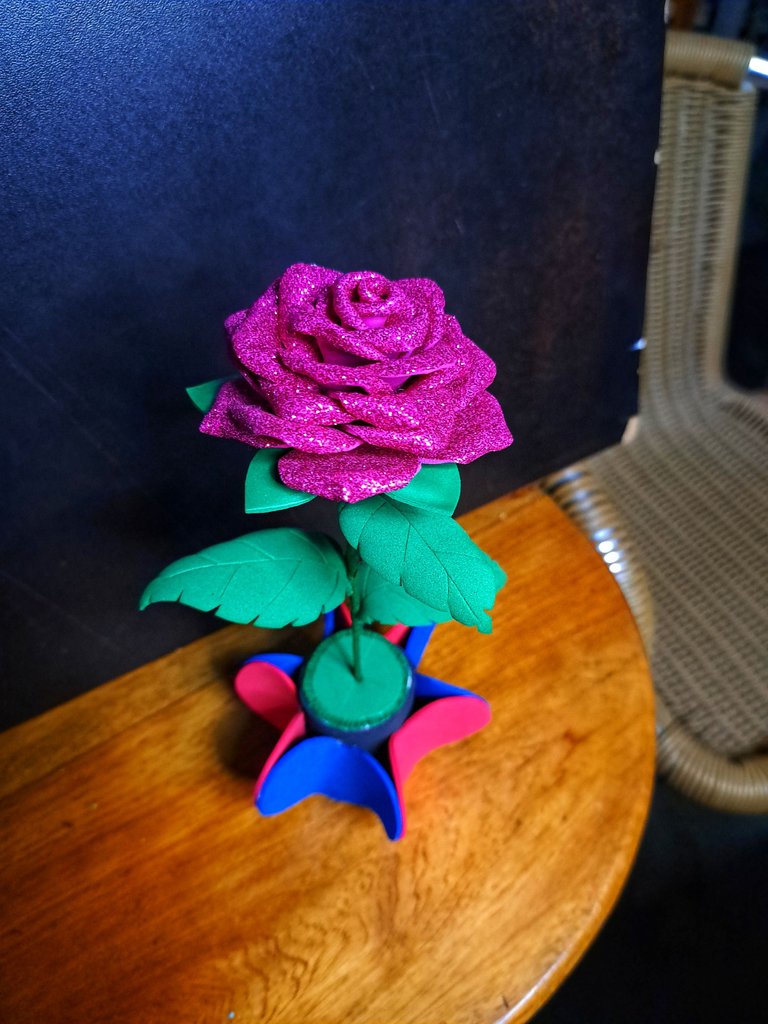
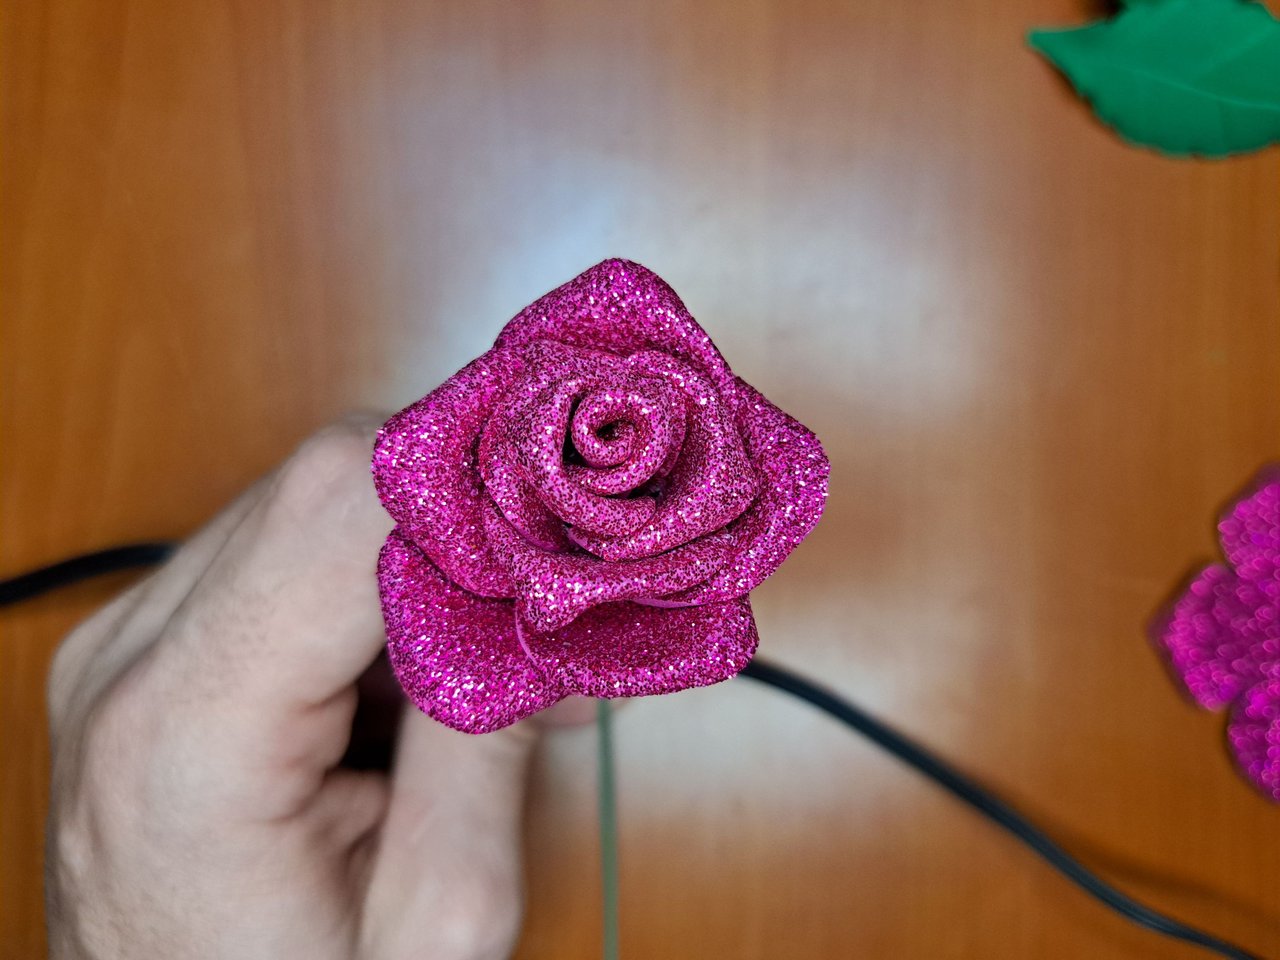
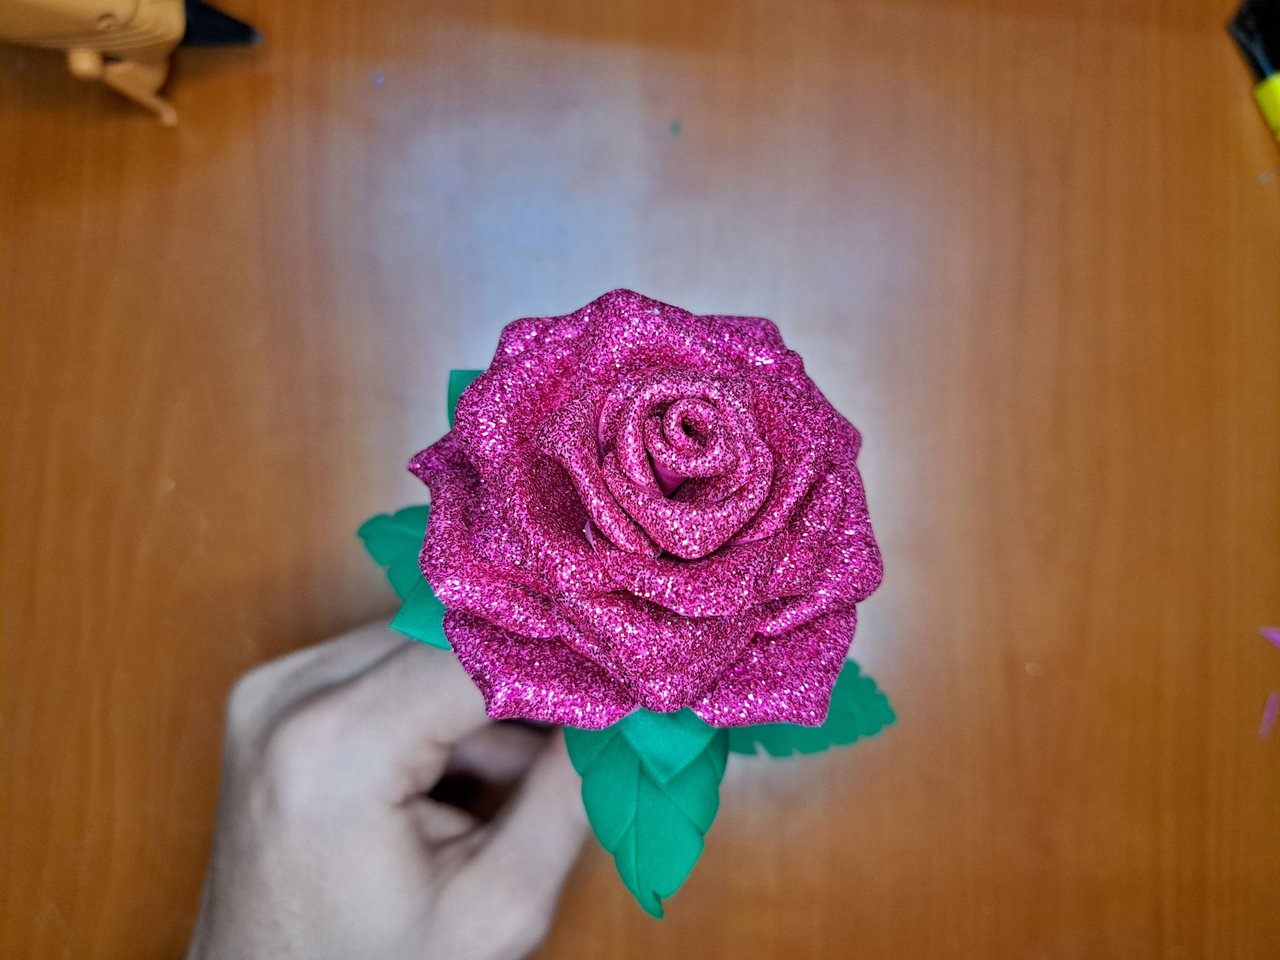
⚜️ Resultado Final // Final Result ⚜️
 |  |
 |  |  |

Thank you very much for reading my post. If you liked it, please leave a comment and consider following me so you don't miss my next posts. I'd love to know your opinion and your thoughts about the topic I discussed in this post, see you in the next one!
Muchas gracias por leer mi post. Si te gustó, por favor deja un comentario y considera seguirme para no perderte mis próximas publicaciones. Me encantaría saber tu opinión y tus ideas sobre el tema que traté en este post. ¡Nos vemos en el próximo!
Cover page created in Canva Pro
Translated by DeepL


Te quedó preciosa mi amor, muchas gracias por el detalle, me encantó 😍😘
Lo que sea por tí mi vida, te regalaré esa y muchísimas más.
https://twitter.com/hivediy47901/status/1764857267331977651
The results are beautiful with glitter effect 😊
I thought you can make more flowers, then put all flowers into good vas.
It can be done but the base would have to be increased in size, because although it may not seem so, several flowers of this material tend to weigh a little.
Te quedo bella esa flor
Gracias 🫂
wow that looks beautiful thanks for Sharing you are so talented.
It is a pleasure for me. Thank you for your words and support.
Saludos @edeyglezsosa que linda rosa el color fucsia me encanta, regularmente se hacen en color rojo pero en fucsia se ven muy bien.
Feliz martes!
Muchas gracias por comentar, me alegra saber que te gustó.
Congratulations @edeyglezsosa! You received a personal badge!
Participate in the next Power Up Day and try to power-up more HIVE to get a bigger Power-Bee.
May the Hive Power be with you!
You can view your badges on your board and compare yourself to others in the Ranking
Check out our last posts:
¡Enhorabuena!
✅ Has hecho un buen trabajo, por lo cual tu publicación ha sido valorada y ha recibido el apoyo de parte de CHESS BROTHERS ♔ 💪
♟ Te invitamos a usar nuestra etiqueta #chessbrothers y a que aprendas más sobre nosotros.
♟♟ También puedes contactarnos en nuestro servidor de Discord y promocionar allí tus publicaciones.
♟♟♟ Considera unirte a nuestro trail de curación para que trabajemos en equipo y recibas recompensas automáticamente.
♞♟ Echa un vistazo a nuestra cuenta @chessbrotherspro para que te informes sobre el proceso de curación llevado a diario por nuestro equipo.
🥇 Si quieres obtener ganancias con tu delegacion de HP y apoyar a nuestro proyecto, te invitamos a unirte al plan Master Investor. Aquí puedes aprender cómo hacerlo.
Cordialmente
El equipo de CHESS BROTHERS