DIY: Wishing well with recycled cardboard and fomi // Pozo de los deseos con cartón reciclado y fomi [ENG+ESP]
"Legend has it that if you throw a coin backwards and it falls into the well, you will be granted a wish."
Hello friends and friends who love crafts and art! For me it is always a pleasure to share with you a new tutorial. Today I bring you a very cool craft made with recycled cardboard and fomi. As you may have noticed, today we will be making a wishing well so that all your wishes come true. So without further ado, let's get started with the tutorial!
! [Spanish Version Here]
Cuenta la leyenda que si de espaldas lanzas una moneda y cae al pozo se te concederá un deseo.¡Hola amigos y amigas amantes de las manualidades y el arte! Para mi siempre es un placer poder compartir con ustedes un nuevo tutorial. El día de hoy les traigo una manualidad muy chula hecha con cartón reciclado y fomi. Como habrán notado, hoy estaremos confeccionando un pozo de los deseos para que todos sus deseos se cumplan. Así que sin más preámbulos, ¡comencemos con el tutorial!
 |
 |
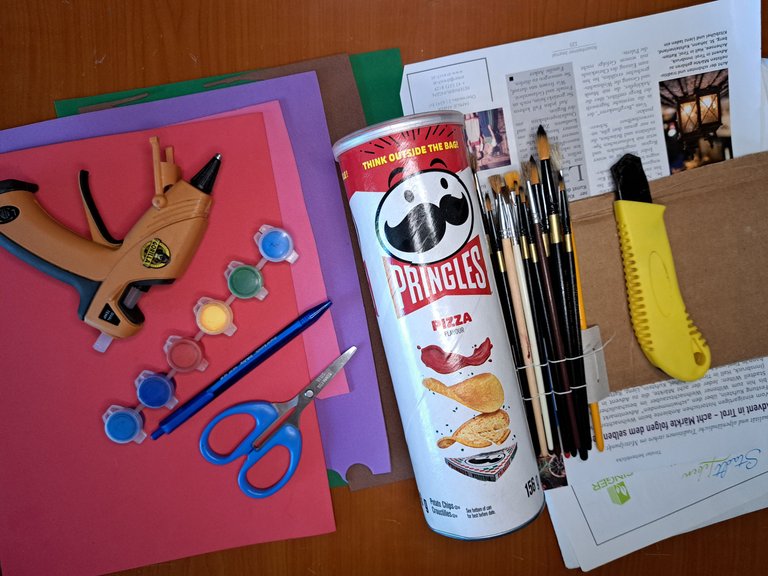
Materials // Materiales
| ✔️ Medium container (Pringles container) | ✔️ Recipiente mediano (Envase de Pringles) |
| ✔️ Smooth fomi in red, lilac, brown, and green colors | ✔️ Fomi liso de color rojo, lila, carmelita y verde |
| ✔️ Scissors and cutter | ✔️ Tijeras y cúter |
| ✔️ Brushes and marker | ✔️ Pinceles y marcador |
| ✔️ Green, red, light brown, and dark brown paint | ✔️ Pintura verde, rojo, carmelita claro y carmelita oscuro |
| ✔️ Recycled cardboard | ✔️ Cartón reciclado |
| ✔️ Magazine sheets | ✔️ Hojas de revista |
| ✔️ Silicone gun | ✔️ Pistola de silicona |
Step by step // Paso a paso
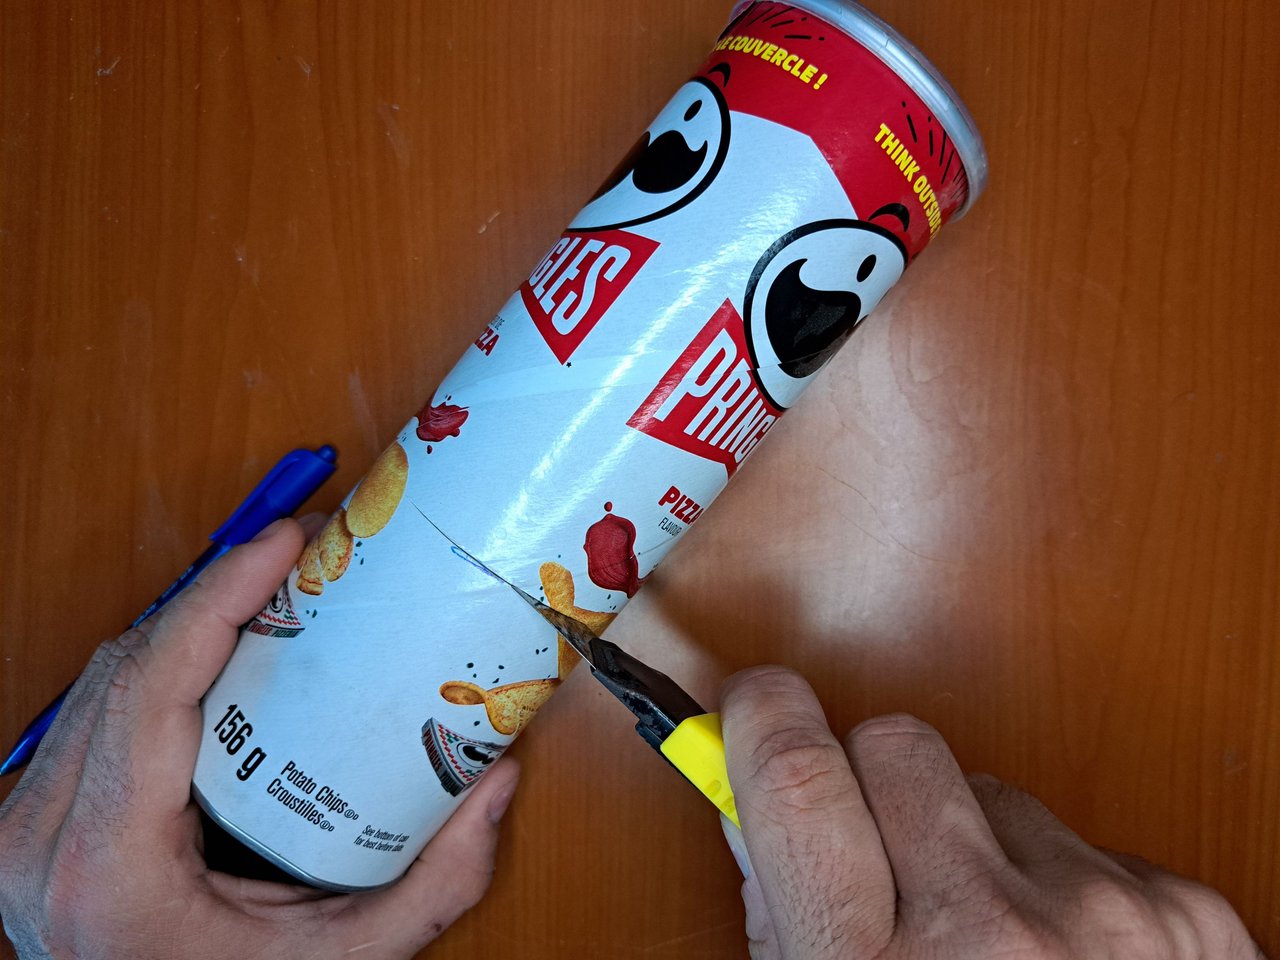
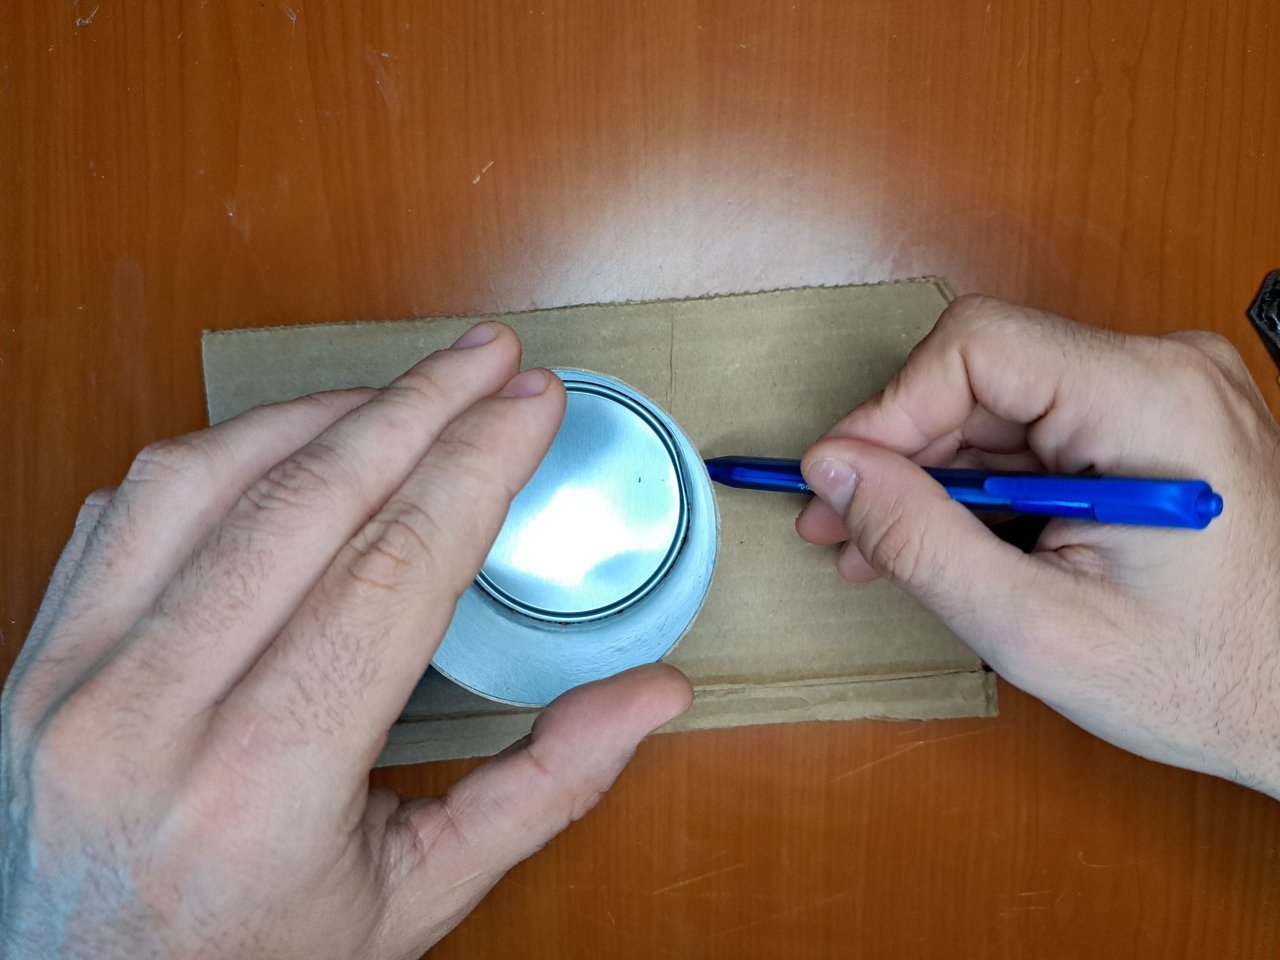
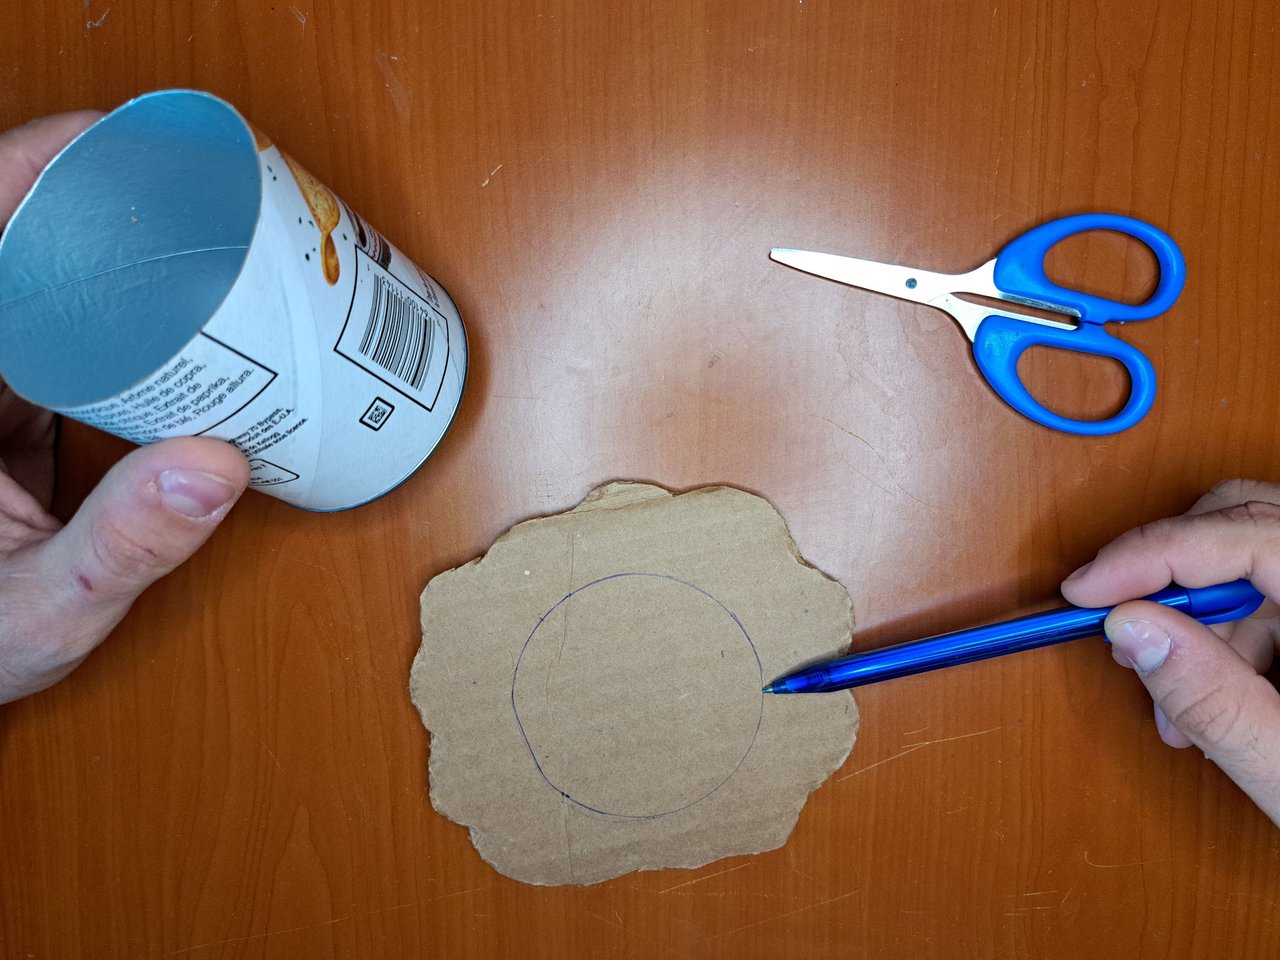
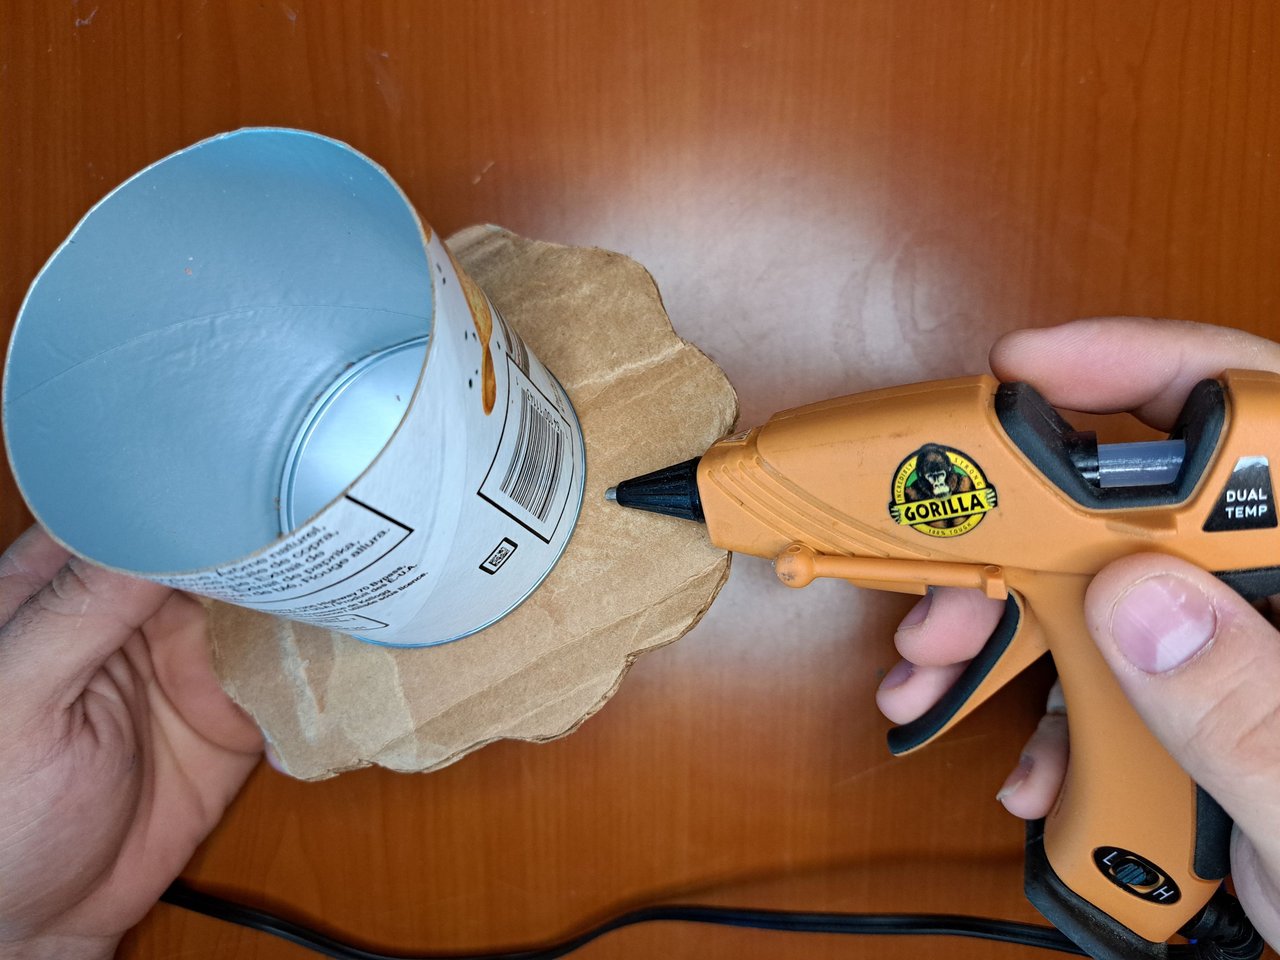
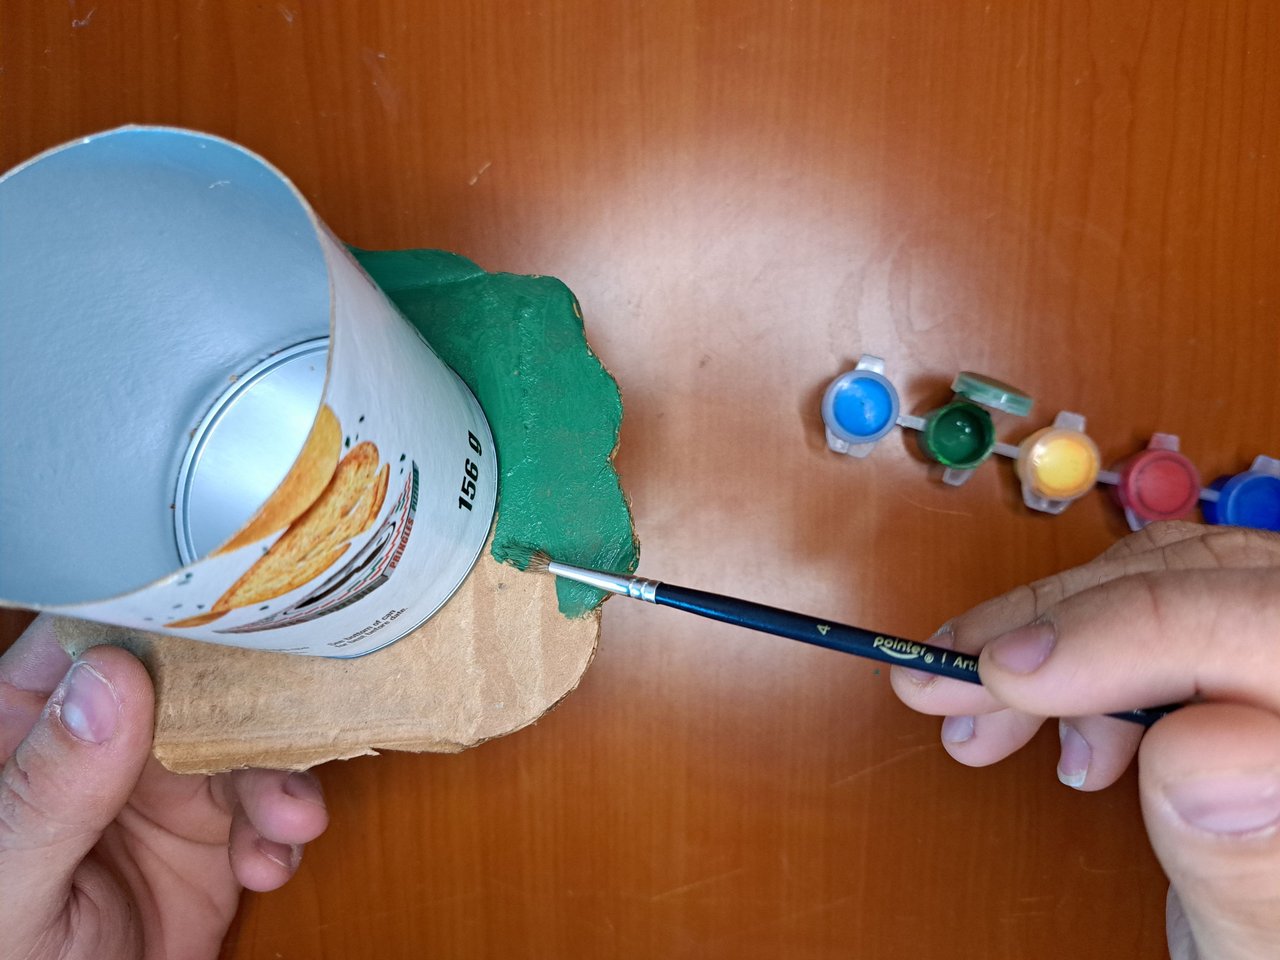
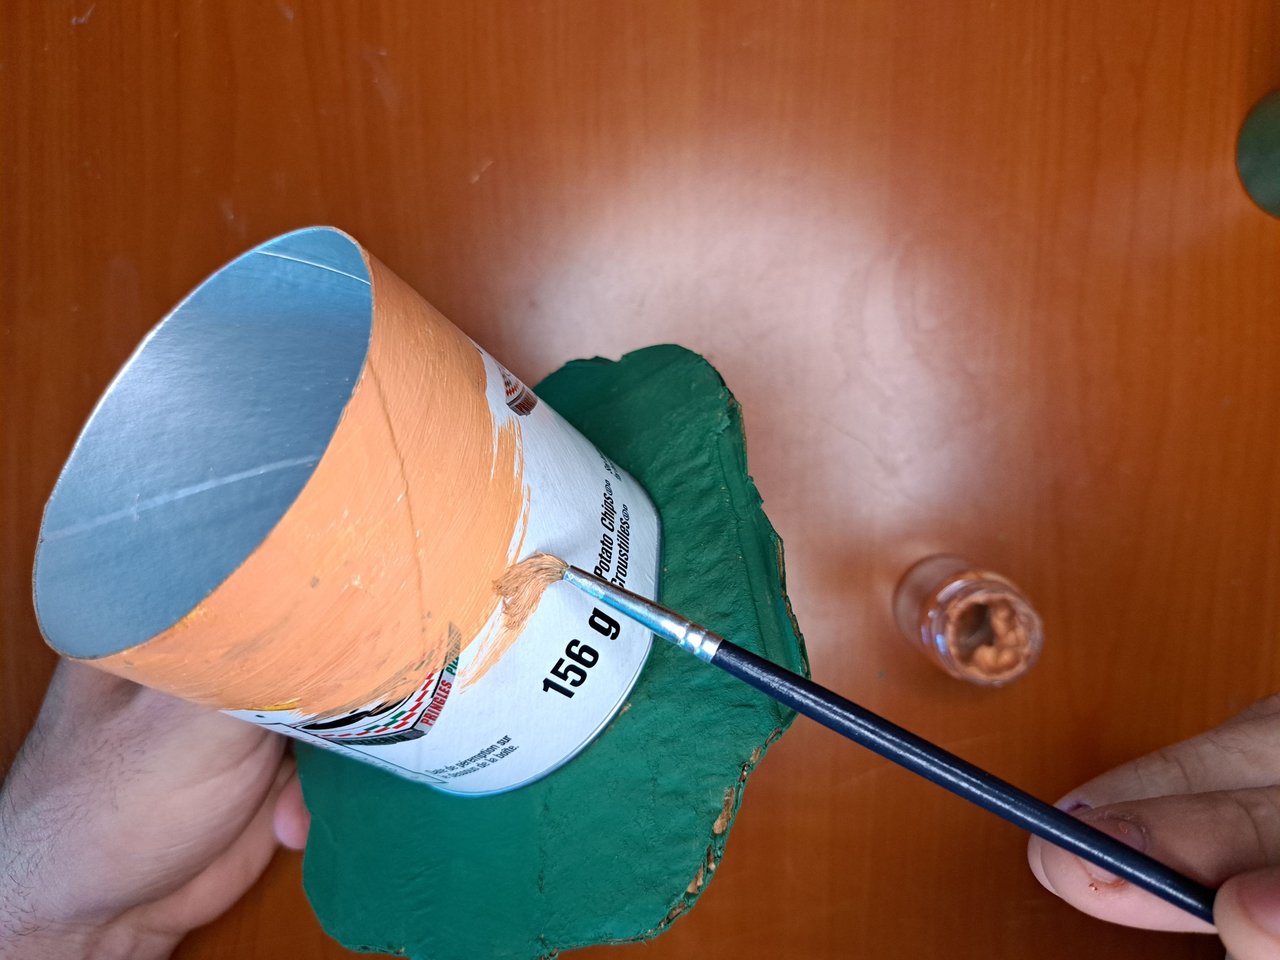
1️⃣ We start the tutorial by cutting a Pringles container to a height of approximately 3 fingers. After cutting the container, we mark the bottom part on a piece of cardboard and cut out the outside of the container, making ripples. After cutting out the cardboard, we glue it to the container and paint both the container and the cardboard light brown and green respectively.
! [Spanish Version Here]
1️⃣ Comenzamos el tutorial cortando un envase de Pringles a una altura aproximada de 3 dedos. Luego de cortar el envase, marcamos su parte inferior en un cartón y recortamos por el exterior haciendo ondulaciones. Después de recortar el cartón, lo pegamos al envase y pintamos tanto el envase como el cartón de color marrón claro y verde respectivamente.
 |
 |
 |
 |
 |
 |
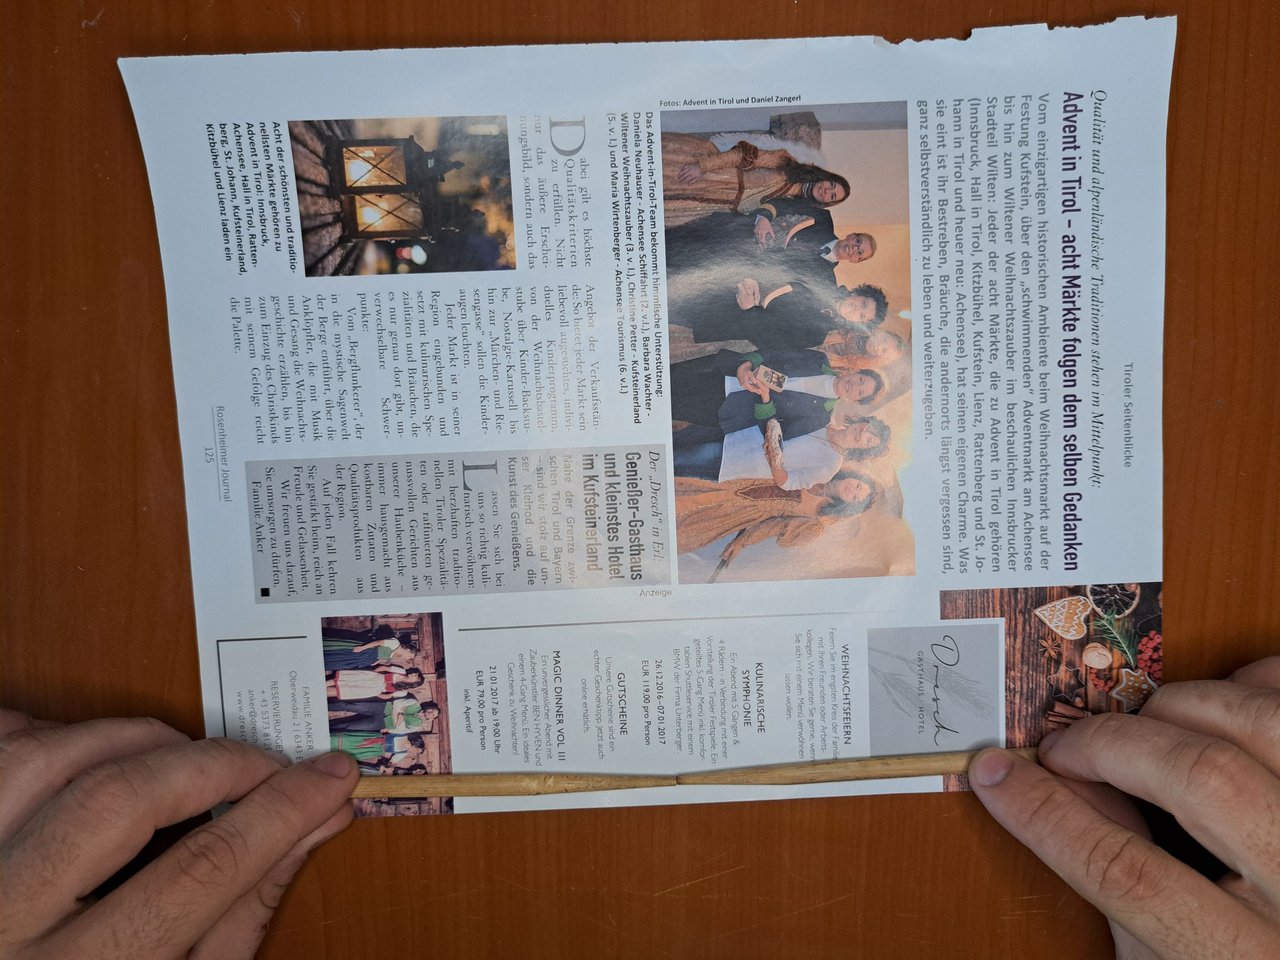
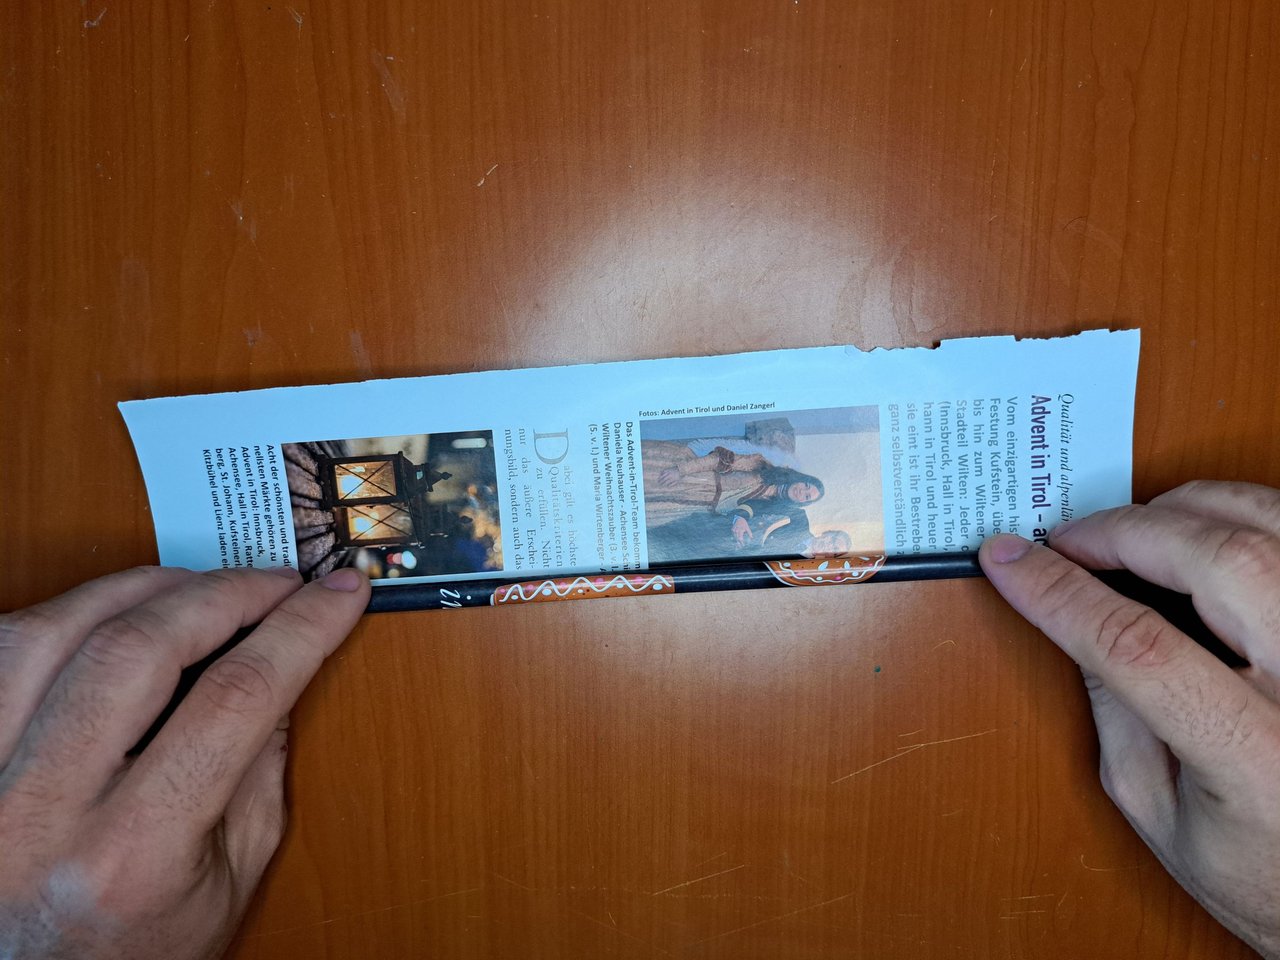
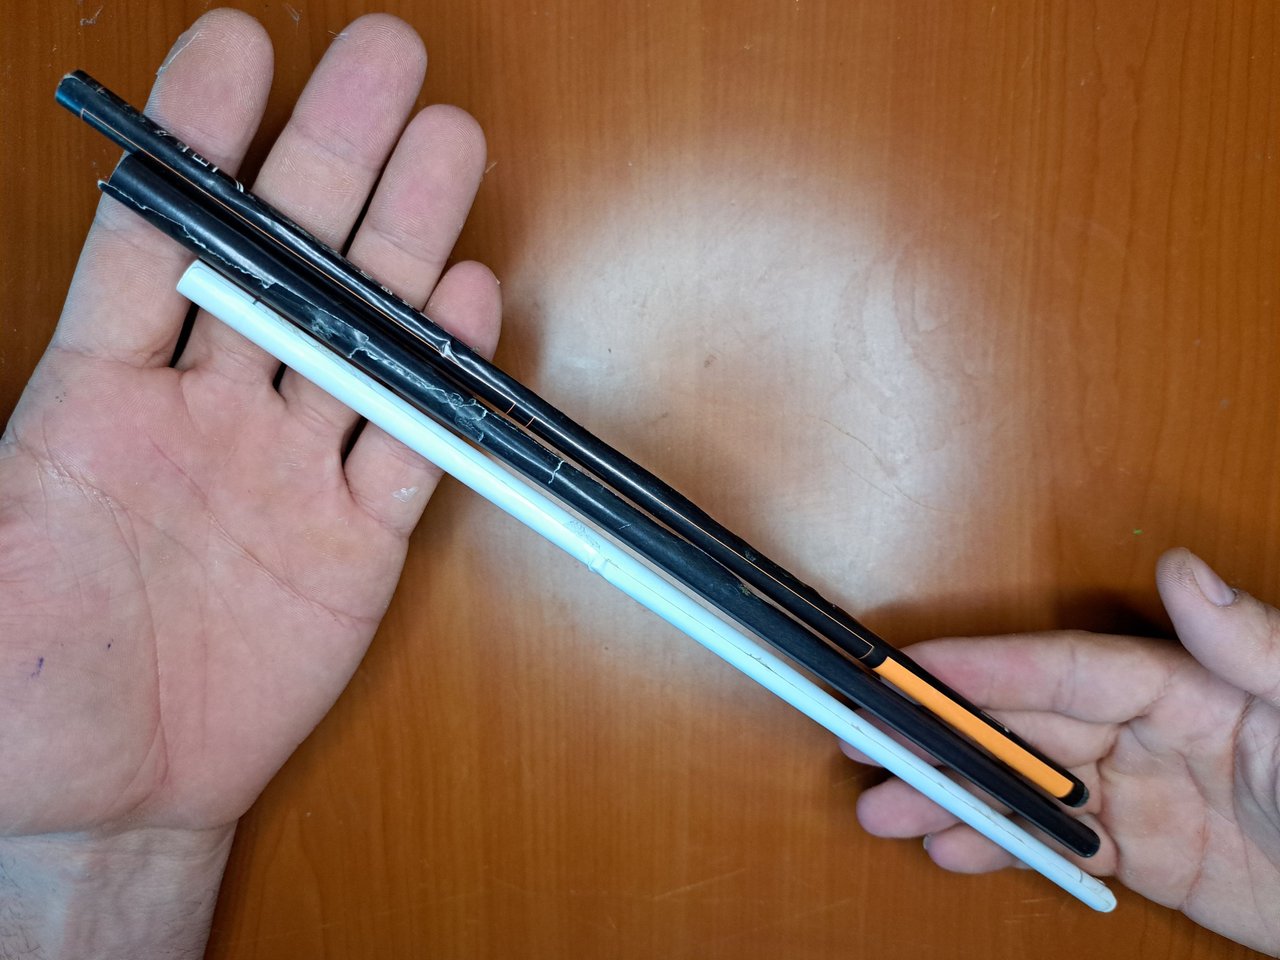
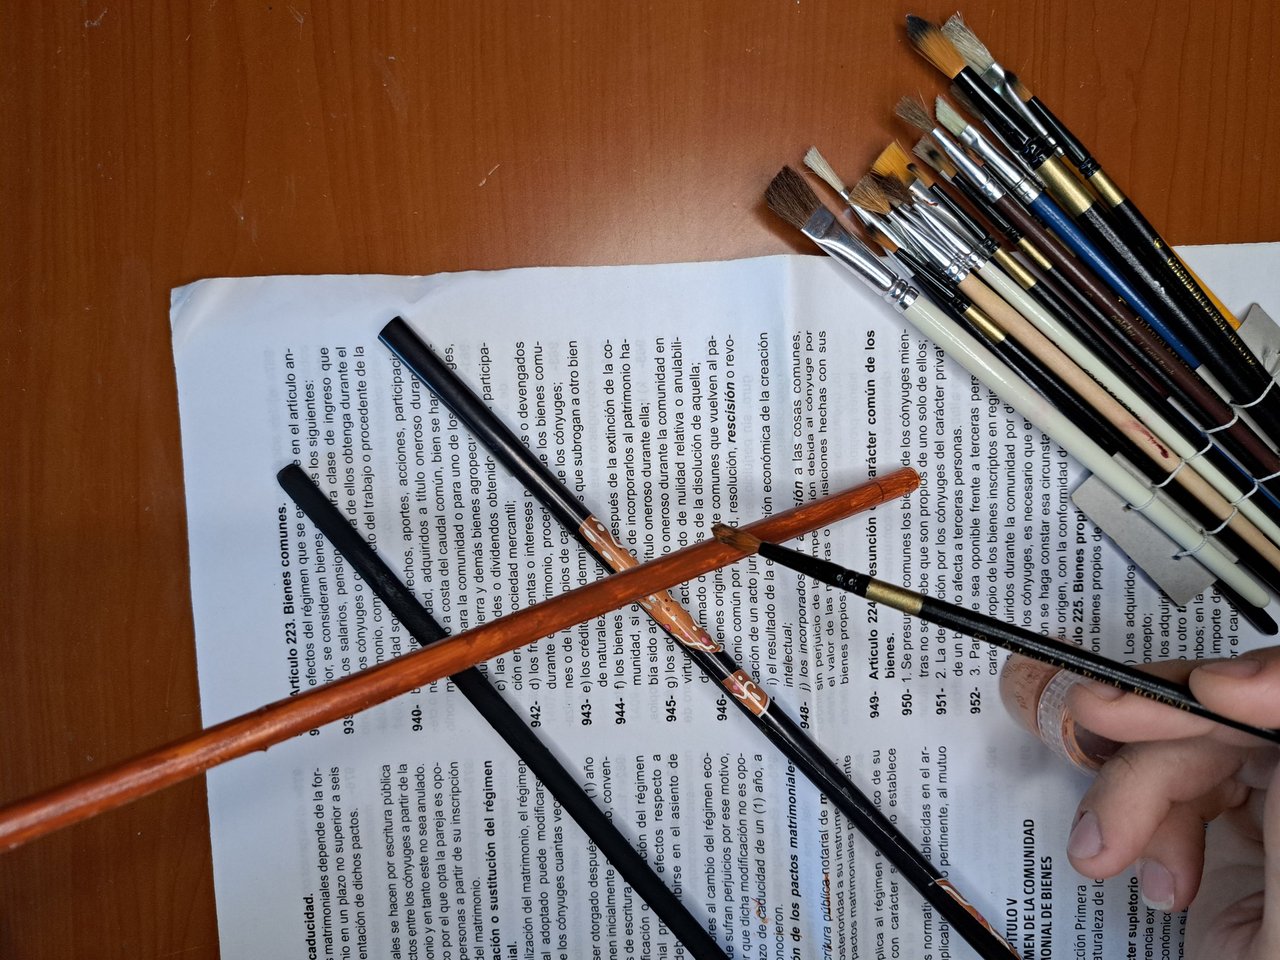
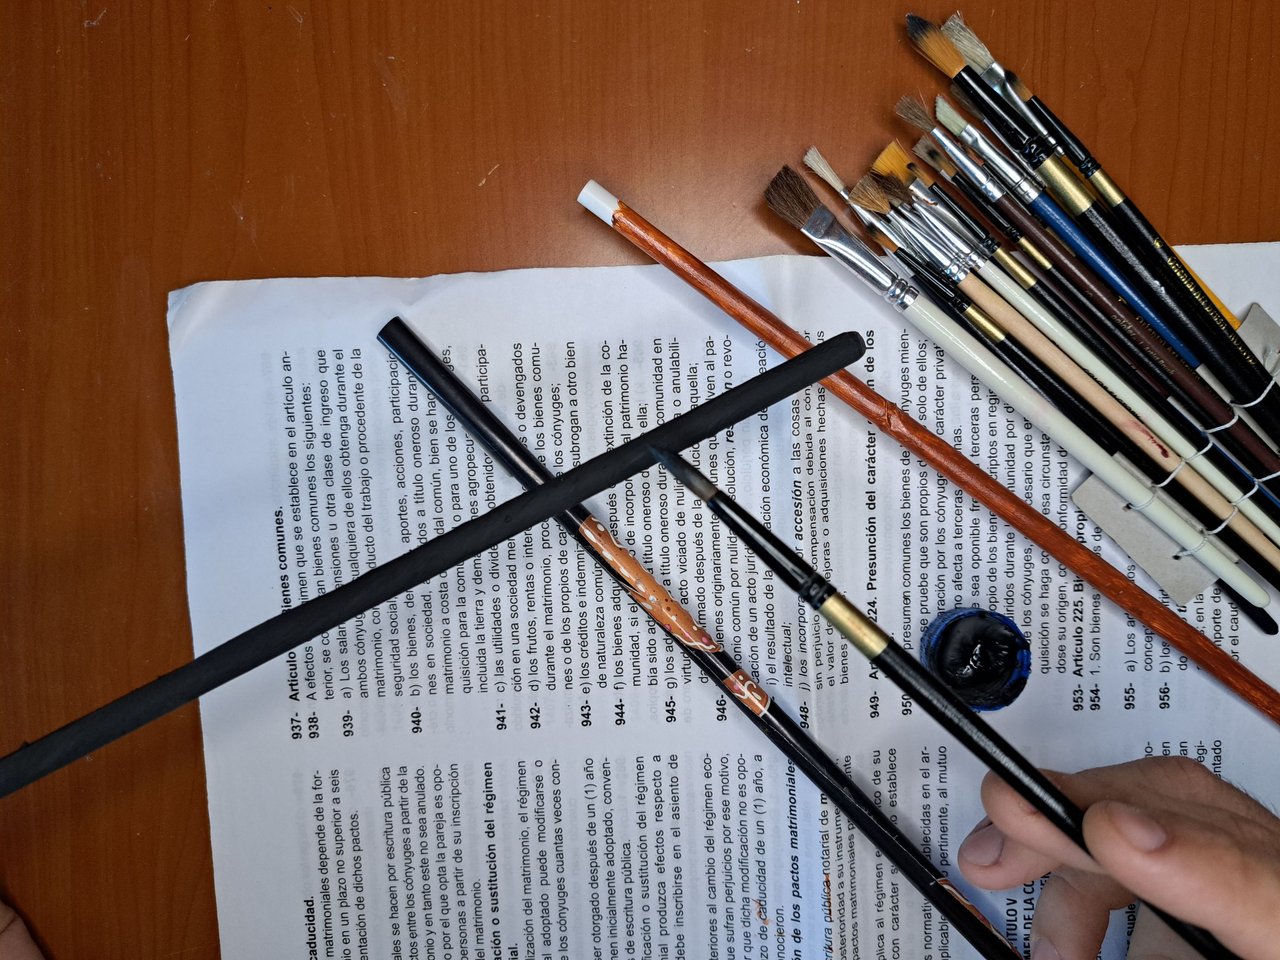
2️⃣ Then we roll and glue some magazine sheets to form thin and long canes. We will use a total of three canes, so we will paint some of them in dark brown and the others in black.
! [Spanish Version Here]
2️⃣ Luego enrollamos y pegamos unas hojas de revista para formar unos bastones finos y largos. En total utilizaremos tres bastones por lo cual pintaremos unos de carmelita oscuro y los demás de color negro.
 |
 |
 |
 |
 |
 |
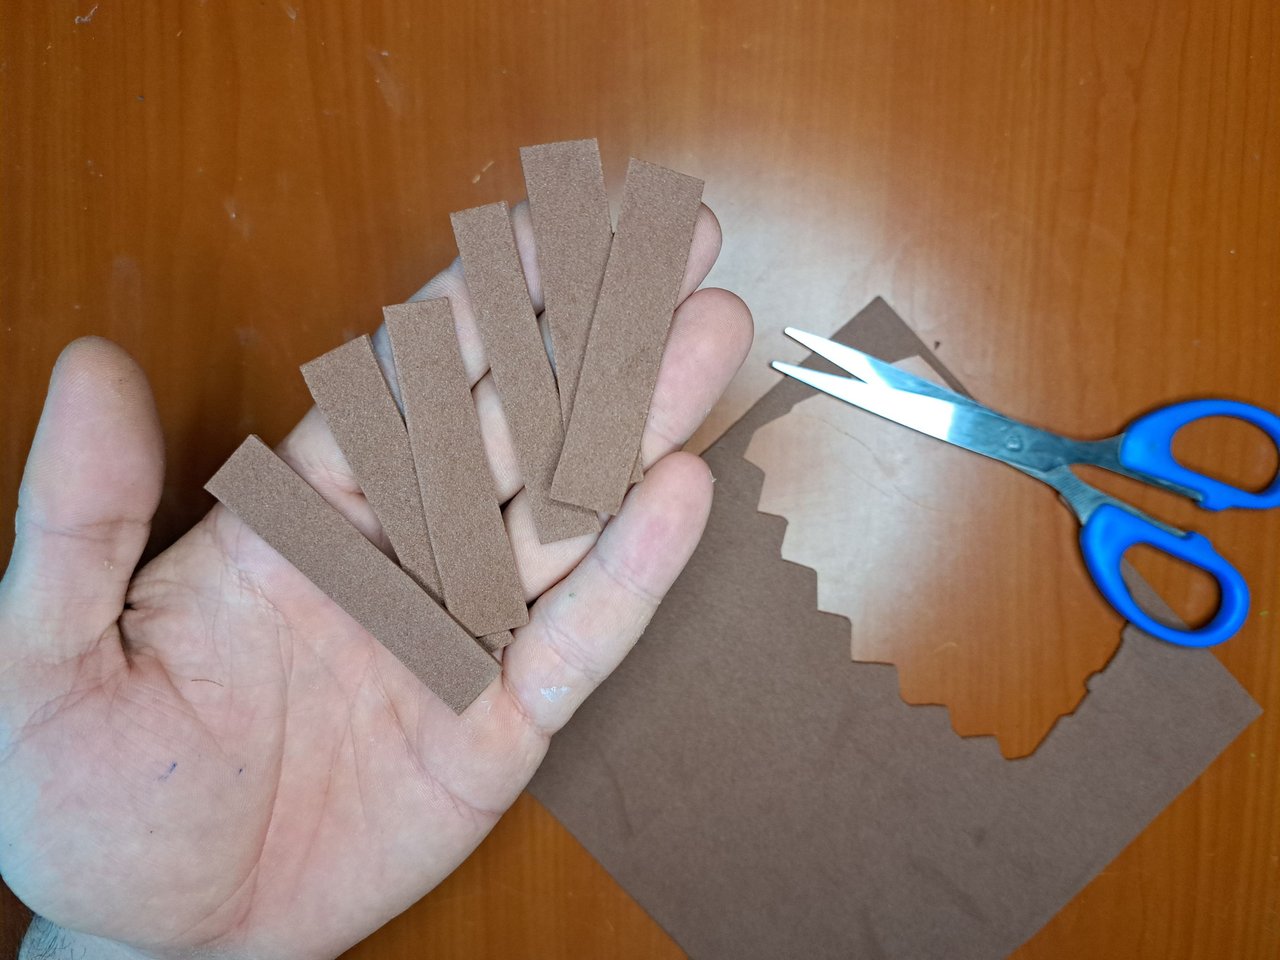
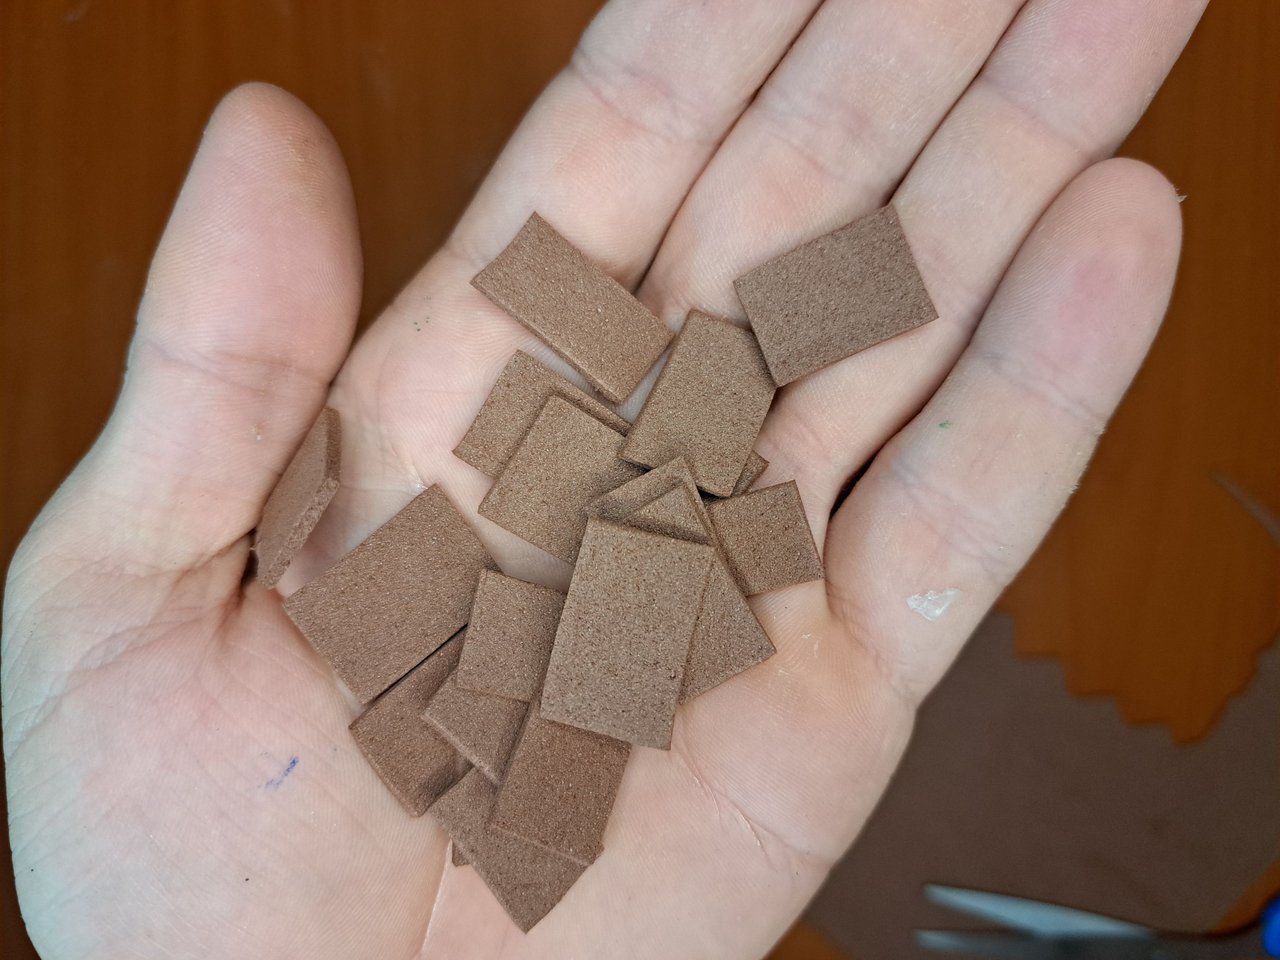
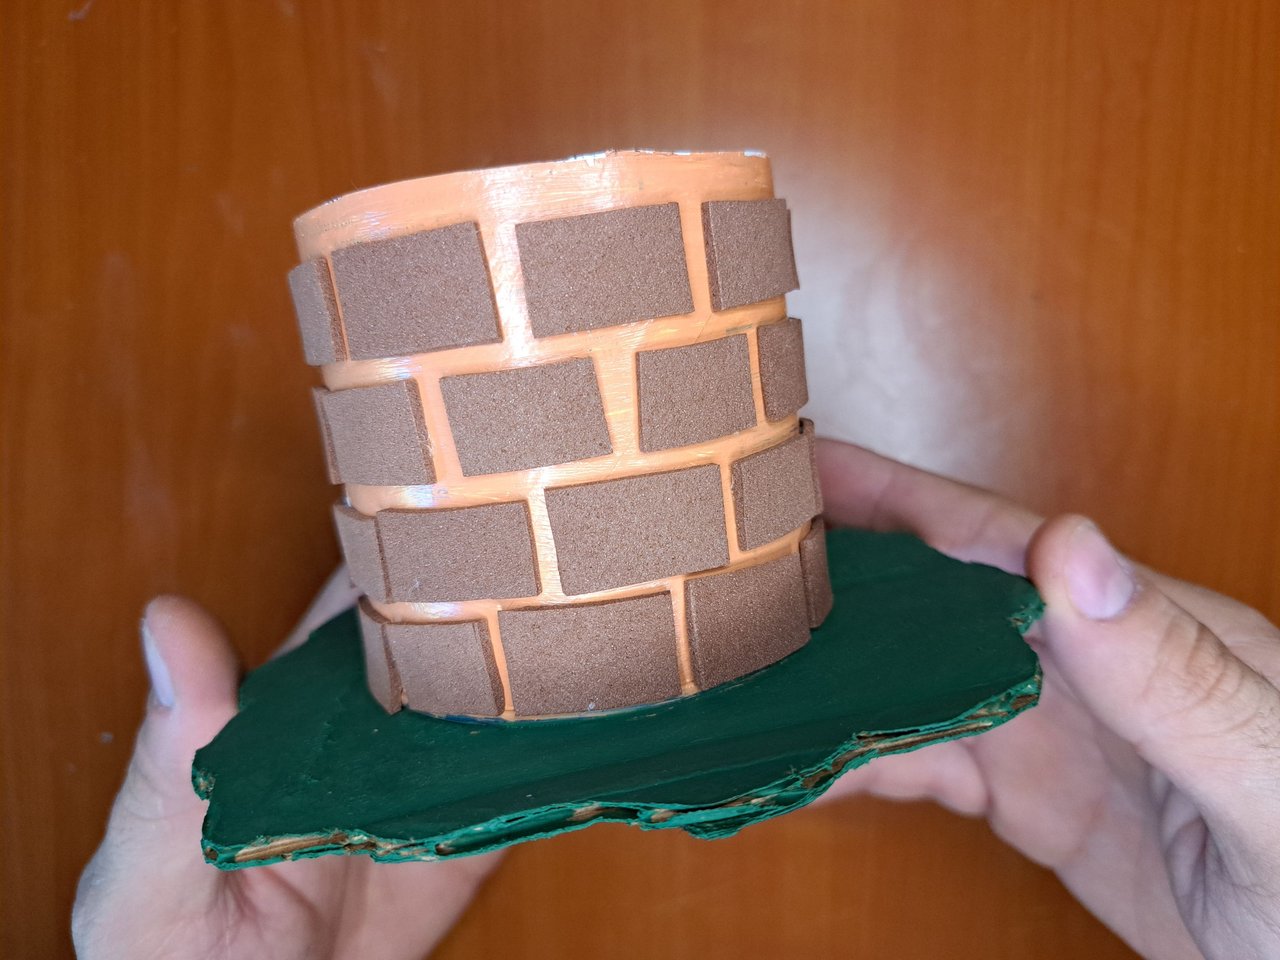
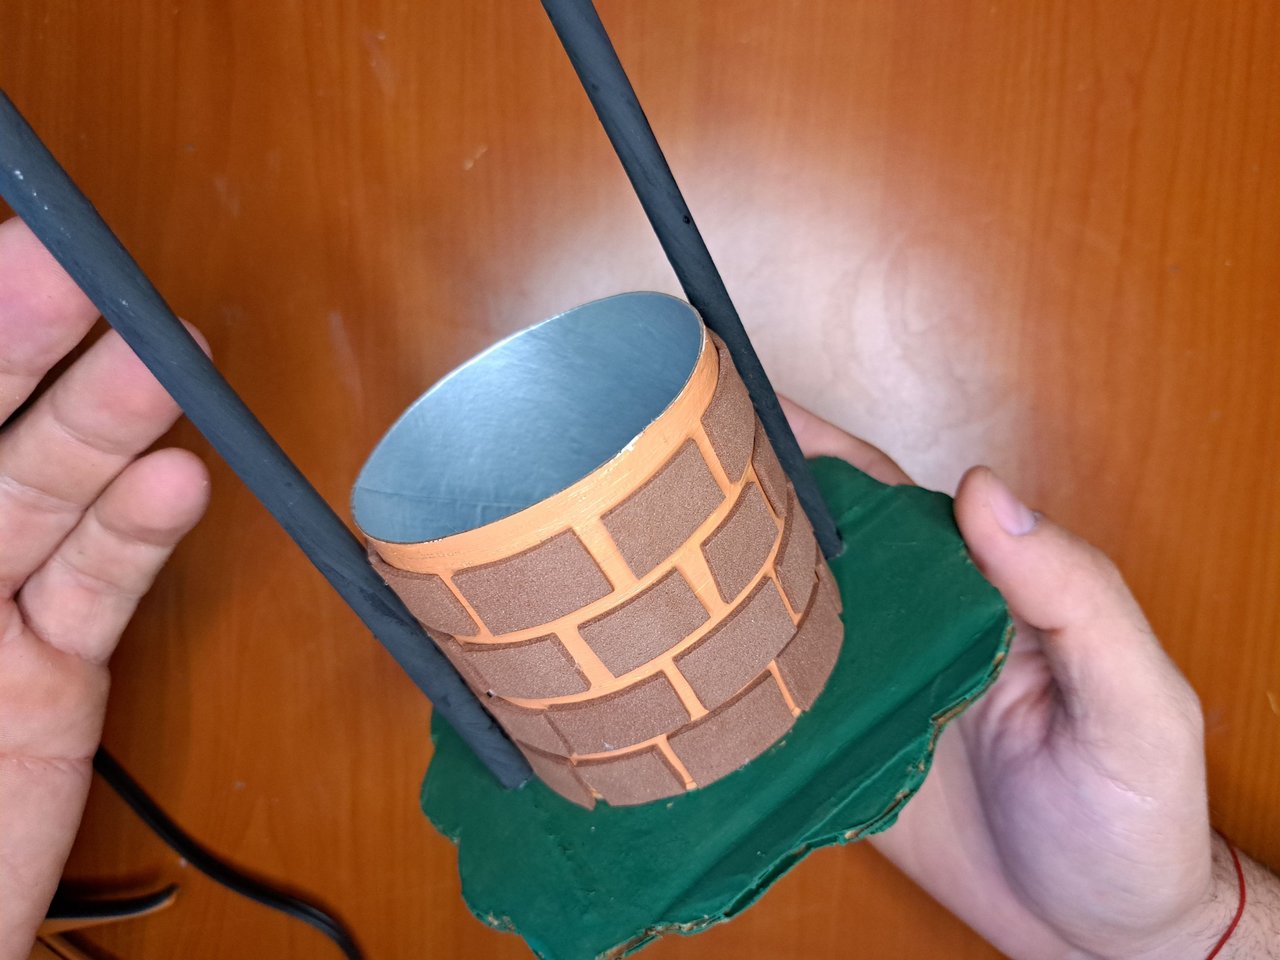
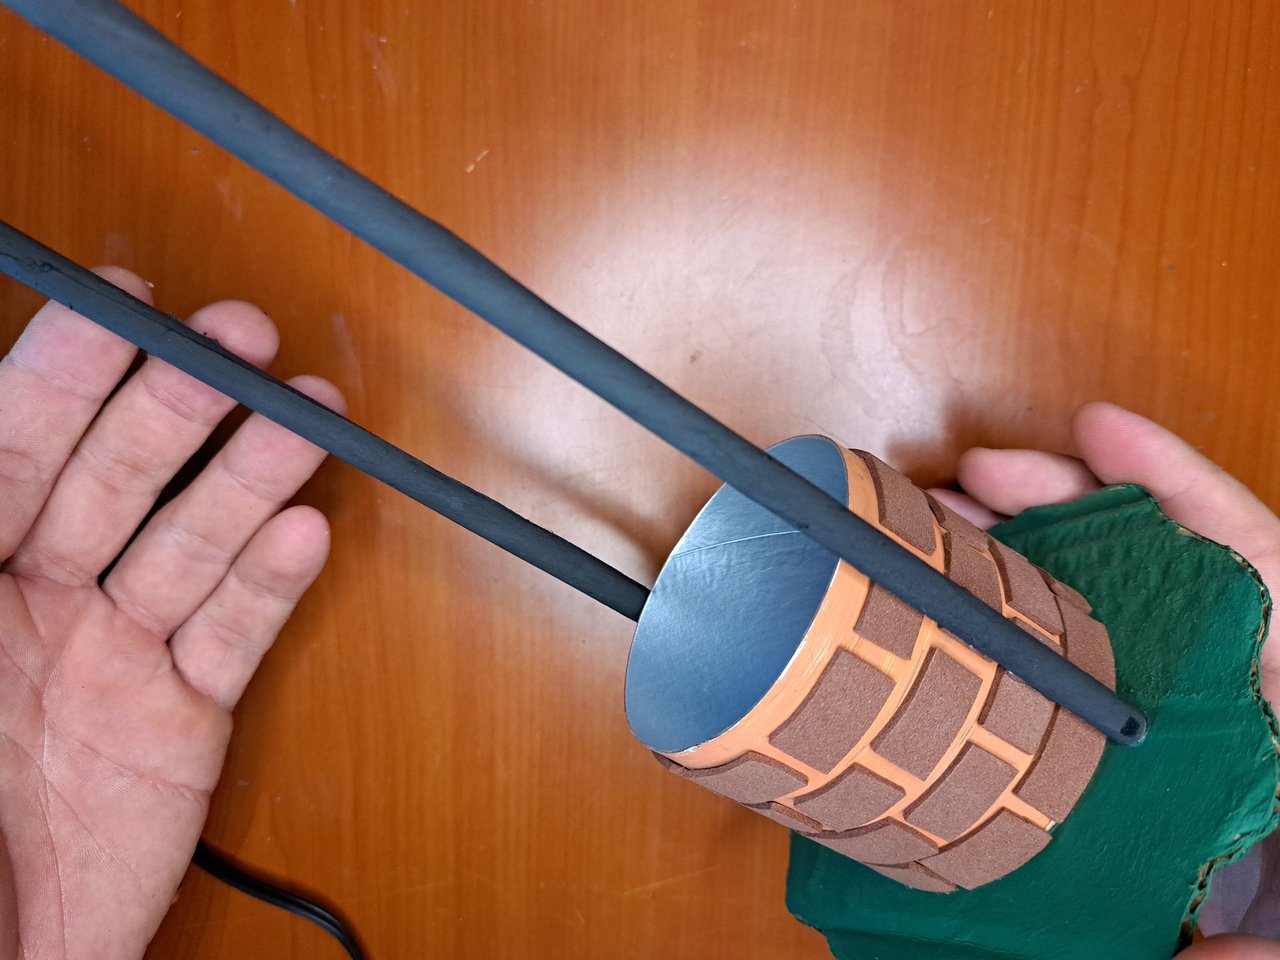
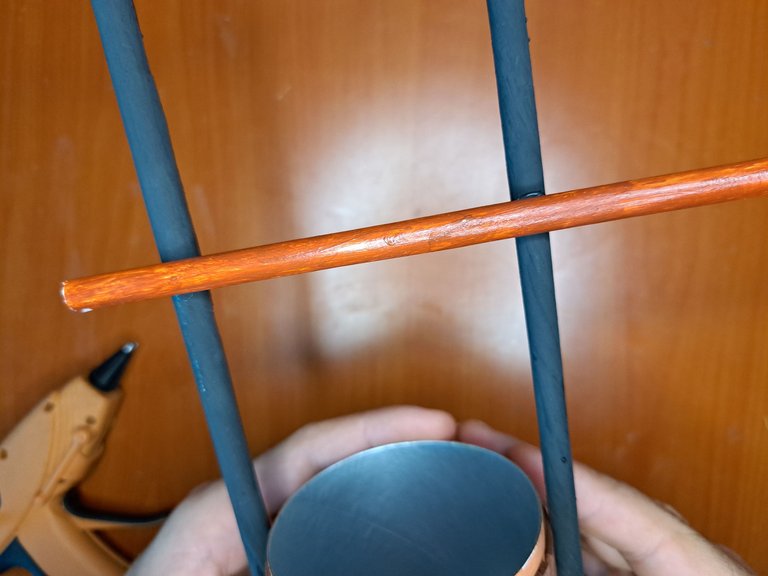
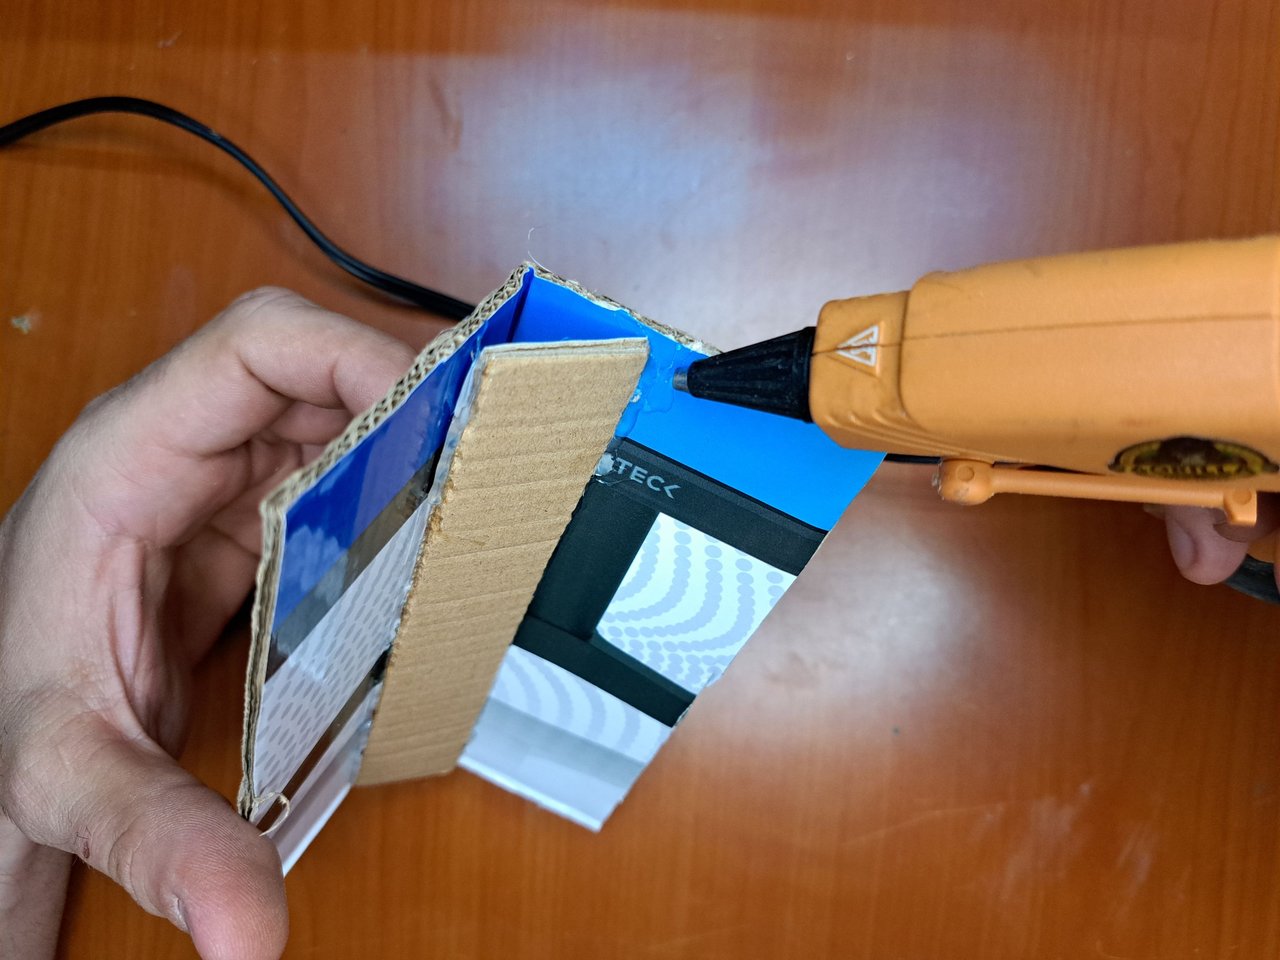
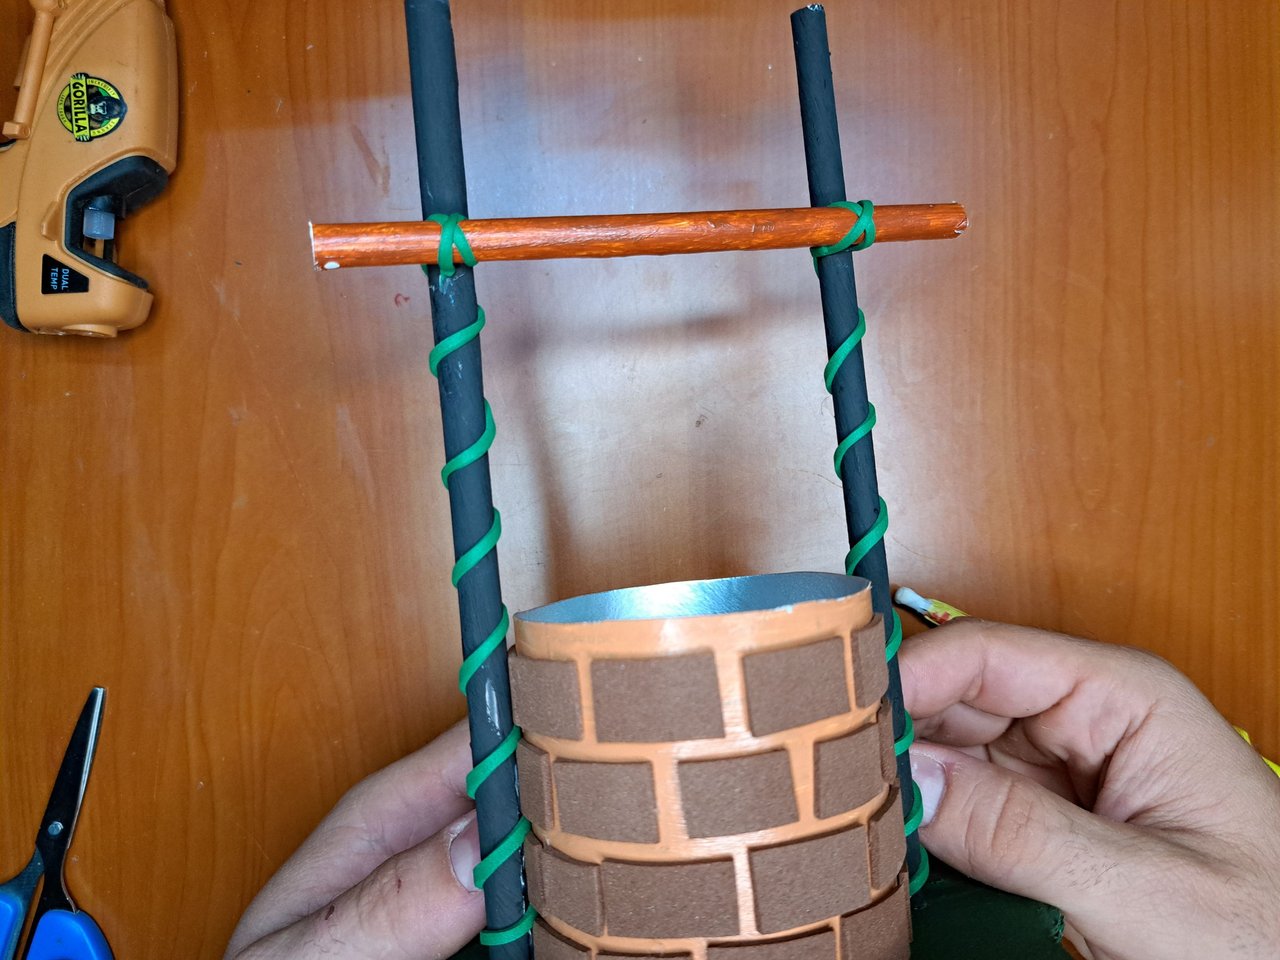
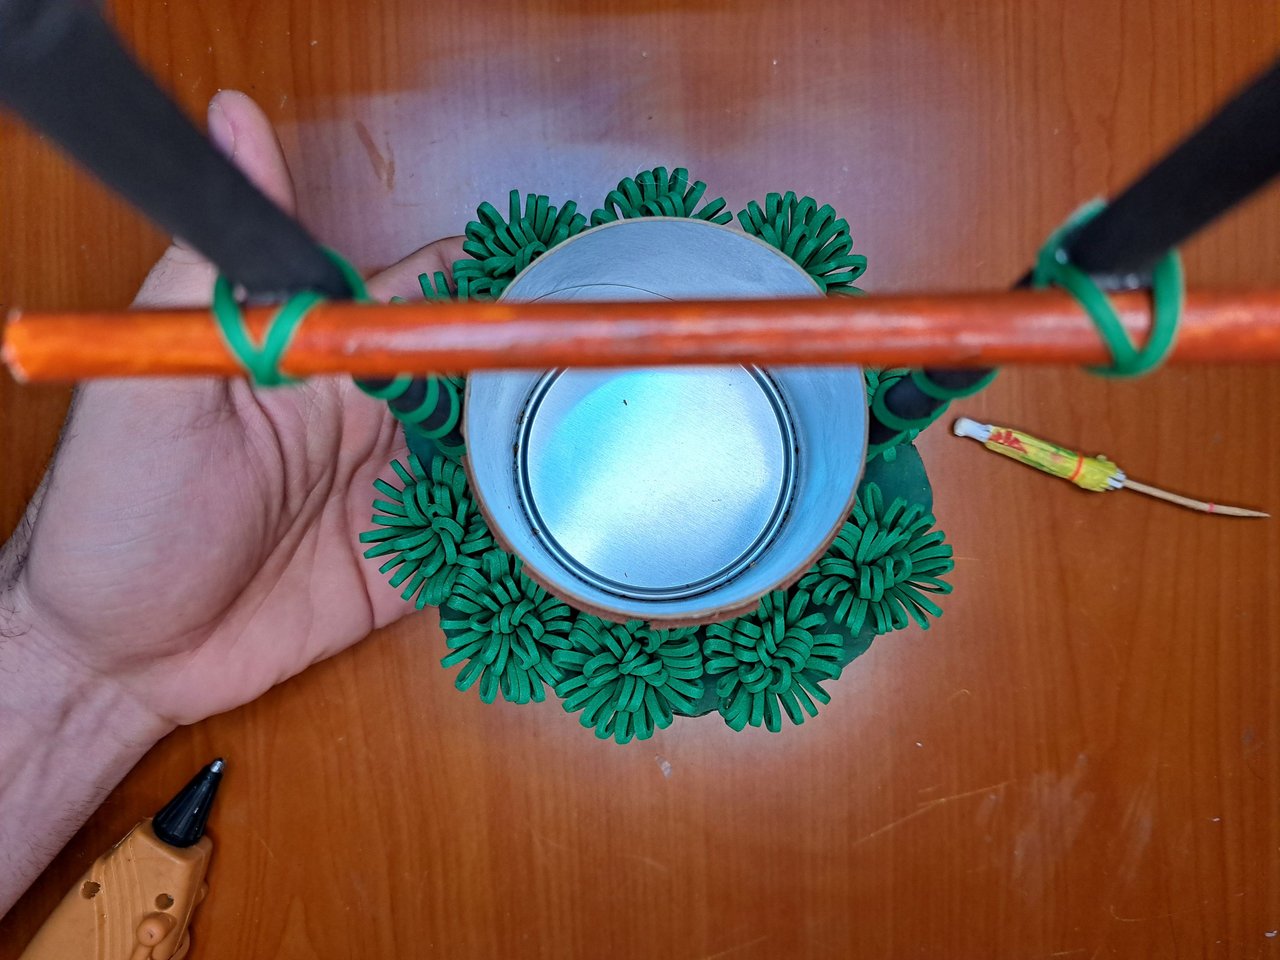
3️⃣ Next, we cut out small rectangles of carmelite-colored fomi and glue them around the painted container as if they were bricks. Next, we glue the black canes on each side of the container and on the top we glue the carmelite cane perpendicularly to the black canes.
! [Spanish Version Here]
3️⃣ A continuación, recortamos pequeños rectángulos de fomi color carmelita y los pegamos alrededor del envase pintado como si fueran ladrillos. Seguidamente, pegamos los bastones negros a cada lado del envase y en la parte superior pegamos el bastón carmelita perpendicularmente a los bastones negros.
 |
 |
 |
 |
 |
 |
 |
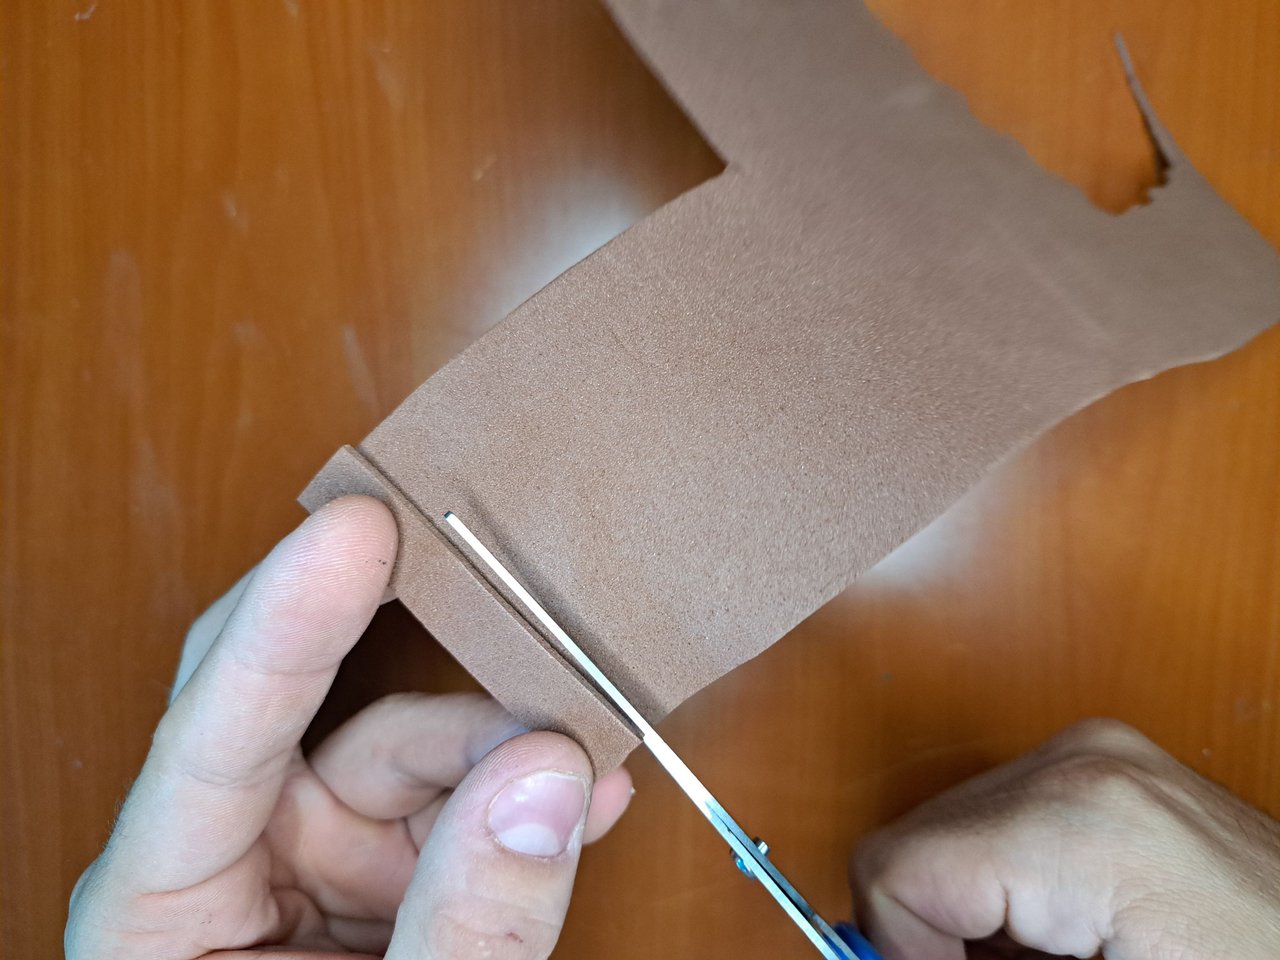
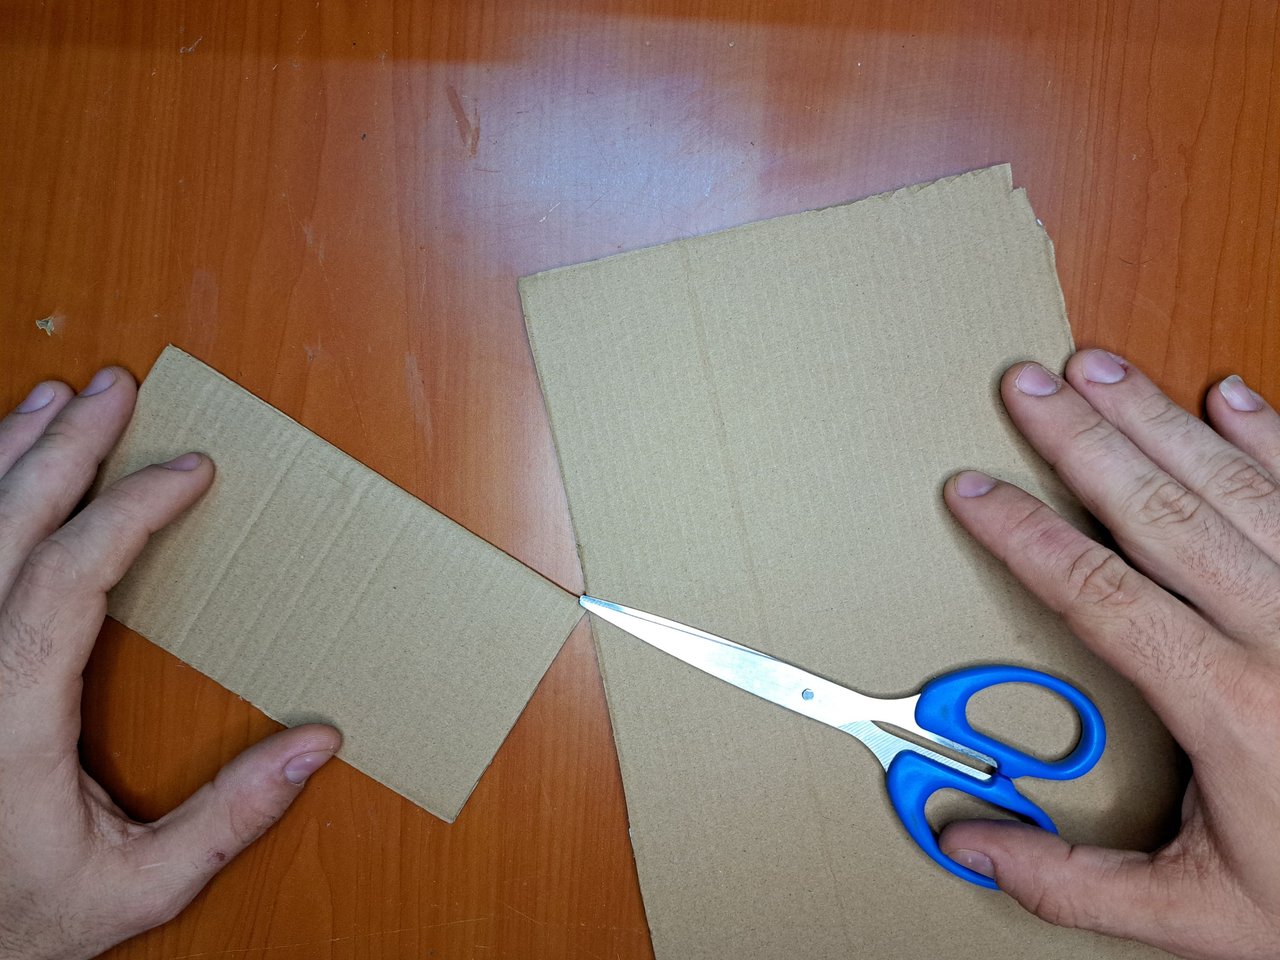
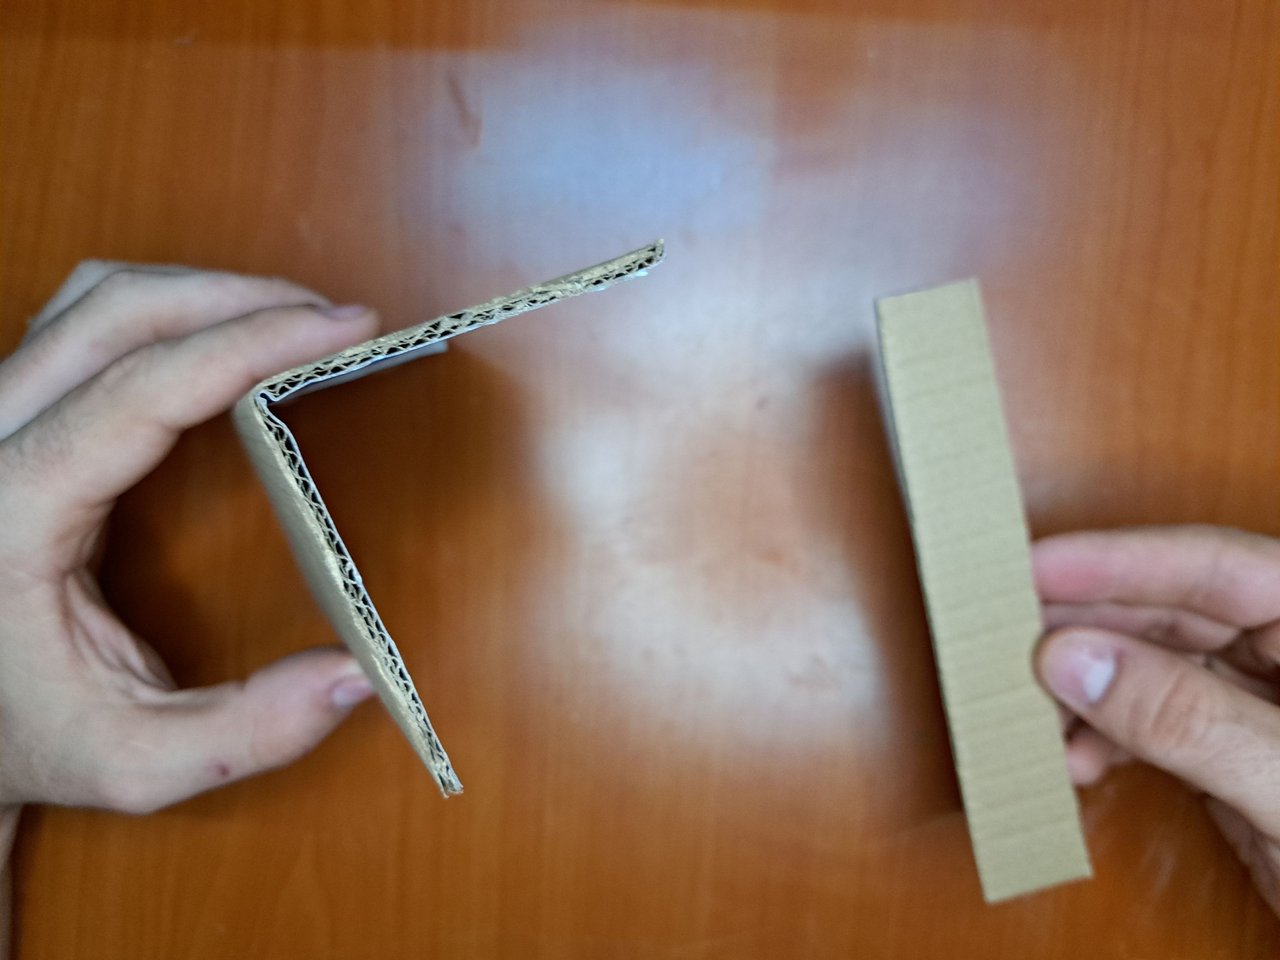
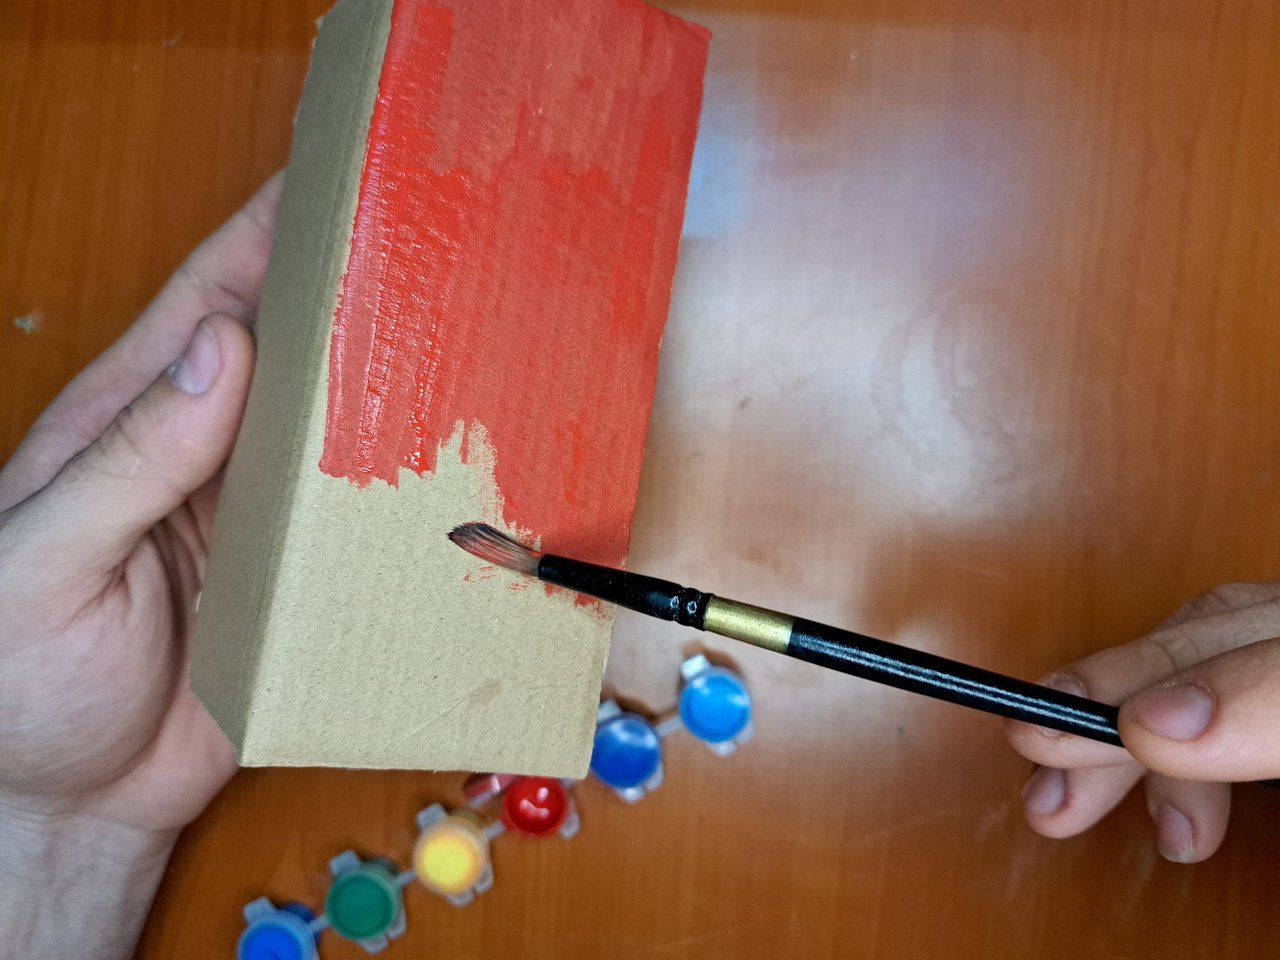
4️⃣ Now we move on to the ceiling, for which we cut out a strip of cardboard a little longer than the distance separating the black sticks. Then we cut out another piece of cardboard and fold it in half. In the middle of the fold we glue the cardboard strip and paint the whole thing red. The red paint will help camouflage the color of the cardboard once we glue the tiles.
! [Spanish Version Here]
4️⃣ Ahora pasamos al techo, para el cual recortaremos una tira de cartón un poco más larga que la distancia que separa a los bastones negros. Luego recortamos otra pieza de cartón y la doblamos a la mitad. En medio del doblez pegamos la tira de cartón y pintamos todo de rojo. La pintura roja ayudará a camuflar el color del cartón una vez peguemos las tejas.
 |
 |
 |  |
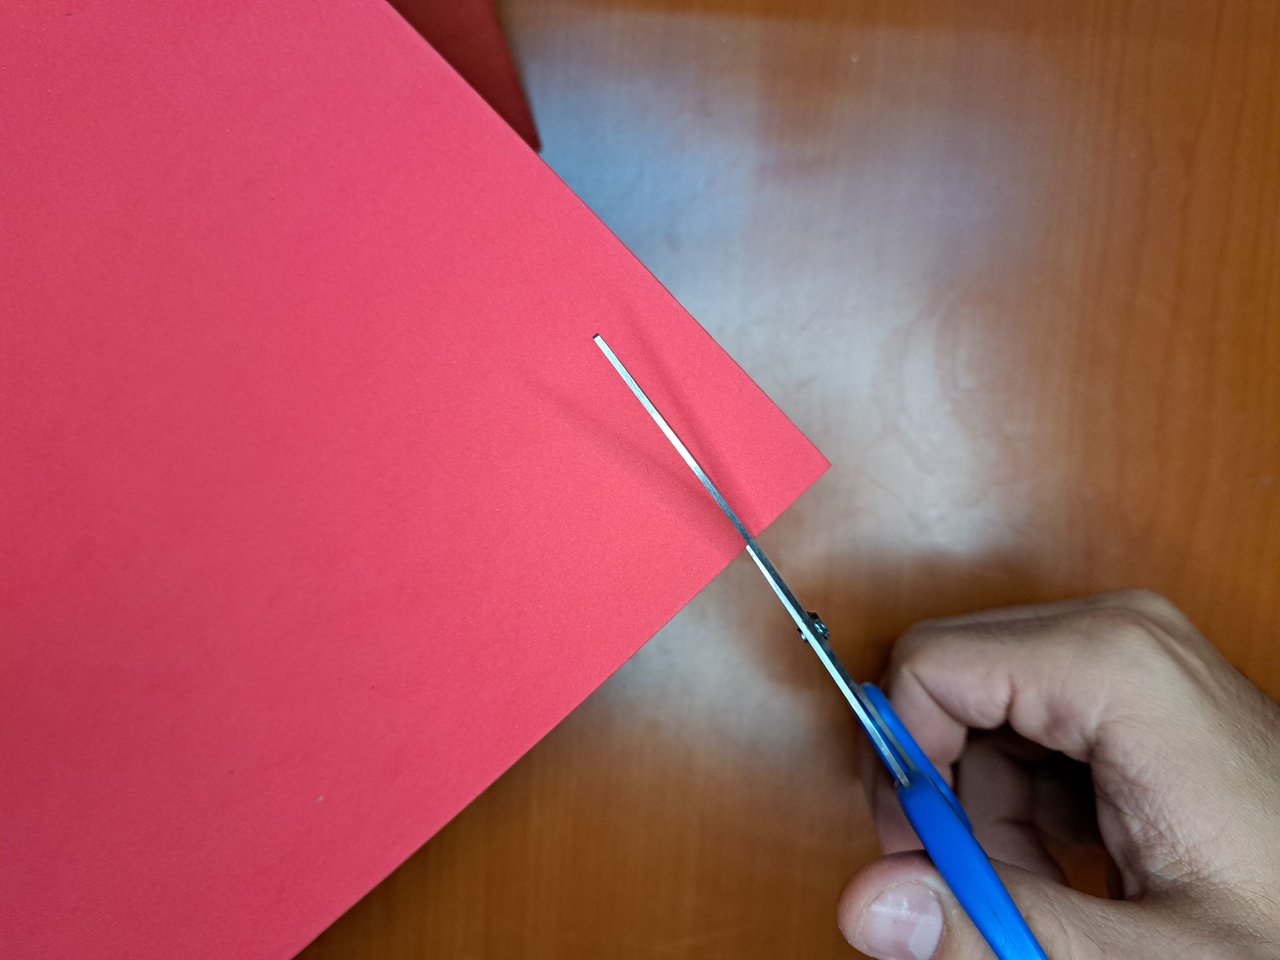
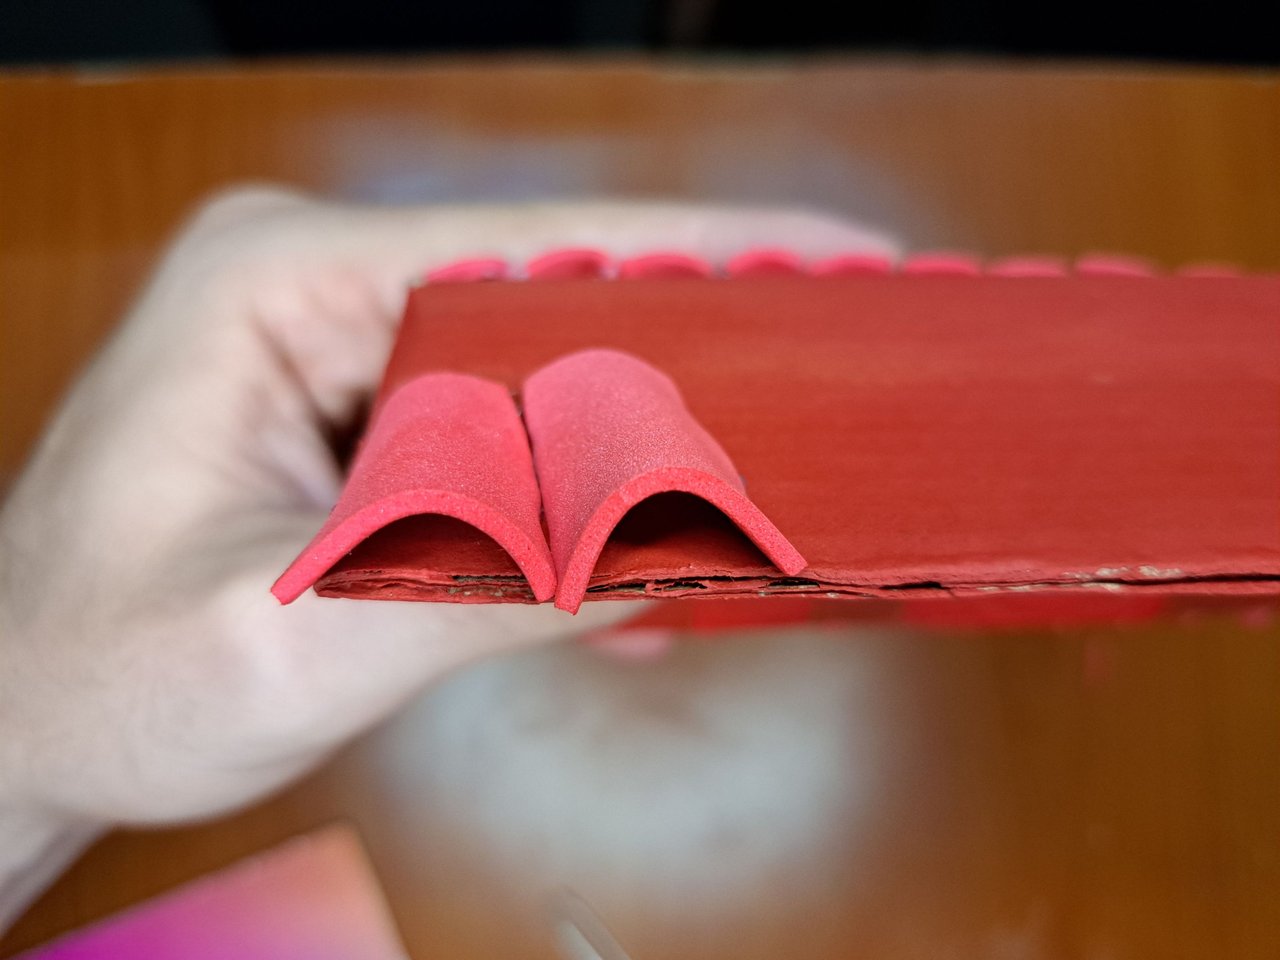
5️⃣ To complete the roof we will cut small pieces of red fomi, a little wider on one side than the other. We will glue each piece of fomi, one next to the other, but arched. Then, the second row will be mounted on top of the bottom of the tiles of the first row. To finish, we will glue a strip of red fomi on the top of the roof to cover the ridge area.
! [Spanish Version Here]
5️⃣ Para completar el techo cortaremos pequeñas piezas de fomi rojo, un poco más anchas de un lado que del otro. Pegaremos cada pieza de fomi, una al lado de otras, pero arqueadas. Luego, la segunda fila irá montada encima de la parte inferior de las tejas de la primera fila. Para terminar, pegaremos una tira de fomi rojo en la parte superior del techo para cubrir la zona del caballete.
 |
 |
 |
 |
 |
 |
 |
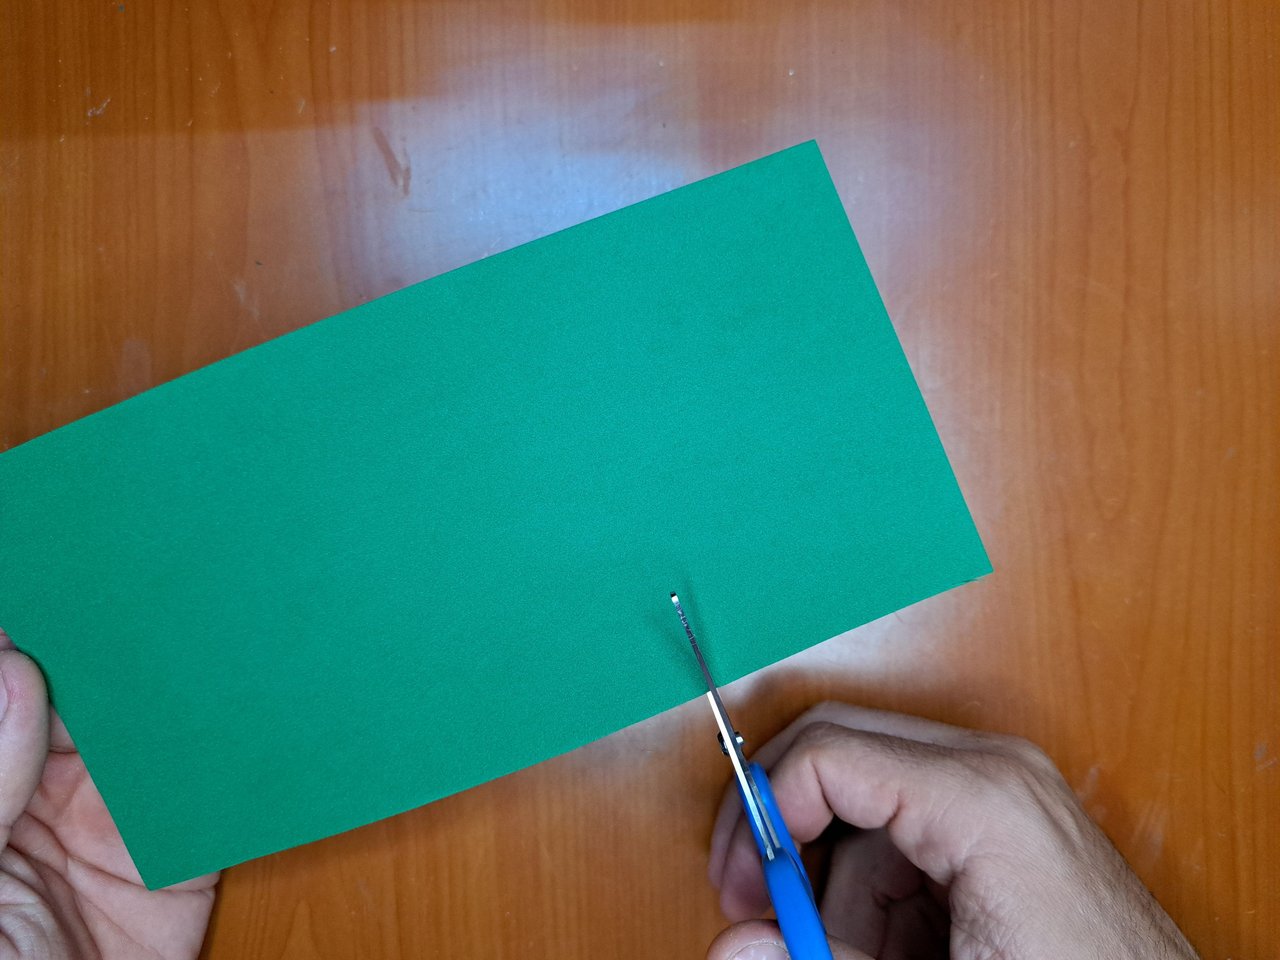
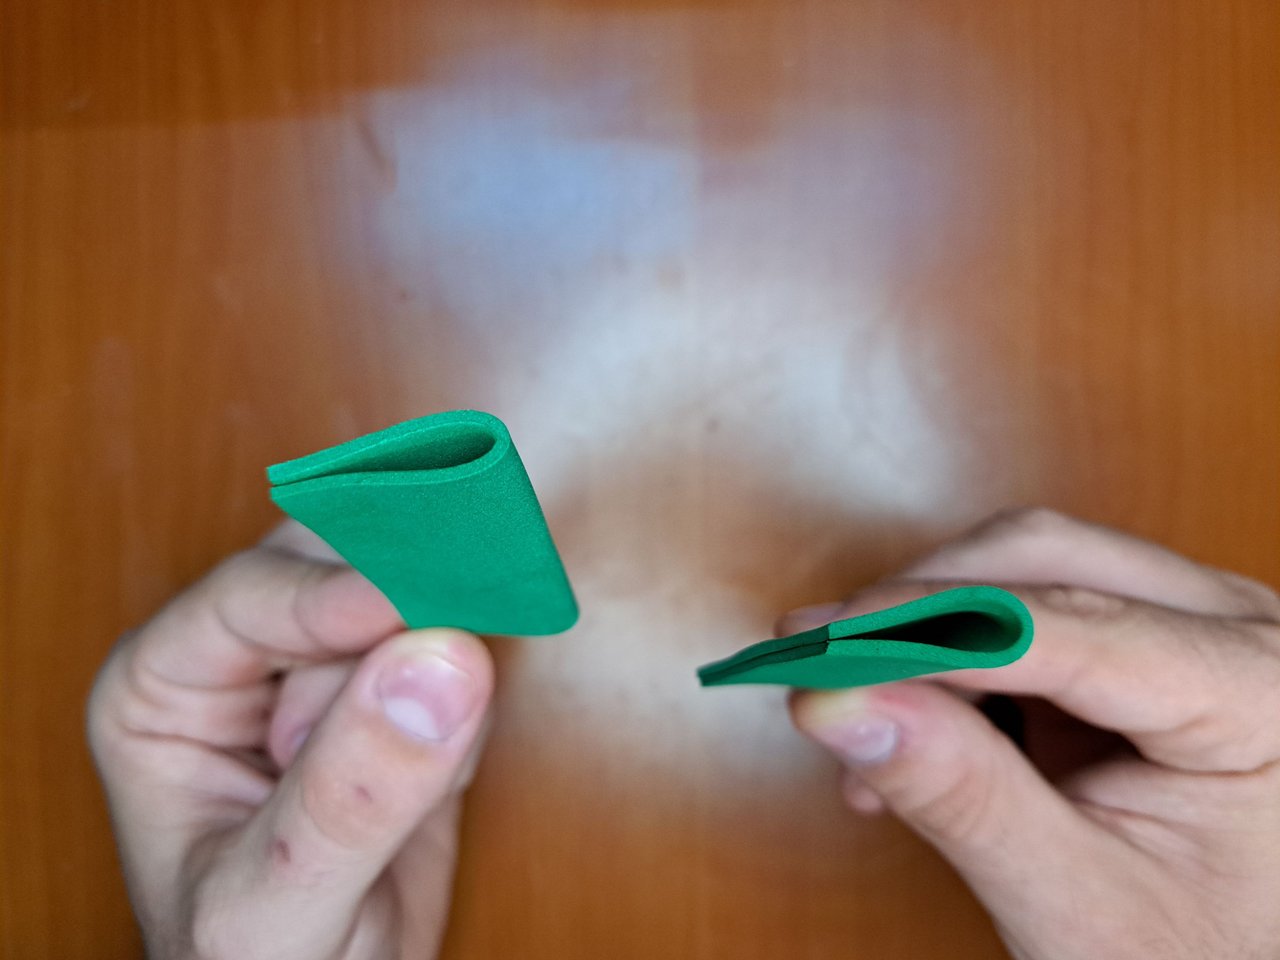
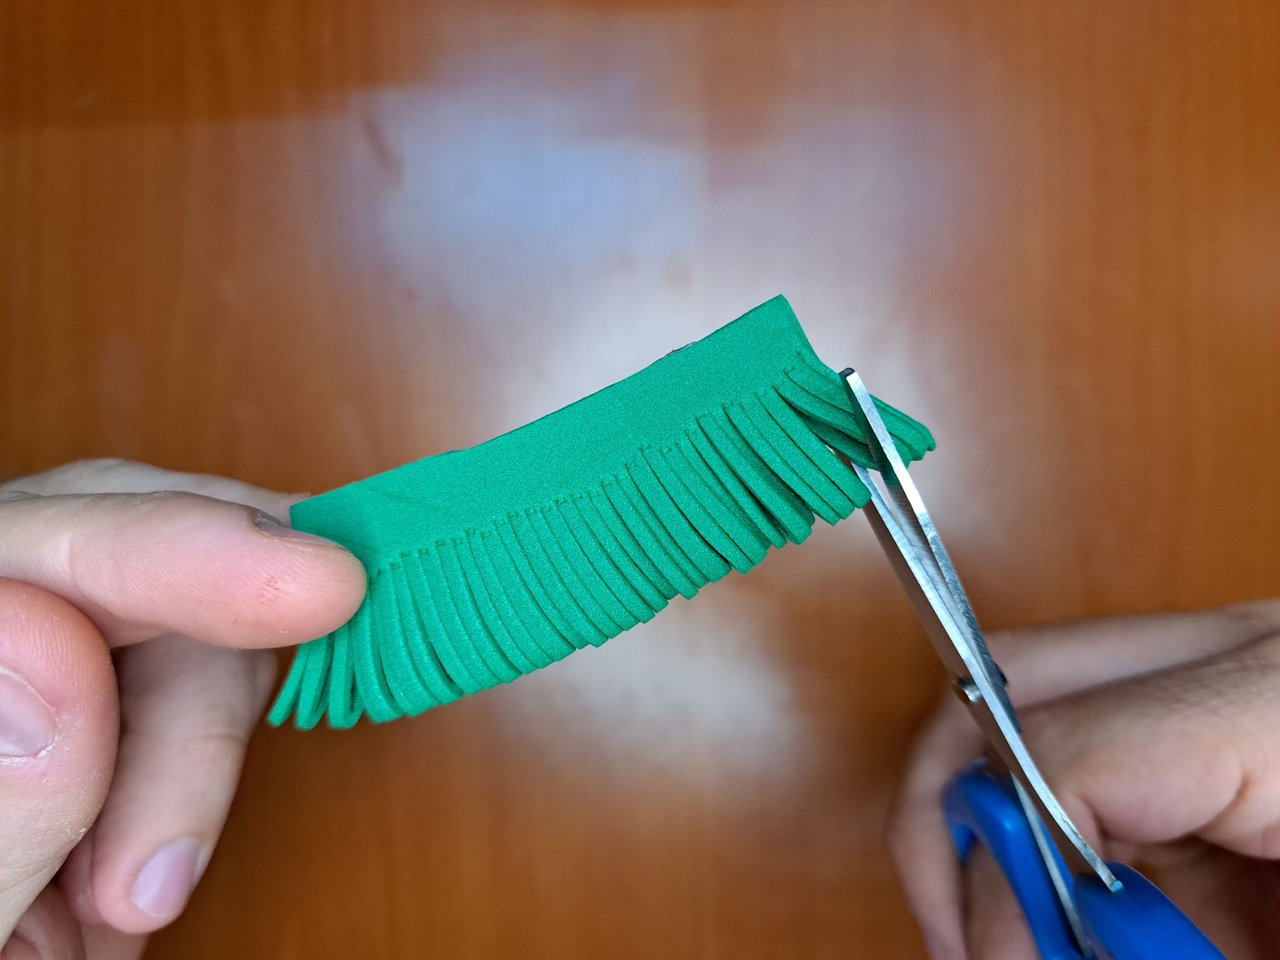
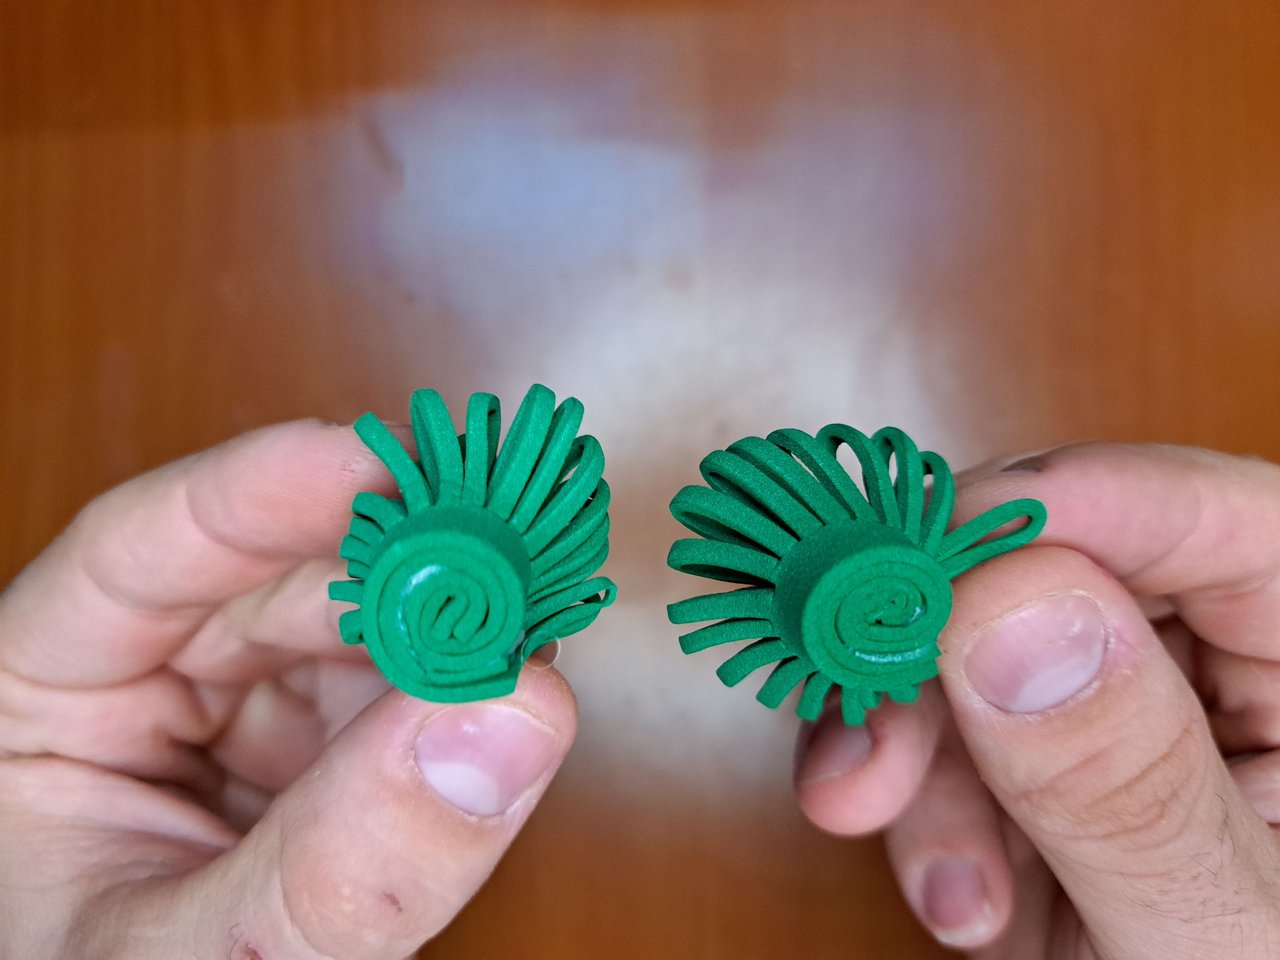
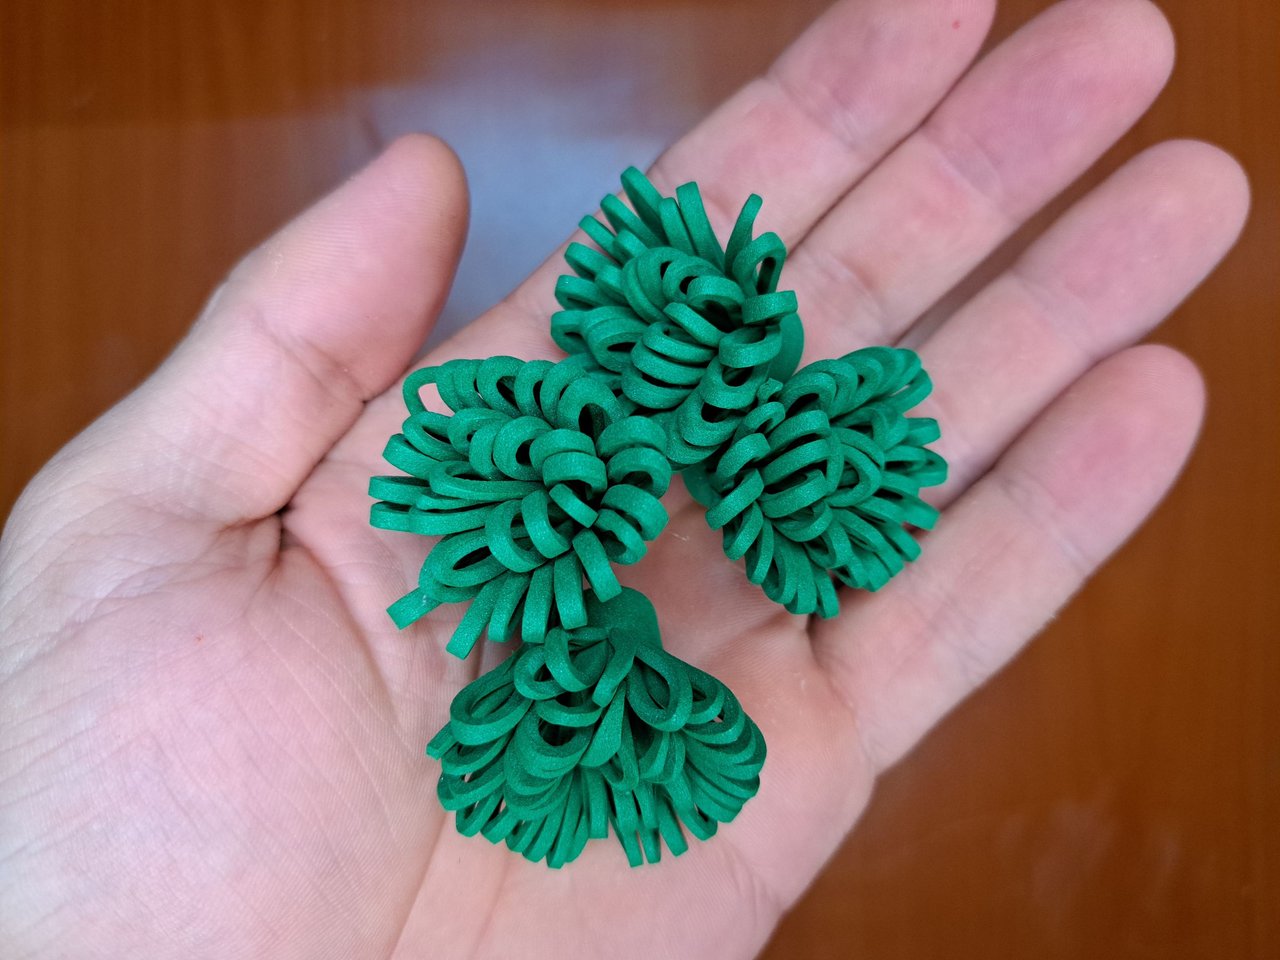
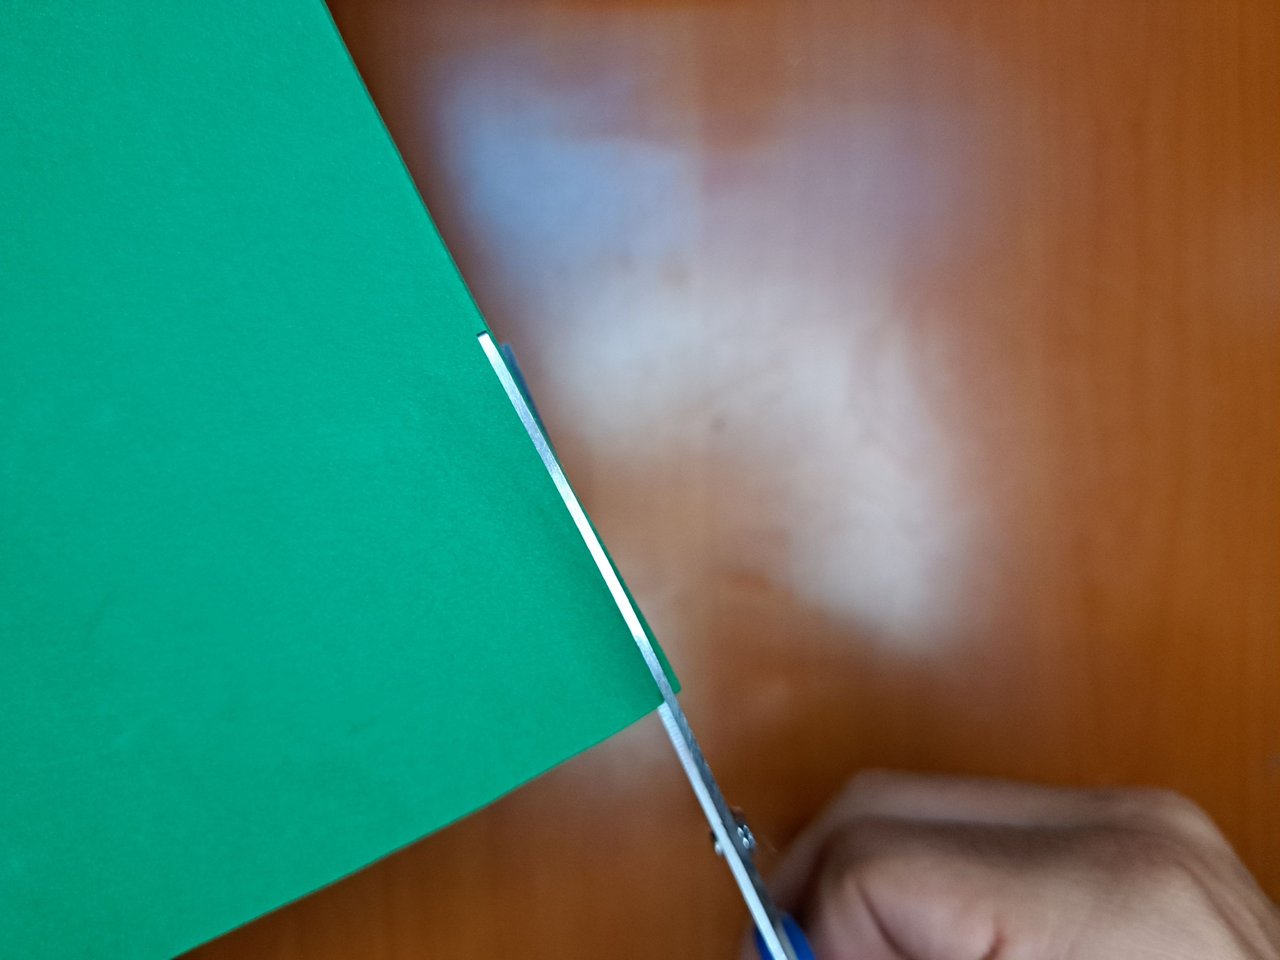
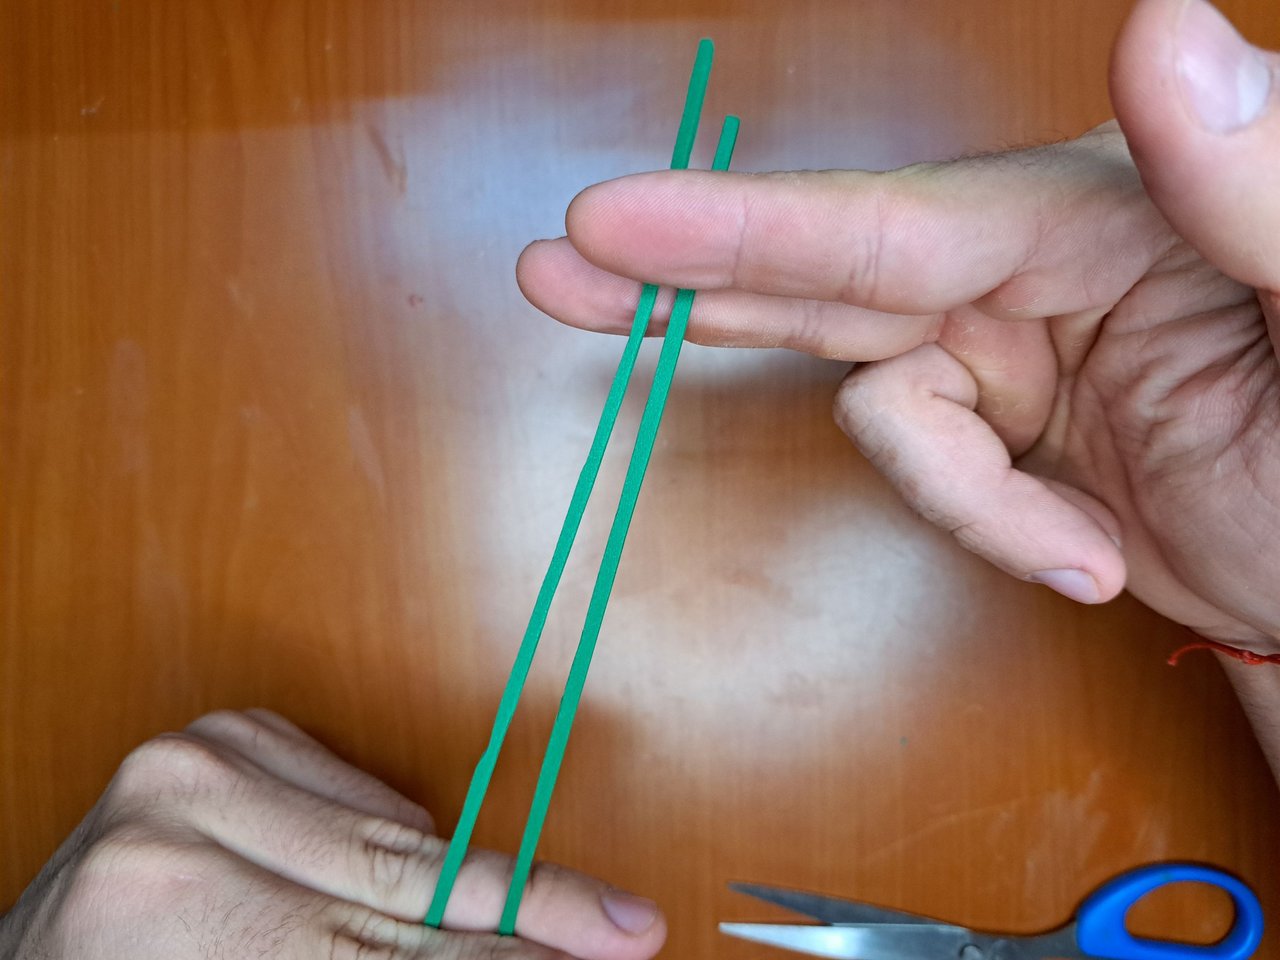
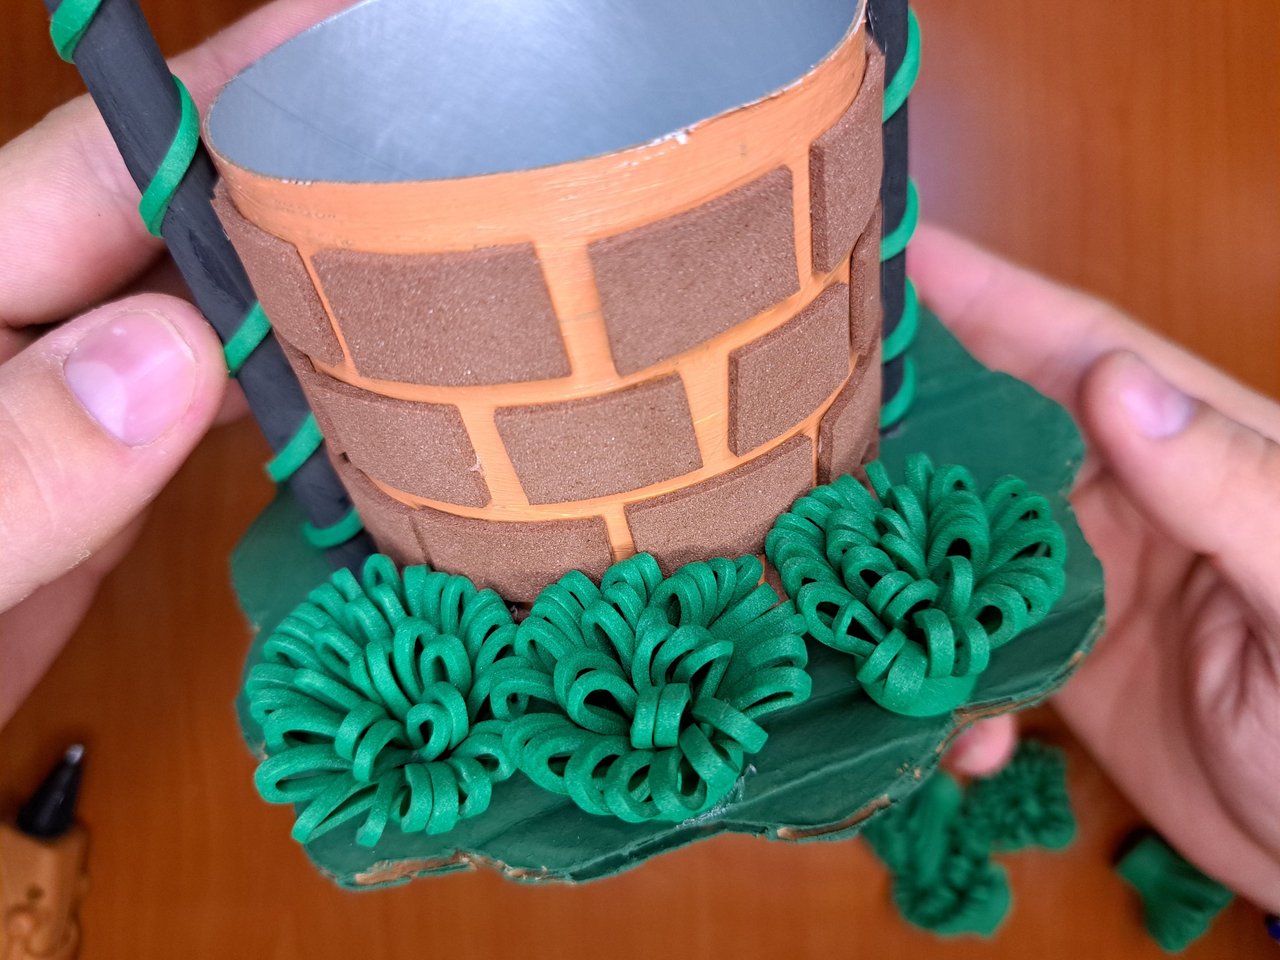
6️⃣ Next, we will make some additional decorations and accessories for the ornament. We'll start by cutting out squares of green fomi and folding them in half. Then we'll make small cuts lengthwise and roll them up to form bushes. We'll also cut thin strips of the same color of fomi to create some vines.
! [Spanish Version Here]
6️⃣ A continuación, haremos algunas decoraciones y accesorios adicionales para el adorno. Empezaremos recortando cuadrados de fomi verde y doblándolos a la mitad. Luego haremos pequeños cortes a lo largo y los enrollaremos para formar arbustos. También recortaremos finas tiras de este mismo color de fomi para crear unas lianas.
 |
 |
 |
 |
 |
 |
 |
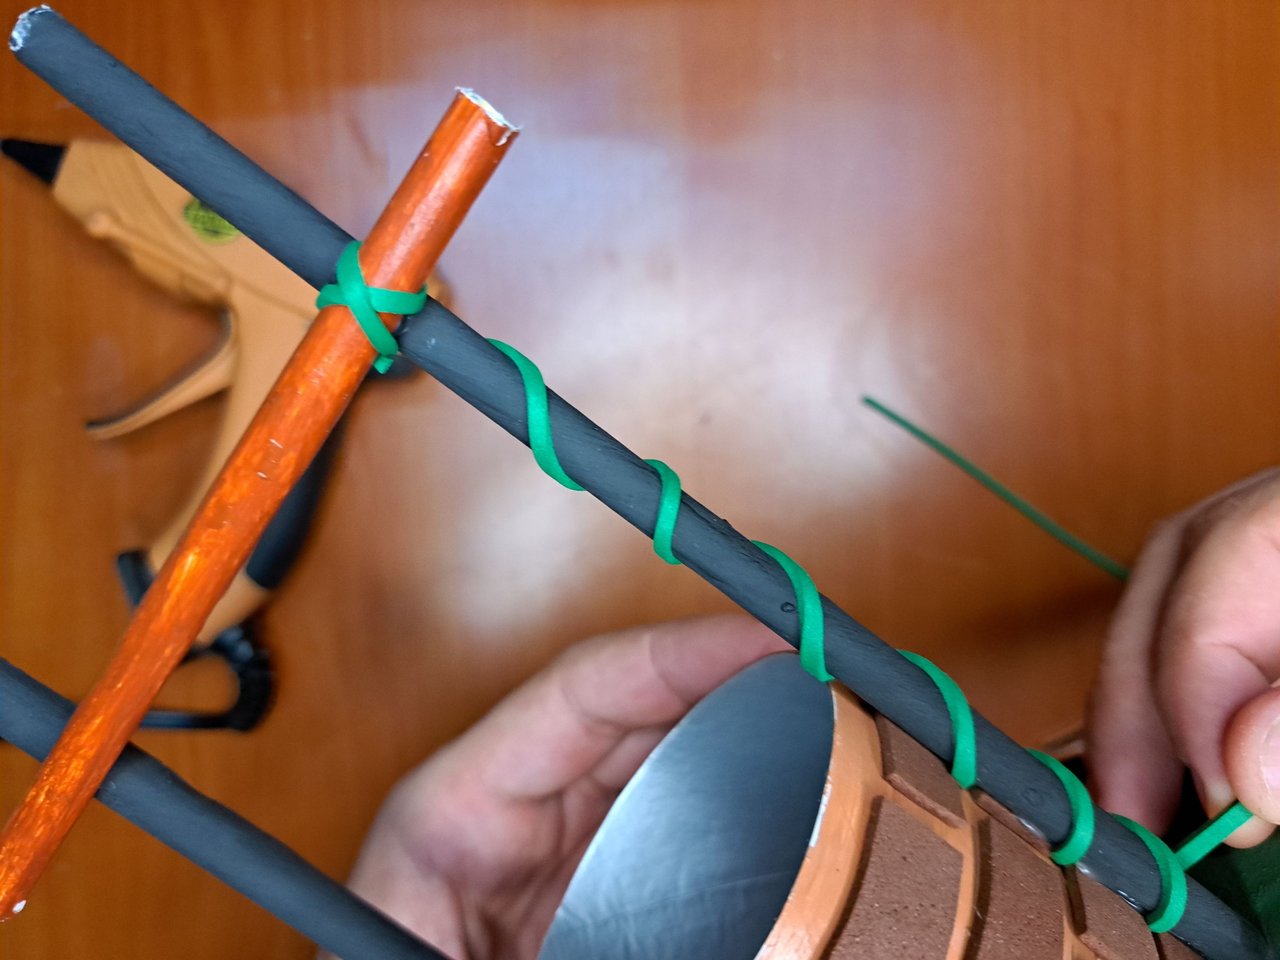
7️⃣ With everything ready, we will start assembling the ornament. We will begin by intertwining the green lianas around the two black canes. The lianas are inserted taking advantage of the gaps left by the bricks and are screwed to the top where the black canes meet the carmelite. We will also glue around the base of the well all the green bushes.
! [Spanish Version Here]
7️⃣ Con todo listo, empezaremos a armar el adorno. Comenzaremos entrelazando las lianas verdes alrededor de los dos bastones de color negro. Las lianas se insertan aprovechando las separaciones que dejan los ladrillos y van atornilladas en la parte superior donde se unen los bastones negros con el carmelita. También pegaremos alrededor de la base del pozo todos los arbustos verdes.
 |
 |
 |
 |
 |
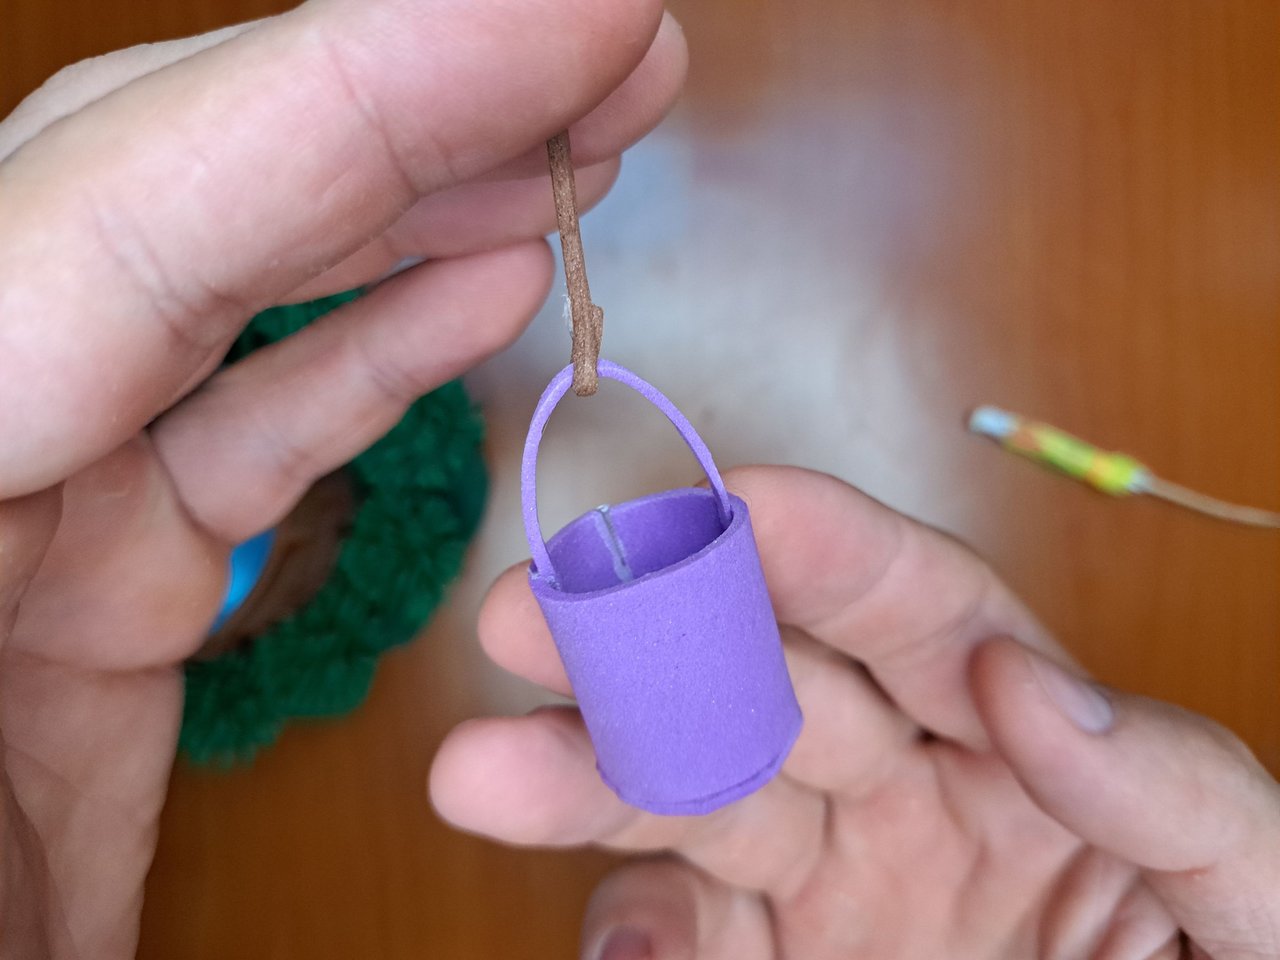
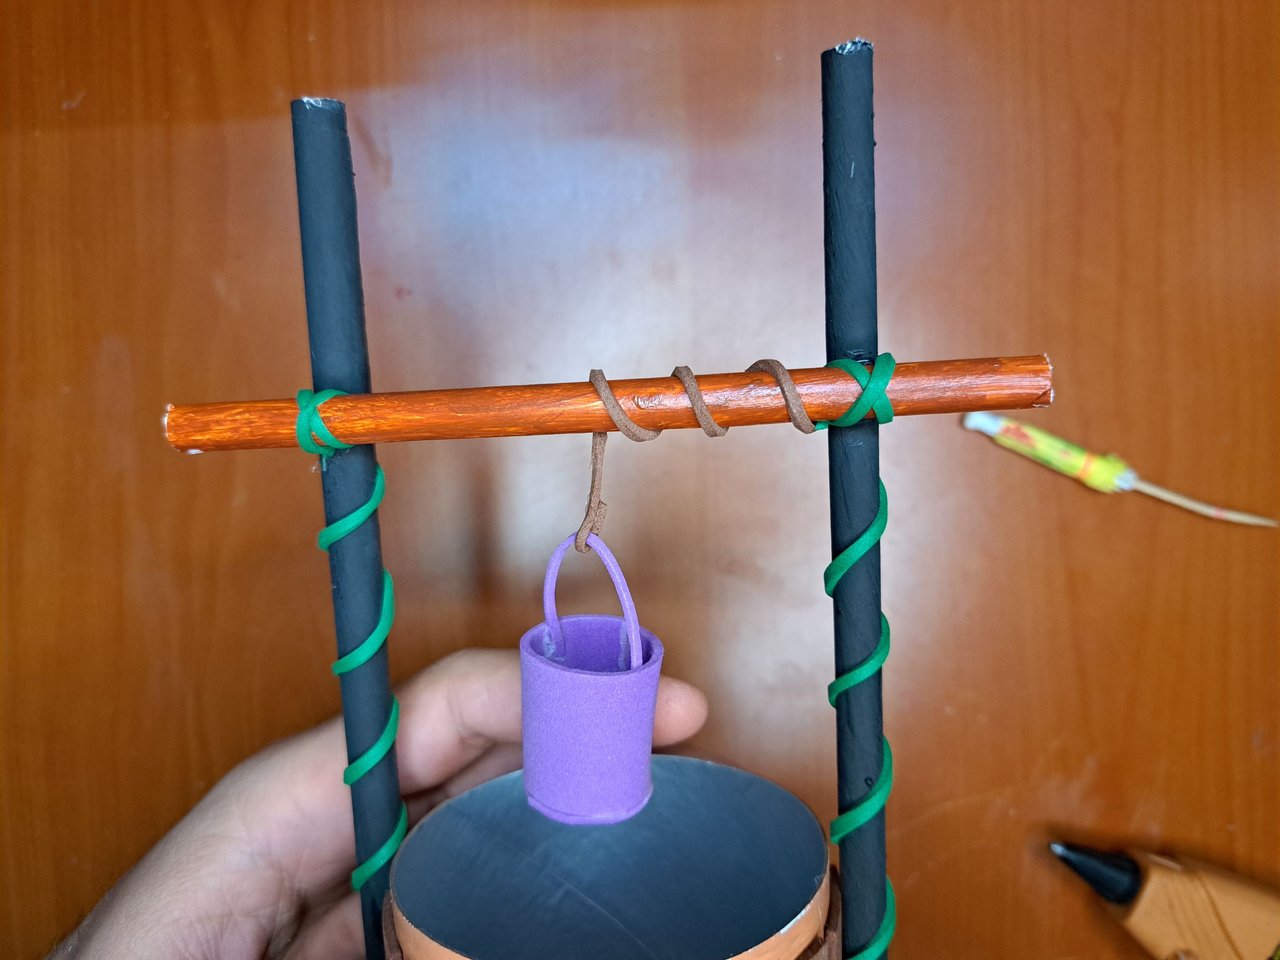
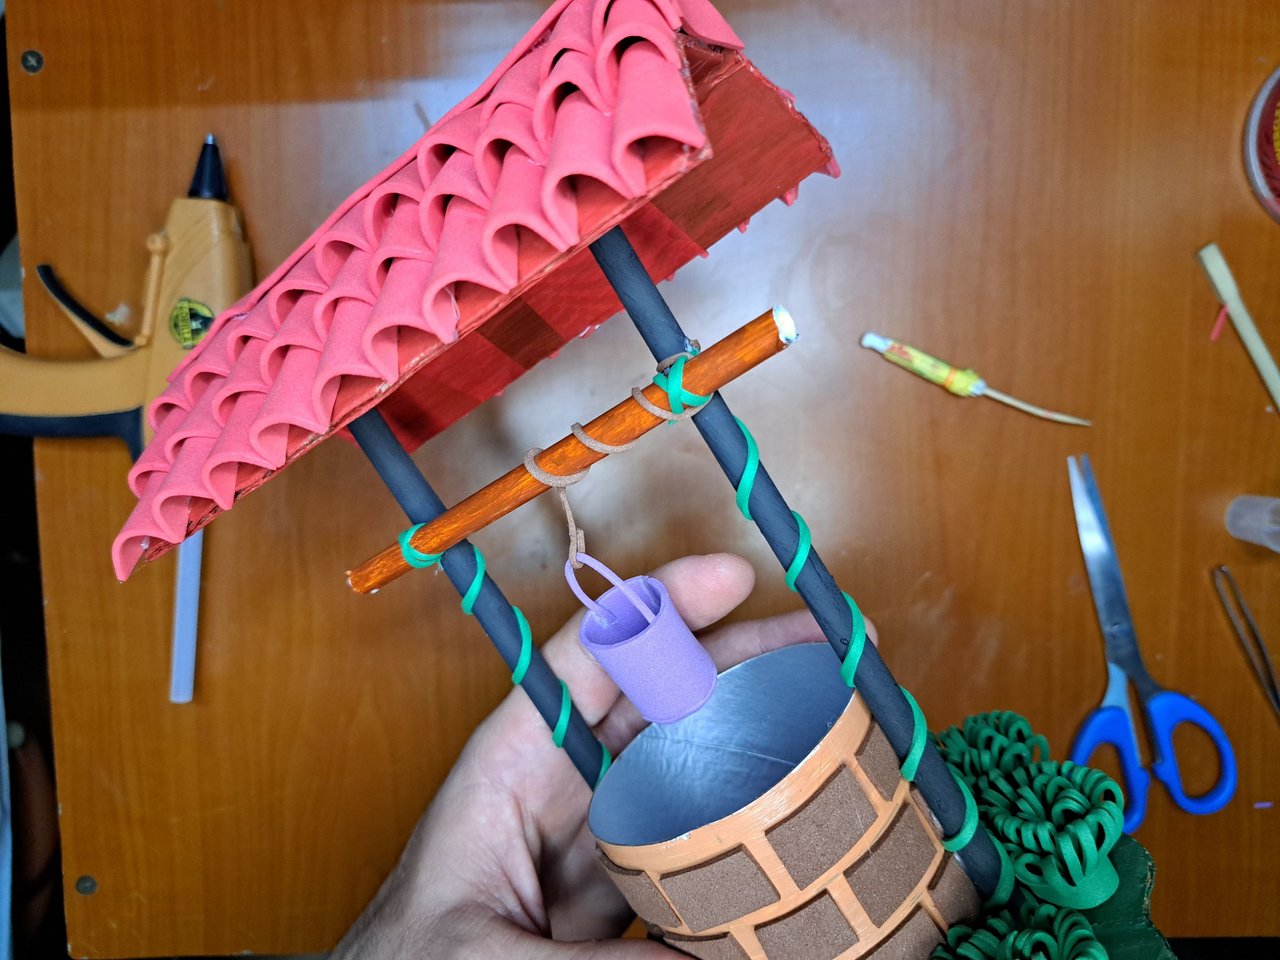
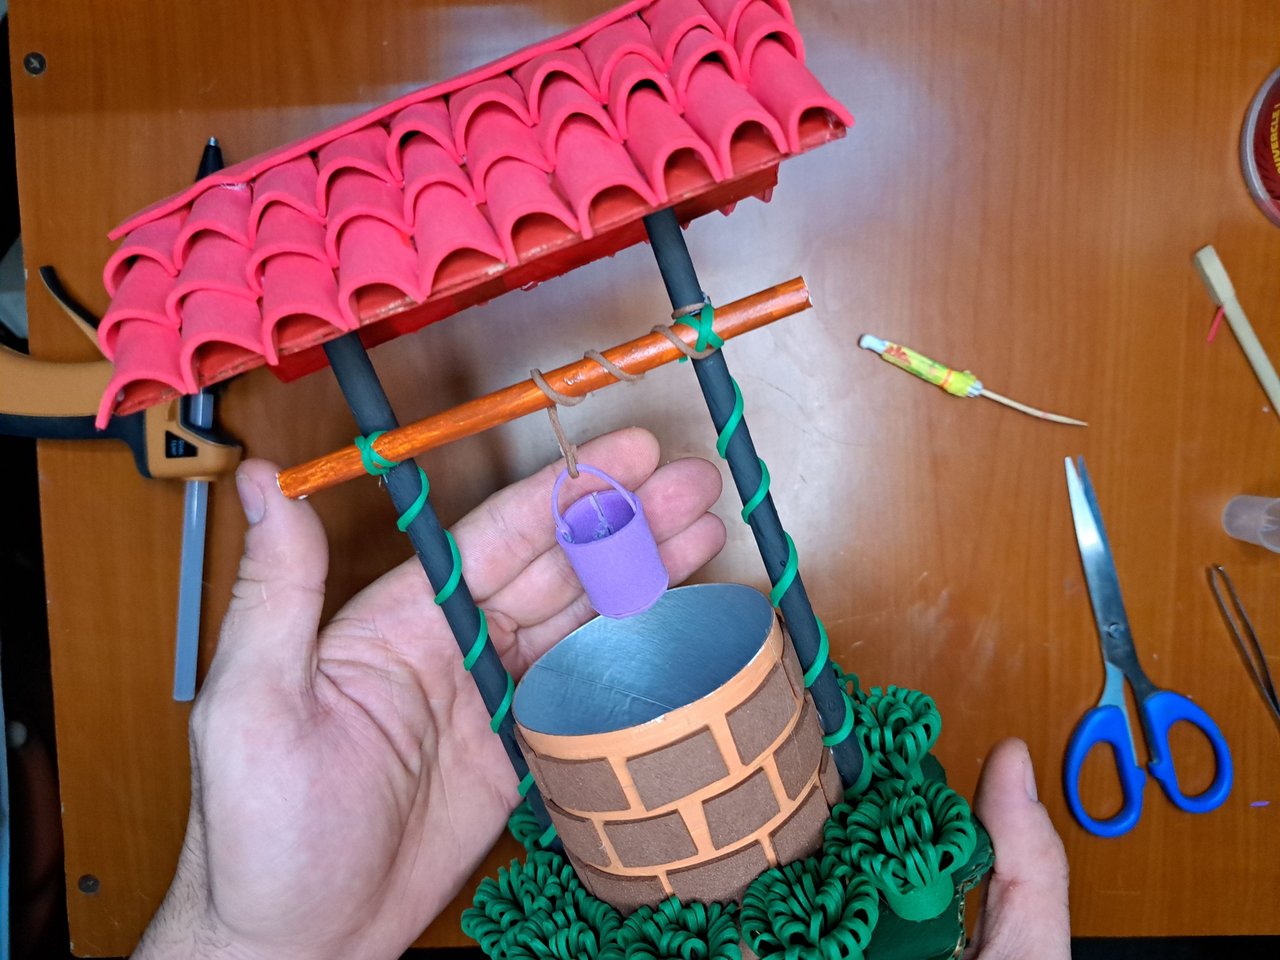
8️⃣ Next we create a small lilac cube and attach it to the well using a thin strip of caramel-colored fomi. Finally, we put the roof in place and reinforce the joints with hot silicone to increase strength.
! [Spanish Version Here]
8️⃣ A continuación creamos un pequeño cubo lila y lo sujetamos al pozo utilizando una fina tira de fomi color caramelo. Para finalizar, colocamos el techo en su lugar y reforzamos las uniones con silicona caliente para aumentar la resistencia.
 |
 |
 |
 |
 |
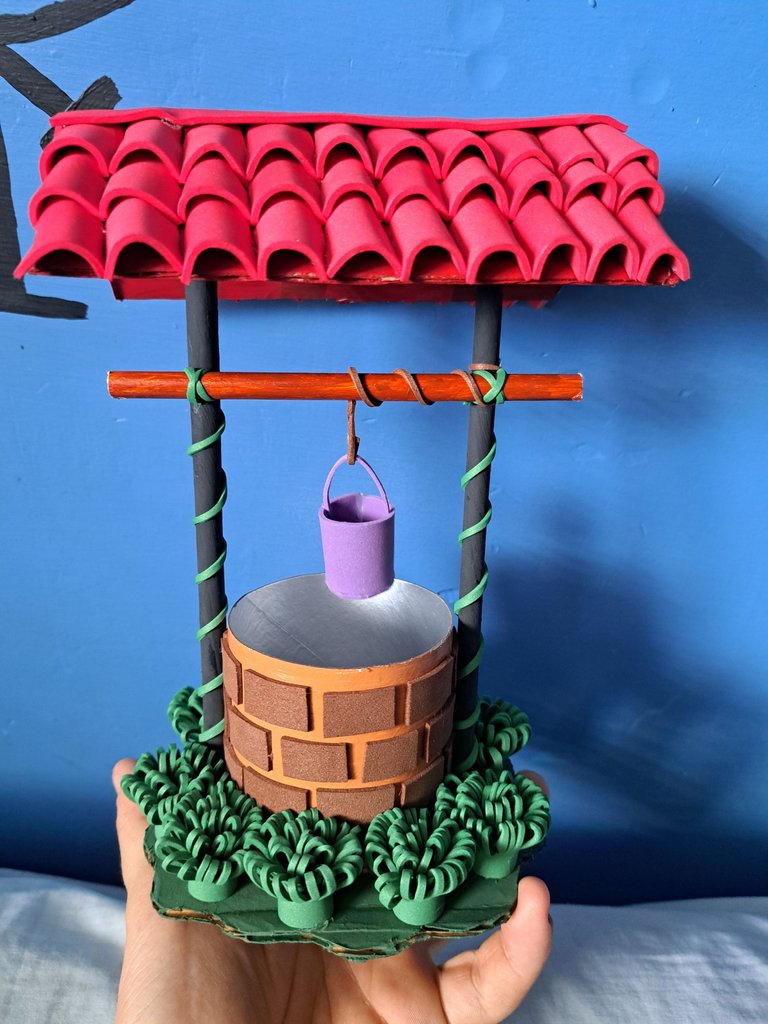
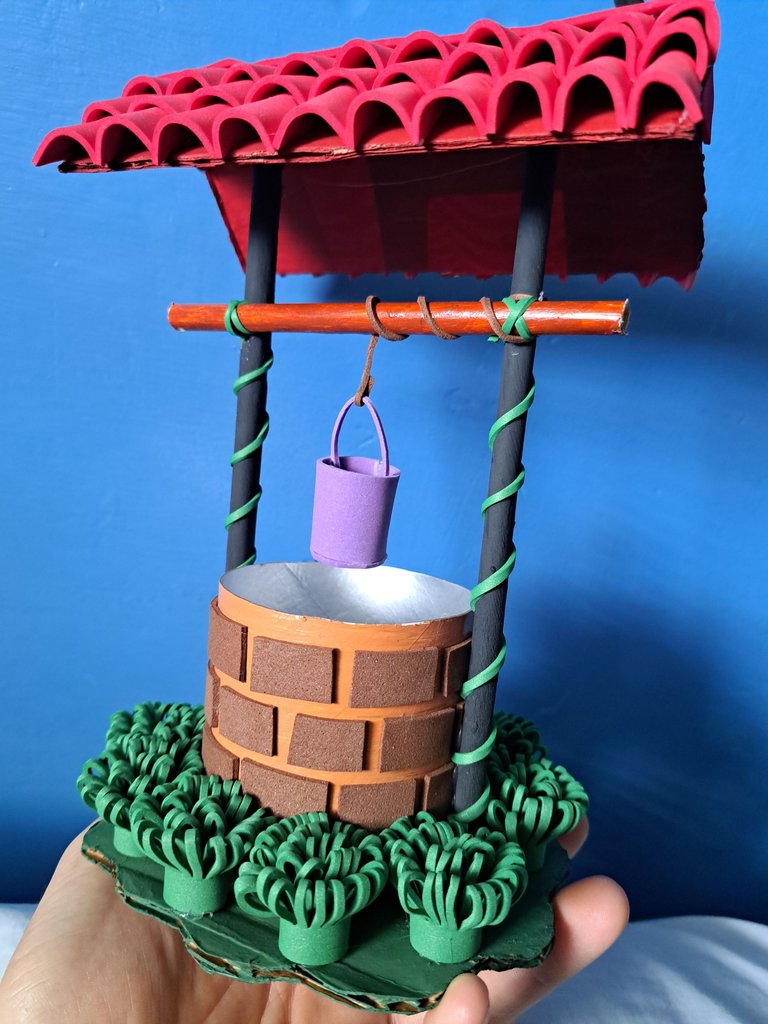
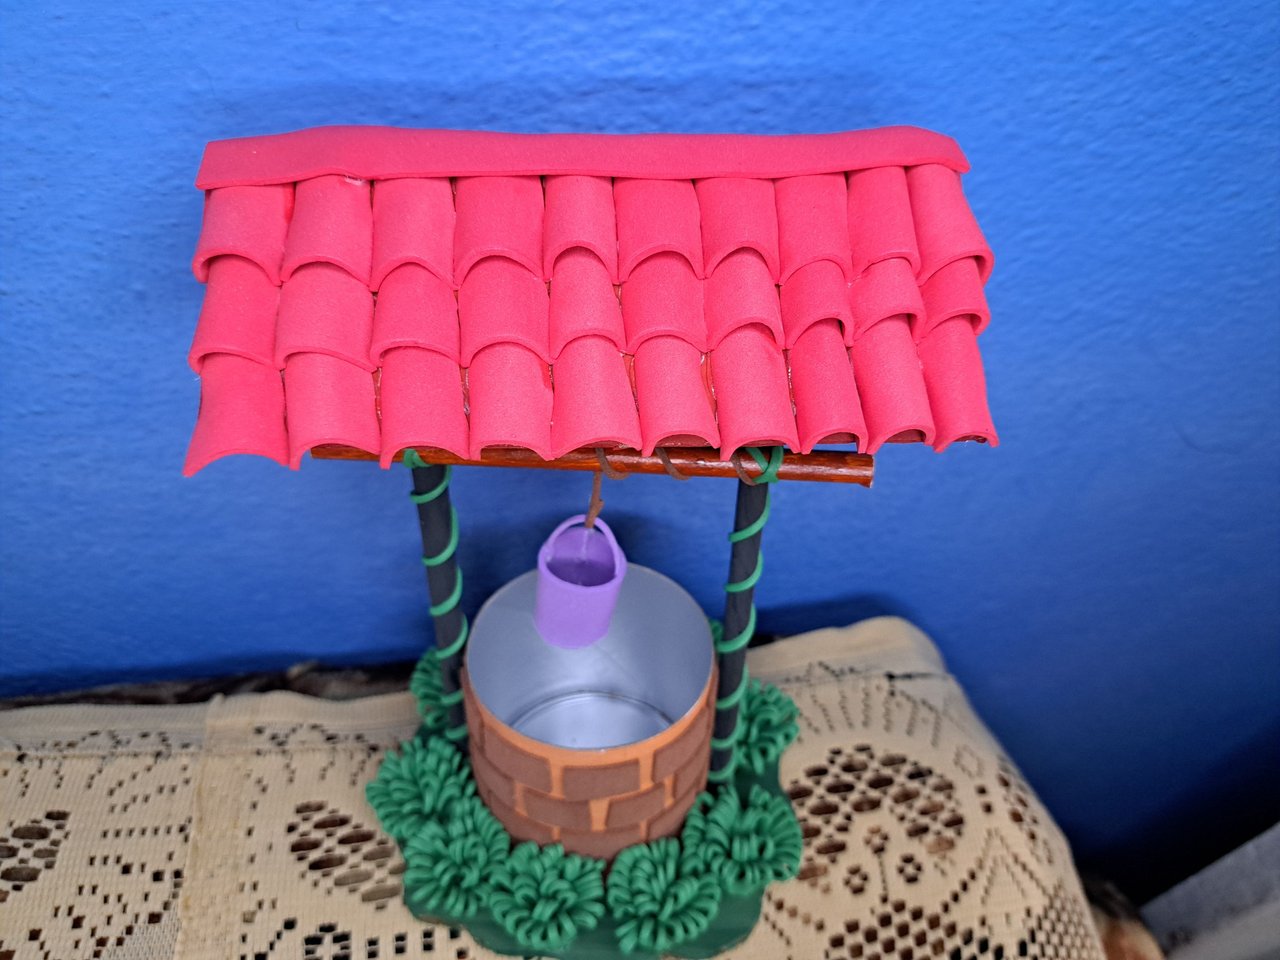
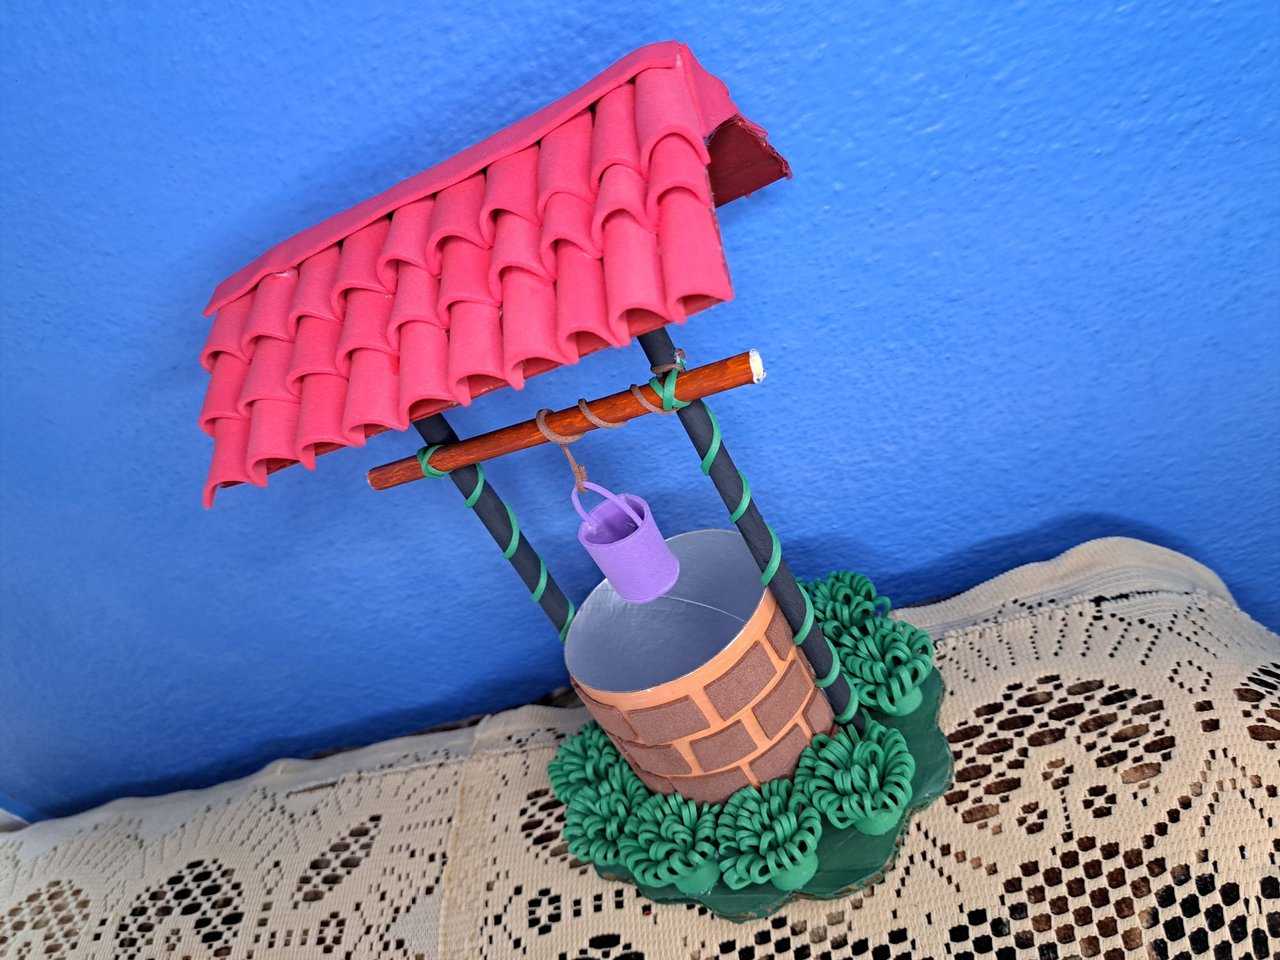
And that concludes this tutorial to make this beautiful wishing well. I hope you liked it and don't forget to toss your imaginary coin, who knows if you will get your wish. For now I say goodbye, but soon I will be back to share with you another little piece of my creative world.
! [Spanish Version Here]
Y así concluiría este tutorial para hacer este hermoso pozo de los deseos. Espero que haya sido de su agrado y no olviden lanzar su moneda imaginaria, quién sabe si se les cumple algún deseo. Por ahora me despido, pero pronto volveré para estar compartiendo con ustedes otro pedacito de mi mundo creativo.
Final Result // Resultado Final
 |
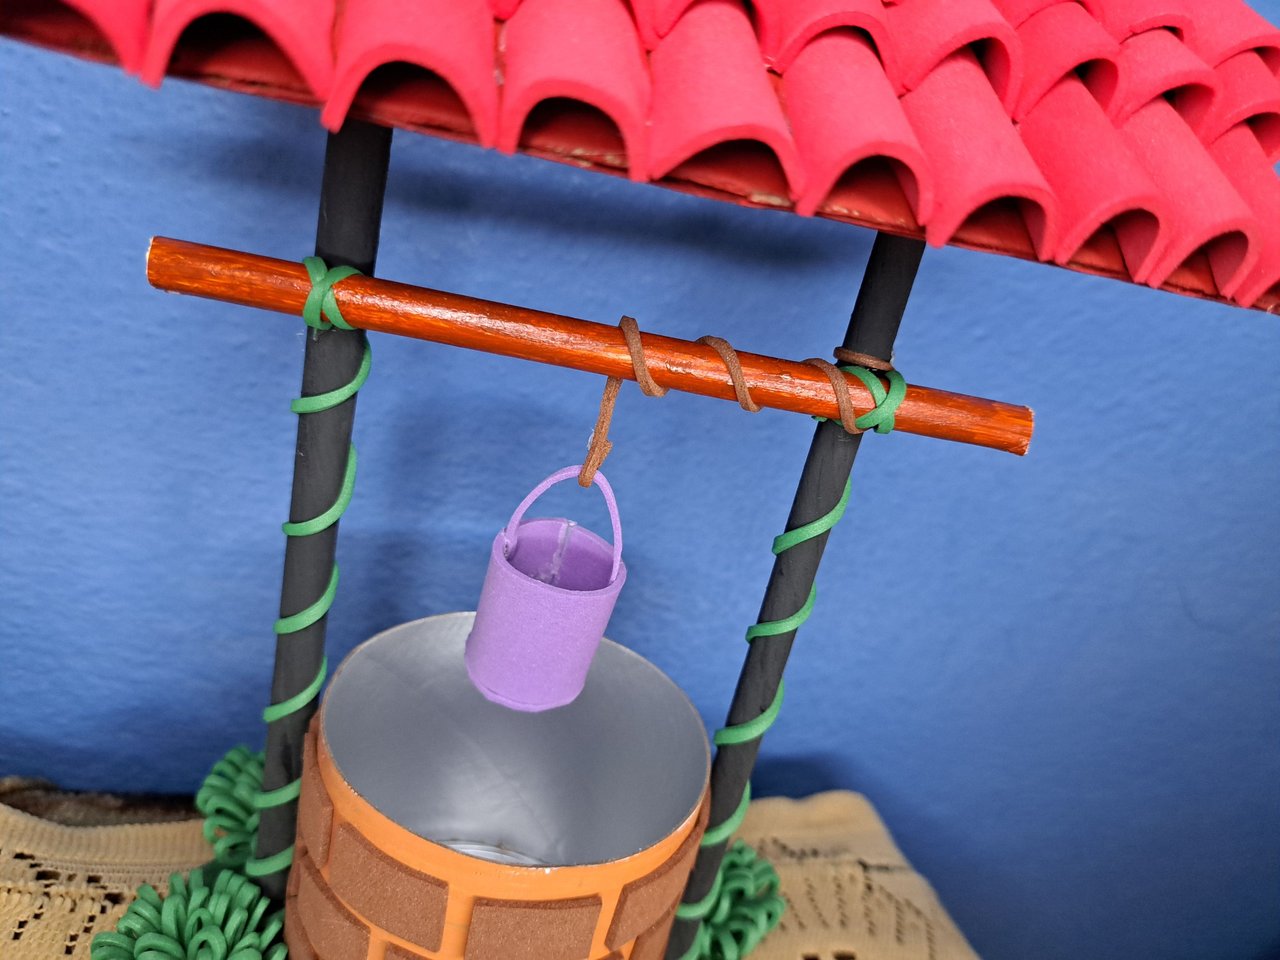 |
 |
 |
 |

Thank you very much for reading my post. If you liked it, please leave a comment and consider following me so you don't miss my next posts. I'd love to know your opinion and your thoughts about the topic I discussed in this post, see you in the next one!
! [Spanish Version Here]
Muchas gracias por leer mi post. Si te gustó, por favor deja un comentario y considera seguirme para no perderte mis próximas publicaciones. Me encantaría saber tu opinión y tus ideas sobre el tema que traté en este post. ¡Nos vemos en el próximo!
Cover page created in Canva Pro
Translated by DeepL


You seemed to ve very creative. Recycling also requires great skill I believe.
Creativity and a lot of commitment, since it is much easier to use new and not recycled materials. But I will still continue to recycle.
Qué belleza, las tejas te quedaron tan creativas que parecen reales, tienes mucha sutileza para crear, realmente este adorno es un lujo para decorar en la casa, la idea de reciclar es un mundo sorprendente.
Reciclar para mí es algo más que crear. Reciclar me permite darle otro significado a la frase: " la basura de unos es el tesoro de otros". Alguno de los materiales que normalmente utilizo serían arrojados a la basura.
Hola. Te ha quedado súper lindo este pozo 🕳️
Me encanta como se ve cada pieza. Los colores son muy vivos. Hiciste algo hermoso reciclando, me encanta. Aprovecho para dejar mi deseo 😃
El pozo de los deseo a recibido tu deseo y se encuentra procesándolo 😉. Gracias por comentar.
Te quedo precioso. Me encantó el resultado final.
Gracias, me alegra saber que te gustó.
Precioso, me encantaron todos los detalles que le colocaste y ademas esta muy bien elaborado y prolijo ❤️ con permiso Buhito lanzara una moneda alli para que se le conceda un deseo jeje
Saludos 🦉
Bienvenida sea la moneda de Buhito junto con su deseo. Espero se le cumpla 🙏
¡Felicidades! Esta publicación obtuvo upvote y fue compartido por @la-colmena, un proyecto de Curación Manual para la comunidad hispana de Hive que cuenta con el respaldo de @curie.
Si te gusta el trabajo que hacemos, te invitamos a darle tu voto a este comentario y a votar como testigo por La Colmena.
Si quieres saber más sobre nuestro proyecto, te invitamos a acompañarnos en nuestro servidor de Discord.
Muchísimas gracias por todo el apoyo 🫂
Excelente trabajo, es una mnualidad con mucho detalle
!discovery 45
Muchísimas gracias 🤗.
This post was shared and voted inside the discord by the curators team of discovery-it
Join our Community and follow our Curation Trail
Discovery-it is also a Witness, vote for us here
Delegate to us for passive income. Check our 80% fee-back Program
Thanks for the support 🤗
https://twitter.com/hivediy47901/status/1783033973402120647
Precioso, esa es la magia del foami
Muy cierto, se puede hacer de todo con él.