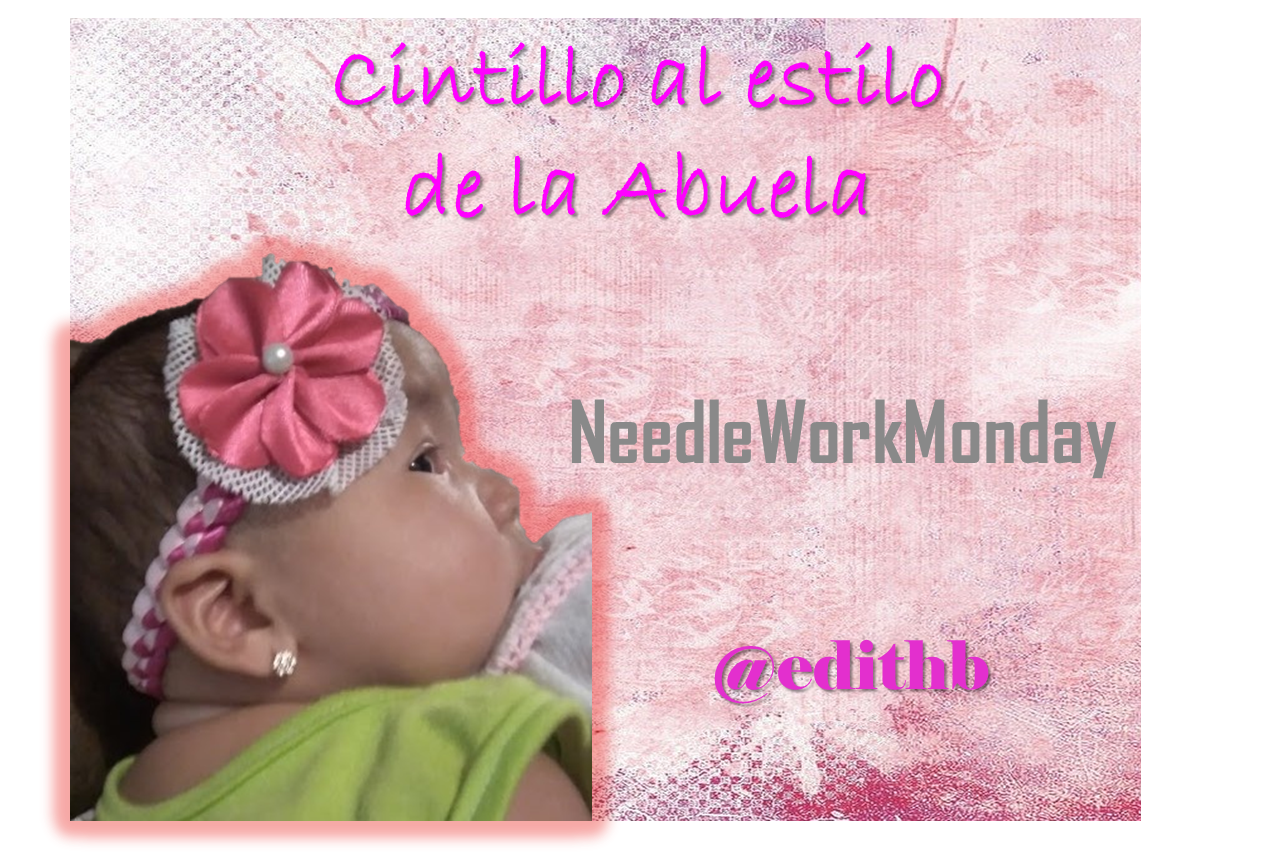
Cintillo al estilo de la Abuela||Grandmother's style headband
Hola espero todos se encuentren muy bien por aquí.
El día de hoy les traigo la elaboración de un cintillo para mi bebe. Es un cintillo tejido a la antigua, es un tejido que vi desde que era chica cuando mi mamá los hacia y luego nos enseñó hacerlos a mis hermanas y a mí, espero les guste.
Necesitaremos…
1.50 m de cinta fina de color fucsia
1.50 m de cinta color rosa clara
1/2m de cinta de 2cm color fucsia
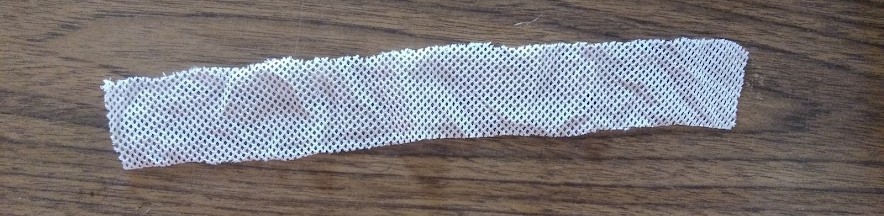
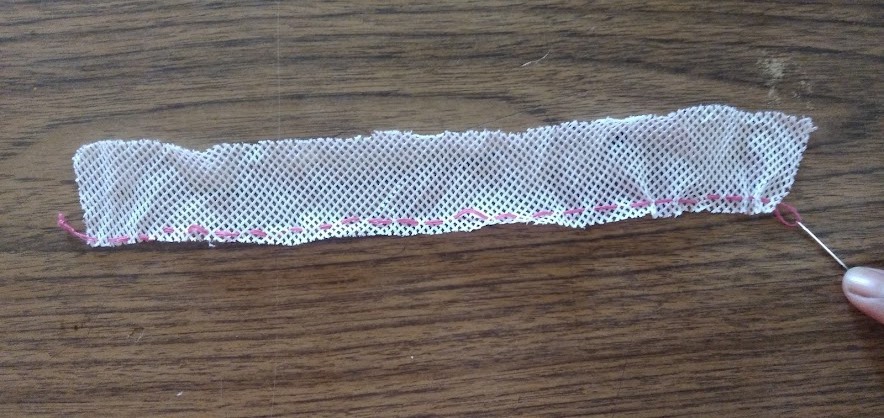
30 cm de malla
30cm de elástico
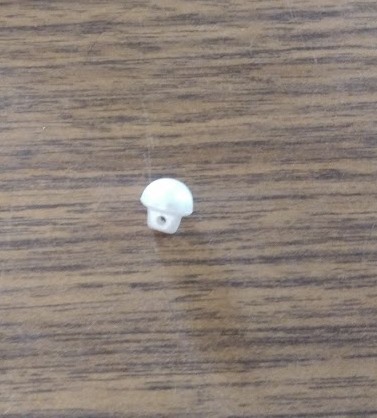
Un botón de la camisa de la abuela
Aguja
Hilo
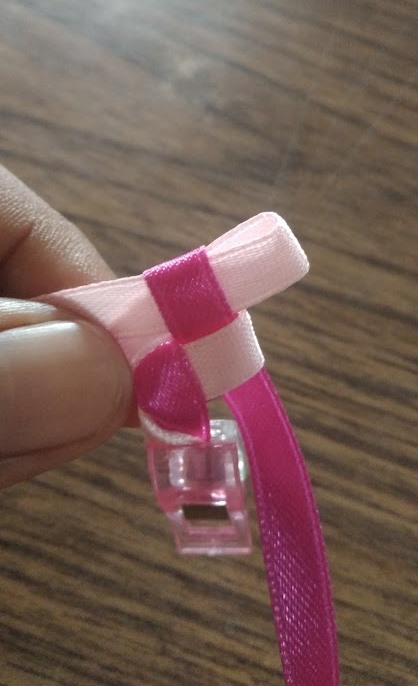
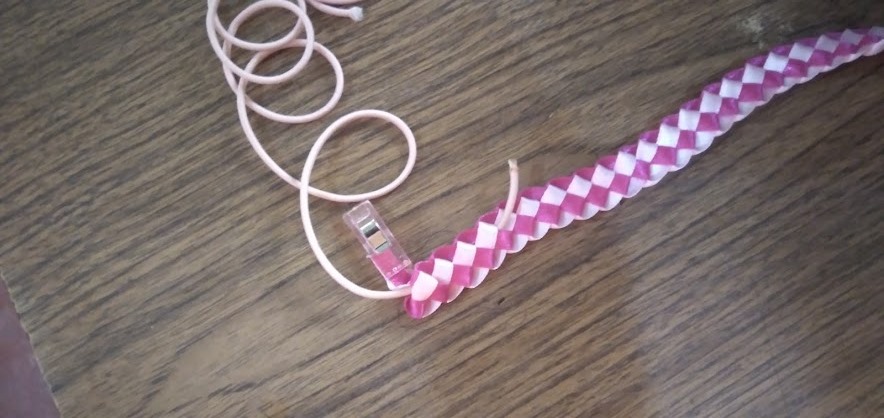
Tomamos las cintas uniendolas una sobre la otra y en el extremo podemos hacerle un nudo o colocar un gancho para que no se suelten.
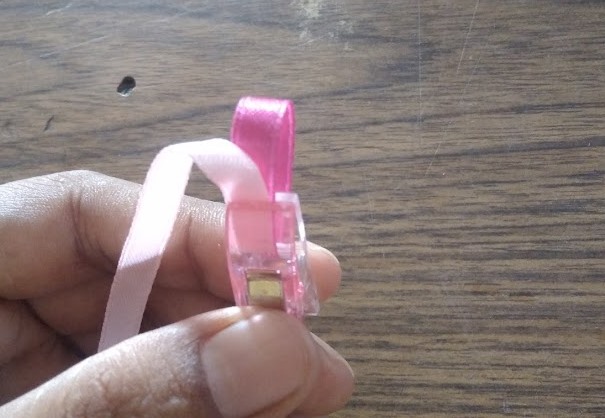
Tomamos uno de los colores y hacemos una lazada hacia adelante.
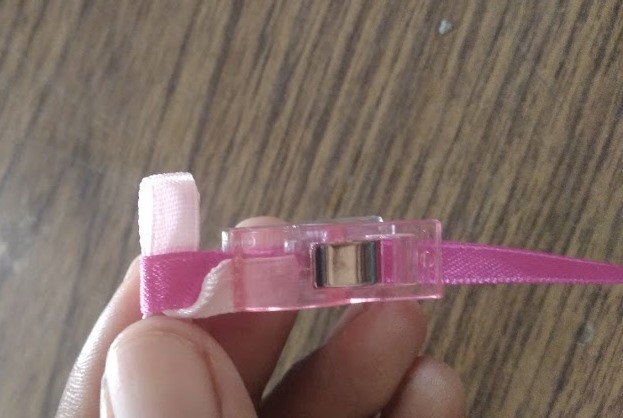
Seguido tomamos el otro color y hacemos una lazada hacia atrás y la pasamos por dentro de la anterior.
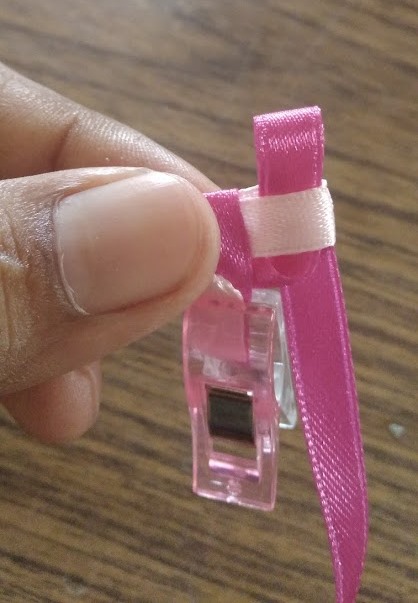
Continuamos con la inicial hacemos una lazada.
Y seguimos con la siguiente por dentro.
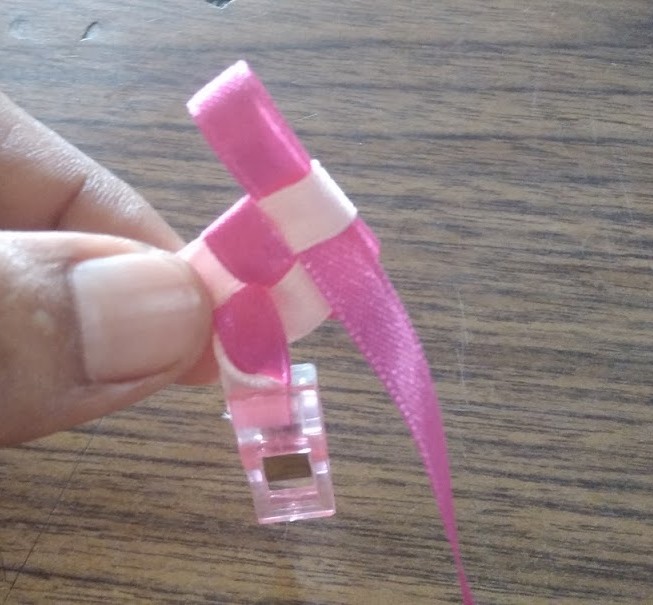
De esta forma hacemos con toda nuestra cinta y vamos viendo el patrón de colores.

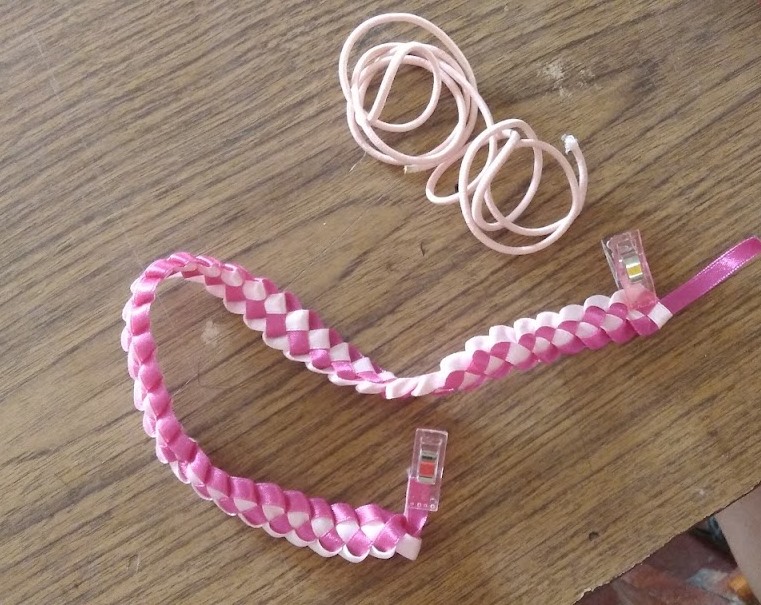
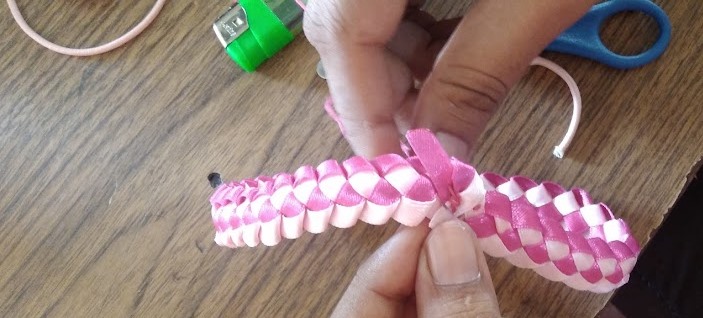
Una vez llegamos el tejido al largo que necesitemos sujetamos el final para que no se suelte.
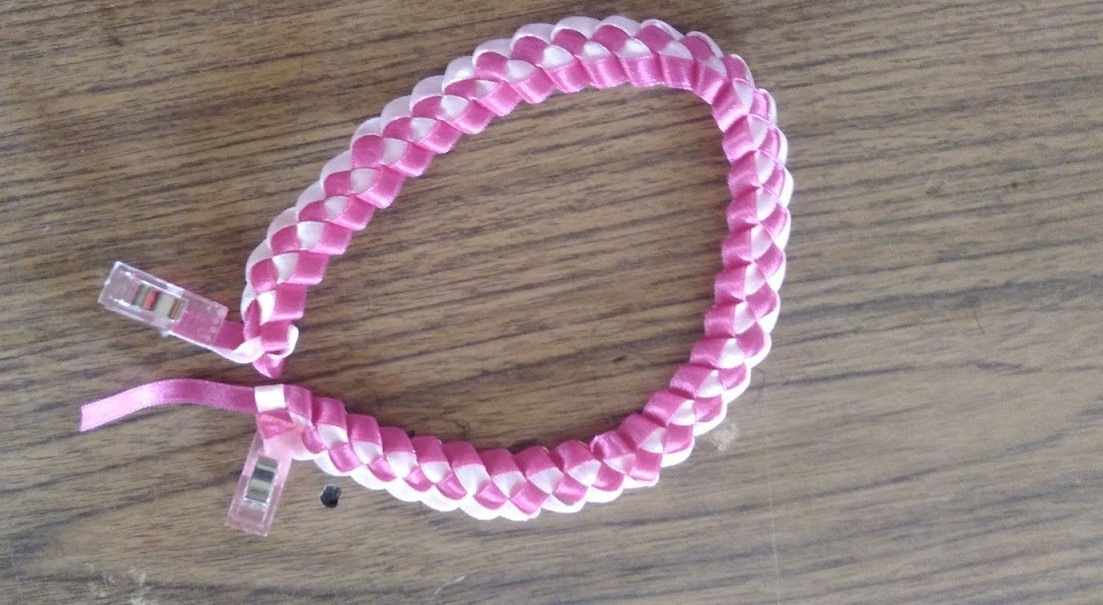
Introducimos con mucho cuidado por el centro de las lazadas el elástico.
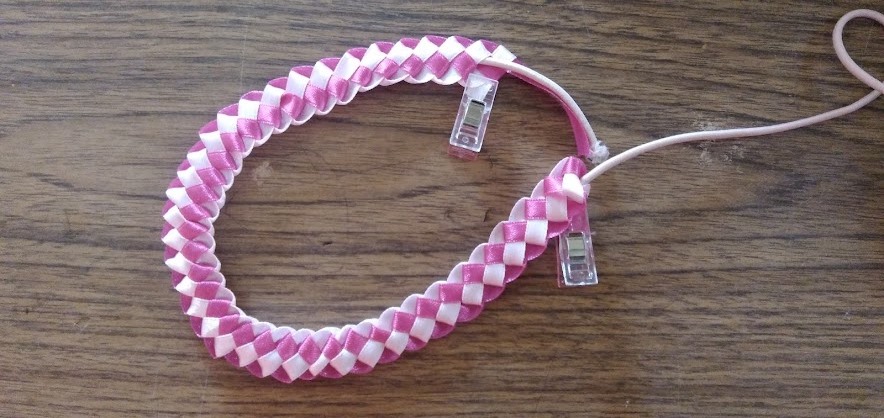
Anudamos el elástico y juntamos los extremos del cintillo, fijándolos con aguja e hilo.
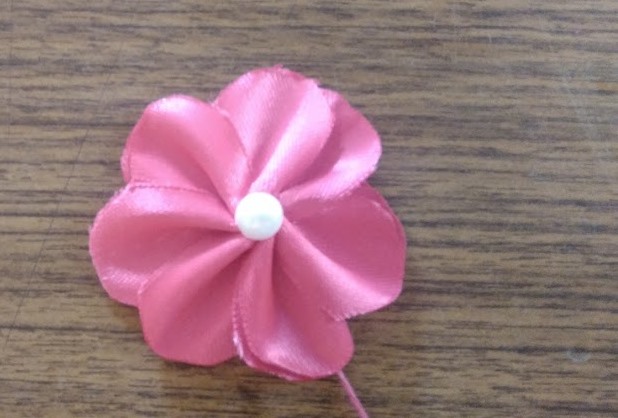
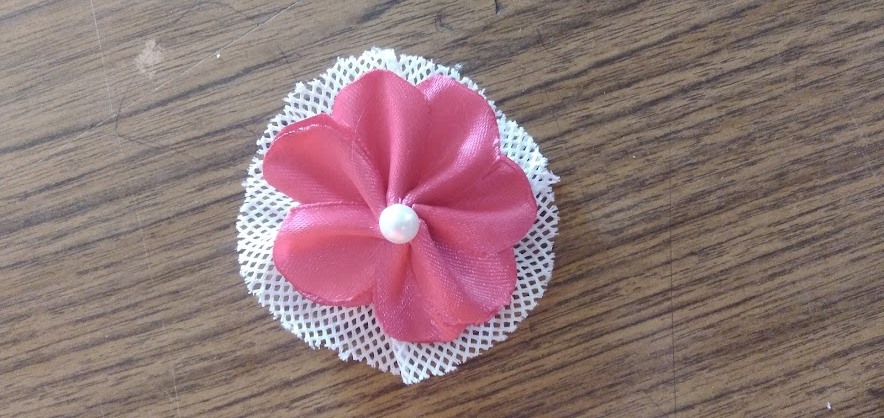
Para la flor.
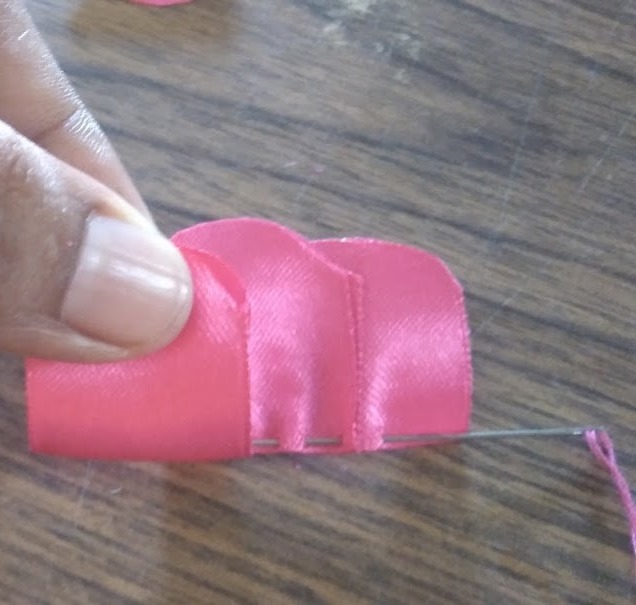
Cortamos la cinta en 7 partes de 6cm cada uno con cinta fucsia de 3cm de ancho, que son los que servirán de pétalos.
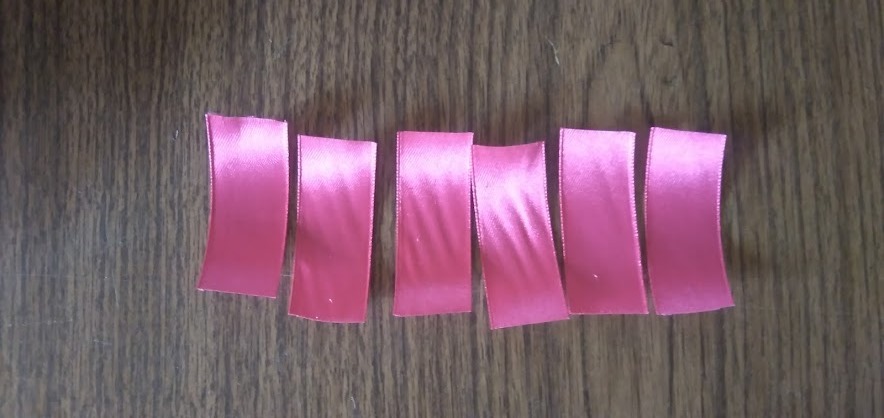
Doblamos los pétalos a la mitad y cortamos los bordes.
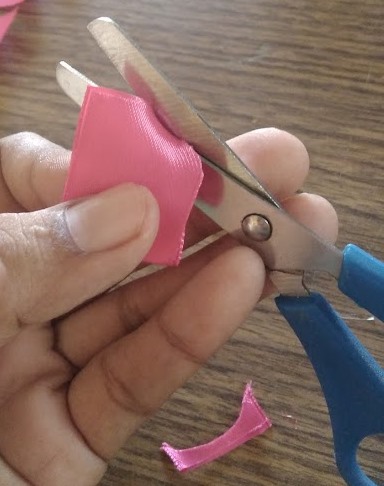
Quemamos los bordes para que no se hilachen.
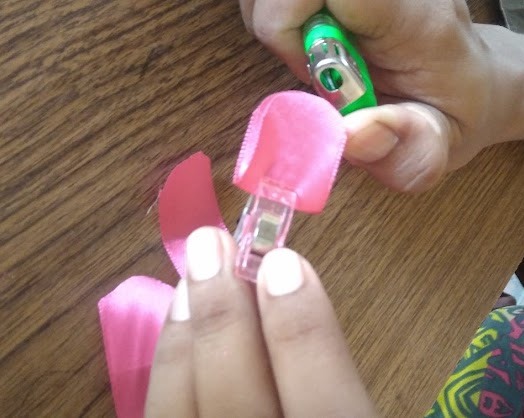
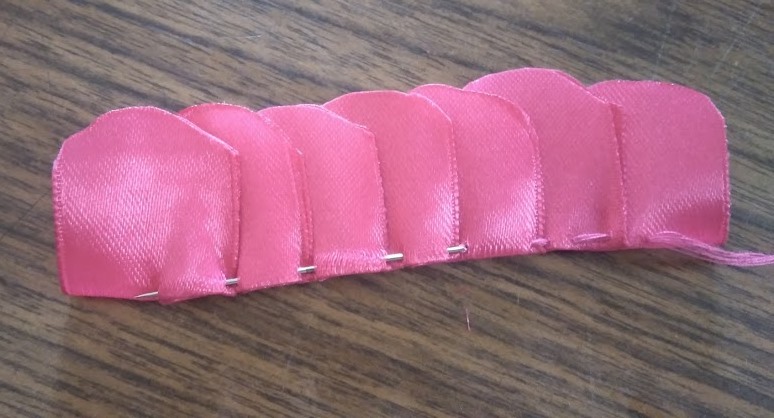
Vamos juntando uno a uno los pétalos iniciando a cocer desde el centro del pétalo, sobre poniendo desde la mitad el siguiente hasta llegar al final.
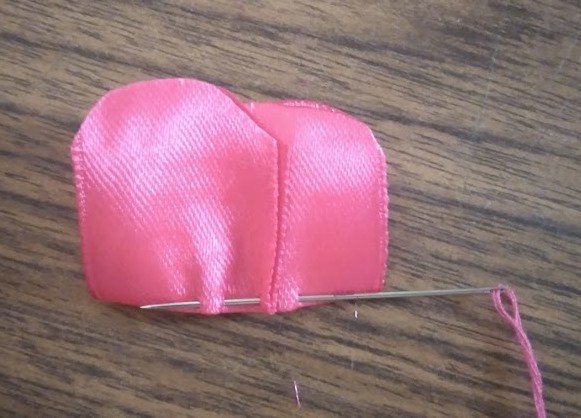
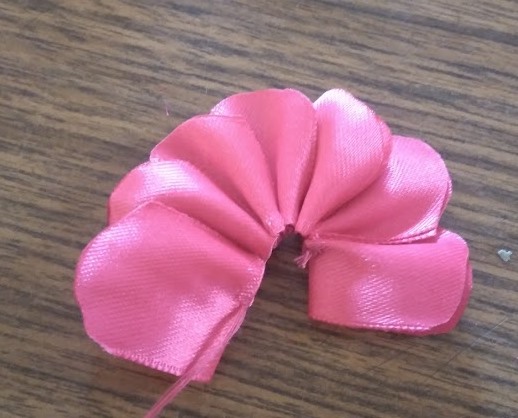
Luego juntamos los extremos y halamos el hilo para darle forma a nuestra flor.
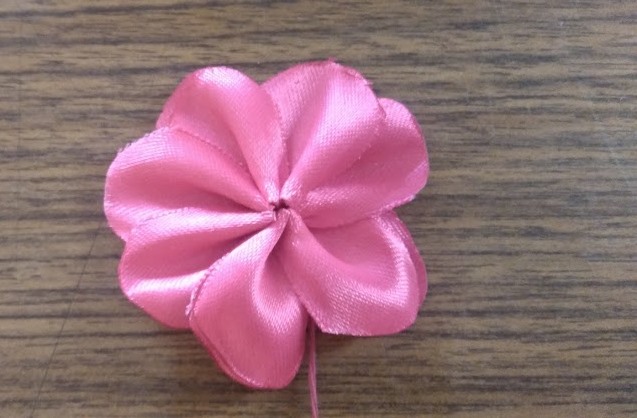
En el centro fijamos el botón de la abuela y listo.
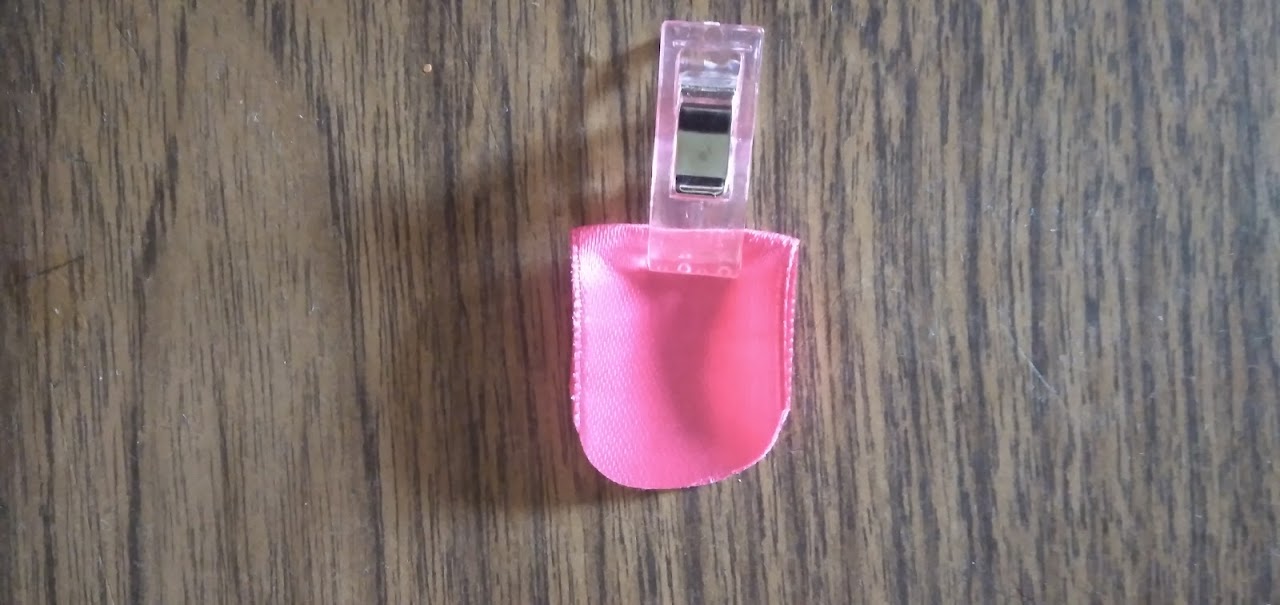
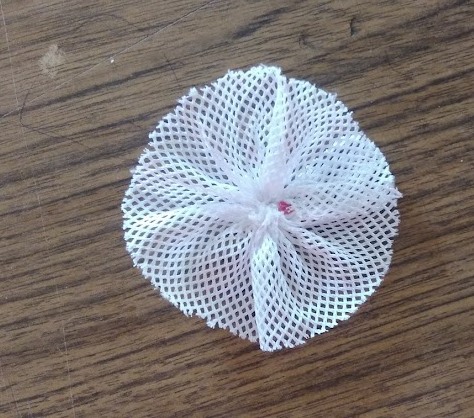
Hilvanamos la malla y halamos el hilo para formar la base de nuestra flor.
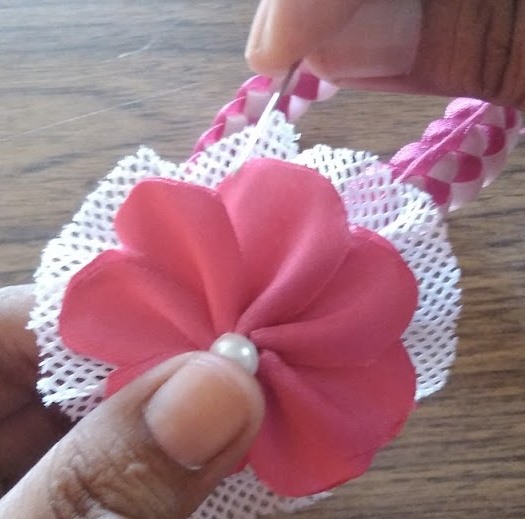
La fijamos en el cintillo.
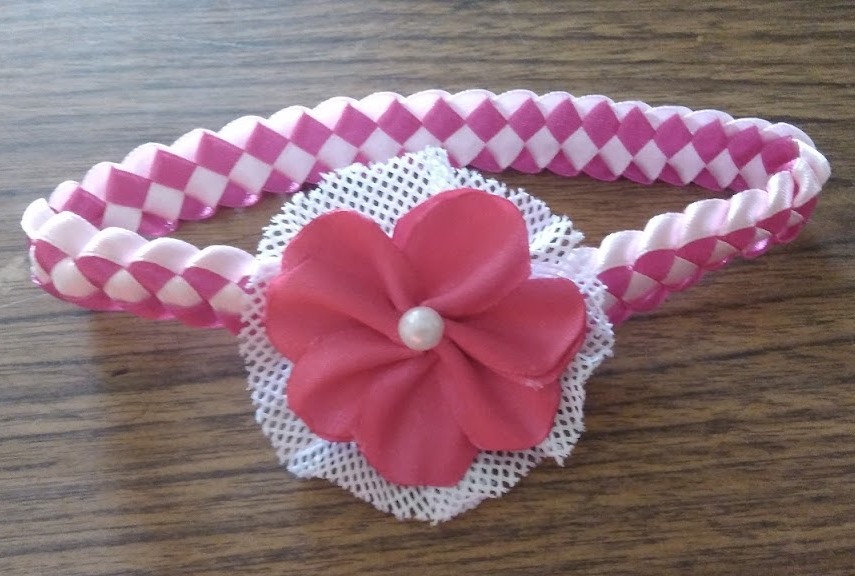
Y de esta forma ha quedado.
Hasta otra oportunidad...
Las imágenes son de mi propiedad.
La imagen de portada la he editado en PowerPoint, con imagen de Pixabay de fondo.
En Ingles
Hello, I hope everyone is doing well here.
Today I bring you the elaboration of a headband for my baby. It is an old fashioned knitted headband, it is a knitting that I saw since I was a little girl when my mom made them and then she taught my sisters and me how to make them, I hope you like it.
We will need...
1.50 m of thin fuchsia ribbon
1.50 m of light pink ribbon
1/2m of 2cm fuchsia ribbon
30 cm of mesh
30cm of elastic
A button from grandmother's shirt
Needle
Thread
We take the ribbons joining them one on top of the other and at the end we can tie a knot or place a hook so that they do not come loose.
We take one of the colors and make a loop forward.
Then we take the other color and make a backward loop and pass it inside the previous one.
We continue with the initial one and make a loop.
And we continue with the next one on the inside.
In this way we do with all our ribbon and we are seeing the pattern of colors.
Once we get the fabric to the length we need we fasten the end so that it does not come loose.
We introduce very carefully through the center of the loops the elastic.
Knot the elastic and join the ends of the headband together, securing them with needle and thread.
For the flower.
We cut the ribbon into 7 parts of 6cm each with 3cm wide fuchsia ribbon, which are the ones that will serve as petals.
Fold the petals in half and cut the edges.
We burn the edges so that they do not get lint.
We join one by one the petals starting to bake from the center of the petal, over putting from the middle the next one until we reach the end.
Then we join the ends together and pull the thread to shape our flower.
In the center we fix the grandmother's button and that's it.
We baste the mesh and pull the thread to form the base of our flower.
We fix it on the headband.
And this is how it looks like.
Until another opportunity...
Que bello este cintillo, mi madre lo hacía cuando yo era jovencita para regalar a las recién nacida de la casa. La flor quedó muy linda complementó tan lindo cintillo. Felicidades. Gracias por compartir tu trabajo.
Gracias por leerme, a la bebe le quedo muy lindo... Saludos
This looks so easy and fun to make. This is so cute, I wish I had a baby sis or niece to make it for. Thanks for sharing
Yes, it is very easy to make the fabric, encourage yourself to do it and give it as a gift to a little girl, I know she will thank you for it. Greetings...
Ok… I will try
This is so beautiful, I really love your creativity, it looks so cute on your baby.
Yes, it was very nice, it is very easy to make. Greetings
!LUV
edithb, metzli sent you LUV. 🙂 (3/5) tools | trade | connect | daily
Made with LUV by crrdlx.