[ENG/ESP] Zarcillos bordados con lentejuelas ❤️


Saludos comunidad, espero se encuentren muy muy bien, para mi siempre es un gusto compartir por aquí algunas de mis creaciones, en esta oportunidad les mostrare unos lindos zarcillos de corazones, amo los corazones, bordados con lentejuelas y mostacillas, son un encanto, pero ya los verán en este paso a paso de hoy..
Espero sea de su agrado..
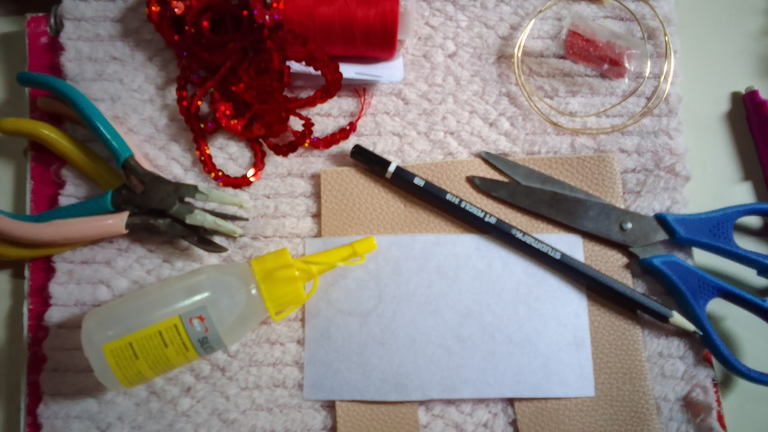
Materiales a usar:
- Lentejuelas color roja
- Mostacillas rojas
- Hilo de costuran rojo, aguja
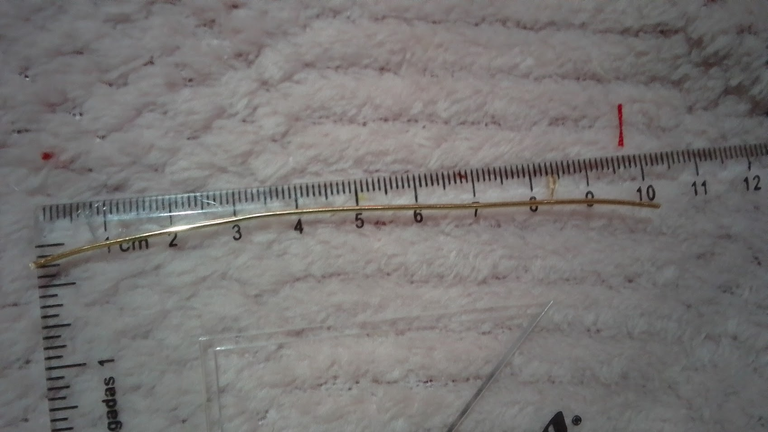
- Alambre calibre 18
- Lápiz, tijera
- Silicona liquida
- Entretela, semicuero
- Herramientas de bisutería
Paso a paso ❤️
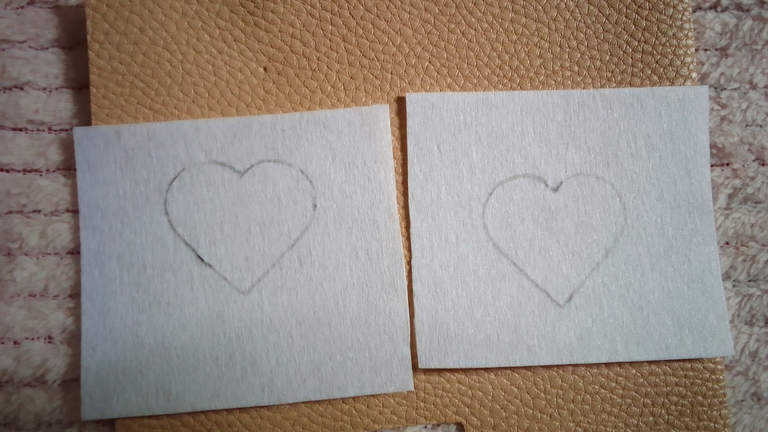
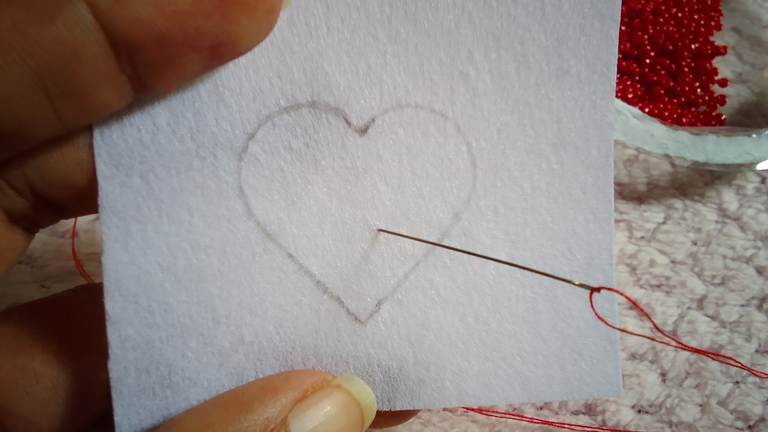
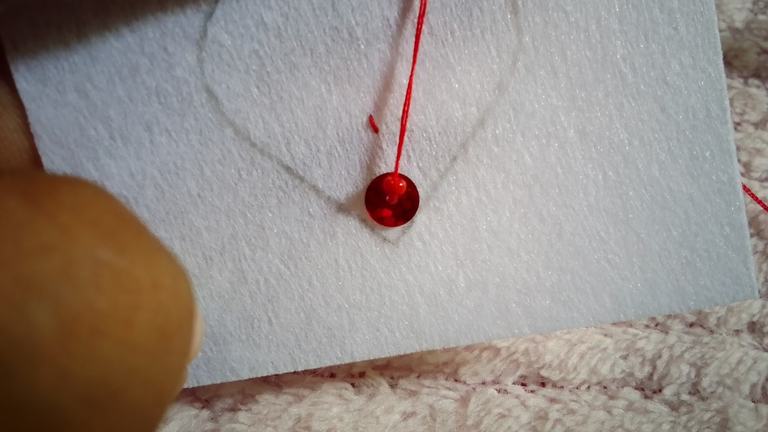
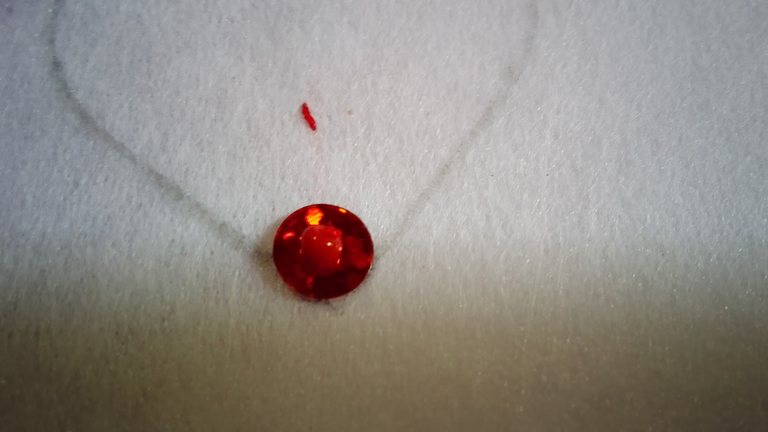
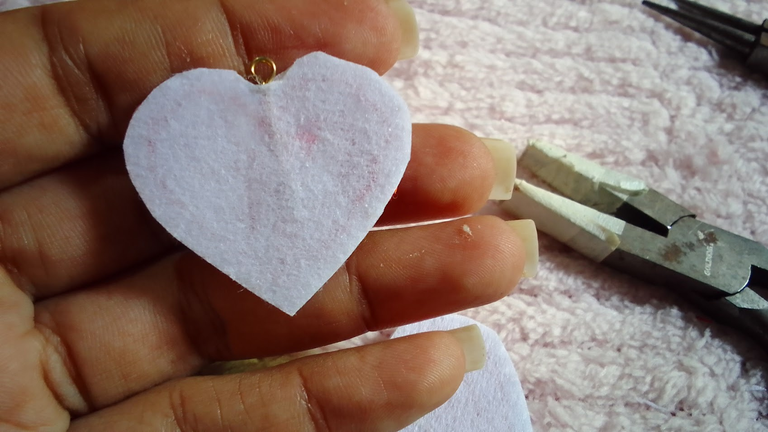
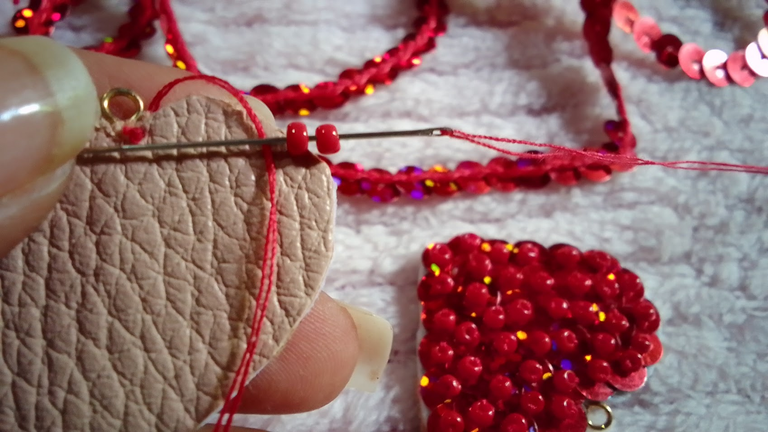
1- Iniciamos dibujando en la entretela un corazón que previamente había realizado en un cartoncito, luego pasamos el hilo por el corazón le hacemos un amarre para iniciar el bordado,
 |  |
|---|
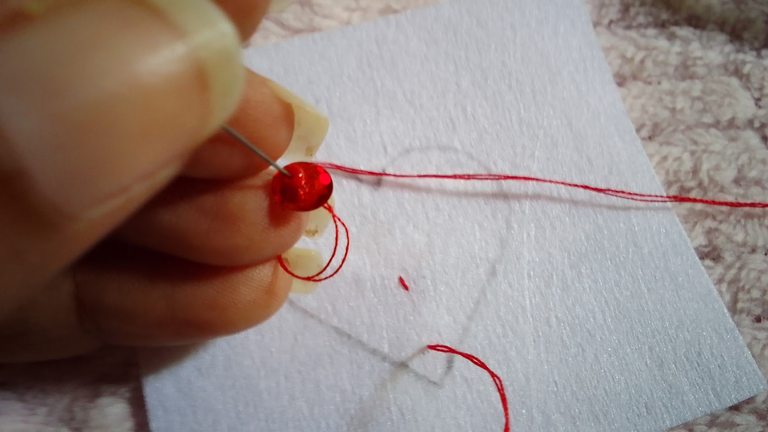
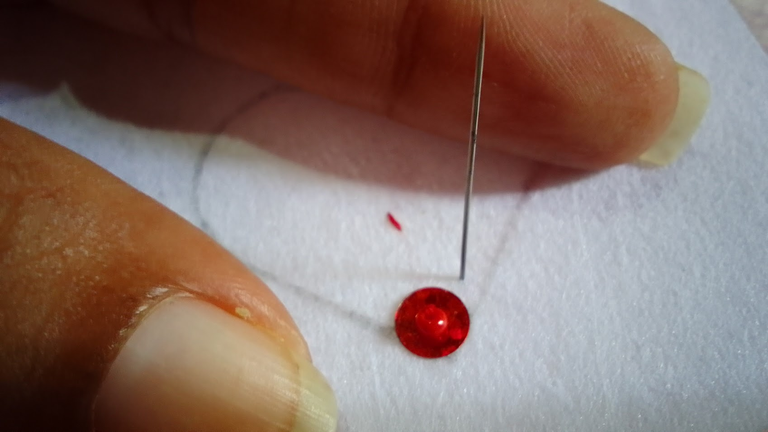
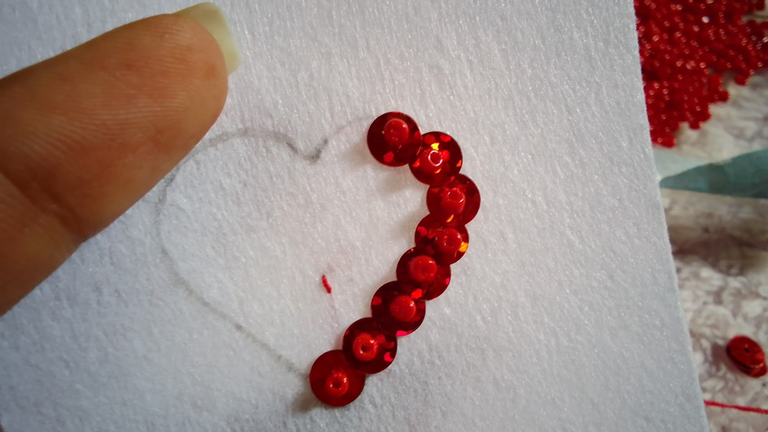
2- A Bordar!! comenzamos con el bordado y para ello enfilamos en la aguja una lentejuela y una mostacilla, lo llevamos hasta la entretela, luego levantamos un poco la mostacilla y pasamos la aguja hacia abajo por el agujero de la lentejuela para fijar en la entretela.
 |  |
|---|---|
 |  |
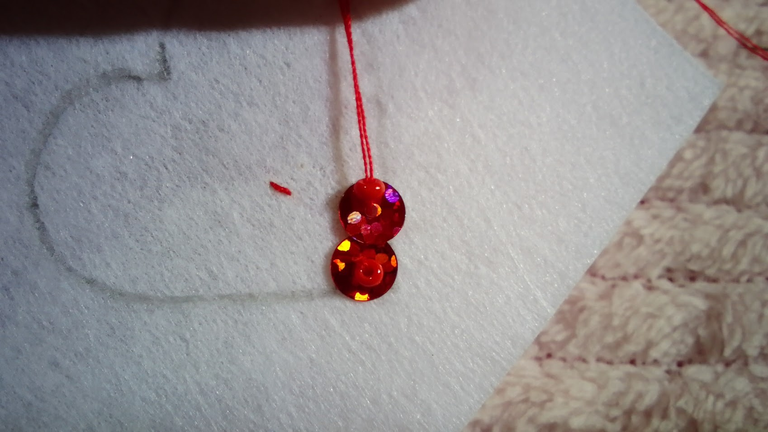
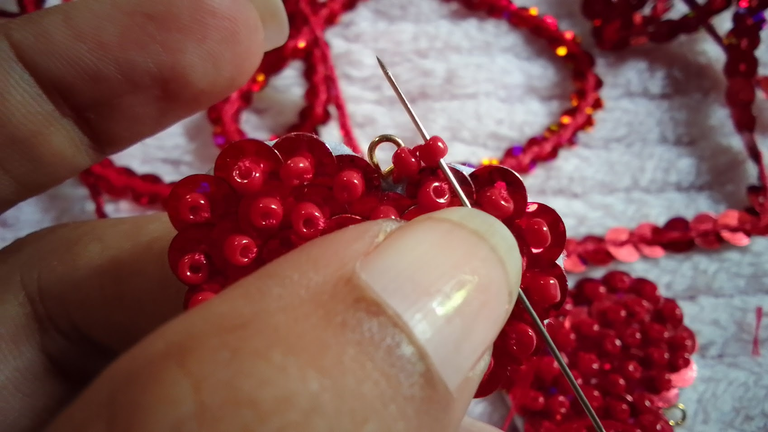
3- Ahora, seguimos con el bordado, pasamos la guja de abajo hacia arriba dejando una pequeña distancia y enfilamos nuevamente en la aguja una lentejuela y una mostacilla, vamos a guiarnos por el borde del corazón que realizamos,
 |  |
|---|
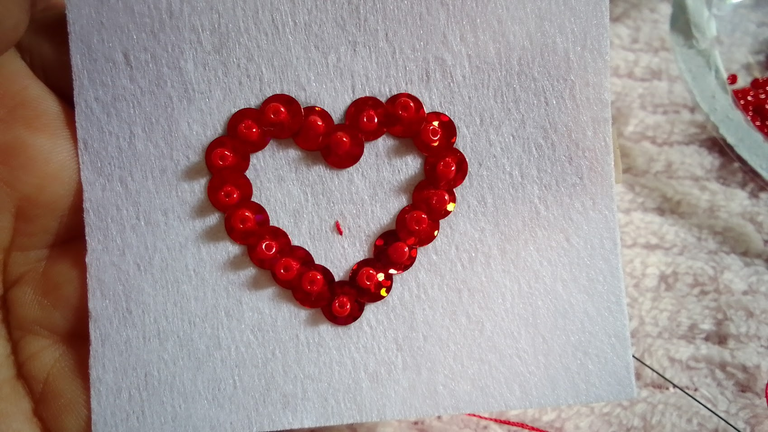
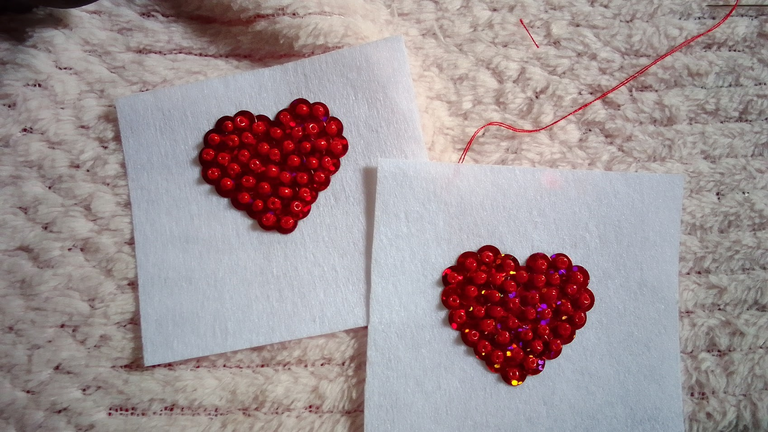
4- Seguimos con el tejido repitiendo el paso anterior hasta terminar el corazón, así mismo repetimos todos los pasos y realizamos el otro corazón.
 |  |  |
|---|
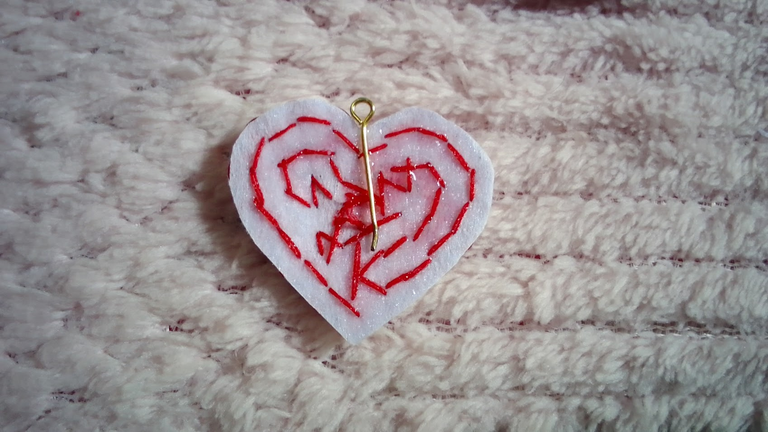
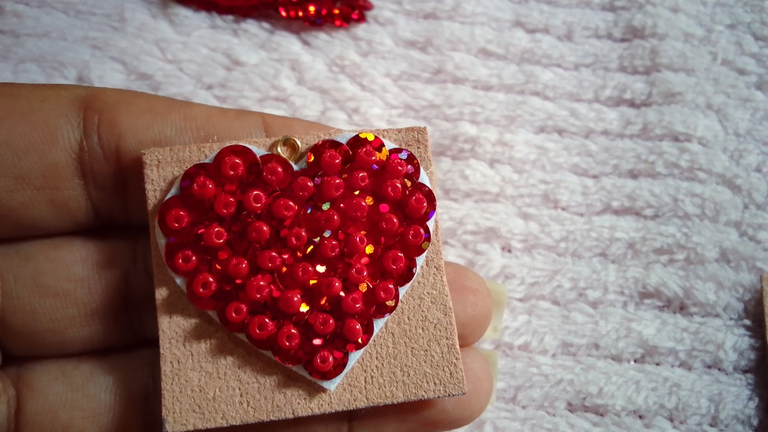
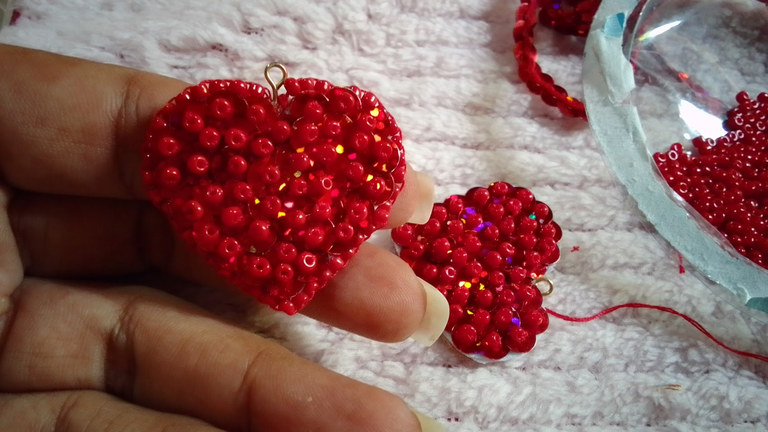
5- Después recortamos el corazón, y le colocamos un pedacito de alambre con un arito para el ensamblaje, le aplicamos pega silicona y otro pedacito de entretela
 |  |
|---|
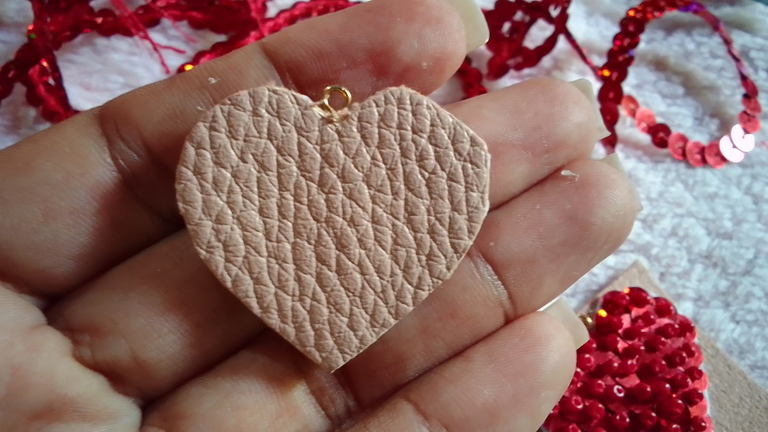
6- Después de secar un poco, le colocamos el semicuero para cerrar la parte de atrás y le quitamos el exceso.
 |  |
|---|
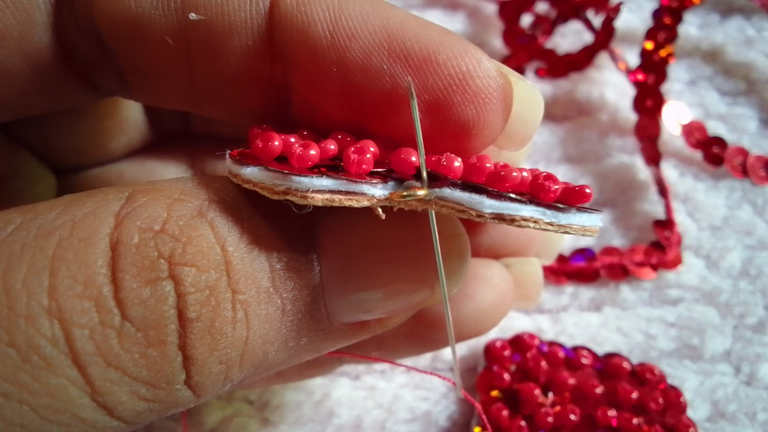
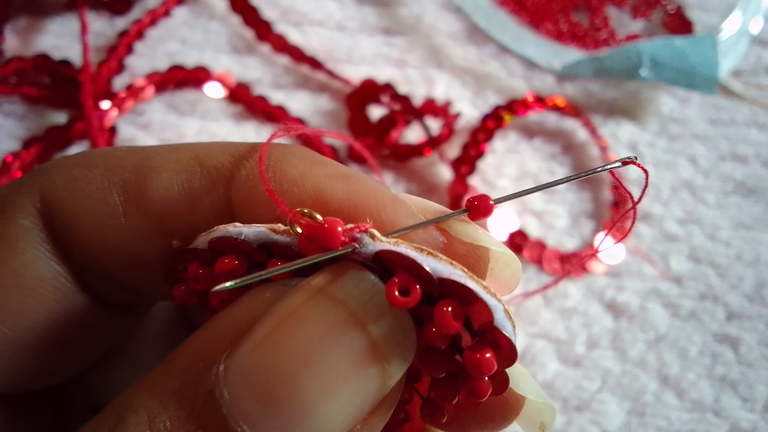
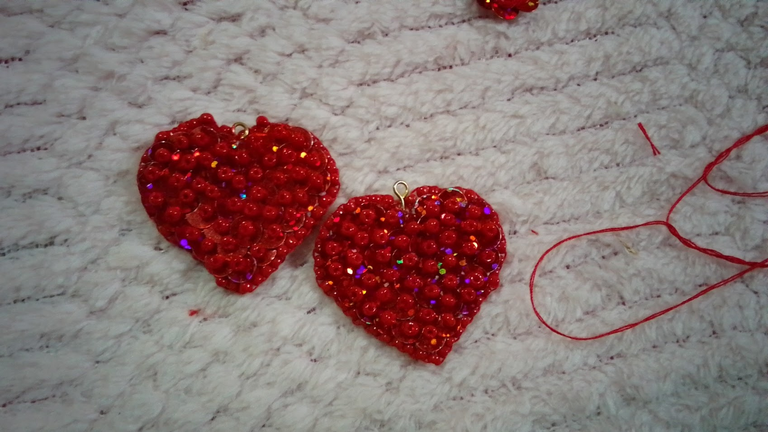
7- Ahora, para tapar los bordes colocaremos mostacillas, lo haremos pasando la aguja en el borde, enfilamos dos mostacillas, la llevamos al borde y pasamos la aguja justo al lado de la segunda mostacilla, luego por la segunda mostacilla pasamos la aguja de abajo hacia arriba para fijar en el borde.
 |  |  |
|---|
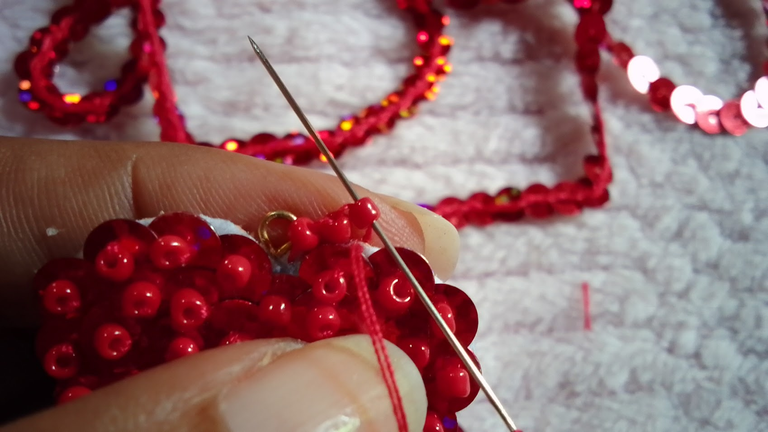
8- Continuamos el tejido enfilando una mostacilla en la aguja, luego la pasamos por el borde llevamos la mostacilla hasta el borde, y pasamos la aguja de abajo hacia arriba por la mostacilla para fijar.
 |  |
|---|
9- Repetimos el procedimiento anterior hasta completar el corazón
 |  |
|---|
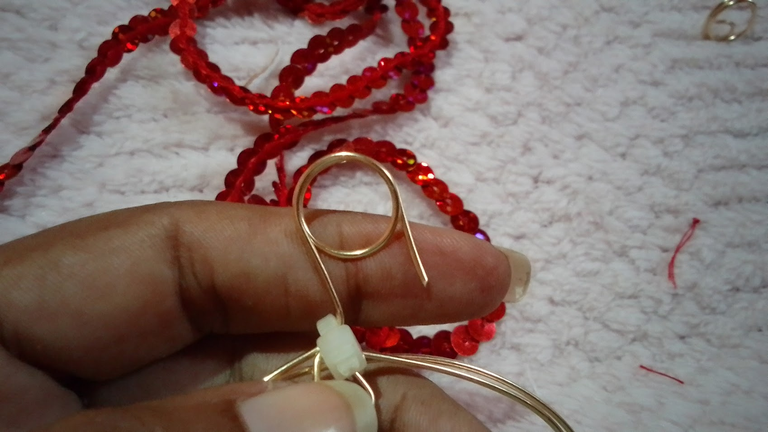
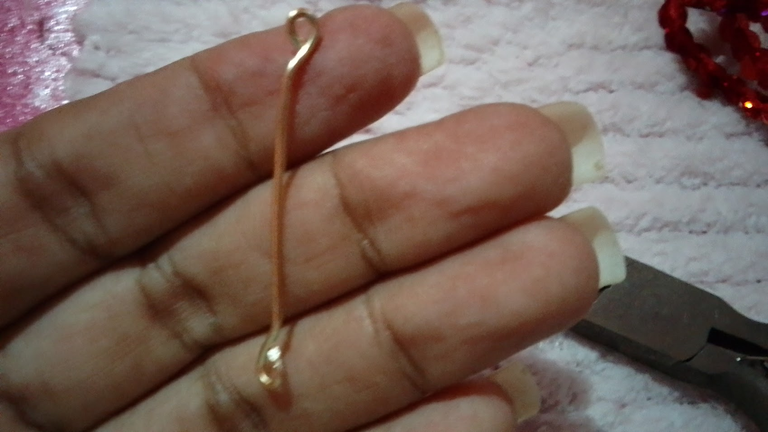
10- Con el alambre calibre 18, haremos los pines de los zarcillos para eso ocupe un marcador, le di dos vueltas, luego con la herramienta punta redonda le hice una especie de aro mas pequeño
 |  |
|---|
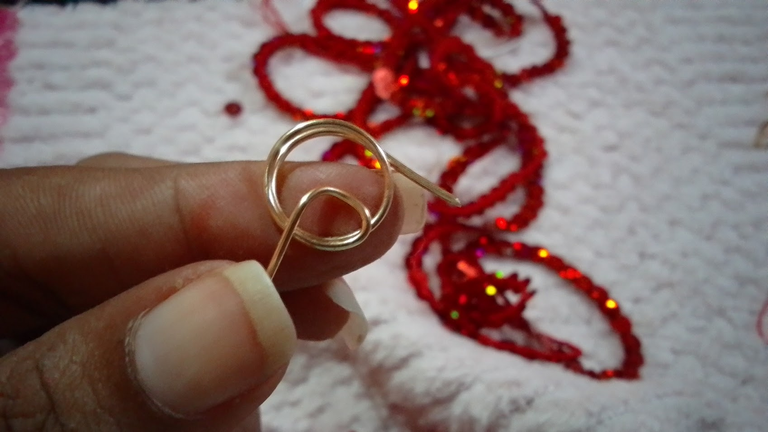
11- Luego tome 10 cm de alambre los pique en dos y a cada extremo de los alambres les realice un arito con la pinza redonda
 |  |
|---|
12- Ensamblaje, luego de tener las tres piezas listas las unimos, abrimos con la pinza redonda los aritos y colocamos el corazón y el pin.
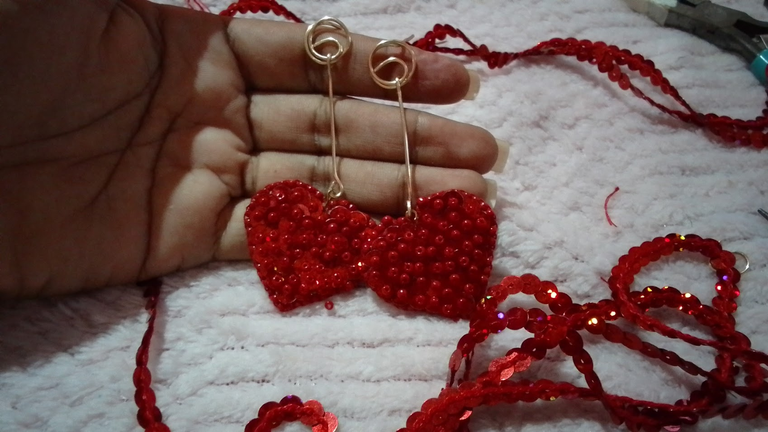
Y así lucen estos lindos zarcillos:

Espero les haya gustado este tutorial, y el resultado final.
Gracias a todos!
Greetings community, I hope you are very very well, for me it is always a pleasure to share here some of my creations, this time I will show you some cute heart tendrils, I love hearts, embroidered with sequins and beads, are a charm, but you will see them in this step by step today ...
I hope it is to your liking..
Materials to use:
- Red sequins - Red beads - Red sewing thread, needle - 18 gauge wire - Pencil, scissors - Liquid silicone - Interlining, half leather - Jewelry tools.
Step by step ❤️
1- We start by drawing on the interlining a heart that I had previously made on a cardboard, then we pass the thread through the heart we make a tie to start the embroidery,
| image.png |
|---|
2- Embroidery!!! we start with the embroidery and for this we thread on the needle a sequin and a bead, we bring it up to the interlining, then we lift a little the bead and pass the needle down through the hole of the sequin to fix it on the interlining.
| |
|---|---|
| |
3- Now, we continue with the embroidery, we pass the needle from the bottom to the top leaving a small distance and we thread again on the needle a sequin and a mustard, we are going to be guided by the edge of the heart that we made,
| |
|---|
4- We continue with the weaving repeating the previous step until we finish the heart, in the same way we repeat all the steps and we make the other heart.
| | |
|---|
5- Then we cut out the heart, and we put a little piece of wire with a ring for the assembly, we apply silicone glue and another little piece of interlining.
| |
|---|
6- After drying a little, we put the half leather to close the back and remove the excess.
| |
|---|
7- Now, to cover the edges we will place beads, we will do it by passing the needle on the edge, we thread two beads, we take it to the edge and pass the needle right next to the second bead, then through the second bead we pass the needle from bottom to top to fix on the edge.
| | |
|---|
8- Continue knitting by threading a bead on the needle, then pass it along the edge, bring the bead to the edge, and pass the needle from the bottom up through the bead to fix.
| |
|---|
9- Repeat the above procedure until the heart is complete.
| |
|---|
10- With the 18 gauge wire, we will make the pins of the tendrils for that I used a marker, I gave two turns, then with the round tip tool I made a kind of smaller ring.
| |
|---|
11- Then take 10 cm of wire and cut them in two and at each end of the wires make a ring with the round pliers.
| |
|---|
12- Assembly, after having the three pieces ready we join them together, we open with the round pliers the rings and place the heart and the pin.
And this is how these pretty earrings look like:
I hope you liked this tutorial, and the final result.
Thank you all!

| Recursos/Resources | Canva |
|---|---|
| Dispositivo móvil/Mobile Device | Realmec11 |

Quedaron muy bonitos y el color super apropiado, yo lo usaría en una salida nocturna. Gracias por compartir cariño
Hola, Feliz día! el color es lindo, el foto no se aprecia mucho pero el rojo es tornasol se ve lindo, muchas gracias, el color es llamativo.. ❤️
@edittasc86 hermoso diseño, con mucha personalidad, me encantaron, gracias por compartir tu creación, saludos 🤗
Hola!! me alegre te haya gustado, la verdad son lindos.. y lucen preciosos..
Precioso este diseño, me encantó.
Se ven super espectacular, para una salida formal ❤️
Hola amiga, muchas gracias me alegra mucho te haya gustado estos zarcillos, la verdad son muy lindos.. son un genial complemento..
The heart tendril really touched my heart. I really enjoyed reading through the procedures you provided.
Hello! I'm glad it touched your heart, I'm glad... thank you very much......
Quedaron muy lindos.
Muchas gracias me alegra le haya gustado.
Muy buena creatividad me encanta esta forma como lo hiciste el resultado genial feliz tarde.
Hola!! me alegra le haya gustado.. son muy lindos y lucen geniales.
Oye si se ven muy lindos y me gustó tu creatividad feliz día.
Amiga están muy lindos éxitos para ti 😘