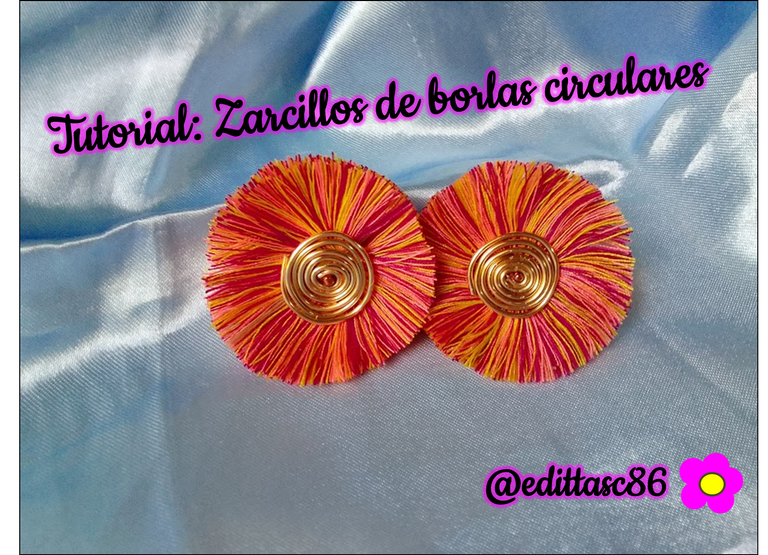
[ESP-ENG] Tutorial: circular tassel earrings
Saludos, comunidad Jewerly soy Edioretza Venezolana, y hoy publicare por primera vez una de mis creaciones en esta linda comunidad, espero sea de su agrado:
Greetings, Jewerly community I am Edioretza Venezuelan, and today I will publish for the first time one of my creations in this beautiful community, I hope you like it:
Zarcillos de Borlas de colores
Les mostrare como los realice, los materiales que utilice
✔Hilos de colores (use de costura)
✔Tablita de 7cm para construir la borla
✔Alambre de calibre 16 para detalle
✔Pega silicona fría
✔Base de cartón redondo para dar forma a la borla
✔Tijera
✔clip de zarcillos o base de zarcillo
I will show you how I made them, the materials I used.
✔ Colored threads (use sewing thread).
✔7cm board to build the tassel.
✔16 gauge wire for detail.
✔Cold silicone glue.
✔Round cardboard base to shape the tassel.
✔Scissors
✔Tril clip or tendril base.

Comencemos con el tutorial
Let's start with the tutorial
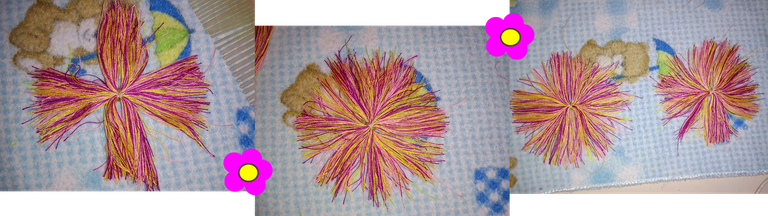
Lo primero que debemos hacer es unir los hilos yo use carretos de 600 yardas, y comencé a darles la vuelta alrededor de mi tablita, en realidad no conté la cantidad de vueltas se que fueron muchas jaja hasta que mas o menos logre un grosor:
The first thing to do is to join the yarns together, I used 600 yard spools, and started to twist them around my little board, I didn't really count the amount of twists I know there were a lot haha until I more or less got a thickness:
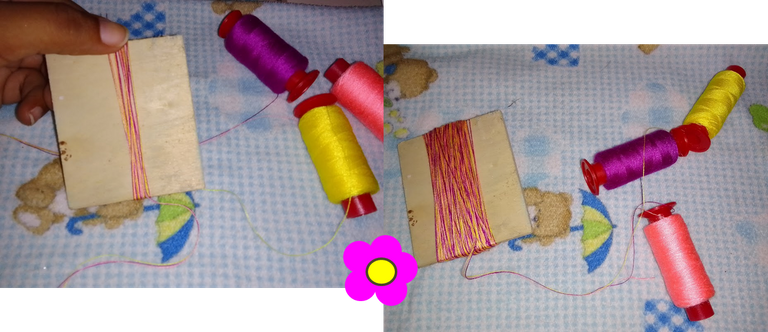
Lo que hacemos seguido a tener el grosor deseado es cortar el hilo para sacarlo de la tabla, y obtendremos aproximadamente 14 cm de largo de hilo
What we do after having the desired thickness is to cut the thread to remove it from the board, and we will obtain approximately 14 cm long thread.
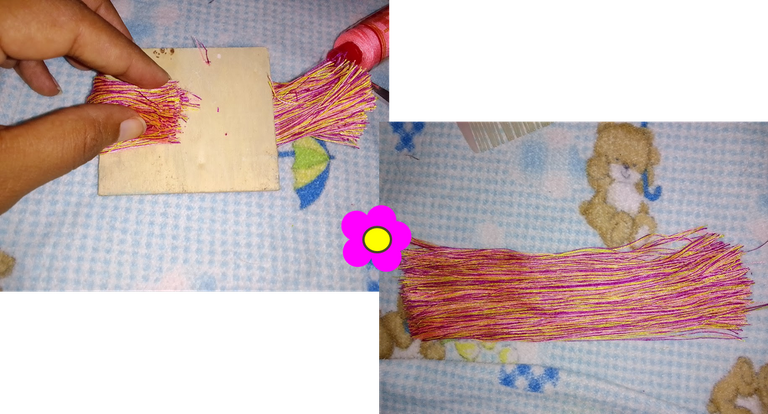
De ese borla de 14 cm lo dividimos en dos tratando de tener dos partes iguales ya que cada una sera una borla para cada zarcillos, y luego esa sección la volvemos a dividir en dos , ya que haremos borlas redondas y para que se vean mas gruesas, cortamos a la mitad unimos y luego sujetamos en el medio con otro hilo, de manera que no se suelten:
From that 14 cm tassel we divide it in two trying to have two equal parts since each one will be a tassel for each tendril, and then that section we divide it again in two, since we will make round tassels and to make them look thicker, we cut them in half, join them and then fasten them in the middle with another thread, so that they do not come loose:
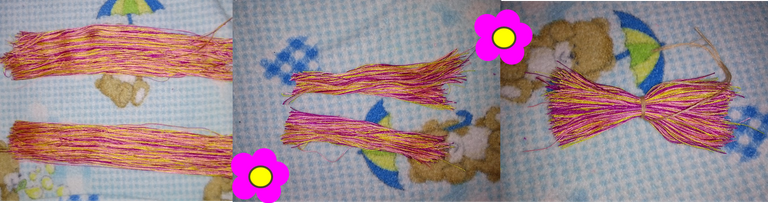
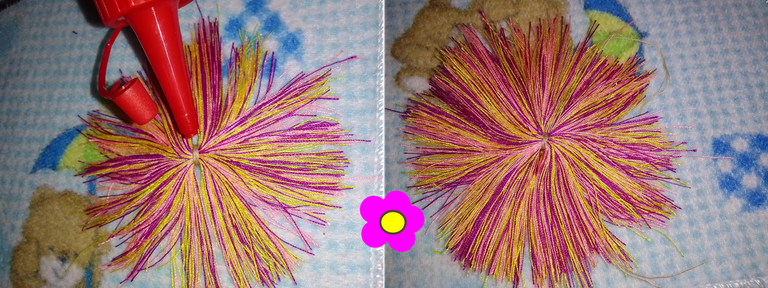
Una vez listo vamos a forma una de las caras de nuestra borla recuerden que con la sección que dividimos inicialmente la subdividimos y haremos con cada una de ellas una cara para nuestra borla redonda y la colocamos de esta manera y la peinamos para darle la forma:
Once ready we are going to form one of the faces of our tassel, remember that with the section that we divided initially we subdivide it and we will make with each one of them a face for our round tassel and we place it in this way and we comb it to give it the shape:
En la parte anterior mostré ambas caras de un zarcillo de borlas luego las unimos, yo utilice pega silicona para pegarlas, yo no pegue los centros juntos porque se puede notar como un poco duro entonces los pegue con los centros uno al lado del otro
In the previous part I showed both sides of a tassel tendril then we join them together, I used silicone glue to glue them, I didn't glue the centers together because it can feel a bit hard so I glued them with the centers side by side.
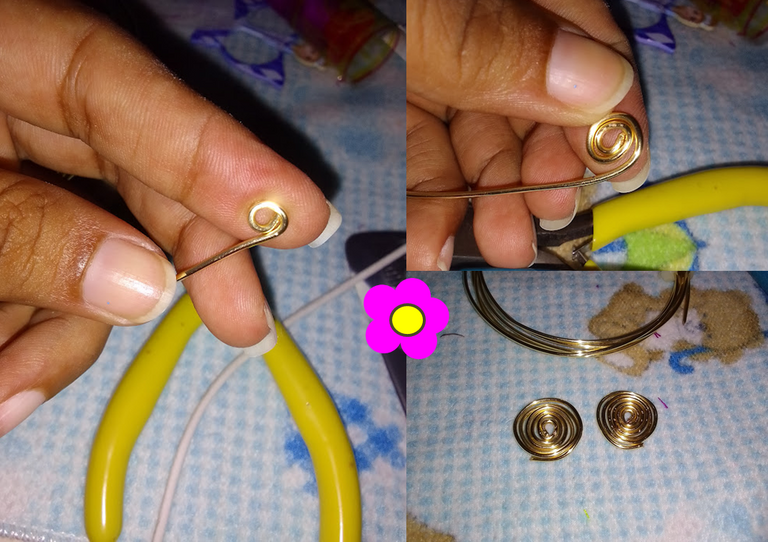
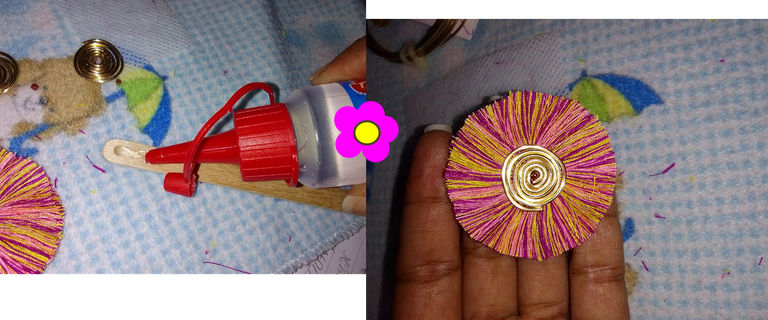
Aquí ya tenemos una borla lista falta pulir, para la otra borla repetimos el procedimiento anterior, mientras ellas se secaban comencé a realizar el detalle del medio y decidí hacer una forma de caracol con el alambre calibre 16, con la ayuda de una pinza redonda inicie el centro y luego con mucha fuerza comencé a dar vueltas unas 6 :
Here we already have a tassel ready to polish, for the other tassel we repeat the previous procedure, while they were drying I started to make the middle detail and decided to make a snail shape with the 16 gauge wire, with the help of a round pliers I started the center and then with great force I started to turn about 6:
Bien, luego de terminar estas formas y que estuvieran pegadas las borlas con la base de cartón y la tijera les di forma redonda:
Well, after finishing these shapes and gluing the tassels with the cardboard base and the scissors, I gave them a round shape:
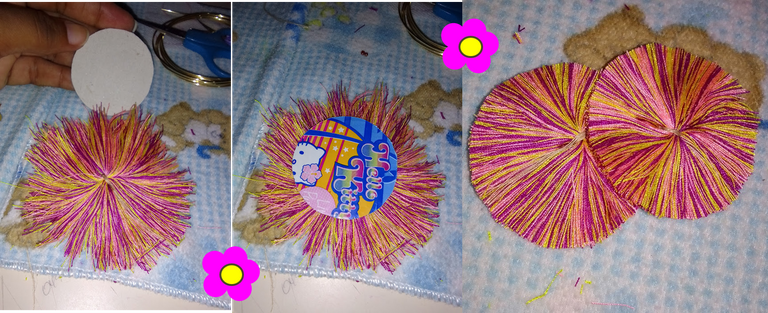
Una vez listos los tamaños deseados pueden ser mas pequeños, es cuestión de gustos, seguí pegando el detalle en el medio utilizando pega silicona yo utilice una paletita de madera para evitar el exceso de pega y en el medio le coloque una mostacilla para tapar ese espacio:
Once ready the desired sizes can be smaller, it is a matter of taste, I continued gluing the detail in the middle using silicone glue, I used a wooden palette to avoid excess glue and in the middle I placed a bead to cover that space:
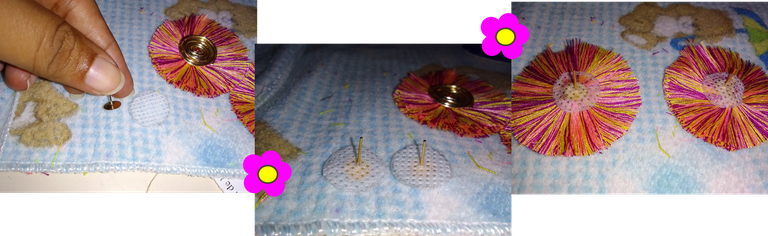
Luego, colocamos el pin del zarcillo utilice tela pop y silicona para fijarlos:
Then, we place the tendril pin using pop cloth and silicone to fix them:
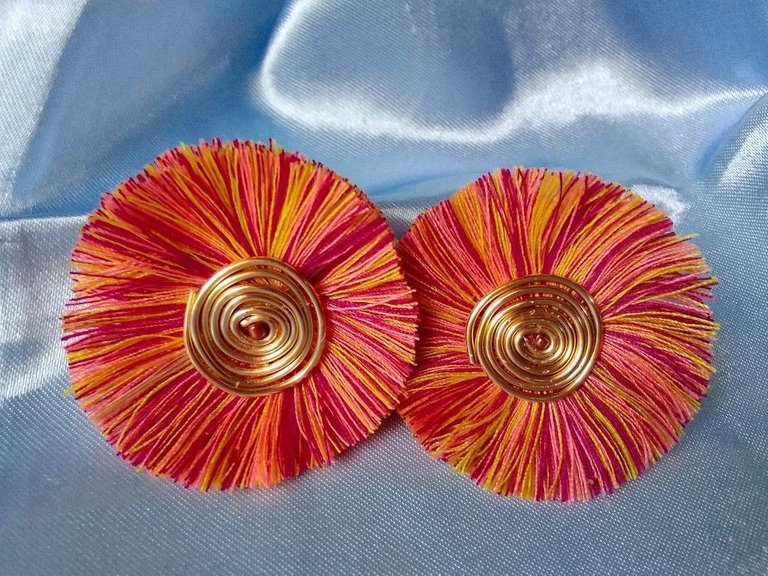
y así se ven mis zarcillos de borlas:
and this is what my tassel tendrils look like:
Espero sea de su agrado mi tutorial
I hope you like my tutorial
Las fotografías fueron tomadas por mi realmec11
los collages realizados en PowerPoint
los separadores realizados de flores en PowerPoint
The photographs were taken by my realmec11
the collages made in PowerPoint
the separators made of flowers in PowerPoint
Saludos a todos...
Greetings to everyone...
que bien amiga, muy lindo tus zarcillos, es todo un proceso por lo que veo jjij tu eres una experta en esto, te quedan muy bien elaborados, te felicito por este tutorial, saludos!
Gracias amiga se lleva su tiempo pero son fáciles de realizar.. a mi me encantan es económico y elegante..
Muy lindos y delicados. Te pueden sacar de apuros en un ocasión especial o simplemente puedo hacer 3 o 4 pares para mi. Explicas todo de manera sencilla. Felicidades y que Dios bendiga tua manos
siii son súper prácticos y para cualquier ocasiona, que bueno te gusto y puedes hacer tus propios zarcillo.. Gracias por pasarte por aquí.. Amén
Es una idea interesante
siii y accesible, saludos muchas gracias por su visita..
good job
Te quedaron muy lindos. Felicidades, lo voy a intentar @edittasc86. Saludos y gracias por compartir tu idea. 💕
Gracias amiga, que bueno te gusto, siiii inténtalo seguro te queda hermoso..
@edittasc86 💖
Quedaron bien lindos.
Tengo varios hilos por ahí, con los que sería bueno practicar esta técnica.
Se pueden hacer para combinar con a ropa que usaremos.
Sii amiga inténtalo,puedes combinar a tu antojo te quedara hermoso
https://twitter.com/EdioretzaC/status/1526550383786704897
The rewards earned on this comment will go directly to the person sharing the post on Twitter as long as they are registered with @poshtoken. Sign up at https://hiveposh.com.
Te quedo muy hermoso la verdad, son bien lindos.
Saludos querida @edittasc86 hoy nos muestras una técnica muy hermosa y sencilla con hilos, estos zarcillos son muy originales, gracias por este contenido de calidad que nos has traído saludos