[ESP - ENG] Tutorial: Sellos para tu Emprendimiento. 🦋

ENGLISH VERSION (click here!)
Hi creative community, I hope you are all very well, I have always liked to do things with my hands, I think that's why I make jewelry, because I really like what each piece represents, and I like to give good attention.
I don't have the best packaging but I like to add things, recently I make little cards with messages or I would write something on the paper bag, but it occurred to me to add a little more of me, so that it is no longer enough to make the accessory, that's why I made a stamp of my business.
And here I will show you how I did it ..
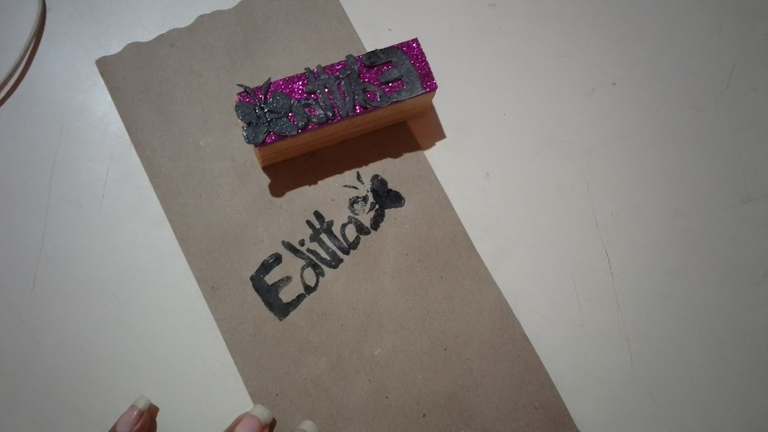
Editta's Stamp 🦋
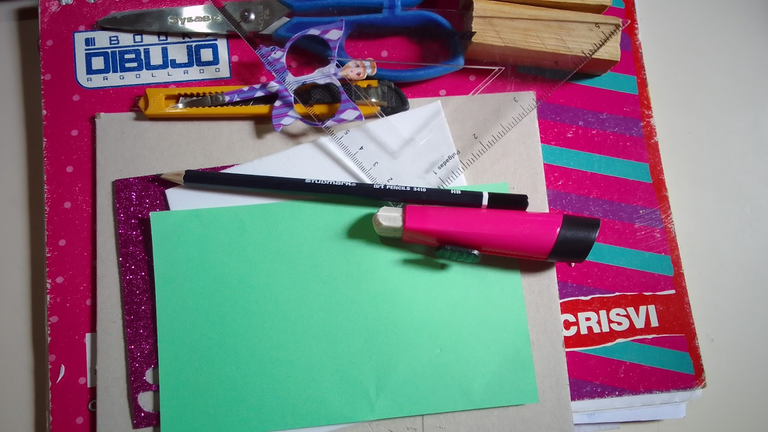
To start, the materials I used:
✏️ Drawing pencil HB
✏️ A sheet
✏️ Eraser
✏️ Wooden block
✏️ Foam or eva foam
✏️ Rule
✏️ Card, Cutter
✏️ Cold silicone
Stamp Elaboration 🦋
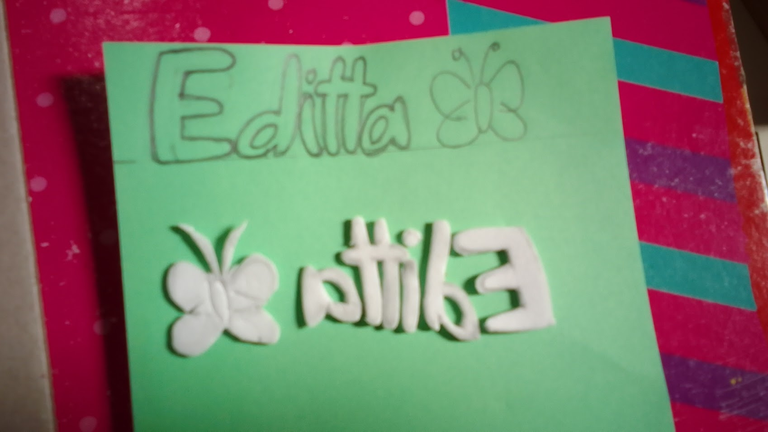
1- We start by drawing on the paper the name you want to mark, in my case as I said before it is of my accessory business @edittastore, and I will put the name on the stamp "EDITTA" with a butterfly, to draw the letters I used drawing pencil HB.
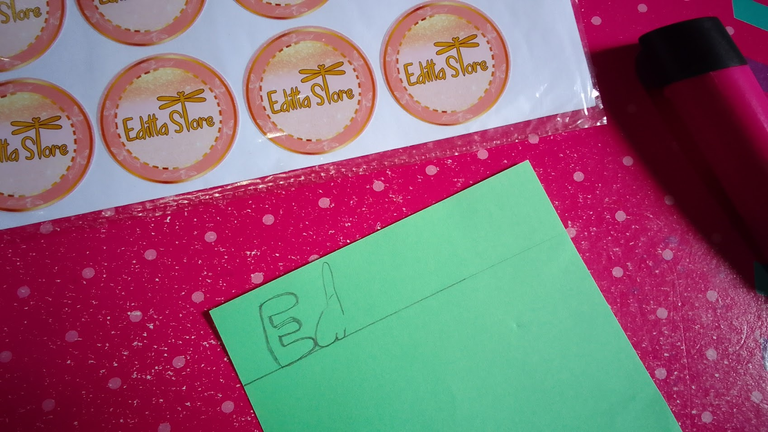
2- After drawing the letters I put the foam to trace the letters on it, with the help of the base of my eraser I transfer the letters, these must be reversed so that when we stamp the stamp the word is correct.
 |  |
|---|
3- After marking on the foam, with the cutter and very carefully not to cut more, cut the letters one by one and the butterfly, this is how they should look
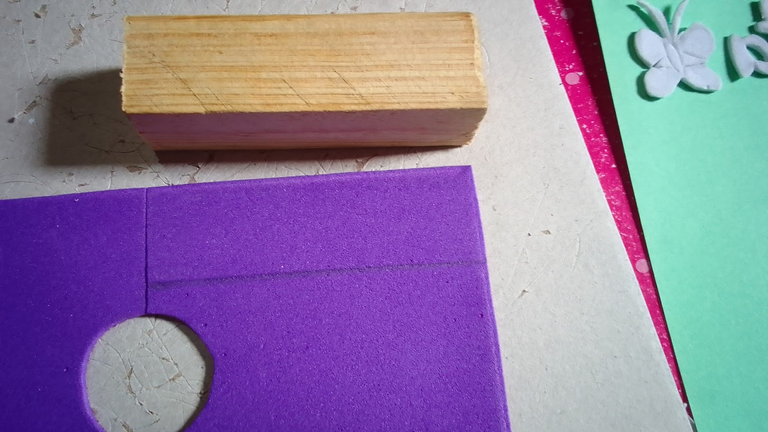
4- Then on the wooden block, I measured another piece of foam to glue it on, this will be the base where the letters of my stamp that I previously cut will be:
 |  |
|---|
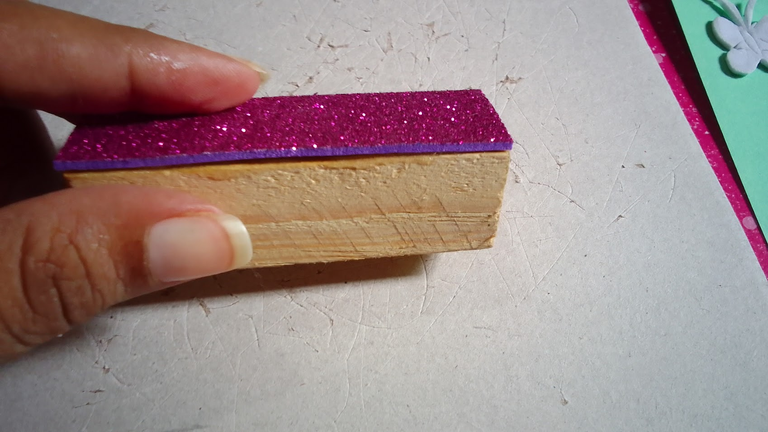
5- When the purple foam is glued to the wooden block, we glue the letters we apply glue silicone to each of the letters and place them like this:

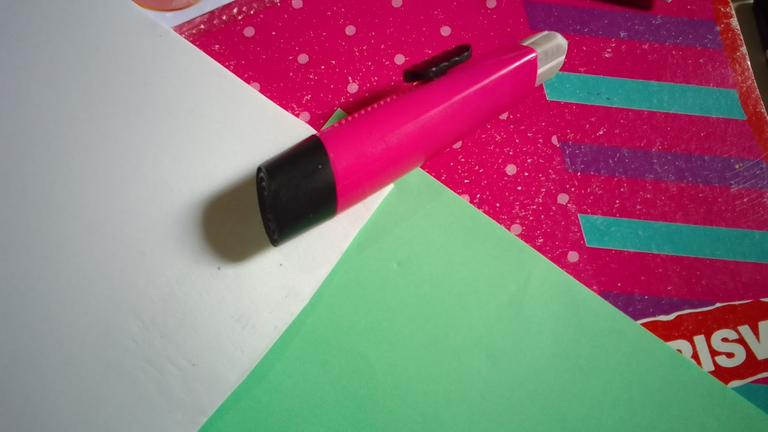
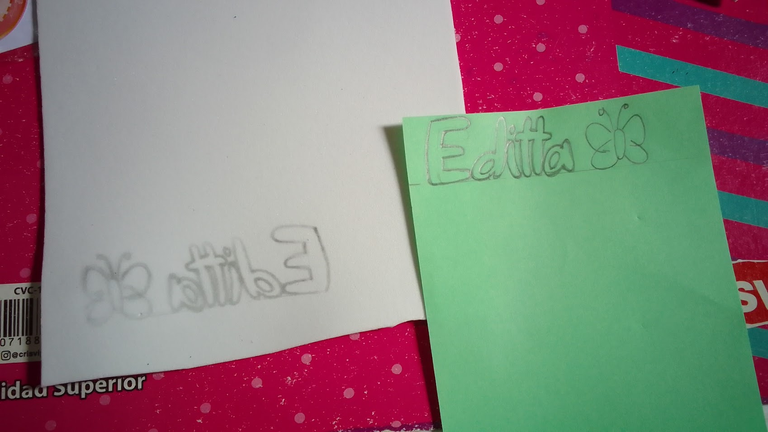
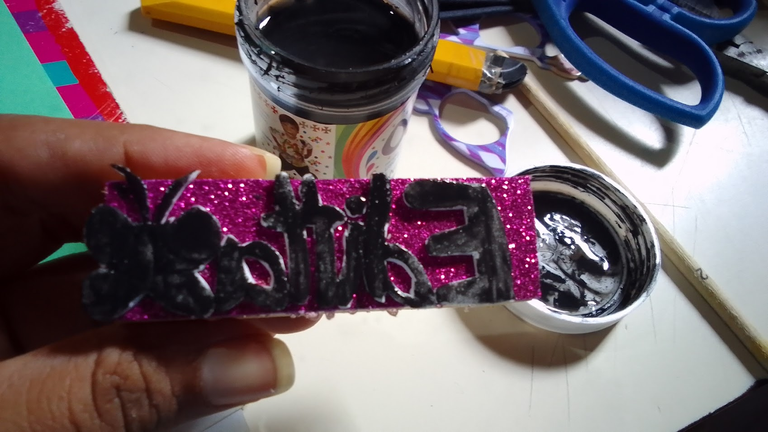
6- After the letters have dried, we apply ink or paint, I will use black cold paint, with a brush I apply to the letters and then to test the stamp on the green sheet and look how the stamp looks:
 |  |
|---|
Isn't it really nice? With this same technique you can make any type of heart, letter or shape stamps, they are beautiful and give a special touch to the packaging of your business, I use these bags and this is how it looks with the stamp:
I hope you liked this tutorial, made with love...

Saludos comunidad creativa espero se encuentren muy muy bien, siempre me gustado hacer cosas con mis manos creo por esto hago bisutería, porque me gusta mucho lo que representa cada pieza que hago, y me gusta brindar una buena atención.
No tengo el mejor empaque pero me gusta agregarle cosas, reciente hago cartoncitos con mensajes o les escribía algo en la bolsita de papel, pero se me ocurrió agregarle un poco mas de mi así, como que ya no es suficiente con hacer el accesorio 😅, es por esto que realice un sello de mi emprendimiento.
Y aquí les mostrare como lo hice..
Sello de Editta 🦋
Para comenzar, los materiales que utilice:
✏️ lápiz de dibujo HB
✏️ Una hoja
✏️ Borrador
✏️ Taco de madera
✏️ Foami o goma eva
✏️ Regla
✏️ Tijeta, Cutter
✏️ silicona frio
Elaboración del Sello 🦋
1- Iniciamos dibujando en el papel el nombre que deseas marcar, en mi caso como les dije anteriormente es de mi emprendimiento de accesorios @edittastore, y colocare el nombre en el sello "EDITTA" con una mariposita, para dibujar las letras utilice lápiz de dibujo HB.
2- Luego de dibujar las letras coloco el foami para calcar en el las letras, con la ayuda de la base de mi borrador traspase las letras, estas deben quedar al revés para que al marcar el sello nos quede la palabra de forma correcta.
| |
|---|
3- Después de marcar en el foami, con el cúter y con mucho cuidado de no cortar demás recorte las letras una por una y la mariposa, así deben quedar
4- Luego en el taco de madera, medí otro pedacito de foami para pegarlo esta sera la base donde estarán las letras de mi sello que recorte previamente:
| |
|---|
5- Cuando el foami morado se haya pegado en el taco de madera pegamos las letras aplicamos pega silicona a cada una de las letras y las colocamos de esta manera:
6- Luego de que las letras se hayan secado, aplicamos tinta o pintura, yo utilizare pintura al frio color negro, con un pincel aplique a las letras y luego para probar selle en la hojita verde y miren como se ve el sello:
| |
|---|
Quedo realmente lindo verdad?? con esta misma técnica se pueden hacer cualquier tipo de sellos de corazones de hoja, de cualquier letra o forma, quedan bonitos y le dan un toque especial a los empaques de tu emprendimiento, yo uso estas bolsitas y así se ve con el sello:
Espero les haya gustado este tutorial, hecho con cariño..
Recursos Resources 🦋
| Portada y banne/Cover and banner | Canva |
|---|---|
| Fotos de mi propiedad/Photos of my property | realme c11 |
| traductor/translator | Hive translator |

Muy genial la idea de hacer sellos con foami. Imagino que haybque ser cuidadoso y limpiarlo con cada uso, pero de que está genial, está genial.
Como sugerencia, habría sido genial que en la portada colocaras una imagen mas grande del sello o la manualidad, que es lo que se busca resaltar en la publicación.
!discovery 35
Hola!! muchas gracias, ok ok gracias por la sugerencia..
This post was shared and voted inside the discord by the curators team of discovery-it
Join our Community and follow our Curation Trail
Discovery-it is also a Witness, vote for us here
Delegate to us for passive income. Check our 80% fee-back Program
https://leofinance.io/threads/view/hive-130560/re-leothreads-2dqjfd4r4
Oh que genial idea, es increíble todo lo que se puede hacer usando creatividad, gran trabajo.
Hola!! sii super chevere lo que se puede hacer con pocos materiales y un toque de creatividad, muchas gracias..
Que buena idea saludos!
Gracias mi bella saludos 🤩