🍇🍍 Creative Ornament to Decorate Our Fridge 🍍🍇 [Eng/Esp].
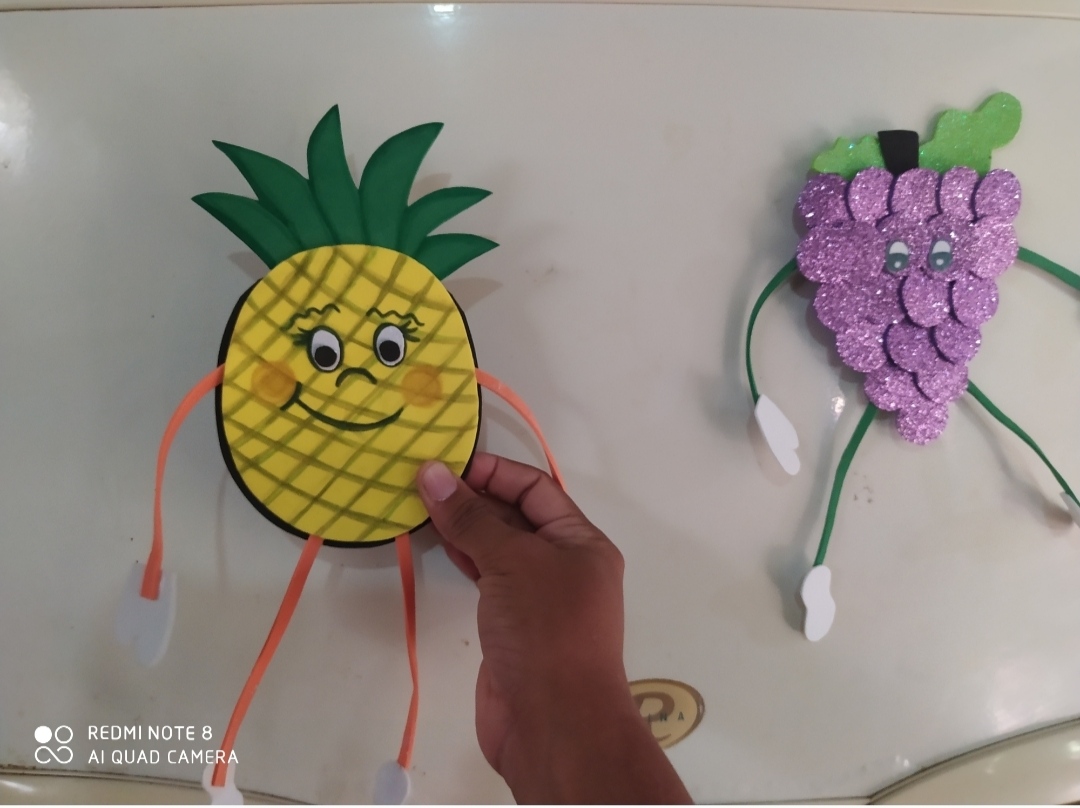
Good evening dear platform... Greetings and blessings to all, happy start to the week, pleased as always to be here a little absent because we are without internet, it has been very difficult for me to publish, tonight, I love to share with you some decorations for our refrigerator with little material, You can make the fruit or vegetable you want, in my case I made a beautiful pineapple 🍍, and a grape 🍇, super easy to make, the best thing of all is that it will help us decorate our refrigerator, as I told you it is super easy and in few steps, I didn't make it that big, I hope you like them, then I will show you the steps..
Buenas noches querida plataforma... Saludos y bendiciones para todos, feliz inicio de semana, contento como siempre de estar aquí un poco ausentes porque estamos sin internet, me ha sido muy difícil publicar, esta noche me encantaría compartir con ustedes algunas decoraciones para nuestro refrigerador. con poco material, puedes hacer la fruta o verdura que quieras, en mi caso hice una hermosa piña 🍍, y una uva 🍇, súper fácil de hacer, lo mejor de todo es que nos ayudará a decorar nuestro refrigerador, ya que Les dije que es súper fácil y en pocos pasos, no lo hice tan grande, espero que les guste, luego les mostraré los pasos.

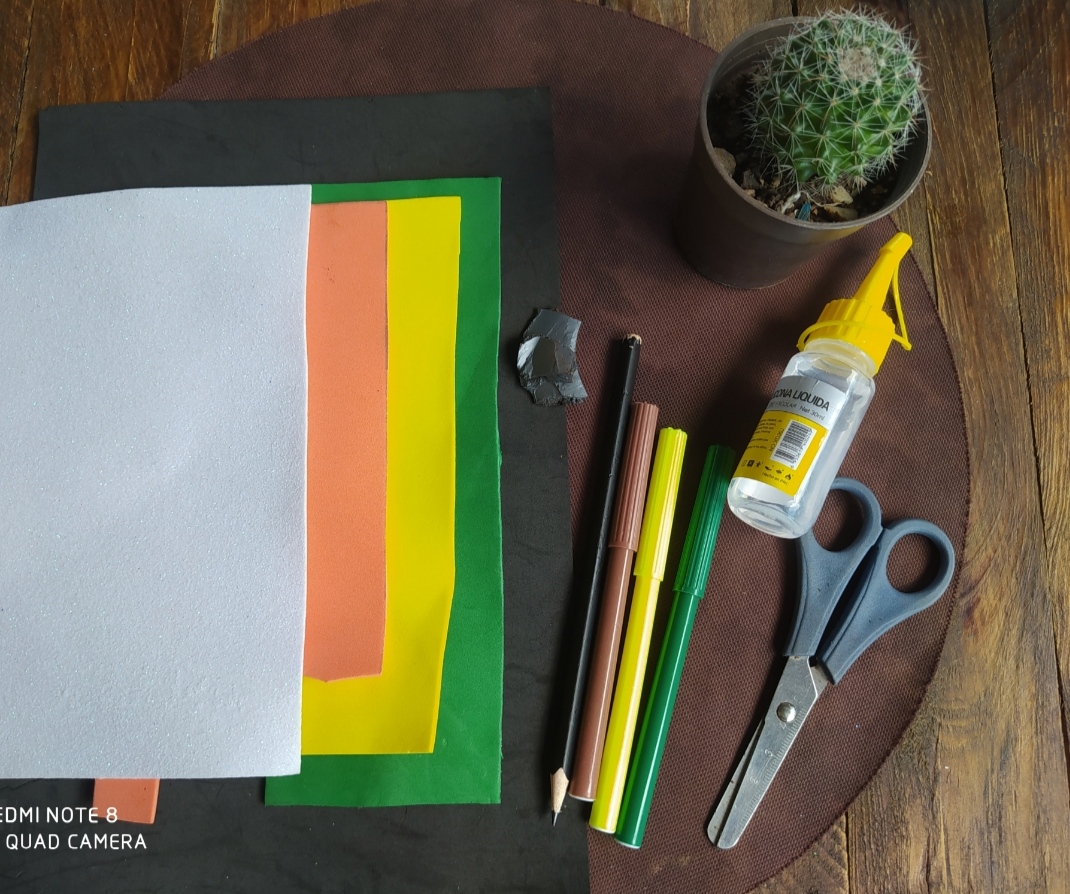
🍇🍍Materials for making refrigerator ornaments🍇🍍:
~ Yellow foam
~Green foam
~Black foam
~Orange foam
~White foam
~Liquid silicone
~Pencil
~Scissors
~Black marker
~Brown marker
~Green marker
~Magnet
~Orange marker.
🍇🍍Materiales para la elaboración de adorno para nevera🍇🍍 :
~ Foami amarillo
~Foami verde
~Foami negro
~Foami anaranjado
~Foami blanco
~Silicon líquido
~Lapiz
~Tijera
~Marcador negro
~Marcador marrón
~Marcador verde
~Iman
~Marcador anaranjado.
The steps we must follow are the following:
Los paso que debemos seguir son los siguientes :
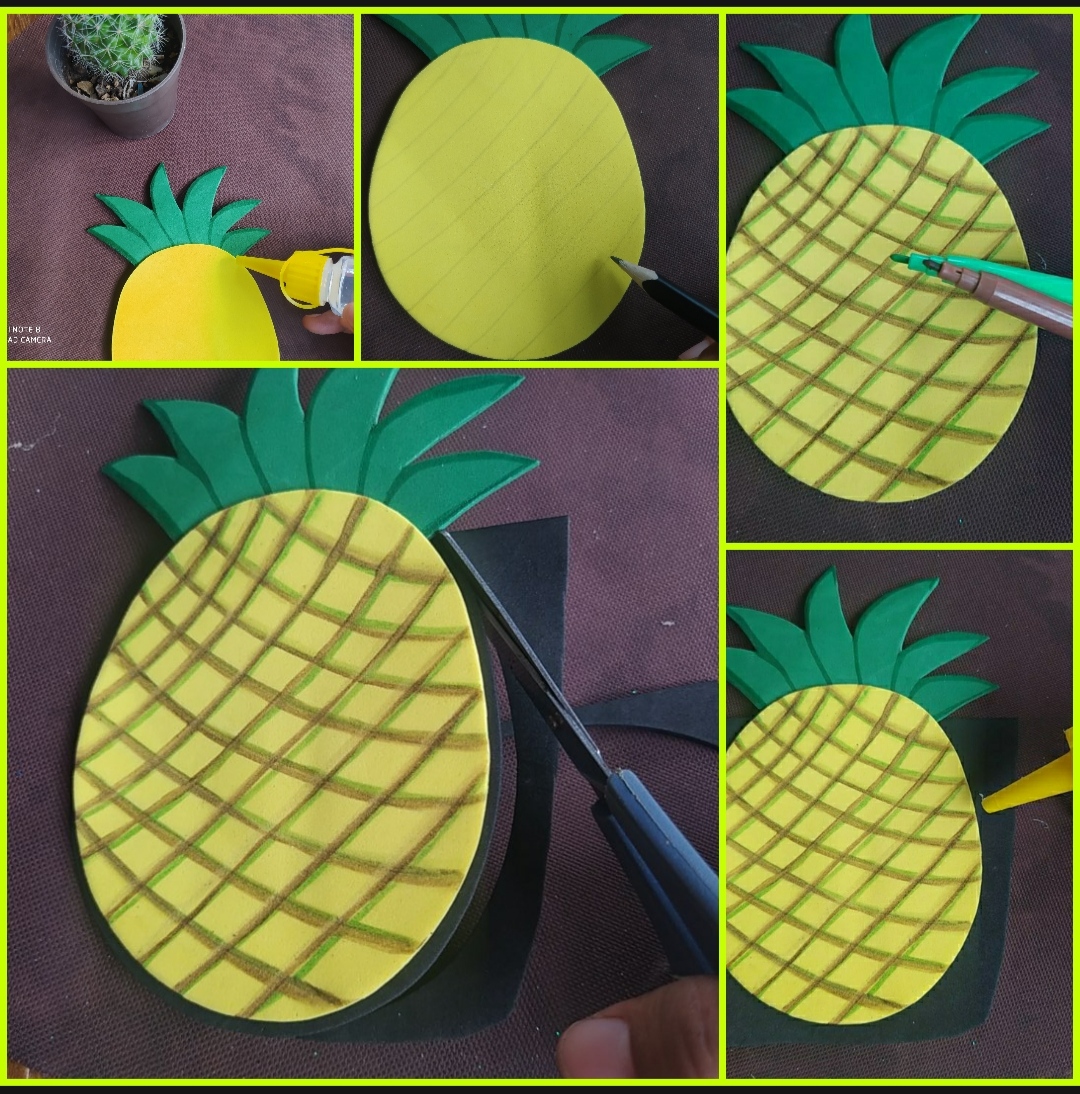
🍍1°Step for preparation:
The first thing we must do is cut out a square in the yellow foam and save the rest, in that square we mark the shape of the pineapple of the size you want, we cut little by little, then we mark the crown part of the pineapple in the green foam and cut out...
Los paso que debemos seguir son los siguientes :
🍍1°Paso para la elaboración:
Lo primero que debemos hacer es recortador un cuadrado en el foami amarillos y se guarda lo restante ,en ese cuadrado marcamos la forma de la piña del tamaño que lo desees ,vamos recortando poco a poco ,luego marcamos la parte de la corona de la piña en el foami verde y se recorta ...

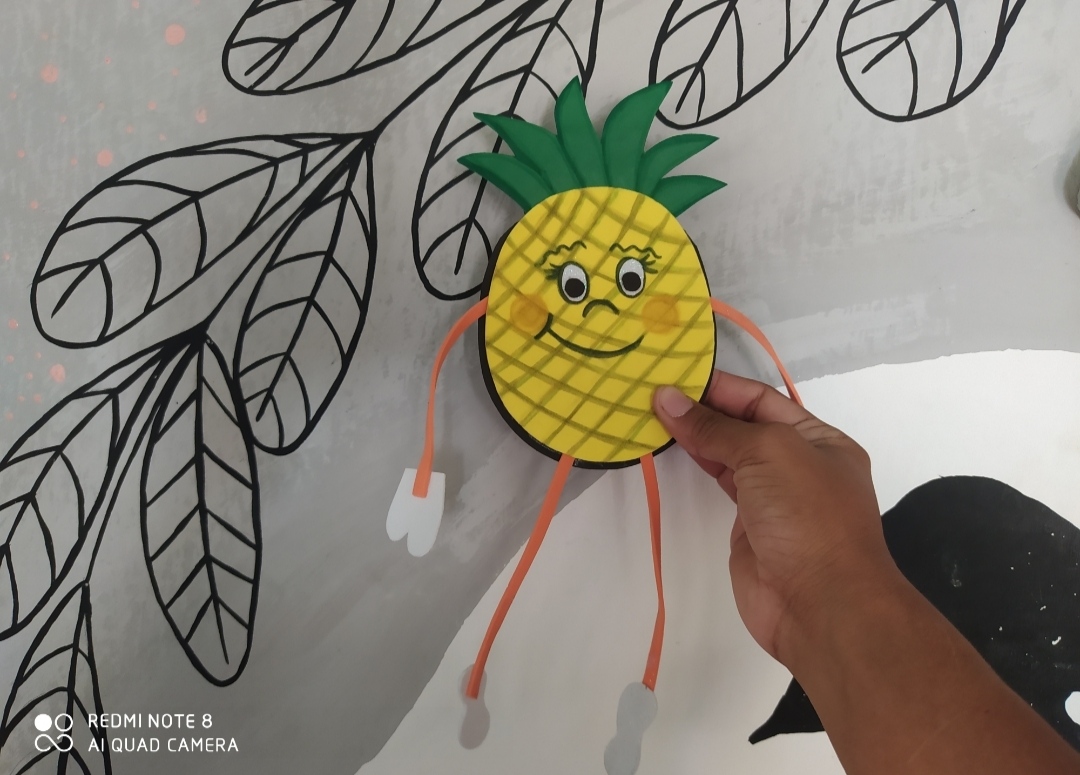
🍍2nd step for preparation:
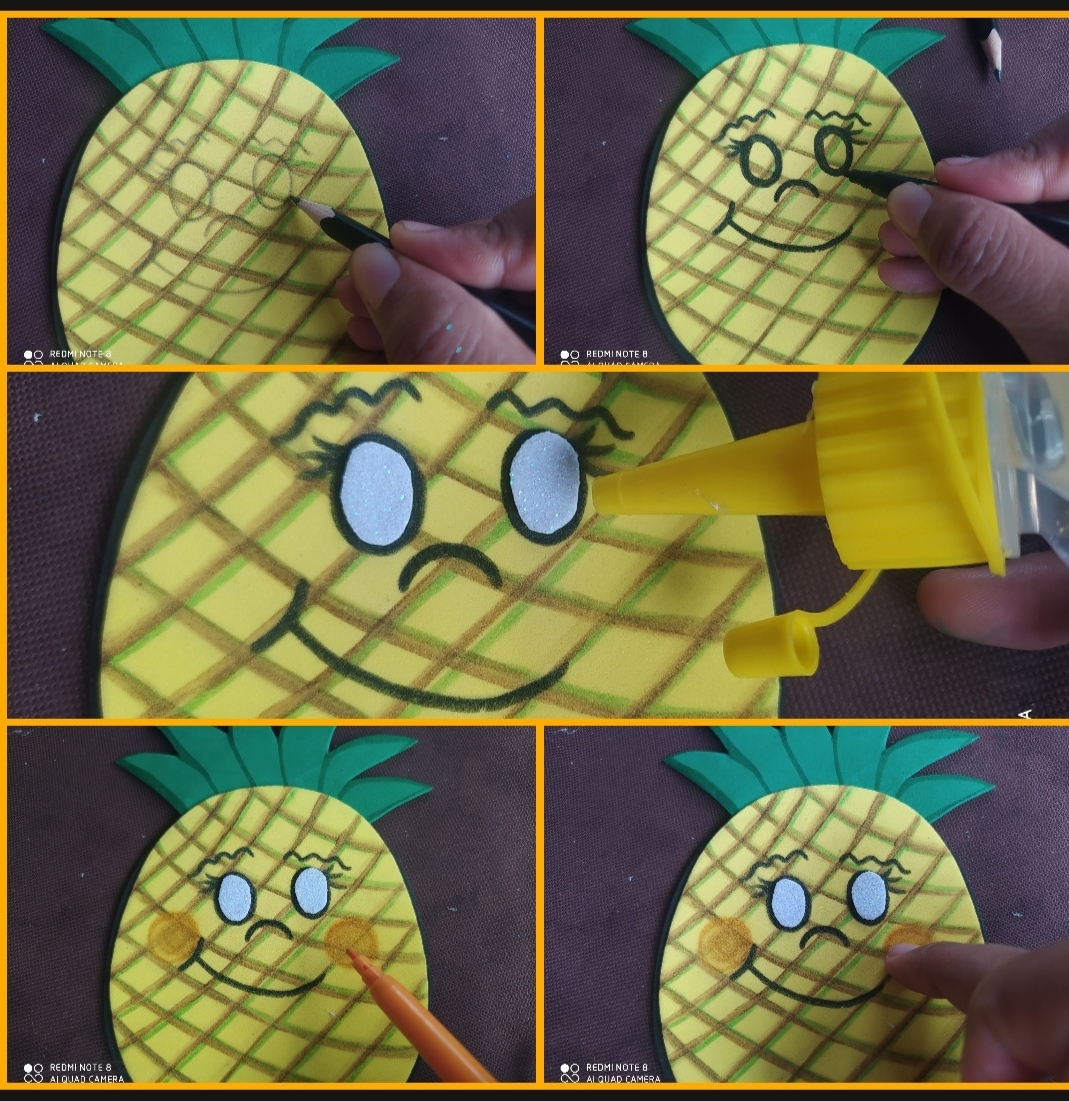
Once we have our pineapple figure, we are going to assemble it, we first glue the crown to the bottom of the pineapple, with a pencil we mark the stripes that the pineapple has, then they are highlighted with the green marker and then We go over the brown and use a cotton swab to blend it, we apply black foam to the pineapple, we cut it to remove the rest of the foam but this will be left a little outside the pineapple, thus leaving an edge.
🍍2° paso para la elaboración:
Una vez que tenemos en nuestra figura de la piña vamos a armarla ,precedemos a pegar la corona de la parte de abajo de la piña ,con un lápiz vamos marcando las rayas que tiene la piña, después se remarcan con el marcador verde y luego le repasamos el marrón y con un hisopo se le pasa para difuminar la misma ,se le paga en foami negro a la piña , se recortan para retirar los restante del foami pero este se dejará un poco afuera de la piña dejando así un borde.
🍇 3rd Step for preparation:
Once we have assembled our pineapple we are going to make the eyes, nose and mouth, we will do it in the following way with the pencil we mark the face of our pineapple and with the black marker we mark the shape of the eyes, the nose and the mouth and With the orange marker, make circles on the sides of the mouth and rub it with your finger, mark the eyes on the white foam and stick them on.
🍇 3° Paso para la elaboración :
Ya cuando tenemos armado nuestra piña vamos hacerle los ojos ,nariz y boca ,lo haremos de la siguiente manera con el lápiz marcamos la carita de nuestra piña y con el marcador negro marcamos la forma de los ojos ,la de la nariz y la boca y con el marcador anaranjado se hace un círculos a los lados de la boca y con dedo vamos frotandolo , en el foami blanco marcamos los ojos y se le pegan .
🍇 4th step for preparation:
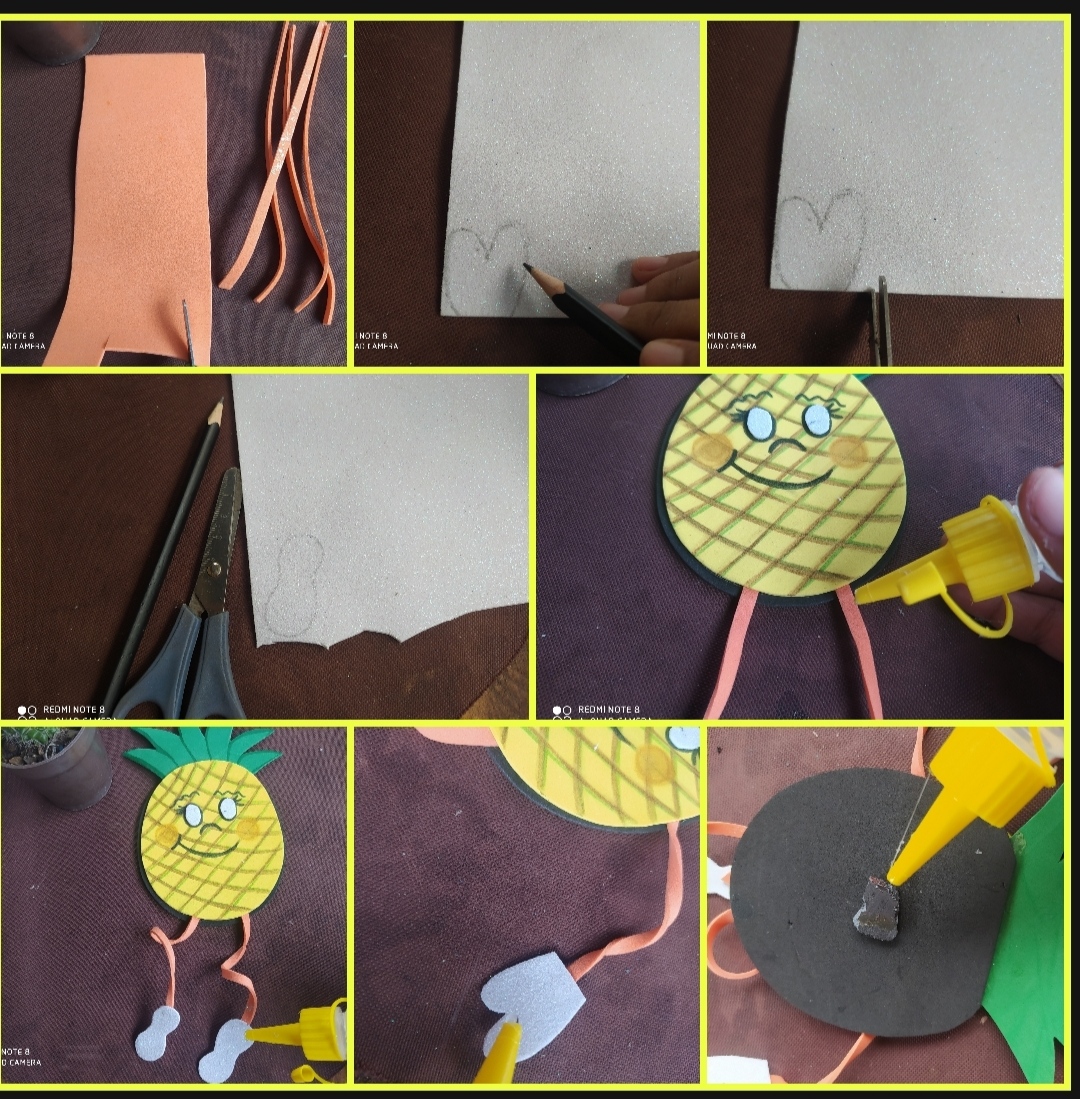
To finish this craft we are going to cut out some thin strips in the orange foam, and in the white foam we mark the hands and feet, they are cut out, then we are going to glue the strips on the top of the pineapple and the others on the bottom. Below, once it is glued, we are going to glue the hands and feet, which will be our arms and legs of this beautiful pineapple and lastly, which cannot be missed, the magnet is glued to the back.
🍇 4° paso para la elaboración:
Para culminar está manualidad vamos a recortar unas tiras delgadas en el foami anaranjado ,y en el foami blanco marcamos las mano y pies ,se recortan ,luego vamos a pegar las tiras en la parte de arriba de la piña y las otras en la parte de abajo una vez que se pega vamos a pegar las manos y pies que esto serán nuestros brazos y piernas de esta hermosa piña y por último que no puede faltar se le pega el imán 🧲 en la parte de atrás .
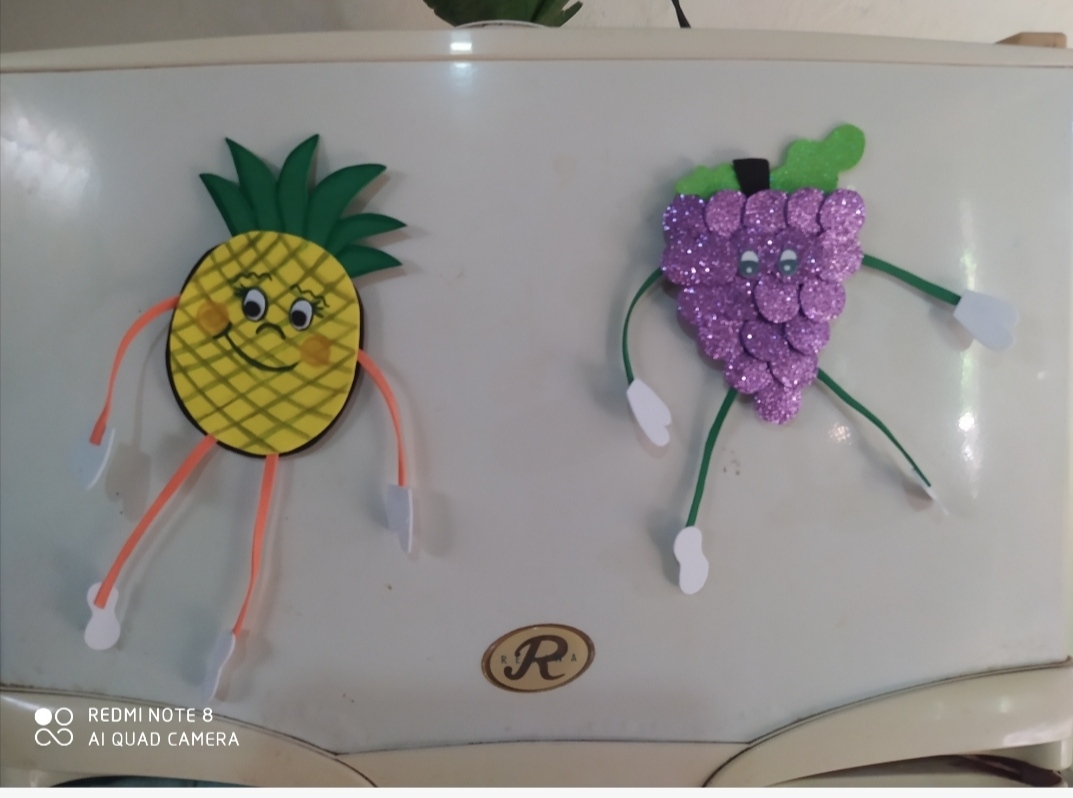
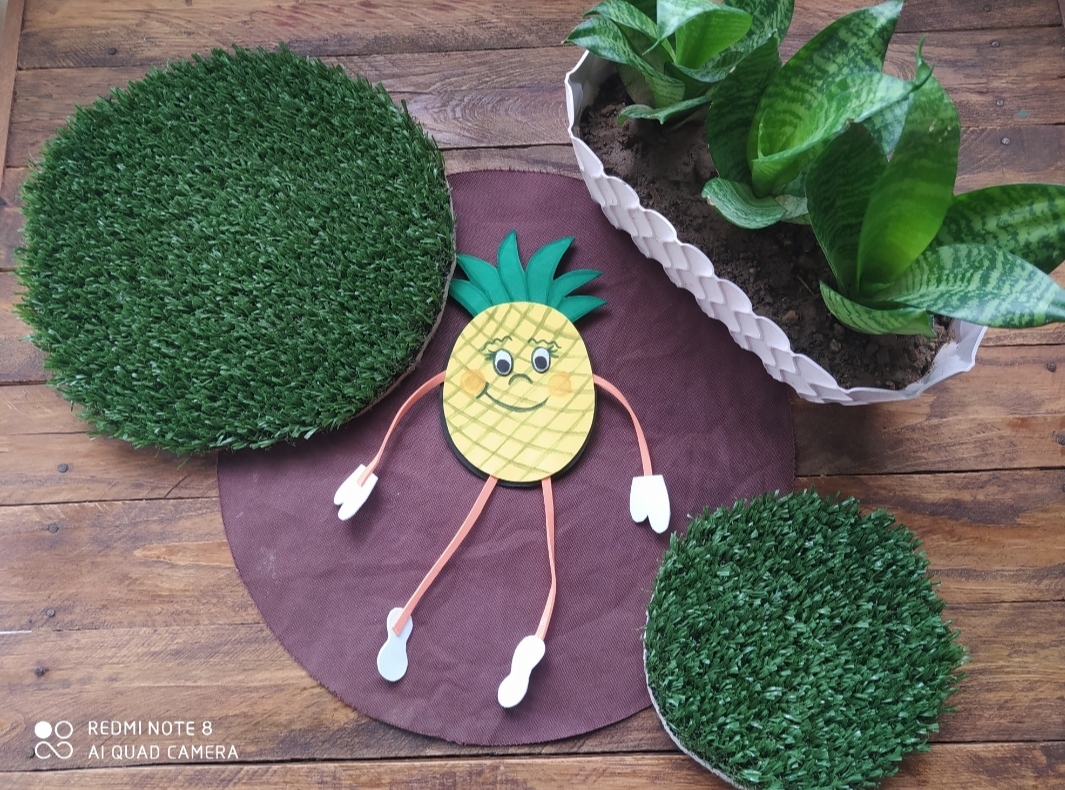
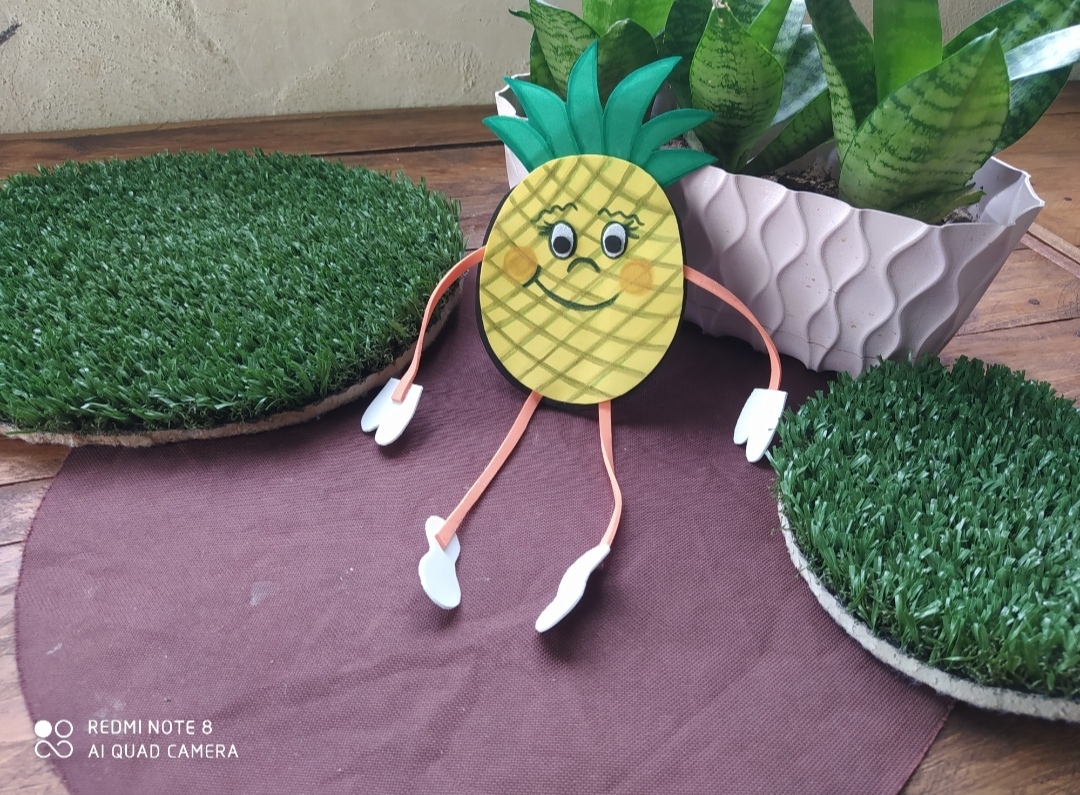
🍍🍇This is how our decoration for the refrigerator will look like 🍍🍇
🧲🍍🍇Así nos quedará nuestro adorno para la nevera 🍍🍇🧲.
Blessings to everyone, I hope you have a happy start to the week and share a lot with your family. I also hope my tutorial is helpful to you and you can feel encouraged to make it as I told you, you can do whatever you want......
Bendiciones para todos espero tengan un feliz inicio de semana y compartan mucho en familia ,también espero les sea de ayudad mi tutorial y puedan animarse a elaborarlo como les dije lo pueden hacer de lo que deseen .
📱📱The photos are my property, they were taken with my Remid note 8 and I used Google translator...📱📱
📱📱Las fotos son de mi propiedad fueron tomadas con mi Remid note 8 y utilice traductor de Google...📱📱
Quedó muy bien 🍍feliz noche!
Gracias amiga ...
Que lindos.... 😍😍😍😍 Me encantan... Quiero unos para colocarlos en mi nevera 😁 jajaja...
Te felicito, de verdad están muy lindos!!! 🤗
Gracias ...espero puedas elaborar uno entonces para decorar esa nevera ...
Se ven muy tierno, me gustó mucho como lo hiciste.
Se ven fácil de hacer.
Gracias amiga ...si es súper fácil de elaborar
What a lovely way to brighten up the kitchen! Thank you for sharing this creative DIY with us, keep up the great work.
Gracias.por el apoyo ..
Gracias por el apoyo...
The pineapple is beautiful, I always like it, the decorations are refrigerator-friendly, and you make it so easy to make, that I'm even encouraged, thank you for sharing this incredible