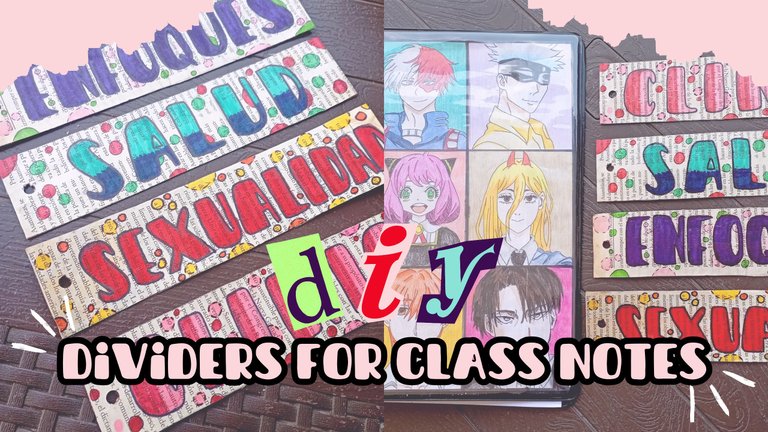
Separadores para apuntes de clases✨📚🎨 || Dividers for class notes✨📚🎨
He estado muy ocupada (y cansada) con asuntos de la universidad, así que no he tenido un momento libre para pasar por aquí, pero me dije: "¿Por qué no hago algo divertido respecto a la universidad?", y esa es la manera en que llegué a esta idea.
Desde hace mucho no me había dedicado a hacer manualidades, a pesar de que es algo que amo, por eso tenía esta pequeña necesidad de crear cualquier cosa, y como soy una obsesionada con la planificación necesitaba algo que separara los apuntes de mis clases (porque se estaban mezclando los temas de todas las materias🙃), así que decidí hacer estos separadores✨💖
Es una idea muy fácil y bonita, espero que te guste💜
I've been very busy (and tired) with college stuff, so I haven't had a free moment to stop by here, but I said to myself, "Why don't I do something fun about college?", and that's the way I came up with this idea.
I hadn't been into crafting for a long time, even though it's something I love, so I had this little need to create anything, and since I'm obsessed with planning I needed something to separate my class notes (because they were mixing up the topics of all subjects🙃), so I decided to make these dividers✨💖
It's a very easy and nice idea, I hope you like it💜
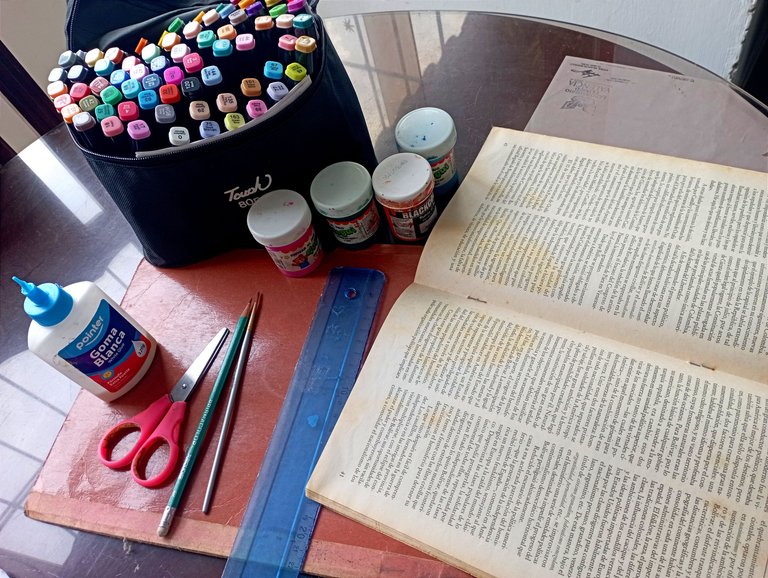
✨MATERIALES || MATERIALS✨
- Carpeta
- Libro viejo o periódico
- Marcadores o pinturas
- Perforadora
- Tijera
- Pega
- Regla
- Lápiz
- Folder
- Old book or newspaper
- Markers or paints
- Hole punch
- Scissors
- Glue stick
- Ruler
- Pencil
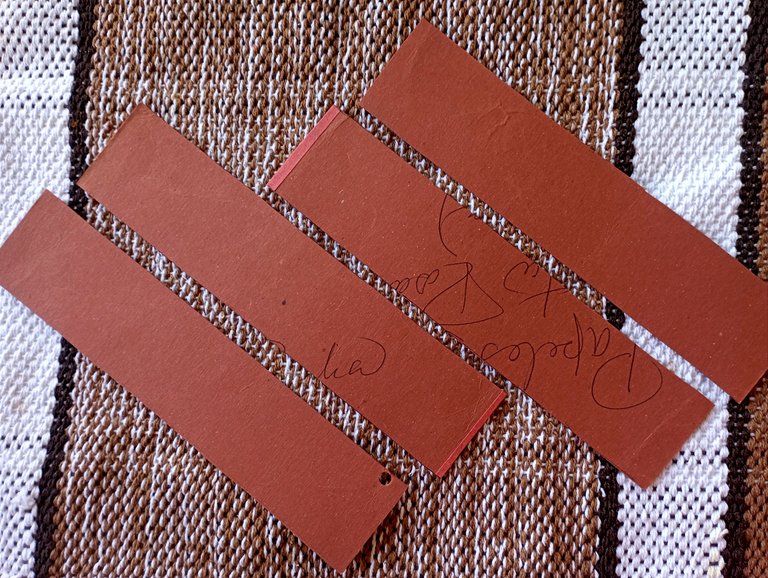
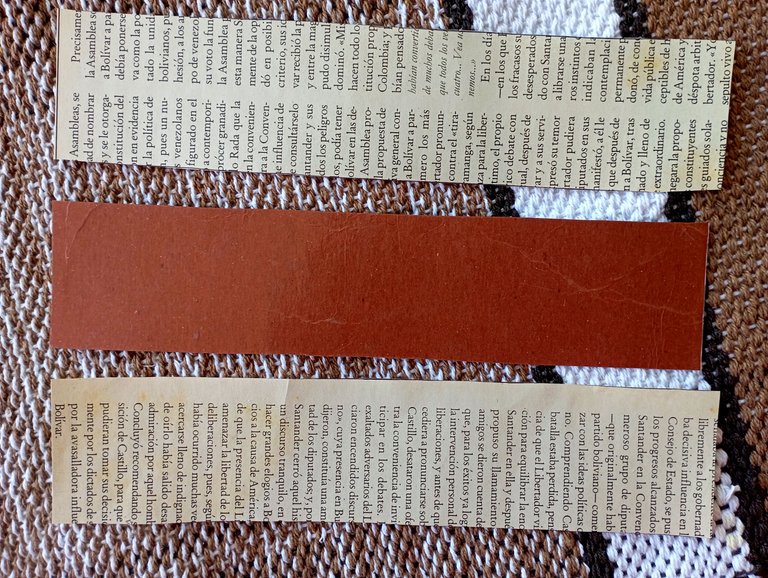
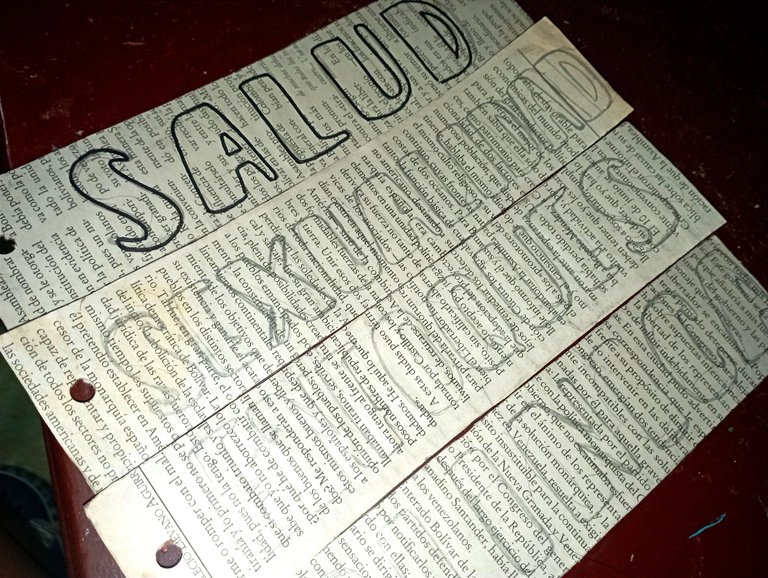
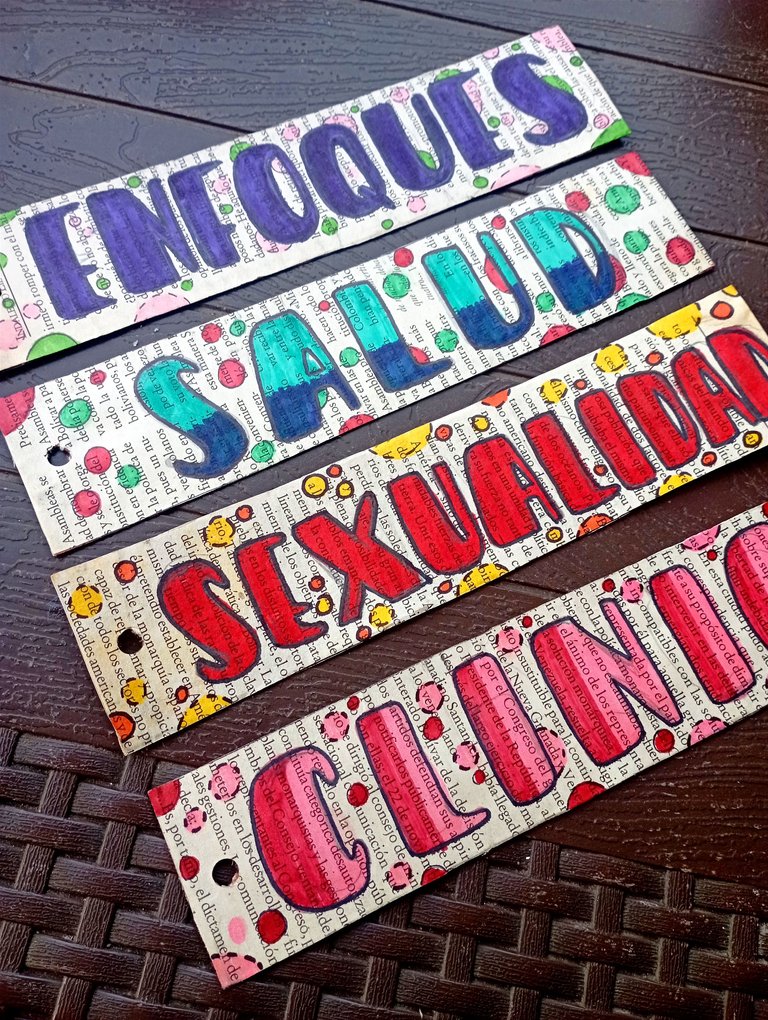
Primero tienes que dibujar un rectángulo en la carpeta, lo hice de 5cm de ancho y 20cm de largo, y dibujé cuatro porque ahora estoy viendo cuatro materias en la universidad. Luego los recortas.
First you have to draw a rectangle on the folder, I made it 5cm wide and 20cm long, and I drew four because now I am looking at four subjects at the university. Then you cut them out.
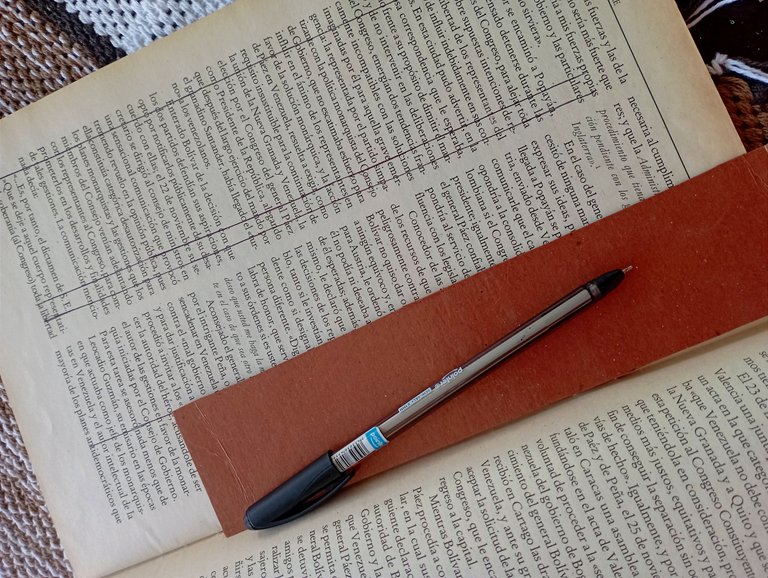
En mi casa hay muchos libros viejos que nadie lee, la mayoría son biografías que antes venían en los periódicos, y normalmente solo están ahí acumulando polvo. Así que les dí un mejor uso.
En varias hojas volví a dibujar rectángulos de la misma medida que los anteriores, pero esta vez fueron ocho (dos rectángulos de papel, por cada rectángulo de carpeta). Después también los recortas.
In my house there are a lot of old books that nobody reads, most of them are biographies that used to come in the newspapers, and they are usually just sitting there collecting dust. So I put them to better use.
On several sheets I drew again rectangles of the same size as the previous ones, but this time there were eight (two rectangles of paper for each rectangle of folder). Then you also cut them out.

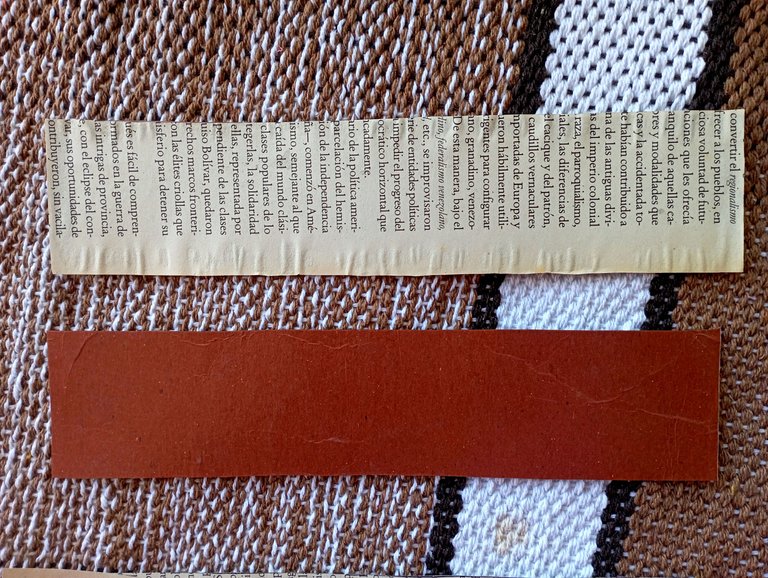
Luego vas a pegar cada rectángulo de papel en cada lado del rectángulo de carpeta. No coloques mucha pega (como yo hice), porque se va arrugar el papel.
Then you are going to glue each rectangle of paper on each side of the folder rectangle. Don't glue too much (as I did), because the paper will wrinkle.
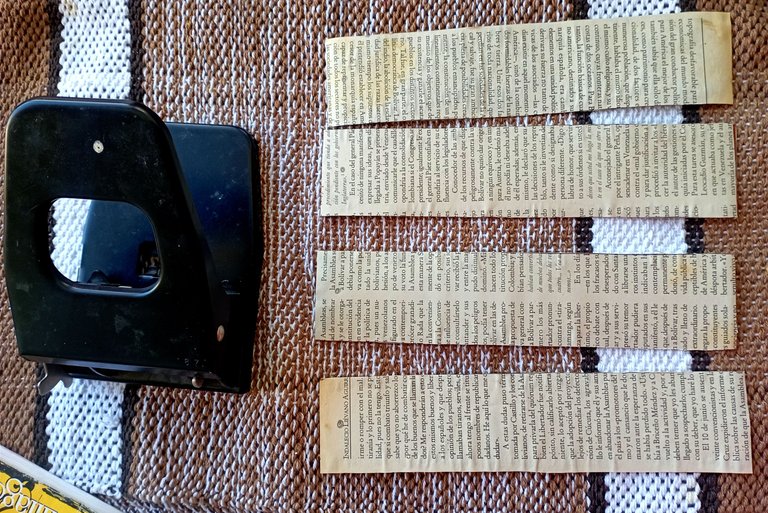
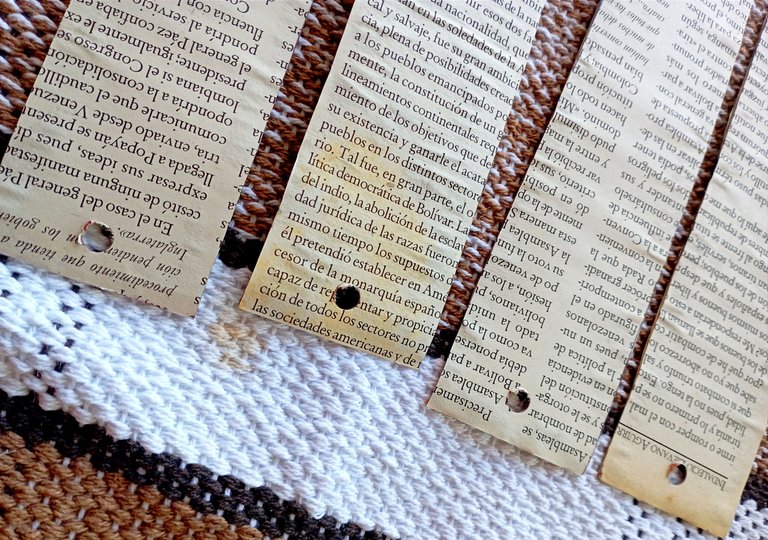
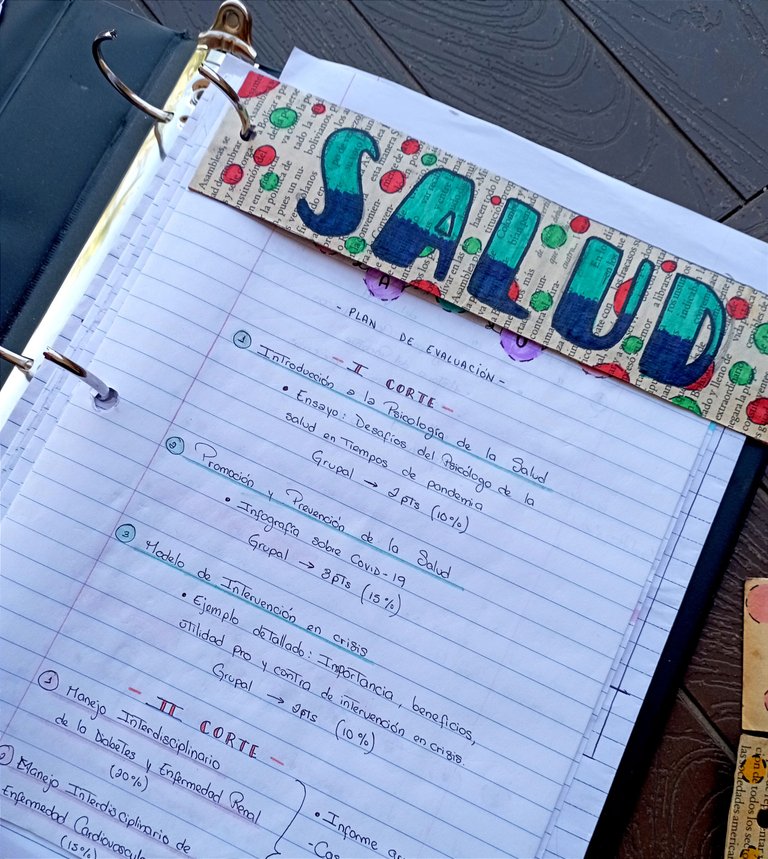
Para mis apuntes de la universidad utilizo una carpeta de gancho, porque es más fácil organizar el montón de hojas de mis apuntes. Por eso utilicé una perforadora para ayudarme abrirle un agujero al separador y colocarlo en mi carpeta.
For my college notes I use a hook binder, because it's easier to organize the pile of sheets of my notes. So I used a hole punch to help me punch a hole in the divider and place it in my binder.
Busqué una tipografía linda por internet (Pinterest, mi fuente de inspiración🤭), y la utilicé para escribir el nombre de mis materias. Luego con marcadores de diferentes colores pinté cada letra, y con marcador negro pinté el borde. También puedes hacerlo con pinturas. Y sí, utilicé colores que para mí fueran "característicos" para cada materia, como si estuviera en la escuela😂
I looked for a cute font online (Pinterest, my source of inspiration🤭), and used it to write the name of my subjects. Then with markers of different colors I painted each letter, and with black marker I painted the border. You can also do it with paints. And yes, I used colors that for me were "characteristic" for each subject, as if I were at school😂
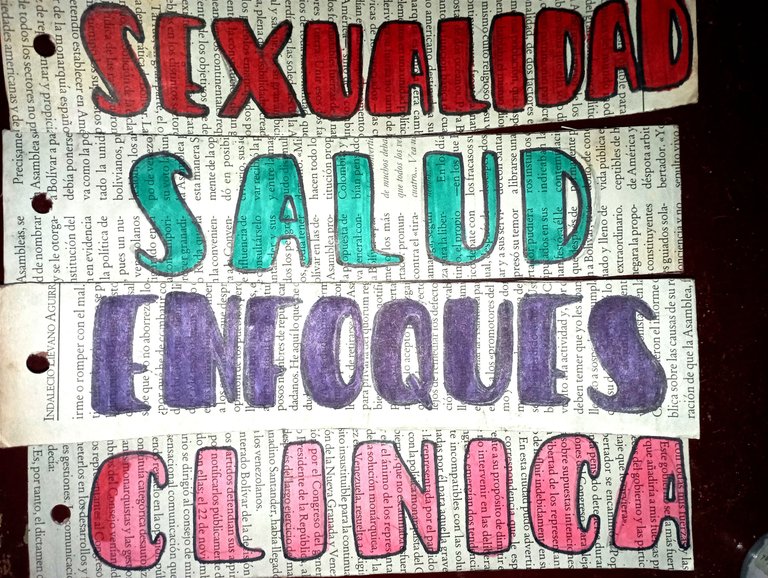
Después de pintar las letras sentía que faltaba "algo", estaba muy simple y necesitaba resaltar. Así que utilicé un marcador de otro color para hacerle detalles a las letras, como sombras; además, también dibujé círculos de diferente colores que combinaran con las letras, y me parece que quedó hermoso.
After painting the letters I felt that "something" was missing, it was very simple and needed to stand out. So I used a different color marker to make details to the letters, like shadows; besides, I also drew circles of different colors to match the letters, and I think it looked beautiful.
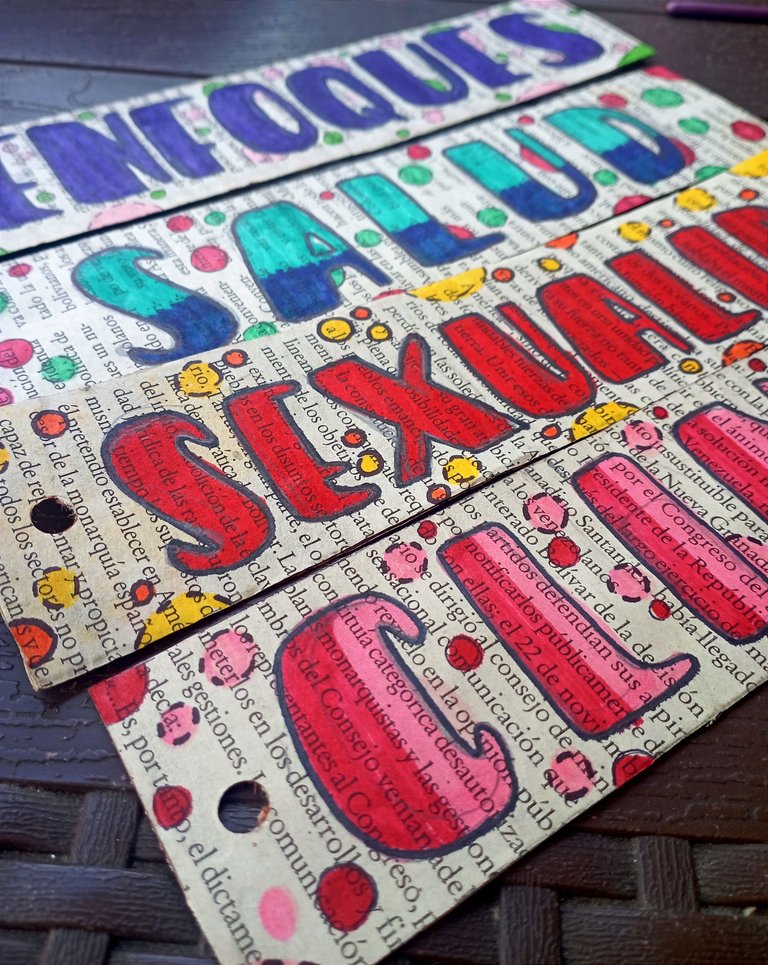
Sin embargo, aún sentía que le faltaba algo, se veía opaco. Así que utilicé una pintura brillante que uso cuando pinto en lienzo para darle más vida. También podrían hacerlo con pega, le da el mismo efecto.
However, I still felt it was missing something, it looked dull. So I used a glossy paint that I use when painting on canvas to give it more life. You could also do it with glue, it gives the same effect.
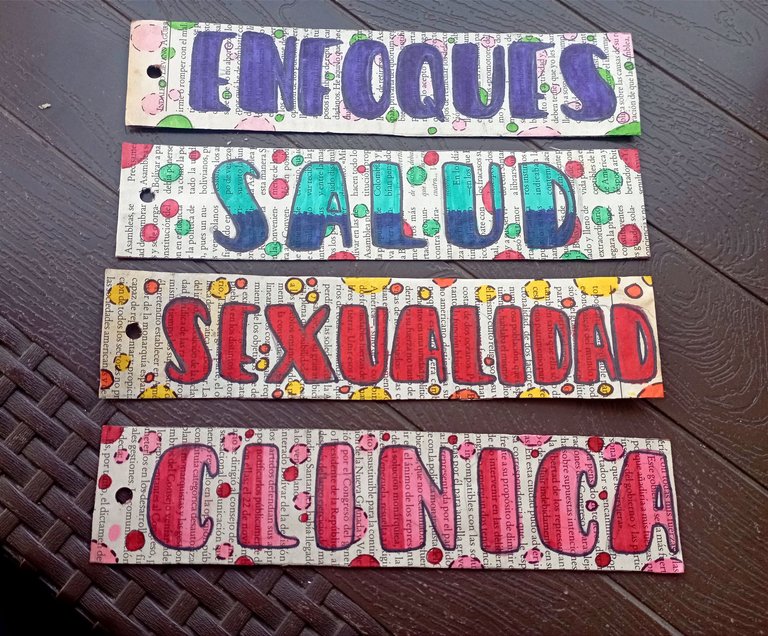
¡Y eso fue todo, amigos!✨ Amo el resultado, es original y lindo, y lo más importante es que mis apuntes ahora están mejor ordenados. Espero que se animen hacerlo, es muy fácil y se utilizan pocos materiales, y pueden decirme en los comentarios que les pareció esta idea.
¡Hasta luego!💜
And that was it, friends!✨ I love the result, it is original and cute, and the most important thing is that my notes are now better organized. I hope you are encouraged to do it, it is very easy and few materials are used, and you can tell me in the comments what you thought of this idea.
See you later!💜


Luego vengo yo y te rayo los cuadernos 🤭
Te cobraré por cada raya que hagas en mis apuntes🙂
https://x.com/KerlysVielma/status/1725109440112652607?s=20
I love using old paper with text and drawing on them, but I've never thought of creating separators. Excellent idea and the outcome looks good. Well done!
Thank you!💖 It's a pretty simple idea, but at the same time very creative, and I think it gives a special touch to our notebooks, and maybe it will be inspiring to study🤭 Thanks for reading!
Wow! que lindos separadores, debo decir que el cuaderno está muy organizado y hermoso, la idea de los separadores es excelente y requiere poco material que generalmente tenemos en casa, gracias por compartir.
Saludos!
¡Gracias!💖 Y sí, es demasiado fácil de hacer, pero el resultado es increíble✨
¡Saludos!
Me encantaron, me pareció una idea maravillosa de reciclaje que también pudiera usarse como marca libros o identificador de carpetas. Gracias por compartir esta idea @eldiariodelys
Por supuesto, creo que ese es solo uno de los tantos usos que se le puede dar, todo queda a manos de la creatividad de cada quién😌 Me gusta esa idea de marcalibros, debe verse muy hermoso💖
Te quedaron muyyy lindos! Justo el tutorial que necesitaba para hacerlo antes de entrar a la univ 😊💞
Oh, ¡espero que sí te ayude y lo puedas intentar! Verás que todo lucirá muy organizado y bonito, y sí, eso da más ganas de estudiar🤭🤣
Claro que lo intentare amiga! Y claro, asi dan mas ganas jajaja
Realmente es una manera creativa de hacer separadores, me gusta el contraste que hace la textura del papel con los marcadores, aunque debo decir que siempre me ha generado un pequeño dolor tener que cortar las hojas de un libro, sin embargo, ideas como estas son buenísimas para darles una nueva vida a aun libro que está muy deteriorado.
A mí también me genera dolor, pero este era más como una revista llena de biografías, era muy viejo, así que era mejor darle un buen uso😌 Y ahora se puede apreciar mejor.
Sí, esa combinación de páginas desgastadas con los colores brillantes del marcador, no lo había visto de esa manera, pero sí hace un gran contraste✨
Gracias por leer💖
Muy práctica y creativa idea amiga, me encanta.
Me alegra demasiado que te haya gustado, espero que lo intentes✨
La niña de los plumones siempre hace cosas hermosas ✨
🤣🤣🤣🤣 la niña de los plumones lo hizo de nuevo🤭