Access Control EN/ES
So far we have seen two ways to read data in a microcontroller, discrete signals that can come from switches, pushbuttons, switches and others of the same nature and analog signals through the ADC.
We have also learned many control and data handling techniques, all this information seems to be enough to control some processes as we have done with some examples of applications, however we still have some details to refine and topics to learn.
Today we will go one step further in the direction of HMI (Human Machine Interface) systems. For this we will learn how to connect and use a matrix keypad on a microcontroller, we will create an interface for an access control using a matrix keypad, a 20x4 LCD, a switch that will represent a door sensor, a pair of LEDs to visually indicate if the key is correct or wrong and a Servo Motor that will be in charge of blocking or allowing access.
Hasta ahora hemos visto dos manera de leer datos en un microcontrolador, señales discretas que pueden venir de conmutadores, pulsadores, switches entre otros de la misma naturaleza y señales analogicas mediante el ADC.
También hemos aprendido muchas técnicas de control y manejo de datos, toda esa información parece suficiente para controlar algunos procesos como en efecto hemos hecho con algunos ejemplos de aplicaciones, sin embargo aun nos quedan algunos detalles que afinar y temas que aprender.
Hoy daremos un paso más en el sentido de los sistemas HMI (Interfaz Humano Máquina). Para ello vamos a aprender a conectar y usar un teclado matricial en un microcontrolador, crearemos una interfaz para un control de acceso usando un teclado matricial, un LCD 20x4, un switch que representara un sensor de puerta, un par de LED para indicar visualmente si la clave es correcta o erronea y un Servo Motor que sera el encargado de bloquear o permitir el acceso.

Matrix Keyboard |
|---|
A matrix keyboard consists of a series of pushbuttons arranged in the form of a matrix grouped by rows and columns.
What is sought is to establish x,y coordinates for each key and thus identify by these coordinates which of the keys is pressed, for this pull-up resistors are used.
Un teclado matricial consiste en una serie de pulsadores arreglados en forma de matriz agrupados por filas y columnas.
Lo que se busca es establecer coordenadas x,y para cada tecla y de esa forma identificar mediante dichas coordenadas cual de las teclas es pulsada, para esto se usan resistencias pull-up.

This type of keyboards is very useful for access control systems, HMI interfaces in which the options are identified with numbers and the user chooses them by pressing each corresponding number and of course, we used them a lot in our phones not long ago even to write sms in which we had to press the same key several times to reach some letters.
To use this keyboard in the microcontroller is recommended to use Port B because it is the only port that has pull-up resistors, if you want to use another port you would have to add them externally and it is not very smart when they are already available in Port B. To enable these resistors you must use the instruction port_b_pullups(true); in addition we will use a library called kbd4x4.c that will provide us with the functions to read the data from the keyboard.
To read data the keyboard must have been initialized (as we do with the LCD) using the instruction kbd_init(), to read the data we will use the instruction kbd_getc() storing the result of the reading in a variable of type "char", since the data received are of type char we can obtain as data a character or a string of characters, for that reason we will use the library string.h that will provide us with the functions to handle string of characters.
Este tipo de teclados es muy útil para sistemas de control de acceso, interfaces HMI en las que las opciones se identifican con números y el usuario las elige pulsando cada número correspondiente y por supuesto, los usamos mucho en nuestros teléfonos de no hace mucho incluso para escribir sms en los que había que pulsar la misma tecla varias veces para alcanzar algunas letras.
Para usar este teclado en el microcontrolador es recomendable usar el Puerto B porque es el unico puerto que dispone de resistencias pull-up, si se desea usar otro puerto habría que añadirlas de forma externa y no es algo muy inteligente cuando ya están disponibles en el Puerto B. Para habilitar estas resistencias se debe usar la instrucción port_b_pullups(true); además usaremos una librería llamada kbd4x4.c que nos facilitará las funciones para leer los datos del teclado.
Para la lectura de datos el teclado debe haber sido inicializado (tal como lo hacemos con la LCD) mediante la instrucción kbd_init(), para leer los datos usaremos la instrucción kbd_getc() almacenando el resultado de la lectura en una variable del tipo "char", ya que los datos recibidos son del tipo char se puede obtener como dato un carácter o una cadena de caracteres, por eso nos apoyaremos con la librería string.h que nos facilitará las funciones para manejar cadena de caracteres.
Access Control |
|---|
We are going to create an application for access control, we will use a PIC16F877A to carry the control, a 4x4 matrix keyboard for data entry which in this case will be a password that we will load in the program code, we will use 123A (please do not disclose it 😉).
Vamos a crear una aplicación para el control de acceso, usaremos un PIC16F877A para llevar el control, un teclado matricial 4x4 para la introducción de datos que en este caso sera una contraseña que cargaremos en el código del programa, usaremos 123A (por favor no la divulgues 😉).

We will have two LEDs, a red one that will light up momentarily when a wrong code is entered and a green one that will do the same when the code is correct. We will also have a switch that represents a door sensor, the state of the switch (open/closed) is the same as that of the door, we use it because we do not want to pass the lock when the door is open because that would prevent the closing of the door and we would look very bad to our customer.
Tendremos dos LEDs, uno rojo que se encenderá momentáneamente cuando se introduzca un código erróneo y uno verde que hará lo mismo cuando el código sea correcto. Tendremos además un switch que representa un sensor de puerta, el estado del switch (abierto/cerrado) es el mismo que el de la puerta, lo usamos porque no queremos pasar el seguro cuando la puerta este abierta ya que eso impediría el cierre de la misma y quedamos muy mal parados ante nuestro cliente.

For the automatic door locking we will use a servo motor, it will be at zero degrees for an opening and will rotate 180 degrees to lock the access.
Para el seguro automático de la puerta usaremos un servo motor, éste estará a cero grados para una apertura y girara 180 grados para bloquear el acceso.

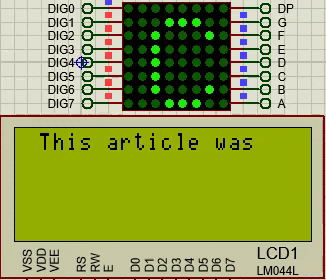
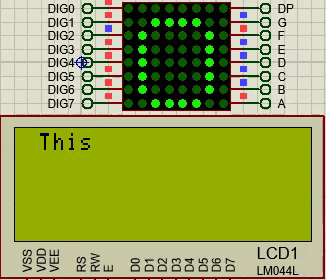
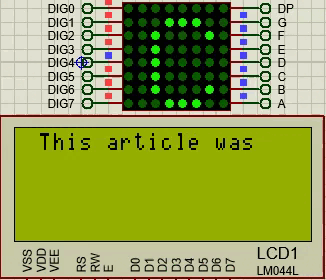
And we will use a LCD20x4 to throw messages to the user concerning the user to enter the password and know if it was correct or not.
Y usaremos un LCD20x4 para arrojar mensajes al usuario concernientes al usuario para que introduzca la contraseña y sepa si ha sido o no correcta.
Control philosophy |
|---|
Initially we will show a welcome message and data from the manufacturer (ie us), then the system will evaluate the condition of the door being possible two options.
The door is open: It will remain in the welcome message until the door is closed.
The door is closed: It rotates the servo motor to lock the access and displays the message for the user to enter the password.
Once at the enter password prompt when a user arrives three possible events can occur (if I miss any please let me know in the comments):
User enters an incorrect password: The door will remain locked, the red LED will light up and a message will be displayed on the screen indicating that the password is not correct, then the system restarts so the user can try again.
The user enters the correct password but does not open the door: When the password is correct the green LED lights up, a message is displayed indicating that the user can access, the servo rotates to unlock the access and the user is given 5 seconds to open the door, if not after 5 seconds the system restarts and as the door will be closed it will lock it again requesting the password again.
The user enters the correct password and opens the door: When the password is correct the green LED lights up, a message is displayed on the screen indicating that the user can access, the servo rotates to unlock the access and the user is given 5 seconds to open the door, after 5 seconds the system restarts and if the door is open it will remain on the welcome message until the door is closed, then it will lock it again and request the password for access.
Inicialmente mostraremos un mensaje de bienvenida y datos del fabricante (osea nosotros), luego el sistema evaluara la condición de la puerta siendo posible dos opciones.
- La puerta está abierta: Se quedará en el mensaje de bienvenida hasta que la puerta sea cerrada.
- La puerta está cerrada: Hace girar el servo motor para bloquear el acceso y muestra el mensaje para que el usuario introduzca la contraseña.
Una vez en el mensaje de introducir contraseña al llegar un usuario pueden ocurrir tres eventos posibles (si se me pasa alguno por favor házmelo saber en los comentarios):
- El usuario introduce una contraseña incorrecta: La puerta permanecerá bloqueada, el LED rojo encenderá y se mostrará un mensaje en pantalla indicando que la contraseña no es correcta, luego el sistema se reinicia para que el usuario pueda intentarlo de nuevo.
- El usuario introduce la contraseña correcta pero no abre la puerta: Cuando la contraseña es correcta el LED verde se enciende, se muestra un mensaje en pantalla indicando que el usuario puede acceder, el servo gira para desbloquear el acceso y se le da al usuario un tiempo de 5 segundos para abrir la puerta, si no lo hace tras 5 segundos el sistema se reinicia y como la puerta estará cerrada la volverá a bloquear solicitando nuevamente la contraseña.
- El usuario introduce la contraseña correcta y abre la puerta: Cuando la contraseña es correcta el LED verde se enciende, se muestra un mensaje en pantalla indicando que el usuario puede acceder, el servo gira para desbloquear el acceso y se le da al usuario un tiempo de 5 segundos para abrir la puerta, pasados los 5 segundos el sistema se reinicia y si la puerta está abierta se quedará en el mensaje de bienvenida hasta que la puerta se cierre, entonces la bloqueará nuevamente y solicitara la contraseña para el acceso.
Programming |
|---|
In our configuration, in addition to the microcontroller we will have to configure the devices to use as the LCD, the [servo motor](https://ecency. com/hive-196387/@electronico/servo-motor-control-with-pwm-on-pic16f877a-enes), and the matrix keyboard (with the codes explained in the previous paragraphs), we add the libraries and create 4 variables, one integer for control uses, one character type to read the keyboard data, one string type with a predefined value corresponding to the correct password and one string type to store the password entered by the user.
En nuestra configuración, además del microcontrolador deberemos configurar los dispositivos a usar como la LCD, el servomotor, y el teclado matricial (con los codigos explicados en los parrafos anteriores), agregamos las librerias y creamos 4 variables, una entera para usos de control, una tipo caracter para leer los datos del teclado, una tipo cadena de caracteres con un valor predefinido que corresponde a la contraseña correcta y una tipo cadena de caracteres que almacenara la contraseña introducida por el usuario.
#include <16f877a.h>

#fuses HS,NOWDT,NOPROTECT,NOPUT,NOLVP,BROWNOUT

#use delay(clock=20M)

#use standard_io(D)

#use standard_io(C)

#define use_servo_1

#define servo_1 PIN_C7

#include <servo_st.c

#define led_ok PIN_D0

#define led_error PIN_D1

#define LCD_DB4  PIN_D4

#define LCD_DB5  PIN_D5

#define LCD_DB6  PIN_D6

#define LCD_DB7  PIN_D7

#define LCD_RS   PIN_D2

#define LCD_E    PIN_D3

#include <LCD_20X4.c

#include <kbd4x4.c

#include <string.h

int i = 0;

char key;

char pass_ok[] = "123A";

char pass[4];
In our main program we initialize our LCD, Keyboard and Servomotor devices, activate the pull-up resistors of Port B and ensure that the LEDs start off.
En nuestro programa principal inicializamos nuestros dispositivos LCD, Teclado y Servomotor, además activamos las resistencias pull-up del Puerto B y garantizamos que los LEDs inicien apagados.
void main()

{

   servo_init();

   lcd_init();

   kbd_init();

   port_b_pullups(true);

   output_low(led_ok);

   output_low(led_error);
Now we will create our while loop of infinite repetition and immediately we print on screen the welcome message, after that we verify the state of the door by means of the discrete input C6 to which the switch is connected and with a condition if we guarantee that the process of blocking and verification will only begin when the door is closed.
Once the door is closed the password will be requested, as the user presses the data will be stored in the key variable, when accumulating 4 the key entered is compared with the correct key, if it is equal we proceed to give access to the user, if not the invalid key condition occurs.
Ahora crearemos nuestro bucle while de repetición infinita e inmediatamente imprimimos en pantalla el mensaje de bienvenida, luego de eso el verificamos el estado de la puerta mediante la entrada discreta C6 a la que esta conectado el switch y con una condicion if garantizamos que el el proceso de bloqueo y verificación solo iniciara cuando la puerta esté cerrada.
Una vez cerrada la puerta se solicitara la contraseña, a medida que el usuario pulse se almacenaran los datos en la variable key, al acumular 4 se compara la clave introducida con la clave correcta, si es igual se procede a dar acceso al usuario, si no se produce la condición de clave invalida.
if(input(PIN_C6)==1)

{

servo_1_write(180);

lcd_clear();

lcd_gotoxy(4,1);

printf(lcd_putc,"ENTER PASSWORD");

lcd_gotoxy(1,3);

printf(lcd_putc,"@electronico - HIVE");

lcd_gotoxy(1,4);

printf(lcd_putc,"Original Content");

i = 0;

while(i < 4)

{

key = kbd_getc();

if(key != 0)

{

pass[i] = key;

i++;

lcd_gotoxy(i+1, 2);

lcd_putc(key);

}

}

delay_ms(150);

if(strstr(pass, pass_ok))

{

output_high(led_ok);

output_low(led_error);

lcd_clear();

lcd_gotoxy(2,1);

lcd_putc("Access Guaranteed");

lcd_gotoxy(5,2);

lcd_putc("Welcome !!!!");

lcd_gotoxy(2,3);

printf(lcd_putc,"@electronico - HIVE");

lcd_gotoxy(2,4);

printf(lcd_putc,"Original Content");

output_low(led_ok);

output_low(led_error);

servo_1_write(0);

delay_ms(5000);

}

          else

{

output_high(led_error);

output_low(led_ok);

lcd_clear();

lcd_gotoxy(5,1);

lcd_putc("Invalid Code");

lcd_gotoxy(5,2);

lcd_putc("Try again");

lcd_gotoxy(2,3);

printf(lcd_putc,"@electronico - HIVE");

lcd_gotoxy(2,4);

printf(lcd_putc,"Original Content");

delay_ms(1500);

output_low(led_error);

output_low(led_ok);

}

}

}

}
Simulation |
|---|
It is important to observe in addition to the LCD the behavior of the servomotor and the LEDs for each condition.
I reduced the waiting times so that the simulation occurs in less time (I use a demo application to record the videos and it won't let me record more than 1 minute 😥).
Para nuestra simulación vamos a crear las tres condiciones; primero introduciremos una contraseña invalida, luego introduciremos la correcta pero no abriremos la puerta y luego introduciremos la correcta y abriremos la puerta.
Es importante observar además de la LCD el comportamiento del servomotor y los LEDs para cada condición.
Reduje los tiempos de espera para que la simulación ocurra en menos tiempo (uso una aplicación demo para grabar los videos y no me deja grabar más de 1 minuto 😥)


Thanks for sharing this topic.
I'm very glad you liked it.... Thanks to you for letting me know and for reading my article!!!!
This look like a electrical building planning
Really? I find that fascinating because we always associate what we look at with things we know!
Sometimes I look at an electronic board of not many dimensions and I compare it with industrial plants because in them each component provides its contribution so that the system fulfills its function.
Thank you for finding that detail in my design! 😉
Yay! 🤗
Your content has been boosted with Ecency Points, by @electronico.
Use Ecency daily to boost your growth on platform!
Support Ecency
Vote for new Proposal
Delegate HP and earn more
Thank you so much!!!!!
Thanks for your contribution to the STEMsocial community. Feel free to join us on discord to get to know the rest of us!
Please consider delegating to the @stemsocial account (85% of the curation rewards are returned).
Thanks for including @stemsocial as a beneficiary, which gives you stronger support.
Thank you so much!!!!! 💙💙💙