Esp/Eng Air conditioning maintenance/Mantenimiento a aire acondicionado
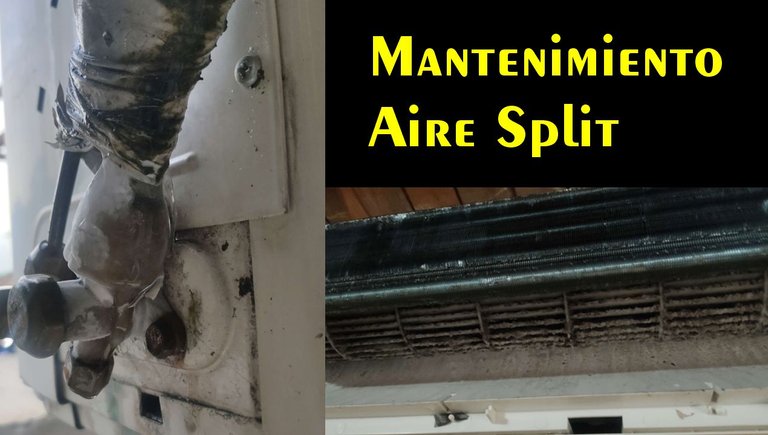

Bienvenidos a un nuevo post en el que vamos a estar hablando de cómo hacerle el mantenimiento a un aire acondicionado tipo Split de una manera totalmente casera y con pocas herramientas porque normalmente este mantenimiento se hace con un hidrojet es mucho más rápido y fácil hacerlo con este tipo de equipos, sin embargo para el momento en el que hice este mantenimiento, yo no contaba con un hidrojet así que hice la limpieza de una manera mucho más manual.
Welcome to a new post in which we are going to be talking about how to maintain a Split-type air conditioner in a homemade way and with few tools because normally this maintenance is done with a hydro-jet, it is much faster and easier to do it with this type of equipment, however by the time I did this maintenance, I did not have a hydro-jet so I did the cleaning in a much more manual way.

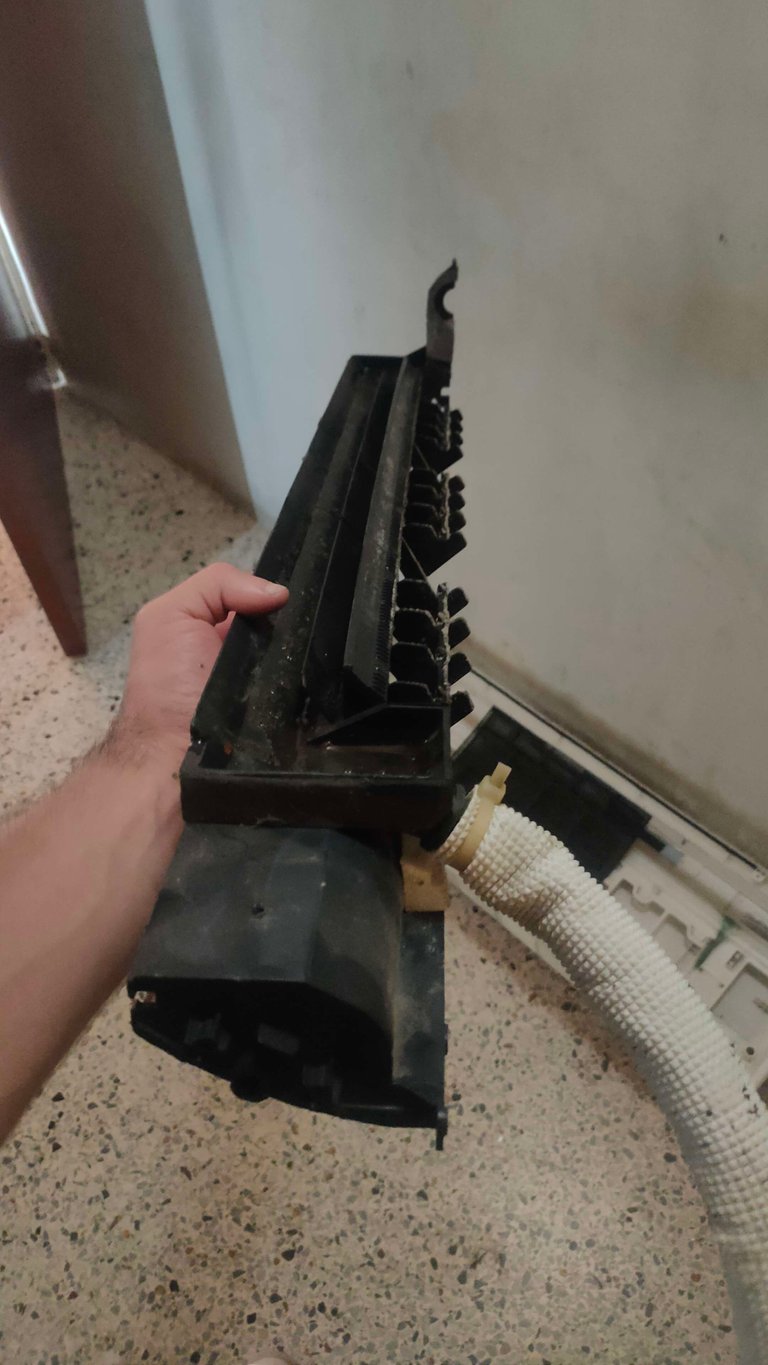
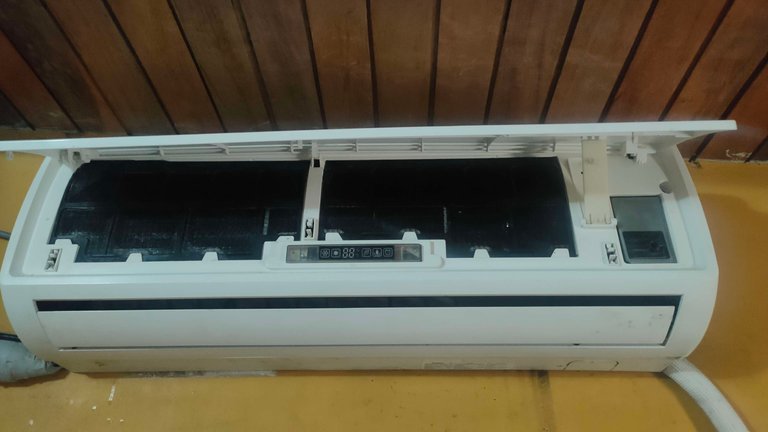
los primeros pasos es desarmar el equipo vamos a desarmar solamente la parte de la consola, qué es la que más atrapa la suciedad del ambiente en la parte de arriba ella cuenta como con 2 mallas de filtro qué impide que todo el polvo penetre directamente al equipo, estás mallas hay que retirarla y limpiarlas también hay que retirar por completo la tapa frontal del equipo, mi equipo cuenta con dos tornillos en la parte de abajo estos se retiran y podemos sacar la tapa de manera muy fácil.
The first step is to disassemble the equipment, we are going to disassemble only the part of the console, which is the one that most trap the dirt from the environment in the upper part, it has 2 filter meshes that prevent all the dust from directly penetrating the equipment. These meshes must be removed and cleaned, and the front cover of the equipment must also be completely removed, my equipment has two screws at the bottom, these are removed and we can remove the cover very easily.
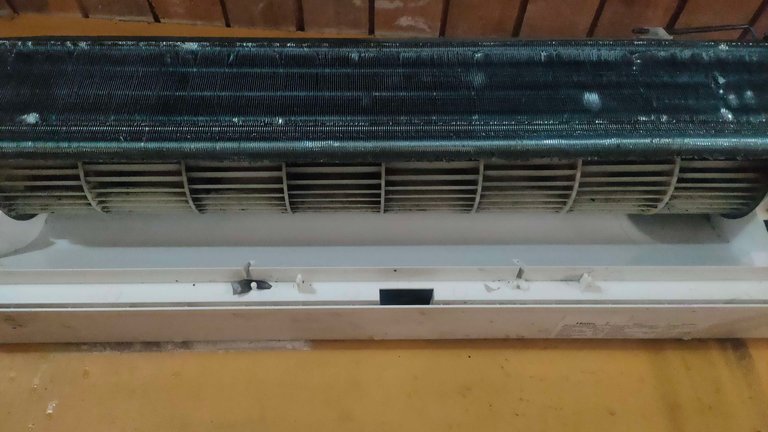
luego de tener destapado nuestro equipo debemos retirar el canal de desagüe este está en la parte de abajo muy cerca donde está el ventilador, en mi caso tiene dos tornillos los cuales desatornillamos y podemos retirar este canal que está unido a la manguera de desagüe de nuestro equipo, este canal lo debemos limpiar por completo se acumula mucho barro en él y debemos lavarlo.
After having uncovered our equipment, we must remove the drainage channel, this is at the bottom very close to where the fan is, in my case, it has two screws which we unscrew and we can remove this channel that is attached to the drain hose of our equipment, we must clean this channel completely, a lot of mud accumulates in it and we must wash it.
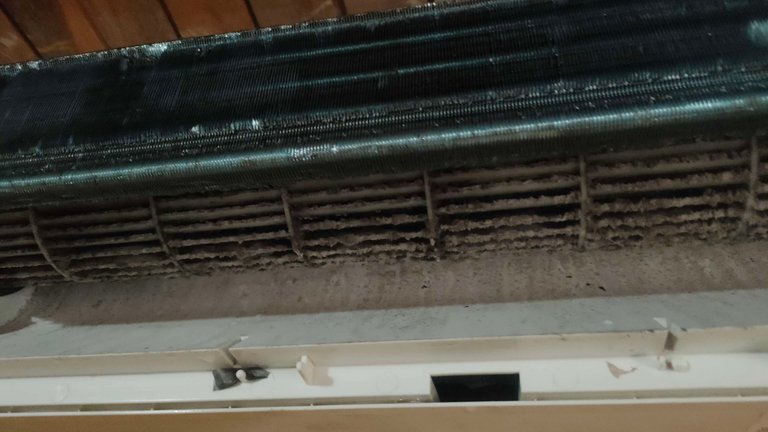
luego de esto se procede a lavar bien las aspas del ventilador a esto realmente es mucho más sencillo con un hidrojet solamente pegándole la presión del agua para que bote todo esa suciedad pero como les comenté no tenía un hidrojet a la mano y lo tuve que hacer con un cepillo es mucho más difícil porque tenemos que ir poco a poco dándole con fuerza con el cepillo adicional yo Le agregué un poco de jabón también para poder extraer con un poco más de facilidad toda la mugre qué se acumula en este zona, luego con agua se retira todo el jabón y se va limpiando también las colmenas de aluminio Por dónde pasa el aire, este proceso como les dije con el hidrogel es mucho más sencillo, de manera manual tarde alrededor de 4 horas limpiando lo máximo posible incluso con un cepillo dental para ser más detallista en la parte de cada una de las ranuras del ventilador también use un aspersor de agua para remover el jabón, también hay que agregar agua en la colmena de aluminio que es por donde pasa el aire y esta suelen llenarse mucho de barro, luego de esto solamente se va armando el equipo nuevamente colocando primero el desagües y las tapas correspondientes del aire acondicionado.
After this, we proceed to wash the fan blades well. This is much easier with a hydro-jet, just hitting the water pressure so that it throws out all that dirt, but as I told you, I did not have a hydro-jet at hand and I had to do it. With a brush it is much more difficult because we have to go little by little, hitting it hard with the additional brush. I also added a little soap to be able to extract all the dirt that accumulates in this area a little more easily, then with With water, all the soap is removed and the aluminum hives are also cleaned. Where the air passes through, this process, as I told you, with the hydrogel is much easier, it takes about 4 hours manually, cleaning as much as possible, even with a brush dental to be more detailed in the part of each one of the fan slots also use a water sprinkler to remove the soap, you also have to add water in the aluminum beehive that is where the air passes through and this usually fills up a lot with mud, after this only the equipment is assembled again, first placing the drains and the corresponding covers of the air conditioning.
por último, hay que colocar los filtros estos filtros a mí me gusta lavarlos bien con agua y jabón de esta manera quedan mucho más limpios y solamente hay que colocarlos en su sitio correspondiente, luego de todo esto procedemos a encender el equipo y nos aseguramos de que esté trabajando de manera eficiente a 19 grados por lo menos para probar, en el equipo es necesario que veamos qué este trabajando a estos 19 grados sin ningún problema de congelación.
Lastly, you have to place the filters. I like to wash them well with soap and water. In this way, they are much cleaner and you just have to place them in their corresponding place. After all this, we proceed to turn on the equipment and make sure that it is working efficiently at 19 degrees at least to test, in the team we must see what is working at these 19 degrees without any freezing problem.
todas las fotos fueron tomadas por mí desde mi teléfono Realme Q
all photos were taken by me from my Realme Q phone


Registrate en KingOfDuel
Registrate en Splinterlands
Registrate en GodsUnchained
My social networks
Hive: @elfino28
https://twitter.com/ElFinoNFT
https://www.instagram.com/ElFinoNFT
https://www.youtube.com/@ElFino28

0
0
0.000
¡Esto está interesantísimo! ¿Es muy difícil colocar un equipo de estos uno mismo? Yo los he visto en algunos lugares y veo que son mucho más cómodos que los antiguos equipos que parecen un cajón. ¡Muchas gracias por compartir tus conocimientos! !PIZZA !PGM !CTP
BUY AND STAKE THE PGM TO SEND A LOT OF TOKENS!
The tokens that the command sends are: 0.1 PGM-0.1 LVL-0.1 THGAMING-0.05 DEC-15 SBT-1 STARBITS-[0.00000001 BTC (SWAP.BTC) only if you have 2500 PGM in stake or more ]
5000 PGM IN STAKE = 2x rewards!
Discord
Support the curation account @ pgm-curator with a delegation 10 HP - 50 HP - 100 HP - 500 HP - 1000 HP
Get potential votes from @ pgm-curator by paying in PGM, here is a guide
I'm a bot, if you want a hand ask @ zottone444
de echo es sumamente sensillo la instalacion solo tiene que saber lo basico de electicidad para conectarlo igual no hay pele por que tiene un mapa con el color de los cables solo los colocas y listo quizas lo mas dificil es hacer la instalacion del 220 del resto es lo enchufar y conectar la consola con el compresor y listo gracias por pasar
$PIZZA slices delivered:
@cpol(1/15) tipped @elfino28
https://leofinance.io/threads/cpol/re-leothreads-a3ghpra9
The rewards earned on this comment will go directly to the people ( cpol ) sharing the post on LeoThreads,LikeTu,dBuzz.
https://reddit.com/r/blogs/comments/141tv3v/how_to_diy_air_conditioner_maintenance_split_ac/
The rewards earned on this comment will go directly to the people( @cpol ) sharing the post on Reddit as long as they are registered with @poshtoken. Sign up at https://hiveposh.com.
Siempre buscando opciones para ahorrar un dinero es bueno aprender ese oficio en mi hogar tenemos 3 aires eso seria una gran ayuda esta guía.